Find unconventional drawing techniques in kindergarten. Drawing on wet paper
Read also
"Non-traditional drawing techniques in kindergarten and their role in the development of preschool children."
(Answers)
Unconventional-
- Not based on tradition.
- Not sticking to tradition.
(Synonym dictionary).
(Answers)
Unconventional drawing
–
- finger drawing;
- drawing with palms;
- tamping.
- foam rubber printing;
- cork printing;
- wax crayons + watercolor;
- candle + watercolor;
- leaf prints;
- hand drawings;
- drawing with cotton swabs;
- magic ropes.
- drawing with sand;
- drawing with soap bubbles;
- drawing with crumpled paper;
- blotography with a straw;
- landscape monotype;
- stencil printing;
- subject monotype;
- blotography is common;
- plasticineography.
Technique "Tamping"
Foam drawings.
Wax crayons + watercolors.
Drawing with a candle.
Technique "Monopitia"
Technique "Diapitia"
Learning to make a background.
Technique "Blotography"
Technique "Threadpainting"
Nitkography method.
Drawing with postcards.
Spray technique -
You can draw snow like that.
Sawdust painting technique.
Frottage technique
Drawing with an eraser
"We draw with small bags."
Technique of prints
Leaves print.
Scratchboard technique
Technique " scratchboard "Are also called" claw-scratches "!
ink gratterscratching technique
.
wax candle carcasses... You can, of course, and gouache acrylic paints
black color
Scratchboard - technique engravings on cardboard
engraving on cardboard
Option 1.
Helpful hints:
Option 2.
Option 3.
Drawing with a piece of textile
.
We draw with plasticine!
.
Features of the technique:
Drawing with salt.
Painting with colored salt.
.
Salt color:
Drawing with a toothbrush.
Collage.
Crumpled paper impression.
Stained glass example:
"Non-traditional drawing techniques in kindergarten and their role in the development of preschool children."
Drawing is a big and serious job for a child. Even doodles contain very specific information and meaning for a little artist. A certain advantage of drawing in comparison with other types of activity is that this type of creativity requires the coordinated participation of many mental functions. The well-known teacher I. Disterweg believed: "The one who draws gets more in one hour than the one who only looks for nine hours." Being directly related to the most important mental functions - vision, motor coordination, speech and thinking, drawing not only contributes to the development of each of these functions, but also connects them with each other, helps the child to streamline rapidly assimilated knowledge, to formulate and fix a model of an increasingly complex idea of the world.
What do you think the word can mean in an unconventional way?
(Answers)
Unconventional-
- Not based on tradition.
- Occurring not by virtue of the established tradition, settling down not according to the established custom. Distinguished by originality.
- Not sticking to tradition.
(Explanatory Dictionary of Efremova, TF Efremov, 2000.)
Synonyms: individually, on new way, extraordinary, unique, non-standard, non-trivial, original, in a new way, in its own way, original, independently, peculiar, peculiar.
(Synonym dictionary).
What is meant by the phrase "non-traditional drawing"?
(Answers)
Unconventional drawing –
The art of depicting, not based on tradition.
Children from a very early age try to reflect their impressions of the world around them in their art. ... Drawing in unconventional ways is a fun, mesmerizing activity that surprises and delights children.
How many unnecessary interesting things at home (a toothbrush, combs, foam rubber, corks, polystyrene, a spool of thread, candles, etc.). We went out for a walk, take a closer look, and how many interesting things are there: sticks, cones, leaves, pebbles, plant seeds, dandelion fluff, thistle, poplar Unusual materials and original techniques attract children by the fact that the word "No" is not present here, you can draw whatever you want and how you want, and you can even come up with your own unusual technique. Children feel unforgettable, positive emotions, and emotions can be used to judge the child's mood, what makes him happy, what makes him sad.
Non-traditional drawing is used at an early age so that the child draws quickly, because it is still difficult for him to show perseverance. And for older children, non-traditional drawing is a way of showing creativity. Since the result is already important for an older baby, so that the drawing is bright, beautiful and reflects all the events. This is a great opportunity for children to think, try, search, experiment, and most importantly, express themselves.
Conducting classes using non-traditional techniques
- Helps relieve children's fears;
- Develops self-confidence;
- Develops spatial thinking;
- Teaches children to freely express their ideas;
- Encourages children to creative searches and solutions;
- Teaches children to work with a variety of materials;
- Develops a sense of composition, rhythm, color, color perception; a sense of texture and volume;
- Develops fine motor skills hands;
- Develops creativity, imagination and flight of fantasy.
- While working, children get aesthetic pleasure.
There are many non-traditional drawing techniques, their unusualness lies in the fact that they allow children to quickly achieve the desired result. For example, which child will not be interested in drawing with his fingers, drawing with his own palm, putting blots on paper and getting a funny drawing. The child loves to quickly achieve results in their work.
It is recommended to use with children of younger preschool age:
- finger drawing;
- imprint with seals from potatoes;
- drawing with palms;
- tamping.
Children of middle preschool age can be introduced to more complex techniques:
- jab with a hard, semi-dry brush.
- foam rubber printing;
- cork printing;
- wax crayons + watercolor;
- candle + watercolor;
- leaf prints;
- hand drawings;
- drawing with cotton swabs;
- magic ropes.
And in older preschool age, children can learn even more difficult methods and techniques:
- drawing with sand;
- drawing with soap bubbles;
- drawing with crumpled paper;
- blotography with a straw;
- landscape monotype;
- stencil printing;
- subject monotype;
- blotography is common;
- plasticineography.
Each of these techniques is a little game. Their use allows children to feel more relaxed, bolder, more direct, develops imagination, gives complete freedom for self-expression.
Finger painting- Happing.
Introduce children to unconventional technique Drawing is better with finger drawing - this is the easiest way to get an image. At an early age, many babies are just learning to use artistic tools, and therefore it is easier for children to control the movements of their own finger than a pencil or brush. Each brush finger has its own paint. You can draw with dots, specks, stains - and it will snow on the street, and smoke will draw from the pipes, and what a bunch of grapes is just a sight for sore eyes.
Children really like to draw with their palms. We dip the child's palm in paint, and the baby puts a print on the paper with it, then we supplement the drawing with tags from the fingers, and we get a giraffe, they pressed their palm to the column and drew dots with our fingers - we got an autumn forest. And if you paint your palm in different colors, you can get funny octopuses, or a cheerful sun and a beautiful butterfly.
Imprint with potato seals.
This technique allows you to repeatedly depict the same object, making a wide variety of compositions from its prints. The child presses the signet to the ink pad and prints it onto a sheet of paper. You can use half an apple.
Technique "Tamping"
We use this technique from an early age. We give a tampon made of foam rubber and, having dipped it in paint, children create images. It turns out light, airy clouds, fluffy dandelions.
Swab stenciling.
The child applies the stencil to the paper, dips the foam rubber in the paint and dabs the foam rubber along the stencil, then carefully removes the stencil, if necessary, repeats the procedure after the paint has dried.
Foam drawings.
For some reason, we are all inclined to think that if we paint with paints, then we must also use a brush. Not always, foam rubber can come to the rescue. We advise you to make a variety of different small geometric figures out of it, and then attach them with a thin wire to a stick or pencil (not sharpened). The tool is already ready. Now you can dip it in paint and use the stamp method to draw red triangles, yellow circles, green squares (all foam rubber, unlike cotton wool, is well washed). At first, children will chaotically draw geometric shapes. And then offer to make the simplest ornaments out of them - first from one type of figure, then from two, three.
A jab with a hard, semi-dry brush.
Means of expressiveness: texture of color, color. Materials: hard brush, gouache, paper of any color and size, or a cut out silhouette of a fluffy or prickly animal. Method of obtaining the image: the child lowers a brush into the gouache and hits it on the paper, holding it vertically. When working, the brush does not sink into the water. This fills the entire sheet, outline or template. It turns out an imitation of the texture of a fluffy or prickly surface.
Wax crayons + watercolors.
Means of expressiveness: color, line, spot, texture. Mediums: wax crayons, thick white paper, watercolor, brushes. Image acquisition method: the child draws with wax crayons on white paper. Then he paints the sheet with watercolors in one or more colors. The crayon drawing remains not painted over.
Drawing with a candle.
Children love to paint with a candle. By drawing invisible strokes or putting dots, and then applying paint to the sheet, you can see rain or waves on the sheet, patterns on the window.
Technique "Monopitia"
This technique is the most common. Bending a sheet of paper in half, apply a few drops of liquid paint on one part of the sheet, cover with the other half of the sheet, expanding, you will see unusual patterns. You can see flowers, clouds, chanterelle in them. If you draw a butterfly with folded wings on one side, cover the image with the other half, you can see that the butterfly spread its wings and flew. Using these techniques, it is easy to explain the law of symmetry to children.
Technique "Diapitia"
Using a swab or paint, apply a light coat of paint to the smooth surface of the cardboard. Place a sheet of paper on top and invite your child to draw something with a pencil, being careful not to press hard on the paper. On the side that was pressed against the cardboard, an imprint is obtained - a mirror image of the drawing with an interesting texture and a colored background.
Wet sheet painting technique
How to properly wet a drawing sheet
This is the most important thing in wet painting technique. Need to find the golden mean: a sheet that is too dry will prevent the paint from flowing nicely. If there is too much water, the paint will spread over the entire sheet and the drawing will also fail.
Draw on a wet sheet with light touches with the tip of a brush. When a brush with paint touches a wet sheet, the paint should spread about 1-2 centimeters in diameter around the brush.
If the paint doesn't run, then you haven't wetted the sheet enough. If the paint spreads out of shape too much, then there is too much water. Excess water can be removed with a dry brush or sponge.
Drawings are very believable, the theme of which is somehow connected with water: fish in a pond or an aquarium, the sea, clouds with rain. Flowers are very lively.
You can draw only the background for the future drawing on a wet sheet. Or, using a stencil, you can draw some kind of figure (for example, an animal) and make the background wet only around this figure.
Learning to make a background.
Usually children draw on white paper. So you can see it more clearly. It's faster this way. But some plots require a background. And, I must say, all children's works look better against a background made in advance. Many children make the background with a brush, moreover, an ordinary one, a small one. Although there is a simple and reliable way: to make the background with cotton wool or a piece of foam rubber dipped in water and paint. You can make the background at the end of the work with wax crayons.
Technique "Blotography"
Play with blots (blotography) well develops imagination. The child scoops up the gouache with a plastic spoon and pours it onto the paper. The result is random spots. Then the sheet is covered with another sheet and pressed. Children examine the image, determine: “What does it look like? ".
Technique "Threadpainting"
This technique delights children. You will need cotton thread, a set of diluted gouache or watercolors that you need to stir from time to time, and paper. Cut the threads so that it is convenient for babies to work with them, 10-15 cm, dip the thread in the paint so that it is soaked. Holding it by the tip, gently lay it on a sheet of paper and cover with another sheet so that the tip of the thread protrudes. Hold the top sheet while pulling the thread. The result is a very beautiful image.
Nitkography method.
This method exists mainly for girls. But this does not mean that it is not suitable for children of the opposite sex. And it consists in the following. First, a 25x25 cm screen is made of cardboard. Either velvet paper or plain flannel is glued onto the cardboard. It would be nice to prepare a cute bag with a set of woolen or semi-woolen threads for the screen. different colors... This method is based on next feature: Flannel or velvet paper attracts threads that have a certain percentage of wool. You only need to attach them light movements index finger... Interesting stories can be prepared from such threads. Imagination, a sense of taste develops. Especially girls learn to skillfully pick colors. Some thread colors are suitable for a light flannel, and completely different ones for a dark one. This is how the gradual path to women's craft begins, needlework, which is very necessary for them.
Drawing with postcards.
In fact, almost every home has a ton of old postcards. Go through old postcards with the children, teach you how to cut out the necessary images and stick them to the place, in the plot. A bright factory image of objects and phenomena will give even the simplest unpretentious drawing a completely artistic design. Can a three-, four- and even five-year-old child draw a dog and a beetle? No. But to the dog and the bug, he will draw the sun, rain and will be very happy. Or if, together with the children, cut out of a postcard and paste fairytale house with the grandmother in the window, then the preschooler, focusing on his imagination, knowledge of fairy tales and visual skills, undoubtedly, will draw something to him.
Spray technique -
Technique "spraying" - spraying drops with which in kindergarten a toothbrush and a ruler, a comb can handle. With a toothbrush, pick up the paint and draw a ruler along the surface of the brush towards you. Themes for drawing can be absolutely any. For example, on a sheet of paper we place a composition of dry plants. We apply a vase stencil and a butterfly stencil. Unscrew the toothbrush away from you (with the bristles up) and start combing it with a ruler, drawing from the bottom up. Do not be afraid to splash, if you perform all the actions correctly, then splashes of paint and water will fly to work. Splatter the created composition along the contour, choose darker and more saturated colors (burgundy, red, dark green) for this.
You can draw snow like that.
Finger painting using sand
Highly interesting job which children will enjoy doing! The lesson takes place in two stages: - at the first stage, we prepare a sheet of paper (preferably a large format) for further drawing - we apply glue to the entire surface and sprinkle evenly with sand (prepared in advance and well sieved) After that, let the glue dry! After the glue dries, it is necessary to remove excess sand - just gently blow it off) After completing the first stage, proceed to the second - directly to drawing! Invite the children to draw with their fingers on the sandy surface of the sheet autumn tree using a variety of colors.
Semolina drawing technique.
A drawing is applied to a sheet of paper with a pencil (or ready-made coloring pages are taken). Then, one by one, the elements of the pattern are coated with glue and covered with semolina. Let it dry, shake off the excess cereal. When the drawing is dry, paint it with gouache.
Sawdust painting technique.
This method is simple, available to almost every child. ... A drawing is applied to the surface of the product with a pencil (or ready-made coloring is taken).
Then, one by one, the elements of the pattern are coated with glue and covered with colored sawdust. The best wood- this is birch and aspen, sawdust should be white. If it is not possible to prepare birch or aspen sawdust, then coniferous sawdust will do. The prepared sawdust is dried and sifted through a fine sieve. Raw sawdust is very poorly sifted. After that, the prepared material is painted over with paints. We use gouache paints. The paints are diluted with water in the required concentration. The amount of water is determined empirically. The more water, the paler it will be coloring material, therefore, the color saturation of the sawdust themselves will change. Prepared sawdust is poured into gauze, tied (not tightly) and filled with coloring solutions (stir well). For better impregnation, we leave the sawdust in the solution for a day (stirring occasionally, then untie the gauze, put them on a film and dry them near the battery. Stained and dried sawdust is stored in plastic containers.
Frottage technique
Another interesting technique for creating small masterpieces. The word "frottage" comes from the French frotter - "to rub, wipe". All of us in childhood transferred coins to paper, putting it under a notebook sheet and painting on top with a pencil! This, it turns out, is frotage.
The frosting technique consists in putting some embossed object under a piece of paper and painting it over with pastels, for a couple of minutes - and the do-it-yourself craft is ready! The main task is to find a relief that will look interesting on paper. And pick colors, of course.
Drawing technique - drawing with a string
For the second year now, I have been using an unconventional technique in my work - drawing with a string. Children learn to draw not only with pencils and paints, but also with colored strings. First, simple patterns, loops are laid out with a string, and then they move on to more complex objects. Each lesson is accompanied by a fairy tale corresponding to the topic. In these classes are used: poetry, riddles, finger gymnastics, physical education minute. Children like these activities very much, they feel joy and are proud of their work. They develop fine motor skills of the hands, prepare the hand for writing, develop their imagination, and strengthen their drawing skills.
Drawing with an eraser
Shade the entire sheet with a simple pencil. Then we take an eraser, outline the middle of the flower and erase the petals with an eraser, and so we draw a whole bouquet, when we have finished "drawing" with an eraser, you can paint the yellow center and green chamomile leaves with paints.
"We draw with small bags."
For work, you need to prepare album sheets, watercolor paints HONEY, brush No. 5-6, water and cellophane bags, pre-cut lengthwise and crosswise.
The only thing you should not get tired of asking children is to work quickly with a brush, not to let the paints dry on paper. If, nevertheless, the paints applied first managed to dry out - help moisten them with water.
Quickly apply watercolors to the sheet. We put cellophane on the center of the picture, moisten the fingertips with water and with GENTLE rotating movements create the wrinkles of the bag on the paper. We direct the rotation of the fingers in any direction. The kulek sticks to the inked paper, and water and watercolor collect in the wrinkles. In these places, the paper will brighten. Let the paper dry, do not rush to remove the bag. after a while we take off the bag and see what happened. You have a set of sheets with fancy patterns. This is a great background for pictures, an exclusive material for applique, for snowflakes, autumn leaves, letters, etc.
Technique of prints
Leaves print.
It is very interesting to paint with leaf prints. Cover the leaves with gouache, then put the painted side on a sheet of paper, press and remove, you get a neat color print of the plant.
Scratchboard technique
Technique " scratchboard "Are also called" claw-scratches "!
The drawing is highlighted by scratching with a pen or a sharp tool on paper or cardboard, flooded ink(in order not to blur, you need to add a little detergent or shampoo, just a few drops). The word comes from French gratter- scratch, scratch, therefore another name for the technique - scratching technique
.
Usually we take thick paper, shading with a thick layer of colored wax crayons. You can take colorful cardboard with a ready-made colorful pattern, then you can limit yourself to the usual wax candle(not colored). Then apply a layer on the surface with a wide brush or sponge carcasses... You can, of course, and gouache use, but it gets dirty after drying. You can also use acrylic paints
black color
take advantage. When it dries, we scratch the drawing with a sharp object - a scraper, knife, knitting needle, plastic fork, toothpick. A pattern is formed on a black background from thin white or colored strokes.
Usually children like this kind of drawing very much. Scratchboard - technique entertaining and unusual, the child is captured by the process of "manifestation" engravings on cardboard... Drawings at the beginning of training can be very simple: the outlines of objects, a cobweb, a balloon, etc. Gradually, tasks can be complicated.
The scope for imagination here is simply huge: for example, you can draw engraving on cardboard a plastic fork: intact - waves at sea, breaking off "extra" teeth - road, rails, etc. You can think of using a fork handle, a disposable plastic knife, and even a spoon!
Option 1.
1) Thick cardboard, sketch with colored wax crayons - you can use one color, you can use multi-colored striped spots (a thick layer). Leaving no white spots.
2) Top with a wide brush or even a small sponge - cover with a layer of thick (sour cream consistency) black gouache (or black ink + a drop of shampoo - does not paint your hands when working, or acrylic paint), let dry.
3) Take a non-writing ballpoint pen (either a sharpened wooden stick for sushi, or a toothpick, and even a plastic fork, or another convenient pointed object, or all objects at once) - and when scratching, clear contrasting multi-colored lines appear. You can draw with lines, strokes - whatever: the underwater world, a bright autumn forest, space ...
Helpful hints:
If the gouache (ink) rolls off the layer treated wax crayons(with crayons)- then you can degrease the base with talcum powder (sprinkle on top and rub with a cotton swab).
So that gouache does not paint your hands when scratching a drawing- you need to add a little PVA glue to it before applying it, and stir well. Or, when drawing, put a piece of blank paper under the arm, which rests on the sheet.
Option 2.
1) For the base, you can take colored or white cardboard, or cardboard with a ready-made bright pattern (even the same cardboard cover from colored cardboard will do). Rub the base with a simple wax candle.
2) Second and third steps - see option 1.
Option 3.
1) For the base, you can take white cardboard and paint the background with any colors, and whatever you like. Dry. Then the second and third steps of option 1.
Drawing with a piece of textile
We take a piece of fabric measuring 10 x 5 cm, crumple it, make something like a tampon. Dip a cloth swab in gouache paint. You can paint with black gouache on white cardboard. You can also paint on a colored background, for example, blue, white paint, then we get a "Winter landscape".
Painting small pebbles.
Of course, most often the child depicts large stones on a plane, on paper, less often on asphalt, large stones. Plane depiction of a house, trees, cars, animals on paper is not as enticing as creating your own voluminous creations. In this regard, sea pebbles are ideally used. They are smooth, small and vary in shape. The very shape of the pebble will sometimes tell the child what image to create in this case (and sometimes adults will help the kids). It is better to paint one pebble under a frog, another - under a bug, and a wonderful fungus will come out of the third. A bright, thick paint is applied to the pebble - and the image is ready. And it is better to finish it like this: after the pebble dries, cover it with colorless varnish. In this case, a voluminous beetle or frog made by children's hands glitters, brightly shimmers. This toy will take part in independent children's games more than once and will be of considerable benefit to its owner.
We draw with plasticine!
Painting with plasticine on glass.
From plasticine, you can sculpt not only volumetric figures, but also create beautiful creations on the plane. This technique has its own name - drawing with plasticine. This is a very entertaining activity for both toddlers and older children.
So, what did we need to create a plasticine drawing?
1. High-quality plasticine, which kneads well and mixes with each other. The less it sticks to your hands, the better.
2. The basis of the painting: glass, cardboard, wood frame. (Frame)
3. A modeling board, a glass of water, napkins for hands, stacks, various improvised devices to create the desired texture.
We use glass as a base to create a picture using the reverse application technique and be sure to protect the edge of the glass with electrical tape so that the children do not get hurt. But it should be noted that this work is done under the close supervision of adults.
Features of the technique:
Drawing (you can put the coloring in a photo frame instead of a photograph. And we start to create) Before proceeding with modeling, it is necessary to think over the combination of colors and choose the necessary shades by mixing. We begin to apply the selected color to the desired details of the picture from the side that the picture is looking at from the frame). Spread the clay evenly with your finger, without going beyond the sketch lines. Layer thickness no more than 2-3 mm.
At the end of the work, gently wipe the glass from greasy prints, remove the second protective film. Choosing a suitable sheet of cardboard for the background. Insert the picture with the back side back into the frame.
Drawing technique "Pointillism"
The name of the movement in painting pointillism comes from the French word pointiller, which means "to write with dots." Pointillism - drawing using dots of different colors (point strokes). And, therefore, this technique is quite within the power of preschool children.
We draw using pointillism technique, using different visual materials: just our fingers, tampons, cotton swabs, brushes, felt-tip pens, markers.
Drawing with salt.
We carry out the drawing first simple pencil... We paint a small section of the picture with watercolors. Sprinkle with salt. The salt absorbs excess water and sticks to the sheet. Shake off excess salt. We continue to work in the same spirit until the end. The use of salt has an unusual effect. Try it - you will see.
Painting with colored salt.
Salt can be dyed in different colors .
Salt color:
To begin with, we dilute the gouache in a container with a small amount water (the more water, the lighter color... The less water, the more intense the color). Then put the salt in a plate and pour out the colored water. Gently stir the salt with a fork so that all the salt is colored. You can dry it in the oven, heat the oven to a temperature of 100 degrees and put our tins with salt there for an hour. you can use a microwave oven, the molds are placed there for 5-10 minutes at the maximum temperature. After taking out the salt, you will see that you get dry lumps. We take a plastic bag and pour salt into it. Then roll out the salt on a cutting board until it becomes crumbly. We take a separate jar for each color.
We draw a drawing with a simple pencil, then with PVA glue, sprinkle with salt on the glue.
Drawing with a toothbrush.
I'll make a reservation right away that not everyone likes this technique. But when drawing some objects, it is simply not replaceable. Therefore, let's say about her too. Drawing with a toothbrush, dipping it, like a brush, in paint, it really turns out fluffy tree, waves of the sea, shaggy animal. It will be difficult to achieve this effect with a brush.
Painting technique with oil pastels on velvet paper.
The pencil moves easily on the paper and is shaded with a finger, creating softer shades, and children are just delighted with this technique! Drawings are bright and funny.
Collage.
The concept itself explains the meaning of this method: several of the above are collected in it. In general, ideally, the following seems important to us: it is good when a preschooler is not only familiar with various image techniques, but also does not forget about them, and uses it to the right place, fulfilling a given goal. For example, one of the children 5-6 years old decided to draw summer, and for this he uses a bitmap (flowers), and the child draws the sun with his finger, he will cut out fruits and vegetables from postcards, he will depict the sky and clouds with fabrics, etc. The limit to improvement and creativity in visual activity no. English teacher-researcher Anna Rogovin recommends using everything that is at hand for drawing exercises: draw with a rag, paper napkin (folded many times); paint with dirty water, old tea leaves, coffee grounds, squeeze from berries. It is also useful to paint cans and bottles, spools and boxes, etc.
Crumpled paper impression.
Means of expressiveness: spot, texture, color. Materials: a saucer or a plastic box containing a stamp pad made of thin foam rubber impregnated with gouache, thick paper of any color and size, crumpled paper. The way of obtaining the image: the child presses the crumpled paper against a stamp pad with ink and makes an impression on the paper. To get a different color, both the saucer and the crumpled paper are changed.
Stained-glass window technique - glue pictures
The contour of the future drawing is made with PVA glue from a bottle with a dispensed spout. A preliminary sketch can be drawn with a simple pencil. Then the boundaries of the contour must be dry. After that, the space between the contours is painted with bright colors. Adhesive borders keep the paint from flowing and mixing.
Stained glass example:
- With a simple pencil, without pressure, divide the sheet with intersecting lines in different directions, necessarily from edge to edge (snowflake design).
- Draw lines from the ends of the resulting snowflake to the middle of each ray to make small windows - "pieces of glass".
- Circle the contour with PVA glue and let dry.
- Paint the space between the glue borders with bright colors.
Unconventional drawing techniques as a means of correcting the psyche allow you to overcome the feeling of fear. It can be said that it allows the little artist to move away from the subject image, to express their feelings and emotions in the drawing, give freedom, instill confidence in their abilities. Modern research prove that unconventional imaging techniques help to weaken the excitement of emotionally disinhibited children. At the same time, as a rule, overly active people need ample space for the deployment of activities. The bottom line is that attention is distracted and extremely unstable. In the process of "playing the artist" the zone of activity narrows, the amplitude of movements decreases. By gaining relevant drawing experience in unconventional technique, the child thereby overcomes fear. Further creativity will give him only pleasure, even from working only with a brush and paints.
Drawing is one of the most joyful and fun activities for a child. In kindergarten, a lot of time is devoted to art classes. The most important thing is that toddlers do not need to be forced to this type of creativity - they themselves are happy to draw. It is important that every toddler experiences a success situation regardless of their visual arts abilities. And to create such conditions, unconventional drawing techniques come to the aid of the teacher. Consider some of the features of the work, and also give an example of a list of the most good topics to master this type of creativity in long-term planning.
Why unconventional techniques are good
V preparatory group traditional drawing requires a significant complication of technique compared to earlier stages educational activities in kindergarten. And what to do if the kid cannot make straight lines, maintain proportions and clearly draw outlines? After a couple of failures, and the little one can lose interest in drawing forever. In this case, unconventional drawing techniques save. The main thing they teach children is the absence of fear of error.
The very environment of drawing lessons in t = non-traditional techniques sets the kids up for a positive, expectation of success, regardless of their abilities
The main thing they teach children is the absence of fear of error... After all, the drawing is very easy to correct, it is enough to paint on something or erase it. Also, unconventional painting techniques- give toddlers confidence in themselves, in their abilities;
- develop aesthetic taste, creativity, imagination;
- help to expand ideas about the world;
- develop fine motor skills;
- educate the independence of thinking.
What techniques are used in the preparatory group
With children 6-7 years old, you can practice all the ways of creating a picture, which kids get to know throughout the entire period of study in kindergarten. Moreover, creative educators bring a number of new techniques to this list.
It is interesting. It is dangerous to use gouache for techniques requiring highly diluted paint, as after drying, a white coating may appear.
Drawing with cotton swabs
It is interesting. Plots in this technique can be created both within the outline and without it.
The essence of the method is that paint (watercolor or gouache), instead of the usual brush, is typed with a cotton swab. You can create a drawing with lines (in other words, use it as a brush), or you can poke it, that is, apply a stick to a sheet of paper, press down and so create a plot. To work, you need a simple set:
- cotton swabs (separate for each paint color);
- paints;
- wet wipes (wipe your fingers and inaccuracies in the drawing).
It is interesting. In some preschool educational institutions, acrylic paints are used. But it is not very convenient to draw with them on paper, since, due to their consistency, they dry for a long time, but amazing drawings are obtained on the fabric. This is how another unconventional painting technique appeared - with acrylic on fabric.
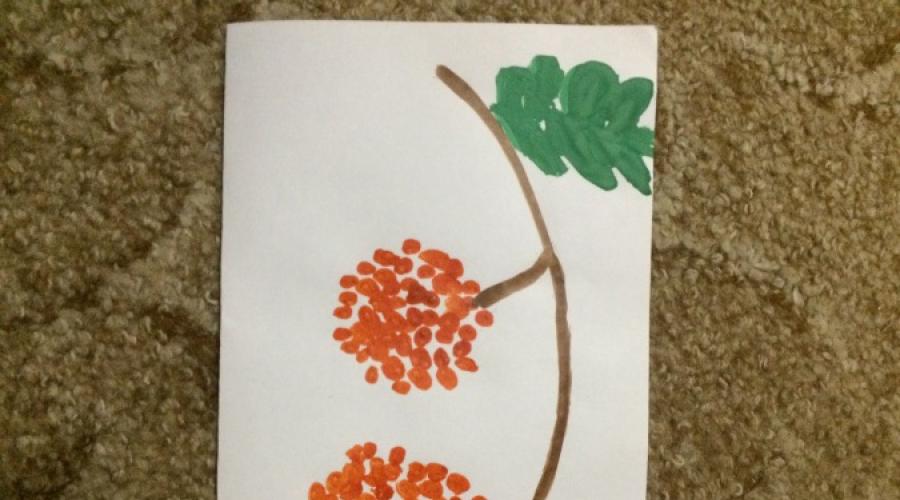
Example of drawing with cotton swabs
"Spring mood"
This is an example of creating a drawing without a pre-drawn outline.
Instructions:
- “We moisten the stick with green paint and draw a stem with smaller stems diverging in different directions. We draw a solid line for each piece of the stem. "
- "We wet the stick with paint yellow color and apply circular strokes based on the stem. The line should resemble circles of a spiral - from the smallest to the largest. "
- "Dip a cotton swab in a different color and repeat the previous step."
A child can create one flower with multi-colored buds, or he can make a whole bouquet. If possible, the kid should choose the color scheme himself.
Video. Dandelions in the technique of drawing with cotton swabs
Photo gallery of drawings in the technique of drawing with cotton swabs
Drawings with cotton swabs can be combined with applique The technique of drawing with cotton swabs is often combined with the technique of drawing with fingers (berries are shown in this figure with fingers) To give the drawing a clearer outline, plot elements can be circled with felt-tip pens
Poke drawing: rainbow, rowan and other compositions
It is no coincidence that this technique coexists with the method of creating a pattern with cotton swabs. The fact is that in some sources these two methods are considered identical. Yes, indeed, the most common way to create a drawing with a cotton swab is to poke, that is, the stick is dipped in paint (gouache or watercolor) and when it is vertical to the sheet, a print is made on paper. Especially beautiful drawings are obtained if you take several sticks, connect them in a bundle and draw with this bunch. And nevertheless, a poke can be obtained when using
- fingers - then the print is made with a finger soaked in paint;
- hard brush - the poke turns out to be needle-like;
- soft brush - the print is softer, as if rounded.
It is interesting. Drawing with fingers is especially widely used when working in the younger group. This method allows babies to develop fine motor skills, and at the same time to know themselves, their creative possibilities.
Consider examples of creating poke patterns using cotton swabs.
Examples of poke patterns
"Rainbow"
Instructions:
- Take 14 sticks.
- "Dip 2 sticks in red and poke a rainbow arc."
- Then the guys repeat the action with the pairs of other rainbow colors (orange, yellow, green, light blue, blue, purple).
- "Now we wet the stick with yellow paint and draw the sun with rays with pokes."
- "We show the background sky in blue".
- "Let's dip a stick in white paint and create clouds in the sky in a circular motion. "
There is another option for creating a rainbow using this technique. But it requires a certain skill, since we will connect multi-colored pairs in one line.
Instructions:
- “We moisten the stick in red and put it on clear sheet».
- "We quickly do the same operation with other colors."
- "We take the sticks with one linear beam and make jabs in an arc."
- Next, we finish the plot according to the previous instructions.
It is interesting. This version of the drawing is performed faster, but requires a certain skill from the kids, since you need to quickly dip the sticks in the paint, and then place them clearly in one line in the fingers.
"Rowan"
Drawing on an autumn theme allows you to combine two techniques: lines and poking with cotton swabs.
Instructions:
- "Dip a stick in black paint and draw a tree trunk with branches."
- "We take a bunch of sticks, tie it with an elastic band."
- "We dip the bunch in red paint and create a bunch of rowan with one poke."
Video. Pussy willow in the technique of drawing with a brush poke
Photo gallery of drawings using the poke technique
If the paint is diluted to the consistency of sour cream, then the drawing with a poke will turn out to be more embossed. For poking with a hard brush, you do not need to add a lot of water to the paint.
Salt painting technique
As the name of the method suggests, you need salt to create the image. It is better if it is not extra, but ordinary stone, so that the crystals are of different sizes - so the drawing will turn out to be more voluminous. In addition, to work in this technique, you will need
- glue (PVA or silicate);
- base sheet of bright color (this is a fundamental condition, since the substrate for the drawing with salt must be contrasting, otherwise the image will be lost).
It is interesting. An alternative to salt can be semolina. There are also options for creating drawings using buckwheat, crushed rice, etc.
Salt painting consists of 4 stages:
- Contouring an image with a pencil.
- Drawing the contour with glue.
- Covering the substrate with salt.
- Drying and disposal of excess salt.
If necessary, the drawing can be painted using the blotting technique with a straw or by wetting a piece of sponge with paint. However, this requires re-drying, as well as a rather painstaking staining work.
Examples of drawings in the technique of drawing with salt
"Bird"
This drawing is made from a combination of materials - the sun is made with cereals.
Instructions:
- "On the sheet blue we draw (outline the stencil) a bird in flight. "
- "Drawing the sun".
- "Apply glue abundantly to the whole bird and the sun, without going beyond the outline of the drawing."
- "Letting the glue" grab "- 30-60 seconds."
- “We fill 2/3 of the leaf with salt, trying to apply an even layer to the bird. You can help with your fingers. "
- "We cover a third of the leaf (where the sun is) with millet."
- You can continue working the next day.
- "We pour excess salt and millet."
- "With a black felt-tip pen we make the bird's eye."
"Planets in space"
This example requires subsequent coloring. In addition, applique (stars) and paper construction (rocket) are used here as additional pictorial means.
Instructions:
- "Draw 5 circles-planets of different sizes on a blue substrate." You can use a pair of compasses or let the children circle cardboard circles of different diameters.
- "Gently fill the borders of the contour with glue."
- "Fill up the drawing with salt."
- Work continues the next day.
- "Pouring excess salt."
- "We dilute paints with water."
- "We dip the brush into the paint and make a drop on the circle."
- "This is how we work through all the circles, making spots of different colors to get transitions."
- We continue to work after the paint has dried (at least every other day). During this time, children can make an origami rocket and cut out the stars.
- "Glue the stars and the rocket."
Video. Salt fireworks
Photo gallery of drawings with salt
Salt is an indispensable material for drawings of winter night paintings.To maintain the clarity of the outline, the next element should be painted over only after the previous one has dried. Drawings with salt develop a subtle sense of color in children
Pictures drawn by the palms
As the name suggests, babies' palms will be the material for creating the picture. They can be applied with water-diluted gouache or watercolor. Moreover, it can be one color, or maybe several, if, for example, the palms are flowers in a vase. The main thing is that children have wet wipes and the ability to thoroughly wash their hands after drawing.
An example of a drawing with palms
"Butterfly"
Instructions:
- "With green paint we paint the body of the butterfly, slightly widening downward."
- "We make the antennae blue, put red dots at their ends."
- "We put on the palms yellow paint and we make an imprint on the left and right below, putting our palms with thumbs down. "
- "Wipe off the handles, apply pink paint."
- "We put our palms on the left and right at the top so that the thumbs are at the top."
- "We wipe the pens and paint the circles-spots on the wings of the butterfly."
Video. How to draw a lion with palms
Photo gallery of drawings with palms
For this drawing, in addition to palms, fingers were used.After applying the print, the octopuses need to be given a finished shape with a contour and their eyes should be painted.If you do not wipe your palms after one paint, but immediately apply the next, then the trees will turn out to be multi-colored, truly Autumn Drawings palms can be turned into appliques
Finger painting method
As already mentioned, you can poke with your fingers. But also in the preparatory group, a combination of prints with lines is actively used. For drawing, you need paint (gouache, watercolor) diluted with water, wet wipes.
It is interesting. Finger painting is often combined with handprints.
An example of a drawing using the technique of drawing with fingers
"Autumn colors on trees"
Instructions:
- "We dip the index finger in green paint and draw a large circle with its prints."
- “Within this circle, we poke different colors to create foliage on the trees.”
- "We dip our thumb in brown paint and draw one line at the bottom - this is the trunk of our tree."
- "Adding foliage under the tree."
Video. Summer meadow in the technique of drawing with fingers
Photo gallery of finger drawings
The technique of drawing with fingers is perfectly complemented by elements made with palms.Fingers can create scenes in motion.
Painting with wax crayons
The essence of this technique is that the kids create a plot using wax crayons, and then paint over the entire substrate with watercolors (or gouache, diluted with water). As an alternative to crayons, you can use a regular wax candle - then the picture will turn out to be monochromatic.
Example of drawing with wax crayons
"Sunset over the sea"
Instructions:
- "Draw a semicircle of the sun with wax crayons."
- "We make rays, draw waves on the sea with dark blue crayons."
- "Wet a thick brush with blue paint and apply it over the whole drawing without touching the sun."
Video. Salute in the technique of drawing with wax crayons and watercolors
Photo gallery of drawings with wax crayons
If you mix several shades of blue paint, the background will turn out even brighter For this picture, the background is made with ink, and the drawing with crayons is not painted over Interesting pictures are obtained if the drawing made with crayons is not covered with watercolors
Spray painting
Working in this unconventional way, unlike the previous ones, requires some preparation. The essence of the method is as follows:
- a drawing is created on cardboard;
- this silhouette is cut out, applied to another sheet of cardboard;
- the stencil is outlined, details are drawn (for example, flower petals);
- the drawn elements are cut out;
- a background is applied to a sheet of paper;
- a template with slots is applied;
- an old toothbrush (finger, paint brush) is sprayed onto the stencil (the toothpick seems to wipe the paint off the bristles);
- after drying, the necessary details of the picture are drawn.
It is interesting. If the plot should remain unpainted, then the procedure is simplified to the stage of cutting out the silhouette, which is then superimposed on the base, protecting the contour from splashing onto the base.
An example of a drawing using the splatter technique
Instructions:
- “This drawing will require shading. Therefore, before spraying with paints, we will paint over the necessary elements and let them dry. "
- "Draw trees, cut out their silhouettes."
- "We apply silhouettes to another base, add the shape of the foliage on it."
- "Cutting out this foliage silhouette."
- Again we apply it on a new base, we make the contour of the foliage, slightly stepping back from the finished layer. "
- "Cutting out the second silhouette of the foliage."
- “We make a silhouette of snowdrifts, leaving slits. Cut out. "
- "We put the trunk and the second silhouette of the foliage on the substrate."
- "We dip the brush into the paint, spray it all over the sheet with our finger."
- "Apply the silhouettes of the second layer of foliage and drifts, spray again."
- "Removing the stencils."
Video. Still life with flowers in the technique of spraying
Photo gallery of drawings in the technique of spraying
Butterfly stencils can be arranged in different ways to give the picture ease and naturalness.
Blotography technique with a straw
This method of creating pictures not only reveals the creative potential of children, but also has a beneficial effect on their health, since blowing paint through a tube develops the strength of the lungs and the entire respiratory system of babies. To draw, you need a simple set:
- liquid diluted paints (watercolor, gouache or ink);
- pipette or small spoon;
- cocktail tube;
- brushes, pencils to complement the plot of the drawing.
The essence of the technique is that the child picks up paint with a spoon or a pipette, drips onto a sheet of paper, and then blows this spot through a tube in different directions, creating required forms... In this case, the stick does not touch a drop of paint or a sheet of paper. If you need to make small branches, then you should blow quickly up and down, left and right, depending on the direction of the plot.
An example of a drawing using the blotography technique with a straw
"Glade with flowers"
Instructions:
- "We drip green paint and inflate the stems of flowers on the shoots. "
- "Now we drip flower paint, blow up the petals."
- "We make the sun with rays in the same way."
- "Put a couple of small drops for the grass in the background, blow up the drops a little."
- “We dip the brush in green paint and finish painting foreground- a clearing ".
Video. How to draw a tree using the blob technique with a straw in a minute
Photo gallery of drawings in the technique of blotography with a straw
In one drawing, you can combine blots and blobs blown up through a tube For landscapes, you can not try to blow out drops with the same force and in one direction Drawings using the blob technique with a tube can be combined with a classic pattern - you get very original works
Raw painting technique
Creating images wet (also called wet) allows you to get images with blurry transitions. This is useful, for example, for drawing animal fur. The essence of the method lies in the fact that the base sheet is moistened with water, and then, while it is wet, a drawing is applied. For this, gouache, watercolor or ink are used. After the picture is dry, the necessary details are drawn.
It is interesting. To keep the sheet moist longer, a damp cloth is placed under it.
There is an alternative way of painting using the wet technique: a drawing is applied to the paper, and then the sheet is lowered into the water with the image down, pulled out sharply and turned over. So the colors flow into each other, creating original combinations. Usually in this way they paint landscapes, sunset. If the picture of the sky (sea) is thought of in the picture, then this can be done as follows: apply a thick line on a dry sheet, dip this part of the sheet in water, and then stretch the element with a brush to the desired size.
Example of drawing on raw
"Kitty"
Instructions:
- "Draw the outline of the kitten with a simple pencil."
- "Let's dip the leaf into the water."
- "We paint the picture with brown paint."
- Let the picture dry.
- "We finish painting with paints (felt-tip pens) antennae, nose, eyes, eyelashes, mouth and tongue."
Video. Drawings on wet on watercolor paper
Photo gallery of drawings on wet
If the composition is complex, then you can put a damp napkin under the sheet - this way the paper will retain the desired condition longer. Raindrops are finished after the main plot dries up - so they will be brighter For drawings on wet, you need to take thick paper, watercolor sheets are ideal
Crumpled paper impression technique
In the younger groups, the kids crumpled sheets of paper, straightened them, and then applied paints - this way the drawing turned out with interesting shades and shadows. In the preparatory group, the technique becomes a little more complicated: with a wad of paper, the guys paint the outline of the plot, making the borders of the drawing blurry, indistinct. To implement the idea, you need
- draw the outline of the plot on a sheet of paper;
- pour paint (watercolor, gouache) into a flat bowl and dilute it to the consistency of sour cream with water;
- crumple a sheet of paper (the denser, the more clear the print will be).
It is interesting. It is better to make a lump of paper from ordinary notebook pages. The smaller the lump, the smaller the impressions will be.
An example of a drawing in the technique of impression with crumpled paper
"Fox"
Instructions:
- "Making the outline of the chanterelle on paper."
- "We crumple ½ part of a single notebook sheet."
- "Pour paint into a plate, add a few drops of water."
- "We dip the lump in the paint and apply it to the borders of the contour."
- "Repeat until the entire shape is painted over."
- "With a brush we finish drawing the eye, nose, claws."
- "We dilute the blue paint heavily with water and draw the background."
Video. An easy way to paint a landscape
Photo gallery of drawings with crumpled paper
This drawing is made with small pieces of crumpled paper Before working with color, you need to apply the outline of the drawing. Elements with crumpled paper are applied after the main elements of the composition are completed
Lesson outline outline
To draw up a lesson plan for a teacher, it is very important to correctly formulate the goals and objectives of the work. Only in this case it will be possible to choose the right techniques and interest the kids. Among the goal-setting factors, in addition to those that were indicated as the goals of using non-traditional drawing techniques in general, one can single out:
- preparing the child's hand for writing;
- development of perception of a multicolor image;
- the formation of an emotionally positive attitude to the creative process;
- development of cognitive abilities.
The tasks that need to be worked on in each session are
- the development of interest in various visual materials, as well as the urge to create with accessible means of expression;
- learning the skill of mixing paints to master the whole variety of color palette;
- cultivate patience at work;
- to form a positive approach in assessing the result of their activities and the work of other team members.
In addition to formulating goals and objectives, the teacher is required to correctly distribute the time between all stages of the lesson, the timing of which is 30 minutes. The work is built in 3 stages:
- introductory part (about 5 minutes) - motivation of children, that is, the use of techniques that contribute to the development of children's interest in work (conversation, playing with visualization, role-playing game listening to fairy tales, songs, etc.);
- the main part (about 20 minutes) is the execution of the drawing, as well as physical education and articulatory gymnastics;
- the final stage (about 5 minutes) - summing up, encouragement from the educator and self-analysis of children in the form of answers to questions ("Did you like drawing in such an unusual way?", "Do you think you succeeded in drawing?" work, in your opinion, the most beautiful? ”and so on).
It is important to note that such a distribution of time for drawing in an unconventional technique is conditional, since there are techniques that take much less than the allotted 20 minutes to complete (for example, drawing with salt). In this case, the teacher can devote more time to motivational techniques.
An example of an outline of a drawing lesson in a non-traditional technique
Kirsanova Natalia “Summary of a lesson on non-traditional drawing techniques in the preparatory group“ Winter. Winter forest "(detail)
| <… Практическая деятельность. Под музыку Чайковского «Времена года», «Зима» Winter: - If you want, I will teach you to draw a winter tree without a brush and pencil. For this we will use a straw and air. -On blue paper, apply a drop of liquid gouache with a pipette and draw a tree trunk, inflating the drop through a tube (“blowing out” the trunk). - If necessary, drip more gouache onto the base of the branches and continue to inflate the blot "drawing" a tree of the desired height. Winter: - You are just real wizards! We were able to draw trees with air without a brush and pencil! - What do trees do in winter? (In winter, the trees seem to freeze, fall asleep until spring.) - When you go to bed in your crib, what do you do? (Cover yourself with a blanket) - Come on, and we will cover our trees with a warm and light blanket. But what can we cover them with? (Snow) - For this, it must snow in our picture. What tool will help us depict snow? -Take the next "magic" object - a cotton swab, dip it into the paint with a thin end and print it all over the picture, saying the magic words: "Let the snow fall on my magic" leaf! " - Our snowball must first cover the branches. - And the snow keeps falling and falling, covering the ground with a white fluffy blanket. And now, under the tree, it becomes more and more. Now turn the cotton swab over with the other end, dip it in the paint and draw drifts under the tree. -Let's do one more magic - put the trees on the canvas, what did we get? (Painting "Winter Forest") - How do you think our trees feel? (They are warm, comfortable. They have become even more beautiful.) 3. Reflection. Educator: - Guys, did you like our meeting? How did you like it? What have you learned today, what kind of magic? (Draw in an unusual way). Who found it difficult to cope with the task? You've all done a great job. I give you these magic tubes, with the help of them you can create different images on paper ...> |
Forward planning
In order for the education process in kindergarten to be organized, and the teacher's work to be orderly, meaningful and, most importantly, effective, a long-term work plan is drawn up by the methodological association of preschool teachers.
Usually, drawing up a plan consists in indicating the month of work, the topic and technique for completing the drawing, the goals of using a particular technique. The source is also indicated in which this method of fine art is described in detail. The teacher can indicate the date of the lesson and set aside the column for notes.
An example of forward planning
Elena Naumova “Perspective plan for non-traditional drawing. Preparatory group "(fragment of the program)
| <…Декабрь Topic: "Fish in an aquarium among algae" (poke with a hard brush with applique elements) Purpose: To improve the ability to convey in a drawing a variety of forms, textures, proportional relationships. To cultivate perseverance, love for nature. (Nikolkina T.A. p. 107) Topic: "My Little Furry Friend" (jab with a hard brush, print with crumpled paper) Purpose: To improve the skills of children in various visual techniques. To teach, most expressively, to display the appearance of animals in a drawing. Develop a sense of composition. (Kazakova R.G. p. 110) Theme: "Multi-colored spray" (spray) Purpose: To acquaint children with an unconventional drawing technique - spraying. Learn to create a varied background for drawing. Develop imagination, creativity. (Kazakova R.G. p. 25) Theme: "Fairy bird" (drawing with the palm of your hand) Purpose: To improve the ability to make palm prints and paint them to a certain image. Develop imagination, creativity. To cultivate accuracy in work. (Kazakova R.G. p. 7) January Topic: "At the New Year's Party" (imprint with a foam rubber swab, gouache) Purpose: To teach children to outline the silhouette of a Christmas tree and convey the fluffiness of the branches using an imprint with a foam rubber swab. Decorate the Christmas tree with colorful toys. Develop a sense of color, fantasy, creativity and imagination. (Koldina D. N. p. 40) ...> |
Drawing classes in kindergarten is one of the most important ways for a child to learn about the world around him, since kids are not only engaged in creativity, but also independently find solutions to the set practical tasks. This improves observation, forms an aesthetic taste. However, the implementation of these goals requires the child's full involvement in creative process, which is not easy to implement if the baby does not have visual abilities. In this case, unconventional drawing techniques come to the rescue. In the preparatory group, the list of ways to create plots on paper is significantly expanded in comparison with junior groups, and children accustomed to working with unusual drawings, continue to master this type of activity with pleasure.
Tatiana Petrovna Belousova
Unconventional drawing techniques. Master class for educators
Municipal government preschool educational institution
Kindergarten No. 4 in Biryusinsk
Unconventional drawing techniques.
(master class for educators)
Prepared:
Belousova Tatiana Petrovna,
Senior group educator
Relevance master - class:
In the classroom drawing the tasks of all-round development of children, which is necessary for successful schooling, are being solved.
In the process of work, children form mental operations (analysis, synthesis, comparison, etc., teamwork skills, the ability to coordinate their actions with the actions of their peers.
Target:
Formation of artistic and creative abilities in preschool children through creative tasks using interesting and unusual visual techniques, unknown material in their work.
The tasks of visual activity with the use unconventional materials and techniques:
Develop a sense of composition and color;
Develop creative imagination, fantasy, thinking of preschoolers through lessons on mastering unconventional painting techniques;
Develop color perception and visual - motor coordination;
Foster a sense of beauty
Drawing in art and children's creativity
Word "drawing" replaced the Old Church Slavonic words "banner","the Omen" meaning "Creating an image", and "drawing", "Typeface" indicating the technique of the image. Since the 18th century, the word "drawing" has become a term for an image as the creation of an image using lines, features that are important to indicate signs subject: shape, size, structure, movement, which are transmitted in all types of arts.
Simplicity of techniques drawing lines and the versatility of the principles of constructing form made drawing the basis of graphics and other arts. The drawing has distinctive peculiarities:
1) Performed by hand, increases the speed of the image and makes it possible to quickly respond to life events;
2) It is done by eye;
3) Visible, conveys the external signs of the subject;
4) Expresses the inner content of the depicted object, evokes certain thoughts and feelings in the viewer.
In system preschool education great place is given drawing having essential for the all-round development of the child. During drawing the child improves observation, aesthetic perception, aesthetic emotions, artistic taste, creativity, the ability to independently create beauty using affordable means.
The child's drawing reflects his view of the world. In drawing, he can express his impressions of what he saw, convey images of the imagination, embodying them with the help of line and color. When creating a drawing, the child controls his actions by representing the depicted object and evaluates them.
To create a drawing, the child must have
A clear idea of how much he wants draw, and certain skills.
Observations of the process drawing in children show that children have great difficulty in creating a drawing if they do not have graphic skills. And when they cannot portray what they want, they refuse altogether. paint.
Technique of any kind visual arts does not exist by itself, it is subordinated to the task of the image. The choice of one or another material for creating a drawing is determined by its expressive capabilities. mastering various materials, ways of working with them, understanding their expressiveness allows children to use them more effectively when reflecting their impressions of the life around them in drawings. In art, the aesthetic image of humanity is conveyed in the form of images. They are inconceivable without emotions, but the experience of the image always presupposes its comprehension. In relation to children of preschool age, it would be more correct to talk about an artistic and expressive image that conveys in a drawing in the unity of experience, understanding of the surrounding world, art, its inner peace and display your impressions.
Artistic techniques are one of the brightest and most diverse means of expression. With their help, you can model an image, giving it individual features, especially when it comes to non-classical techniques, which are based on experiments with materials. Preschoolers are easily included in this experiment. Why? The bottom line is that they have not yet formed pictorial stereotypes that hinder their creative development.
We all know traditional means very well. drawing:
Pencil. There are several types pencils:
A simple slate pencil, colored pencils, art pencil "Retouch", wax crayons, watercolor pencils, automatic collet pencils, sanguine, pastels, wax crayons, felt-tip pen.
Brushes. Paints.
This is the first paint that kids are introduced to. Gouache is a material with an admixture of white for drawing, the paint layer is dense, opaque, very thick paint.
Watercolor.
A colorful material designed for watercolor painting... The main property is the transparency of the paint layer, the color depends on the amount of water added to the paint. Basic reception drawing with paints - strokes.
Oil paints
Previously, these paints did not painted in preschool institutions, but they have always attracted children with their brightness, unusual technique of work, smell and originality of the design of paintings. Due to the specific smell, paints can be used for no more than 10-15 minutes.
There are also unconventional drawing techniques.
For example, if you add flour or starch paste to the gouache, then the drawings made with such gouache will seem voluminous. At drawing ice cream sticks or hard brushes are used, paint is applied in large strokes. If you add salt to the gouache, semolina or sawdust, the resulting pattern will be grainy.
Pointeism.
The image is made up of many small dots made by jabbing with the end of a hand or with a finger.
Stamps or seals.
Use purchased stamps or seals or make them in front of a child from potatoes, carrots, etc. as stamps, you can use buttons, cubes, leaves.
Plant twigs.
This technique can be used to drawing animal fur.
Use of foam rubber.
For coloring items instead of a brush, you can use foam rubber. This gives the object to be painted a velvety surface.
Pyatnography.
A sheet of paper is folded in half and bright spots are applied to one side. Then the sheet is folded and smoothed, a symmetrical image is obtained, which can then be finish painting.
Scratching wet paint.
Strokes or stripes are applied to the image using a stack.
Highlighting the tone.
With a brush or a damp cloth, remove some of the paint, achieving its lightening.
Monotype.
On a smooth surface (stack, plastic board, foil) drawing is done with oil or gouache paint. The material on which the paint is applied must be impervious to water. A sheet of paper is superimposed on top, which is pressed against the surface. It turns out a print in a mirror image and only one, hence the name "Monotype"... The number of colors in a monotype can be any.
Diatipia.
This technique is usually considered a type of monotype, but there are significant differences. Special roller (for smoothing the wallpaper) or with a swab, apply a light layer of paint on glass or a smooth surface of cardboard, on top of a sheet of paper and begin paint... Draw with a pencil or a sharpened stick, trying not to press hard. Then the sheet is removed. On the side that was pressed against the glass, an impression is obtained - a mirror repetition of the pattern.
Aquatouch or aquatipia.
A mushroom, tree or fruit is drawn on a thick sheet of paper. When the gouache dries up, the entire drawing is covered with black ink. When the ink dries, the drawing is dipped in a bath of water. In water, gouache is washed off the paper, and ink is only partially washed off. On a black background, a white pattern remains with slightly blurred outlines.
A method of highlighting a picture by scratching with a pen or a sharp instrument of paper or cardboard filled with ink, another name for the technique is the scratching technique.
Blotography
A few drops of paint are applied to a white or tinted sheet of paper with a pipette and, with the help of tubes or empty pens, the edges of the blot are inflated, which take on bizarre shapes.
Printing is a cliché
Cardboard is glued onto a wooden and smooth block, and on it - patterns, which can be not only made of paper, but also of rope. The patterns are painted and stamped onto paper or fabric.
Flora print
Flowers collected during a walk, sprigs of plants are dried between the pages of books. Then these elements are smeared with gouache and put on a blank sheet of paper. Cover with another sheet on top and press tightly.
Pair drawing
This is a smooth transition to collective drawing... A sheet of paper is divided in half, each one draws on its own part. Paint can be different or one plot. If this is a plot, then you need to learn to negotiate with each other.
Thread drawing
Take a piece of cardboard 25x25cm and fold it in half, dip the woolen thread in the thick paint. The thread is randomly folded into an unbent cardboard, which is then bent in half and pressed down with one hand, with the other slowly pulling the thread. It turns out a chaotic image, which can then be finish painting.
Magic drawing
A drawing is made on paper with a sharpened wax candle. Then paint is applied to the entire image with foam rubber or cotton wool. The paint adheres to the wax, so the drawing appears unexpectedly in front of the child's eyes. Laundry soap can be used instead of a candle.
Nitkography
Requires a sheet of velvet paper and woolen multicolored threads, from which you can make multi-colored patterns.
Drawing on wet paper
Certain plots are better draw not on dry paper, and on wet, if it will be topics related to rain or fog, or maybe someone's dream. Blurred image Wet will give the desired effect.
Painting on pebbles
Children love to play with flat, rounded pebbles. And if you consider a brooch - a cameo, and then draw something like that on a pebble.
Finger drawing.
Who said, that paint can I use a brush or pencil? And if a finger reaches for paints? It is good to put points with your finger, filling traced outline.
When conducting classes using unconventional painting techniques, one should not forget that the child is the subject of creativity.
And I would like to end with the words of Pablo Picasso “Every child is an artist. The difficulty is to remain an artist beyond childhood. "
Carrying out master class... Splitting into three group:
1. Thread drawing
2. Magic drawing
3. Blotography
And in conclusion - drawing in pairs.
Used Books:
1. Komarova T.S. "Teaching children technology drawing»
2. Kosminskaya V.B., Vasilyeva E.I., Kazakova R.G. et al. "Theory and methodology visual activity "
3. Kosterin N. P. "Educational Painting»
4. Ezhova N.V. "Forms of work in a preschool educational institution"
5. Journal "Preschool upbringing» No. 4/2010
6. Master class on the topic« Unconventional ways of drawing as a means of forming color perception in preschool children "
Elena Nikitina
Painting one of the favorite activities of children. Painting in unusual ways evokes even more positive emotions in children. Using unconventional drawing techniques development of thinking, imagination, fantasy, creative abilities... The child develops an interest in drawing, as a consequence, the desire to create.
Today I will tell you and show you how paint without using a brush.
1. Drawing with cotton swabs... We collect paint on a stick and decorate the image on a sheet of paper with dots. (Herringbone, snow, kettle, sundress, rowan branch).


2. Hand drawing... Pour the paint into a flat container. We dip our palm and press it against a sheet of paper. (Flowers, fish, Santa Claus, swan, carrots).

3. Drawing with cotton pads... With cotton pads you can paint by folding them in half, quarter or whole. (Moon, drifts, various flowers).


4. Drawing with prints... Simple way of drawing: ink is applied to the surface to be printed and the print is placed on a sheet of paper. (Use: flowers, shells, fruits, vegetables).


5. Blotography. A stain is made on a sheet of paper or a blot of watercolor paint is placed. Take a tube and blow air onto the blot.

6. Fork drawing... On the fork we collect paint from a flat plate and the flat surface of the fork makes an imprint. Can paint the grass, fence, flowers, hedgehog.

7. Thread drawing... The best thing draw with woolen thread... We dip the thread in the paint and apply it to a sheet of paper and create a pattern by printing with the movement of the thread. Woolen thread creates fancy pattern, which is suitable for the image of a cloud, a cloud, a sheep, an unusual flower.
8. Painting a sponge or a piece of foam rubber. We clamp a piece of foam rubber with a clothespin, dip it into the paint and apply prints that create the texture of the object. They paint animal fur, fluffy clusters of flowers, clouds, tree crowns.


9. Splatter painting... You will need a toothbrush and a comb. We take a little paint on the brush and spray it with a comb. We brush over a sheet of paper with a comb. You can apply paints of different colors, it will turn out very beautifully.

10. Drawing with stamps... The stamp is easy to make from plasticine. We put plasticine on a block, a cube, etc. Using any sharp object, we depict an object or an abstract pattern on it. The stamp is ready. We make a pillow from a sponge. Pour paint onto the sponge. Apply the die to the paint sponge. Now you can make prints. A stamp can be made from the bottom of a plastic bottle, beautiful flowers are obtained.

11. Painting imprints of cups and necks of different diameters. Pour the paint into a flat plate. We put the glass in the paint and put the drawing on a sheet of paper.

12. Drawing with a comb... We need a comb with fine teeth. Apply multi-colored paint (next to each other) on a sheet of paper in the form of a drop. Then we brush over all the drops of paint with a comb, connecting and smearing them. It turns out to be an amazing rainbow. You can also draw different patterns adding drops and combing in different directions.


13. Painting with wax crayons... Using colored wax crayons or wax crayons, apply the drawing on a sheet of paper. Then paint over with one or more layers of watercolor. It turns out an unusual and vivid drawing. (Can draw stars, flowers).
14. Scratchboard (waxography)... We paint the surface of the entire sheet of paper with wax crayons, then cover the sheet with black gouache. When everything is dry we scratch the paint and create a drawing with lines. You can scratch with a sharpened stick, skewer, toothpick.

15. Drawing with gauze... Apply a layer of gauze to a wet sheet of paper, straightening it. The gauze should be stationary on the paper. Draw on top of the gauze with a paintbrush. We leave the drawing to dry. We remove the gauze - a drawing remains on the paper in the form of an imprint of the texture of gauze fabric. (Landscape, sky, tree, grass)

16. Painting using plastic film. We draw a picture. Until the paint has dried, quickly apply the film to the drawing in the right place and gently, with rotating movements, create the wrinkles of the film on the paper. Paint collects in the wrinkles. Allow to dry and carefully remove the linen.

17. Monotype. We draw symmetrical objects. To do this, fold a sheet of paper in half and draw an object on one half. Until the paint has dried, fold the sheet in two again. The second half will have a print, After that the image can be paint or decorate.


18. Painting air bubble wrap. With this wonderful material, you can very easily draw falling snow... Apply white or pale blue paint to the film and apply it to a sheet of paper with a picture. With this technicians you can make an extraordinary background for your winter applique.


19. Drawing with salt... On a sheet of colored cardboard we apply a drawing with PVA glue. We draw a picture on the theme of winter. Sprinkle salt on top. When everything is dry, shake off the excess salt.

20. Drawing with semolina... For drawing in this technique colored paper or cardboard is used. PVA glue is applied to the contour of the drawing. Semolina is poured on top and a sheet of paper is tightly applied on top. Then we remove the paper and shake off the excess semolina. So way the next part is created.
21. Candle painting... On a thick sheet of paper or cardboard, children draw with a candle according to the idea. The sheet is painted over with watercolor paint. Wax images will appear through the watercolor. (Christmas tree, snowflakes, animals).
You can also use these techniques. unconventional drawing: pen drawing, finger drawing, Painting stenciled with a tampon, poke drawing, painting with soap bubbles, drawing with crumpled paper, drawing with leaves.
Related publications:
Acquaintance with non-traditional techniques of fine arts activities 1. "Acquaintance with non-traditional techniques of art activities" 2. slide Children should live in the world of beauty, games, fairy tales, music, drawing, fantasy ,.
Consultation "Drawing in non-traditional ways" The development of the creative potential of the individual should be carried out with early childhood when a child, under the guidance of adults, begins to master.
 Me and the children of our group really enjoyed getting to know different techniques. artistic creation... The guys are so immersed in.
 Abstract on drawing with non-traditional techniques " Autumn leaves» Age group: 2nd junior Type: productive activity Form of organization :.
Introducing preschool children to non-traditional drawing techniques Municipal budgetary preschool educational institution MBDOU No. 33 "Malinka" METHODOLOGICAL DEVELOPMENT: "Introducing preschool children.
Seminar in kindergarten (preschool)
Workshop for teachers
“Acquaintance with unconventional painting techniques
and their role in the development of preschool children "
Completed by: head of the circle
« Magic world paints "Chulkova T.I.
MDOU "Kindergarten" Ivushka "Uvarovo
Form of carrying out: workshop.
Target: To reveal the importance of non-traditional methods of activity in working with preschoolers for the development of imagination, creative thinking and creative activity. Show the relevance of circle work in kindergarten. To acquaint teachers with the variety of non-standard coloring techniques.
The motto of my work: "For the child, together with the child, based on the child's capabilities."
Preparatory stage:
- To arrange an exhibition of children's drawings in various drawing techniques.
- Lay out materials that are used in non-traditional painting.
- Quotes. "The more skill in a child's hand, the smarter the child."
“Childhood is an important period human life not preparing for future life, but a real, bright, original, unique life. And from how childhood passed, who led the child by the hand in childhood, what entered his mind and heart from the world around him, the type of person today's baby will become decisively depends on. (V. A. Sukhomlinsky)
Introduction.
Formation creative personality is one of the important tasks of pedagogical theory and practice in the present stage... Its development begins more effectively from preschool age. As V. A. Sukhomlinsky said: “The origins of the abilities and talents of children are at your fingertips. From the fingers, figuratively speaking, there are the finest threads-streams, which are fed by the source of creative thought. In other words, the more skill in a child's hand, the smarter child”. According to many teachers, all children are talented. Therefore, it is necessary, in time to notice, feel these talents and try, as early as possible, to give children the opportunity to show them in practice, in real life... Developing artistic and creative abilities with the help of adults, the child creates new works (drawing, applique)... Coming up with something unique, every time he experiments with ways to create an object. Preschooler in his aesthetic development goes the way from an elementary visual sensory impression to creating an original image (compositions) adequate pictorially - expressive means... Thus, it is necessary to create a base for his creativity. The more the child sees, hears, experiences, the more significant and productive the activity of his imagination will become.
Working with children of preschool age for several years, I paid attention to the results of diagnostics for visual activity. Children show nice results by criteria:
- Ability to hatch, draw various lines with colored pencils;
- Ability to apply paint strokes with a narrow and wide brush;
- Ability to recognize, name the main colors, shades of paints and mix them;
- Ability to correctly use brushes, glue and plasticine in work;
- Ability to use stencils and prints when working;
- Ability to clean up the workplace.
- At the same time, the low abilities of children were manifested:
- Uncertainty and constraint in actions and responses in the classroom;
- Passivity in the independent choice of visual materials and the location of the image on the sheet;
- Confusion when using non-standard coloring methods;
- Ability to experiment with visual materials;
- Waiting for a clear explanation by the teacher of a familiar drawing method;
- Manifestation of imagination, artistic creativity;
- Ability to convey a personal relationship to the object of the image;
Summing up, I understood that children lack self-confidence, imagination, independence. To solve this problem, I began to study methodological literature in depth. For myself, she clearly identified the criteria for leadership in visual activity, such as: knowledge of the peculiarities of the creative development of children, their specifics, the ability to subtly, tactfully, to support the initiative and independence of the child, to promote the mastery of the necessary skills.
I was especially interested in non-traditional ways of drawing, with the help of which it is possible to develop intelligence in children, teach them to think outside the box and activate creative activity. According to psychologist Olga Novikova, "Drawing for a child is not art, but speech. Drawing makes it possible to express what, due to age restrictions, he cannot express in words. In the process of drawing, the rational fades into the background, prohibitions and restrictions recede. At this moment the child is absolutely free. "
Unconventional painting techniques showcase unusual combinations of materials and tools. Undoubtedly, the advantage of such techniques is the versatility of their use. The technology for their implementation is interesting and accessible to both adults and children.
That is why, non-traditional methods are very attractive for children, as they open up great opportunities for expressing their own fantasies, desires and self-expression in general.
In practice, these tasks are realized by me through the lessons of the circle "The Magic World of Colors". Within the framework of the circle classes, children have unlimited opportunities to express their thoughts, feelings, experiences, mood in drawings. The use of various techniques contributes to the development of the ability to see images in combinations of color spots and lines and to design them into recognizable images. The activities of the circle are not in the form of "study and teaching". Children master artistic techniques and interesting means of knowing the world around them through unobtrusive involvement in the drawing process. The lesson turns into a creative creative process of the teacher and children with the help of a variety of visual material, which goes through the same stages as the creative process of the artist. These activities are assigned the role of a source of fantasy, creativity, independence.
Theoretical stage.
Unconventional painting techniques.
Finger painting
Expression tools: spot, point, short line, Colour.
Materials: bowls with gouache, thick paper of any color, small sheets, napkins.
Method of obtaining the image: the child lowers his finger in gouache and applies dots, specks on the paper. Each finger is filled with paint of a different color. After work, the fingers are wiped off with a napkin, then the gouache is easily washed off.
Hand drawing
(whole brush) (from 5 years old)
Paper rolling
Means of expressiveness: texture, volume.
Materials: napkins or colored double-sided paper, PVA glue poured into a saucer, thick paper or colored cardboard for the base.
The way of obtaining the image: the child crumples the paper in his hands until it becomes soft. Then he rolls a ball out of it. Its sizes can be different: from small (berry) to big (a cloud, a lump for a snowman)... After that, the paper lump is dipped into the glue and glued to the base.
Foam rubber stamp
Crumpled paper impression
Means of expressiveness: spot, texture, color.
Wax crayons + watercolor
Candle + watercolor
Means of expressiveness: color, line, spot, texture.
Subject monotype
Splashing
(5x5 cm).
Leaf prints
(preferably fallen), brushes.
Conducting a cycle of classes using a variety of techniques to identify the abilities of children over the time passed, it is clear that children have the ability to work with paints using non-traditional techniques. In children with poorly developed artistic and creative abilities, the indicators are slightly higher than at the beginning school year, but through the use of non-traditional materials, the level of enthusiasm for the topic and technique and the ability to color perception have improved.
Practical stage.
"Instead of a brush, a hand"
All children love to draw. Creativity for them is a reflection of mental work. Senses, mind, eyes and hands are the instruments of the soul. Faced with the beauty and harmony of the world, while experiencing the feeling of delight and admiration, they feel the desire to “stop a wonderful moment” by displaying their attitude to reality on a piece of paper.
Creativity cannot exist under pressure and violence. It should be free, bright and unique. Without parting with crayons, felt-tip pens, paints, the child imperceptibly learns to observe, compare, think, fantasize.
The child is familiar and familiar with the traces left by pencils, felt-tip pens, ballpoint pen and a brush, but the use of fingers and palms to draw stamps and stencils remains amazing.
Non-standard approaches to the organization of visual activity surprise and delight children, thereby causing the desire to do such an interesting thing. Original drawing reveals the creative possibilities of the child, allows you to feel the colors, their character and mood. And it's not scary at all if your little artist gets dirty, the main thing is that he should enjoy communicating with paints and be happy with the results of his work.
(for drying hands).
Operating procedure:
"We print with leaves on paper"
Required materials and tools:
Gouache, watercolor, brush, pencil, paper, colored ink or ink; a piece of foam rubber; and also: leaves of different trees, flowers;
Operating procedure:
We collect various fallen leaves, smear each leaf with gouache from the side of the veins. The paper we will print on may be colored. Press the painted side down against the paper. Carefully remove it, taking it by the petiole. Having smeared the leaf again and attaching it to the paper, we get another print, etc. If we apply the lower tip of the leaf to the previous print, then a flower will come out, you just need to finish painting the stem with a brush. Symmetrical attachment of a leaf on one side and the other, a finished body - and the butterfly is ready. Looking at the print of the sheet, you can see the most unexpected image in it and embody it on paper, completing the details. And the combination of this technique and the "raw" technique gives room for imagination when toning the sheet. For example, when drawing a meadow, the background will be grass. We take a leaf, moisten it with a sponge, then pour in the paint of the desired shades and immediately print the leaves.
This performance technique is good for its variety of techniques. If the sheet is smeared with paint in a tone higher than the background, then the print will be more expressive. Applying a clean leaf gives a smooth, soft outline.
Technique of drawing blobography
Drawing method: On dry, you can apply a drop of dark paint to the tinted background at the bottom (black, brown or green)... Blow from the straw onto the drop, as if pushing it forward. To get small branches, the tube must be shaken from side to side during blowing. You can paint some elements with a brush or decorate with an applique made from natural material.
The complexity of the technique: Carry out the drawing procedure in stages, as well as individually or in subgroups. Help is needed for insecure children. Observe the safety measures for children when working. Since the work is difficult for many children, dynamic pauses are necessary.
Approximate topics for using the technique: "Grass in the meadow", " Autumn landscape"," Sunset "," The bottom of the ocean "," Aquarium "," Kitten with threads ", etc.
Stencil drawing technique
Drawing method: Make a stencil: bending a sheet of paper in half, cut off 1 cm at the edges, and on the fold draw a half of a vase and a bouquet of elements of flowers and various greenery. Cut everything neatly. Place the stencil on a blank sheet of paper. Dip the sponge into the paint, then press it against the paper, making a "piercing" motion. Dip a sponge in a different color of ink and continue to print. Using the desired colors, paint over all areas of the design. If desired, you can draw the details of the drawing with a brush or felt-tip pen.
Show of children's works using the considered drawing method.
Approximate topics for using the technique: "Autumn", "Aquarium", "Favorite animals", "Postcard to mom", "My toys", "Fantasy", "Road", "Bouquet of flowers", etc.
Drawing technique with wax crayons, a candle.
An invisible drawing can be depicted with white wax crayon or a candle.
Complexity of technique: It is imperative to interest and induce little child reveal an invisible pattern. At the first stage, it is necessary to involve an adult child in the work so that he does not lose interest in completing the task with invisible materials. Help is needed for insecure children.
Show of children's works using the considered drawing method.
Approximate topics for using the technique: "Who is there?", "Wizards".
We can say with confidence that a variety of techniques contributes to the expressiveness of images in children's works. My work experience has shown that mastering the technique of the image gives kids true joy, if it is built taking into account the specifics of the activity and age of children. They are happy to cover with spots, strokes, strokes one sheet of paper after another, depicting either autumn leaves swirling in the air, or snowflakes smoothly falling to the ground. Children boldly take on art materials, they are not afraid of the diversity and the prospect of independent choice. They enjoy the very process of execution. Children are ready to repeat this or that action many times. And the better the movement is, the more pleasure they repeat it, as if demonstrating their success, and rejoice, attracting the attention of an adult.
The final stage.
- Dedication of educators to artists who paint in non-traditional techniques. (presentation of a comic ID)
- Memo to all participants of the seminar.
Variants of non-traditional drawing techniques with children of three years old.
"Instead of a brush, a hand"
Required materials and tools:
Tinted or white paper, gouache paints, brushes, rags (for drying hands).
Operating procedure:
If you smear your palm with paint, then it will leave an interesting print on paper, in which you can see various amazing images... Our palms can turn into the sun. Open your palm and spread your straightened fingers to the sides. Now put your fingers together. This is what the fence turned out to be! And if you move your thumb to the side a little and push the rest apart, your hand will turn into a cute hedgehog. It remains to finish painting the fungus that the caring dad drags into the hole, and even not forget about the paws, eyes and nose of the animal. And the butterfly will fly, and the flower will delight with its petals, and the elephant, and the fish, and much more can be imagined together with the baby.
"We print with our fingers"
Required materials and tools:
Drawing paper, palette, watercolors, hand rags, brush, black pencil, newspaper.
Operating procedure:
"Rainbow Fish". Dip the pad of your thumb into the paint of different colors prepared on the palette. Let's make a print. With the tip of our finger, we will depict a ponytail. We print the eye with the blunt end of a pencil, dipping it in black paint.
"Flower". We print the petals with the index finger, the middle with the little finger.
The technique of drawing with the palm and fingers is very similar to the technique of working with a stamp.
It can also be used when working with babies, but only the simplest exercises are simple - printing a certain figure for printing on the surface of the sheet.
Non-traditional drawing techniques with children of the middle group
Foam rubber stamp
Means of expressiveness: spot, texture, color.
Materials: a bowl or a plastic box containing a stamp pad made of thin foam rubber impregnated with gouache, thick paper of any color and size, pieces of foam rubber.
Method of obtaining the image: a child presses the foam rubber against a stamp pad with paint and makes an impression on the paper. To change the color, take another bowl and foam rubber.
Crumpled paper impression
Means of expressiveness: spot, texture, color.
Materials: a saucer or a plastic box containing a stamp pad made of thin foam rubber impregnated with gouache, thick paper of any color and size, crumpled paper.
The way of obtaining the image: the child presses the crumpled paper against a stamp pad with ink and makes an impression on the paper. To get a different color, both the saucer and the crumpled paper are changed.
Hand drawing
Means of expression: spot, color, fantastic silhouette.
Materials: wide saucers with gouache, brush, thick paper of any color, large-format sheets, napkins.
Method of obtaining the image: the child lowers his palm in the gouache (whole brush) or colors it with a brush (from 5 years old) and makes a print on paper. Draw with both right and left hands, painted in different colors. After work, hands are wiped off with a napkin, then the gouache is easily washed off.
Non-traditional drawing techniques with older children
Foam rubber stamp
Means of expressiveness: spot, texture, color.
Materials: a bowl or a plastic box containing a stamp pad made of thin foam rubber impregnated with gouache, thick paper of any color and size, pieces of foam rubber.
Method of obtaining the image: a child presses the foam rubber against a stamp pad with paint and makes an impression on the paper. To change the color, take another bowl and foam rubber.
Crumpled paper impression
Means of expressiveness: spot, texture, color.
Materials: a saucer or a plastic box containing a stamp pad made of thin foam rubber impregnated with gouache, thick paper of any color and size, crumpled paper.
The way of obtaining the image: the child presses the crumpled paper against a stamp pad with ink and makes an impression on the paper. To get a different color, both the saucer and the crumpled paper are changed.
Wax crayons + watercolor
Means of expressiveness: color, line, spot, texture.
Mediums: wax crayons, thick white paper, watercolor, brushes.
Image acquisition method: the child draws with wax crayons on white paper. Then he paints the sheet with watercolors in one or more colors. The crayon drawing remains unpainted.
Leaf prints
Means of expressiveness: texture, color.
Materials: paper, gouache, leaves of different trees (preferably fallen), brushes.
Method of obtaining an image: a child covers a piece of wood with paints of different colors, then applies it with the painted side to the paper to obtain a print. Each time a new sheet is taken. The petioles of the leaves can be painted with a brush.
Non-traditional drawing techniques with children of the preparatory group
Candle + watercolor
Means of expressiveness: color, line, spot, texture.
Mediums: candle, thick paper, watercolor, brushes.
Method of obtaining the image: the child draws with a candle on paper. Then he paints the sheet with watercolors in one or more colors. The candlestick pattern remains white.
Subject monotype
Means of expressiveness: spot, color, symmetry.
Materials: thick paper of any color, brushes, gouache or watercolor.
Method of obtaining the image: the child folds a sheet of paper in half and draws half of the depicted object on one half of it (items are chosen symmetrical)... After painting each part of the subject until the paint has dried, the sheet is folded in half again to produce a print. The image can then be decorated by also folding the sheet after drawing a few decorations.
Splashing
Means of expressiveness: point, texture.
Materials: paper, gouache, hard brush, a piece of thick cardboard or plastic (5x5 cm).
Method of obtaining the image: the child draws paint on a brush and hits the brush against the cardboard, which he holds over the paper. Then he paints the sheet with watercolors in one or more colors. Paint splashes onto the paper.
A jab with a hard, semi-dry brush
Means of expressiveness: texture of color, color.
Materials: hard brush, gouache, paper of any color and size, or a cut out silhouette of a fluffy or prickly animal.
Method of obtaining the image: the child lowers a brush into the gouache and hits it on the paper, holding it vertically. When working, the brush does not sink into the water. This fills the entire sheet, outline or template. It turns out an imitation of the texture of a fluffy or prickly surface.