Techniques for applying watercolors. Watercolor painting techniques - tips and tricks
Read also
1. Rinsing the brush
The paint can be removed from the brush by tapping lightly on the bottom of the container of water. This will wash out most of the paint. To wash off dark paint before working with light paint, tap harder with the brush. Then the brush must be rinsed in another container with clean water.
2. Draw a full brush of paint
That is, draw as much paint as possible on the brush. Brush over the soaked paint and pick up. If residue drips off the tip, you've drawn a full brush. Remove excess by running one tip along the rim of the container.
3. Pick up paint brush
The difference from the previous technique is that in order to remove excess paint, it is necessary to run along the rim of the container several times.
4. Blotting the brush
Brush with the paint you have collected over the rolled paper towel. You can also remove excess moisture or paint from your drawing with a paper towel.
5. Lightly blotting the brush
You should touch the tip of your brush to a cloth or paper towel. Light blotting can indicate the degree of pressure with a paper towel on the drawing when removing excess paint or moisture.
6. Complete removal of moisture from the brush
Touch a paper towel first with one side of the brush and then with the other. This will remove all moisture without removing the paint.
Seemingly simple tricks. But, you see, sometimes just such basic knowledge is not enough to embody your imagination on paper.
How to remove excess ink from paper
 But it is much more difficult to remove excess paint from paper. Especially when you consider that there is no white paint in watercolor, which can be used to cover the inaccuracies. However, there are several ways to remove excess ink from paper.
Removing paint with a brush
You will need a clean, damp brush and a clean, damp cloth. With a damp brush, lightly dampen the area on the paper where you want to remove the paint layer. Wipe the brush on a cloth and blot the paper again with the brush. If necessary, moisten the brush again and repeat the procedure (this will remove more paint).
If you want to "draw" thinner, lighter lines on the paint, use the tip of a wet brush. Give it the pointed shape you want. Draw a line with short strokes and wipe with a damp cloth.
Scraping paint
This technique is suitable for removing paint that has already dried. You need a stiff brush and dry cloth. Dried paint can be removed with the tip of a brush. To do this, slightly moisten the brush and tap it on the side of the can of water. Using continuous strokes with the tip of the brush, clean the desired area in the drawing. Rinse the brush. If necessary, the procedure can be deleted.
You can use the flat side of the brush to scrape off the paint more evenly. The method is the same. You can remove paint in continuous downward strokes, or with overlapping strokes from side to side. But you need to move the brush in one direction, otherwise the paint will again fall on the already cleaned areas.
Blotting paint with a cloth
This is a very simple way to lighten an area that has just been painted over. In addition, the fabric can add texture to the design. And the degree to which the ink is washed off depends on how much the paper is dampened and how hard you press the fabric. If the paper is damp and the cloth is pressed firmly, the paint can be lightened quite strongly. You can crush the fabric to change the stiffness of the fabric. The same advice can be given if you are going to add texture to the pattern using fabric.
Watercolor techniques
Dry brush technique
This is a very creative way to create interesting structure in your drawing. The essence of this technique is  therein. That more pigment is applied to the paper than water. This technique looks especially beautiful on textured watercolor paper with a coarse texture.
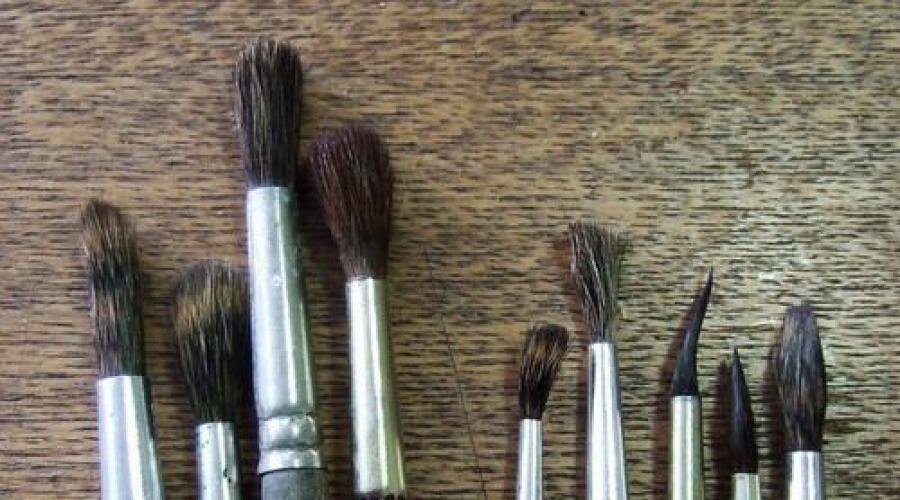
Apply paint to the brush and then blot the brush with a towel. Run the brush over the paper without applying too much pressure. Use only the side of the bristles. To increase the contrast, dry the pattern and then repeat the procedure again. A round brush with a small tip works best for this technique. So that you can draw a line with just a light touch of the paper. "Shaggy" brushes will not work: the drawing will be too sloppy.
Raw Technique
This technique is versatile and popular. The paint is applied to a damp surface, which creates an original effect of a soft blurred background. Apply water to the area you plan to paint over. Once the water is slightly absorbed and stops shining, start adding paint. You can add more water on top of the paint to enhance the effect.
In this technique, it is better to use one color or colors of the same color scheme. Remember that the blending effect in watercolor is not created by applying paints at the same time, but by overlaying colors. So wait before introducing a new color. Until the previous layer dries. In general, test the paint on a separate piece of paper to avoid mistakes and surprises.
Salt technology
 This technique allows you to create beautiful pattern textures. The size of the salt crystals determines how large and scaled the pattern will be. First, paint over the part of the picture where you want to create the texture. Wait until the paper stops shiny with water. Sprinkle a pinch of salt onto the painted surface. Dry the paper and gently wipe off the salt with a paper towel. Experiment on a separate sheet of paper (the same paper you plan to paint on) to determine the amount of paper dry and the size of the salt crystals you need to get the best effect.
Using a sponge
The sponge will help you create interesting textures, as well as give lightness and lightness to the painted foliage and trees. You will need a sea sponge. Submerge it in water and wring it out, repeat several times until the sponge is completely saturated with moisture. Wrap the sponge in a paper towel and roll it lightly in your hands until it is just damp.
The sponge can now be dipped into the paint. You need to lightly touch the paper with a sponge so as not to spoil the texture. Once you've applied the paint, blot the sponge with a damp paper towel.  It is advisable to repeat the procedure several times to completely remove the paint from the sponge. Now the sponge can be dipped into the next paint and continue working. Well, do not forget that, usually, they start with light tones, gradually moving on to dark ones.
A sea sponge works best for this technique. But if it was not possible to get a sea sponge, after some preparation, an ordinary household sponge will do. Cut a new dry sponge into 2 * 2 centimeters squares. Rinse the pieces several times. To wash out all possible industrial pollution from them. Squeeze the squares and roll them into a paper towel. Round off one of the corners of the square by pinching off a piece of sponge. Now test the sponge by dipping it in the paint and touching it to the paper. If you don't like the print, pinch off more sponge until you are satisfied with the result.
Graduated washes
This technique is often used in watercolor to depict the sky. The hue goes from bright and saturated at the top to the lightest at the horizon. Apply paint from one edge of the paper to the other, brush with water and quickly mix it with the paint on the paper. The paint must also be washed from one edge to the other. Put water back on the brush and apply the next level of wash. Thus, you need to paint over the entire required area. Blot excess water from the brush and paper.
But you can not only make a smooth transition from a saturated shade to a lighter one, but also make transitions between colors. For example, in the image of the same sky, which, as you know, is not always uniformly blue. Take two shades of paint, one lighter and the other darker. First apply a drop of clean water, then brush with a light shade of paint and start painting over the surface until you reach the edge. Rinse the brush. Take a light shade again and start painting in the other direction. The procedure must be repeated until the required area is painted over with a light shade. Now let's move on to the dark color. Do everything exactly the same. Blot off excess paint, position the design at an angle, and continue blotting off excess paint. This will blend the shades by themselves.
Spray technique
 The splatter technique will help you create depth and texture in your artwork. For this technique, you can use either a hard watercolor brush or a toothbrush. The effect will be about the same. Dilute a medium-dark paint on the palette, touch it with all the bristles of the toothbrush. Flip the brush over with the bristles up and hold over the area of the design that you plan to treat. Slowly slide your thumb along the bristles to spray. The procedure can be repeated several times before the paint runs out. You can direct the spray by turning the toothbrush.
Why use dark or medium shades of paint for this technique? Simply, light shades, and even diluted with water, will not give the desired effect. If you splash on a damp surface, you will get a slight blur effect. And so that splashes do not fall on the part of the picture where it should not be, cover it with paper towels or special adhesive tape.
A little about watercolor terms
1. Sizing. It is a special substance that is applied to watercolor paper on one or both sides during production. It slows down the absorption of paint and water, as well as prevents any unwanted spreading. Thanks to sizing, you can get bright saturated colors and shaded areas with smooth edges.
Whether the paper is sizing is difficult to see with the naked eye. It is also impossible to determine by eye whether the substance is sufficient and whether it is evenly applied to the surface. Due to imperfections in the application, either white spots (if there is a lot of sizing) or roughness (if there is no sizing and the paper is washed out with water) may appear in the drawing. But you can try to redistribute the sizing yourself if you moisten the surface of the paper and walk over it with a large synthetic brush with plenty of cold water.
2. Watercolor drop. It is the volume of paint or water stretched over a specific area on a sheet of paper. The sheet should have a certain angle of inclination relative to the horizontal surface.
3. Controlled wash. Accurate and even application of watercolors using a wash or  graduation. The work is also carried out on a slightly inclined surface for better flow of colors.
4. Uncontrolled washout. Paint or water is applied with a flat brush to the paper. In this case, strokes can be multidirectional, and the surface of the paper - dry or wet.
5. Transition. This is a smooth transition from one color to another with the help of water.
6. Wet shine. This is the shine of the not yet dry surface of the paper, when the paint or water has not yet been absorbed and continues to shine. In some techniques, it is important to maintain a wet gloss to achieve the desired effect. The intensity of the gloss indicates the moisture content of the watercolor.
Artist Problems: Blurring Errors
Sometimes something goes wrong, and when washed, unnecessary streaks and color spots appear on the surface. Especially often such problems arise for those who have just begun to master the technique. Fortunately, while problematic, you can still remove blur problems.
Problems
1. There was no watercolor blob and the top of the fill dried too quickly.
2. The brush was pressed too hard, so the paint was uneven.
 3. In one step, the entire surface was painted over. and the paint on the wash has dried too quickly.
4. Excess paint was not removed after washing, so the surface was left with defects that looked like small bubbles.
5. Too small watercolor blob that dries quickly. When adding paint, the color is too saturated and the effect of bubbles.
6. The watercolor drop was not enough during stretching, and when a new drop was added, a transition was noticeable.
7. After rinsing, the brush was not thoroughly soaked from moisture before removing paint residues. Consequently, the paint layer has been washed out.
How to avoid and eliminate
1. Be sure to create a watercolor blob before painting over the area.
2. Do not press too hard on the brush when painting. Make neat, light strokes.
3. Reduce the distance between strokes, do not stretch too long. Brush more often.
4. Always remove excess paint after finishing wash.
5. Make sure the volume of the watercolor drop is sufficient and there is sufficient moisture for the wash.
6. Draw on paint as needed to maintain the watercolor blob.
7. It is not necessary to rinse the brush at the end of the wash before removing paint residues. It is enough just to get wet with a brush.
This is not all you need to know in order to comprehend all the subtleties of watercolor drawing. But already these tips will help you learn some tricks and avoid possible mistakes. Happy experiments!
The purpose of today's lesson: Explore 5 watercolor techniques, learn how not to dirty your work, and create a fantasy artwork in A4 format.
Watercolor- adhesive water-soluble paint. Transparent vegetable adhesives, readily soluble in water, serve as a binder for watercolors. As a plasticizer, glycerin and invert sugar are introduced into them, which retain moisture. Without this, paints would dry out easily and become brittle. Another additive to professional watercolors that serves as a surfactant is bovine bile. It prevents paint from rolling into drops, making painting easier.
WATERWATER TECHNIQUES
Multilayer watercolor technique (glaze)
This watercolor technique can give the green light to realist paintings. Glaze- multilayer technique, applying watercolors with transparent strokes from lighter to darker, one layer on top of another.

Features of the multi-layered watercolor technique:
- realism of the image: the picture is in bright, saturated colors;
- the bottom layer of light and transparent strokes should have time to dry before the next application;
- the boundaries of the strokes are visible;
- paint does not mix in different layers;
- strokes are done neatly, plans are airy, painting in a soft style;
- you can divide the process into several sessions, perform a large canvas.
Glazed watercolors become like oil or gouache painting. So that the work does not have such a drawback, one must be able to work with light, apply glazing subtly and accurately.
To paint you need brushes, paints, technique and special effects. You can paint with a dry (wrung out), semi-dry and wet brush (kolinsky or squirrel).
Wet watercolor (English watercolor)

The French call this technique "working on water" (travailler dans l'eau, fr.)
A sheet of paper is abundantly moistened with water. In this technique, the main feature is the unpredictability of the result. Even if the artist has correctly calculated the tone and color, the drawing may change more than once before it is completely dry before taking the final form. The contours of objects in this technique are vague, the lines flow smoothly into each other and are airy. A picture made in this technique is thought out and imagined by the viewer.
Artist's steps in wet watercolor technique:
- adding water to paints;
- mixing paint, no matter where, on a palette or on a sheet;
- wet the sheet abundantly, then smooth it so that there are no irregularities;
- remove excess water from the sheet with a piece of cotton wool so that it stops shining;
- perform drawing, making extremely accurate strokes;
- drying the drawing from 2 hours;
- elaboration of foreground elements (if required).
Mixed media watercolor
Many artists combine several drawing techniques in one work.
Combined (mixed) techniques:
- put the first layer of paint on a wet sheet;
- elaboration of plans, creation of the required degree of blur;
- drying the drawing;
- lay out the next layers of paint in stages;
- elaboration of middle and near plans.
Basic rule of technique: not all of the paper is wetted, but in the desired area (reserve); the pigment is applied to the surface from top to bottom.

Fragments of paper may be wetted out. The artist himself decides which plan to work out, creating watercolor stains. With the help of a sponge, it is necessary to remove excess water so that water does not seep into those areas that should remain dry as intended by the artist.
You can also combine coloring materials and create special effects:
- Mixing watercolors with whitewash, gouache, watercolor pencils, ink, pastel. This is no longer a pure technique, but a mixed one. What does it do? - clarity (pencils), shading (pastel), washing (ink), book illustrations (pen), reserve (whitewash), linear strokes (watercolor pencils).

- Special effect drawing on crumpled paper»Gives an amazing light and shade effect on the folds of the paper.
- Special effect with salt: Salt crystals are applied to the drawing, as a result of friction with the paper, fantastic stains appear. Suitable for painting a starry sky or water meadow.

Exercise # 1.
Divide the sheet into 4 rectangles (leave gaps between them), three of which will be underpainting and three executions in watercolor techniques.

Stages of the assignment:
- .Fill in the first rectangle with one color
- In the second, we make a tone stretch in any color.
- In the third, the transition from color to color
- In the fourth, we use the technique "Raw"
- We fix everything, finish where we expected it to dry.
TECHNIQUE OF DRAWING WITH WATERPROOF "WITHOUT MUD"
1.
IN DRAWING WITH WATERCOLOR, USE QUALITY MATERIALS
The quality of your work will depend on the colors. Avoid paint kits that are whitish in appearance with pastel shades. They will give turbidity in the batch.
2.
FOLLOW THE TRANSPARENCY OF WATER LAYERS
Remember that the paper must show through a layer of paint in watercolor.And this does not mean that the colors should be pale, light!Even black in a watercolor painting can be transparent, while remaining saturated and deep.
3.
DO NOT MIX WATER COLOR WITH WHITE
Even if your paint kit contains whitewash, this does not mean that they need to be mixed with other colors or applied in a large layer in order to get a light shade.In watercolor, paper plays the role of white. To get a lighter shade, we simply dilute the paint with water.
4.
USE COLORING PAINTS CAREFULLY
Opaque paints include yellow, orange, iron oxide red, cerruleum and other shades.Remember that in watercolor you cannot achieve sonorous brightness due to the thickness of the layer.In order for the yellow to glow, to be bright, it must be laid with a transparent layer!In most cases, layer thickness = opacity = dirt.
5.
DO NOT WRITE IN LIGHT SHADES ON DARK
If you paint with watercolors in layers, apply one shade to another, then go from light to dark.First, paint all the light and distant areas, and then gradually go to the foreground and darker shades.
6.
DO NOT MIX A LARGE NUMBER OF COLORS IN ONE KNOT
We have already found out that gray can be sonorous and beautiful.It becomes ugly and dirty when it loses its transparency.Remember, the more colors you mix, the more different pigments that make up them are involved in the mix. And the less chance you have of getting a more sonorous and transparent color.
The natural composition of watercolors is a crushed pigment with natural adhesives - gum arabic, casein or milk phosphoprotein, dextrin, honey, phenol. The paint is applied with water with a brush on the surface of the paper. This term refers to work performed in this environment. Pigments are usually transparent, but can be made opaque by mixing with whitewash - in this form, paints are known as gouache.
Watercolor differs from other types of painting in a variety of techniques.
Weightless lightweight paint gives freshness and luminosity in calligraphic strokes, which gives the work an atmosphere and weightlessness. There is one fundamental difference between watercolor and other painting mediums - its transparency.
The artist applies oil on one opaque color to another until he achieves the desired result. Watercolor is a versatile painting medium, as it makes it possible to reproduce all genres, as the water base allows for unique and unpredictable effects. For an abstract style, randomly scattered watercolor strokes on wet paper help create a blur effect.
Sanguine drawing with red crayons
Watercolors on paper can melt, flow, and blends create a beautiful combination of colors in a variety of painting styles. 
Working methods
Watercolor is the freest form of painting due to its transparent watery nature. There are certain painting techniques for working with watercolors, but the most popular are:
Differential blur
This is the main way artists work, which is achieved by wetting paper in a specific area and applying pigment to the surface from top to bottom. The technique is used for a massive image of the sky, water, meadows and allows you to experiment with different shades. The paper rises almost vertically, and on a wet surface, colors spread in all directions. The technique requires drying naturally.
Glazing
This method is similar to blur, but requires the use of a pigment that is applied to a dry leaf. The method actually adjusts color and tone, ideal colors and transitions. Dry each color separately before applying the next one.
"Wet on wet"
The “A la Prima” method is the process of wetting the paper before applying the pigment. To do this, use a large brush or sponge to distribute the water evenly over a sheet of watercolor paper. The technique creates beautiful blurred shapes and colors, soft shades and paint transitions in the works.
Technique of pasty painting
"Dry brush"
For painting, a barely damp, harsh brush with a lot of paint on dry paper is used. On an uneven surface, a clear, hard, highlighted trace is obtained, granular effects similar to a pencil drawing. Whole compositions are done in this way, using also a dim background to revive. 
Flushing
The process of removing paint after application and complete drying. The area that needs to be changed, to make a deeper color or to add volume, moisten with water, blot the paint with a cloth. The technique creates complex shapes, lines, especially if you use strips of paper to mask areas with removed pigment in a painting.
Exposure to water on paint
When the applied watercolor on the drawing dries up, you can drop water on the desired area with a clean wet brush to obtain the effects of layering, cracking, roundness, volume.
Glaze
It is a method of multi-layering watercolors from a lighter shade at the base to a darker shade at the top. Watercolors are applied with transparent thinnest strokes after the previous layer of work has dried. The result is a three-dimensional image, where the colors do not mix, but complement each other and allow you to see the border of each layer.
Properties of oil pastels
 Author Natalia Shevchenko
Scratching
Scratching or removing some of the dry painted surface creates lighter areas of the same tone.
Disguise
If it is required to keep some areas white during the work, they use a reserve, that is, they cover the necessary places with a mask of paraffin or wax, which, after the work is completely dry, I clean it with a brush or roll it into a ball by hand.
Adding
Adding a different color to the wet area of the painting allows it to merge and branch out, creating interesting illusions. The method produces interesting and vibrant color gradations that cannot be obtained by mixing a pigment on a palette.
Notable artists
Some well-known artists working with watercolors often used similar effects in their work:

Dry brush technique in painting
Watercolors learned to take advantage of the unexpected results of painting. The greatest painters practiced spontaneity. Artists improvised to make effective use of the power of watercolor.
English School
The classical painting technique was perfected in England in the eighteenth and nineteenth centuries:

Watercolor is a tradition that has its own chronicle in history. Primitive man used pigments mixed with water for cave paintings and applied them with fingers, sticks and bones. The ancient Egyptians used water-based paints to decorate the walls of temples and tombs and created the first drawings on papyrus.
Wall art
Oriental school

In the Far and Middle East, the first watercolor schools had an individual style - Chinese and Japanese masters of painting on silk and exquisite handmade rice paper. Their art was filled with literary allusion and calligraphy. But the main image remained a typically contemplative landscape that became a central aspect of the watercolor tradition in the following centuries. In India and Persia, opaque gouaches were used for religious images.
Middle Ages
During the Middle Ages, monks in Europe used tempera to paint manuscripts - books were considered the most important art form and the equivalent of easel painting. The monks copied the holy texts by hand on sheets of parchment made of sheepskin and calfskin. Sometimes entire pages were adorned with elaborate curls and symbolic imagery.
Watercolor painting has its own history and traditions. It first appeared in China in the 12th century, although even in Ancient Egypt they used opaque watercolors with the addition of whitewash.
It is interesting, because one of the characteristic features of watercolors is their transparency, and there is never white in the sets. In medieval Europe, as in Russia, opaque watercolors were used to color church books or manuscripts, in which capital letters or ornaments were highlighted in watercolors.
Water-based paints
Common to ancient Egyptian, medieval and later paints is that the solvent for them is water - aqua. Hence the name aquarelle, or watercolor. This term is applicable both to the actual paints, and to the type of painting performed by them. The main features of pure watercolor are the aforementioned transparency and purity of color. Watercolor painting is usually delicate, fragile and airy. But until the middle of the XIII century, it had a purely applied character, it was mainly used for coloring drawings, engravings, and frescoes. Although such a masterpiece as "The Hare" by Albrecht Durer, considered a textbook work, was written back in 1502.
From isolated hobbies to general recognition
Remarkable single examples were encountered later, but this was an exception to the rule. Renowned artists such as Van Dyck, Giovanni Castiglione and Claude Lauren dabbled in watercolors. In England, she received special development thanks to Joseph Turner. Although before him, watercolor painting was promoted by fairly venerable English artists. Under Turner, watercolor became the leading painting in this country, and in 1804 the Society of Watercolors was created in England.
Excellent foreign watercolorists
Watercolor came into vogue in France, other countries of Europe and America. It can be added that, at the suggestion of the Argentine artist Rojo, the International Watercolor Day was declared. It was first noted on November 23, 2001.

In the public domain, you can see amazing watercolors by the Japanese artist Abe Toshiyuki, who achieves photographic accuracy in his extraordinary paintings.
Great Russian masters
How did watercolor painting develop in Russia? The first major master in this art form was P.F.Sokolov (1791-1848), who is considered the founder of the genre of Russian watercolor portraiture. Academician of the Imperial Academy of Arts, he left to descendants a slice of the era, as he captured contemporary Russia in his landscapes, portraits, and everyday scenes. Karl Bryullov and A. A. Ivanov paid tribute to watercolors. In the 18th-19th centuries, she became very popular, especially the miniatures she made. But the large works created with water paints are also remarkable. Especially good are the paintings of Ilya Repin, Mikhail Vrubel, Valentin Serov, and the artists of the World of Art. The Society of Russian Watercolorists was founded in 1887.
The beauty of watercolor landscapes
Water paints are capable of all painting genres, but landscapes are especially good. Watercolors can convey subtle color transitions, the saturation of space with air, the richness of each tone. That is why the blooming gardens in the landscapes made by aquarelle are so uniquely beautiful and colorful.

Especially good are the works of the English artist Beatrice E. Parsons (1870-1955). Watercolor landscapes, in particular winter ones, made by Russian masters, are unique and inimitable. A selection of Russian winter landscapes created by various watercolors is widely available.
Typical tricks
How are the effects inherent only in watercolor achieved? It is characterized by special techniques, it has its own rules and, of course, its own paints prepared in a special way. Blurring and flowing are specific techniques of this genre. We must immediately make a reservation that drawing with watercolors is a rather complicated matter, requiring special skill.

Nowadays, with a huge number of master classes and tips on how to replace the masterly mastery of the brush with various tricks on the Internet, you can find the statement that everyone can draw. Not all. And such a technique as glazing is available only to strong professionals. And then there are such techniques as "washing", "alla prima", "dry brush", "drops" and "wet". Only virtuosos can master them perfectly.
Painting on paper
In the second half of the 19th century easel watercolor developed, the works of which are not inferior to oil painting. Their significant difference is not only in colors, but also in the material on which the works are created. In watercolor, it is paper, less often silk. And this makes drawing with watercolors related to graphics.

When creating pictures with water paints, the paper is sometimes pre-wetted (“wet” technique), the smear at the same time acquires a special spreading shape, and applied next to it forms, merging with the previous one, a new shade, which is sometimes difficult to predict.
Special devices
The paper dries quickly and warps. Therefore, the sheet must be stretched. This is achieved in several ways. You can put a wet sheet on the glass and then tilt it at the right angle during work in order to save more moisture in the desired area. It is clear that this method is not available to a beginner. There are special frames for tensioning the sheet. They are called erasers. To preserve moisture, a damp flannel is placed under the paper. It all depends on the ratio of paint and water, and at the same time completely different shades are achieved. For various techniques, various aids have been created, such as a tablet and watercolor blocks.
Tools
Each watercolorist has his own technique. It is not so easy to master watercolor, all its virtuoso techniques, you need to lime a lot of paper, which is divided in quality into several types - Bristol cardboard, Whatman paper, torchon and many other types adapted for frequent wetting. Aquarellists use brushes made from delicate squirrel hair. Such brushes are even used in forensics. The hair of marten, ferret and badger is suitable.
When working with water-based paints, there is much that is included in the concept of "technique". Watercolors can be used, as mentioned above, both on dry paper and on wet paper. In the first case, there are their own methods, in the second - their own. When drawing directly with paints, paper, even initially wet, is still dried. The application of several layers to obtain depth and iridescence of color (glaze) implies only dry cardboard.
The most common technique
Painting with watercolors "on wet" or "on wet" or "wet on wet" is unique and inherent only in this genre of painting. True, the frescoes are applied on damp ground, and some experts consider them to be the forerunner of watercolors, made using the wet technique. A soft brushstroke and a unique texture of the paint layer are the specifics of working with watercolors “on wet”. In addition, in these works there is an effect of tremor and mobility of the image. Then you can enter a drawing with a pen or a pencil into the dried watercolor, especially since not so long ago there were watercolor pencils. The essence of watercolor is that a white or light tone is obtained due to the cardboard showing through a transparent layer of paint.
The actual paint
And what about the paints? Their quality is achieved by special grinding of the pegment and its quantity in the original product. To prevent the pigment from rolling into balls, bovine bile is added to the paint, which is a tension-reducing surfactant. Gum arabic and dextrin (processed corn and potato starch), readily soluble in water, are incorporated into paints as binders.

To give them elasticity and plasticity, plasticizers such as glycerin are added to them, and inverted sugar retains moisture well. The biggest complaint about water-based paint is the uniformity of the color pigment. Bad paints remain on the paper as grains of sand. This is an indicator that the paint is unusable.
Watercolor marinas
It was noted above that water colors are unusually good for depicting landscapes. The sea especially benefits. Watercolor with all the techniques and methods available only to her can depict all the exciting beauty of the water space. And then maybe there is something in painting water with water colors? Maybe that's why there are so many tutorials for beginners to paint with watercolors to paint exactly the sea? And how consonant with the expanse of water are such watercolor techniques as "drops" or "bloating". In addition, wax crayons can be used in the marina to cover the cardboard in order to preserve the white areas.
All sorts of different ways
Methods such as bleaching, punching, spraying, using masking tape and many others used by watercolors, especially beginners, will help not only depict the sea in watercolors, but also turn the work into a fun activity, especially if you paint with a child. But in serious adult works, different techniques are also used. Sometimes, to achieve the desired effect, you can put the brush aside and try something else. What masters do not resort to: cling film, foam, salt, stamping and much more - the imagination of a person, especially an artistically gifted person, is limitless.

In our time, when the information field is so wide, when in any genre of fine or applied art, which you had never heard of before, you can not only try yourself, but also exhibit your work, a great many people discovered talents in themselves and decided on the direction development of their own skills. Moreover, on any issue there are a lot of available tips, master classes, recommendations and opportunities to acquire the items and tools necessary for this type of creativity. Painting with watercolors for beginners does not stand aside. Dozens of lessons, step-by-step descriptions of absolutely everything related to water paints are widely available.
To the official heyday, which came on a foggy London morning only at the beginning of the 19th century. A frightening abyss of centuries gradually changed the materials and techniques of watercolor painting: the paint "came to life" on papyrus and rice paper. Later - in the working sketches of artists or a ghostly "haze", almost an illusion, thinly hidden on the sheets under the confident drawing of a lead and a pen.
Basic watercolor painting techniques
True work in the technique of watercolor is akin to the emerging bright morning: it smells of fresh grass, flowers, overturning the subtlest images and thoughts on us from its soft depths. But roses also have thorns! Despite its velvety, watercolor can be impudent and capricious. Nervous graphic lines, hard strokes and tone density are quite acceptable to her. It all depends on the tasks set by the artist.

Amazing watercolor painting by Japanese artist Abe Toshiyuki.
Technique "A la prima". The Italian energetic approach to solve everything "in one go" was reflected primarily in French Impressionist painting. In fact, this is a “one touch” technique, writing pictures on wet paper at once, without alterations and additional overlays of paint layers. The fascinating effect of the work is in the unpredictability of the final result. This painting technique exists wonderfully in landscapes, suggesting the skill and dexterity of the artist. Although this technique of painting with watercolors for beginner painters is also a good lesson to "fill your hand" and "sharpen the eye".


Watercolor cityscapes by American artist Thomas Schaller.
Painting technique "raw". The plot is written on abundantly moistened paper. Most often, the master touches the paint to the sheet, which has already well absorbed water. The degree of filling the brush with water is also controlled. Depending on the tasks, the author writes either with a dry brush on a wet background surface, or "wet-on-wet". The essential difference between this technique is that the artist can carry out a separate drawing of details already on dried paper, complementing and clarifying the plot. Such a watercolor painting, "sinking" on the wet surface of the sheet, allows you to achieve a lot of impressive moments: picturesque softness, subtle color transitions, lightness and transparency.


Rain in watercolor paintings by Taiwanese artist Lin Ching-Che.
Multilayer painting technique... Reception is carried out due to transparent color glazes - fillings and paint strokes, which are superimposed on each other in layers. Each layer must be dried, avoiding mixing. As a result, correctly filled paints form a gap, filling the depth of the painting with transparency. Multi-layered watercolor creates rich reflections and deep shadows, striking with realism and special color resonance. The technique is excellent for depicting multi-faceted complex landscapes, still life productions and portraits.


Watercolor still life of the artist Elena Bazanova.
Painting technique on dry paper... In watercolor, it is sometimes difficult to understand where painting ends and graphics begin. The dry method is just the case for those who want to control the spreading of paint on paper, with the drawing of thin linear and clear contours. But there are other options as well. One of the popular ones is a one-layer painting with a well-dampened brush. Each fill forms a water sludge that blends with the next brush strokes. Thus, the combination of colorful islands gives a pleasant softness and beautiful mixes.


Realistic watercolor by Steve Hanks.
Mixed painting technique... If you want to get away from classical watercolors and learn to paint outside the box, the combined approach to painting is an irreplaceable assistant. The painting combines a variety of artistic materials and techniques, sometimes even mutually exclusive. For example, in one work, the author is able to combine the method of writing on wet and dry paper. They mix watercolor with ink, wax, pastel, watercolor pencils, gouache, achieving amazing effects, but sometimes - to the detriment of the "purity" of the watercolor sound.


City landscape in watercolors by Heinz Schweizer.
Notable schools and watercolors
Before the appearance of paper, watercolors in an almost inaudible whisper declared themselves on the thin canvases of Chinese silk. Spilling over into the laconic graphics of hieroglyphs and stunning Asian landscapes, the paint has long been entrenched in this poetic genre. The paper, created in China, contributed to the further development of the oriental watercolor school with a special personality and national flavor.


Delicate floral watercolor by French artist Sylvie Fortin.
Classic layered painting is a brilliant creation of the English school of watercolors. Distinguished by its full depth and thick tonality, it was not inferior to the "oil" paintings, and even surpassed them with its airiness. The second half of the 18th century was a time of great change and the flourishing of English watercolors. A deep imprint on its history was left by bold innovative artists: T. Guertin, D.W. Turner, D. Constable and many others.
Watercolor came to Russia late. Dense, multi-layered writing on dry paper was used by the brothers Karl and Alexander Bryullov, creating "living" images of their contemporaries. The legendary A. A. Ivanov turned to this technique for quick, sketchy writing, creating small masterpieces of painting. PF Sokolov is an artist of marvelous miniature portrait watercolors - symbols of an elusive era.


Watercolor still lifes with flowers by the Korean artist Yi Seong-bu (Lee Seok Bo).
In the late 19th and early 20th centuries, translucent paint gained great popularity among Russian artists. M. A. Vrubel, I. E. Repin, V. I. Surikov often worked in this technique. Petersburg artists (A. N. Benois, A. P. Ostroumova-Lebedeva, K. A. Somov, L. S. Bakst and others) were especially fond of watercolors.
Later, the technique of watercolor glazing was forgotten for a long time, existing only in England. Today, multi-layered painting is reviving again. Watercolor schools are opening, exhibitions, contests and training courses for fans of this thoughtful artistic technique are held in Moscow.