Non-traditional drawing methods for children in kindergartens. Classics in an unconventional reading
"Unconventional painting techniques in kindergarten and their role in the development of preschool children ”.
(Answers)
Unconventional-
- Not based on tradition.
- Not sticking to tradition.
(Synonym dictionary).
(Answers)
Unconventional drawing –
- finger drawing;
- drawing with palms;
- tamping.
- foam rubber printing;
- cork printing;
- wax crayons + watercolor;
- candle + watercolor;
- leaf prints;
- hand drawings;
- drawing with cotton swabs;
- magic ropes.
- drawing with sand;
- drawing with soap bubbles;
- drawing with crumpled paper;
- blotography with a straw;
- landscape monotype;
- stencil printing;
- subject monotype;
- blotography is common;
- plasticineography.
Technique "Tamping"
Foam drawings.
Wax crayons + watercolors.
Drawing with a candle.
Technique "Monopitia"
Technique "Diapitia"
Learning to make a background.
Technique "Blotography"
Technique "Threadpainting"
Nitkography method.
Draw with postcards.
Spray technique -
You can draw snow like that.
Sawdust painting technique.
Frottage technique
Drawing with an eraser
"We draw with small bags."
Technique of prints
Leaves print.
Scratchboard technique
Technique " scratchboard "Are also called" claw-scratches "!
ink gratterscratching technique
.
wax candle carcasses... You can, of course, and gouache acrylic paints
black color
Scratchboard - technique engravings on cardboard
engraving on cardboard
Option 1.
Helpful hints:
Option 2.
Option 3.
Drawing with a piece of textile
.
We draw with plasticine!
.
Features of the technique:
Drawing with salt.
Painting with colored salt.
.
Salt color:
Drawing with a toothbrush.
Collage.
Crumpled paper impression.
Stained glass example:
"Non-traditional drawing techniques in kindergarten and their role in the development of preschool children."
Drawing is a big and serious job for a child. Even doodles contain for little artist very specific information and meaning. A certain advantage of drawing in comparison with other types of activity is that this type of creativity requires the coordinated participation of many mental functions. The well-known teacher I. Disterweg believed: "The one who draws gets more in one hour than the one who only looks for nine hours." Being directly related to the most important mental functions - vision, motor coordination, speech and thinking, drawing not only contributes to the development of each of these functions, but also connects them with each other, helps the child to streamline rapidly assimilated knowledge, to formulate and fix a model of an increasingly complex idea of the world.
What do you think the word can mean in an unconventional way?
(Answers)
Unconventional-
- Not based on tradition.
- Occurring not by virtue of the established tradition, settling down not according to the established custom. Distinguished by originality.
- Not sticking to tradition.
(Explanatory Dictionary of Efremova, TF Efremov, 2000.)
Synonyms: individually, in a new way, extraordinary, unique, non-standard, non-trivial, original, in a new way, in their own way, original, independently, peculiar, original.
(Synonym dictionary).
What is meant by the phrase "non-traditional drawing"?
(Answers)
Unconventional drawing –
The art of depicting, not based on tradition.
Children from a very early age try to reflect their impressions of the world around them in their art. ... Drawing in unconventional ways is a fun, mesmerizing activity that surprises and delights children.
How many unnecessary interesting things at home (a toothbrush, combs, foam rubber, corks, polystyrene, a spool of thread, candles, etc.). We went out for a walk, take a closer look, and how many interesting things are there: sticks, cones, leaves, pebbles, plant seeds, dandelion fluff, thistle, poplar. as you want and you can even come up with your own unusual technique... Children feel unforgettable, positive emotions, and emotions can be used to judge the child's mood, what makes him happy, what makes him sad.
Non-traditional drawing is used at an early age so that the child draws quickly, because it is still difficult for him to show perseverance. And for older children, non-traditional drawing is a way of showing creativity. Since the result is already important for an older baby, so that the drawing is bright, beautiful and reflects all the events. This is a great opportunity for children to think, try, search, experiment, and most importantly, express themselves.
Conducting classes using non-traditional techniques
- Helps relieve children's fears;
- Develops self-confidence;
- Develops spatial thinking;
- Teaches children to freely express their ideas;
- Encourages children to creative searches and solutions;
- Teaches children to work with a variety of materials;
- Develops a sense of composition, rhythm, color, color perception; a sense of texture and volume;
- Develops fine motor skills of the hands;
- Develops creativity, imagination and flight of fantasy.
- While working, children get aesthetic pleasure.
There are many non-traditional drawing techniques, their unusualness lies in the fact that they allow children to quickly achieve desired result... For example, which child will not be interested in drawing with his fingers, drawing with his own palm, putting blots on paper and getting a funny drawing. The child loves to quickly achieve results in their work.
It is recommended to use with children of younger preschool age:
- finger drawing;
- imprint with potato seals;
- drawing with palms;
- tamping.
Children of middle preschool age can be introduced to more complex techniques:
- jab with a hard, semi-dry brush.
- foam rubber printing;
- cork printing;
- wax crayons + watercolor;
- candle + watercolor;
- leaf prints;
- hand drawings;
- drawing with cotton swabs;
- magic ropes.
And in older preschool age, children can learn even more difficult methods and techniques:
- drawing with sand;
- drawing with soap bubbles;
- drawing with crumpled paper;
- blotography with a straw;
- landscape monotype;
- stencil printing;
- subject monotype;
- blotography is common;
- plasticineography.
Each of these techniques is a little game. Their use allows children to feel more relaxed, bolder, more direct, develops imagination, gives complete freedom for self-expression.
Finger painting - happy.
Introduce children to unconventional technique Drawing is better with finger drawing - this is the easiest way to get an image. At an early age, many babies are just learning to use artistic tools, and therefore it is easier for children to control the movements of their own finger than a pencil or brush. Each brush finger has its own paint. You can draw with dots, specks, stains - and it will snow on the street, and smoke will draw from the pipes, and what a bunch of grapes is just a sight for sore eyes.
Children really like to draw with their palms. We dip the child's palm in paint, and the baby puts a print on the paper with it, then we supplement the drawing with tags from the fingers, and we get a giraffe, they pressed their palm to the column and drew dots with our fingers - it turned out autumn forest... And if you paint your palm in different colors, you can get funny octopuses, or a cheerful sun and a beautiful butterfly.
Imprint with potato seals.
This technique allows you to repeatedly depict the same object, making up the most diverse different compositions... The child presses the signet to the ink pad and prints it onto a sheet of paper. You can use half an apple.
Technique "Tamping"
We use this technique from an early age. We give a tampon made of foam rubber and, having dipped it in paint, children create images. It turns out light, airy clouds, fluffy dandelions.
Swab stenciling.
The child applies the stencil to the paper, dips the foam rubber in the paint and dabs the foam rubber along the stencil, then carefully removes the stencil, if necessary, repeats the procedure after the paint has dried.
Foam drawings.
For some reason, we are all inclined to think that if we paint with paints, then we must also use a brush. Not always, foam rubber can come to the rescue. We advise you to make a variety of various small geometric figures out of it, and then attach them with a thin wire to a stick or pencil (not sharpened). The tool is ready. Now you can dip it in paint and use the stamp method to draw red triangles, yellow circles, green squares (all foam rubber, unlike cotton wool, is well washed). At first, children will draw chaotically. geometric figures... And then offer to make the simplest ornaments out of them - first from one type of figure, then from two, three.
A jab with a hard, semi-dry brush.
Means of expressiveness: texture of color, color. Materials: a stiff brush, gouache, paper of any color and size, or a cut out silhouette of a fluffy or prickly animal. Method of obtaining the image: the child lowers a brush into the gouache and hits it on the paper, holding it vertically. When working, the brush does not sink into the water. This fills the entire sheet, outline or template. It turns out an imitation of the texture of a fluffy or prickly surface.
Wax crayons + watercolors.
Means of expressiveness: color, line, spot, texture. Mediums: wax crayons, thick white paper, watercolor, brushes. Image acquisition method: the child draws with wax crayons on white paper. Then he paints the sheet with watercolors in one or more colors. The crayon drawing remains not painted over.
Drawing with a candle.
Children love to paint with a candle. By drawing invisible strokes or putting dots, and then applying paint to the sheet, you can see rain or waves on the sheet, patterns on the window.
Technique "Monopitia"
This technique is the most common. Bending a sheet of paper in half, apply a few drops of liquid paint on one part of the sheet, cover with the other half of the sheet, expanding, you will see unusual patterns. You can see flowers, clouds, chanterelle in them. If you draw a butterfly with folded wings on one side, cover the image with the other half, you can see that the butterfly spread its wings and flew. Using these techniques, it is easy to explain to children the law of symmetry.
Technique "Diapitia"
Using a swab or paint, apply a light coat of paint to the smooth surface of the cardboard. Place a sheet of paper on top and invite your child to draw something with a pencil, being careful not to press hard on the paper. On the side that was pressed against the cardboard, an imprint is obtained - a mirror image of the drawing with an interesting texture and a colored background.
Wet sheet painting technique
How to properly wet a drawing sheet
This is the most important thing in wet painting technique. You need to find a middle ground: a sheet that is too dry will not allow the paint to flow beautifully. If there is too much water, the paint will spread over the entire sheet and the drawing will also fail.
Draw on a wet sheet with light touches with the tip of a brush. When a brush with paint touches a wet sheet, the paint should spread about 1-2 centimeters in diameter around the brush.
If the paint doesn't run, then you haven't wetted the sheet enough. If the paint spreads very shapelessly, then there is too much water. Excess water can be removed with a dry brush or sponge.
Drawings are very believable, the theme of which is somehow connected with water: fish in a pond or an aquarium, the sea, clouds with rain. Flowers are very lively.
You can draw only the background for the future drawing on a wet sheet. Or, using a stencil, you can draw some kind of figure (for example, an animal) and make the background wet only around this figure.
Learning to make a background.
Usually children draw on white paper. So you can see it more clearly. It's faster this way. But some plots require a background. And, I must say, all children's works look better against a background made in advance. Many children make the background with a brush, moreover, an ordinary one, a small one. Although there is a simple and reliable way: to make the background with cotton wool or a piece of foam rubber dipped in water and paint. You can make the background at the end of the work with wax crayons.
Technique "Blotography"
Play with blots (blotography) well develops imagination. The child scoops up the gouache with a plastic spoon and pours it onto the paper. The result is random spots. Then the sheet is covered with another sheet and pressed. Children examine the image, determine: “What does it look like? ".
Technique "Threadpainting"
This technique delights children. You will need cotton thread, a set of diluted gouache or watercolors that you need to stir from time to time, and paper. Cut the threads so that it is convenient for babies to work with them, 10-15 cm, dip the thread in the paint so that it is soaked. Holding it by the tip, gently lay it on a sheet of paper and cover with another sheet so that the tip of the thread protrudes. Hold the top sheet while pulling the thread. The result is a very beautiful image.
Nitkography method.
This method exists mainly for girls. But this does not mean that it is not suitable for children of the opposite sex. And it consists in the following. First, a 25x25 cm screen is made of cardboard. Either velvet paper or plain flannel is glued onto the cardboard. It would be nice to prepare a cute bag with a set of woolen or semi-woolen threads for the screen. different colors... This method is based on the following feature: threads with a certain percentage of wool are attracted to flannel or velvet paper. You just need to attach them with light movements of the index finger. Interesting stories can be prepared from such threads. Imagination, a sense of taste develops. Especially girls learn to skillfully pick colors. Some thread colors are suitable for a light flannel, and completely different ones for a dark one. This is how the gradual path to women's craft begins, needlework, which is very necessary for them.
Draw with postcards.
In fact, almost every home has a ton of old postcards. Go through old postcards with the children, teach you how to cut out the necessary images and stick them to the place, in the plot. A bright factory image of objects and phenomena will give even the simplest unpretentious drawing a completely artistic design. Can a three-, four- and even five-year-old child draw a dog and a beetle? No. But to the dog and the bug, he will draw the sun, rain and will be very happy. Or if, together with the children, you cut out a fairy-tale house with a grandmother in the window from a postcard and stick it, then the preschooler, focusing on his imagination, knowledge of fairy tales and visual skills, undoubtedly, will draw something to him.
Spray technique -
Technique "spraying" - spraying drops with which in kindergarten a toothbrush and a ruler, a comb can handle. We collect paint with a toothbrush and draw a ruler along the surface of the brush towards ourselves. Themes for drawing can be absolutely any. For example, on a sheet of paper we place a composition of dry plants. We apply a vase stencil and a butterfly stencil. Unscrew the toothbrush away from you (bristles up) and start combing it with a ruler, drawing from the bottom up. Do not be afraid to splash, if you perform all the actions correctly, then splashes of paint and water will fly to work. Splatter the created composition along the contour, choose for this darker and more saturated colors (burgundy, red, dark green).
You can draw snow like that.
Finger drawing using sand
Very interesting work that children do with pleasure! The lesson takes place in two stages: - at the first stage, we prepare a sheet of paper (preferably a large format) for further drawing - apply glue to the entire surface and sprinkle evenly with sand (prepared in advance and well sieved) After that, let the glue dry! After the glue dries, it is necessary to remove excess sand - just blow it off carefully) After completing the first stage, proceed to the second - directly to drawing! Invite the children to draw an autumn tree using their fingers on the sandy surface of the leaf using a variety of colors.
Semolina drawing technique.
A drawing is applied to a sheet of paper with a pencil (or ready-made coloring pages are taken). Then, one by one, the elements of the pattern are coated with glue and covered with semolina. Let it dry, shake off the excess cereal. When the drawing is dry, paint it with gouache.
Sawdust painting technique.
This method is simple, available to almost every child. ... A drawing is applied to the surface of the product with a pencil (or ready-made coloring is taken).
Then, one by one, the elements of the pattern are coated with glue and covered with colored sawdust. The best wood- this is birch and aspen, sawdust should be white. If it is not possible to prepare birch or aspen sawdust, then coniferous sawdust will do. The prepared sawdust is dried and sifted through a fine sieve. Raw sawdust is very poorly sifted. After that, the prepared material is painted over with paints. We use gouache paints. The paints are diluted with water in the required concentration. The amount of water is determined empirically. How more water, the paler the coloring material will be, therefore, the color saturation of the sawdust itself will change. Prepared sawdust is poured into gauze, tied (not tightly) and filled with coloring solutions (stir well). For better impregnation, we leave the sawdust in the solution for a day (stirring occasionally, then untie the gauze, put them on a film and dry them near the battery. Stained and dried sawdust is stored in plastic containers.
Frottage technique
Another interesting technique for creating small masterpieces. The word "frottage" comes from the French frotter - "to rub, wipe". All of us in childhood transferred coins to paper, putting it under a notebook sheet and painting on top with a pencil! This, it turns out, is frotage.
The frosting technique consists in putting some embossed object under a piece of paper and painting it over with pastels, a couple of minutes - and the do-it-yourself craft is ready! the main task- find a relief that will look interesting on paper. And pick colors, of course.
Drawing technique - drawing with a string
For the second year now, I have been using an unconventional technique in my work - drawing with a string. Children learn to draw not only with pencils and paints, but also with colored strings. First, simple patterns, loops are laid out with a string, and then they move on to more complex objects. Each lesson is accompanied by a fairy tale corresponding to the topic. In these classes are used: poetry, riddles, finger gymnastics, exercise minute... Children like these activities very much, they feel joy and are proud of their work. They develop fine motor skills of the hands, prepare the hand for writing, develop their imagination, and strengthen their drawing skills.
Drawing with an eraser
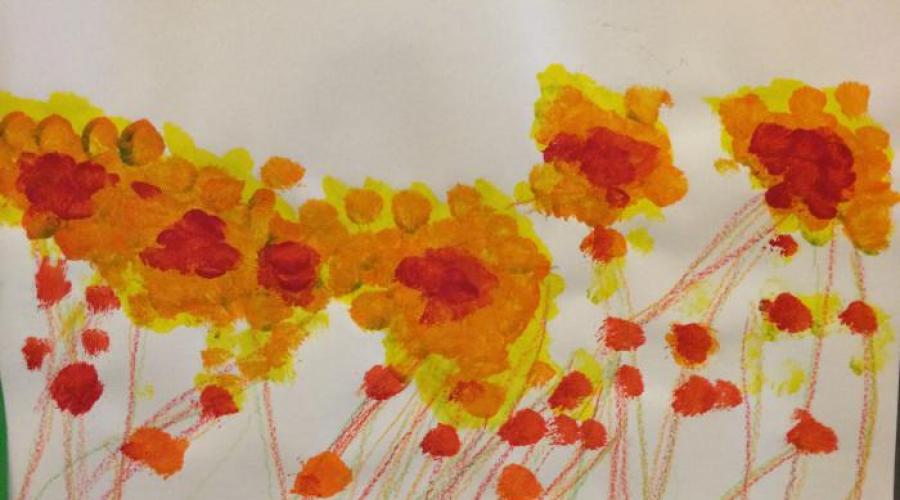
Shade the entire sheet with a simple pencil. Then we take an eraser, outline the middle of the flower and erase the petals with an eraser, and so we draw a whole bouquet, when we have finished "drawing" with an eraser, you can paint the yellow center and green chamomile leaves with paints.
"We draw with small bags."
For work, you need to prepare album sheets, watercolors HONEY, brush No. 5-6, water and cellophane bags, previously cut up and down.
The only thing you should not get tired of asking children is to work quickly with a brush, not to let the paints dry on paper. If, nevertheless, the paints applied first managed to dry out - help moisten them with water.
Quickly apply watercolors to the sheet. We put cellophane on the center of the picture, wet the fingertips with water and with GENTLE rotating movements create the wrinkles of the bag on the paper. We direct the rotation of the fingers in any direction. The kulek sticks to the inked paper, and water and watercolor collect in the wrinkles. In these places, the paper will brighten. Let the paper dry, do not rush to remove the bag. after a while we take off the bag and see what happened. You have a set of sheets with fancy patterns... This is a great background for pictures, an exclusive material for applique, for snowflakes, autumn leaves, letters, etc.
Technique of prints
Leaves print.
It is very interesting to paint with leaf prints. Cover the leaves with gouache, then put the painted side on a sheet of paper, press and remove, you get a neat color print of the plant.
Scratchboard technique
Technique " scratchboard "Are also called" claw-scratches "!
The drawing is highlighted by scratching with a pen or a sharp tool on paper or cardboard, flooded ink(in order not to blur, you need to add a little detergent or shampoo, just a few drops). The word comes from French gratter- scratch, scratch, therefore another name for the technique - scratching technique
.
Usually we take thick paper, shading with a thick layer of colored wax crayons. You can take colorful cardboard with a ready-made colorful pattern, then you can limit yourself to the usual wax candle(not colored). Then apply a layer on the surface with a wide brush or sponge carcasses... You can, of course, and gouache use, but it gets dirty after drying. You can also use acrylic paints
black color
take advantage. When it dries, we scratch the drawing with a sharp object - a scraper, knife, knitting needle, plastic fork, toothpick. A pattern is formed on a black background from thin white or colored strokes.
Children usually like this kind of drawing very much. Scratchboard - technique entertaining and unusual, the child is captured by the process of "manifestation" engravings on cardboard... Drawings at the beginning of training can be very simple: the outlines of objects, a cobweb, a balloon, etc. Gradually, tasks can be complicated.
The scope for imagination here is simply huge: for example, you can draw engraving on cardboard a plastic fork: intact - waves at sea, breaking off "extra" teeth - road, rails, etc. You can think of using a fork handle, a disposable plastic knife, and even a spoon!
Option 1.
1) Thick cardboard, sketch with colored wax crayons - you can use one color, you can use multi-colored striped spots (a thick layer). Leaving no white spots.
2) Top with a wide brush or even a small sponge - cover with a layer of thick (sour cream consistency) black gouache (or black ink + a drop of shampoo - does not paint your hands when working, or acrylic paint), let dry.
3) Take a non-writing ballpoint pen (either a sharpened wooden stick for sushi, or a toothpick, and even a plastic fork, or another convenient pointed object, or all objects at once) - and when scratching, clear contrasting multi-colored lines appear. You can draw with lines, strokes - whatever: underwater world, bright autumn forest, space ...
Helpful hints:
If the gouache (ink) rolls off the layer treated with wax crayons (crayons)- then you can degrease the base with talcum powder (sprinkle on top and rub with a cotton swab).
So that gouache does not paint your hands when scratching a drawing- you need to add a little PVA glue to it before applying it, and stir well. Or, when drawing, put a piece of blank paper under the arm, which rests on the sheet.
Option 2.
1) For the base, you can take colored or white cardboard, or cardboard with a ready-made bright pattern (even the same cardboard cover from colored cardboard will do). Rub the base with a simple wax candle.
2) Second and third steps - see option 1.
Option 3.
1) For the base, you can take white cardboard and paint the background with any colors, and whatever you like. Dry. Then the second and third steps of option 1.
Drawing with a piece of textile
We take a piece of fabric measuring 10 x 5 cm, crumple it, make something like a tampon. Dip a cloth swab in gouache paint. You can paint with black gouache on white cardboard. You can also paint on a colored background, for example, blue, white paint, then we get a "Winter landscape".
Painting small pebbles.
Of course, most often the child depicts large stones on a plane, on paper, less often on asphalt, large stones. Plane depiction of a house, trees, cars, animals on paper is not as enticing as creating your own voluminous creations. In this regard, sea pebbles are ideally used. They are smooth, small and vary in shape. The very shape of the pebble will sometimes tell the child what image to create in this case (and sometimes adults will help the kids). It is better to paint one pebble under a frog, another - under a bug, and a wonderful fungus will come out of the third. A bright, thick paint is applied to the pebble - and the image is ready. And it is better to finish it like this: after the pebble dries, cover it with colorless varnish. In this case, a voluminous beetle or frog made by children's hands glitters, brightly shimmers. This toy will take part in independent children's games more than once and bring considerable benefit to its owner.
We draw with plasticine!
Painting with plasticine on glass.
From plasticine, you can sculpt not only volumetric figures, but also create beautiful creations on the plane. This technique has its own name - drawing with plasticine. This is a very entertaining activity for both toddlers and older children.
So, what did we need to create a plasticine drawing?
1. High-quality plasticine, which kneads well and mixes with each other. The less it sticks to your hands, the better.
2. The basis of the painting: glass, cardboard, wood frame. (Frame)
3. A modeling board, a glass of water, napkins for hands, stacks, various improvised devices to create the desired texture.
We use glass as a base to create a picture using the reverse application technique and be sure to protect the edge of the glass with electrical tape so that the children do not get hurt. But it should be borne in mind that this work is done under the close supervision of adults.
Features of the technique:
Drawing (we can put the coloring in the photo frame instead of the photo. And we start to create) Before proceeding with the sculpting, it is necessary to think over the combination of colors and choose the necessary shades by mixing. We begin to apply the selected color to the desired details of the picture from the side that the picture is looking at from the frame). Spread the clay evenly with your finger, without going beyond the sketch lines. Layer thickness no more than 2-3 mm.
At the end of the work, gently wipe the glass from greasy prints, remove the second protective film. Choosing a suitable sheet of cardboard for the background. Insert the picture flip side back to the frame.
Drawing technique "Pointillism"
The name of the movement in painting pointillism comes from the French word pointiller, which means "to write with dots." Pointillism - drawing with dots different color(dotted strokes). And, therefore, this technique is quite within the power of preschool children.
We draw using the pointillism technique, using different visual materials: just our fingers, tampons, cotton swabs, brushes, felt-tip pens, markers.
Drawing with salt.
We first carry out a drawing with a simple pencil. We paint a small section of the picture with watercolors. Sprinkle with salt. The salt absorbs excess water and sticks to the sheet. Shake off excess salt. We continue to work in the same spirit until the end. The use of salt has an unusual effect. Try it - you will see.
Painting with colored salt.
Salt can be dyed in different colors .
Salt color:
To begin with, we dilute the gouache in a container with a small amount of water (the more water, the lighter color... The less water, the more intense the color). Then put the salt in a plate and pour out the colored water. Gently stir the salt with a fork so that all the salt is colored. You can dry it in the oven, heat the oven to a temperature of 100 degrees and put our tins with salt there for an hour. you can use a microwave oven, the molds are placed there for 5-10 minutes at the maximum temperature. After taking out the salt, you will see that you get dry lumps. We take a plastic bag and pour salt into it. Then roll out the salt on a cutting board until it becomes crumbly. We take a separate jar for each color.
We draw a drawing with a simple pencil, then with PVA glue, sprinkle with salt on the glue.
Drawing with a toothbrush.
Let me make a reservation right away that not everyone likes this technique. But when drawing some objects, it is simply not replaceable. Therefore, let's say about her too. Drawing with a toothbrush, dipping it, like a brush, in paint, you get a really fluffy Christmas tree, waves on the sea, a shaggy animal. With a brush, such an effect will be achieved, oh, how difficult it is.
Painting technique with oil pastels on velvet paper.
The pencil moves easily on the paper and is shaded with a finger, creating softer shades, and children are just delighted with this technique! Drawings are bright and funny.
Collage.
The concept itself explains the meaning of this method: several of the above are collected in it. In general, ideally, the following seems important to us: it is good when a preschooler is not only familiar with various image techniques, but also does not forget about them, and uses it to the right place, fulfilling a given goal. For example, one of the children 5-6 years old decided to draw summer, and for this he uses a bitmap (flowers), and the child draws the sun with his finger, he will cut fruits and vegetables from postcards, he will depict the sky and clouds with fabrics, etc. There is no limit to improvement and creativity in the visual activity. The English teacher-researcher Anna Rogovin recommends using everything that is at hand for drawing exercises: draw with a rag, paper napkin (folded many times); paint dirty water, old tea leaves, coffee grounds, squeeze from berries. It is also useful to paint cans and bottles, spools and boxes, etc.
Crumpled paper impression.
Means of expressiveness: spot, texture, color. Materials: a saucer or a plastic box containing a stamp pad made of thin foam rubber impregnated with gouache, thick paper of any color and size, crumpled paper. The way of obtaining the image: the child presses the crumpled paper against a stamp pad with ink and makes an impression on the paper. To get a different color, both the saucer and the crumpled paper are changed.
Stained-glass window technique - glue pictures
The contour of the future drawing is made with PVA glue from a bottle with a dispensed spout. A preliminary sketch can be drawn with a simple pencil. Then the boundaries of the contour must be dry. After that, the space between the contours is painted with bright colors. Adhesive borders keep the paint from flowing and mixing.
Stained glass example:
- Using a simple pencil, without pressure, divide the sheet with intersecting lines in different directions, necessarily from edge to edge (snowflake design).
- Draw lines from the ends of the resulting snowflake to the middle of each ray to make small windows - "pieces of glass".
- Circle the contour with PVA glue and let dry.
- Paint the space between the glue borders with bright colors.
Unconventional drawing techniques as a means of correcting the psyche allow you to overcome the feeling of fear. It can be said that it allows the little artist to move away from the subject image, to express their feelings and emotions in the drawing, give freedom, instill confidence in their abilities. Modern research proves that unconventional imaging techniques help reduce the excitement of emotionally disinhibited children. At the same time, as a rule, overly active people need ample space for the deployment of activities. The bottom line is that attention is distracted and extremely unstable. In the process of "playing the artist" the zone of activity narrows, the amplitude of movements decreases. By gaining the appropriate experience of drawing in a non-traditional technique, the child thereby overcomes fear. Further creativity will give him only pleasure, even from working only with a brush and paints.
"Methodology and organization of drawing lessons in kindergarten"Prepared by A. M. Shaikhina
In the formation of a child's personality, various types of artistic and creative activities are invaluable: drawing, modeling, cutting out figures from paper and sticking them, creating various designs from natural materials, etc.
Such activities give children the joy of learning, creativity. Having experienced this feeling once, the kid will strive in his drawings, applications, crafts to tell about what he learned, saw, experienced.
The visual activity of a child, which he is just beginning to master, needs qualification guidance from an adult.
But in order to develop in each pupil the creative abilities inherent in nature, the teacher must himself understand the fine arts, in children's creativity, own the necessary ways artistic activities.
The visual activity of preschoolers as a type of artistic activity should be emotional, creative. The teacher must create all the conditions for this: he must first of all provide an emotional, imaginative perception of reality, form aesthetic feelings and ideas, develop imaginative thinking and imagination, teach children how to create images, the means of their expressive performance.
The learning process should be aimed at the development of children's art, at the creative reflection of impressions from the surrounding world, works of literature and art.
Mastering the ability to portray is impossible without purposeful visual perception - observation. In order to draw, sculpt any object, you must first familiarize yourself with it well, remember its shape, size, color, design and arrangement of parts.
For the mental development of children has great importance gradual expansion of the stock of knowledge on the basis of ideas about the variety of forms of spatial arrangement of objects of the surrounding world, different sizes, variety of shades of colors.
When organizing the perception of objects and phenomena, it is important to pay attention of children to the variability of shapes, sizes (child and adult), flowers (plants at different times of the year), different spatial arrangement of objects and parts (a bird sits, flies, pecks grains, a fish swims in different directions etc.); structural parts can also be arranged in different ways.
While drawing, children get acquainted with materials (paper, paints, chalk, etc.), with their properties, expressive possibilities, acquire work skills.
In the classroom on visual activity, the speech of children is developed: the assimilation and name of forms, colors and their shades, spatial designations contributes to the enrichment of the vocabulary; statements in the process of observing objects, when examining objects, buildings, as well as when examining illustrations, reproductions from paintings by artists have a positive effect on the expansion of vocabulary and the formation of coherent speech.
Visual activity is closely related to sensory education. The formation of ideas about objects requires the assimilation of knowledge about their properties and qualities, shape, color, size, position in space. Children define and name these properties, compare objects, find similarities and differences, that is, they perform mental actions.
Thus, visual activity contributes to sensory education and the development of visual-figurative thinking. Children's art has a social orientation. The child draws not only for himself, but also for those around him. He wants his drawing to say something, so that what he depicted will be recognized.
The social orientation of children's art is also manifested in the fact that in their work, children convey phenomena public life.
The value of visual activities for moral education also lies in the fact that in the process of these activities, the children develop moral and volitional qualities: the need and ability to bring what has been started to the end, to study with concentration and purposefulness, help a friend, overcome difficulties, etc.
In the process of visual activity, mental and physical activity is combined. To create a drawing, it is necessary to make efforts, to carry out labor actions, to master certain skills. The visual activity of preschoolers teaches them to overcome difficulties, to show labor efforts, to master labor skills. First, children develop an interest in the movement of a pencil or brush, in the traces they leave on paper; gradually new motives of creativity appear - the desire to get a result, to create a certain image.
Preschoolers acquire many practical skills that will later be needed to perform a wide variety of jobs, acquire manual skill that will allow them to feel independent.
The main meaning of visual activity is that it is a means of aesthetic education.
For the aesthetic education of children and for the development of their visual abilities, acquaintance with works of visual art is of great importance. Brightness, expressiveness of images in pictures, sculpture, architecture and works of applied art evoke aesthetic experiences, help to perceive the phenomena of life more deeply and more fully and find figurative expressions of their impressions in drawing, modeling, application. Gradually, children develop an artistic taste.
The tasks of the visual activity of children 3 - 4 years old
Offer children to display their impressions of the world around them in drawings using accessible graphic and pictorial means.
To continue teaching to draw with pencils and felt-tip pens - to draw lines (vertical, horizontal, wavy, curves) and close them into shapes, thereby creating expressive images.
Continue to acquaint children with paints and develop skills in drawing with a brush (draw paint on the nap: gently dip it with all the nap in a jar of paint, remove excess paint on the edge of the jar with a light touch of the nap, rinse the brush well before picking paint of a different color; teach to dry the washed brush on a soft cloth or paper napkin; draw lines, draw and paint closed shapes).
To consolidate the knowledge of the names of colors (red, blue, green, yellow, white, black), to acquaint with the shades (pink, blue, gray). Draw the attention of children to the selection of a color that matches the depicted object.
To teach the rhythmic drawing of lines, strokes, spots, strokes; accompany the movements of a pencil or brush with words, game actions (for example: "Rain, more often - drip - drip - drip!", "Legs are running along the path - top - top!").
To involve children in decorative activities: to teach to decorate with patterns the silhouettes of objects cut out by the teacher (dress, kese, etc.)
Learn to depict simple objects, draw straight lines (short, long) in different directions, crossing them. Lead children to the image of objects of different shapes (round, rectangular) and objects consisting of combinations of different shapes and lines (tumbler, snowman, chicken, trailer, etc.).
To form the ability to create simple plot compositions, repeating the image of one object (Christmas trees on our site, dandelions in the grass) or depicting various objects, insects, etc. (the bun rolls along the path, etc.). Learn to arrange images throughout the sheet.
The tasks of the visual activity of children 4 - 5 years old.
Continue to develop children's drawing skills individual items and create subject compositions, repeating the image of the same objects (trees on our site in winter, chickens walking on the grass) and adding others to them (the sun, falling snow, etc.).
Form and consolidate ideas about the shape of objects (round, oval, square, rectangular, triangular), size, location of parts.
To help children, when conveying a plot, arrange images on the entire sheet in accordance with the content of the action and the objects included in the action. To direct the attention of children to the transfer of the ratio of objects in size: a tall tree, a bush below a tree, flowers below a bush.
Continue to consolidate and enrich children's ideas about the colors and shades of surrounding objects and objects of nature. Add new ones to the already known colors and shades (brown, orange, light green); form an idea of how you can get these colors. Learn to mix paints to obtain the desired colors and shades.
Develop a desire to use a variety of colors in drawing, pay attention to the multicolor of the surrounding world.
To consolidate the ability to properly hold a pencil, brush, felt-tip pen, crayon; use them when creating an image.
Teach children to paint over drawings with a brush, pencil, drawing lines and strokes in only one direction (from top to bottom or from left to right); rhythmically apply strokes, strokes throughout the shape, without going beyond the contour; draw wide lines with the entire brush, and narrow lines and dots with the end of the brush nap. Reinforce the ability to cleanly rinse the brush before using a paint of a different color. By the end of the year, to form in children the ability to obtain light and dark shades of color by changing the pressure on the pencil.
To form the ability to correctly convey the location of parts when drawing complex objects (doll, bunny, etc.) and correlate them in size.
Continue to develop aesthetic perception, imagination, aesthetic feelings, artistic and creative abilities.
Decorative painting:
Continue to develop the ability to create decorative compositions based on folk patterns and ornaments. Use DPI to develop aesthetic perception of beauty and as samples to create patterns in the style of these paintings.
Learn to highlight individual elements of patterns and ornaments, see and name the colors used in painting.
The tasks of the visual activity of children 5 - 6 years old.
Object drawing:
Continue to improve the ability to convey in the drawing images of objects, objects, characters of fairy tales, literary works. To draw the attention of children to the differences between objects in shape, size, proportions of parts; encourage them to convey these differences in drawings.
To teach to convey the position of objects in space on a sheet of paper, to draw the attention of children to the fact that objects can be located in different ways on the plane (stand, lie, change position: living beings can move, change poses, etc.). Learn to convey the movements of the figures.
Promote the mastery of compositional skills: learn to place an object on a sheet, taking into account its proportions (if an object is elongated in height, place it vertically on a sheet; if it is stretched in width, for example, a not very tall, but long house, arrange it horizontally). To consolidate the methods and techniques of drawing with various graphic materials (colored pencils, gouache, watercolor, crayons, pastels, sanguine, charcoal pencil, felt-tip pens, various brushes, etc.).
Develop skills in drawing the outline of an object with a simple pencil with light pressure on it, so that when the image is subsequently painted over, there are no hard, rough lines that stain the drawing.
Learn to paint with watercolors in accordance with its specifics (transparency and lightness of color, smooth transition from one color to another).
Teach children to draw with a brush in different ways: wide lines - with all the pile, thin - with the end of the brush; apply strokes, apply the brush with all the nap to the paper, paint small specks with the end of the brush.
Consolidate knowledge about already known colors, introduce new colors (purple) and shades (blue, pink, dark green, lilac), develop a sense of color. Learn to mix paints to get new colors and shades (when painting with gouache) and to lighten the color by adding water to the paint (when painting with watercolors). When drawing with a pencil, learn to convey shades of color by adjusting the pressure on the pencil. In the pencil version, children can, by adjusting the pressure, transfer up to three shades.
Plot drawing:
Teach children to create plot compositions on the themes of the surrounding life and on the themes of literary compositions.
Develop compositional skills, learn to place images on a strip at the bottom of the sheet, all over the sheet.
Draw children's attention to the ratio of the size of different objects in the plot (houses are large, trees are tall and low; people are smaller than houses, but there are more flowers growing in the meadow). Learn to place objects in the picture so that they do not block each other.
Decorative painting:
Introduce regional (local) decorative arts.
Learn to make patterns based on Gorodets, Polkhov - Maidan, Gzhel painting: to acquaint with the characteristic elements (buds, flowers, leaves, grass, antennae, curls, revives).
Learn to create patterns on sheets in the form folk products
For the development of creativity in decorative activities, use decorative fabrics. Provide children with paper in the form of clothing and hats, household items (napkin, towel).
Learn to place the pattern rhythmically. Offer to paint paper silhouettes and volumetric figures.
Continue to acquaint children with handicrafts, offer to create images based on folk decorative painting, acquaint them with its color system and elements of composition, to achieve great variety used elements. Continue to introduce the varieties of ornaments, teach them to use for decoration with their color scheme.
The tasks of the visual activity of children 6 - 7 years old. Object drawing:
Improve the ability to depict objects from memory and from nature; develop observation, the ability to notice the characteristic features of objects and convey them by means of drawing (shape, proportions, location on a sheet of paper).
Improve the technique of the image. Continue to develop freedom and at the same time accuracy of hand movements under the control of vision, their smoothness, rhythm. Expand the set of materials that can be used in drawing. Offer to combine in one drawing different materials to create an expressive image. Teach new ways of working with already familiar materials (for example, paint with watercolors on a wet layer); different ways of creating a background for the picture being depicted: when painting with watercolors and ink - before creating the main image; when drawing with pastels and colored pencils, the background can be prepared both at the beginning and at the end of the main image.
Continue to develop the ability to fluently use a pencil when performing a linear drawing, teach smooth hand turns when drawing rounded lines, curls in different direction(from the twig and from the end of the curl to the twig, vertically and horizontally), teach how to move with the whole hand when drawing long lines, large shapes, with one fingers - when drawing small shapes and small details, short lines, strokes, grass (khokhloma), ozhivok (gorodets), etc.
To teach to see the beauty of the created image and in the transfer of form, smoothness, cohesion of lines or their subtlety, elegance, rhythm of the arrangement of lines and spots, uniformity of painting a picture; feel the smooth transitions of color shades, obtained with uniform painting and adjusting the pressure on the pencil.
To develop an idea of the variety of colors and shades, based on the real coloring of objects, decorative painting, fabulous plots; learn to create colors and shades.
Gradually bring children to the designation of colors, for example, including two shades (yellow-green, gray-blue) or similar to natural (crimson, peach, etc.). Draw their attention to the variability of the color of objects (for example, in the process of growth, tomatoes are green, and ripe ones are red). Learn to notice a change in color in nature due to changes in the weather (the sky is blue on a sunny day and gray on a cloudy day). To develop color perception in order to enrich the color scheme of the picture.
To teach children to distinguish shades of colors and convey them in a drawing, develop perception, the ability to observe and compare the colors of surrounding objects, phenomena (soft green leaves that have just appeared, etc.).
^ Plot drawing:
Continue teaching children to place pictures on the sheet in accordance with their real position; convey differences in the size of the objects depicted. To form the ability to build a picture composition; to transmit the movements of people and animals, plants, bending over from the wind. Continue to develop the ability to convey in drawings both the plots of folk tales and works of authorship (poems, fairy tales, stories); show independence in choosing a theme, compositional and color scheme.
Decorative painting:
Continue to develop decorative creativity children; the ability to create patterns based on folk paintings already familiar to children and new ones (Gorodets, Gzhel, etc.). Teach children to highlight and convey the colors of the folk decorative arts a certain kind. To consolidate the ability to create compositions on sheets of paper of various shapes, silhouettes of objects and toys; paint toys sculpted by children.
To consolidate the skill when drawing up a decorative composition based on a particular type folk art use the characteristic elements of the pattern and color scheme
Classification of teaching methods.
The success of upbringing and teaching largely depends on what methods and techniques the teacher uses to convey a certain content to children, to form their knowledge, abilities, skills, and also to develop abilities in a particular area of activity.
The methods of teaching visual activity are understood as the system of actions of the teacher organizing the practical and cognitive activities of children, which is aimed at assimilating the content determined by the "Program of education and training in kindergarten".
Teaching techniques are called individual details, constituent parts of the method.
Traditionally, teaching methods are classified according to the source from which children acquire knowledge, skills and abilities, according to the means by which these knowledge, skills and abilities are presented. Since preschool children acquire knowledge in the process of direct perception of objects and phenomena of the surrounding reality and from the teacher's messages (explanations, stories), as well as in direct practical activity (design, modeling, drawing, etc.), the following methods are distinguished:
· Visual;
· Verbal;
· Practical.
This is a traditional classification.
V recent times a new classification of methods has been developed. The authors of the new classification are: Lerner I.Ya., Skatkin M.N. it includes the following teaching methods:
· Informative - receptive;
· Reproductive;
· Research;
· Heuristic;
· Method of problem presentation of material.
The information-receptive method includes the following techniques:
Ø examination;
Ø observation;
Ø excursion;
Ø sample of the educator;
Ø show the educator.
The verbal method includes:
Ø conversation;
Ø story, art history story;
Ø use of teacher's samples;
Ø artistic word.
The reproductive method is a method aimed at consolidating the knowledge and skills of children. This is a method of exercise to make the skills automatic. It includes:
Ø receiving a repeat;
Ø work on drafts;
Ø execution of shaping hand movements.
The heuristic method is aimed at demonstrating independence in any moment of work in the classroom, i.e. the teacher invites the child to do part of the work on his own.
The research method is aimed at developing in children not only independence, but also imagination and creativity. The teacher proposes to independently do not any part, but all the work.
The method of problem presentation, according to didactics, cannot be used in teaching preschoolers and younger schoolchildren: it is applicable only for older schoolchildren.
In his activities, the educator uses different methods and techniques in drawing.
So in drawing, the main technique for the first younger group is to show how to use pencils and paints. The most effective technique is passive movements, when the child does not act independently, but with help. Effective game pictorial movements of a uniform, rhythmic nature with the pronunciation of the words: "here and there", "top - down", etc. This technique makes it possible to associate the image of an object with a pictorial movement.
Reading poetry, nursery rhymes, songs in the classroom is the most important methodological technique. Another method of work in the first junior group is the co-creation of a teacher with children.
In the second junior group, in drawing lessons, the information-receptive method is actively used. Especially useful before class efficient way acquaintance with the shape of the object: children circle the shape with their hand, play with flags, balls, balls, feel their outlines. This examination of the subject creates a more complete picture of it.
Also effective is the method of examining an object by moving the hand along the contour and showing this movement in the air. Direct display of the method of the image is used only when the given form is encountered for the first time.
“A child can do anything until he knows that he cannot do something,” a well-known Russian teacher remarked at one time. The kid is sensitive to color, color relationships and their effect on mood. It is important not to miss this age feature and not ruin the child's ability to perceive color. It is necessary to develop a sense of color in him, to help him seek his understanding, to teach him to express his emotions through color, and not to repeat after adults their ideas about color, which are largely limited by stereotypes.
To do this, you need to create certain conditions. At this age, there is a desire for free drawing, manipulation of paints, i.e. the kid is interested not so much in the plot of the picture as in the process of changing the environment with the help of color. Children given age rejoice at mixing and blur, wonder, admire the emergence of new color spots.
The real world is full of color richness. Three primary colors (red, blue, yellow) and three composite (green, orange, purple) are just a small piece of the multicolor palette the real world... Children will learn that by adding black and white colors to the three main colors, you can significantly expand the world of colors from enlightened gentle to gloomy alarming tones. In the classroom, children, together with an adult, mix colors in different combinations, observe, discuss how their "character" and "mood" change. All this contributes to the development in the child's soul of "special experiences filled with fantasy." Such work requires paints (gouache, watercolors), large sheets paper (wallpaper), wide brushes.
At the same time, it is important to ask the child how he chooses colors for work, and to support, approve, if he is guided by the feelings that this or that color evokes, correlates it with the general mood that he wanted to express in the drawing.
Drawing methods are non-traditional, which contributes not only to the development of imagination, but also to familiarization with the world of art. At this age, tactile sensations play an important role in the development of the child. Kids draw with their finger, palm, spout, paper, cotton swab, brushes, straws, corks, not only on wallpaper, but also on glass and tiles.
The drawing process also contains psychotherapeutic elements. The presence of a teacher or parent nearby makes the drawing process soothing; experiences pour out onto the sheet, and the kids are freed from them.
Middle group (4-5 years old)
At this age, as A.N. Leontiev, emotions are becoming more stable. Adequate emotional regulation in various situations is formed on the basis of the ability to distinguish the emotional state by their external manifestations - through facial expressions, gestures, pantomime, etc.
This also manifests itself in drawing: the child develops an interest in the line, its plasticity and expressiveness. It is important to catch the moment when this interest appears and to develop it in order to facilitate the expression of feelings and fantasies in the language of artistic and graphic images.
A line, a line, a stroke can be short and long, oblique and even, slightly noticeable and bright, wavy and moving in a circle, intersecting and with an influx into another. Through lightness, airiness or softness and smoothness, sharpness and aggressiveness, one can tell about the character of the hero, his attitude to the world around him.
Pencil, sanguine, charcoal, pastel, ink are excellent means for expressing your vision of the beauty of the world around you.
Drawing helps the child to relieve stress. Attentive teachers notice that there is a so-called "graphic response", which is especially important for those children who cannot express their conflicts and understand them because of the poverty of their vocabulary. Drawing is a means of visual communication between a teacher and a closed, closed child.
Classes are organized as a game of transformation, where the child and the adult become either actors or spectators. In order for the game to acquire the effect of isotherapy, movements, music, sounds, touch are used. All this leads to the establishment of emotional contacts between children, between an adult and a child.
Senior group (5-6 years old)
At this age, children develop a craving for subject drawing. The child seeks to create his own image, expressing his attitude to what he portrays.
In life, a child expresses himself through a mood, word, deed. And in drawing - with the help of color, line and others expressive means... In some drawings, you can see kind, airy images warmed by the love of a child. On others, the images are completely different: sharp, rigid, angular. This is how the child expresses his dislike, disgust, fear. And this should not upset the teacher, as in drawing there is a "purification of the soul".
The older preschooler has a great ability to transform. And this ability allows him to push the boundaries of his "I". Reincarnating, the child from the inside sees the life of a fairytale hero, animal, plant or even an object
Preparatory group for school (6-7 years old)
This age is key in the development of imagination. The purposeful development of the mechanisms of creative imagination significantly affects the ability of children to provide an adequate emotional response, to the ability to distinguish emotional states by their external manifestations. That is why one of the areas of work with older preschool children is teaching methods of self-regulation of the emotional state by means of purposeful creative imagination. This is the development of understanding of the "soul" of the image, the development of methods of expressiveness.
Older preschoolers are already developing a critical attitude to the results of their activities. How important it is to reinforce in the child the consciousness of confidence that he will be able to do everything! There is no need to strive for an accurate reproduction of a hero, an object on paper. The main thing is to convey his individuality, to emphasize in him qualities that are important for a young artist through color, light, form, rhythm, artistic means. Thus, the young artist embodies his idea, expresses his own emotional attitude to the world. Therefore, the drawings are very different.
The preschooler begins to feel the role and significance of art, its kindness and strength, the organic unity of art and life. Of course, he does not think in these categories, but begins to feel it in accordance with his age capabilities.
Techniques and methods used in classes on activity
1. Emotional attitude
This method involves the use of musical compositions in the classroom. It must be remembered that musical images and musical language must be appropriate for the age of the children.
In the classroom, music tunes children into a unified way: it calms the excited, mobilizes the inhibited, activates the attention of children. Music can also accompany the process of visual creativity in the lesson.
2. Artistic word
How many points of contact can be found between words and art! They complement each other, activating artistic perception image. Children especially emotionally respond to the beauty of poetic lines, they help preschoolers to comprehend their feelings before taking a brush and paints.
3. Pedagogical drama
In the classroom, children often travel. Travel can be real, dreamlike, or imaginary. For younger preschoolers, this is a journey to the Land of Drawing. An entertaining storyline of a fairy tale, unconventional ways of drawing - all this helps to develop emotions and imagination in children.
For older preschoolers, the method of creative visualization is used. Children sit comfortably on the carpet, relax, close their eyes, listen to the sounds of the forest, the river, the sound of the sea. The calm, warm voice of the teacher helps to present a picture of nature, which the children will then embody in their drawings.
Also, children can travel to real places - to the artist's studio, to the exhibition hall, to take excursions around the city, to the forest or field. During these travels, children come into direct contact with the world of art, meet with true masters. Everything - whether it be nature, a hall or a street - becomes a teacher of Beauty for a child: a human artist and a nature artist help the teacher, awaken the feelings of children.
4. Plastic
Preschoolers have natural grace and body freedom. Sometimes it seems that they manifest all their thoughts and experiences through movement. Initially, the child receives almost all information about the environment through bodily sensations, therefore, in different parts of the body there are zones that "remember" the positive and negative imprints of his communication with the world. And it is very important in the development of a child to try to avoid psychological clamps in the body, formed as a result of negative experiences.
That is why movement and dance are actively used in visual activity. Exercises such as "Dance of Flowers", "Air Ball", "Merry Zoo", "Sea", not only develop plastic, they are aimed at the child's feeling of freedom, emotional self-expression.
5. Theater
Elements of the theater are organically included in the activities of art, contribute to the development of feelings in children. There are no memorized roles, positions, gestures - everything is based on the emotional experience of children, on the embodiment of their experiences.
The younger group uses the elements shadow theater... The image is devoid of details, the child singles out from his hero only the main, characteristic. Older children themselves can already by means of lines, color, by selection artistic means to convey the character of the fairytale hero - the evil Baba Yaga or the valiant hero-defender.
Children of the preparatory group continue to get acquainted with theater arts... Now the children themselves play the chosen heroes, having previously made a mask - a laconic but vivid way of conveying the character and mood of the hero.
6. Game
One of the most important methods of developing a child's inner world is play. V.A. Sukhomlinsky wrote: "Play is a huge bright window through which a life-giving stream of ideas and concepts about the world around is poured into the child's spiritual world."
Play is the most important method for developing the imagination and cognitive abilities of children. In the game, it is easy to direct the child's attention to the most important guidelines - moral, aesthetic.
7.Using non-traditional drawing techniques.
The most accessible of the many ways of non-traditional drawing techniques is finger drawing (finger drawing). It can be used starting from the youngest group. Such drawing develops fine motor skills, and therefore speech skills. One of the varieties of this method is hand printing, which is carried out in the senior and preparatory groups. Finger drawing is far from the only non-traditional drawing method that is used when working with children. Signet (stamp). Monotype. Spray. Freehand print. Crumpled leaf. Drawing on wet paper. Magic thread (nitkography). Stencil (drawing with templates). Drawing with candles. Volumetric application. Bitmap. By smell. Blotography.
It is important to note that after the end of the drawing process, for each drawing, it is necessary to conduct a conversation with the children: what is drawn, what it looks like. Also, in group work, you can use additional methods of correction, for example, creating collages, drawing fantastic characters using the method of morphoanalysis.
A psychologist, like a teacher working in a preschool institution, must adhere to the basic rules for using non-traditional drawing methods in his work. So, the child should have the right, the opportunity to independently choose the visual material: colored and simple pencils, watercolor, gouache, pastel, ink, coal, sanguine, colored crayons, wax candles, plasticine, clay, shells, glue, gouache in tubes, various waste material. All this material should be in a place accessible to the child during his entire stay in the garden, if this is not possible, then it is obligatory during classes. The choice of material on which the image will be applied must belong to the child, access to different material should be free. It can be white, colored, velvet paper, patterned and one-color fabric, cardboard, plywood, foil.
Thus, having an idea of the non-traditional methods of drawing used, we can develop a correctional and developmental program for preschool children.
Organization and conduct of drawing classes
Preparation of the lesson
For the successful conduct of the lesson, it is of great importance to prepare it well in advance. The preparation of the lesson consists of the preparation of material for the work of children, material for showing and explaining the teacher and the preparedness of the teacher himself.
Material preparation
The preparation of the material includes the following:
1 Selection and cutting of paper of the desired color, shape and size for drawing with paints, pencils. Paper is cut in various shapes and sizes, depending on what the children will portray on it. So, to draw a triangle in the middle group, it is good to give a sheet of white paper of a square shape, 12x12 cm in size, and for the image of a winter walk, it is advisable to cut rectangles of gray or blue color at least 30X40 cm in size. The decorative composition "Tray" in the preparatory group will require a large sheet of paper oval, tinted, etc., that is, literally every activity requires paper of a certain shape, color and size, and there can be no stencil in this. Sheets are written before class, on the reverse side, in the upper left corner, and the name and initial the name of the child, as well as the date of the lesson. Always have 5-10 sheets of spare when stocking up paper. It is given to children who quickly completed the task, with a proposal to draw what they want. Sometimes you have to change the sheet for a child who accidentally flooded the paper with paint, etc.
2. Selection of paints and preparation of colors and shades necessary for this lesson. Pouring prepared paints into cups and placing them in palettes. All paints in bottles must be checked in advance and, if required, filled with water.
When preparing paints on the eve of a lesson, you need to add water to each of them with a teaspoon and stir with a bristle (glue) brush until you get an even solid mass of the consistency of liquid sour cream. How different shades and new colors are composed is a separate topic.
3. Checking the presence and condition of brushes, rags, cans
for water, filling jars with water.
Water should be poured into cans in the morning of the day of the class. The water level should not exceed the upper bend of the can, i.e., be about 3-4 cm below the upper edge of the can's neck. If you pour more water, up to the very neck, then children, when rinsing their brushes, will involuntarily splash it, staining pictures and tables; with a small amount of water, it quickly becomes dirty from paints and has to be changed.
4. Inspection and sharpening of colored and graphite pencils (when drawing with a pencil).
5. Preparation of material for demonstration during the teacher's explanation. This may include:
a) selection of nature or model;
b) sample preparation;
c) material for showing the techniques of drawing, cutting or sculpting (paper, large brush, paints, charcoal, sanguine, clay, large scissors, plasticine, buttons).
All the listed material, both for the work of children and for showing by the teacher, must be well thought out and carefully prepared in advance.
Procurement of material for such activities as painting with paints of 5-10 colors takes a lot of time, and therefore it cannot be left "in the morning, just before class, especially since these hours are usually occupied by morning exercises, individual work with children or a walk. Therefore, it is necessary to prepare the material, as a rule, the day before, and sometimes even earlier, while in the morning you can leave only such small things as writing on sheets of paper, pouring prepared paints into cups.
Children should be gradually involved in the preparation of the material, which will give them certain knowledge and skills, and will bring up elements of hard work.
So, children 4-5 years old can be instructed to lay out brushes in stands, and children 5-6 years old - pour water into cans for washing brushes, make up some paint colors, etc. In the preparatory group, this load can be increased by inviting children to check pencils in boxes, fix broken ones, etc.
Various activities for visual activity require different methods. In some cases, there is a nature or model,
in others, the display of image techniques appears, in the third
a sample is needed. However, one must remember well - no matter what
was shown to children, you need to prepare for this in advance, but only in different cases this training is varied.
For example, if a branch with leaves is drawn from nature, then it is necessary to pick up a suitable branch the day before
and see if it is accessible to children's perception and image, is it not difficult, and if there is something superfluous (for example, a large number of leaves covering each other, then remove this superfluous; think over how to arrange the twig on paper - obliquely, horizontally or vertically, in order to emphasize something characteristic (for example, for birch, the position of the branch from top to bottom will be natural, and for willow - horizontal, since it better reveals and emphasizes its smooth curvature); you should also pay attention to the color of nature - as it is
matches the selected paper color, it is better to choose this
background. If a toy serves as a kind, you need to think about how to show it in such a way as to emphasize, to reveal the main thing. For example, for children 3-4 years old, it is better to leave only 3 balls out of 5 in a turret of balls, but pick them up so that the difference in size is striking, would be clearly noticeable. And such
every nature requires a thoughtful, serious attitude towards itself.
If in the lesson you need to show image techniques, then you need not only to prepare the material for this (paper, paints, charcoal, etc., but also to train your hand and eye the day before, drawing this image on paper of the required size, first on the table, and then and in an upright position, on an easel, that is, as it will be necessary to do it in front of children.When showing the whole group of children, replace the pencil with charcoal for artists, sanguine or pastels, which leave a bright, wide mark on the paper. (for example, in decorative painting, then it should also be done in advance, in the same material that the children will do the work with, but bigger size than children's work, ranging from 1, 3 to 1, 5 the size of children's work
All demonstrations of drawing techniques should be conducted leisurely, with precise, clear movements, accompanied by an appropriate explanation. There should be nothing superfluous in words or movements.
The words with which the teacher will address the children should be simple and accurate. Work out the text of the appeal very clearly, so that it contains only the necessary, guiding words. Therefore, it is recommended that, after thinking over the entire course of the lesson and your appeal to the children, write it down, and after a while, view the recording and, perhaps, replace some words with more accurate and figurative ones, delete something insignificant, etc.
Organization of classes
In the organization of classes, a clear sequence of stages of work and the distribution of responsibilities between the educator, nanny and children play an important role. This is especially important when you have to rearrange tables closer to the light for classes, or when seating four children at a six-seater table, put additional tables. Therefore, when accepting a group, the teacher should immediately think over the arrangement of tables for the lesson, try several options and stay on the best. It is advisable to assign to each child permanent place... Small children are seated at the front tables, and taller children are seated in the back. An exception is made only for children with impaired vision - they are seated at the front tables, regardless of their height.
In order to quickly and more accurately remember the place of each child, the teacher draws a table layout for himself and signs the name of each child on it. Such a scheme is also very useful when pre-labeling paper for children: using the scheme, the teacher signs the sheets in exactly the order in which he will distribute them in class. It is convenient and fast. About once every six months, a new distribution of seats should be made: children grow unevenly, and those who were small at the beginning of the year compared to other children can overtake them in six months. In addition, some of the children sit with their backs to the windows; it is necessary to transplant them from time to time to lighter places so that they do not strain their eyes all the time. It is necessary to determine the place for the easel, on which the show is held, the nature is attached, etc. The light should fall on it from the left or right, so that everything shown can be clearly seen. When arranging tables in 2 rows, the easel is located along the axis of the passage at a distance of about 2 m from the front tables. If the tables are double and stand in 3 rows, then it is better to place the easel along the axis of the middle row, but at a distance of at least 2.5 m.
As this distance decreases, the angle of view of children sitting on the left and right at the front tables becomes too sharp, and they see objects and images in a highly distorted form.
Usually, in kindergartens, the distribution of material and small equipment is completely assigned to the attendants.
As practice has shown, it is much more expedient to combine the work of the attendants with the self-service of children. This disciplines children, creates a serious, businesslike attitude. The entire preparation process takes place many times faster than when only the attendants work. Children develop a valuable habit of preparing everything for themselves and then cleaning up after themselves, which will be very useful for them when they enter school. Self-care should be introduced from the second junior group, giving all children the simplest assignments first, such as bringing a box of pencils or a stand with a brush. Gradually, from year to year, the requirements should be increased, ensuring that in the preparatory group each child completely prepares his workplace and completely removes it at the end of the work. It is organized approximately as follows.
Second junior group (3-4 years old). Children, having finished breakfast, go to play. At this time, the nanny clears the tables and wipes the floor, immediately placing the chairs as required for the lesson (4 chairs, each to the table leg, and also prepares additional tables.
If the tables are moved closer to the light during the lesson, then at the end of breakfast, the children should be invited to immediately take their chairs and put them along the free wall and piers so that they do not interfere with the movement of the tables. While the children are busy placing chairs, the teacher puts in two places the equipment that they will take themselves: brushes, stands for them, pads, rags, boxes with pencils. Then the teacher and nanny set the tables as needed for the class. The teacher invites the children to remove the toys, take the chairs and put them to the tables in their places, and then bring and put a stand and a brush on the right, and a folded cloth near a jar of water. While the children are doing all this, the teacher arranges cans of water and sets of paints. After that, the children are invited to sit quietly at the tables and the teacher distributes to them pre-signed sheets of paper. The lesson begins.
At the end of the lesson, the children should quietly push in their chairs and carry (each) a stand, a brush and a cloth to their place. Children bring pencil drawings and immediately put them on the stand, but it is better to leave the work with paints on the tables for a while to dry, and later the teacher puts them on the stand for viewing.
Cans of water and paints are drawn up by the caregiver or nanny on the caregiver's table. Here, the attendants bring the individual small equipment collected by the children (brushes, coasters, etc., moreover, brushes for paints, it is advisable for the teacher to immediately rinse them clean under the tap so that they do not dry out.
Note: at the beginning school year(1-2 months) all small equipment is laid out and removed by the teacher.
Middle group (4 - 5 years old). The teacher rearranges the tables with the help of the attendants (by the end of the year, the attendants do this independently, puts water and paints on each table. brushes.
The attendants for the first half of the year do the same as in the previous group. In addition, water is poured in advance. In the second half of the year, they themselves bring and put water and paints prepared by the teacher. When the lesson is over, they do all the same work as last year, and on top of that, they carry and pour out water, collect sets of paints from the tables, put them in the appointed place. By the end of the year, they help the caregiver wash the jars and palettes. Check the stacking of colored pencils in boxes (the sequence of the arrangement of colors along the spectrum, tipped end to one side). The rest of the children do the same as in the younger group.
Senior group (5 - 6 years old). The teacher, having established the order of arrangement of tables for classes (if the tables are double, then they are placed in 2-3 rows, introduces him to all children, who in the future, on duty, will have to arrange tables in this order. The teacher only observes the attendants, giving instructions , advice and evaluating their work. During the first month, he teaches children the correct and rational methods of washing dishes from under paints, helping them; in the future, he only supervises the implementation of the established rules. In this group, it is advisable to appoint 3 pairs of persons on duty according to the number of rows, entrusting each pair with the arrangement and equipment of their row of tables.
The attendants set up tables, put water, paints, glue, paper on them. After the lesson, pour out the water, soak the dishes from under the paints (later they wash them). The paints remaining after drawing are poured into bottles by the teacher himself. All children do the same as in the previous groups. At the end of the lesson, all individual equipment is put in place.
Preparatory group (6-7 years). The teacher, having determined at the beginning of the year the duties of the attendants and the rest of the children, only observes their implementation. The attendants arrange tables in the working order, take glasses with brushes or graphite pencils, lining, a box of rags, stands to the designated place. If drawing with watercolors is carried out, then they are soaked before breakfast. The attendants supervise the preparation of their workplaces by all children. At the end of the lesson, make sure that everyone not only cleans up all their individual equipment, but also leaves the workplace in exemplary order (the table is clean, the chair is level, the floor is clean).
All children, on the instructions of the educator, fully equip their workplace, that is, in addition to individual equipment, they themselves bring and put water and sets of paints. It is advisable to distribute this work as follows: if the tables are double, then, for example, today all the children sitting on the left pour and bring water, and those sitting on the right bring and put sets of paints, in the next lesson they change roles. This distribution creates greater clarity in the organization of the lesson.
In this group, when drawing with paints, you can in some cases be allowed to leave the child from the table, change the water, when drawing with pencils, change a broken pencil or take something extra. It is necessary to teach children to do this as quietly as possible, so as not to interfere with others' work. The signed sheets of paper, as well as the individual nature, are distributed by the teacher himself, distributing the latter, taking into account the capabilities of each child.
Organization of the lesson process
The lesson process is divided into 3 parts:
1) introductory part - instructions of the educator, conversation with children;
2) managing the process of doing the work, and
3) the final part - viewing and evaluating children's work.
The first part of the lesson. Instructions are given at each lesson in visual activity, whether it is drawing from nature, by design, plot drawing, decorative work. Depending on how well prepared this part is, the results of the session will be good or bad. Therefore, in each case, it must be thought out and worked out in advance. The structure of this part of the lesson is something like this:
1. Communication of the content of the upcoming work, creation of interest and emotional mood.
2. Analysis of the depicted (nature, sample, reminder of what he saw earlier, reading the text. Conversation with children.
3. Specific instructions for performing the work. Active participation of children in explanations and demonstration of implementation techniques.
Each time, new content is put into these three parts. In addition, the ratio of these parts changes: in some cases, more place is given to the analysis of the subject, for example, in subject drawing, in others - the creation of a living, expressive image, for example, in plot drawing, etc.
The first words with which the teacher addresses children,
must be emotional, interest children in the upcoming work, create a living image that children will draw, carve or sculpt.
In younger and middle groups, interest in the lesson can be aroused by introducing elements of the game into the examination of the object: the conversation of children with a bear or doll, with a snowman as a living character, including game actions, moments of surprise, the unexpected appearance of a toy, etc.
In the senior and preparatory groups, the conversation should be conducted in a more businesslike and serious tone, but do not forget about expressive intonation.
Then an analysis is carried out of the object that the children will depict, or a sample. The teacher asks questions - the children answer. It is bad when the teacher explains and tells everything himself, without causing the children to answer, to talk and not giving food to the child's mind. You should only explain yourself what is new or difficult for children; if you can rely on the previous experience of children, then you should turn to their memory and ingenuity, asking questions, calling for statements, remarks. During the conversation, it is useful to call 1-2 children to the easel and offer to show with a gesture what was said. Here is an example of such an analysis for children 5-6 years old.
Children, in order to draw a bear well, let's take a closer look at it. What is the shape of the bear's torso? Tell me, Olya. Right, oval. And the head? Yes, it is round and has semicircular ears. The paws of the bear are also oval, but elongated. Where do the front legs attach? Vova, tell me. That's right, upstairs, to the shoulders. And the back ones? Downstairs, of course. Nina, come here, show and say what you will draw first, then what. True, first in the middle of the leaf is a large oval body, then a round head on top, and after a paw.
In some cases, when children are excited about something, are not yet well organized, or when everyone needs to show something from a close distance (there may be other reasons, the teacher gathers them around him. Appeals to everyone, talking about what they will be engage in, or promises to show something, or shows everyone a little thing, toy, etc.
After the children have calmed down and their attention has been gathered and their curiosity has been aroused, the teacher invites them to sit quietly in their places. If necessary, the teacher gives additional explanations or shows something when everyone is seated at the tables. The different organization of children in the process of the first and second parts increases the susceptibility of children, interest in the lesson. You can detain standing children near you for no more than 1-2 minutes.
Specific guidance on how to get the job done and the sequencing are especially important. Children should also take an active part in this - answer questions, recall skills learned earlier. The teacher excites the thought of children, their initiative in relation to what can be sculpted, cut, pasted, drawn. He calls individual children to the easel for a show.
Before starting work, children should have a good understanding of where to start and how to proceed. These instructions are given to them by the teacher.
Management of the process of performing work. In the process of performing the work by children, the teacher must lead the lesson as a whole, as well as pay attention to individual children, without losing sight of either one or the other. For some children, work is progressing smoothly, for others, immediately after the start of it, difficulties arise: they have no confidence in how to do it, and they begin to hesitate, which immediately reduces the pace of work and interest in it. There may be several such hesitant children in the group. It is sometimes helpful to show all the children a job well started shortly after the start of the class and emphasize that it is well done. This general guideline will help unfaithful children start and continue at a good pace, along with the rest of the group.
After the educator is convinced that he has established the work of the group as a whole, he can temporarily switch to individual leadership. However, it is especially not worth rushing with help. Since it is desirable. So that the children learn to independently resolve the difficulties that have arisen. If the educator is convinced that the child really cannot cope with the difficulty on his own, then he should be helped, mainly in the form of leading questions, sometimes advice and only in rare cases by showing an image of something and only on a separate sheet, and not in the child's drawing. ...
From time to time, you should break away from individual help in order to. To see how the work of the whole group is progressing. If any general difficulty or mistake is outlined, then it is necessary to invite all children to suspend work and listen to additional clarification. If in the process of work the child wants to ask the teacher about something. Then he must raise his hand and wait for the teacher to come up to him.
The final part of the lesson. The final part of the lesson is the review and assessment of children's work by children and the teacher. In most cases, it has the character of a detailed analysis, in which the work of all children should be presented. The analysis of children's work is carried out immediately after class or after a walk.
In the first case, a short break is needed between the work process and the analysis to give the children a physical warm-up.
It is advisable to invite children to get up from the tables and remove individual equipment, and then immediately assemble them in a semicircle (or put them back in place) near the stand and assess the work done. The analysis is very active and fruitful after a walk, it takes only 5 - 7 minutes, which does not violate the general regimen of children's life.
The questions asked by the educator during the analysis should be varied. You can't boil everything down to "right" or "wrong".
When working according to the plan, the attention of children should be drawn to that new and interesting that manifested itself in any work.
When evaluating plot and many subject drawings, first you need to focus on the imagery, the specific character of the characters (the funniest and cheerful parsley, a wonderful dancing Matryoshka, etc.) and the expressiveness of the action (a fox sneaks up on, chickens catch a beetle, etc.).
In drawings from nature - on the correctness of the structure of the object.
In all cases, children should be drawn to the aesthetic qualities of the work - the beauty of the color combination, the eye-pleasing arrangement on a sheet of paper, sometimes to the cleanliness and accuracy of the work.
After the children say, closing words says the teacher. He gives an overall assessment of the lesson, highlighting in individual works what he considers in this moment important. This sums up the lesson.
Literature and sources of information:
Kazakova R.G. Drawing with preschool children. - M .: Creative center SPHERE - 2004 - 463p.
Komarova T.O. Visual activity in kindergarten. Education and creativity. - M .: Pedagogy. - 1990 .-- 281s.
Sakulina N.P., Komarova T.S. Visual activity in kindergarten. - M .: Education - 1982 - 318s.
http://www.maaam.ru
Drawing is very important in the formation of the personality of the baby. It brings invaluable benefits and develops both the intellectual abilities of children and their thinking. Indeed, at the time when children draw, not only visual, but also motor analyzers are involved in the work, which perfectly develops fine motor skills and memory.
In addition, while drawing, the child learns to imagine and compose, think and compare. At the same time, his stock of knowledge develops gradually, which is very good in childhood.
Drawing develops creativity
Drawing classes in kindergarten are loved by all children. Kids clumsily try to portray what they see from an early age. To develop this desire, you can give the child a soft sponge for up to a year, which he will first play with, and then, with the help of adults, lower it in a saucer of paint and move it over the paper, observing the result. After some time, the baby will begin to do this operation on his own.
At the time when the child goes to kindergarten, his drawings will no longer be continuous blots. By toddler age, children can hold a pencil and brush. It's too early to talk about the drawing process itself, but by manipulating these objects, the kid leaves random strokes, dots and lines on paper. This attracts him very much.
At the same age, you can begin to apply the simplest techniques of unconventional drawing, for example, dip your hand clenched into a fist in a saucer of paint and leave a mark on the paper. You will get a caterpillar that the kids saw on a walk.
What drawing classes give in preschool institutions
Non-traditional visual arts techniques used in kindergarten help kids who do not yet know how to fully master pencils and brushes, not only to perceive the world but also convey it through the drawing. Everything that the children saw during the walk is very simply depicted on paper with the help of improvised means. It develops fantasy well.

Leaves that have fallen from trees in autumn will help depict a courtyard covered with foliage. You just need to lower them in a saucer of paint and attach them to paper. A handprint can be compared to the footprints of animals left in the snow.
Drawing classes develop children's imagination well and provide an opportunity for creativity and inspiration, as well as a sense of beauty. At the same time, the child's personality receives harmonious development.
Unconventional drawing. Why is it needed?
The use of non-traditional drawing techniques makes it possible to develop artistic, rather than formulaic thinking in kids. Even, rather, artistic and figurative, which is directly related to creativity and observation, as well as spiritual qualities.
And it doesn't matter how well the child masters the drawing technique, because the main thing here will be to teach the kids to put their thoughts and feelings on paper, and with the help of various colors to convey their mood.

Artistic thinking develops perfectly when children paint a fairy tale on sheets of paper with paints and improvised means. This form of training can be not only individual, but also group. To do this, each kid should be invited to depict their understanding of the plot in a certain area of the general Whatman paper. After everything is ready, the children are happy to make additions to the drawing, thus coming up with a continuation of the fairy tale.
Unconventional techniques used for drawing with children
In such an interesting and complex process, which drawing is for children, it will be best to use various techniques. All of them instill a love for the fine arts. Unconventional drawing techniques in kindergarten deserve great attention, which give children room for imagination.
They are introduced from a very early age, but at first, while the child learns to think figuratively and act correctly with his hands, the adult must take a direct part in this process. They are attractive for babies by the ability to achieve the desired result very quickly.
This form of development is good in that it is very interesting for any child. Children are always attracted to drawing with their fingers and the whole palm, as well as turning an ordinary blot into a very funny figure.

Non-traditional materials and techniques that are used in visual activities contribute to the development of not only imaginative thinking in a child, but also self-control, perseverance, attention, visual perception and spatial orientation, tactile and aesthetic perception, as well as fine motor skills of the hands.
Performing such work, children also learn to fantasize and put their feelings on paper through various colors.
Finger painting as one of the options for an unconventional image of objects
When non-traditional drawing techniques are used in kindergarten or at home, the best option may be to draw with your fingers or the whole palm.
This technique can be used even while the baby is still small. Finger painting has proven itself very well. For this method, a brush is not needed, only gouache paints poured into small containers and bowls of water for washing hands are enough.
When using this method, the child's imagination develops very well. After all, with the pads of your fingers dipped in paints, you can depict flowers as a gift for mom, and New Year's confetti, and various patterns on a dress. And by drawing lines on paper with your fingers, you can get more complex objects.

Before you start fantasizing with your baby, it is worth trying the prints of different parts of the palm on a separate sheet to see what they look like. When changing hands, all prints will bend in different directions. This type of painting gives children the opportunity to come up with and depict a whole plot on paper, makes them think figuratively.
The middle group of the kindergarten. Drawing and its features
Various activities are popular in the children's team. Non-traditional drawing techniques in kindergarten are interesting not only for kids, but also for children as middle group and the older one. They have acquired skills already, so educators can start using outlining gestures. The kid listens to the story of an adult, watches how he shows what has been said with gestures, and seeks to reproduce his image on the sheet.
But still, one cannot do without a visual nature at this age. Words and gestures alone may not be enough to form a certain image. Therefore, the best thing will be when the child's eyes are in front of nature, which helps to create the correct perception of the described object or plot, to revive children's ideas about it. It can be a toy, picture or drawing of an adult.
In addition, in front of the children, you need to put several varieties of improvised items. They may be required to create the image. This will provide an opportunity for choice, as well as the ability to compare and fantasize.
How to draw the seasons using unconventional techniques
Any walk with children makes it possible to reproduce what they saw unconventional method... Such a wonderful time of the year, like winter, allows you to show a lot of imagination in order to depict what you want on paper.
When unconventional painting techniques are used, winter can be painted with pieces of cotton wool or styrofoam to represent the snow, as well as small sparkles to symbolize its shine.

Drawing with the help of available tools is much more interesting, because you need to apply associative perception and learn to compare. With this technique, the process of how the snow falls can be shown by the method of splashing paint, as well as using all kinds of materials that evoke an association with a given plot. Non-traditional drawing techniques with children provide very great opportunities for the development of their imagination.
What materials are used for unconventional painting
Classes in non-traditional drawing techniques are carried out using improvised materials. You also need to pay attention to the child's preferences when choosing tools for performing drawings. Colors, their shades, methods of application on paper are filled with the baby's attitude and can tell a lot about him.
When unusual material is used in the classroom, children develop creativity and personal spirit. Every kid gets the opportunity to feel unforgettable emotions and reflect their impressions and mood on paper.

Non-traditional drawing techniques in kindergarten involve the use of such improvised materials as tree foliage, semolina and salt, plasticine, wax, sand, threads. And the tools that replace brushes and pencils can be fingers, toothbrushes and foam rubber. Junk things, such as corks, old buttons, beads, can also be used as visual material.
Existing forms of non-traditional visual arts
The drawing technique in kindergarten in non-traditional ways involves the use of different techniques... The most common of these are linotherapy performed with differently colored threads, toothbrush splashing, and blotting. Also, children really like drawing on wet or crumpled paper, on balloons and fabric.
Drawings drawn by children are best framed and hung. Any child will be pleased that the subject of his work is admired. This raises the baby's self-esteem.
This material will introduce parents to a variety of ways and techniques of working with gouache and watercolors, charcoal, sanguine, pastels and other materials, as well as their combination.
The experience of working with children in kindergarten showed: to draw in unusual ways and at the same time using the materials that surround us in everyday life, cause tremendous positive emotions in children. Drawing fascinates children, and especially non-traditional ones, children with a great desire to draw, create and compose something new themselves. To instill in children a love of the fine arts, to arouse interest in drawing, you need to start with a game. By the way, unconventional ways of drawing are suitable for this, which, accompanying the traditional ways of drawing, work wonders and turn ordinary activities into a game, into a fairy tale. Drawing in these ways, children are not afraid to make mistakes, since everything can be easily corrected, and from a mistake you can easily come up with something new, and the child gains self-confidence, overcomes the "fear of a blank sheet of paper" and begins to feel like a little artist. He has INTEREST, and at the same time a DESIRE to draw. You can draw with anything, anywhere and in any way! The variety of materials poses new challenges and forces you to come up with something all the time. And from these naive and uncomplicated children's drawings, as a result, a recognizable object emerges - I am. The unclouded joy of satisfaction that “I did it - all this is mine!”.
DRAWING WITH LINE
Material: pencil, felt-tip pen, paper
Progress :
Try to draw an object without lifting a pencil or felt-tip pen from the paper. This is where imagination works!
Or you can close your eyes and draw randomly different uninterrupted lines to the music, then see what happened, what to look like and paint it.
MAGIC THREAD 
Material: threads No. 10, rope, gouache of different colors.
Progress:
1st way
Soak one, two, three threads with paints. Spread the threads on a sheet of paper and close with another sheet so that the ends of the threads are visible. Pull one thread, then another, then a third, and hold the top sheet with your hand. The result is a fantasy, space, maybe our mood? Try it, you will get so much joy!
2nd way
Fold the scrapbook in half. Dip the thread into the paint, and then randomly spread it on one side of the sheet, cover the other on top and press with your hand. Open, remove the thread, examine the resulting image. Add to the final result as needed.
3rd way
Dip the rope into the paint, and then spread it out in a ring or in any other way on a sheet of paper. Cover with another sheet on top and press down with your palm. Open, remove the rope and look at the resulting image, finish painting.
4th way
Wrap the rope around the cylinder. Make a criss-cross pattern, first put the rope up, then down along the entire length of the cylinder. Absorb the paint onto the rope. Then press the cylinder against the bottom edge of the paper. Pressing tightly, you want it from yourself. A rope pattern will appear on the sheet.
MONOTYPY 
Material: paint, brush, paper
Progress:
Fold a piece of paper in half. On one side, closer to the center, apply a few bright colored spots with a brush. Now quickly fold the sheet along the same fold and iron it well with your palm. Open and take a look: what happened? Fabulous flowers? Bug? No, it's a beautiful butterfly!
SPLASH 
Material: old toothbrushes, gouache, paper, herbarium, silhouettes.
Progress:
A little paint is collected on the tip of the brush. Tilt the brush over a piece of paper, and brush over the nap with a cardboard or comb. The spray will scatter over a clean sheet. So you can depict the starry sky, fireworks. You can also cut out any silhouette and place it on a piece of paper and spray paint. Then remove the silhouette and you will have a trace, it can be supplemented by painting on the missing lines with a brush.
DRAWING WITH SOAP FOAM 
Material: plexiglass, watercolors, foam sponge, soap, shampoo, cocktail tube, paper, pencil, brush.
Progress:
1st way
Lather up the foam sponge and squeeze the foam out of it into a plate. Draw a contour on a piece of paper with a pencil. On pencil drawing(you can use coloring) apply pure plexiglass. We will use soap foam to paint the drawing on the glass that lies under the glass. Take the foam with a brush and dip it into the watercolor paint of the desired color. Stir until the foam is colored in the color we need. We paint with colored foam on the glass, let it dry. We slightly moisten a clean sheet of paper with water and put the wet side on the glass, press it, then tear it off the glass. All is ready!
2nd way
Add shampoo to a jar of liquid paint, stir well. We lower the tube into the jar and blow until the bubbles rise on top. Then we lower the sheet of paper, then slightly press and lift it up. For work, you can use paper of different sizes, colors, you can overlay one soap drawing on the other, paint on, cut out, make appliqués.
DRAWING WITH CANDLES OR WAX GRINS
Material: Candle, paper, brush, paints.
Progress.
1. Transfer - put a sketched outline drawing under a thin album sheet. Circle the top with a candle, then apply paint.
2. Friction - under thin paper put some clearly defined relief pattern, rub the top sheet of paper with a candle and apply paint.
 FINGERS - PALETTE. PRINT BY HAND
Material: paint, plates, paper
Progress.
Make a fist and press it into the paint. Move it from side to side so that the paint is well spread over your hand. Place the side of your fist on a piece of paper and lift it up. Make some prints. The paint can also be applied with a brush. You can draw with the whole palm, thumb, tip of the little finger, bent finger, bent finger joint of the side of the little finger and palm, bent fingers into a fist, fingertips.
SIGNET 
Material: seals, paint paper, plates, sponge pad.
Progress.
This technique allows you to repeatedly depict the same object, composing different compositions from its prints, decorating them with invitation cards, postcards, napkins, scarves, etc.
It is not difficult to make the seals ourselves: you need to take an eraser, draw the intended pattern on the end, and cut off all unnecessary. "Signet" is ready! You can use various paints, corks, sandboxes, etc. Now press the seal to the ink pad and then to the sheet of paper. The result is an even and clear print. Compose any composition!
 BLOTGRAPHY. DRAWING WITH STRAW.
Material: cocktail tube, paint brush, water.
Progress.
1st way
We put on a sheet of paper a large blot (liquid paint) and carefully blow on the drop ... It ran up, leaving a trail behind. Turn the leaf and blow again. And you can make another one, but in a different color. Let them meet. What will happen, think for yourself.
2nd way
Perform any drawing with paint and a brush. Put the drops on the lines you need and blow them up with a straw. The drawing is ready!
RAW DRAWING 
Material: wet napkin, container with water, paints, brushes, watercolor crayons.
Progress.
1st way
Wet the paper and place it on a damp cloth (to keep the paper from drying out). Take your watercolor crayon and paint whatever you want.
2nd way
If not watercolor pencils, you can paint with paints and a brush.
 CRUMPLED PAPER
Material: paper, paints, brushes, plates.
Progress.
1st way
Crumple a clean sheet of paper with your hands and smooth it out. Draw the intended drawing. This technique is interesting in that at the places of the folds of the paper, the paint becomes more intense, darker during painting - this is called the mosaic effect.
2nd way
Crumple a piece of paper, dip in wet paint, then apply a drawing by wetting. This method can be used for the background, or to complete the work - flowers, tree crown, drifts, etc.
GRATTAGE
Material: Candle, black gouache, shampoo, pointed stick.
Progress.
We will apply a colored background with watercolor or take colored cardboard or plain white paper. The entire background is completely overwhelmed with wax, paraffin. Pour black or colored gouache into an outlet, add a little shampoo and mix thoroughly. Then we will cover the paraffin sheet with this mixture. The canvas is ready.
Now take a sharpened stick and start scratching out the drawing. What is not an engraving!
TRIO - INK, WATER, GUACHE
Material: thick paper, gouache, ink, container with water.
Progress.
Dilute the gouache with water and paint with coarsely wide brush strokes what you have in mind. The main thing is that the drawing is large. When the gouache has set, cover the entire sheet with black ink. And when it dries, dip the "developing" sheet in the water bath. The gouache will wash off the paper, but the ink will remain. An interesting white outline of the drawing with various edges will appear on a black background. .
 DRAWING METHOD - "POINT"
Material: A slate pencil with an elastic band at the end, an old cut-off brush 1 mm thick, a bristle brush, a felt-tip pen tube with inserted foam rubber, white paper, coloring books, a plate, gouache.
Progress.
Gouache is poured into the plates. Then with the help of the made "pokes" paint is applied to the image, first along the contour, then the inner image. The finished drawing imitates the pointillism painting technique. With a dry bristle brush, you can poke animal hair, a clearing, a tree crown. The variety of images depends on the chosen material for the poke.
DRAWING METHOD - FRICTION
Material: Dried leaves, silhouettes with a pronounced relief, cotton wool, powder from planed colored pencil leads.
Progress.
Put a dried leaf, branch, flowers, silhouette under thin paper, rub on top with a cotton or rag swab with powder from a pencil lead. Glue the image obtained on thin paper on thick paper - you get a postcard. In this way, you can create a plot composition, a decorative pattern.
In the same way, you can rub the edges of the silhouette that are attached to the sheet of paper.
DRAWING BY THE APPLICATION METHOD 
Material: Brushes of different sizes, gouache, watercolor, ink, paper
Progress.
Having dipped the brush into the paint, attach its tail to a sheet of paper and raise it to form a drop. If you apply such droplets in a circle, you get a flower. By dipping, you can draw leaves of trees, animals and other drawings, you just have to dream up.
DRAWING WITH THE SPOT METHOD
Material: Brush # 10, 3, paper, paint, felt-tip pens, wax pencils, charcoal or other graphic materials
Progress.
1st way
A wide brush is used to apply a spot randomly or in accordance with the intended image. When it dries up, the missing details are additionally painted on with paint or other visual materials. In this way, you can draw animals, flowers, etc.
2nd way
Draw the eyes, nose, mouth with a wax pencil. Then paint those yellow spots with a wide brush on top of the image with paint - you get a funny kolobok. So you can depict trees, branches and the trunk with wax pencils, and the crown with paint. Imagine.
MAGIC BALLS
Material: box lid, balls, paint, paper, brushes, water.
Progress.
Place a sheet of paper in a box, apply several multi-colored or monochromatic drops of paint on it. Put in a box
2-3 balls and shake the box so that the balls roll, mixing paints, creating a pattern.
DRAWING WITH NATURAL MATERIALS
Material: Dried leaves, twigs, poppy pods, moss, cones, spikelets, etc. Paper, low hollow forms with paint - gouache, tempera, brush.
Progress.
Natural material is dipped in a mold with paint and applied to paper, lightly pressed - an imprint remains. Depending on the image, a natural material for printing is also selected.
If you ate a dried leaf from a tree, a bush, paint and print on paper, you can get trees, flowers, the sun and other images. Poppy boxes can be used to draw stars, dandelions, snowflakes, etc. Lichen, moss make beautiful meadows with grass, fluffy animals, tree crowns, etc.
 DRAWING WITH PLASTIC
Material: thick paper or cardboard, plasticine, pencil.
Progress.
On a thick sheet of paper or cardboard, draw an outline with a pencil. Draw on it with warm plasticine. It turns out very expressively. The kids are delighted.
DRAWING WITH TAPE
Material: Colored tape, scissors, colored and white paper, coloring book, waterproof colored markers.
Progress.
A linear drawing with a large image without small details is pre-selected. Then the image is filled with small pieces of scotch tape. At the end of the work, all small details are drawn with a marker.
INK DRAWING
Material: ink, paper, sponge, stroke
Progress.
1st way
The work is done on a horizontal surface. The sheet of paper is pre-soaked. Then either drops of mascara are applied, or, turning the tube of mascara, draw lines, lightly pressing on it. An interesting blurry image is obtained, which, after drying, is complemented by a clear linear pattern with a drawing of details with a glue pen, felt-tip pen or other graphic material.
If you cover the entire sheet with blue ink, and then apply dots with a white stroke, you get a snowy evening sky.
2nd way
Strips of colored mascara are applied across the width of a damp but well-wrung sponge. The sponge is turned over with the paint down - "face" to a damp sheet of paper, and a continuous line is drawn - a rainbow, field, waves, bush, etc.
Various movements of the hand with a sponge leave various traces that can be easily turned into a butterfly, snail, flower, complementing the drawing with characteristic strokes.
GEL GRAPHICS
Material: Black paper, a set of gel pens, a simple pencil.
Progress.
1st way
Monochrome technique. On a black background, apply a linear image with a white (silver) gel pen (note: it is necessary to show a sense of proportion). Castles, landscapes, painting of miniatures look expressive in this way. Preliminary sketches can be done in pencil. The error can be safely retouched with gouache or black ink, choosing the desired shade.
2nd way
Polychrome technique. Work in color on a black background gel pens, tint the image with white or silver gel. White tone will give freshness, brightness, silver imitates metallography. After drying, you need to make an underpainting (white, silver) and apply the required colors. In exceptional cases, for example, when painting Easter eggs, spinning wheels, let's say a colored background.
The work of this kind looks great when it is issued in the passport.
TONING PAPER
Material: White paper, starch paste, rag, baths, gouache, glue or oil paints, oil thinner (gasoline).
Progress:
1st way
Dilute 2-3 tones of oil paint with oil thinner to the thickness of very liquid sour cream. Each color in a separate bowl, with a separate brush.
Pour cold water into a bowl or bath, sprinkle diluted paint of the same color on it. Put a sheet of paper on the resulting stains (marble film) (hold the paper by the bent corner) and remove immediately.
On other sheets, you can sprinkle 2-3 paints of different colors at once. Dry the dyed paper on a newspaper and put it under a press. Paper dyed in this way resembles streaks of marble.
2nd way
Take glue or gouache paints of 2-3 colors, boil the starch paste, pour it into a tray or plate, add paint to it and stir slightly. Obtained in the form of a paste or jelly, the colored mass is applied to the paper with a brush, then the excess is removed with a cloth, brush, comb or hard brush. The desired pattern can also be obtained by attaching a spruce branch or by drawing all kinds of lines in different directions.
COLORED FIGURES ON GLASS 
Material: Paints in tubes, transparent film or glass surface, sheet of paper, adhesive tape.
Progress:
1st way
To get a drawing, it is necessary to squeeze the paint from the tubes onto the film in thin strips, leaving wide margins from each other.
You can use a lot of different colors.
Gently place the second layer of film on the image, press the edges. Smooth out the paint with your fingertips. Attach the painting to the window, smooth it out and see how light plays on the colors. Paste over the perimeter with adhesive tape.
2nd way
Paint is applied to glass and mirror in the same way as in the first method. Then they put paper on it and press it on top with another glass, or some other heavy object. This will allow the paint to spread across the sheet of paper at the same time. Then the load is removed, the paint on the paper is waited for drying. After that, small details are painted with a brush or other visual materials.
THE MAGIC OF THE PAPER
Material: Toilet paper, landscape paper, baths, paint, brushes.
Progress:
Pour the paint into trays, dilute with water.
Prepare toilet paper in 6-4-2 squares, about 18 strips.
To make flowers fold strips of 4-6 squares in half and in half again. Roll them into tubes. Soak paper in paint. Then quickly dip it in a bowl of warm water and leave to dry for a few seconds. Fold the paper into a ring on a stack of newspapers, press on top of it so that the paint and water drip off.
To make leaves bend strips of paper from 2 squares in half, and roll into a tube. Also paint and press like flowers.
Place flowers and leaves on a dish, cover with tracing paper and dry in the oven for 10 minutes.
The finished flowers are placed and glued to paper. You can add a vase, twig, or other details as you wish.
Information prepared by: teacher of fine arts, L.V. Ovsyankina
Activities in the visual arts provide an opportunity to enjoy positive emotions, to feel like the master of your creativity. Children study and learn to know the world around them by copying it. Their drawings reflect a personal attitude to everything that happens around. A variety of forms, methods and techniques of work on visual activity develops the artistic abilities of the child. This article presents certain types unconventional drawing techniques.
What is non-traditional drawing?
This is an art that is not based on traditions, does not adhere to them, but is distinguished by its unbreakable and original nature. Drawing in an unconventional style captivates, mesmerizes, delights and surprises children. After all, unusual materials are used here, and most importantly, there is no place for the word "no". You can portray what you want, how you want and what you want. Moreover, it is not forbidden to come up with new technique image images.
Non-traditional drawing techniques in schools and kindergartens teach children to express their ideas freely, without any restrictions. Childhood fears recede, self-confidence appears. The unusual thing about unconventional drawing is that it allows children to quickly get the desired result.
What is the importance of image technique when creating a child's drawing?
In the creativity of the children, the world around them opens up differently each time. It depends on the inner state of the little artist: on his desires and feelings. Children are more prone to emotions. In their imagination, such images arise that defy any explanation. They can paint a red elephant, yellow rain, a running house.
Why does a child want to create, what prompts him to do this? First of all, of course, the imaginary image in his mind. At first glance, everything seems to be simple: I saw and painted. But in fact, this path is very difficult for a child, and requires a lot of knowledge and impressions from him. These are both emotional experiences and the ability to be surprised, to observe.

Painting. Unconventional technique. Senior group
Drawing a drawing on paper with pencils or paints helps your child prepare for the learning process at school. Indeed, during classes, children show their individuality. Correctly organized drawing lessons develop the child's intellectual abilities, correct mental processes. And this is no coincidence. In such classes, preschoolers have the opportunity to confidently assess their strengths, which is very important for the future. school staff... The development of fine motor skills of the hands is facilitated by the techniques of non-traditional drawing. Children of the senior group of the kindergarten learn to paint with their fingers, wax, palms, foam rubber, watercolors. The guys draw with great interest using the method of blotting, point images, prints, spraying.
Blotography using thread
You don't need a brush to paint a drawing using this technique. The unconventional drawing technique, the photo of which is presented to your attention, is so attractive because there are no strictly designated canons here. For example, this blob needs to be drawn in mandatory rounded shape. Using the techniques of non-traditional drawing in the classroom, there are ample opportunities for children's imagination.

So, you need threads, paints and white paper to work. First, the thread should be dyed in the color that you like best. Then lay it out on a prepared sheet of paper in a chaotic manner, but so that the tip remains behind the field. Cover with another sheet on top, and pull the thread. You will get bizarre spots and lines. With the help of a pencil, they are easily transformed into the desired image.
Splashing
Non-traditional drawing techniques for children are very diverse. One of these is splattering, or splattering. In this technique, the drawing should be done with a stiff brush or a toothbrush. To get some kind of image, first you need to dip the brush in gouache, and then spray it all over the sheet. Small droplets are obtained, which in places merge into large spots. It is enough to take a pencil and draw your favorite character or object. If the brush is dipped in toothpaste and sprayed, it will snow.
Monotype
There are a wide variety of non-traditional drawing techniques. Monotype is one of them. This is perhaps the most magical genre of drawing: neither painting, nor graphics, but something in between a trick and a beautiful fairy tale. Children's non-traditional drawing techniques provide an opportunity for free expression. This drawing method is very tempting for preschoolers, although it is rarely used in art classes. What is it?
This technique is used when you want to get a specular reflection. With its help, a reflection is drawn on the water, objects located symmetrically. First, the drawing is depicted on smooth cellophane. To do this, you need a soft brush or a match wrapped in cotton wool. As a last resort, you can draw with your finger. The paint should be bright and thick so that it does not spread. The further action is as follows: while the paint has not dried, cellophane is turned over onto a white sheet of thick paper with a pattern down and, as it were, blotted. Then, carefully, so as not to smudge, rises. It turns out two identical drawings: one on paper, the other on cellophane.
Scratchboard
This word translated from French means "scratch, scratch", hence another name for this technique - scratching. To complete a drawing in this technique, you need to fill the cardboard with paraffin, apply ink, wait until it is completely dry and scratch out the desired drawing.
Aquatipia
Drawing in this technique is done with water. To do this, a large gouache drawing is depicted on thick paper. When the paint is dry, the entire drawing is covered with black ink and appears in the water. The gouache will be washed off with water, but the mascara will remain. Unconventional drawing techniques work wonders. Flowers painted this way are especially beautiful.
Water print
This is a kind of drawing method. For work, you need a bath of water. Paint of different colors is poured directly onto its surface, and an album sheet of paper is placed on top of it. You will get an image, it can be completed with strokes using a brush.
Painting with a candle or wax crayons
Nontraditional drawing techniques have a lot of names. One of them is candle painting. To do this, you need to paint a sheet of white paper with pencils of different colors. Then, with a candle, draw houses, stars or some other object or image. After that, paint over our drawing with watercolors.

Dot drawing
Non-traditional drawing techniques are very popular with children. Writing a drawing with dots is an unusual technique. For this, colored pencils or felt-tip pens are taken and dots are drawn on a white sheet of paper. But it is better to do it with paints.

The match is cleaned of sulfur, a piece of cotton is wound on the tip, dipped in paint and dots are applied.
Drawings with foam rubber
For many people, painting with paints is associated with a brush. But this is not entirely correct judgment. Indeed, instead of a brush, you can cut geometric shapes from foam rubber, attach them to an unsharpened pencil or any even stick. The homemade brush is ready. Then each figure is dipped in paint and stamped on paper. Thus, circles, triangles, rhombuses are obtained. You can make an ornament from them.
Chalk drawing
Children love to be varied in their lives. This can be done using ordinary chalk or coal. They fit well on asphalt, ceramic tiles, stones, porcelain. Capacious images of plots are good for drawing on the asphalt.

If the work is not finished, you can continue the next day. Of course, it can be disappointing if it rains and wipes out the whole drawing. Children compose whole stories based on the plots drawn. It is convenient to depict small objects and patterns on ceramic tiles. But on large stones - the heads of fabulous animals.
Imprint
The usual material in use - potatoes - can be used to depict animals on paper. To do this, you need to make a signet out of the vegetable. The potatoes are cut in half and an animal or object is drawn on the smooth side with a pen. Then, with the tip of a knife, carefully cut out along the contour to a height of 1.5 centimeters, attach the handle and the seal is ready. The child applies a seal to the foam rubber with paint, then the print is applied to the paper. If the color of the paint needs to be changed, another seal and foam rubber are taken. This drawing technique is especially popular with children. After all, one and the same object can be depicted several times, and make up a whole composition of it.
Leaf prints
Conducting classes with children, you can apply a wide variety of non-traditional drawing techniques at a preschool educational institution. In early spring, when young sticky leaves bloom on the trees, and in late autumn, when they change color and fall off, the child watches them with interest. Therefore, when in the classroom, children are invited to print a real leaf of birch or maple, they do it with great pleasure. First you need to cover the sheet with paint, and then attach it to the white paper with the painted side. Take a different sheet of paper each time. This will make the veins print better. If there is no petiole, it doesn't matter. It can be easily painted with a brush.
Bloat paint
If you need to depict shrubs, trees, unusual fabulous plants or corals, use this technique. You need to drip paint onto a sheet of paper and use a cocktail straw to inflate it in accordance with the intended image. The drawing is bright and expressive. This technique is especially suitable for those children who find it difficult to express their creativity through the line.
Drawing on wet paper
The types of non-traditional drawing techniques are so diverse that you can individually choose the most interesting and exciting method for each child. One of these is the image of a drawing on wet paper. The fact is that until recently it was considered possible to draw only on dry paper, since paint diluted with water moisturizes it anyway.
But there are such plots, images, objects that need to be vague and uncertain. For example, fog, a dream, night. However, the paper should not be excessively damp, otherwise the drawing will not work. You do not need to dip all the paper in water. It is enough to wet a piece of cotton wool, squeeze it out and run it over the surface of the sheet or its individual parts. The paper is ready for work, you can start drawing images.
Drawing with hands
Children of the older group of kindergarten are happy to learn this method of non-traditional drawing. Indeed, the work uses fingers, which the child lowers into gouache and begins to draw with them without any brush. Each finger can be dipped in a different color paint. Thus, a whole set of brushes is obtained. And if you paint your palm with paint and attach it to paper, an imprint will remain on it.

The guys themselves give the image the desired shape. They easily turn him into a dragon, a butterfly, who has enough imagination for that. Performing this task, children make different movements with their hands: blot, swat, smear.
Drawing with a cloth swab. Master class on the topic
This form of conducting classes in kindergarten attracts children, their parents and educators. It is with great pleasure that those who wish attend the master class. Non-traditional drawing techniques are always interesting for their mystery and novelty. If the theme of the master class is to designate the drawing of a landscape in black and white, then for work you will need gouache of the corresponding color, pieces of cotton fabric, a white sheet of paper, PVA glue, colored cardboard, scissors.
So, let's start working. We wrinkle the fabric and make a tampon out of it in such a size that it is convenient to hold it. This will be your brush. We dip it in black paint and draw a horizontal line on a sheet of paper. It is the horizon, that is, it separates the sky from the earth. The higher this line, the more space opens up to the eye.
We continue drawing with an unconventional technique. We will depict a forest at a distant distance. To do this, we print shrubs and trees from the horizon line upwards with chaotic damping movements. You should always remember that objects in the foreground are always larger and more distinct than those in the far. This rule also applies to non-traditional painting techniques. The pictures then turn out beautiful, the objects depicted on them become similar to the real ones.
Now we fill foreground and draw the coastline in a left-to-right way. We print the bushes with the same swab, then use the smearing method to draw clouds and clouds in the sky. Next, we depict ripples on the lake, the sun and its reflection in transparent water. Drawing with unconventional technique is over. The picture is ready.