Pictures gel handle patterns. How to make a light tattoo handle on hand, how long and simple sketches for beginners
Read also
We continue to talk about how to teach the child to draw. Baby refuses to draw pencils or paints? This is because it is weakly developed by the muscles of the shoulder belt.
It is necessary to press on the pencil, keep silent on weight, it is difficult. Try to offer him draw gel handle. The line turns out clear and bright, goes easily. Drawing gel handle is peculiar and beautiful.
When we say it non-traditional drawing, Many are surprised: What is unconventional in an ordinary gel handle? The point is not in the handle, but the method of drawing.
This technique works the artist Dmitry Rybin. Its technique is called "mystical graphics of gel handles." In his opinion, anyone who wants to be learned to such unconventional drawing. And for children, the technique of drawing helium handles is suitable in that it can be mastered to learn how to draw from scratch.
Machinery drawing gel handles
Drawing according to the method of Dmitry Rybin - something average between graphics and ornament (this is also suitable for working with the guys). Looks like Zenart. This is the repetition of elementary forms, and not the creation of a masterpiece or a highly artistic picture.
Draw elementary forms can be able to draw, but ultimately, the picture is exactly from them. Many elements of graphics are simple and accessible to children: circle, square, triangle, point, wavy line, three crossed lines (snowflake) and others.
With all the simplicity of elements, it turns out very interesting paintingssimilar to schedule, Chinese or Japanese painting (drawing "Tree of Life"). The drawing is characterized by conciseness and completion.
Materials and tools
What materials will require non-traditional drawing with gel handles?
Pens
- Ordinary helium handles sold in any stationery store. Usually paint black color on white paper. But if there is a desire to draw color picture, You can purchase sets of color handles.
- Capillary handles if no helium. For capillary handles, you need to pick up paper. On some types of ink paper spread. In fact, it is the same felt-tipper with a very thin rod. Inside the rod, like a felt-meter. A bad writing pen remember the rod - the handle will still serve. For coloring, you can also use ordinary markers.
- When choosing a handle should take into account the following circumstance. Preschoolers or schoolchildren with a disturbed motor disintegrates at first, unnecessarily pressed on the handle during drawing. Capillary handles in this case fail faster. Preferably helium.
Paper
Paper white color, smooth, dense. It is best to suit a piece of Watman size A5. Sometimes, not particularly thinking, buy albums for drawing. When choosing, pay attention to the quality of the paper.
Rules drawing
- The line must be continuous (therefore with older reoxoites at first need to draw short lines). Alarm children tend to circle the same element of the template many times. The line must be alone. No hatching. Exercise will provide smooth lines on the letter.
- Each element must be clear and separate, without merging with other elements.
- We supply the template, gradually moving downwards, trying not to smear.
Where to begin
You can start work with children from 6 years, but it is best to draw such drawing from schoolchildren. Recall yourself, the majority in school and student times painted something similar, bored in classes.
We start with the layout of templates. The template can be contour drawing subject (simple coloring with small quantity details are suitable). Note! The helium handle does not draw a pencil in a pencil, so we draw contour with a simple pencil very thin, it may be even an intermittent line.
Little child do not paint so much, the template draws an adult. Or prints on the printer a pale line. A photocopyed picture is also not suitable for the same reason as a pencil. We just scanned samples and printed.
The child learned gently and beautifully circle pattern. Complicate work. We divide the sheet of paper vertically into two fields. On the right template for the stroke, on the left - empty place. We offer the child first to circle the pattern, and then to the left at the free place to copy the pattern on your own. Work is difficult, but performing. At first, the copy will turn out to be deformed in shape or size (more often). With the acquisition of skill, workout, the quality of the copy is improved.
Tattoo is an excellent way to allocate your individuality. In ancient times, people applied for themselves colorful drawingsTo emphasize your importance.
Now images on the skin Do not talk about wildness and many resort to such decorations.
Not everyone gets determined to leave the drawing for a long time. Some consider this step too responsible, someone does not like the official position, someone is afraid of pain.
In addition, to reduce such a tattoo is quite problematic and expensive. As a possible output - applying temporary tattoos.
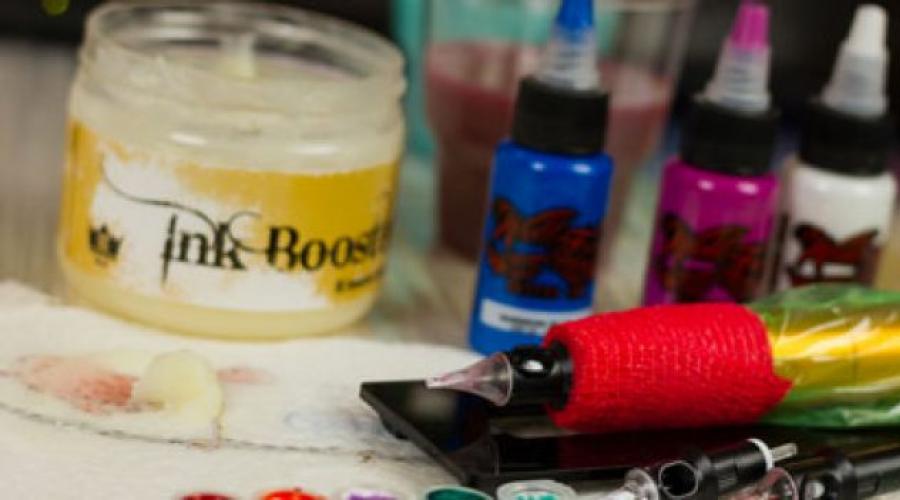
Technology creation of images A blue or black gel handle allows you to create a drawing, the maximum similar to the present tattoo.
At the same time avoiding hazards and providing for quick removal.
Compliance with safety, can the tattoo handle call allergies?
With this method of application, the drawing is simply applied to the skin, It can also be fixed with insignificant punzes of the fine needle.

It is not necessary to scare this, because the shallow impact depth does not represent a serious danger. Some risks still exist.
To ensure security rules, when performing such a tattoo required:
- Shave Picture of drawing.
- Carefully process Skin area with a disinfectant.
- Pick up Maximum thin needle and disinfection it.
- Use funds individual protection (sterile wool, gloves, etc.).
As for the possible allergic reaction, It is very unlikely, because the needle pierces the skin on a very insignificant depth.
To ensure normal ink tolerance, a small plot is processed at an invisible place.
If itching this time will appear, and the skin will become red, it means that your body does not tolerate this paint, and it is necessary to pick up other materials, or to abandon the venture.
What picture to choose: mini tattoo, images, inscriptions, hieroglyphs. Simple sketches for self-performance
Most simple picturesavailable for beginners look in the form of a mini tattoo:

- Hieroglyphs.
- Small birds.
- Texts.
- Ornaments.
- Simple natural components (leaves, branches).
A tattoo can be a ring on the finger - it looks very interesting.
For easy applied tattoo You can use the lecturer. It is first applied to the skin, after that the picture is knocked out.
Consider how to draw a tattoo with a handle. At the same time you need to use:
- Ball gel black handle.
- Thin sharpened simple pencil.
- Parchment, tracing.
- Watu.
- Scissors.
- Wet wipes or cloth.
- Gel or mousse for fixation hairstyles.
- Alcohol-containing liquid.
- Disinfectant.

First you need to choose or come up with a picture. For teens, it can be a skull, machine, cool patterns.
For girls, you can make a tattoo in the form of small birds, beautiful colors, intricate figures. For more solid men or women, it can be some kind of commemorative inscription.
Pictures Must be easy to execute. They are designed to display the nature and emotions of the owner.
If the image is not enough fantasy, it can be copied from the Internet or any magazine.
The drawing is selected. Now its sketches should be applied to the traction or parchment with a sharp pencil.
The gel handle neatly paint patterns inside. Make it need it very carefully so that the paint does not go beyond the borders.
Now the most important thing is to determine the location of the tattoo. If it is done to yourself, it should be in an affordable place, for example, on the leg, wrist. In the presence of help, you can experiment.
The selected area must be carefully treated with alcohol. Now it's small: take a wet napkin or a cloth moistened in heated water, and distribute it on top of a tracing with a layout.
The cloth is then pressed against the body and keeps at least a minute, without moving. After this time, a small piece of carting is carefully moved to check whether the drawing was transferred.
If this did not happen, the cloth needs to hold some time. In case of insufficient brightness of the image, it is necessary to apply the top layer with a gel handle.
So that the tattoo holds longer and not erased, It can be fixed using a hairstyle spray hairstyle, pre-renewing the skin. Temporary tattoo is ready.
To apply a long-term tattoo, it will be necessary:
- Black gel pen.
- Needle.
- Cotton swabs.
- Disinfectant.
- Alcohol solution.

Consider the procedure for performing step by step:
- Selected pattern. It is processed by the place of applying.
- The image is superimposed in the form of contour. To do this, you can use tracing or black cosmetic pencil.
- The contours need to be applied very carefully: In case of any inaccuracies, the edges are erased.
- It is not possible to hurt himself. For this procedure, you can ask for help of comrade with strong nerves.
The needle is processed with alcohol, then carefully, making little shallow holes, the image is applied in stages. For this purpose, you can use a special typewriter.
- If the procedure is performed for the first time, It is advisable to choose the easiest picture.
- Painted dots are painted with a gel handle. Calculate a couple of minutes and excess paints are carefully removed.
- The resulting wound is well disinfected. It is possible for fidelity to treat tattoo fixing sprays, but it is not necessary. Work is ready.
Important! You should wait several hours: do not wet and do not rub the processed area.
For some time a crust may form - in no case to tear it, give a wound to heal! The girls are still better limited to temporary tattoo.
How much time is the drawn tattoo?
Tattoo safety time depends on the technique of applying:

The drawing applied with high-quality paint, with compliance with all requirements, will remain unchanged for a long time.
How many years can you take a tattoo with children?
According to the legislative standards, it is allowed to apply tattoos to the body for children not under the age of 14, and only with the written permission of parents. This requirement applies to a temporary tattoo.

At the age of 10, you can make small temporary drawings without leaving the house.
Federal Sheepskin Service Follows much attention moral appearance Children, therefore, for violation of the rules, responsibility is assigned to the parents.
Useful video
Drawing techniques zentangle, doodling and zendoodling.
Get acquainted with drawing techniques like zentangle, doodling and zendoodling
I really liked the drawing technique, it is especially good (in my opinion) for those creative natures who want to show themselves in the picture, but do not have classic skills.
Here, in order to achieve success, you need a lot of fantasy and creativity and minimum drawing techniques, although the spatial imagination is still useful to us. The pictures are unusual and exciting, you can have a long time to look at and study.
Unfortunately, in Russian, I did not find information about these techniques, so I translated with english sources (Do not judge strictly my translation).

Zentangle A small piece of art made by a handle with a thin rod and graphite to highlight light and shadow. It is drawn up in a certain order. Take the square of watercolor paper and place a 4-point pencil in each corner at a distance of about half an inches from the leaf border. Connect these points with a pencil border, which can be both smooth and curved (irregular). Inside the resulting frame draw a pencil "strings", the so-called crazy lines. This divides the drawing area on the sectors of various sizes and special profiles. Take a thin feathery handle and fill out the form with a variety of patterns with repetition. When you filled out spaces, pencil lines are erased, and then shading is added to give a zentangle shape.
If your drawing does not follow these guidelines, then this is not zentangle. Zentangle is an abstract pattern and can be considered from either side. If it has a recognizable image, for example, a face or eye or an animal, it is not zentangle. However, it may well be stylized zentangle or zia.


Doodle (translated by Karakul) This is a focused figure, made while the attention of a person is employed by something else. Doodles - simple drawingswhich may have specific representative values \u200b\u200bor may be simply abstract forms.
Stereotypical examples of drawing are located in the school notebook, often on the fields made by students when they dream or lose interest during classes. Other common drawing examples are made during long telephone conversations, if there is a handle and paper at hand.
Popular views include cartoon versions, images of teachers or comrades for school, well-known television or comic characters, fictional creatures, landscapes, geometric shapes and patterns, textures, banners with legends and animation scenes made sequence on different pages Books or laptop.


Zendoodling is an art hybrid mixed on the style of zentangle with doodling. Zendoodles often arbitrary shape and has an abstract look sometimes with splashes.
It is not strictly called zentangling, because here the "string" method does not apply, as well as the requirement of black and white design.
Zendoodles are created using black ink on any type of color background, not necessarily white paper. It is also allowed to use watercolor, pencils, shallow, markers, etc. at your discretion.


It is in the search for drawing pens I made a lot of discoveries. First, the same handles can be completely called in different stores and books. Secondly, pens, liners, markers and other drawing tools are an innumerable set, and each type has its own characteristics. Well, thirdly, in Minsk all this good is almost not found, and what to find - at times more expensive than in other countries (even Russia and Lithuania) ...
In my material, I will use those names to which in the end came, and at the same time I will illustrate every photo tool - so that you know what to seek (actually so I myself buy a handle :))
Ballpoint pens. They, of course, you can draw, but they are good for Dudling (see). Since because of the ball ink, it is unevenly distributed, then even a solid line with a constant pressure can be on different sections, then too pale, then vice versa with paint (and smearing! Yes, it is ballpoint handles that are most of all label).
One of the possible applications ballproof handles with bright colors - decoration ready black and white drawing Color. By the way, "poisonous" (they are sometimes called neon) color perfectly and on black / dark paper. In Minsk, this has not yet met, but there is a purchase experience from the Chinese. Apparently, such handles can be bought in neighboring countries - in particular in Russia.


Gel handles. Also a little sin, like ball, inconstancy of the line, but:
- Of these, the best handles with white, silver and golden ink for drawing on black / crafted, colored paper;
- They are sold even in Minsk, although the Chinese have more choice;
- They are very cheap.


Feltolsters. Why and yes? For example, I just robbed the child into several colored markers and I even liked it. In the markers, of course, their features: for example, if you spend the same place in the same place twice, then the color changes noticeably, the paper is very strongly saturated with paint, and some even goes with "katoshi" or rush. Therefore, it seems to me that markers are good for drawing or on dense smooth paper, or when your movements are already recovered and confident.


By the way, bilateral markers are comfortable:

Liners (In stores they are called simply handles, capillary, gel and still God knows what). Alternative name for these handles - Liners: Different masters are called differently. The liners are the most convenient and widespread tool for drawing, as they solve the problem of paint uniformity. Today they are released a variety of species.
What is a liner for drawing? How to determine if it is a liner? By dubke - this is:

The liners may differ in thickness: as a rule, it is indicated by a number that characterizes the thickness of millimeters. For example, here in the photo 0.7, 0.5 and 0.05:

What exactly you need a thickness - to solve yourself. But practice shows that initial stage Learn to draw is easier than thick liners. Thin more suitable for small elements inside a large drawing.

Liners are different colors. At the same time, different thickness make, as a rule, only black and brown liners. Colored liners are usually equally thin. Well, or others did not come across :) In Minsk you can find them even in ordinary stationery, but I usually meet a very poor choice.

Colored liners can be used for:
- Coloring other mandalas (I have not yet said that the most popular on Amazon last year with a large triumph became an antistress coloring for adults - and was it made in the techniques that I tell?!);
- Coloring your black and white drawings;
- Drawing color mandalas and other elements.
Unfortunately, such liners are suitable for drawing / coloring precisely on white paper. For dark basics They lack saturation and brightness (and for such cases there are other options;) Just about them - next time).


Brown liners. I call them crafts for myself - because the color they very much resemble crafting paper. They are also different thickness, like black. And some manufacturers can even find a brush liner! True, I haven't mastered it yet - she just included :))


By the way, in nature there are hybrids, bilateral liners: for example, a tool that has a felt-tip pen, and on the other - a liner. Such tools are good in that you have the same color in both cases. It is convenient when you are in the main drawing use a thick line, and the details draw more thin.


How to learn to draw zentngle and dudling?
If you have not tried to draw a Zentahl or Dudling techniques in popular today, then it's time to learn them.
Let you not create real pictures from the drawings, but you have exactly the occupation to which you will contact if you need to throw the accumulated negative, think about something good and beautiful.
This article contains information about the techniques of drawing Zentungl and Dudling. You will not only learn when and who first had the idea of \u200b\u200bfilling the white sheet with simple, but spectacular patterns, and the difference in drawing techniques, but also be able to develop their hidden abilities.
What is zentngle and dudling?
Sentangle technique has long been adopted by people creative professions To create amazing and fascinating drawings, filling out non-books, sketchbook pages.


Interesting patterns are used even art therapists during their trainings. Patterns drawn on the cards with gel handle can be seen on the Internet, but you can create wonderful drawings yourself.
Pros from drawing in equipment Zentahl and Dudling:
- drawing is considered as a way to melect
- you can distract from pressing problems for a while
- you can see the usual things fresh look
- ability to reconfigure and inspire new projects
- is an excellent tool from insomnia
- the way to increase self-esteem
- drawing of uncomplicated patterns soothes, relieves stress
- way to develop the hardness of the hand, the eye, improve the handwriting
- attention increases and small motility is being developed
The photo below shows the spectacular black and white and colored patterns drawn in the Sentahl technique.


So, what about yourself beautiful works Arts in miniature?
Zentangle (Zentngest) - These are the drawings that are created unconsciously during waiting, or just to relax, calm down.


After studying some features of drawing patterns, you can not just drive the handle on the sheet, but to transfer unique abstractions into white paper squares.
For drawings, repetitive motifs are characteristic of the design of the ZentNagl. Sentangl technique received its name in 2006 in the United States from two words:
- "Xen" is one of the Buddhist sects
- "Tangle" - means confusion, interlacing

Dudling - these are the most doodles that are so good in humans of different ages: from small to large. The drawing in the Dudling technique consists of simple forms and curved lines.
This technique you can start drawing without any knowledge, skills. After all, the main thing is that it helps to create an interesting pattern is an opportunity to act intuitively.


The drawing in the Sentangle technique is characterized in that there is a significant concentration of attention. Draw patterns on square cardswhose size of which 9x9 cm.


 Cards can be cut from dense paper, and you can buy ready-made in the store for artists
 Zentahl can be drawn in notebooks, flashering a sheet into squares with 9x9 cm sides


You can draw a regular sheet of paper into squares. Each square encompasses a separate composition. There is another embodiment of the drawings: in a large square, several small are drawn.
Curved lines inside squares determine the boundaries of future patterns and figures, combining them into one composition.
In each pattern, it is necessary to highlight and show the shaded area. Shadows and glare in the drawings will emphasize the depressions, create the illusion of volumetric patterns, will help to give an unfamiliar appeal. Ton contrasts will make the world recognizable.
Examples of patterns:


Zentngle Drawing for relaxation, inspiration and pleasure
Drawings in the Sentahl technique - this is what we take on paper, sitting at the meeting, at the lecture, during the tightened telephone conversation. Doodle and dashes help not lose concentration, overcome drowsiness.
With emotional exhaustion, fatigue, marker, felt-tip or ordinary handle will distract from pressing problems: you will begin to create anything, without thinking. Thinking energy at such moments is not consumed, and therefore the information received continues to be processed and digest.


Several squares with patterns turn into an interesting completed product and does not require any special skills in the field of drawing.
Today, elements of a zentange or dudling can be seen on various elements of the decor. Strange and intricate figures are connected to bizarre surreal plots.
What is the meaning of meditation during drawing in the Sentahl technique?
- In order for the drawing to be beautiful, you need to be able to focus on the moment "here and now." And this is possible only under the condition full dive in the drawing process.
- Machine movements hand over time become informed.
- Spontaneity is gradually displaced by the wellness of the composition.
Signagl and Dudling drawing technology
Exist certain rules For drawings, Zentahl:
- pattern is performed in black and white colors
- the pattern is limited to a square frame inside the card of the specified size (9x9 cm)
- inside the frame draws arbitrarily lines that divide the square on the sector
- formed after the sector lines are filled with bizarre arbitrary patterns.
- the plot of each composition is abstract
Pictures in the Dudling technique are performed intuitively, there are no rules when they are fulfilled. Zentangl, unlike Dudling, is created in such a way that the pattern is full and finished on any side and from any angle.
For drawing, the following materials will be needed for drawing in the Sentnglah technique:
- dense watercolor paper
- liin (capillary handle), marker or ordinary
- ball pen
- simple pencil
A variety and unique patterns are created in one scheme:
- Cut from paper tiles of classical size in a zentngle (9x9 cm).
- We draw lines: put four points with a pencil in the corners of the tile, slightly retreating from the edge. We try not to press the pencil to push it later it was easy to get rid of lines.


- Rows connect one solid line. It is not necessary to use a ruler for this or try to draw a line exactly: some negligence will give a special charm tile with a painted pattern. Thus, we set borders for further work.
- The next step is the creation of "zones" inside the square for future patterns. They will not be scattered in chaotic order, but create a holeric picture.

- When the Zentahl patterns start to get acquired, it will be possible to skip this step and start drawing without prior "markup".
- How to place a square on "zones"? Holding lines without cutting hands from paper. You can see how such lines look like.

- Now you need to fill the empty space between the lines. Source a segment behind the segment. Here's what it looks like:


- There is no specific sequence that must be followed: Segments Fill in the pattern as you suggest your imagination. Leave some areas unfinished, the general picture does not suffer from this.


- When you consider that the drawing does not require adjustments and additions, erase the painted early pencil lines.
- Be sure to add shadows by defining the location of the light source. Without shading, the glance will not slide in the picture and attract attention.
- Deciding where the light is to fall on the elements of the pattern, add solid pencil And good in painted borders.
- Parties filled with segment segments, giving three-dimension image.
The shaded patterns of "pebbles", "leaves", "pea", "balls" look especially impressive. If your shadows do not get or too dark, you can erase them with eraser or clarify.
Patterns for the Zentungl are given in this section. You can make changes to them or invent your own. However, if you just learn to draw a zentahl, then it is better to use the classic patterns of patterns.

Zentngle tiles during drawing turn over around its axis so that it is more convenient to draw lines. Specify where the pictures of the bottom, you can, putting a signature on one of the parties.
Dudeling drawings Pencil stages for beginners
- Pictures in Dudling technique do not comply with any rules and tiles cut no need. You can simply print the contours of the animal, geometric Figure, Plants and fill the empty space by patterns.
- You can draw a square or oval in the center of the sheet, and then call for help your fantasy and draw everything that comes to mind. Somewhere drew the pigtails, somewhere add a spikelet or let it be bugged into the ribbons leaving the sink mouth.
- You just add oblique lines to your creation, combine arbitrary elements into a circle, draw contours and get a unique picture.


Allow your hand to move chaotically or determine the direction and draw simple repeating patterns that are from the inside.
How to draw in the Dudling technique, you will learn by looking at the video.
Video: Dudling Feather
Zentagla Step-by-Step Lessons: Learn Tangles
To fill the tiles with patterns, you must perform pre-drawings of tangles - patterns. You can practice in the drawing of tangles and only then start creating the drawings of the Zentahl.
Below are uncomplicated tangles for beginners.


 Several beautiful variations of the Cadent pattern for your inspiration


Video: Draw tangles
Video: 24 Patterns for Dudling, Zentahn Patterns
Zentahl - manicure
Beautiful patterns have become popular not only among artists: Dudling is used to create an unusual fashion manicure.
Whole work of art on marigolds in new technique Complete the image and help make it harmonious. In addition, even the girl who has long waved his hand on an independent nail design for a long time to apply an orphanage in the Dudling technique. After all, many believe that they cannot draw anything to them.


What do you need for a simple, but spectacular pattern on the nails?
- search the Internet the appropriate template that you can repeat
- disassemble the pattern to the components and stages to practice it on paper
- start sketching pattern, carefully carrying lines, circles, petals
- Do not worry if you have some lines turned out uneven: Dudling is able to hide many mistakes!
- If you look at the design of nails in Dudling style, then make sure there is nothing complicated in these drawings.


The process of creating a manicure includes several stages:
- nail coating lacquer
- application of a pattern of lacquer more liquid consistency
- instead of lacquer for drawing patterns, you can use acrylic paint
- fastening upper coating applying
What instruments will need?
- special thin brush
- in the absence of a tassel, you can use the toothpick or handle
The photo presents fir-handed materials that can replace special tools. You can see which thickness of the strokes are obtained when using them.


- Start from the circumference at the base of the nail plate, gradually moving on: over the first circle, draw the second, then the petals that diverge on the sides and fill the empty space with dots or strokes.


Video: Zentahl for beginners