How to make a pencil drawing in Photoshop. Photography: how to turn it into a painted portrait
Detailed lesson to turn ordinary photography into hyperrealistic painting in just a couple of minutes.
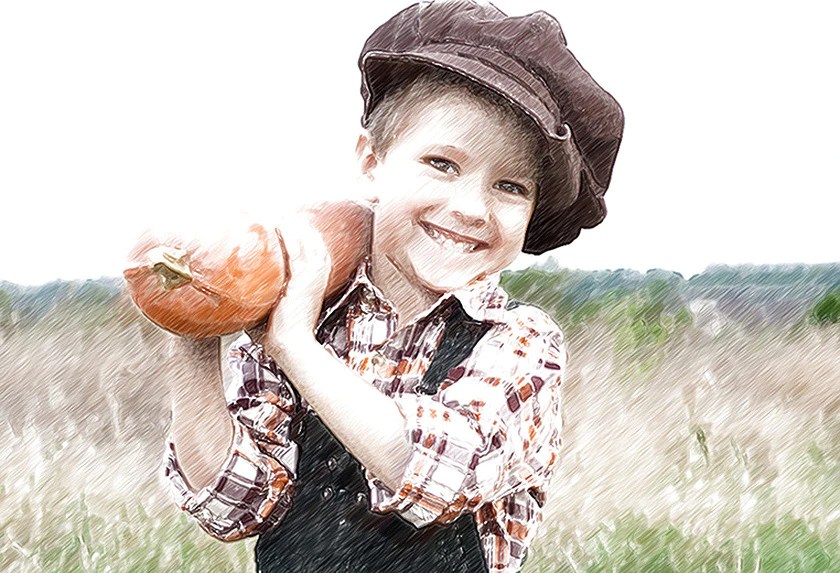
Some talented artists can draw in the technique of hyperrealism, but we, mere mortals, can only dream of it. Fortunately, there is Adobe Photoshop where you can create all kinds of cool effects and simulate hand-drawn styles. We found a great tutorial from Chris Spooner, designer and founder of Blog Spoon Graphics. It shows how you can make a real work of art from a simple portrait photo in just a couple of minutes with detailed strokes and highlights.

Of course, in the example of Chris, everything looks really masterpiece, but in Photoshop a lot depends on the original photo, and the effects that work great with one photo are not always suitable for another. Therefore, we decided to take a portrait of a slightly different quality and try to do all the same manipulations in the hope of getting something similar.

1. So open your chosen photo in Photoshop and add a Curves Adjustment Layer. We need to shade the shadows a bit and lighten the highlights to give the photo more contrast.

2. Press Ctrl + J to duplicate the background layer twice. Then add the High Pass effect from the filters menu to the top of the duplicates.

3. Adjust the radius of the High Pass filter between 1-3 px. This will be enough to create the desired effect. Larger radii can result in unwanted noise and halo.

4. Change the blending mode of the High Pass filter layer from Normal to Linear Light to make the photo sharp. The increased sharpness ensures precise strokes, especially on the hair.

5. Now merge the High Pass layer with the duplicate background layer below to solidify the resulting effect. This can be done using the MergeVisible command from the layers menu. Just to begin with, leave visible only the two layers that you are going to merge. After that go to Filter> Stylize> Diffuse.

6. Change the blur mode to Anisotropic - this is the key point that actually creates this magical picture effect.

7. If you look closely at the result, you will notice ugly seams that scatter and repeat. But there is a way to solve this problem.

8. Go to Image> Image Rotation> 90 ° CW to rotate the image and press Ctrl + F (Cmd + F) to redo adding the diffuse filter.

9. Rotate the image one more time and apply the diffuse filter again. Repeat this step a third time to return the photo to the correct position.
10. Diffuse filter perfectly imitates a brush, but at the same time it blurs the image a little. Go to Filter> Sharpen> Smart Sharpen to add clarity. Set the Threshold value to around 100, but use a small radius so as not to overdo it.

11. The result already looks impressive, but you can make it even more interesting. Select Surface Blur from Filter> Blur and set the Radius to around 20 and the Threshold to around 15 (as you can see, a Radius value of 40 blurs the picture a lot) This will create flat areas and give the photo an even more painted look.

12. Well that's all, our Santa has turned from a photograph into a hyperrealistic painting. From a distance, you might think that this is still a photograph, but if you look closely, you will notice the numerous strokes and transitions inherent in painting.

We hope you enjoyed this tutorial as much as we did - a couple of simple manipulations to achieve a stylish effect. This can be useful to you for the contact section on the site, for example, when you need to combine different photos something in common to achieve harmony.
You can watch the original lesson by Chris Spooner. © PressFoto / Hasloo
Photo styling is always very interesting for beginners (and not so much) photoshoppers. Without long prefaces, I will say that in this lesson you will learn how to make a drawing from a photograph in Photoshop.
The lesson does not pretend to be any artistic value, I'll just show you a few tricks that will allow you to achieve the effect of a hand-drawn photo.
One more note. For a successful photo conversion, it should be enough big size, since some filters cannot be applied (they can, but the effect is not the same) to small images.
So, open the original photo in the program.

Make a copy of the image by dragging it onto the new layer icon in the layers palette.

Then desaturate the photo (the layer we just created) with the keyboard shortcut CTRL + SHIFT + U.

Make a copy of this layer (see above), go to the first copy, and remove visibility from the top layer.

Now we proceed directly to the creation of the picture. Go to the menu "Filter - Strokes - Cross Strokes".

Using the sliders, we achieve approximately the same effect as in the screenshot.


Then go to upper layer and turn on its visibility (see above). Go to the menu "Filter - Sketch - Photocopy".

As with the previous filter, we achieve the effect as in the screenshot.


As a result, we get something like this (remember that the results will be fully visible only at one hundred percent scale):

We continue to create the effect of the picture in Photoshop. Create an imprint (merged copy) of all layers with a keyboard shortcut CTRL + SHIFT + ALT + E.

Then go to the menu again "Filter" and select the item "Imitation - Oil Painting".

The applied effect should not be too strong. Try to keep as much detail as possible. The main starting point is the model's eyes.


We are coming to the end of the stylization of our photo. As we can see, the colors in the "picture" are too bright and saturated. Let's correct this injustice. How to create an adjustment layer Hue / Saturation.

In the opened layer properties window, muffle the colors with the slider saturation and add a little yellow color on the model's skin with a slider color tone.

The final touch is a canvas texture mapping. Such textures can be found in huge quantities on the Internet by typing the corresponding request in the search engine.
Drag the textured image onto the model image and, if required, stretch it across the entire canvas and click ENTER.

Change the blending mode (see above) for the texture layer to "Soft light".
Here's what you should end up with:

If the texture is too pronounced, then you can lower the opacity of this layer.

Unfortunately, the requirements for the size of screenshots on our site will not allow me to show the final result at a scale of 100%, but even at this resolution it is clear that the result, as they say, is obvious.

This concludes the lesson. You yourself can play with the strength of the effects, the saturation of colors and the imposition of various textures (for example, you can overlay a paper texture instead of a canvas). Good luck with your creativity!
Many would like to learn how to make a real drawing from photography. Indeed, this is how, sometimes, combinations look beneficial beautiful photos and pencil drawings. This business has its own charm.
But, the catch is that making a good, real, high-quality drawing from a photograph is not so easy. Most existing plugins and programs do not pencil drawing, but a kind of semblance. Yes, it seems, but the real drawing is far away.
Consider two approaches to solving this issue:
Let's start to master the first option.
Enough caught my eye interesting video lesson taken by Alexey Kuzmichev. Indeed, the result is a good pencil drawing from a photograph.
How to convert a photo into a pencil drawing
Well, we met. I hope you enjoyed the result. To me personally, yes. But, there is a small catch. Remembering this whole thing is not so easy. So I decided to make a small cheat sheet, in which all the steps are painted necessary actions.
Making a pencil drawing from a photo step by step instructions
Here is the image I got with this approach. There is a certain similarity with a pencil drawing, but, you know, you still need to work on the final result. Hover your mouse to see the starting photo.
1. Make two copies of the selected photo - Ctrl + J... Turn off the visibility of the first top copy.
2. Go to the second copy and click Ctrl + I- invert the layer. Convert the layer to smart object... Making the blend mode - lightening the base... Go to Filters - Gaussian Blur - make the blur radius 15 px.
- - add an adjustment layer to this layer Saturation- lower the saturation to –100 (desaturate the image);
- - second adjustment layer - Levels, in the left window, set the value to 95 (add contrast for the photo);
- - group all three layers (select the layers with Shift pressed and press Ctrl + G), name this group The foundation;
3. Go to the top layer, turn on its visibility.
- - convert it to smart object, select black on the color palette, the background color should be white;
- - choose a filter Filter Gallery - Sketch - Photocopy- detail 3, blackout - 20;
- filter Filter Gallery - Strokes - Slanted Strokes- Direction balance - 78, stroke length - 50, sharpness - 10; Change the Blending Mode to Blackout; Name the layer Circuit;
- - duplicate this layer Ctrl + J, change the blending mode to Darkening the base, reduce the opacity of the layer to 80%, name the layer in Contour - copy;
4. Create a copy of the Contour copy layer Ctrl + J;
- - filter Filter Gallery - Imitation - Fresco- size 10, detail - 10, texture - 1;
- - filter Filter Gallery - Sketch - Postage Paper- Tone ballast - 50, grain size - 5, relief - 25;
- - we change the transparency by 60%;
5. Copy the main, bottom layer with the photo Ctrl + J, move the copy to the very top;
- - filter Filter Gallery - Texture - Texturizer- Texture - brick, scale - 100%, relief - 15, light - on the right, a tick opposite Invert;
- - filter Filter Gallery - Exiz - Halftone Pattern- size - 4, contrast - 4, pattern type - line;
- - filter Blur - Motion Blur- angle 45, offset 40 px;
- - Blending mode for this layer - Hard light;
- - we call the layer Halftone;
6. Duplicate this layer Ctrl + J;
- - filter - Grain, intensity - 45, contrast - 45, grain type - splashes;
- - change the transparency of the layer - 85%;
- - we call the layer Corn;
7. Duplicate the Outline layer Ctrl + J and place the copy at the very top;
- - filter Filter Gallery - Imitation - Fresco- size -10, detail - 10, texture - 1;
- - Layer Blend Mode - Darkening the base, transparency - 60%;
8. Duplicate the Halftone layer, place the copy at the very top;
- - filter Filter Gallery - Texture - Grain- grain, intensity - 45, contrast - 65, grain type - splashes;
- - filter Filter Gallery - Sketch - Coal- intensity - 6, detail - 5, tone balance - 88;
- - filter Filter Gallery - Sketch - Halftone Pattern- size - 1, contrast - 0, pattern type - line;
- - filter Blur - Motion Blur- angle 45, offset 100 px;
- - layer blend mode - Normal, layer transparency - 70% ;
8. Duplicate the main photo Ctrl + J, place the copy at the very top, convert to smart object;
- -filter Filter Gallery - Sketch - Photocopy- detail -3 (sometimes it is better to put 2 for a more graceful line), shading - 20;
- - blend mode for layer Multiplication, transparency - 50% ;
9. Add a paper texture to the drawing:
- - download an image with a paper texture to your computer, here;
- - drag the image with the paper texture onto our image, it should be on top;
- - stretch to fit the entire photo across Transformation;
- - change the blending mode to Multiplication;
- - change the transparency to 60% ;
For myself, I made a file in Word and printed it out, on one sheet on both sides the whole thing easily fit. With this approach, mastering this technique is much easier and more convenient.
Here's another picture that I got. Hover the mouse over and see the original. Here, however, I had to work a little with masks for additional blurring of the background:
For those who want to apply this approach in their work on a regular basis, I recommend making an Action for Photoshop in which you can record all the necessary actions, as a result, the process of turning any photo into a pencil drawing will take a couple of minutes.
This is one way. The result, in principle, is not bad, it may be suitable for certain tasks, but, alas, it is far from the real drawing. To fully master the technique of translating a photo into a pencil drawing, I suggest another method in which there are no filters and the final result will depend only on your artistic taste.
Pencil drawing from a photo without filters
This option is more like drawing and you will have to rely on your inner sense of proportion and harmony. From the same picture, you can get completely different results... But, as they say, the more interesting.
It is important to choose a good, high-contrast photo. The more expressive the eyes and facial features are, the more likely you are to get a high-quality drawing at the output.
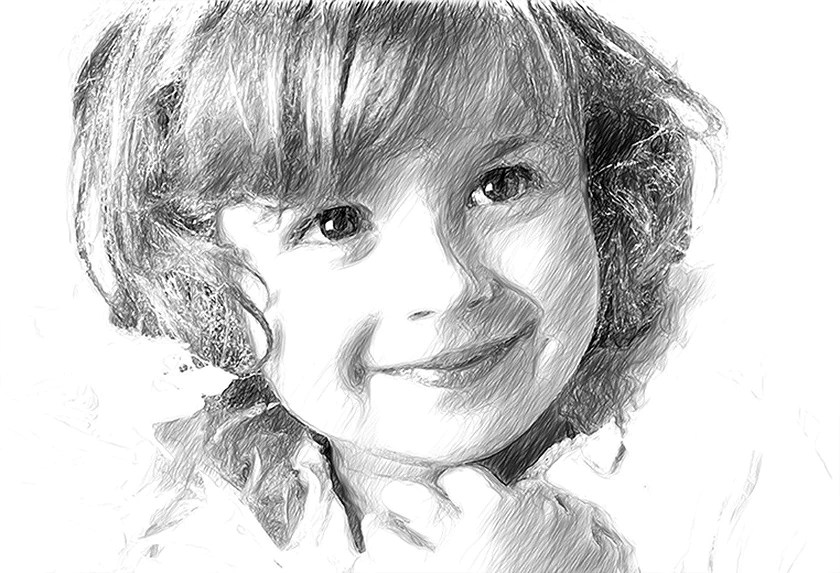
I chose a photo of a girl with a snow hat. The contrast is good, the eyes are expressive. In my opinion, translation into pencil can give a photo lightness, airiness, great consonance. inner peace child. Which, in the end, happened. On mouse hover, you can see the difference between the original and the final result:
Now let's look at what needs to be done for this.
- Take our photo and make two copies with a keyboard shortcut Ctrl + J, on the palette of colors Main color- white, background - black;
- The top layer is called Crib, keys Ctrl + Shift + U we decolorize it, Layer transparency install on 40% ;
- The second layer is called Drawing, Ctrl + Shift + U we decolorize it, Layer - Layer Mask - Hide All- make a layer mask;
- Create a new layer above the Main Image, fill it with white;
- Highlight Layer mask on layer Drawing, we will draw on it;
Here's what we should get at this stage:
How to create the desired layers for a pencil drawing from a photograph
First brush - Pencil line
To select the most expressive elements of the image, we need a Brush that looks like a pencil trail.
- Choosing a tool Brush- key B, turn on Brush control panel F5;
- Choose a regular, hard-edged round brush and set the size to 2-6 pixels. I put 4 px;
- We put a tick in the paragraph Form dynamics (Shape dynamics) – Fluctuation in size (Size Jitter) put on 60% ;
- Diffusion (Scattering) – Diffusion put 43% ;
- Broadcast (Other Dynamics) – Fluctuating Opacity (Opacity jitter) put on 10% ;
- Upper right corner of the Brush Control Panel - select New set of brush options- Save our new brush under the name Pencil line;
You can start with the initial sketch. The task at this stage is to carefully select the necessary parts of the drawing for greater expressiveness. Start, preferably as carefully as possible, set the transparency from 10 to 30%. Here it is better not to finish drawing a little, then, towards the end, you can make the necessary selections again.
Don't be afraid to make a mistake. Remember, we are working on the Mask, and in this mode the white brush only develops the image of the lower layer.
This is what I got at this stage with the layer turned off. Crib... I deliberately did not begin to finish drawing all the details, it is better, in my opinion, later, on final stage add the necessary finishing touches:
Initial sketch of a pencil drawing
Second Brush Pencil Hatch
Now it's time to move on to shading. For this you need a special brush.
- Turn off the visibility of the Picture and Cheat Sheet layers;
- We do main color Black Transparency put on 100% ;
- Pencil line brush, make the thickness 2px and draw a line with the key pressed down on the white layer Shift, the length of the line is approximately 80px;
- Magic Wand (W) select this line;
- Editing - Define Brush- save this new brush under the name Temporary, remove the line from the white layer;
- We include F5 Brush Control Panel and we carry out desired settings for a new brush;
- Form dynamics (Shape dynamics) – Fluctuation in size (Size Jitter)60%, Angle Fluctuation ( Angle jitter) – 3% ;
- Diffusion (Scattering) – Diffusion — 43% ;
- Broadcast (Other Dynamics) – Fluctuating Opacity (Opacity jitter) — 10%, Fluctuation of the amount of paint ( Flow jitter) – 80% ;
- Brushprint shape (Brush Tip Shape) – Intervals (Spacing) - 70%, Angle ( Angle) set the value (-20 degrees);
- Save a new brush with the name Pencil shading;
Adjusting the transparency of the brush Pencil shading by 5-10% and begin to carefully hatch our drawing. You can turn off the Cheat Sheet layer so that you can immediately see what appears on the white sheet.
Gradually changing the brush size, opacity and angle of the brush can achieve a very good result. Do not be lazy, change all these values more often, thereby you bring your creation closer to a real pencil drawing.
If necessary, the necessary areas can be additionally processed with the Pencil-line brush.
And do not forget the simple truth, it is better not to finish a little than to overdo it. Gradually, with mastering the technique, a stable understanding of when to stop will be formed.
This is the technique. There is nothing difficult, you just need a desire and a little time to master. And the results can be quite interesting.
Good luck to everyone and unusual creative solutions.
Often users want to know how to make a drawing out of a photo in order to later print the photo and store it as a drawing.
Consider the most effective ways.
First, let's take a look at several popular services with which you can quickly create a picture effect on a photo without installing an additional software on computer.
Photo Phunia Service
On this site, users can take advantage of an automatic effect, with the help of which an ordinary picture is converted into a drawing.
You can also choose the background texture of the source file: color, white or "special".
To get started, select the file on your PC. To do this, click the Browse button on the website.
Then define color range images (black and white or color).
Click on the shape of the texture you want to output and click on the "Create" button to start the process of converting the file.
In a few seconds, a direct link will be generated to download the picture from the site.

Croper service
The next popular site for creating a drawing from a regular picture is Croper. This online photo editor allows you to apply additional effects to your photo.
With its help, you can create a unique image without loss of quality.
One of the most popular features of this site is the pencil drawing feature.
The transformation of the file occurs by creating darker tones of the image, then strokes are gradually superimposed on the layers of the picture, which, in turn, make a sketch from the picture.
The editor interface is very simple. Upload the file to the site by clicking on the appropriate button.
The picture will open in a new site window. After that, find the main menu tabs - they are located at the top of the site.
Click in turn on "Operations" - "Effects" - "Pencil".

At the top of the page, select a stroke length setting and a slope level.
Then press the Apply button to start the process of converting the image.
It will take less than one minute. If necessary, you can adjust the contrast of the final image.
The result of Croper's work is shown in the figure below.

Create a picture in Adobe Photoshop
With help, you can also create a pencil drawing from a regular picture.
Using the built-in functions of the program, you can achieve a better display of all strokes and the resulting picture will look natural.
The effect of the picture will be very clearly visible if you print it on a printer. For more effect, you can use white or craft paper.
All of the steps below were performed in Photoshop CS6. The functions used are available in earlier and in all new versions of the application.
We will use a regular scanned photograph.
We recommend that you do not use small pictures while working in Photoshop, because after applying the "picture" effect, some of the pixels may be blurred, which will worsen the quality of the final image small size.

First, we need to copy the original image.
To do this, open the picture in the program, wait for the toolbar to load and press the F7 button. Then click on the combination of buttons Ctrl - J.
This will create a duplicate layer.

Read also:
To do this, click on the Image item (main menu of the program). Click on "Correction" - "Inversion".
Also, to apply discoloration to a layer, just press the Ctrl and I keys at the same time.
As a result of desaturation, we get the negative of the image, and not its black and white version. All the light areas of the photo will become dark, and the dark areas will become light.

In the layers panel, the resulting negative will be displayed as a second copy of the original layer. Next, let's change the display mode of the layer.
Click on layer 2 and in the "Mode" line open the drop-down list. Click on Color Dodge.

After changing the mode, the project canvas will turn completely or partially white. On the main menu bar, click "Filter" - "Blur".
Select "Gaussian Blur" from the list provided. In the window that opens, adjust the slider to create a level of blur.
The higher the value of this indicator, the brighter the picture becomes, acquiring the outline of the drawn one.

Important! Don't overdo it with the blur filter, otherwise the photo may become too light and the pencil effect will be lost. The optimal value for blur is 12.5 - 13 pixels.
This method of desaturation allows you to achieve maximum clarity of the strokes of the picture, pixels are not lost, the resolution of the picture is preserved.
As you can see, the picture has acquired the outlines of a pencil, but did not become too light.
Go to the window for working with layers and select the very first layer, as shown in the image below. Then, move the pointer to the layer name and wait for the context menu to appear.
In it, click on the item "Merge visible layers". Hold down the Alt button and select all three layers that need to be merged with the pointer.

Select the topmost layer (layer 1). You need to change the display mode to "Multiply". This darkens each sketch line, giving the sketch more naturalness.
The lines shouldn't be too dark. If this happens, adjust the Opacity to 50%.
It is necessary that the color of the "plain" pencil is preserved.

This can be the end of the work. As a result, we get black and white sketch original photograph.
If you want to add some color to the sketch, create a copy of the background layer by pressing Ctrl - J.

Now we only need to change the display color parameters of the duplicated layer.
Select the "Color" mode and in the line Transparency set the value to 65%, as shown in the picture above.
The final result of converting a picture to a sketch will look like this:

Creating a drawing from a regular photo in Photoshop will take you no more than 10 minutes, even if you are not an advanced user.
This method allows you to achieve the highest quality effect of a picture drawn with a pencil.
AKVIS Sketch allows you to turn a photo into a pencil sketch.
Now you do not need to masterfully own a pencil to create an original work of art.
It is enough to have a little imagination and AKVIS Sketch!
The program turns photographs into sketches made pencil or coal, allows you to create not only black and white pencil sketch, but also color drawing and also get the effect of watercolors and pastels.
The drawings created by the program can compete with the real works. Sketch lets you get amazingly quality result, similar to the work of an artist.
If you've always dreamed of learning how to draw, but didn't know how, try AKVIS Sketch!

The program features two main styles that allow you to create drawings with different types shading: Classical and Art... Each style comes with a selection of ready-made presets.
An intuitive interface, the ability to select parameters using a quick view window, a tooltip bar and a rich collection of presets will help you quickly get used to the program and learn how to create your own masterpieces.

The transformation of a photo into a drawing takes place before your very eyes. Frame tape allows you to track the process of converting a photo at different stages and get pictures of different degrees of elaboration without changing the effect parameters.

Using the program, you can prepare illustrations for a book or article, create a unique greeting card, an interesting avatar, a poster or a picture on the wall, a print for a t-shirt.
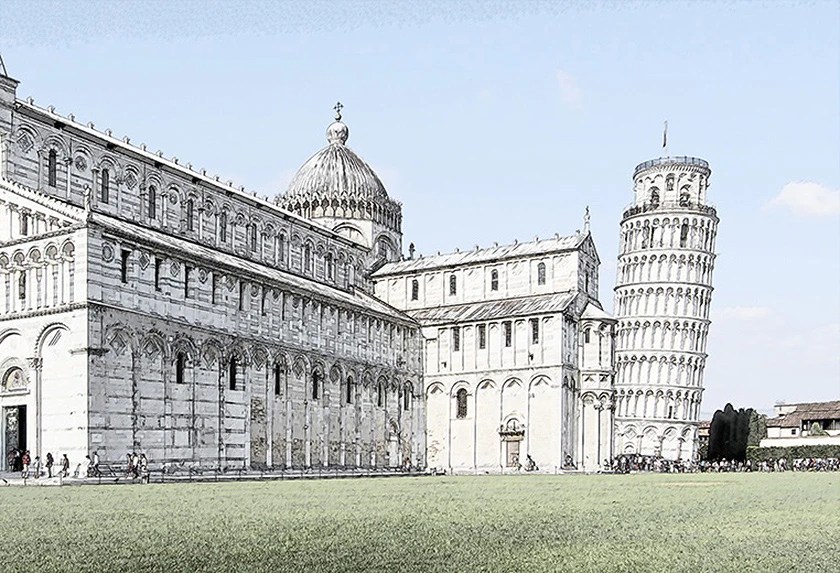
The program is good not only for processing portrait photographs, but also types of nature, architectural monuments. Sketch is used by professionals to demonstrate the features of architectural styles, prepare presentations. The program is indispensable when working on a promotional brochure or website, when you need to present a set of images in the same style.
AKVIS Sketch makes everyone feel like an artist!


Batch processing of files helps to quickly, in automatic mode, turn into drawings great amount photos, create cartoons, comics.
Using bookmarks Background, Canvas and Inscription you can add additional effects to the image: get a combination of photography and drawing, simulate drawing on a different kind