Abstract of GCD for NGO "Artistic creativity" (drawing) in the second junior group "Herringbone is a green needle. Abstract of a drawing lesson in the II junior group "Christmas tree with balls
Topic: "Christmas tree for the holiday"
Software content:
Preliminary work:
Concept formation:
Surprise moment;
Questions;
Directions;
Reminders;
Praise;
Examining the fir;
Artistic word;
Showing the finished sample;
Pictures of the New Year's tree;
Show progress of work.
Material:
Lesson structure:
1. Introductory part:
Creation of a problematic situation;
Surprise moment;
2. Main part:
Work progress display;
Completing the assignment;
3. The final part:
Summarizing;
Reflection;
Download:
Preview:
Abstract of GCD in the second younger group"Artistic and aesthetic development" (drawing).
Topic: "Christmas tree for the holiday"
Integration educational areas:
Artistic creation(drawing), cognition (FEMP), communication, socialization, physical culture.
Software content:
Clarify the knowledge of children about eating, repeat the concepts of size: "high", "low";
Continue to learn to gently use paint and brush;
Continue to learn to paint over the object completely, without leaving white spots and without going beyond the outline of the image;
Continue to learn how to poke paint;
Encourage others to help, be responsive;
Preliminary work:
1. Conversation about winter, oh new year holiday.
2. Learning poems and songs about the New Year, about Santa Claus;
3. Examination of pictures on the New Year theme;
4. Observation of the spruce while walking;
Concept formation:
"High", "low", "prickly", "fluffy", "odorous".
Methods and techniques: (visual, verbal, practical)
Creation of a problematic situation;
Surprise moment;
Questions;
Directions;
Reminders;
Praise;
Receiving a planned error;
Examining the fir;
Artistic word;
Showing the finished sample;
Pictures of the New Year's tree;
Show progress of work.
Material:
Artificial spruce; ready sample big size; a picture of a Christmas decorated Christmas tree; pre-prepared ate templates; paint green and white; hard brushes; napkins.
Lesson structure:
1. Introductory part:
Creation of a problematic situation;
Surprise moment;
2. Main part:
Work progress display;
Comparison of Christmas trees in height;
Physical education "Buratino";
Completing the assignment;
Setting a task for the next lesson (decorating Christmas trees);
3. The final part:
Summarizing;
Reflection;
Course of the lesson:
IN: -Hello guys! (children say hello in return)
D: - Hello!
IN: -Guys, this morning, when I was going to kindergarten, I met Santa Claus! Can you imagine ?! But for some reason he was sad, saddened. I asked him: “Santa Claus, why are you not funny? Soon a holiday, New Year, the guys are waiting for you to visit! " And he answered me: “How can I not be sad, the New Year is coming soon, I need to decorate Christmas trees for matinees, but I have no time at all! There are a lot of children and kindergartens, but I can’t cope alone, I’m afraid the children will be left without a Christmas tree ... ”And I answered him, children:“ Don't worry, Grandfather Frost, the guys and I will help you - we will draw a lot of New Year's trees, and you will be in time! Our kids are always happy to help! "
Santa Claus was delighted with my words, because I promised to help him. We will help Santa Claus by drawing beautiful Christmas trees?
D: - yes.
IN: - to make the Christmas trees beautiful, a Christmas tree has come to visit us, look at it! We will look at her and draw the same beautiful Christmas trees! (the teacher opens a pre-prepared artificial Christmas tree, standing on the table, covered with white cloth):
Christmas tree
On shaggy, prickly paws
The Christmas tree brings a smell to the house:
The smell of heated pine needles,
The smell of freshness and wind
And a snowy forest
And the barely audible smell of summer.
Y. Shcherbakov
IN: - Really, guys, the Christmas tree is very beautiful? What color is it? And what about the Christmas tree instead of leaves?
D: green. Needles.
Q: - Well done!
See what beautiful herringbone I drew. You like? (showing the finished work on a large sheet). Now I’ll show you how I drew it, and then you’ll draw it yourself, would you like? Then watch carefully and remember!
I take clear sheet, position it correctly. Then I take in right hand brush. How to take it correctly? Like this? (points incorrectly, children answer) Or maybe this is correct? (again picks up the brush incorrectly, the children answer) is that correct? (takes it right, the children answer) Well done! I will draw with a jab. I dip the brush into a palette with green paint, I only dip the nap, like this. (shows). It is necessary to collect a little paint on a brush, only on its edge.
When poking, the brush should be in an upright position, then the pile is flattened and a large"Fluffy" point.
Guys, where am I going to start painting over my Christmas tree? That's right, bottom-up, like this. Do I go beyond the contour? No! I draw neatly, I don’t go beyond the contour, I paint over everything, I press the brush from left to right in rows, I don’t leave white spots. Now I wipe the brush and take white paint, sprinkle our Christmas tree with fluffy snow.
So I drew a Christmas tree, look, guys! Beautiful? Now look at what kind of Christmas trees I got (places the just painted template to the previously drawn Christmas tree, they are different in size) Guys, are they the same or different? (children's answers) Why did you decide that? (children's answers) That's right, guys, they are different. One tree is tall and the other is low. What is this tree? (shows high) Right! And this? (gestures low) Good girls!
Guys, let's get some rest, and then let's get to work. Let's all get up and have some fun physical activity:
Physical education on the poem "Fir"
The spruce stands under the blue sky,
On which the stars sleep.
(We are in a standing position, arms outstretched below - we spread our arms and legs a little to the sides, we keep our palms parallel to the floor - we represent a spruce. Raise our head up, stretch our neck - we try to see the stars "in the sky")
All it was painted with frost
From head to toe.
(We raise our outstretched arms up above our head and, making smooth movements with our palms from side to side, we slowly bend over and lower our arms in front of us to the floor - this is how we “painted” the whole Christmas tree with “palms-brushes”)
Pure pearls sparkling
In a choppy, ringing silence,
(We depict pearls with the fingers of both hands - large and index finger we connect each hand in small circles. We make abrupt movements with our hands in different directions, bending and straightening our arms - we show how brightly our tree sparkles)
Such an elegant spruce -
Like a fairy tale by the moon.
(We return to the starting position, depicting a Christmas tree: the legs are slightly shoulder-width apart, the outstretched arms are slightly apart, the open palms are facing the floor. our tree!)
Touching the clouds with my shoulder
(Again we stand "with a herringbone". Raise the right and left shoulder in turn)
She catches thick snow.
(We jump as high as possible and at the same time clap arms outstretched overhead - "catching snow")
Even a hare stood on its paws
Before this beauty!
(We represent a bunny standing on its paws: we squat down, keep our hands at chest level. Being in this position, we look up and tilt our head alternately to one side and the other - we show how the bunny admires a beautiful Christmas tree)
IN: -Well, have you had a rest? Sit down! Then we sit down correctly, the back is straight, the legs under the table sit quietly. Now I will distribute leaflets to everyone, and you can get to work. Here Santa Claus will be delighted! Children start painting the patterns of Christmas trees, while the teacher constantly reminds them how to hold the brush, how to use the paint, constantly encourages and praises the children, makes comments if necessary, and helps.
What good fellows you are all, you are trying so hard for Santa Claus, glorious Christmas trees are obtained!
Guys, what did we do today? Who did you help? Did you like it? You are great! Admire your Christmas trees, how beautiful it turned out! Now Santa Claus will definitely do everything thanks to you. And how neatly you worked, everyone has clean tables, hands, no one got their clothes dirty. Our lesson has come to an end.
Current page: 5 (total of the book has 8 pages) [available passage for reading: 2 pages]
Lesson 30. Molding "Cookies"
Software content. Strengthen the ability of children to roll out clay in a circular motion; flatten the ball, squeezing it with your palms. Develop a desire to sculpt. Continue to practice modeling skills. Strengthen the ability to accurately work with clay (plasticine).
Methodology for conducting the lesson. Invite the children to make cookies for playing with dolls (to the "store", on "birthday", on "guests", etc.).
Consider round cookies with children, clarify their shape (round, flat). Ask the guys: "How can you make cookies?" If no one answers, say that you first need to roll a round ball, and then squeeze it with your palms.
For children who will have difficulty flattening the ball, show this technique on a separate lump of clay or by taking the child's palms in theirs and lightly squeezing the ball.
Materials. Biscuit. Clay, boards, sticks for drawing a pattern on cookies (for each child).
During games, walks, consider flat round objects with children.
December
Lesson 31. Drawing "Snowballs, large and small"
(Option "Fluffy Toy")
Software content. Strengthen the ability of children to draw round objects. To teach the correct techniques of painting with paints (without going beyond the contour, draw lines with a brush from top to bottom or from left to right). Learn to repeat the image by filling free space sheet.
Methodology for conducting the lesson. Remember with the children how they sculpted lumps out of snow on a walk, clarify their shape.
Invite them to remember with their hand in the air, and then make a circular motion with their hand and brush.
Show the shading technique on the board. Make children want to paint.
Note. This lesson can be done collectively. In this case, the children draw (in subgroups) on a large sheet of paper.
Materials. Sheets of colored paper A4 or slightly larger (depending on the size of the brushes), white gouache, jars of water, brushes, napkins (for each child).
Connection with other occupations and activities. Children play with snow while walking. Examination of illustrations, fluffy toys.
Lesson 32. Sculpting "Flatbreads, large and small"
Software content. Continue teaching children how to pinch off large and small lumps from a large piece of clay; roll out lumps of clay in a circular motion. Strengthen the ability to flatten the ball by squeezing it with your palms.
Methodology for conducting the lesson. Invite children to remember and show in the air the techniques of sculpting a cake, encourage them to name the actions performed: "I broke off a piece of clay, put it on my palm, rolled a ball with both palms and squeezed it with my palms - it turned out a cake."
If the children cannot name the sequence of actions, turn on and name the actions, activating the children and asking them: "What to do next?" Words accompanying the process of depicting will help children to understand and remember what and how to do.
Invite children to make cakes, large and small. Ask to name what else they sculpted similar to flat cakes.
When the cakes are sculpted, praise the guys for sculpting diligently; offer to treat dolls with cakes.
Materials. Clay, boards, sticks for decorating sculpted cakes (for each child).
Lesson 33. Molding "Rattle"
Software content. Teach children to sculpt an object consisting of two parts: a ball and a stick; connect the parts, pressing them tightly to each other. Exercise in rolling the clay with straight and circular movements of the palms.
Methodology for conducting the lesson. Consider 2-3 rattles with the children, clarify their shape and structure, offer to "draw" rattles in the air with the fingers of one hand, then the other.
Ask the children about sculpting techniques. Invite them to show them in the air with their hands how they will roll the clay for the parts of the rattle. To say that every child can make whatever rattle he wants.
In the process, monitor the use of the correct sculpting techniques. The children who quickly coped with the work should be given additional lumps of clay so that they can mold one more toy at a time.
Consider all sculpted rattles with children, note the variety of toys; to motivate the children to make statements about the shape and structure of rattles.
Materials. 2-3 rattles of different designs. Plasticine of different colors or clay, boards (for each child)
Connection with other occupations and activities. Games in the play corner, examining rattles, clarifying their shape.
Lesson 34. Drawing "Trees on our site"
Software content. Teach children to create an image of a tree in drawing; draw objects consisting of straight vertical and oblique lines, arrange images all over the sheet of paper, draw large, over the entire sheet. Continue learning to paint with paints. Methodology for conducting the lesson. Remember with the children the peculiarities of the structure of trees. You can invite them to go to the window and once again look at the trees that grow on the site of the kindergarten, on the street.
Invite the children to show together with the movement of their hands how the trunk and branches of the tree are located. Call a few guys to the board to demonstrate the techniques of the image.
At the end of the work, consider all the drawings with the children. Mark how many different trees they drew - the whole forest turned out.
Note. This lesson can be done collectively. For a collective composition, you should prepare big leaf paper, placing it on a separate table, to which 2-3 children will approach and draw. The rest of the children draw on their sheets of paper at this time. Collective composition can be supplemented with relevant images in free time... (This activity is organized by the educator, discussing with the children what may still be in the forest (bushes, broken branches of trees lying in the snow, etc.).) Encourage the activity and creativity of children who have come up with something of their own. At the end of the work, consider the big picture, Mark beautiful trees; offer to hang the picture in a group to admire it, show it to parents.
"Tree in winter"
Kostya I., 2nd junior group
Materials. White paper 1/2 of a landscape sheet (or a large sheet for a collective composition), gouache paints, cans of water, brushes, napkins (for each child).
Connection with other occupations and activities. Walking observations; examining different trees, including hand movements to outline branches and trunk. Draw the attention of children to the color of tree trunks and branches.
Lesson 35. Application "Pyramid"
Software content. Teach children to convey the image of a toy in the application; depict an object consisting of several parts; arrange parts in decreasing order of magnitude. Consolidate knowledge of colors. Develop color perception.
Methodology for conducting the lesson. Consider the pyramid with children, clarify the shape, size of its parts.
Together with the guys, determine the gluing sequence. In the process of work, direct their actions by asking questions about the procedure for gluing. To draw the attention of children to the need to use the correct gluing techniques.
Consider all the resulting pyramids, invite the children to name their colors. Highlight the most beautiful works.
Materials. Pyramid (preferably consisting of balls or rings of the same color). Album sheets, paper mugs (different colors for different tables), glue, glue brushes, napkins.
Connection with other occupations and activities. Children play with objects and toys of various sizes, round; disassembling and collecting pyramids and other toys consisting of round parts (caterpillar).
Lesson 36. Drawing "Herringbone"
Software content. To teach children to convey the image of a Christmas tree in drawing; draw objects consisting of lines (vertical, horizontal or oblique). Continue to learn how to use paints and a brush (rinse the brush in water and blot it on a cloth (napkin) before picking up paint of a different color).

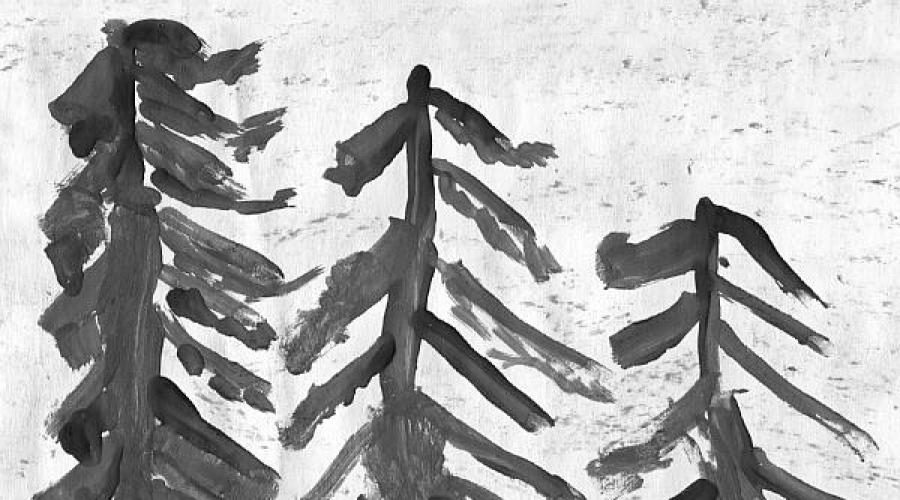
"Fir-trees"
Ira F., 2nd junior group
Methodology for conducting the lesson. Remind children about the New Year's holiday. Consider the Christmas tree with them, including showing its shape with a hand movement in the air. Call 2-3 children (those who have mastered the methods of drawing well) to the board for drawing a Christmas tree.
The guys who will quickly cope with the work can be given another sheet of paper. If a child places several Christmas trees on one sheet, he should be praised for independence, creativity; emphasize the variety of created images.
At the end of the lesson, put all the drawings on the board, be glad that there are many different Christmas trees (small, tall, slender, fluffy, etc.). This activity can be done as a group.
Materials. 1/2 landscape sheet paper, dark green gouache, brushes, cans of water, napkins (for each child).
Connection with other occupations and activities. Examination of the tree (s) in the kindergarten area, the tree in the group room; comparing the tree with other trees. Reading poems about the New Year's holiday. Examination of illustrations in children's books, highlighting the main parts and features of firs.
Lesson 37. Molding "Turret" ("Pyramid of discs, rings")
Software content. Continue to teach children to roll the lumps of clay between their palms in a circular motion; flatten the ball between the palms; make up an object from several parts, superimposing one on top of the other. Strengthen the ability to sculpt neatly.
Methodology for conducting the lesson. Consider the turret with the children, clarify what parts it consists of. Invite all the children to show in the air how they roll the clay in a circular motion with their palms.
Teach children to achieve the transfer of the difference in rings in size; pinch off excess clay from a lump if it turns out to be larger than necessary.
Consider all the fashioned products, rejoice with the children at how many beautiful turrets have turned out, consisting of rings of different sizes.
Materials. A turret consisting of 4–5 rings of the same color. Clay, boards (for each child)
Connection with other occupations and activities. Games with turrets "Who will most likely collect?", "Collect the same." Exercise children in comparing objects of different sizes in the process of games.
Lesson 38. Drawing “Acquaintance with Dymkovo toys. Drawing patterns "
(Option "Beautiful toy" - drawing by design)
Software content. To acquaint with folk Dymkovo toys. Arouse the joy of looking at a bright, elegant painted toy. Draw the attention of children to the patterns that decorate the toys. Learn to highlight and name individual elements of the pattern, their color.
Methodology for conducting the lesson. Put the children around a table with Dymkovo toys. Offer to consider them; tell that these smart, bright toys are made of clay, covered with white paint, and then painted with bright patterns.
Invite children to select and name patterns, give them the opportunity to draw a finger along the lines of the pattern and name its parts. If the guys find it difficult to answer, ask them (repeating the movement with your finger along the contours of the pattern elements) what this shape is called (ring, strip, speck), what color it is.
Invite the children to come to the tables in a long row and draw patterns, whoever wants what.
At the end of the work, invite the children to look at all the drawings, say what patterns they drew, name their color and shape.
Materials. 3-4 Dymkovo toys, decorated simple patterns... Album sheets, gouache paints (2-3 colors, one for two standing next to children), brushes, water, napkins (for each child).
Connection with other occupations and activities. When considering the design of a group room, draw the attention of children to Dymkovo toys, admire them, note their brightness, elegance, beauty; offer to name the objects transferred to them, to highlight decorations (lines, specks, dots; their color).
Lesson 39. Sculpting by design
Software content. Develop the ability to independently think about the content of the sculpting. Exercise in a variety of sculpting techniques.
Methodology for conducting the lesson. Invite children to name beautiful toys and objects around them, seen on a walk. If any of the named items are in the group, consider them with the children.
Offer the guys to dazzle whoever wants what. Remind you of the correct sculpting techniques. Encourage independence, perseverance.
Collect all objects sculpted by children on a common board.
Praise the children for their diligence and tell them a fairy tale invented by the teacher, including sculpted objects in action.
Materials. Clay (plasticine, plastic), boards (for each child).
Lesson 40. Application "Stick what kind of toy you want"
Software content. Develop imagination, creativity of children. Consolidate knowledge about shape and size. Exercise in the correct techniques for composing images from parts, sticking.
Methodology for conducting the lesson. Ask the children to name toys that are round or made of round parts.
To say that every child should think about what he would like to stick, and then compose the image on the sheet. Check the correctness of the task and allow the children to start gluing. Encourage the sticking of multiple items.

"Cheburashka"
Anya B., 2nd junior group
Everything finished work put on the board or spread out on the table, consider them with the children, offer to name the toys depicted.
Praise the guys and rejoice with them bright, beautiful pictures... Ask the children to name the shape and color of the toys shown.
Materials. 3-4 toys of a round shape or consisting of round parts (rattles, balls, pyramids, etc.). Multi-colored paper mugs of different sizes, album sheets, glue, glue brushes, napkins (for each child).
Connection with other occupations and activities. Toy games; clarification of the shape, structure, color of toys.
Lesson 41. Drawing " Christmas tree with lights and balls "
Software content. To teach children to convey the image of an elegant Christmas tree in a drawing; draw a Christmas tree large, in the entire sheet; decorate it using the techniques of dipping, drawing round shapes and lines. Develop aesthetic perception, form figurative representations. Introduce pink and blue flowers... Evoke a feeling of joy from beautiful drawings.
Methodology for conducting the lesson. Before the start of the lesson, consider with the children elegant Christmas trees in the group, in the hall. Emphasize that the Christmas tree in the hall is very high - from floor to ceiling. Draw the children’s attention to the Christmas tree decorations that they can draw (balls, beads, rain threads, flags, etc.), their shape and color.
Invite the guys called to the board to show on a Christmas tree cut out of paper how it can be decorated (lights, balls, silver threads, beads) and what tricks it can be done. (The teacher shows the adhesion technique.)

"Beautiful balls and an elegant Christmas tree"
Julia P., 2nd junior group
At the end of the lesson, admire the bright drawings with the children, name the colors used (pink, blue).
Materials. Album sheets; gouache paints green, yellow, pink, blue, white; brushes, jars of water, napkins (for each child).
Connection with other occupations and activities. Participation in the New Year's holiday, viewing the Christmas tree and Christmas tree decorations... Playing with toys, didactic games to consolidate knowledge about the shape and color of objects. Invite the children to tell what trees they have at home, what they are decorated with.
Lesson 42. Drawing "Let's decorate a house mitten"
(Integrated lesson based on theatrical action)
Software content. Teach children to draw based on the fairy tale "Mitten", create fabulous image... Develop imagination, creativity. To form the ability to decorate an object. To consolidate the ability to use paints of different colors in the process of drawing; rinse the brush cleanly and dry it on a napkin before taking another paint.
Methodology for conducting the lesson. After watching the play “Mitten”, invite the children to decorate the mitten so that the animals have a new, beautiful house.
Ask the guys how you can decorate a mitten with a brush and paints.
Invite the children to name the colors of the paints that stand in front of them on the tables. Ask how to properly hold the brush, draw paint on it, rinse the brush. In the course of the lesson, remind drawing techniques, methods of decoration.
Together with the children, consider ready-made drawings, enjoy the variety of decorations. You can take the little animals in your hands, show them new mitten houses and ask: "Do you like the houses that the guys drew for you?", Praise all the children.
Materials. Mitts cut out of paper by a teacher, gouache paints of 4-5 colors, brushes, cans of water, napkins (for each child).
Connection with other occupations and activities. Consider clothing decorations, Dymkovo toys with children. Reading Belarusian folk tale"Mitten" (Book for reading in kindergarten and at home. 2-4 years. Compiled by V.V. Gerbova, N.P. Ilchuk. - M .: Onyx, 2005).
Lesson 43. Modeling "Tangerines and oranges"
Software content. Strengthen the children's ability to sculpt round objects by rolling the clay in a circular motion between the palms. Learn to sculpt objects of different sizes.
Methodology for conducting the lesson. Consider tangerines and oranges with children (you can take other fruits or objects of different sizes), determine their shape and size. Clarify the amount of clay needed to sculpt large and small objects.
Invite the children to show the technique of rolling clay with a gesture in the air.
Children who finish their work earlier than others can be given an extra lump of clay. Ensure that children more clearly convey the difference between objects in size. Enjoy all the images created together.
Materials. Tangerines and oranges (or other round objects of different sizes). Clay, boards (for each child).
Connection with other occupations and activities. IN Everyday life and in the process of games to enrich children's ideas about round objects of different sizes, for different purposes (toys, vegetables, fruits).
Lesson 44. Drawing "Let's decorate the Dymkovo duck"
Software content. Continue to acquaint children with the Dymkovo toy. Learn to highlight the elements of the painting, apply them to a duck cut out of paper. Cause joy from the resulting result; from the brightness, beauty of the Dymkovo painting.
Methodology for conducting the lesson. Consider with children 2-3 Dymkovo toys. Ask how the toys are decorated, suggest to name the decoration elements (stripes, adhering spots, dots). Invite the children who wish to show on a sheet of paper, pinned to the board, how they will decorate their ducks.
Then invite the children to paint with a pattern of white ducks. Clarify the correct techniques for working with paints. Put all the painted ducks on the table, admire them with the children. Note that all the ducks turned out to be bright, elegant, beautiful.
Materials. 2-3 Dymkovo toys. Ducks cut out of white paper by the teacher (the length of the silhouette of a duck is 10–12 cm), gouache paints of 2 colors (different color combinations on each table), brushes, napkins, jars of water (for each child).
Connection with other occupations and activities. In my free time, we can examine Dymkovo toys with children, their bright elegant painting.
Lesson 45. Application "Beautiful napkin"
Software content. Teach children to make a pattern on square paper, placing large circles of the same color in the corners and in the middle, and in the middle of each side – small circles of a different color. Develop compositional skills, color perception, aesthetic feelings.
Methodology for conducting the lesson. Tell the children that today they will be decorating a napkin. Remind them that they have already looked at different decorated items. Consider two samples of napkins with the children, ask how they are decorated. Remind you that you first need to lay out the mugs on a sheet of paper. Clarify the order of the arrangement of the figures and offer to carefully glue them.
Put all the finished works on the board, mark the most beautiful napkins in composition, color combination. Encourage children to speak out (name the figures, their color; tell how the decorations are located).

"Cat and toys: bear, ball, ball"
Lena T., 2nd junior group
Materials. Two samples of napkins, different in color. White paper 15x15 cm in size, paper mugs of different sizes (3 cm and 2 cm in diameter), well combined in color (2 colors per table, different combinations for different tables), brushes, glue, napkins (for each child).
Connection with other occupations and activities. Examining items decorated with simple decorative patterns, Dymkovo toys, napkins, etc.
elmira debt
1. Teach children draw an item consisting of vertical and oblique lines, draw straight lines(short, long); learn to position the image on a piece of paper.
2. Continue to teach correctly, hold the hand without straining the muscles or tightly squeezing the fingers; recruit paint on a brush: gently dip it with all the nap in a jar of water; remove excess paint on the edge of the jar with a light touch of the pile; develop aesthetic perception.
3. Foster children's interest in drawing.
Vocabulary work
A) Active dictionary: herringbone, green, long, short.
B) Passive vocabulary: line.
Previous work - observation of the spruce while walking.
Individual work
Help Eric distinguish colors.
Equipment and materials:
A) Demonstration material: pictures with a picture of a Christmas tree.
B) Handout: album sheet, paints, brushes.
Lesson structure and methodological tricks:
1) Beginning of the lesson (2-3 min.)
A) Artistic word
B) Conversation
C) Questions for children
2) Main part (10-12 minutes)
A) Show with explanation
B) Indication
C) Questions for children
D) Incentives
3) The final part (2 minutes)
A) Encouragement
B) Gratitude to children
Course of the lesson:
Guys, now I'm going to give you a riddle, and you have to guess it. Listen carefully.
- "In winter and summer in one color".
Guys, what do you think this is?
Christmas tree. That's right, well done!
It was not by chance that I asked you this riddle, guys, today we will be with you draw a herringbone.
Please tell me what color is the tree?
Yes, we have a green Christmas tree. Both winter and summer in one color.
The tree has a trunk. There he is. And branches.
Look, and the branches of the Christmas tree, what are they? Short or Long?
At the bottom, the branches are long-long, and at the crown they are short.
- Repeat after me long, short.
Well done!
There are needles on the branches of the Christmas tree.
Showing how we will draw a herringbone... We are watching everything carefully.
Is our Christmas tree green? I take a green paint and draw a line... This is the trunk.
We have a trunk, we must draw branches... Our branches grow upward, reaching out to the sun. Beginning draw branches... I do not forget that the branches are long at the bottom. I draw a branch on the left, and now on the right. Again on the left and again on the right. At the top of the Christmas tree, I draw shorter branches. Here.
Did you get a Christmas tree?
And now the guys have raised their tassels. All together we draw a line in the air. Here. Branches went from the trunk. We start from the bottom. The branches are long on the right, on the left, again on the right, on the left ... Closer to the crown, the branches become shorter.
Like this. Well done!
Guys, now put the sheets exactly as I am showing you now.
Did you put everything right?
We take a brush in our hands. We hold the brush with three fingers of the right hand.
Well done!
Now dip the brush in a jar of water, do not forget to squeeze the brush on the edge of the jar.
We type with a brush green paint... And we begin paint.
Eric, where are we green color... That's right. Well done!
Guys, let's try to have Christmas trees beautiful.
What do you all have beautiful Christmas trees! What good fellows you are all with me!
Guys, did you like it paint?
And that today we are with you painted?
Now we will put the drawings on the windowsill, let them dry.
Then we will arrange an exhibition. So that parents can also admire your work.
Related publications:
Purpose of the lesson: Arouse interest in creating the image of flowers using various non-traditional techniques. Create conditions for experimentation with.
Summary of the lesson on familiarization with the outside world "My group" (second junior group) Lesson summary Acquaintance with the outside world Topic: "My group" Tasks: Remind the children of the location of the premises (entrance hall, locker room ,.
Registration of a plot in the second junior group of kindergarten No. 63 in Magnitogorsk. Topic of the week: "Insects". Purpose: Consolidation of children's knowledge.
Walking September second junior group September № 1. Observation of the state of the weather. Purpose: to teach to determine the time of year by characteristic features. Develop attention, observation.

Organized educational activities for artistic and aesthetic development (drawing) in the second junior group.
DOWNLOAD (with photo)
GBOU school number 492 structural unit number 1 "Aquarelle"
Educator: Alexandrova Oksana Vyacheslavovna.
Second junior group (3-3.5 g.)
The theme is "Christmas tree!"
The relevance of this OOD is due to the fact that
now there is a need for new approaches to solving modern problems of aesthetic perception and personality development in general.
Visual activity takes a special place in the development and education of children. By promoting the development of imagination and fantasy, spatial thinking, it contributes to the disclosure creativity personality, contributes to the formation of the child's aesthetic culture, his emotional responsiveness. Acquiring practical skills in the field of artistic creativity, children get the opportunity to satisfy the need for creativity, to realize the desire to create something new on their own.
The ability to see and understand the beauty of the surrounding world, contributes to the education of a culture of feelings, the development of artistic and aesthetic taste, labor and creative activity, fosters purposefulness, perseverance, a sense of mutual assistance, makes it possible for the creative self-realization of the individual.
Target: Development of artistic and creative abilities of younger children preschool age through the use of unconventional painting techniques.
Tasks:
Educational:
- Learn to create a simple plot picture(on the topic "Winter").
- Learn to use non-traditional techniques in work (drawing with cotton swabs, using a stencil template and "poke").
- Strengthen children's knowledge about winter.
Developing:
- Develop the ability to distinguish and name a shape (circle, triangle). Color (red, yellow, green, blue, white).
- To develop a dialogical form of speech: to form the ability to conduct a dialogue with the teacher, to understand the question asked and be able to answer it.
- Develop fine motor skills hands.
- Develop attention and thinking.
Educational:
- To cultivate perseverance, accuracy.
- To cultivate an interest in nature, love and respect To her.
Integration of educational areas:"Cognitive development", "Artistic and aesthetic development" (drawing), "Social - communicative development", "Speech development", "Physical development".
Preliminary work. Observing seasonal changes in nature in winter, talking about characteristic features winters, reading poems about winter, viewing illustrations, listening to audio recordings, guessing riddles, observing our Christmas tree while walking.
Vocabulary work: ice, snow, winter, frost, wind, blizzard, blizzard, snowfall.
Material:
- sheets of white paper (A4) with a large triangle drawn in advance (made by the teacher),
- cotton swabs (for each child), homemade "pokes",
- gouache of green, white, red, blue, yellow colors,
- palette,
- glasses of water,
- kit Christmas balls different color and size,
- hand wipes - for each child.
Equipment: board, illustration of a New Year tree (poster); a tree decorated with toys in a group, a tape recorder, a set of Christmas balls of different colors and sizes, audio recordings.
Course of the lesson:
Organizing time.
Educator:Guys, please, everyone come to me. (The teacher gathers all the children around him). I need your help. I was asked a riddle today, but I could not guess it. Will you help me guess this complex riddle? Will you help? Thank you, my dears. Then listen very carefully to the riddle:
All the guys like
Green beauty.
Balls, needles
On New Year's ... (Christmas tree).
Children: Christmas tree!
Educator: Everything is correct. It's a Christmas tree. How could I not have guessed? You are my assistants. What would I do without you? Thank you all very much.
There is a knock at the door.
Educator: It seems that someone is knocking…. Let's listen. (The knock is repeated). Who's knocking on the door? Guys, who is this? Let's get a look…
The teacher opens the door to the group. Behind the door there is a small Christmas tree (artificial) with an envelope with a letter attached to it and paints (gouache) under it. (The teacher brings the Christmas tree and paints to the group for the children).
Educator: Guys, look who came to visit us today! This is the same Christmas tree about which we have guessed the riddle. But she did not come to us alone. She came to us with paints.
(Children are considering guests).
Educator: Let's take a close look at the Christmas tree. Oh, what is it on our tree?
Children: A piece of paper.
Educator: We need to see what it is. (The teacher opens the envelope). Guys, this is a letter for us. Let's read what it says? (The teacher reads a letter to the children).
Dear Guys!
My name is Yolochka! I walked towards you on the ice. I met a blizzard and snowfall on the way. There was a bitter frost. But I came to you anyway.
I really want to get to your kindergarten for New Year! But I need your help. Everyone comes to the holiday dressed up. Decorate me please! And funny colors will help you!
Educator: Children, can we help our Christmas tree?
Children: Of course, we will help!
Educator: Guys, do you remember what is written in the letter? The Christmas tree came to us through blizzards, there was a severe frost and snowfall. And when is there frost and snow?
Children: In winter!
Educator: Well done! Of course in winter. (The teacher shows the children illustrations). Rice. one.
Guys, what are we going to decorate the Christmas tree with? Let's take a look at our Christmas tree, which is already dressed up and stands in our group. We decorated it all together. (Children come up to the decorated Christmas tree and examine it). What weighs on the tree?
Children: balls.
Educator: Correct balls. What color are the balls?
Children: green, red, blue, yellow.
Educator: Right. What size balls?
Children: children's answers. (Big and small).
Educator: Guys, now let's find everything in our group in green (children's answers: car, table, children's dishes ...). And now red (book, designer, train ...), yellow color etc.
Educator: Well done. Now let's take a look at the Christmas tree. Its first branches are short, the second are long, the third is even longer, and the last is the longest. To the bottom, it becomes more and more.
Let's once again remember how the twigs grow on the Christmas tree. (We consolidate knowledge with children).
(There is a poster with a picture of a Christmas tree on the board). Rice. 2.
Educator: What are all great fellows. Now let's sit down at the tables. Guys, look what everyone has on the table. Paper, green paint and a pencil with a sponge, you know him. This is a "jab". Rice. 3.
A triangle is drawn on the paper. It is very similar to our Christmas tree, only it needs to be painted. What color are we going to paint?
Children: Green.
Educator: That's right. Now I will show you how we will draw a Christmas tree. And in order for the Christmas tree to turn out beautiful, you need to carefully listen to how to draw it. I take our magic "poke", dip it in green paint and press the "poke" to the paper from top to bottom (I ran and ran "poke" down). Pressed - removed, once again pressed - removed. When the paint is finished, you need to dip it in green paint again and continue. The Christmas tree should become all green and fluffy.
Guys, let's remember how we will draw again. (Fixing). Well done!Rice. 4.
Educator: Children, let's start drawing. Let's all take the right "poke" and make our Christmas tree beautiful and fluffy.
(Children do the work independently under the supervision of a teacher).
After this part of the work is done, children leave their work on the tables to dry.
Educator: And now we will all become Christmas trees. Come all closer to me. Children leave the tables and go up to the teacher. Listen carefully.
An audio recording (backing track) sounds: Oscar Feltsman "Fir-tree-fir-tree forest aroma".
Physical education
Christmas tree.
Our tree is great ( circular motion with hands),
Our tree is high ( stand on tiptoes),
Higher than mom, higher than dad ( sit down and stand on tiptoes),
Reaches the ceiling ( stretch out).
Let's dance merrily. Eh, eh, eh!
We will sing songs. La-la-la!
So that the tree wants to visit us again!
(While the physical education is being held, the assistant educator adds paint and missing materials to the tables for the children).
Educator: Well, here we have a little rest, and now we need to continue our work. We made the Christmas tree green and fluffy, but we haven't decorated it yet. What's missing on the tree?
Children: balls.
Educator: Sure. We need to decorate the Christmas tree with balls of different colors and sizes. For this we need pokes and cotton swabs. We will draw large balls with a large "poke", and small ones with cotton swabs.
Guys, there are paints of different colors in front of you. Let's remember their colors. (Fixing).
Children name colors.
Educator: Now let's draw big balls. Take the "poke", dip it in red paint and press the "poke" against the paper. Removed the "poke". So we got a ball. In another place, we will draw the same ball. Children, let's start drawing. Let's get it right "Jab" and draw a ball... What good fellows you are all! Rice. five.
After the red large balls are drawn, we begin to draw small balls of a different color. For this we will take cotton swab and dip it in yellow paint... And we will draw in the same way as the red balls. They put a stick to the paper - they removed it, put it in - they took it away. How clever and beautiful you are at decorating our Christmas tree.
Now take a clean stick and a different color of paint. How are we going to draw balls? Tell me.
Children: children's answers. (Fixing in progress).
(Drawing is accompanied by words - hints, if the child needs help, the teacher draws the element on his piece of paper).
Educator: Children, you are all great! Everyone did a good job! Here's what we got. Rice. 6.
All beautifully decorated their Christmas trees. Now elegant herringbone will definitely come to us for a holiday. Now let's knead our legs, sing and dance for our Christmas trees.
Children dance and sing with the teacher "The Forest Raised a Christmas Tree".
(At the end, the Christmas trees were cut and glued into cones and presented to the parents).
Application
Rice. 1 Illustrations for vocabulary work (winter, snowfall, blizzard, blizzard).
Rice. 2 Christmas tree poster.
Rice. 3 Materials for work.
Rice. 4. We draw a herringbone technique "poke".
Rice. 5. Herringbone with balls.
Fig. 6. Christmas trees.
Integrated lesson "Decorate the Christmas tree" ( unconventional technique drawing) 2 junior group
Software content:- improve skills unconventional image subject.
develop speech, imagination, Creative skills.
- to give children the opportunity to experience a variety of muscle loads by imitative repetition of the teacher's movements and actions.
- to form a sense of rhythm, coordination of movements.
- to develop articulation apparatus and fine motor skills of hands, develop speech, imagination, creativity, develop and improve communication skills.
- to create a situation of success, an atmosphere of joy and kindness, to create a sense of group unity.
Material: diluted gouache, baths with water, napkins, plates, illustrations, Whatman paper with a picture of a Christmas tree, soft toys, health tracks, audio recording of the Seasons, tape recorder.
Techniques and methods: play, conversation, story, visual, verbal, game.
Vocabulary: circular motions of fingers, adhesion, birch
Ind.worker- to consolidate the concept of forest, garden.
Course of the lesson
1.Organizational moment"Hello" (establishing emotional contact).
Children enter the group to quiet music. The teacher reads a poem:
Hello, the sun is golden!
Hello the sky is blue
Hello, free breeze
Hello, little white snow!
Hello kids: girls and boys,
Hello, I'll tell you, I greet you all!
Today guests have come to us, we will welcome them.
2. Psychological training:
"Zimushka - winter" (development of the transmission of an emotional state, positive emotions, development of imagination).
An audio recording of "The Four Seasons" by P. Tchaikovsky sounds
Educator: What a wonderful melody, right guys? What does it look like, how can you say about this music? (Light, joyful, snowy, fluffy, winter). This is a winter melody, do you like winter? What do you like, Alina? And you, Valeria? How does Kostya like winter, and how does Vlada like it? I love winter too.
Tell me guys what do you like to do most in winter, what games to play? (Ride down a hill, sled, play snowballs, wallow in the snow, sculpt a snow woman ...).
Educator: I invite you for a walk around winter forest do you want to go with me? Well, let's go! (Background music sounds)
3. Simulation exercise"We are walking through the snowdrifts" (emotional release)
We walk through the snowdrifts
Let's raise our legs high
On steep snowdrifts.
Raise your leg higher.
We walked for a very long time
Our legs are tired.
Now let's sit down, rest,
And let's go for a walk again.
Look, guys, at what winter clearing we went out.
Oh look at some pictures here, what is shown on them? (tree, tree)
- What is the difference between a tree and a Christmas tree? (the branches grow upward at the tree, downward at the tree).
- Where do the trees grow? (in the forest, garden). (showing illustrations)
- And what trees grow in the forest? - What kind (birch, mountain ash, tree).And how did you guess that this is a birch (white barrel), Christmas tree (needles, bumps), Rowan (rowan fruits).
- In the garden? (trees on which fruits grow)... What are these trees?
- What forest tree came to visit us recently? (Christmas tree).
- And who can read poems about the Christmas tree? (reading poetry).
4. Physical minutes
5. Surprise moment
- Bunny comes to visit the children.
I came to visit you at the request of all the inhabitants of the forest. They are very upset that all the children had a beautiful, elegant Christmas tree. And there are a lot of Christmas trees in the forest, but we all don't know how to dress it up beautifully, will you help us? (takes out a drawing paper with a picture of a Christmas tree).
- Guys, what can you hang on the tree? (balls, beads, icicles, flags).
- And now I want you to turn into artists and draw decorations for the Christmas tree.
Bunny: But you don't have brushes, what are you going to use to paint decorations for the Christmas tree?
(fingers).
Come to the tables, sit down. Before starting work, let's say in what color we will draw balls, icicles). Will we have round icicles? (long), let's remember how to use paints on plates correctly.
(wet your finger in water, then in a plate with paint, and after we draw a ball, you need to wash your finger and draw another paint).
Let's prepare our fingers for work, warm them up.
Bunny: Guys, can I decorate the Christmas tree with you?
6 finger play- massage "Boy - finger"
Finger boy where have you been
Where did you go with your brothers?
- With this I was lying in the snow,
- I rode down the hill with this,
- I walked with this in the woods,
- With this I played snowballs.
We are all fingers-friends
Where they are - there I am!
7. Execution of work.
- the top row is red balls, the bottom one is blue.
And the work is amazing! It's time for me to praise you!
They did everything so beautifully, What a miracle - the masters!
Look at what a wonderful tree we have turned out. It looks like our Christmas tree, which we had in kindergarten. And now let's take it to the forest and give it to the forest animals, they are already waiting for us. And we will go along the path. On blue - fast, on green - slowly. Well, let's go, and the bunny will show us the way.
(children walk along the path to the magnetic board, animals are waiting for them there).
8. Reflection. Analysis of the lesson.
- Did you like our lesson?
- How did Alina remember it? Than Kostya?
- What is your mood now after our lesson? Choose from the offered pictures (funny, sad, joyful).
What's your mood?
- In! (show thumb)... Let's give our good mood to our guests. (Children blow the mood off the palm).