Trees Different types of watercolor crowns. Wood watercolor
Watercolor: how to draw trees
Found just a super-lesson watercolor. From the artistMarvin Chew. I share with those who want to learn or at least try yourself in watercolor - an interesting occupation. But to learn how to know the rules after all. Draw trees and shrubs not as simple as it seems. I know it from my experience ...
And so the watercolor tree is very cute and very lively
Let's try to draw similarly
1. We observe the color and light in nature
To begin with, we will watch the color of the trees (well, if it is trees that grow nearby) at different times of the day and with different lighting. Watch the color is better with the camera to capture all the shades of color. We draw attention to everything: how, for example, long branches affect the color of shorter. What leaves at the ends of the branches, how light and shadow in foliage are intertwined. Where does sunlight go and how it is reflected in different layers of foliage. Where the shadow is lucked, etc. We observe the color, light and shadow. For the same purpose, carefully look at the photos taken.

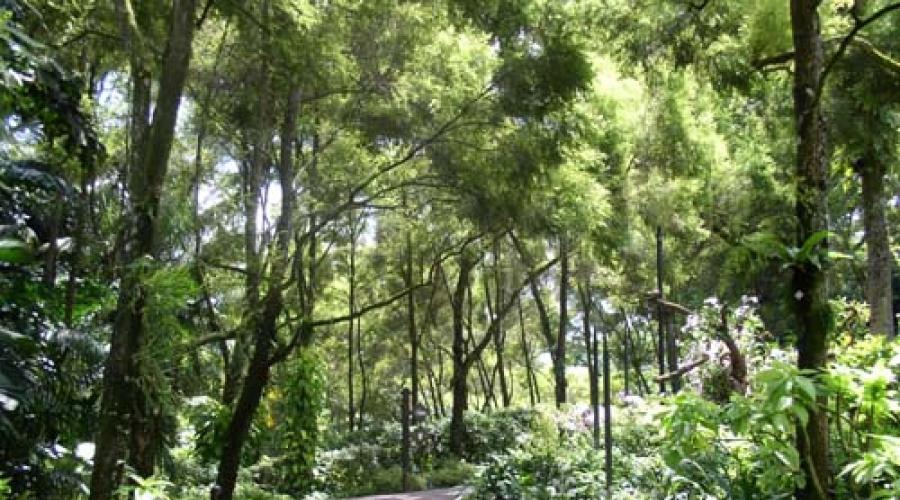
Please note how the color changes depending on the remoteness ...

From afar, we can not see any leaves or branches. Agree, they simply represent different shades of greenery and shadow.
2. Mix the paints

Line A: Color straight from the tube
A1 - Lemon Yellow
A2 - Yellow Ossociation
A3 - Bright green / green leaf
A4 - SAP green
A5 - COBALT BLUE
A6 - French ultramarine blue
A7 - Indigo.
A8 - Sepia.
Line B: Mixed Colors
B1 - Lemon Yellow + Bright Green
B2 - Lemon Yellow + Bright Green + Yellow Ozz
B3 - Lemon Yellow + Green + Vivid SAP Green
B4 - SAP Green + Cobalt Blue
B5 - SAP Green + Cobalt Blue + Indigo
B6 - SAP Green + Indigo + Sepia
We go to try creating your shades.
4. Making Muses
Now about the size of the brush: the artist uses: Sable (№№ 8 and 3). But, the greater the size of the picture, the more should be a brush. And so the artist inflicts strokes, which later become leaves. The arrows indicate the direction of the smear. Over time, we will produce a refill: from top to bottom and left to right, etc. And this is normal!

5. We write a tree
Using a mixture of lemon yellow and bright green, draw the easiest contours (mark) of foliage (view like from top). We need a sufficient amount of this color of the mixture, because the paint will be needed at other stages of drawing. Light paint make the same strokes as the author. Leave and unpainted areas ...

Add to the previous mixture a bit brighter green and draw foliage wet wet, while paint is wet, so that it spread a little to the right and down

Before the paint in the previous step will dry completely, add more green tones and draw the bottom of the foliage. Let it be tiny points, and in our imagination - leaves. After all, the details depending on the distance become less noticeable ...

Now go to more than dark colors. Add a bit of blue cobalt and blue ultramarine into the previous green mixture and paint the dark areas wet wet.

Let's give paint to dry completely. Then we mix the green indigo and sepia to get a very dark color mixture that we use for shadows. We put paint into the lower part of the foliage - we get a shadow. Now we will wash the brush and a humid brush in the dark just painted edges, barely touching them to soften them and deprive of clear lines, which is good. If you want to get a clear foliage, you don't need a wet brush around the edges.
Learning to draw a watercolor tree with every novice artist, because such an element is often found in pictures. Without it, it is impossible to draw a landscape. Therefore, we safely take a watercolor sheet, paints and rush to master new skills in drawing.
Tree drawing materials
- - watercolor;
- - brushes;
- - sheet of paper for watercolor;
- - water in the tank;
- - Pencil.

Tree drawing watercolor step by step
1. In the first stage, we will use the paint. If you wish, you can use a pencil to get a light sketch. We divor the brown watercolor on the palette with a small amount of water and spend on a sheet vertical tree trunk line. Add a few side twigs.

2. Testing a brown watercolor a few additional branches that can be on the other side.

3. We start drawing foliage. We use dark green watercolor color. We divorce good water and a wide brush create a divorce. Add droplets of a saturated color and give paint to grow effectively to obtain beautiful divorces.

4. So score all the tree. In some areas near the crown of the tree, we enhance the tone.

5. The trunk of the tree and the twigs on it are crouching with a more brown brown. Additionally, work in green watercolor foliage.

6. Mix brown watercolor with green. The resulting shade is missing the trunk. Add the foliage around the founding of the tree.
Trees draw always very interesting and quite simple. The main thing is to know some rules and possess observation. How to draw a tree? First of all, you need to know what kind of kind, breed? How do the branches grow - right, to the sides, go down to the ground? What crown at the plant - lush, small, round, thick, triangular? Birch has its own silhouette of the crown, in pine - its own. In this lesson, let's try to draw a tree in stages. You will understand how to propose a thick foliage, bark, the roots of the village. These knowledge will be useful to you when you go to the plenier or want to draw something your own.
- We take a tight sheet of watercolor paper, a simple pencil, eraser. If you want to draw a tree in the "wet" technique, the sheet is pre-slightly wetted with water. This can be made with a wide soft tassel or sponge. With this technique, very beautiful divorces and gradients will turn out. For a start, make a pencil to our tree. Draw it with a lush green crown. In summer and spring trees are especially beautiful, the sun is reflected from each leaf and they seem like. Draw a semicircle ground. Tree itself is pictured with small roots. The tree is from the viewer far, so the roots will seem small. The thickness of the branches make such that the approximate sum of their thickness was equal to the trunk of our tree. The higher the branches are, the topics they become thinner. At the top of the crown of branches are thin and young. Tree crown draw a common, uneven circumference.

- Now we denote the "floors" of the crown. If you take a look at any tree, then every big branch creates a separate "tier", a kind of mini-tree, and all together they form a lush crown. Each such "tier" has its own volume, they overlap each other, later we denote by the game of shadows and light.

- In order for the tree to look more organically, Dvoris the elements of the landscape - the sky, the clouds, as well as the shadow of the tree. Clouds are only slightly chained with a pencil, these sections of white paper are then simply circled with blue paint, and add a light shadow for volume. So that the trunk of the tree does not look smooth and boring, draw it as if consisted of a variety of large branches. The texture of the cortex will not be visible, so we will draw a tree trunk with color shades, without swaying small parts.

- We proceed to drawing watercolor. We start with the crown of wood and transparent yellow-green paint unevenly paint this area with a soft brush. Somewhere we leave white spots, somewhere add paints a walking, but do not overdo it. The grass on the ground will be in a shade colder, so add a little blue or blue. Note shadow from the tree. The sky is drawing a blue gradient, at the top of the thick shade, gradually to the horizon, the paint is diluted with water. Clouds just get a tassel.

- Draw shades. We take green shade with the addition of blue and short strokes "Lepim" to the crown. On the lower "floor" the shadows will be more and darker, to the top of the smear, the tassel become shorter and lighter. A couple of branches in the middle carefully describe. Give the volume of the tree trunk. Shadows on the whole drawing are on the left. Different shades of brown (with the addition of ocher, blue and a bit green) draw a tree bark, in some places leaving white specks of light. On the clouds, too, we make shadows - a gray-blue shade, paint the lower part of each cloud.

- The most "delicious" stage - draw details. Now we need the thinnest brush. Come on all shadows again and make them more saturated. The viewer's attention should be accentuated on the central part of the pattern, it must be drawn especially carefully to be interesting to look at. Therefore, add contrast to the branches, in the shadows on the crown and the trunk of the tree. We denote small branches in the depths of the crown. We draw grass with light strokes (touching a brush of paper and make it a quick barcode "from myself").

This dramatic watercolor landscape is easy to write, if you use the masking fluid among watercolor artists.
One of the most surprising elements of this dramatic scene is a thundering sky. However, imagine how hard it is difficult to portray fragments of a dark sky between the bizarre curved branches of the tree1. In such a case, watercolor artworks use masking fluid.
Without the help of a camouflage fluid, it is absolutely impossible to show details of the branch of the tree.
Masking liquid
Masking liquid - Perfect material for those cases where the artist needs to combine large areas of saturated color with a detailed subject or character. The layer of elastic, similar to the rubber, which pre-cover the selected fragment of the picture, protects this section from paint. Subsequently, the image, purified from the camouflage fluid, can be left white or painted in a contrasting relative to the main tone.
How to draw the sky
In this case, the barrel and branches of the tree are covered with a camouflage fluid to save the image under the subsequent layer of paint, without fear of losing thin lines and small details of the tree. Now you can use all the advantages of transparent watercolor to write a thundering sky.
While you will create the sky, drawn earlier, the tree will be securely hidden under the layer of camouflage fluid. At the end of the work, you can simply erase the dried disguise liquid with your finger.
For the drawing lesson, watercolor will need:
Paper sheet for watercolor about 28 × 41 cm
Pencil 2V.
Eraser
Round brushes: Thin No. 00, № 6
Thin Old Brush No. 00 for applying a camouflage fluid
Masking liquid
11 Watercolor Colors: Yellow Cadmium, Lemon-Yellow, Yellow Ossaging, Lugged Siena, Raw Siena, Red Cadmium, Prussian Sinka, Blue Indigo, Black (Logging Ivory), Green-Green, Green Cobalt
1 We draw a tree and outlined the line of the horizon
Pencil sketches the outlines of the tree. Mark the horizon line, raised about one third of the lower edge of the picture. Main image - wood. It follows it by shifting to the right from the center. First draw the trunk, then bizarre curved branches.
Screeing camouflage liquid
Apply a masking fluid on paper should be very careful. Do not dial it on a brush too much, otherwise you can inappropriately pick up paper or allow liquid to grow. To avoid similar troubles, always apply masking liquid only with a thin tassel. If you are still not drunk at that place, do not try to remove the fluid until it dries. Let the drop dries, only then erase the film with his finger and start drawing.
2 Covered wood by camouflage liquid

Take the old brush number 00 and cover the image of the tree with a layer of camouflage fluid. Apply the camouflage liquid to be gradually covering only a small portion of the image. Remember that they will remain impaired all sections covered with this liquid. After completing the process, immediately rinse the brush E warm soapy water.
3 Pour the sky with the main tone

Brush number 6 Mix the Prussian blue sky with a yellow ocher droplet and spread paints with plenty of water. Apply a thin layer of this paint on the entire surface of the sky, from the top edge of the picture to the horizon. Mark in the left top of the sky spot Prussian blue. Dry the brush into the water and make the fill using the blue board applied on paper.
4 Create clouds

Again, Prussian Blue Sign, she will emphasize the lower edge of the clouds. Leave the sky sections around fairly light to create a contrast.
5 N. anosim by the foreground basis

Rinse the brush. Mix the yellow okhru with water and a droplet of red cadmium. Cover paint a third of the bottom of the painting. This main tone will be depicted covered with dried grass.
Now that we have a tree painted and designated the main areas of the landscape - the thunder sky and the earth, go back to the same colors and open the sky and earth again, seeking to achieve maximum contrast between light and shadow. Do not worry if individual pattern fragments will seem too dark to you: watercolor paints when drying become lighter. Do not try to write out the thunderstorm sky. To create color effects, add more water to the paint.
6 Make the background darker

Brush number 6 Divide the yellow okhru. Moving down from the horizon line, apply a layer of this paint on the left side of the picture.
Applying a camouflage fluid, you can try differently writing the sky. Feel free to give the will of your fantasy - the drama of the scene completely allows it. Boldly overlap one to another elephant paint, just follow the work that the work does not work / different. On the presented version of the landscape, our artist wrote the sky with blue indigo, purple and purple paints. He retained the trunk of the tree brightly lit by the beam, breaking through due to clouds and creating a very sharp, almost theatrical lighting of the scene. At the bottom of the picture, he depicted a field with separate blades written on top of several smooth paint layers. True, on this landscape the land in the foreground looks more alive than in our picture.
7 We continue to write clouds

Rinse the brush and add a bit of blue indigo on the left side of the sky. The paint needs to be dissolved with water so that it is easily spread through paper, but at the same time retained intense color. Write the same clouds that run through the thunderstorm sky. Soften their edges, blurring clean water. Give paint drying.
8 Enhance tone sky

Continue to strengthen the color in the right side of the sky. Mix the Prussian blue blue paint (burning ivory) and write this mixture of the sky between the branches in this mixture to make a cloud-terrainous cloud. Give paint drying. If you want to speed up the process, dry the paint with a hair dryer.
How to make fill
Watercolor painting water is used not only for breeding paints. If you apply paint stain on paper, and then spend a line from it, after having saved the brush into clean water, the paint will begin to spread. This way, watercolor artists are very often used when they make fill.
9 Add texture in the foreground

Rinse the brush. Prepare a mixture of raw Siena and a yellow ocher and spend the line above the horizon. Add a blue-green paint to the mixture and spend the line under the tree, and then make small horizontal strokes throughout the foreground. Add some water to make paint easily spread.
10 We work on a thunderstorm sky

Now make the sky is really thunderstorm. Drain the blue indigo water and add a black paint droplet. Apply the stain of this mixture into the upper left corner of the picture and swing all over the sky. To make a dark color to make lighter, dip the brush into clean water when you spend it on the sky. Saturation and segment of the sky should be given behind the vertex of the tree using a mixture consisting of Prussian blue and black paint.
11 Draw grass

Mix green cobalt, black paint and yellow ocher with a small amount of water. Write this mixture short, different vertical lines in height. Start by the foot of the tree and move to the bottom edge of the picture. Let some strokes spread slightly.
12 Remove the masking fluid and write a tree

When the paint can dry, erase the film of the dried camouflage fluid with a finger. After that, the image of a tree will appear in the picture, which retained all the small parts - branches and twigs. Mix lemon yellow paint, yellow cadmium and a droplet of red cadmium, spread the mixture with water. Brush № 00 Write a tree.
13 Pay attention to detail

Rinse the brush. Divide the water linked Siena and write separate twigs and shadow areas of large branches. Add a little yellow ocher to the paint to emphasize individual blades in the lower left corner of the picture.
The last, final item of this painting is a rainbow. Her arc growing over the horizon connects the sky and the ground. If it seems to you that the sky was not dark enough, mix blue indigo or Prussian blue paint and make even more thunderstorms tightened clouds.
14 D. selate the sky is darker

Rinse the brush. A mixture of Prussian blue and black paint apply between branches to emphasize their bizarre bends. Rinse the brush again.
15 N. amechem Radugu

Take the eraser and spend them an arc from the middle of the sky to the ground. At the same time, most of the paints that the sky is written, a little erased, a light strip is formed - we will write a rainbow.
16 We write rainbow

Write a rainbow with diluted with red cadmium, and then yellow cadmium.
Result of the Landscape Landscape Framework

And discharged details
Due to the camouflage fluid, all thin lines in the picture remain clear. Easily consider even twigs standing out against the background of the thunderstorm sky.
B feeling space
Some sections of the picture - for example, a piece of sky behind the tree, form an interesting contrast with a shared dark picture background. These sites help the artist create the illusion of depth.
In blurred rainbow
The arc of the rainbow was scheduled for an eraser along the already written offshore, so the lower dark layers of paint were preserved and partially appear on the fragment, so that the rainbow seems to be lost in the clouds.
You know when I am made up this lesson, I brief myself for not thinking to take this topic before. I enjoyed work, and I really liked how ordinary points and forms turn into stunning trees.
I had to take for drawing trees only for the reason that I was often asked to publish a lesson about creating landscapes. But before starting work, it seemed to me a good idea to disassemble its main components. The most important of them (in my opinion) are trees. This lesson will teach you not only to display watercolor trees, but also will show four options for performing various forms of crowns. This is the first part of two. Next time you will find four more forms.
For drawing trees in watercolor you will need:
- Road set of watercolor paints Sakura Koi


In this lesson I use watercolor paints of the Sakura Koi brand. I highly recommend them all novice artists. A set of 12 colors is on the Amazon website only $ 15, and it's convenient to travel with it.
- Yellow-green (Yellow Green)
- Viridona Saturated (Viridian Hue)
- Yellow Lemon (Lemon Yellow)
- Uching yellow (Yellow Ochre)
Before starting a step-by-step demonstration of the process, I would like to tell about four forms of crown trees with which we will work today. Moving from the upper left corner clockwise, the figure shows the column-like, spread, open and round crown. Trees are classified on the form of the outline of their foliage. I painted black contours so that you were easier to make a pencil sketch.

1. Columnious tree
According to the name, such a crown resembles a column. Cherry and red maple belong to this type. I did without a pencil sketch, but you can draw it, if you are not sure that you can immediately write paint. Yellow-lemon (Lemon Yellow) I used as a base, imposing several drop-like smears, starting from the top. As you move down, add a bit viridone (Viridian Hue). Since this is the base layer, I abundantly diluted with water pigments.

At this stage, I connected the viridon (Viridian Hue) with yellow green (Yellow Green) and gave them to shock. The best in watercolor is that she herself will fulfill all the work if they allow it. See how miraculous the color of the mixture came out.

While the paint did not dry, I introduced a yellow lemon grain (Lemon Yellow). Then, I continued to write with color stains, drawing a shadow of foliage until I received the outline of the crown.

Finally, I prepared a yellow ocher (Yellow Ochre) and Viridonova (Viridian Hue) for displaying shaded areas at the bottom of the foliage in the barrel. You can also add the depths of the drawing by touching the crown by this tint in several places. Finally depict the trunk and land.

2. Crawn crown
Have you ever seen a beautiful banyan tree? It is so huge, and his branches are located so much that several people can hide under his shadow. This is the brightest example of a sprawle crown. As the base tone, I took the yellow-lemon (Lemon Yellow). Next, on both sides of the foliage along the contours I entered the yellow-green (Yellow Green).

After that, I drew some sections with viridon (Viridian Hue), leaving the central part of the crown yellowish. I decided that it would fall on this area. Continue to apply dark strokes.

At the final stage, mix okhru yellow (Yellow Ochre) and Viridona (Viridian Hue). Put several points on the foliage in the foliage obtained by a darker tint. Banyan tree has air roots hanging down the branches. I drew them together with the barrel.

3. Round Crown
This is the funny and simple form of all here presented. And this does not require explanations, because so? It is clear that this form is the easiest way. Black maple and wood frame possess exactly such a silhouette of foliage. As in the previous cases, start with the application of bright shades.

Gradually go to darker tones. The main thing is that the form does not look tough and fixed. Let Krona and a round, a couple of branches can always be knocked out of it.

Draw the trunk and, if necessary, change the shape of the leaves. To get a spherical outline, make sure that the lower part of the crown has a darker tone, which gradually brightens, approaching the tip of the tree.

4. Open krona
In my opinion, such a tree is the most beautiful. It must be assumed, this is explained by its asymmetric silhouette. Scatter at random a few "islets" of foliage, drawing the largest tree at the top of the tree. You can navigate my picture at the beginning of the article.

At the bottom of the foliage, impose dark tones.

At the top of the top highlight the illuminated areas of yellow-lemon smears (Lemon Yellow).

Then, suck the shadows so that the tree looks plausible. Picture the trunk and several branches connecting all the "islands" of foliage. That's all!

What do you think?
What kind of crown form did you like more? What is your favorite tree? My - Banyan tree, because it is connected with my children's memories. What other landscape components do I need to devote a lesson? Leave your answers in the comments. And do not forget to use Hashtag #makeinkstruck in your Instagram if you painted with me.
So, these were four ways to draw different forms of crown trees. I hope that the photo turned out to be exhaustive and quite visual. I wish you a great day!