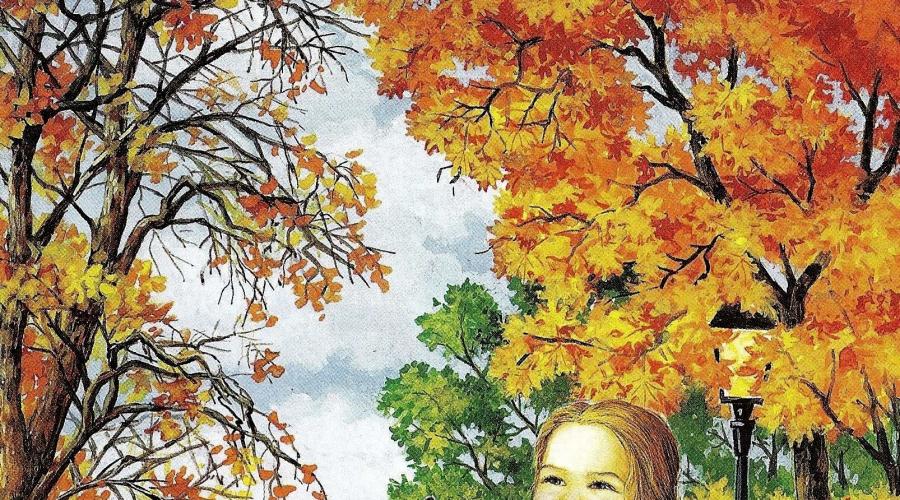
Children's drawings on the theme of autumn paints. How to draw a beautiful autumn landscape of nature with a pencil and paints in stages for beginners? How to draw an easy autumn landscape with a pencil for beginners? Finished works on the theme "Autumn landscape" photo
Good afternoon, today I want to make a helper article for all kindergarten teachers... In this article I have collected didactic pictures on the theme of autumn. You will be able to use FALL pictures in speech development, Child and Nature, Child and Society. Pictures of Autumn will be an excellent visual material for preschool children. You will be able to show them different aspects of this time of the year. Also I am attaching ready-made cards for logic tasks on the theme of autumn in kindergarten... As far as possible, this article will be replenished with new didactic materials (pictures and cards on the theme of autumn for kindergarten), so do not go far, come back here in the new autumn season.
So, I laid out the autumn cards on different topics. Separately, visibility for the formation of ideas, separately visibility for drawing up a story on a picture of an autumn theme, separately example cards for educational games. Let's see what kind of Autumn pictures for kindergarten you can get here and replenish your methodical piggy bank.
Every picture INCREASES when clicked with the mouse button.
Didactic pictures AUTUMN
for kindergarten classes.
Here is a series of large pictures for kindergarten on the theme of autumn. You can place them on a convenient sheet of any size. It can be a regular A4 Word file, or you can print it and make large posters for a kindergarten class.
These are the largest images of good quality that will give a bright print at any point on the printout of your city.
To enlarge the picture, click on it with the mouse.

Pictures of children in autumn for kindergarten

Picture autumn rain for kindergarten.

Picture autumn in the mushroom forest for kindergarten.

Picture autumn in the forest - boat trip. Suitable for speech development classes in a younger group.

Pictures Golden Autumn. A didactic task for children is to name as many autumn colors as possible ... what color trees are in the autumn in the forest.
Be sure to click on this picture (photo below) - and you will be stunned by this beauty. 
Look guys, how beautifully the trees are reflected in the water. What transparent water, it works like a mirror. This is how Autumn Beauty looks in the mirror and dresses up to become even more beautiful.
And here is a beautiful picture for viewing with children, it is good to learn from it to describe objects in the picture, to learn what the foreground, middle and background are.

Click on the picture to make it larger. You can reduce its size by fitting it to the sheet of paper on which you will print it.
Pictures Autumn and its gifts
for kindergarten.
You can also expand on the topic of Gifts from Mother Autumn in the classroom. Tell that autumn is harvest time. People grow vegetables, pick mushrooms in the forest. They make preparations of vitamin vegetables and fruits for the winter.
To think with the children what else does autumn give us ... And what does it give to animals? ... A squirrel, a hedgehog, a field mouse?
Here are just pictures of autumn in this theme of gifts and products of the autumn harvest. Harvest autumn in the garden and in the forest.


Pictures for kindergarten
How autumn helps animals.
Autumn helps the chanterelle to become invisible. It is easier for her to catch animals (mice and bunnies) - and she accumulates fat by the cold winter, eats well and gets fat so as not to freeze in the cold.

Autumn gives pets joy ... cats love to play with rustling leaves. Cats have a good sense of smell and hearing. They hear a mouse rustling in the leaves and can instantly catch it.

All forest dwellers prepare supplies for the winter in the fall. Squirrels, hamsters, chipmunks, hedgehogs, mouse voles. Think about what kind of animals are preparing their own food in the fall.

Fall Pictures
it's time for fun games.
The golden beauty of autumn is warm and cheerful. All children and all parents love autumn for its beautiful leaves and magical leaf fall. Let's remember, children, how you can have fun in the fall. Pictures of entertainment in the fall will guide you through this part of the lesson.
You can collect beautiful leaves and arrange them according to color.

You can give bouquets with leaves to mom, grandmother and dad.

All pictures are enlarged if you click on them with the mouse.


You can swim, bury yourself in rustling fragrant leaves. Let's remember how they smell. Warm leaves heated by the autumn sun.

And you can also throw leaves in the fall, arrange leaf fall, dance under a golden rain of leaves.

In an open class in kindergarten, all these pictures can be used as elements of a slide show on a projector or screen.


Autumn pictures
for speech development classes
in kindergarten.
It is very good to weave elements into the structure of the lesson where tasks for the development of the child's speech are solved. The lesson on the theme of Autumn in kindergarten can be supplemented with pictures that the children will describe on their own or by answering questions-tips from the teacher.
Below I give beautiful bright subject pictures on the theme of autumn. You can make up a story-description based on them (who does what in the picture). You can conduct a blitz poll "Find the signs of autumn" ... prove that this is an autumn picture.


You can come up with a fairy tale story based on the picture. What we see now ... what happened before ... what will happen next.
We see brother and sister, they went to the forest for mushrooms. What happened before ... they used to walk through the woods next to mom and dad ... and now they are lost ... What will happen then, they will loudly shout ay and they will be heard.

Or the story could be about that. how they shared with the mushroom squirrel ... a cautionary tale about not being greedy.

The story of how Pavlik and Masha saw birds flying away ... (picture on the theme of autumn for kindergarten).

How the first snow suddenly fell in autumn ... tell us how nature changed, how the animals were surprised, what they began to do ... how the sun came out and the first snow melted ... it became water ...

Pictures of autumn for children help them to visually remember the signs of autumn, to highlight the signs of nature, which is preparing for winter, to name them, describe and comment with additions and explanations.

The picture to describe - what's in the foreground, what's in the middle, what's in the background. What colors the artist used. What is the mood of the picture. What day (sunny or cloudy). What time of year is in the picture? Was it raining yesterday? Was there fog in the morning? How do you think the artist painted morning or evening?

Educational games
with pictures AUTUMN
in kindergarten.
You can immediately prepare pictures on the topic of different seasons. And conduct interesting game activities for children in a group with them. These autumn pictures for children will help you. I offer several ideas at once.

Game What is superfluous on the block of pictures (autumn, winter, spring, summer). Assignment for children of the younger and middle group.

To enlarge the autumn cards, click on them with the mouse. You can print them on a color printer. Stick on cardboard and cut out. If you do not mind the money (the teacher's salary is sad), then you can immediately print it on thick photographic paper.
Didactic pictures autumn for kindergarten. For classes in the development of speech and nature.
You can do just such a game with your own hands - pick up the elements for the picture from time to time.

Didactic picture SEASONAL TREE. Assignment: Compare autumn with other seasons. We print the seasonal tree, glue it on cardboard and make a stand from a roll of toilet paper (a slot in the roll and insert a tree into it). Changes in nature are traced on the example of one tree. What is it like in winter, autumn, spring and summer.


Lay out the pictures according to the seasons (separately autumn, spring, summer, winter). A selection for preschool children.

You can print these autumn pictures (below) and mix them with other very different pictures. The task of children from the general mass is to find only those that are related to the theme of autumn.
A simple and quick-to-make game for children in kindergarten.

These are the didactic educational pictures of autumn for children you could find on our website. You can also see here a large selection of ideas for autumn DIY with children in kindergarten classes.
Good luck with your children.
Olga Klishevskaya, specially for the site
If you have always wanted to learn how to draw, but for some reason you didn’t succeed, then our article will definitely come in handy for you. Here you will find simple drawings of golden autumn with a step-by-step explanation.
Even without having a special talent for drawing, you can draw fairly simple but beautiful drawings. There are already many articles on our site that explain in detail how to draw various drawings with pencils, gouache or watercolors.
This article will help you draw not very complex autumn landscapes with colored pencils and paints.
How to draw a beautiful autumn landscape of nature with a pencil step by step for beginners?
Now we will tell you how to draw a bright autumn landscape using the most common simple pencils that you can buy at any stationery store.
On a blank sheet of paper, we first outline the approximate location of our fence. To do this, draw a short vertical line below the middle of the sheet and slightly to the right. Then we draw a horizontal stripe crossing it and two stripes at the bottom, going up to the vertical one.

We outline the trees. To do this, draw, as shown in the figure, two vertical lines. We draw a crown for trees - large ovals of irregular shape. In the background, mark the forest with a curved horizontal line.

We draw the fence in detail. There should be 7 vertical stakes in total. The two lower horizontal lines that we drew at the beginning are rods behind stakes. We also outline them. Under the fence, you can mark the grass.

We make our trees voluminous - we add a lush crown, not very thick trunks. Be sure to draw branches in the crown so that the drawing looks more natural. In the foreground, mark the path. You can take the path into the distance, or you can do it as in the photo.

... "There is nowhere in more detail." That is how this part of the work could be called. All the details that were conceived must be transferred to paper. These are clouds, drawing of leaves, bark, grass in the foreground. Draw a little bird on the fence.

Take the eraser and remove all unnecessary strokes. so to speak, "clean up" the drawing. The lines should be smooth, single. Since a person is not a robot, even an experienced artist's hand can sometimes tremble and give out not perfect lines.

We take 5 colored pencils: 3 shades of green (from light to dark) and two shades of yellow (one lemon, the other warmer, a mixture of lemon and ocher). And with the help of these pencils, with vertical short strokes, we begin to draw the grass in the foreground and in the far. Please note that the grass in the foreground is drawn in more detail, as opposed to the far one.

With the help of red, gray and yellow we draw a path and stones. We leave a few small red spots on the path - these are fallen leaves.

Draw the trunks and branches of birches with a black pencil. Do not forget that the birch trunks are painted with stripes (we use black and gray pencils for this), and the branches can be drawn in black. At the bushes, paint over the trunks brown.

Now we play with colors! We take green, brown, red, orange, yellow and lemon pencils (if there are more shades in the set - use them too!). With all these flowers we draw the crown of trees and bushes. To do this, remember autumn and what colors the foliage is usually painted with in autumn. For birch, you can take yellow and orange, for the rest of the bushes - red, green, yellow, lemon, brown gray. Burgundy, marsh, emerald are also suitable. Finally, we add colors to our bird.

Draw our fence using gray and brown pencils. Do not forget that the fence is in the foreground, which means it must be drawn well enough and in detail.

With the help of green, yellow and orange pencils draw the background. And in the background we have a forest. Draw such a forest so that looking at it, you would like to go there.

At the beginning of the work, we outlined the clouds with a simple pencil. Now with the help of blue and purple we will paint the sky and those very clouds. With light vertical movements of the blue pencil, outline the sky, and with even lighter movements, but already with a purple pencil, add volume to the clouds.

Bring the drawing to perfection, correct minor flaws. The purple pencil on the clouds can be lightly shaded with your finger or dry brush. The drawing is ready! Now you can draw a simple autumn landscape with a box of crayons!

How to draw a beautiful autumn landscape of nature with paints, watercolors, gouache? Step by step for beginners?
What kind of gouache drawing can even a beginner draw? The answer is: "One that does not contain clear lines, forms and can be almost anything, depending on the mood and desire of the author of the work!" In this part of the article, we suggest you learn how to paint a beautiful and colorful landscape using a brush and gouache.

We take two colors: blue and white. We mentally divide the sheet horizontally into two halves, the top should be slightly smaller. Now, with wide horizontal strokes, paint over the upper part with white gouache, and the lower one with blue.

We create the background. Now our task is to mix these two colors, to make the transition smoother. We continue to go white with the same wide strokes on the blue part, the colors will begin to mix and get a gradient. Highlight the middle with white color, as shown in the figure.

At this stage, we mark the horizon line and right on it with the help of white, gray and brown colors, we mark the forest in the background with strokes. With a pencil we mark a tapering path to the horizon from the near edge of the sheet. Draw trees along this path with a thin brush and black paint. Try to make the trunks not equally straight. There should be bends, fractures - everything to make the tree seem "alive".

Let the trees dry and literally press the leaves into the paper with yellow paint. To do this, take a pony brush No. 4-6, dip it in water, then dry it with a towel or rag, make the brush fluffy by running your finger over it a couple of times and dip the brush in the paint. Then with this “tousled” brush with paint we put “blots” on the paper in the places where the foliage should be, as in the photo below. These "blots" are the leaves.

In the palette, mix yellow and white paint until a light yellow pastel shade is obtained. In exactly the same way as in Step 4, we mark the background. On the path marked with a pencil, draw the reflections of the trees.

Add red and orange to the work. Several strokes in red into the foliage of the nearest trees. Divide the asphalt on each side visually into 3 sections, separated by blue. We paint over each section in red and orange. You can make a few strokes of yellow paint in the foreground on the asphalt - these are fallen leaves.

We mark the border as shown in the picture, add more detail to the work. You can add more leaves, add a few twigs to the trees.
Now your work is finally ready! Let it dry and frame it.

If such a drawing seems too complicated for you, then try to draw a simpler version - just a very beautiful tree.

Take clean watercolor paper, visually mark where your tree will be located. We recommend choosing a place for it in the middle. Now we take the yellow watercolor, dip the brush in water, then in paint. We will need an additional item: a toothbrush, a stick, a ruler, in general, something that can be tapped lightly. We bring the brush as shown in the figure and tap the paint onto a sheet of paper with tapping movements.

Add another color - red. We get beautiful splashes.
Important! Do not brush too much water on the brush, otherwise the drawing may turn out to be too blurry!

Add green, orange and a few drops of blue to yellow and red.

You can add a few more colors: pink, lilac, malon.

Using a spray gun, we slightly blur the crown of our future tree so that the colors are not so bright and beautiful overflows are obtained. It is enough to sprinkle the drawing with water only 2-3 times.

When the paint spreads a little, let it dry, before that, blending it a little with a brush.

Draw twigs here and there with a thin sharp brush. Mark the trunk and the ground below with brown paint - the tree is ready!

How to draw an easy landscape in autumn with a pencil for beginners?
The landscape that we suggest you draw below is actually quite easy. And our step-by-step guide will help you avoid mistakes in your work. Good luck!
Mark the horizon line just above the middle of the sheet. Then, with an inclined line, we designate the foreground - a hill where our trees will grow.

We draw the silhouettes of the trunks with two vertical lines. We try to avoid straight lines.

We will have a lake between the hill and the horizon. We mark its far and near banks on the left side.

To the right, in the distance, you can also see the distant coast. Mark a low forest at the top of the bank, as shown in the picture.

In the foreground, where we marked the hillock, draw the grass. This is pretty easy to do. Again, try to avoid straight lines.

Now try to draw as realistic as possible, as long as your skills allow, to draw tree trunks with branches. The tree on the right should be wide enough.

Now finish painting the left tree. In some places on the branches draw leaves, draw leaves of the same shape on the ground near the tree. Where you drew the grass, draw in addition the reeds.

Shade the lake with wide strokes, not tightly, with a simple pencil, leaving a large distance between the lines.

Take a simple pencil and shade the hillock on which the trees are. Do not forget that the shadow from the trees will be darker.

Also shade the distant plan, disassembling in the shadows. Paint over the reeds with a shade of medium intensity.

Paint the entire background, including the lake and the left bank of the lake, as shown in the picture. And try to make part of the lake along the banks a little darker than in the center.

Shade the sky with gentle pressure on the pencil. Then, with a little more pressure on the pencil, draw light clouds.

Using the eraser, highlight the small circle on the left, as shown in the picture - this is the sun. Now the atmosphere is not so dark, and your drawing is finished! Congratulations!

Simple and light and beautiful autumn landscapes: drawings for sketching
These three pictures are very simple. you can make them in color, or you can leave them as sketches.
drawing in color 2

Video: how to draw a golden autumn?
Summary: DIY autumn crafts for children. Autumn drawings. How to draw autumn. Autumn leaves. Drawings of autumn trees. Pictures on the theme of autumn.
We have divided the article into two parts. In the first part, we will teach you how to draw autumn trees in different ways. In the second part of the article, we will tell you how you can draw autumn leaves.
1. Autumn drawings. How to draw autumn trees
The easiest way to draw a tree is by blowing it out of a straw. To do this, paint the trunk and some branches with black or brown paint, trying to leave more paint on the paper. And now the fun begins! Take a straw and blow the twigs through it. You will have a beautiful tree that looks very natural!

To make it autumnal, you can:
Draw a tree on a pre-prepared colored background made in autumn colors

Draw autumn leaves with a cotton swab or fingers


Punch confetti with a hole punch and pour them onto areas of the drawing that must be covered with glue before that.


Make an applique from dry leaves

Using a conventional flower spray gun, spray paint mixed with a little water. If you don't have a spray bottle, an old toothbrush or stiff brush can replace it.


2. We draw autumn. Drawings on the theme of autumn
You can also try to draw trees not of the usual shape, but some unusual, intricate, fabulous ones. For example, such.

Thus, you can draw a whole autumn forest.

3. Autumn forest. How to draw an autumn forest
Many are probably familiar with the technique of creating leaf prints on paper. To print a sheet, you can use absolutely any paint, you just get slightly different prints. Apply paint to the streaked side. You can paint a sheet with paint of the same color, or with different colors.

By printing the leaves on paper, you can make postcards or something else interesting. But if you print a large sheet, then it will turn out to be a real tree!

By the same principle, you can make a whole autumn forest.

4. Autumn application. Applique on the theme of autumn
Well, those who do not like to draw can make an application of autumn leaves "Autumn Forest".
Golden autumn is a traditional theme for drawings not only in kindergarten, but also in elementary school. As a rule, such thematic drawings are performed with colored pencils, gouache or watercolors. Well, the main subject of drawings on the theme of "Autumn" are the brightest and unshakable attributes of this season - autumn leaves. Moreover, it can be either individual leaves or whole bouquets of them, autumn trees or whole forest landscapes. It is possible to supplement such a children's drawing on the theme of "Autumn" with other autumn elements, for example, the key of birds flying away or a fruit and vegetable harvest. In our today's article, we have collected for you three step-by-step master classes with photos of drawings on the theme "Autumn", which are suitable for kindergarten and elementary school (grades 1-5).
Drawing on the theme "Autumn" in kindergarten, a step-by-step master class with a photo
The first master class that we offer you to master is ideal for the smallest artists - kindergarten students. Drawing on the autumn theme, described below, is done with gouache or thick acrylic paints. But the most important attribute of this master class is dry autumn leaves of various shapes. How exactly the leaves will be used in the drawing on the theme "Autumn" for kindergarten, learn from the step-by-step master class with the photo below.

Required materials for drawing on the theme "Autumn" for kindergarten
- paper
- paints
- wide tassel
- dry leaves of different types of trees
Step-by-step instructions for a master class of children's drawing on the theme "Autumn"
- Autumn leaves will serve as a kind of stamps for drawing, so it is advisable to take leaves of different tree species - this way the finished drawing will turn out to be more interesting. We take the leaves dry, but elastic enough. Apply a thick layer of paint with a brush to the inner surface of the leaf. Photo 22
On a note! To make the drawing even more colorful, apply several different colors to one leaf.
- We hold our "stamp" by the tail and carefully transfer the paint to the paper. We will draw an autumn tree, so we will form its crown with leaves. Photo 23
- We transfer paints from different leaves, gradually filling most of the paper. As a result, you should get a large, lush and colorful crown. Photo 24
- Let the paints dry a little and begin to paint the trunk and branches with a brush with brown paint. Ready! Thanks to such an interesting technique, the drawing turns out to be very original - the stamp leaves not only give shape, but also leave beautiful patterns.
Drawing on the theme "Autumn" for children of grades 1-5, a step-by-step master class with a photo
The autumn theme is also relevant for drawing lessons in elementary school. Most often, students in grades 1-5 are given the task to draw autumn landscapes. Our next drawing on the theme "Autumn" is just such a step-by-step master class for children in grades 1-5. It describes in detail how to draw an autumn tree, which can be both an independent drawing and the basis for a children's landscape.

Necessary materials for drawing on the theme "Autumn" for children of grades 1-5
- paper
- colour pencils
Instructions for a master class of drawing on the theme "Autumn" for children of grades 1-5
- With a simple or black pencil, outline the base of the future tree trunk in the middle of the leaf.

- Then, with simple lines, draw the bases of the branches. First, we draw large branches, and already from them we form thin small branches.


- Draw the silhouette of the crown around the resulting template.

- Add details to the tree: draw the volume of the crown, simulate the relief of the bark and leaves with several strokes.

- Let's move on to coloring our drawing. We start with the trunk, which we fill with strokes with a brown pencil.

- To make the crown more voluminous, we will decorate it with several colors. For example, the borders of the crown can be filled in with a red pencil.

- Then fill the middle part of the crown with orange and yellow flowers. Photo 9 It remains to decorate the fallen leaves in different colors and our drawing on the theme "Autumn" for children of grades 1-5 is ready!

Children's drawing on the theme "Autumn" in pencil - how to draw "Autumn Sunset" in stages
The next master class of children's drawing on an autumn theme is performed using wax pencils. The main theme will be an autumn sunset, against which a lonely tree grows, which has already managed to throw off all its leaves. This master class of children's drawing on an autumn theme with a pencil "Autumn Sunset" is suitable for children from 7 years old.

Necessary materials for drawing on the theme "Autumn" in pencil
- wax pencils (black, orange, yellow, red, white)
- paper
Instructions for drawing "Autumn Sunset" in pencil
- Fill in the entire surface of the sheet with a yellow pencil, drawing wide horizontal strokes.

- Then, using a small piece of cotton wool or simply rub the pencil into a light haze with your finger.

- Draw such strokes from above, but with an orange pencil.

- Using the same technique, rub them and apply red lines on top of the middle of the sheet.

- Gently rub the pencil so that there are no visible transitions and lines.


- Draw the soil below with a black pencil, making the earth embossed and heterogeneous. We make a small depression approximately in the middle.

- In the lower right corner, we begin to draw our lonely growing tree. Its height and size are adjustable at your discretion.

- In the depression, with a white pencil, draw a silhouette of the sun setting over the horizon.

- Finally, draw a flock of birds flying south. Ready!

Even small children can draw a tree using the "poke" method. The master class is conducted by Vera Parfentieva, a reader of the Native Path, a technology teacher, head of a circle of artistic creativity for preschool children, a participant in our Internet Workshop of developing games "Through play - to success!".
To draw a tree using the poke method, you need:
- gouache paints,
- brushes No. 2, No. 4,
- white paper for watercolor A 4.
We will draw this tree at once with paints without preliminary drawing of the contour. The crown of the tree will consist of 3 tiers of different sizes. We will draw it as follows.
A step-by-step description of drawing a tree
Step 1:
In the center of the upper part of the sheet of paper, using a brush No. 4 with yellow paint, draw a dotted outline in the form of a cloud, the upper tier of the crown of the tree. At the same time, the brush must be held vertically. It is necessary to draw with the tip of a brush, making "pokes". Then, inside the contour, using the "poke" method, paint over this layer.
Step 2: Having retreated from the first tier down approximately 1 - 1.5 centimeters, as in the first paragraph, we draw pointwise the second tier of the crown a little larger than the first. I say roughly, because the size of each tier will be completely different for everyone. Therefore, every little artist will orient himself in size relative to the sheet. The contour should not be perfectly flat and symmetrical around the edges relative to the center.

Step 3: Similarly to the previous points inside the contour, using the "poke" method, paint over the second tier and draw the third tier. Fill it inside the path. Make sure that the brush is always directed vertically.

Step 4: Apply a dotted orange paint to all three tiers of the autumn tree. We apply orange paint mostly on the left side at the bottom of the crown, creating darker spots, because Let's conditionally select the lighting on the right. Therefore, the right side should be lighter than the left.

Step 5: Using the same “poke” method, paint the grass under the tree, first with yellow paint, then orange.

Step 6: For source # 2, paint the trunk between the tiers with brown paint. Moreover, it is better to draw it from the bottom up, as the tree grows, gradually narrowing the trunk to the upper small tier. It is advisable to take paint in two shades: dark and lighter. Then the texture of the bark will stand out on the trunk. Draw the twigs.

Step 7: Since we conditionally assumed that the light falls on the tree from the right, then with yellow paint we will add thin lines along the trunk of the right side.

I would like to add that children of different ages coped with the task. Some have completed the drawing of the autumn tree entirely on their own. I helped others to draw on the outline and trunk first with a pencil.
Examples of children's drawings of an autumn tree


How to draw a tree: creative tasks for children
- What two groups are tree species divided into? (Deciduous and coniferous)
- Name the species of deciduous trees (rowan, aspen, poplar, linden, elm, autumn, maple, birch and others).
- What tree did you draw? Think, is it possible to depict conifers using this technique?
- Try to draw a pine tree using this technique? How can I do that? ().
- Consider the shape of the tree. Are the crown and trunk sizes the same at the top and bottom? What is the difference? How can you get this result when drawing a tree?
- Why is autumn called golden?
- Read or learn poems about autumn to the children:
If in the trees
the leaves turned yellow
If to a distant land
the birds flew away
If the sky is gloomy
if it rains
This time of year
called in the fall. (M. Khodyakova "Autumn")
Following the summer
Autumn is coming.
Yellow songs
The wind sings to her
Red under your feet
Spreads foliage
White snowflake
Flies into the blue. (V. Stepanov "Autumn is Coming")
An autumn tree can be drawn not only by the "poke" method, but also in other techniques. How to do this - in the step-by-step master classes below.
Master class 2. How to draw an autumn tree with watercolors using a straw
In this step-by-step video from the Art School channel, you will learn how you can draw a tree very quickly and easily using a straw, a brush and watercolors.
Master class 3. How to draw an autumn tree with watercolors using the "monotype" technique
Master class 4. How to draw an autumn tree with gouache paints
If you want to draw a more realistic tree, then for you a very, very detailed master class - a lesson in drawing a tree.
Click on or on the course cover below to free subscription
