The geometric shapes were pasted one by one onto the paper. Master class “Geometric Shapes. TN "Geometric Shapes" (material)
Good day, dear residents of the Country of Mothers! I promised to make a theme day about geometric shapes. Unfortunately, due to the circumstances, I did not have enough time. To make amends, I present to your attention a whole thematic week dedicated to figures. I hope you enjoy it and you can work out fruitfully with your treasures.
The resulting images of the stripes of all the first students were combined into general scheme and presented to the audience. Classes were again: "The story of the little blue square." Then all the pages of the story were linked to a book for each child. Besides stimulating mathematical concepts, learning geometric shapes is a logic exercise for kids, and logic will be a useful skill not only for processing numbers, but also for art and language.
Learning how to split objects according to their formats requires them to ask themselves why they are different from each other. Therefore, children develop the ability to classify their universe. Mathematics and logical reasoning... From 3 years old, with only a few general forms and big amount instructions from the teacher, starting at 4 years old with the introduction of less conventional forms.
1. Information block(cartoons, books, presentations).
2. Creative activities:
- drawing,
- modeling,
- application,
- crafts.
3. Games for the development of fine motor skills.
4. Games for the development of logic, attention.
5. Outdoor games and outdoor games.
6. Experiments and Experiments.
7. Dramatizations, role-playing games.
8. Poems.
9. Bonuses.
Foreword.
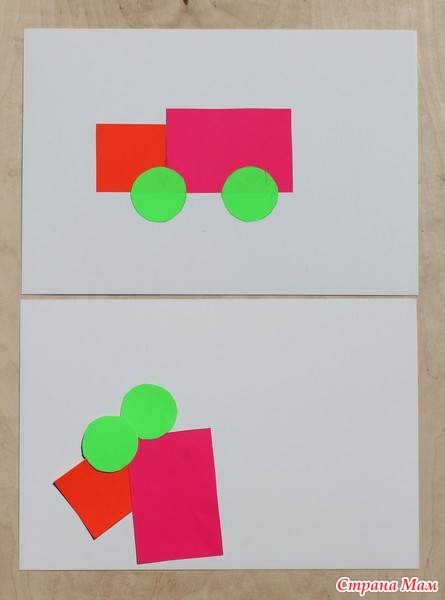
Large cardboard sheet light color, flat geometric shapes cut from colored cardboard, glue glue, colored canisters. Before the class in question, cut out the geometric shapes of the card stock or card stock. The suggestion is to use the same color for all shapes with the same number of sides, so that identification is immediate - for example, a round and pink egg, an orange triangle, a rectangle, a square, and a green cake.
Stick the blank card on the wall in the classroom - remember to hang it at a height that the children can reach, because they are the ones who are going to place the pieces later. Arrange the group sitting in a semicircle so that everyone can see the poster and sit next to it, with the geometric shapes already prepared.
“The recommended time for classes is in the morning. The environment should be as comfortable as possible for the child.
The place for the games should be as convenient as possible, since most games require a flat horizontal surface, so these games are best played at the table. The duration of classes should not exceed 15 minutes and contain no more than 2 exercises. For the games, you must first prepare the game material.
Making play material together with the child will be especially useful for the development of his cognitive activity.
It is necessary to follow the principle - from simple to complex. At the first explanation of the task, the mother must be given a "standard answer" - show correct execution exercises. Talk to your child in a more accessible and understandable way. Do not include many unfamiliar concepts in one sentence at once, dose information.
Name the words correctly - say "red square", not "red square". Do not test the child's attention, finish the game before the child wants it. Leave "something" unsaid and tomorrow you will have something to talk about. "-
Enter the shapes, showing them, one by one, for the class: say your name and, together, count the number of sides. Repeat this process several times, asking different children to stick to the shape and hold their sides until they are involved. Do this with all the trimmings.
Use this exercise to memorize the correct names for each shape. After everyone has participated, tell them that they will create a poster with the shapes they know. Whenever one of the children brings the requested form, repeat the entire process and finally ask her to insert the form onto the poster. Keep joking until all the shapes are glued, in order, according to the number of sides - first with those that have no sides, and then with two sides, three sides, etc.
1. Information block (cartoons, books, presentations).
-Books on this topic sea. there is also a lot of other didactic literature.
The easiest way is for you to look at the Labyrinth website yourself and find the material you are interested in. I will nevertheless present a few manuals to your attention. 
Finally, ask the children to draw on the poster, below the geometric shapes, something that represents the number of sides of each. They can draw three hearts below the triangle or four stars below the rectangle. Math concepts: Ask the children ahead of time about taking recyclable material out of the house for use in the classroom. Take some of the more unusual shapes: small children's party hats or cardboard plates, for example, can showcase a triangle and a circle. Then, when the above activity is complete, direct the class to also insert their objects below each shape, according to their format.
- Did the kids notice the difference between flat geometric shapes?
- Could they classify them according to colors?
- And by the number of sides?
- Did you find out the correct names for the shapes, depending on the number of sides?
- Did you relate the shape of the cutouts to the shape of other objects?

Benefits uploaded to the group's albums.
-"Lotto. Geometric figures."
- "You and I are of the same form"
- "Rolling? Not rolling. Colored shapes"
- “Bugs. Geometric Shapes "-" Red, Round and Large "
It is important for children that their learning is recognized and celebrated. Consider when writing your post. Did the kids show curiosity, wanting to hold onto geometric shapes and counting with the teacher? Did they make the classification consciously the number of sides and names of each shape, or instinctively, according to colors and visual similarities? Did anyone have major difficulties compared to the rest of the class? What are the reasons for this result and what can be done to improve it? Have there been behaviors that stood out positively or negatively? What were and for what reasons could the children do this? How did you resolve the conflict and what might you do differently next time? Did all children retrain the learned content in their routine, comparing forms to objects in their universe?
- Did you know how to classify shapes?
- In the first case, the logical-mathematical concept is more developed.
- Were they able to track activity?
Do not forget also about large selection toys on this topic - sorters, dominoes, cubes, balls, etc.
Doman's cards http://www.tvoyrebenok.ru/glen-doman-kartochki.shtml
-Video
For mothers http://www.youtube.com/watch?v=2O6j8jXNvws Lesson number 1 "Studying geometric shapes"
"Baby Einstein" (2 parts)
www.youtube.com/watch?v=FNDufHPzkSE
www.youtube.com/watch?v=BHMtSZftZhY
Video from "Umachka": shapes and angles
www.youtube.com/watch?v=rRewibcaHpg
Video from "Umachka": we build objects from figures.
www.youtube.com/watch?v=t5gznkhAYRo&feature=related
Video from "KS-Kids": Colors and shapes
www.youtube.com/watch?v=8eLlIrDZ4C0
This is a cartoon from a toy. My little ones are delighted with it. Great for toddlers. Very simple and fun.
www.video.mail.ru/mail/anya.lev/_myvideo/6.html Magiq 3 12 tfileru
Then create timelines with posted texts, photos and videos and automatically generate charts and reports to make it easier to visualize their growth! Sixth graders learn what mosaics are by observing examples in nature and on the floors of historic buildings. Then creating your own numbers is a jump.
Mosaics are one of the most beautiful practical uses of geometry. They combine mathematical precision with aesthetic sense, and behind them is hidden a large number of concepts that often obstruct interest in school. Mathematics teacher Renato Silveiro Alves from the Caranda School in São Paulo took the mosaic into class. And they made the children worry about the topic.
-Presentations
"Geometric names" www.900igr.net/prezentatsii/tsvet-i-forma/Figury-3.files/Nazvanija-geometricheskikh-figur.html
figures www.900igr.net/prezentatsii/tsvet-i-forma/Figury-2.files/Figury.html
2. Creative activities:
- drawing,
Teach your child to draw a circle.
Points (corners of a shape) can be drawn. Let the child connect the dots, you get a square, a triangle ...
You can draw pictures from geometric shapes (you can draw and tell yourself, and the child will be an observer) 
One of the good things about the project, developed since the 6th grade: lead to the construction of geometric shapes, not just their identification and conceptualization. The teacher went beyond cut-out pieces and finished models and encouraged the class to use rulers, squares and bars. Polygons, inscribed in a circle, regular and starry, a great subject worked. In addition, several others appeared: angle, symmetry, perimeter, composition and decomposition of figures, etc. one of the principles of mosaic is to connect the pieces so that there are no gaps or overlaps between them.
Draw shapes through a stencil
These pictures may be suitable for printing. You can paint the figures with finger paints or make an applique with cereals. 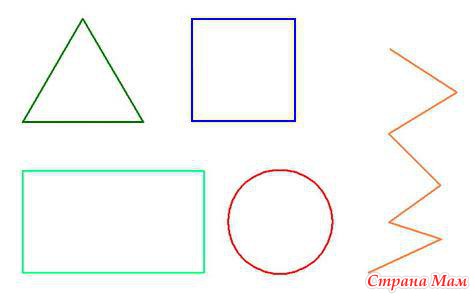

- modeling,
For this to happen, the sum of the interior angles of the shapes embedded around each vertex must be 360º, a shape that already encompasses several concepts of geometry. Renato started by requesting a survey. Then, with images projected into the classroom, the students studied examples of nature - tortoiseshell shells, snakeskin, and the eyes of some reptiles. “They learned from the geometric mechanisms found in nature to determine the common aspects of the figures,” he says. For example: the shell of a pineapple is formed by polygons of four irregular sides, already the honeycomb consists of perfect hexagons.
Arm yourself with tins (you can even use baking tins) and sculpt figures from plasticine 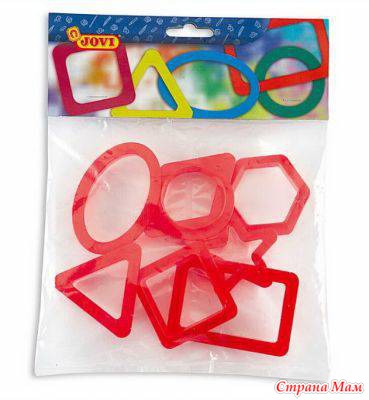
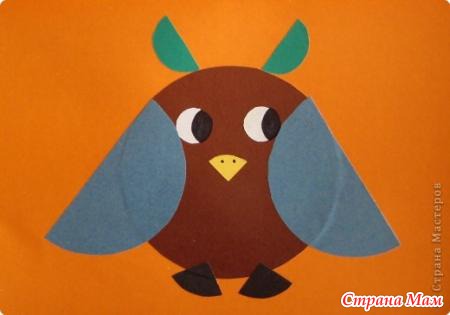
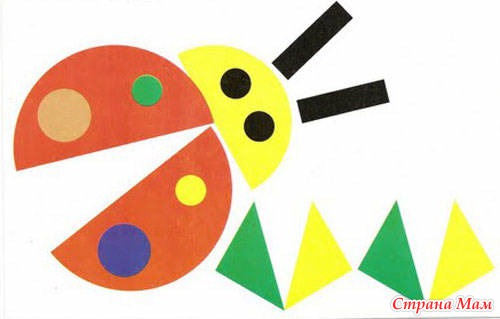
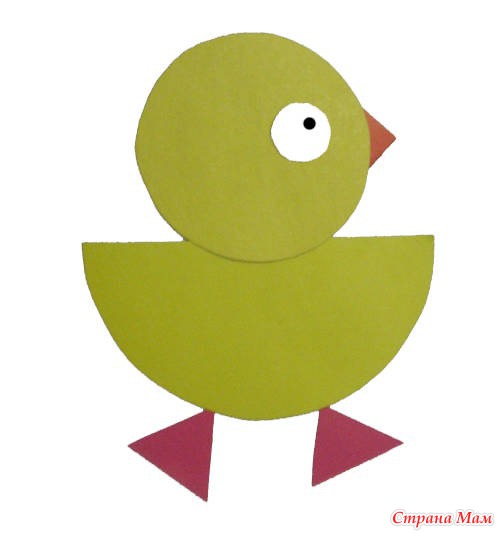
- application,
"Geometric Creativity"
Geometric applications can be on any topic - as your fantasy tells you. At first, it is more appropriate to use shapes of the same type, for example, only circles or only triangles. For example, the application "robot" using squares, or "fish", where you can use only triangles.
Application "Caterpillar" using circles. The mother paints on the head, and the baby glues the "body" out of the circles (the picture shows a blank for the applique).
Later can be used for applique different figures... You can use the geometric shape itself as the basis for the applique: "Decorate the oval" - glue pieces of different fabric, corrugated paper, etc. onto the finished oval shape.
A more complex version of the "Geometric Mosaic" - from small geometric shapes (for example, squares with a side of 1 x 1 cm) - "lay out" a tree, a house, etc.
In addition, you can make various crafts based on a geometric figure directly. The figure shows an elephant craft based on a rectangle (you can use, for example, a paper bag). You can also take paper disposable plates as a basis.
By exploring the possibilities of geometric mosaics, including construction techniques, began new stage work that expanded both knowledge of the subject and interest in it. Escher, a researcher of the history of mosaics, in particular the repetitive patterns of the East. At the same time, everyone is reading the book "Mosaic Geometry". To enrich this activity, Renato "rolled" on the project of his colleagues in history and geography, which facilitated a visit to the city center. Its purpose was to look for examples in the external and internal architecture of the region's old buildings.
Striving for success: documenting everything with pictures, the group discovered patterns different types... The school made transparencies of the most beautiful photos designed to better understand the details. Then the actual activity of geometric design began, focused on polygons inscribed in a circle. “We used several classes to figure out the decagon triangle, then we went to the stellar polygons,” says Renato. During the process, he also drew polygons onto the slate using a ruler, compass, and wooden squares.
-crafts.
The goal was to stimulate creativity. The works became the attraction of the cultural fair, which won a large mosaic made on the floor with a circle of strings and chalk and painted in gouache, with several hands. The figure was covered with transparent adhesive plastic so visitors could walk on it without damaging it.
“The proposed activity required rigor because the goal was to get a perfect design in which different geometric concepts could be tested,” notes Maria Suely Monteiro, Mathematics Consultant São Paulo. The project made it possible to approach educational activities specific situations. “Children understand that their creations on paper have the same character as in buildings in the city center.”
With the help of matches or sticks and plasticine, you can make models of figures. They may not necessarily be in 3D.
3. Games for the development of fine motor skills.
"Magic chalk"
On a slate board, prepare in advance (draw with chalk) the figure under study (circle, oval, triangle, square). Then the baby lowers his finger into a container of water and must erase the figure, tracing the figure along the contour. At the same time, the mother needs to comment on what is happening - name the figure, count the angles, etc. The figure under study should be in front of the child's eyes.
Material used: slate board (any surface on which you can draw with chalk is possible and contact with the child's fingers will not cause damage), chalk, sample, geometric figure, tracing template, glass of water, apron.
This game can also be played while swimming. You can draw on the tiles with children's toothpaste.
Step by step From old buildings to paper. There are two main methods for drawing polygons within a circle. One is to divide the center angle by 360º as many times as the polygon. For example, the principle of constructing a pentagon is to define an angle of 72 ° with a protractor. Another method, more complicated as well as more accurate, is the one that uses a compass.
The teacher asked the class to research the work Dutch artist... He drew attention to the fact that when certain models that shapes such as lizards stand out are regular polygons. Escher's fantastic landscapes enchanted the students with their optical effects.
"Wonderful bag"
Cubes and balls are placed in a bag made of opaque fabric. You ask the child to take out one at a time. There are two options: a simpler one - the child takes out and names an object. And the second, more difficult one - the child must guess by touch: "What's in the bag?"
Material used: 30 * 40 opaque cloth bag
"Tactile figures"
Tactile figures are made as follows: figures cut from sandpaper are glued onto A5 format cardboard (you can use 2 types of sandpaper - small and large, artificial fur, fleece, etc.).
When playing with the baby, you examine the figure, name it, ask to run your finger over it. You start working with one figure, that is, he studies all the cards, where the same figure is presented in all "tactile" manifestations.
Used material: A5 cardboard, glue, sandpaper on a paper basis, scraps of fabric - drape, fleece, velvet, etc., figure templates.
The next step was to find the mosaic in the center of São Paulo. Found beautiful examples ranged from checkered slabs, in relatively simple repeating patterns, such as at the Teatro Municipal, to more complex combinations at the Monastery of San Bento. The ground floor has an intricate star mosaic tinkering with the imaginations of the kids. They asked me if it was possible to do something like that on paper, and some are very close to it, says Renato. Artists Pablo Picasso and Georges Braque changed the face of art in the 20th century by fragmenting the subject matter of their works of art and creating a Cubist art movement that revolutionized European painting and sculpture, in addition to inspiring movements related to music and literature.
"Smart clothespins"
For the exercise, you need to prepare a circle of dense colored (yellow, red, gold) cardboard. In the course of the game, you offer the kid to attach clothespins to a circle in a circle like "rays", and you will have a wonderful "sun".
Material used: colored cardboard, circle template, glue, clothespins.
Objects are fragmented, analyzed, made from multiple angles, and assembled in an abstract form instead of an object presented from a single point of view. The artist shows an object from multiple points of view to represent the subject in a broader context. Surfaces often intersect at random, eliminating general feeling depths. The context and the object come into each other to create an ambiguous space, a characteristic different from cubism.
Cubist artwork draws inspiration from African art, but it was the work of the artist Paul Cézanne that inspired artists to explore Cubism. In the late 19th and early 20th centuries, the European cultural elite first discovered African and American art from America. Artists such as Paul Gauguin, Henri Matisse and Pablo Picasso were intrigued and inspired by the strength and simplicity of these styles from foreign cultures.
"Geometric Tablet"
This manual was invented by M. Montessori and can be found commercially. It develops beautifully fine motor skills, abstract thinking, introduces geometric concepts. Making it at home is very simple. Take a plank, mark with a pencil in the center of it (with equal indents from each edge of at least 1.5 cm) a checkerboard-like grid (5 horizontal and 5 vertical lines spaced at an equal distance from each other and together forming squares of the same size). Drive nails into the corners of the squares, leaving a distance of about 0.5 cm to the cap. The tablet is ready.
With the help of colored rubber bands, your child will be able to "draw" various shapes on the tablet: geometric shapes, animals, birds, etc. You just need to hook one end of the rubber band to one nail, pull and fix its other end to the other nail. A figure is formed from several stretched elastic bands.
Material used: board 15 x 15 cm, nails (25 pieces), a hammer, a ruler and a pencil (for marking), multi-colored rubber bands (with which money is usually used).
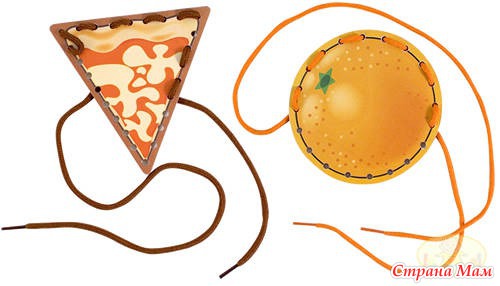
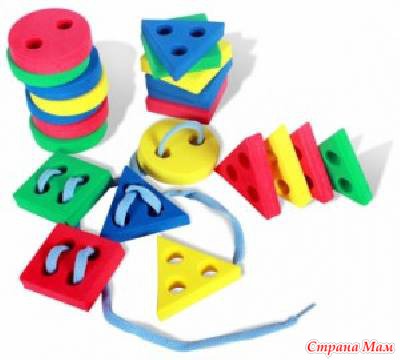
"Lacing"
It is necessary to take thick paper (cardboard), cut out a simple shape from it, for example a triangle, glue it over with colored paper. Then with a hole punch along the edge, make holes at a distance of 0.5-1 cm. Tie a lace or ribbon to the extreme hole. Offer the child to braid a little, pulling the lace through these holes.
Used material: colored cardboard, glue, scotch tape, hole punch, scissors, lace, figure templates.
Or such an option 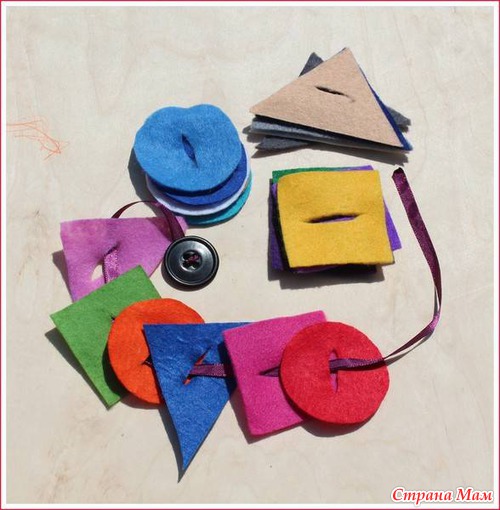
Sensor box. We are looking for, sorting. 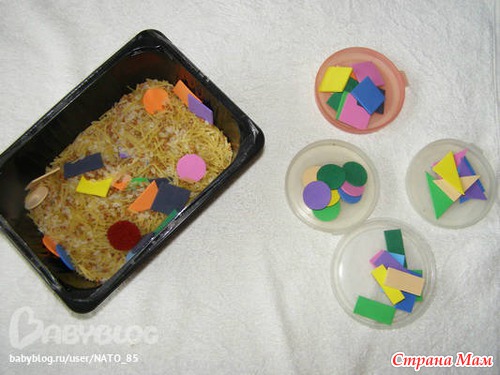
or this version of "fishing"
Drawing in the sand, you can take semolina ...
4. Games for the development of logic, attention.
Homemade development 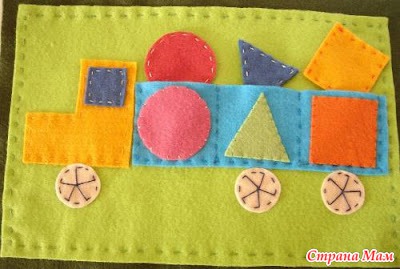
"Name the figure"
Lotto and puzzles are homemade. 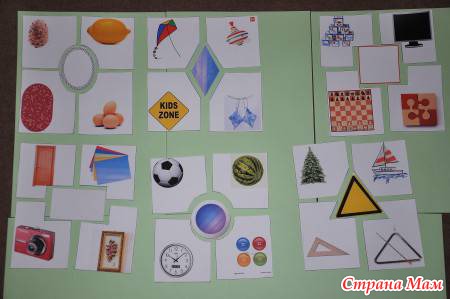
Sorter
"Find the superfluous."
"Collector"
For this exercise, you need to prepare small squares, circles, triangles made of thick cardboard (it is advisable to glue the details - geometric shapes - on both sides with tape for strength). You invite your child to collect parts in a piggy bank.
First, you lay out to him for "assembly" only parts of one kind, for example, only squares, while pronouncing the properties of the square. Then, as you study the shapes, you complicate the task - gradually introduce new shapes to sort. For example, first you collect only squares, then circles, etc. You can also make a piggy bank yourself. It is necessary to make a slot from any box with an opening lid, plastic can (for example, an empty jar of mayonnaise). The size of the figures depends on the size of the slot.
Used material: piggy bank, colored cardboard, geometric patterns, glue, tape.
"Logics"
For this exercise, you need to make a "logical geometric cube". To do this, you can use any cardboard box (preferably a box made of thick cardboard) of medium size (approximately 25 x 25 cm). On the edges you need to cut out" windows "in the form of a circle, triangle, square. The easiest option is when one edge contains one “window.” The sizes of the windows must correspond to the cubes, balls, balls, etc. You have.
Material used: cardboard box, scissors or a sharp clerical knife.
"Pick up the wheels"
Buttons can be used to study the circle.
You can use the drawings in the coloring pages or prepare yourself or glue an applique together with the baby - a car (train) without wheels. And instead of wheels, invite the baby to substitute buttons.
Material used: picture vehicle without wheels, buttons, cardboard, glue, tape.
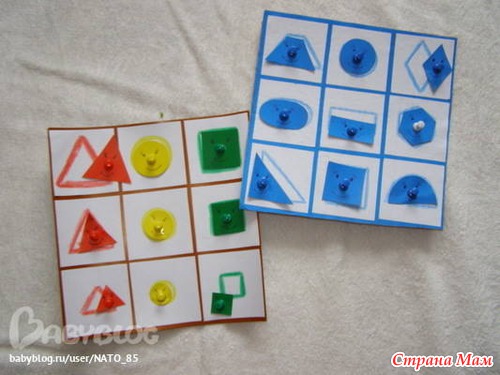
"Inserts"
You can also make geometric inserts yourself. To do this, you can use thick cardboard (from boxes from household appliances) or polyurethane foam rugs. It is necessary to cut out a shape along the contour with a sharp knife - at the base you will get a corresponding window. You can sew a button or part of a power clip (without the sharp part) on the cut out figure - for more convenient removal and insertion.
Cut out several shapes on the basis and suggest placing the shapes in the corresponding "houses".
Used material: thick industrial cardboard or polyurethane foam, stationery knife, figure templates, buttons.
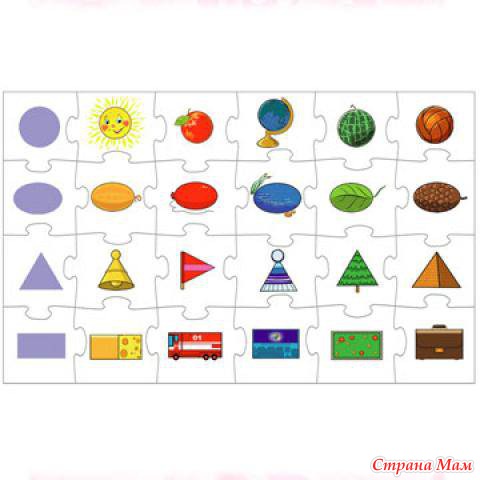
"Puzzles"
It is not difficult to make the simplest geometric shape puzzle yourself.
Take a cardboard A5 size, stick a geometric figure made of colored paper on it (the figures should be different color) and cut into several parts (see figure, - - - - - - cut line). The easiest way to cut is into 3 equal pieces. You can cut it either vertically or horizontally.
More complex ways- cutting into 4 equal parts (4th level of difficulty). An even more difficult option is cutting into unequal parts (5th level of difficulty).
For greater strength, each part of the puzzle can be pasted over with tape or adhesive tape.
Used material: cardboard A5, colored paper, templates of geometric shapes, scissors, scotch tape or adhesive paper.
"Mosaic"
In this case, you can use a regular mosaic to study the figures.
First option. Mom puts the outline of the figure under study on the "field" for the mosaic in advance and offers to "paint over" (fill the figure with mosaic elements).
The second option is to use any available shape templates. Offer the child to "circle" along the contour, laying out this figure from the mosaic.
"Find similar"
For this exercise, you can use any picture - rooms, vehicles, etc. Ask the kid to find in the picture all objects that look like a square, a circle, etc. This can be done simply by looking at the kid's room or walking on the street
"Bones"
For this game you need to do dice, on the faces of which to glue geometric shapes (on each face, one shape). You will also need didactic material- small geometric shapes (can be made from colored cardboard). Invite your kid to throw a dice and ask him to recognize the "dropped figure" and choose it from the offered figures.
Material used: cardboard, colored paper, glue, scotch tape, scissors, figure templates
5. Outdoor games and outdoor games.
Take your crayons for a walk. Draw shapes. Have the child find something of a similar shape and place it in the appropriate shape. For example, a pebble in an oval, Maple Leaf- an asterisk. or just jump on command at certain figures... You can do this - get to the goal only in squares.
6. Experiments and Experiments.
"Impressions"
You can use plastic cubes for this exercise. You invite the kid to paint over the edge of the cube and attach it to the paper. A print of the cube will remain on the paper. What does it look like?
Instead of cubes and balls, you can use shapes cut from the remnants of textured wallpaper. The technology is the same. In addition, whole paintings can be created from such prints.
Used material: plastic cubes, balls, paper, paint, brushes, remnants of textured wallpaper, scissors, shape templates.
"Focus"
Between two sheets of A4 white paper, fastened with paper clips at the corners, place a flat geometric figure made of dense material (for example, cardboard).
First, ask the child to "grope" the object hidden there and try to guess what it is by touch. Then ask to shade with crayon (wax pencil, pastel) on top - a three-dimensional image of a geometric figure will appear on white paper.
Material used: A4 paper, paper clips, flat geometric figure made of dense material, colored chalk ( wax crayon, pastel).
7. Dramatizations, role-playing games.
"Merry and Sad Circle"
For the game, you need to prepare figures (square, circle or triangle) from colored thick cardboard. On the figure, glue the eyes, mouth and nose (if the mother wishes, both hair and ears). One square will be funny, the other will be sad. And together with the square, for example, will go on a journey through the kitchen "In Search of Plates".
Used material: colored cardboard, glue, scotch tape.
You can compose a fairy tale about geometric figures (it is good to do it on a flanographer) - how geometric "figures build the world" and how bad it would be, for example, a square ... 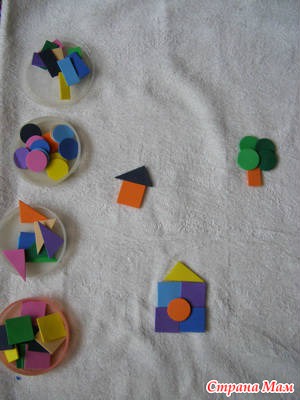
8. Poems.
"Figured painting"
For this exercise, you need to prepare all the geometric shapes that are discussed in the poem. You can make these figures from colored paper or cardboard. You read the poem and, as you present it, "draw" by attaching the figures with magnets to a magnetic board (for example, on the refrigerator door). The whole picture will turn out! At the end, repeat all the shapes again, gradually removing them from the magnetic board.
Holding scissors like a sword
I, deciding to create a picture,
Multicolored paper
I cut like a spider web.
And in the corner of the album sheet
I glue the QUADRATIC at home.
A TAPE runs along the path ...
FROM SQUARE window
It can be seen as from the forest edge
Go to your feeder
Animals can without fear:
AT RECTANGULAR DOOR
Food for them is left in a niche,
Eat boldly, only quieter:
There on the TRIANGULAR roof
With its ringing song
A nightingale has perched.
The clouds are above him, and above,
Illuminating everything around
The sun is gilded CIRCLE!
So as not to grieve in the winter
To those who will live in the house
I really need a vegetable garden -
Fruits vegetables. And so:
STRIPS are finely cut -
There will be boards for the fence,
And behind them for order
There will be an earthen bed.
Hey, who's in the house! Do not snooze!
Harvest your crops!
Two KRUZHOCHKA - two watermelons,
Three OVALS - corn
And a huge turnip CIRCLE,
It takes a friend to snatch
Well I glued it very tightly -
This is a fabulous turnip.
Where is parents? Look!
What have I done, rate it!
Mom and Dad praise their son
His picture was successful!
Curly poems
TRIANGLE
The plane flies across the sky
Triangular wing,
On my bike
Triangular saddle,
There is such an object - a square,
And all this is a TRIANGLE.
Here mom has three matches
She put it on the table.
And I got a triangle.
I folded it from the matches.
And at this time I was drawing.
And watched my mom
I connected three straight lines.
And did the same
SQUARE
An older brother came from school
I laid out a square from the matches.
Mom gave me chocolate
I broke off a slice - a square.
And the table is a square, and the chair is a square,
And there is a poster on the wall - a square
The board where the chess stands
And each cell is a square
There are horses and elephants,
The figures are fighting.
SQUARE - four sides,
All sides are equal,
And all the corners are straight.
CIRCLE and CIRCLE
My brother and I live together
We have so much fun together
We'll put a mug on the sheet
Outline with a pencil.
It turned out what you need -
The CIRCLE is called.
My drawing brother
He considers himself a mother,
Everything inside the circle
He painted over with a felt-tip pen.
Here's a red circle, a circle,
Along the edge there is a blue rim.
CIRCLE - plate, wheel,
CIRCLE - hoop, belt.
CIRCLE is the outline of a CIRCLE.
I look at our sheet
I began to look for a corner near the circle,
But I couldn't find him.
Brother laughs - that's it!
Yes, the circle has no angle
By the plate and the coin
You will not find corners, there are none.
KEYSTONE
KEYSTONE, KEYSTONE
There is such a figure
I don’t know her.
Where do you live, trapeze,
In America, in China?
Maybe behind the trapezoid
Should I go to Greece?
Mom says: "Don't,
The trapezoid is with you.
I will dispel your longing
You wait a minute "-
And on the ironing board
Stows her skirt
He runs along it with an iron,
So as not to bristle with a bag:
- Here's the KEYSTONE,
You shouldn't go to Greece.
OVAL
How to draw an oval?
I called my brother for help.
The brother took a felt-tip pen and skillfully
I drew an oval:
You slightly flatten the circumference,
It turns out OVAL.
How many times have I seen him
In the bathroom, the mirror is an oval!
An oval is both a dish and an egg.
Mom says: Face
You have an oval one.
Let it be oval
If only not sad.
We laughed and in the oval
The face was drawn.
Oval - elongated circle
And the face in her is surprised.
Cube
The postman brought us a box -
A package for me and my brother.
The box is a CUBE, it has six sides,
All sides are squares.
What is in the package?
There are shavings and sawdust,
Sweets and bagels,
More jars with jam.
CYLINDER
"Cylinder - what is it?" - I asked my dad.
The father laughed: A top hat is a hat.
To have a correct idea,
The cylinder is, let's say, a tin can.
Steamer pipe - cylinder,
The chimney on our roof, too,
All pipes are similar to a cylinder.
And I gave an example like this -
My beloved kaleidoscope
You can't take your eyes off him
And also looks like a cylinder.
CONE
Mom said: And now
My story will be about the cone.
Astrologer in a high hat
Counts stars all year round.
CONE - Astrologer hat.
That's what he is. Understood? That's it.
Mom stood at the table,
She poured oil into bottles.
- Where is the funnel? No funnel.
Look. Don't stand aside.
- Mom, I won't budge,
Tell us more about the cone.
- The funnel is in the form of a watering can cone.
Come on, find her for me as soon as possible.
I could not find a funnel,
But mom made a bag
I twisted the cardboard around my finger
And deftly secured it with a paper clip.
Oil is pouring, mom is glad
The cone came out exactly what we need.
PYRAMID
I saw the picture. In this picture
There is a PYRAMID in the sandy desert.
Everything in the pyramid is extraordinary
There is some kind of mystery and mystery in it.
A Spasskaya Tower on Red Square
Familiar to both children and adults very well.
You look at the tower - it looks ordinary,
And what's on top of her? Pyramid!
BALL
Hit! Hit! Another blow!
A ball flies into the gate - BALL!
And this is a watermelon ball
Green, round, tasty.
Look better - what a ball!
It is made from the same circles.
Cut the watermelon into circles
And taste them.
9. Bonuses.
Geometric fairy tales (for children from 3 years old) It's great to print these fairy tales and draw small illustrations for them.
A TALE ABOUT THE SQUARE
Lived in the country of Geometry List. Its edges were uneven, with many bends, because a boy named Vovka snatched it out of a notebook, and Liszt had been on the road for a long time. And our hero really wanted all his sides to become even again.
Gathering his strength, Leaf went in search of the Ruler, Pencil and Scissors. Only they could help him. Leaf spent five whole days on the road, because he could only move with the help of the wind, and the windy weather was not every day. On the sixth day of his journey, Liszt met Pencil. A pencil at this time was drawing corners in the sand. Its angles were of different sizes, and he stubbornly repeated out loud: "Sharp, dull, straight, deployed!" The leaf quietly flew up to Pencil and told his story. Pencil felt sorry for him and agreed to help, but, unfortunately, he could not do anything without the Ruler and Scissors.
Now they went on a journey together. But they did not have to look for the Ruler for a long time, because instead of a bridge it lay on two opposite banks of the stream. Pencil and Leaf carefully dragged the Ruler to their bank and asked for her help.
- Yes! Yes! Yes! - Ruler exclaimed (she missed her job so much), - Of course, I will help!
Work has begun. The pencil was straight. The ruler measured the sides so that they were all the same length. When the work was done, the Ruler announced to List:
- Well, now you will be a square!
- A square? - Liszt was surprised.
- Yes! Yes! Square! - Ruler answered convincingly.
- And what is it? Liszt asked.
“It's a rectangle with all sides not only even, but equal,” said the Ruler.
Leaf was delighted. He thanked Pencil and Ruler and went in search of the Scissors.
Walking down the path, Leaf saw beautiful house with a very unusual acacia instead of a fence. He went up the steps and knocked. The door creaked softly, and Scissors came out to meet him. Liszt's joy was beyond description. He jumped with happiness. And the Scissors at this time looked at him and did not understand what was the matter. Finally, Leaf calmed down and told the Scissors his story. The scissors behaved unusually, they suddenly began to cut the air. It turned out that they expressed their pleasure in this way. The scissors really loved to work, that is, to cut. In five minutes, our Leaf turned into a real Square. The scissors brought him a mirror. He looked into it for a long time, and then shouted:
- Square! Square!
And the Scissors again stood in bewilderment and looked at the Leaf. They did not understand what kind of word our hero was repeating. But you and I know what this figure is!
Happy lessons!
P.S. Girls, just recently they brought me a laptop. Before that I went out from the phone to the Country of Mothers. All your topics looked. I liked it very much, even more than. Thank you for taking an active part in the life of the group!
Daria Karpukhina
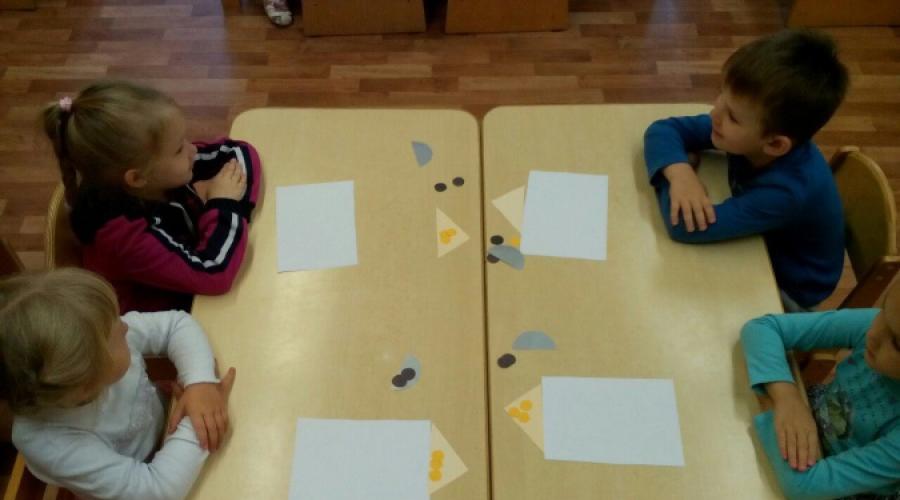
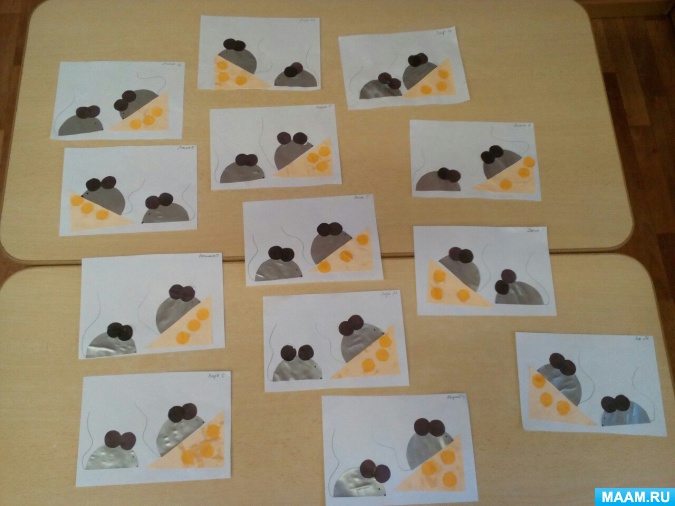
Our math classes are not very enthusiastic, children find it difficult and uninteresting, so we have to resort to methods to get the kids interested. In the last lesson, our topic was "Various geometric figures"and we didn't just talk, watched the presentation, consolidated the material didactic games, but also made so to speak, " geometric craft". The first stage was the preparation of figures from colored paper.
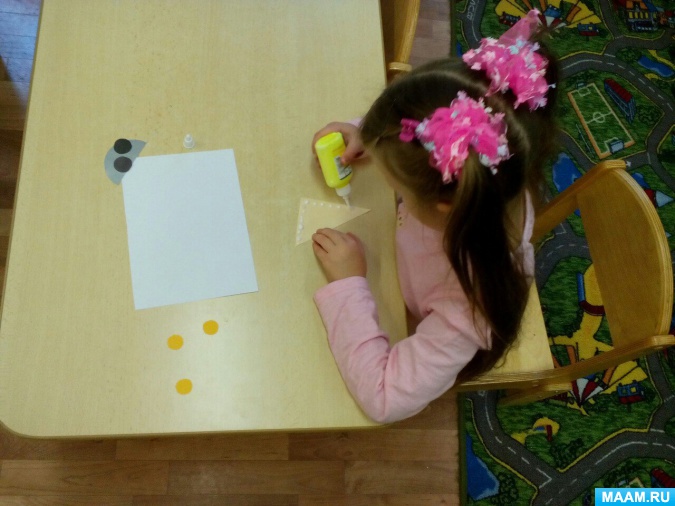
Then we moved on to one of the mice. Glued her torso (half-oval) and immediately added ears (small circles).
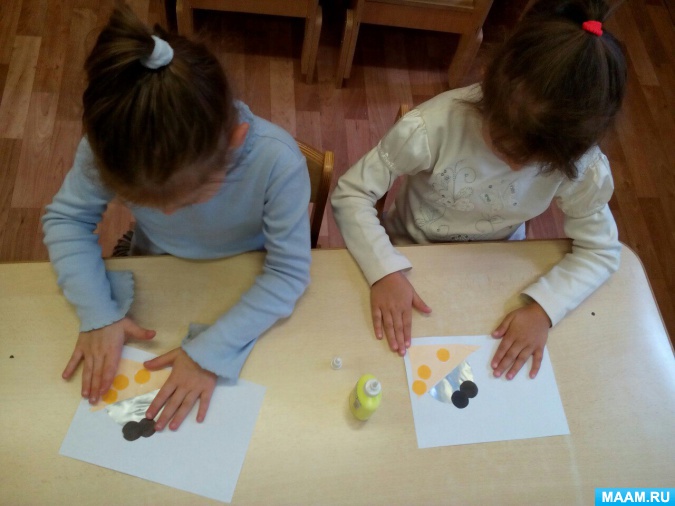
The mouse is ready, went to her friend. Same torso (half-oval)
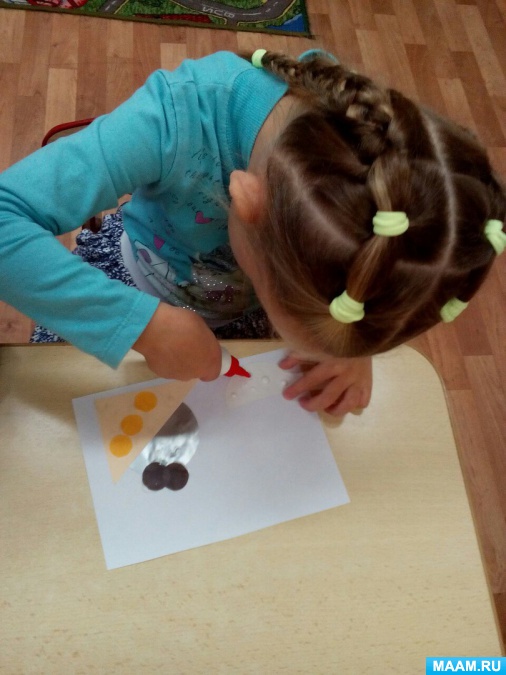
Two " geometric abalone" (circles)
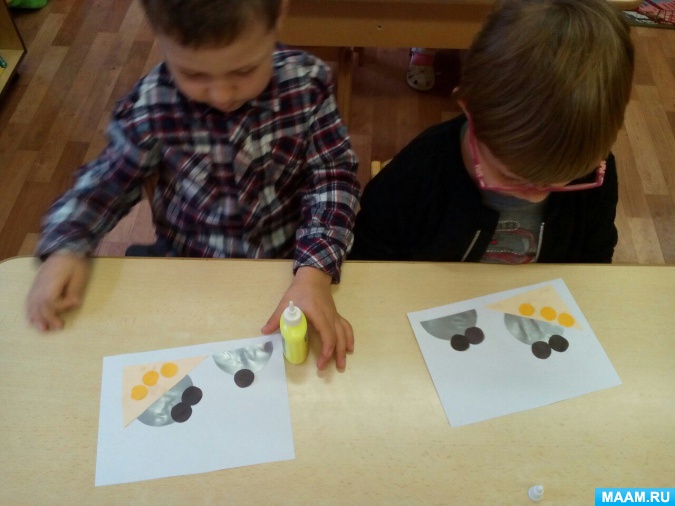
It remains to finish drawing their eyes and tails, but the children quickly and easily coped with it.
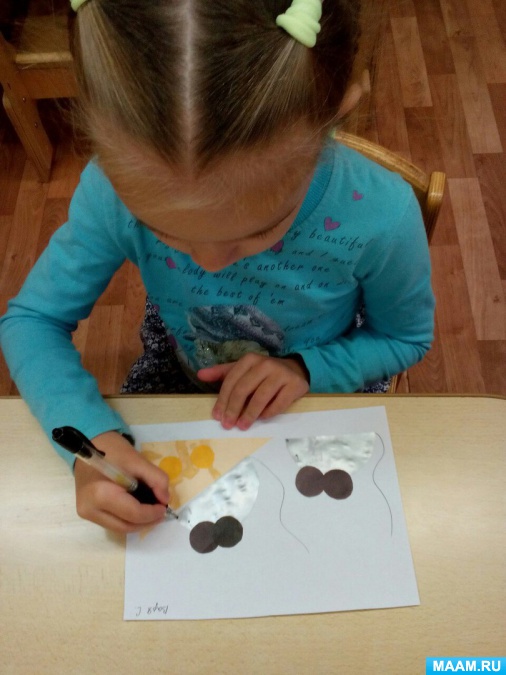
These are so cute mice we succeeded and the lesson was interesting and entertaining!
Related publications:
Hello. Dear Colleagues. So I want spring, I decided to make such flowers. For this we need: glue, colored paper, scissors, a jar.
So the Valentine's Day holiday has passed. Many bright, beautiful good crafts were made by children with the help of educators. It was.
Good afternoon, dear colleagues) Here has passed a wonderful, bright holiday Valentine's Day, and we could not leave it unattended! Decided.
Spring has come and nature comes to life around us, including including insects: and my children and I decided to make caterpillars, beautiful, bright and unusual.
Flowers of mother-and-stepmother - "Friendly family". Where there is even a slight elevation, bathed in the sun, after the snow, they can announce about.
Master class in the senior group "Volumetric butterflies from colored paper and flowers from crepe paper." Municipal Preschool Educational State-financed organization kindergarten No. 20 "Birch" x. Kirov, Municipal Formation Novokubansky.