That you can draw with colored pencils easily. How to Draw with Colored Pencils for Beginners - Top Tips
Read also
Colored paintings have long attracted their colorfulness and were in demand: they were used to decorate houses and halls of large rooms for several centuries. To give color to paintings, artists use paints, pencils. Drawing with colored pencils appeared relatively recently, in late XIX century when the simple pencil was invented. Later they began to improve it, give it different thickness, hardness, experiment with color and use it in painting. During this period, it became possible to draw with colored pencils for beginners.
What attracts drawing with colored pencils?
This type of creativity is gaining great popularity. With his help, talented artists recreate the most complex color images. The variety of views and the tip of a sharpened pencil allow you to emphasize the smallest parts of the image.
This art is subject to anyone with an elementary desire to create, be inspired, and learn. Yes! Exactly to study! In our school of art, we are ready to teach all the subtleties of drawing with colored pencils. You don't have to be good at painting. The main thing is the desire to create.
How to learn to draw with pencils, subtleties and features?
During the training, we reveal several basic questions:
1. Who can draw?
Talent for art is present in every personality. Some realize this themselves, and begin to draw without any help, others have to develop this skill. This is regardless of age, race and nationality. Do you know how to hold a pencil in your hands? Then a sense will come out of you.
2. How to draw?
 We are learning to draw with colored pencils, but which ones? There is a huge variety of pencils that differ in the hardness of the lead, the thickness of the rod, the material of which the base is made. There is a designation that determines the degree of hardness of the lead: 1H - the hardest, 5B - the softest. This designation is indicated on a pencil basis. Often used and watercolor pencils... Charcoal, chalk, and sanguine were also used as a variety of colored pencils.
When redrawing from another image, you may be disappointed that you end up with something completely different. This is the inability to choose the right tones. Each color has many shades. In the case of pencils, it is the same. We will teach you how to select correct view pencils.
3. What to draw on?
Usually paper is used. It, like the type of pencils, must be chosen correctly. It can differ in density, roughness, shade.
We will teach you how to choose the right materials so that the desired drawing will be reflected on the paper.
4. What to draw?
The main mistake of novice artists is the wrong selection of the image. For ease of memorization of all the rules and subtleties, you should start with simple drawing containing a minimum of elements and colors. When the hand is already full, all the basics are learned - we proceed to difficult tasks.
5. How to draw?
 There are various techniques, drawing principles, and strokes. This part of the training is challenging and requires additional concentration and time.
Popular painting techniques include:
- pressure. In the case of paints, the more you put on the tip of the brush, the more pronounced and intense the color will be. It is different with pencils - the harder you press when applying, the more pronounced the shades will be;
- hatching allows you to give a certain effect to the work: movement, volume, direction;
- overlaying and feathering allows you to create the effect of a smooth transition of colors and tones.
It is especially difficult to draw pictures from life on paper.
The whole process of drawing a picture can be reduced to the following scheme:
1. Determine where we will redraw: from nature, from memory or according to the selected sample.
2. Choose the materials and the desired paper size.
3. Draw the main contours, transferring them exactly as in the source.
4. Apply fine contours.
5. We give the elements of the picture volume, the desired color and chiaroscuro.
6. When to draw?
Many today admire the work of other people, their hard work, popularity and do not realize that if they started yesterday, they would have already been among such people. If you have the desire, the time and the goal, you can start learning immediately. Do not be afraid that it will not work. Be careful not to try.
7. What will be the result?
After completing a step-by-step training course in drawing with colored pencils for beginners, you will learn how to create your own unique images and get the basic skills of an artist, and we will get a successful and talented student.
8. Where to apply the acquired skills?
Everyone can tie their own further life with creativity. There are cases when students of creative schools became worldwide famous artists, art designers, popular bloggers in social networks in this direction.
 Why exactly our drawing studio?
We love and appreciate our work! You enjoy drawing, and we teach you.
We work according to modern proven methods that are suitable even for beginners.
Our students are never left without results.
Join our team and make your dream come true today!
Today we'll talk about various techniques drawing with colored pencils.
WITH colored pencils insanely enjoyable to work with, partly because they are easy to manipulate and control. How you sharpen the pencil, how you hold it and how hard you press on it, depends on what effect you will achieve when drawing. By using colored pencils you can create both soft combinations and dazzling vibrant realistic textures. Once you grasp the basics described below, you can decide which technique will give an object its unique properties. Technician in drawing with colored pencils a lot, as much as the effects can be achieved with their help. Therefore, the more you practice and experiment, the more potential you will notice in images that inspire you.
Pressure
Drawing with colored pencils different from painting with paints, you can't just put more color on the tip to make it darker. Therefore, your main tool is pressure when you apply color. It is best to start with a light color, which will preserve the texture of the paper for much longer. Over time, you will develop the mechanical skill of varying the pressure on the pencil to achieve the desired effect.
Light pressure
In this area (in the picture on the left), the color was superimposed just barely touching the surface of the paper with the pencil. With a light touch, the color is still transparent.
Moderate pressure
Moderate pressure on the pencil creates good foundation for layers (center). This is also the click with which you might want to label your drawings.
Strong pressure
Pressing very hard on the pencil flattens the surface of the paper, making the color really solid (right).
Strokes
Every line that you make colored pencil very important - the direction, thickness and texture of the line will contribute to the creation of this or that effect. Practice various shading types... You will notice that you have a penchant for one or two types of shading but the touches help convey the texture and emotion of your work.
 Hatching and texture
 You can simulate different textures by creating dot and dash patterns on paper. Using dots, you can even create a dense, dense texture.
 Hatching and movement
 While a group of straight lines gives direction (in the picture on the left), a group of slightly curved lines conveys a sense of movement (on the right). Try combinations of different shading options and to create a more rugged, rich design. Such exercises show you how lines and strokes can be not only expressive, but also informative.
 Line thickness
 Lines of varying thickness help create texture. These lines create a sense of volume in the drawing.
Shading types
 Rounded
 Make circular movements with a pencil or in random order, as in the picture, or in the same rows. For a tighter coverage like the one on the right side of the example, make several layers, overlapping circles. You can also experiment with varying degrees pressing, for more randomness.
 Rectilinear
 You may find it more convenient to work in a straight-line style: vertical, diagonal, or horizontal, depending on your preference. Your strokes can be short and choppy, or long, depending on the texture you want.
 Chaotic
 This effect is created by scribbling a pencil across the surface of the paper in a random manner, creating an organic mass of color. By varying the pressure and the amount of time it takes to draw a line in one area, you can increase or decrease the saturation of the color.
 Regular and cross-hatching
 This term refers to the creation of a series of nearly parallel lines. The closer the lines are to each other, the denser and darker the color. Crosshatches are created by superimposing some parallel lines on top of others, but at a different angle. You can use hatching to fill areas with solid colors or to create textures.
 Smooth
 No matter what your favorite type of shading is, you should strive to be able to control the pencil and apply a smooth, even color. I used small circles in this example. Note: When the color is flat, you cannot tell with which lines it was applied.
 Point
Point This is the most mechanical application of color, however it creates a very strong texture. Just sharpen your pencil and create small dots all over the surface. Place dots closer friend to a friend for a tighter coverage.
Layers and feathers
Anyone who paints can first mix colors on a palette and then transfer them to the canvas. Working with colored pencils, all mixing and shading of colors occurs directly on the surface of the paper. With layers, you can get how to get new color and a new shade. To enhance the color, you need to put more layers on top, and to muffle, use a complimentary (contrast) color. You can also blend colors with a white pencil or a colorless blender.
 Layers
 The easiest way to blend colors is to apply a second coat of color directly to the first coat. You can do this with as many colors as you need to achieve the desired color or saturation. The key to this technique is using light pressure, working with a sharpened pencil, and evenly applying each layer.
 Polishing with a colorless blender
 To refresh your memory, let me remind you that polishing Is a technique that requires strong pressure to combine two or more colors together for an even, glossy look. A colorless blender tends to darken colors (as shown), while using a white or light pencil (next example) lightens the colors and gives them a metallic look.
 Polishing light on top of dark
 You can also mix colors using lighter or white pencil... To create an orange tint, apply a layer of red and then paint over yellow. Remember that the dark color should always be under the light one. If you apply a dark color on top of a light one, no mixing will occur. Also try not to press too hard on the lower layers in the polishing area, as if you flatten the surface of the paper too quickly, the mixing result will not be as effective.
 Optical mixing
 This method is usually used when working with pastels, the viewer sees two colors side by side, as if they are mixed. Use handwriting, strokes, dotted lines, or rounded scribbles to apply color, making each pencil look like a small piece of string. When viewed as a whole, lines of different colors merge and appear as one mass. It is very lively and new method mixing that will captivate your audience.
The eagle is a bird of prey with a large body, strong legs, long wings, sharp claws, short tail, massive beak and large eyes with good vision. All these features allow him to soar high in the sky for a long time, consider future prey and easily attack. Therefore, you should definitely learn how to draw an eagle, because it is quite common in Eurasia, Africa and North America.
Required materials for drawing such a bird:
DecorysAn owl is a nocturnal bird that hunts at this particular time of day. And all this thanks to big eyes who see well in the dark. It will not be difficult to draw an owl. Especially if it's in a cartoon version.
Necessary materials:
 Decorys
Nowadays, you can find not only ordinary forest urchins but also home. They look very similar to their wild relatives, but have slightly different features that help them live well at home. So let's learn how to draw a beloved hedgehog that has needles on its back, and also knows how to curl into a spiky ball.
Any drawing begins with a sketch, where you need to determine the overall size of an animal or object, and then move on to drawing large details. If you are drawing a hedgehog, then at the first stage it will be enough to draw a large oval. Gradually simple geometric figure will take on a natural look, with spiky needles, short legs and an elongated muzzle with small features.
Required materials for drawing a hedgehog:
 Decorys
The deer is the real pride of the forest. After all, no animal has such a "crown". In addition, the deer is a very graceful mammal. Therefore, it is very difficult to draw it in dynamics. So for the first acquaintance with him, we will learn how to draw a cute cloven-hoofed animal in a simple pose. The structure of the head and body is very similar to that of a horse, but there are some differences. For example, a graceful and short body, a short small tail, branchy chic horns and a small head. All of these traits make the deer a personality that provides inspiration to learn how to draw.
Necessary materials:
 Decorys
It is possible at any time of the year, because they are very beautiful. For example, how to draw a swallow. The main part of the body is no different from other birds, but the tail is long and has a slit in the middle. Therefore, it resembles a fork. Also, you can notice another feature of this bird - the wings, which are curved, sharp and long. The color of the swallow will be very simple in the picture. To paint it, it will be enough to have three colored pencils - black, red and Brown color... Optionally, it can be supplemented with other shades.
Required art materials for drawing a swallow:
 Decorys
Santa Claus and his granddaughter Snegurochka often dazzle on postcards and all kinds of tree decorations... However, there are other wonderful and good heroes... For example, a snowman. You can draw a snowman not only in the form of three circles, but also make interesting illustration... In it, we beautifully place the main character on this album sheet. We "dress" him in a hat and a scarf. V right hand we place a gift, and in the left - a broom. We supplement the drawing with small elements and paint with bright colors. So we get a drawing of a snowman on New Year 2018.
The sparrow is a very small bird that does not stand out very much with its feather color or singing. However, it is a very common bird in the forest, in the park, in the yards or in your own garden. Therefore, you probably saw such a small sparrow. To learn how to draw a bird, you should determine its main features and be sure to capture them on paper in the sketching stages before applying strokes with colored pencils. When drawing, do not forget that it is small in appearance, it has a short tiny beak and small legs. except correct proportions due time should be given to coloring the picture so that the color turns out to be natural, like a real bird. To do this, select as much as possible different shades brown pencils. Bring a black charcoal pencil with you to color in the eye, some feathers, and stroke. Necessary materials:Learn to draw a sparrow

Colored pencils are a versatile tool that anyone can draw with. They do not require any special skills and are ideal for the first sketches. Selected 8 tips from the book "Diary of a Naturalist Artist" - try to create your first painting right now.
1. Mix colors by shading
Pencil colors rarely match the desired shade. A huge set is not an option: it is hard and inconvenient to wear, and finding the right color takes a lot of time. Better buy a medium set and learn how to make up colors. The primary colors are sky blue, yellow and magenta. Other shades can be obtained from them. 
Diary of a naturalist artist

Usually the color of the pencil is intense and rich. In nature, tones are more muted. Therefore, another plus of mixing is the ability to muffle pure colors to natural shades. 
2. How to hatch with layers
To learn how to hatch with layers, you need to consider two points. First, choose a slightly grainy paper. Do not press too hard on the pencil, otherwise the paper will polish and the pigment will not stick to it.
Secondly, the black pencil for the shadow looks unnatural - it seems "glued". Therefore, use complementary colors for the shadows. Their pairs lie on a circle opposite each other:
- magenta and green,
- blue and orange-red,
- yellow and violet blue.

Use color circle to define colors for shadows
Combining an object's color with a complementary color gives a muted brown or gray shadow. Here's an example of how to use tints to depict shadows.
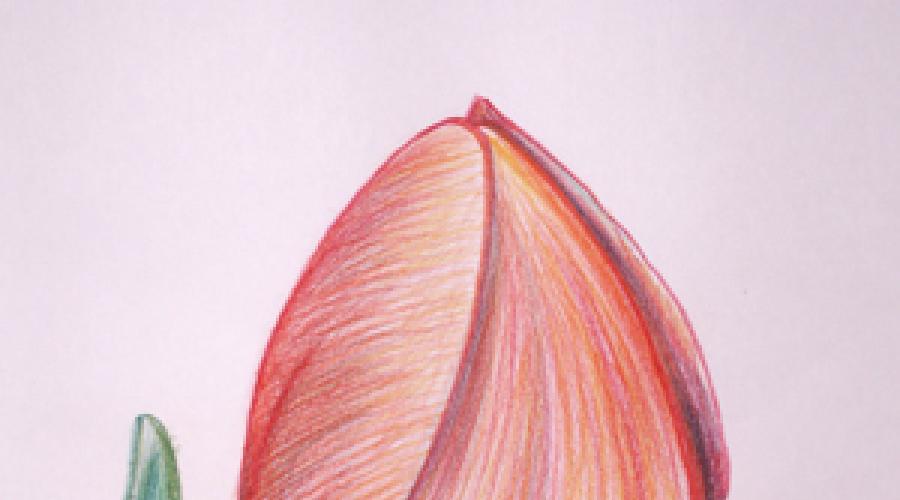
1. Start drawing an orange ball with a shadow with a complementary color of blue.
2. Put a layer of dark orange on top of the shadow.
3. Add other colors: yellow, red and green. The drawing will glow with glimpses of different shades.

3. Choose the right stroke technique
It is the stroke technique that affects the result and speed of the drawing. Choose the appropriate option for the desired effect.
- Small, light, rounded strokes ideal for even coverage and maximum control. Lead crumbles less, colors blend easier. Requires perseverance, but very relaxing under the mood.

- Scribble- fast and interesting technique but not as accurate. The smaller the scribbles, the more accurate the result. The texture will be visible in the finished drawing.

- Lines- a series of parallel lines. Too fast technique... Draw the lines at an angle that is comfortable for your hand. Control the pressure and do not increase it at the end of a stroke, otherwise streaks will remain.

- Cross stroke- a series of intersecting lines. The more layers, the smoother the texture: the next layers hide the unevenness of the previous ones. Cross-strokes can be used in the same color to deepen the tone, or in a different color if you want to change the tone.

4. How to quickly and easily draw shadows
Shadows add dimension and depth to an image. Don't forget about them and don't leave them for later. Remember that it is more difficult to add shadows at the end: it is a pity to overlap carefully mixed colors and the paper is almost completely polished. Draw the shadows first, then match them with a local color.

- A shade for the eyeshadow. Most of the shadows can be painted with a Black Grape pencil. It is a muted purple and produces convincing shadows when paired with most other colors.
- Yellow shades. The most difficult thing is to draw shadows on yellow objects. If there is even a hint of blue in the color of the shadow, it immediately turns green. "The Reed" is the color of Greyed Lavender. Its pale purple tint when mixed with yellow it gives a pleasant neutral brown or gray.

5. How to go to black
If you paint the shadows or the background with black only, the picture looks flat. Liven up the shadows with complementary colors, and the black areas of the drawing with dark pencils. Which ones? Indigo Blue, Dark Green and Tuscan Red in combination, they give a rich black with glimpses of the original colors. You can start with a black pencil layer and add one or more of these colors.

6. Why do you need paper embossing
So you are drawing a green leaf and you need to get thin light lines on a dark background. How to do it?

- White lines. Push the paper with a thin blunt tool (you can make it yourself from a thin ballpoint pen with dried ink) - and the lines will remain white against the background of the crayon layer. It must be blunt so that the lead does not touch the embossing.
- Colored lines. If you want to get thin colored lines, first apply the color, then emboss and put another color on top.
7. Use an unscented thinner to blend
Most often, small areas of paper are visible in drawings. An odorless solvent (white spirit) will help to get rid of them, shade the strokes and make the color brighter. This is a common gasoline solvent from which harmful volatiles have been removed.

Apply it over uniform, close strokes. For convenience, pour into a brush with a reservoir and smear over the pattern with a cotton swab / disc or shading. When the paper is dry, you can continue to paint: the texture is completely preserved. An odorless solvent can be used in combination with a colorless pencil blender.
8. Colorless blender - also for shading
One more good tool for shading - a blender. How do I use it? Rub the drawing in a circular motion. The colors will blend, the gaps will disappear, the paper will be polished. The color layer will become uniform and vibrant. But it is only suitable for strokes that are close together.

Colored pencils are familiar to everyone from childhood and therefore are associated with something insignificant and childish. But take a closer look at them and you will see that you can draw beautifully and realistically with colored pencils.
So, let's consider the features of drawing with colored pencils. They:
- suitable for drawing only on small formats;
- have color transparency;
- poorly erased with an eraser;
- allow you to get complex colors overlaid;
- require drawing experience.
Materials (edit)
Newbies will inevitably make mistakes, so they will need a lot of inexpensive paper that is thick enough to withstand multiple edits.
You do not need to choose highly textured paper. Hard pencils will cling, and soft pencils will break on her.
Colored pencils require careful selection in order not to be disappointed in drawing with them. It is not worth saving and buying faded, non-shading, poorly fitting on paper, inconvenient to work with, pencils made of low-quality wood. They will not bring pleasure to your drawing.
There are many manufacturers of professional and semi-professional pencils: Faber-Castel, Derwent, Creta-Color, Daler-Rauni, Koh-i-nor, etc. Study the reviews on them, see the work done by them and make your choice.
It is preferable to buy from 24 colors. If you wish, you can buy even more. After all, there are sets with hundreds of shades.
There are also watercolor pencils that are brighter and softer than regular pencils and can be washed out with water.

How to draw
A few tips to help you avoid many errors:
1. Start with a sketch. Without paying attention to small details, outline the main points simple pencil on a separate sheet. You can outline areas of light and shade. We carefully transfer the result to a clean sheet.
2. Increase the color saturation carefully. Don't start with bright spots right away to avoid confusion. It also makes it easier to correct inaccuracies. The eraser will only rub the saturated layer of dye.

3. Draw with light lines. This will allow you to work out and improve the work with each layer.
4. Learn to see the depicted object as a collection of spots. This will make it easier for you to portray him. Highlight the middle, dark and light areas
5. Mentally divide the subject into fragments and draw them gradually, because thin pencil lines are difficult to cover a large area at once.
6. It is better not to use a white pencil to indicate light areas, but leave unpainted areas of paper in the place of highlights.

7. After the designation of the three basic tones, we are engaged in mixing them, ie. transitions. Work in the same area until you get the desired shade.
8. Do not use only one pencil to mark a color spot. Add a few more shades.
9. The more colors you use, the more interesting the effect will be, but match well.
10. Having finished the main work, proceed to clarification. small parts and the transmission of the finest play of light.
11. Use different strengths of pressure on the pencil to get lines of varying thickness and brightness. But don't press too hard or you will end up with unnecessary shine.
12. When the drawing is almost complete, step back a few meters and look at it from this distance. You may want to change or add something.
13. Now it remains to erase everything unnecessary: a simple pencil, mistakes and stains on the paper.

- See also -
Experiment with the choice of paper and the application of color, practice and you will enjoy a technique that allows you to combine painting and graphic techniques.
Drawing technique with colored pencils - video