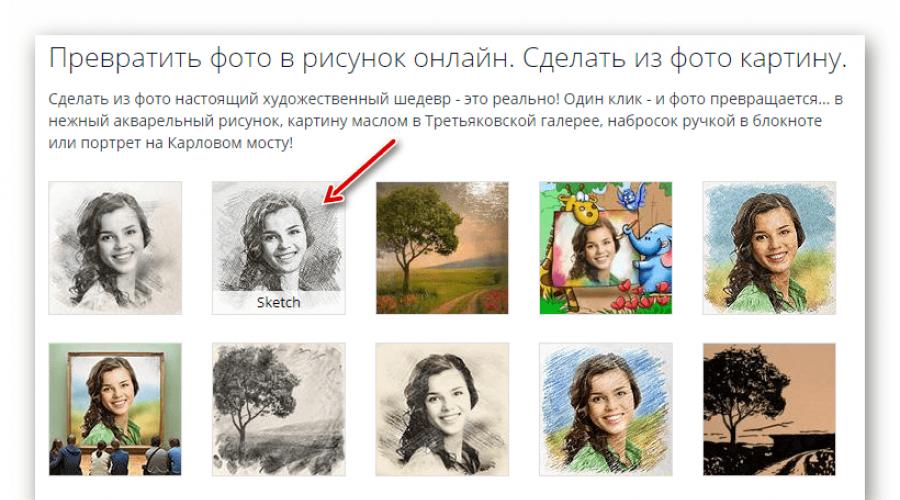
A program for converting a photo into a drawing. How to Make a Realistic Painting Effect in Photoshop
Read also
What people do not try to surprise each other by posting photos, for example, on Instagram: a sunset at the sea, outlandish animals close-up, cute couples, etc. But one of the most big problems user social networks- Exposure of the entire account in one style.
To solve this "problem", there are many applications or sites on the Internet. Your photographs can easily be turned into paintings in watercolor, oil, acrylic, pencil and in absolutely any style - whether they are portraits of Van Gogh or Chagall's masterpieces.
Quite often people go the simple route and turn photos into pencil sketches without using fancy programs like Photoshop. A special site found in a search engine can help make your photo a wonderful pencil drawing.
How to make a pencil drawing from a photo
Turning a photo into a pencil drawing is easy enough - you just need to find a web resource that will meet your requirements. Maybe you just need to process a photo to put it on your personal blog, or maybe you need to create a whole collage in a frame, in the same style.
In this article, we will consider two options for solving this problem, using resources such as Pho.to and PhotoFunya.
Option 1: Pho.to
The proposed site contains a fairly extensive functionality and at the same time you can work directly in the browser without buying paid subscriptions and without downloading additional software. "Photo effects", the section you need, makes it possible to automatically select the appropriate effect for the photo. This section, in turn, has subcategories - on the Pho.to website there are many options for processing photos. The desired photoelectric effect, which is obvious, is in the subcategory "Art".

This service is good because the photo you processed is converted into JPG format and different high quality. The site presents a lot of additional photo effects with several variations. For example, there are several variations of the pencil drawing effect.
Option 2: PhotoFunia
This online resource does not work out your photos, but, as it were, pastes them, stylizes them for a given environment. There is a whole category of effects that can be applied to pictures here - and almost all of them place your photo on a specific third-party object.
Again, PhotoFunia provides the ability to "turn" your photo into a painting, even in multiple versions.

PhotoMania is a very popular service that processes great amount images every day. And with such a load, delays during processing are minimal.
The site presents a large number of effects that turn ordinary photos into extraordinary shots.
The services discussed in this article allow you to creatively process a photo. You can spend a few seconds to get masterpieces, while using professional services or utilities would take much more effort and time.
AKVIS Sketch allows you to turn a photo into a pencil drawing.
Now you do not need to masterfully master the pencil to create an original work of art.
All you need is a little imagination and AKVIS Sketch!
The program turns photographs into thumbnails taken pencil or coal, allows you to create not only black and white pencil sketch, but also color drawing, as well as get the effect of watercolor and pastels.

The drawings created by the program can compete with real works. Sketch lets you get amazing quality result similar to the work of an artist.
If you've always wanted to learn how to draw but didn't know how, try AKVIS Sketch!


The program provides two basic styles that allow you to create drawings with different type hatching: Classical and Art. Each style comes with a set of ready-made presets.
An intuitive interface, the ability to select parameters using the quick view window, a hint panel and a rich collection of presets will help you quickly get used to the program and learn how to create your masterpieces.
The transformation of a photo into a drawing takes place before your eyes. Frame tape allows you to track the process of converting a photo at different stages and get pictures of different degrees of sophistication without changing the effect parameters.

Using the program, you can prepare illustrations for a book or article, create a unique greeting card, an interesting avatar, a poster or a picture on the wall, a print for a T-shirt.
The program is good not only for processing portrait photographs, but also for views of nature, architectural monuments. Sketch is used by professionals to demonstrate the features of architectural styles, preparing presentations. The program is indispensable when working on an advertising booklet or website, when you want to present a set of images in the same style.
AKVIS Sketch makes everyone feel like an artist!


Batch File Processing helps to quickly, automatically, turn a huge number of photos into drawings, create cartoons, comics.
Using bookmarks Background, Canvas and Inscription you can add additional effects to the image: get a combination of photography and drawing, imitate drawing in a different way
Beginning Photoshop users can't wait to create interesting work but sometimes knowledge is not enough for this. In that case, they will help Photoshop effects. Quick ready-made effects of the program are in the "Filter Gallery". Perhaps you've seen the transformed pencil drawing from a photo in Photoshop? Such drawings are easy to make by applying effects to photos in Photoshop from the "Filter Gallery".
To understand how this gallery works, it is enough to consider a couple of effects from it. The rest you will learn just as easily.
First, let's look at an example of how to make a photo painted with paint. Next - how to make a pencil drawing from a photo.
Painting with paint from a photo in Photoshop
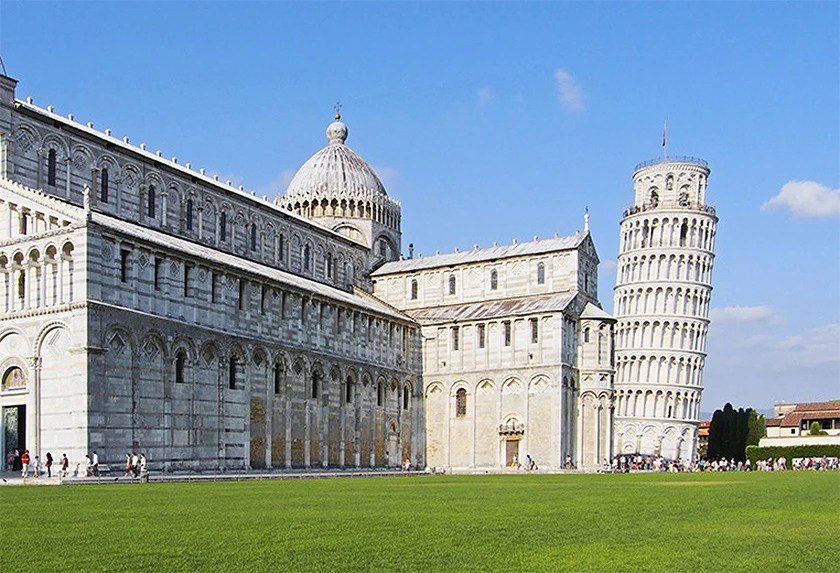
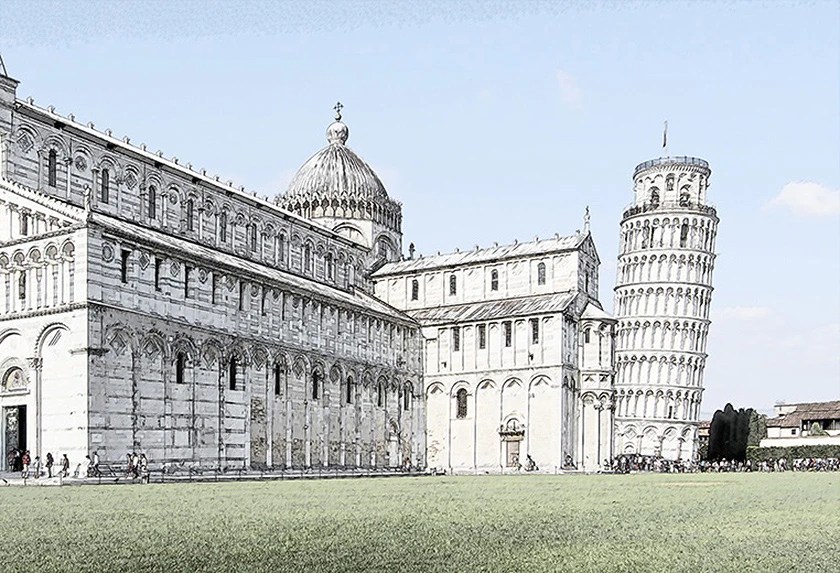
Landscapes and views of cities are best suited for painting with paints. Open the image in Photoshop. In the main menu, select the item "Filter" / Filter, .
A preview and effect selection window will open. By clicking on the plus and minus at the bottom left, you can scale the image. In the middle are lists of effects by theme. Lists are opened by clicking on the arrow next to the name. On the right are the effect controls. Basically, these are texture drop-down lists, stroke size sliders, and the like.
Let's transform a photo into a drawing oil paint. Selecting an effect group "Imitation" / Artistic, and in it - the effect "Oil painting"/Paint Daubs.

It remains to choose to your taste Brush Size, "Sharpness" / Sharpness(the degree of fusion of adjacent strokes depends on it) and "Brush"/Brush Type ("Simple" / Simple, Wide Sharp, "Light Rough"/Light Rough, "Wide Blurry" / Wide Blurry, Dark Rough, "Sparks" / Sparkle).
After completing the settings, click Ok, save the photo ( Shift+Ctrl+S) in any convenient format, for example, in JPG.
We will select the settings for this picture, as indicated in the photo below.

It turned out to be quite plausible. Can be used as a souvenir postcard. If such a photograph in processing is printed on canvas in a darkroom, it will be very similar to the real picture and may well serve as an interior decoration.


Learn more about Photoshop in courses.
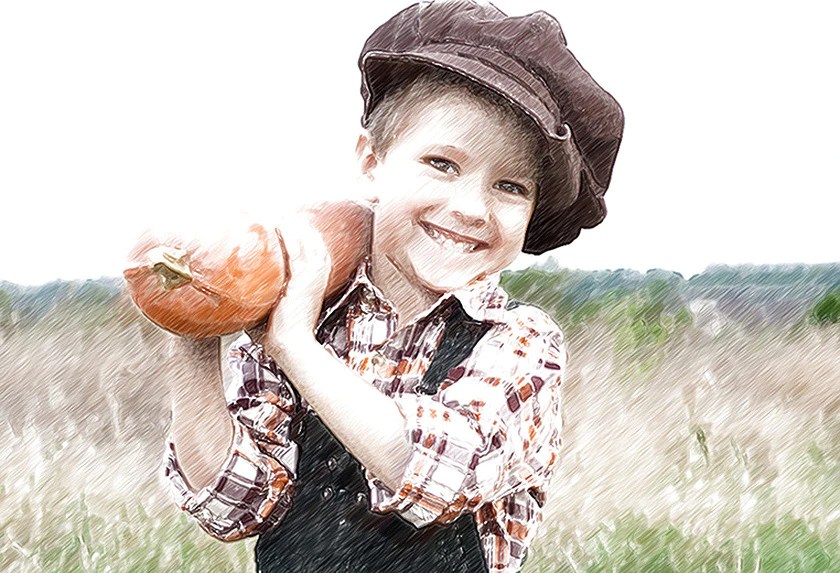
Pencil drawing from a photo in Photoshop

AT "Filter Gallery" you can pick up the effect of a sketch drawing with a pencil. It is most often used for portraits. This is an easy method, but it is important to consider the following: the higher the resolution of the photo, the better the effect will work. In addition, the photo should be contrasting (the background is uniform so that the model does not merge with it).
We select a photo big size(in this case 5472x2767 pixels). Open it up in Photoshop.
The color of the strokes of the sketch will correspond to the main color, which is selected from the toolbar at the bottom. You can call the palette for choosing a color by clicking once on the image of the squares superimposed on each other.

After choosing the main color, go to "Filter Gallery". Main menu, "Filter" / Filter, Filter Gallery, Sketch, Effect "Photocopy" / Photocopy. By moving the sliders Detail and "Darkness" / Darkness, you need to achieve an image that is as similar as possible to a pencil drawing. To this photo settings have been applied, which can be seen in the picture below.

You can add another effect from "Filter Galleries", which will enhance the similarity with a pencil drawing. To do this, in the lower right corner, click on the image of a folded sheet of paper. Another line will appear in the list of used effects.

Now you can go to another list of effects. Go to the filter group Brush Strokes, choose Crosshash/Crosshatch. In its settings, we select the parameters so that our sketch resembles pencil hatching as much as possible. Parameter Stroke Length, "Sharpness" / Sharpness, "Intensity"/Strength in our case can be seen in the photo below. After selecting the settings, press Ok.

As a result, you can refine the drawing. If suddenly not very attractive gray spots turned out against the background of the image, they can be painted over with a white soft brush. The tool is invoked by pressing a key B, on the control panel select "With feathered edge". We change the main color to white by clicking the corner arrow above the image of the squares superimposed on each other. Then just paint over the unwanted areas.
Exist talented people capable of creating stunning realistic paintings. But if you're not one of them, today's tutorial will help you achieve a similar effect using Adobe Photoshop. In this tutorial, you will learn how to create a painted image effect from a photo. In this case, you do not need to wield a brush, since the whole process is based on effects.

The effect we want to achieve in this tutorial simulates realistic brush strokes. This technique is great for turning a photo into an illustration, such as creating retro posters.

Open your image in Photoshop. The example uses a portrait from Shutterstock. Add a Curves adjustment layer and darken the dark areas and brighten the light areas to increase the contrast.

Press CMD/Ctrl+J twice to duplicate the background layer twice. Switch to the top copy and choose the High Pass effect from the Filters menu.

Adjust the effect so that image details appear against a gray background. A small value - about 1-3px - will help to avoid creating a halo.

Change the blending mode for this layer to Linear Light / Linear light. Now the image looks sharper. These sharpened areas will help us create brush strokes, particularly in the hair.

Merge the High Pass effect layer with a copy of the background layer below it, then choose Filter > Stylize > Diffuse from the menu.

Select Anisotropic / Anisotropic diffusion mode. This is the key to creating the brushstroke effect.

If you look at the work up close, you will notice ugly places in areas where diffusion is repeated. Now we will fix it.

Select Image > Image Rotation > 90° CW from the menu, then press CMD/Ctrl+F to repeat the Diffuse filter.

Repeat the same procedure by rotating the image 90° again and apply the Diffuse filter again. Repeat this step a third time and rotate the image again to get it in the correct position.

Filter Diffuse / Diffusion created a cool brushstroke effect, but blurred the image a bit. To fix this, select from the menu Filter > Sharpen > Smart Sharpen/Filter> Sharpen>Custom Sharpness. Use a value around 100% but on a small radius so you don't overdo it.

The result already looks good. Diffuse / Diffusion has created swirling details on the skin, which makes the image even more like it was painted. But there is one more step that can be taken to make the work look like it was drawn on a computer. Select Surface Blur from the menu Filter>Blur/Filter>Blur. Set the Radius to about 50px and Threshold to about 15. If you set these parameters correctly, the effect will only affect large, flat areas of the image.

Our drawn image effect is ready!

Up close, the effect looks especially good.
Translation - Desk
Many users want to somehow edit their photo, make it more beautiful or noticeable. For editing photos and applying effects, there are many programs that have long been known to everyone, as well as the effects from them. In order not to repeat each time laying out pictures similar in processing, you can convert the photo into a pencil drawing. This will undoubtedly draw attention to the image immediately.
You can perform this operation in several ways. To begin with, you can use serious graphic editors that are installed on the user's computer and carry out all the actions through them. If the user does not like this method, then you can use applications for mobile devices or go to online services and do everything with their help. This article will tell you exactly how and with what applications you can make a photo from your picture with a pencil.
How to make a pencil drawing from a photo online
To begin with, it is worth disassembling the work online services, which allow you to convert a photo into a pencil drawing, because they do not require the installation of an additional software to the user's computer, which can be an important factor if the photo is converted only once or if it will not be done so often. This section will list several services on which you can perform the required operation.
Photo Phunia
The user can find the service itself at the link photofunia.com. A page with a pencil effect will open immediately. It is quite easy to use and does not require any special skills, there is also no need for a long and fine tuning a variety of settings. You just need to go to the specified site, after which you should upload a photo to it, you can do this both from a computer, and from a laptop or mobile device. To select a photo, click on Browse.
After that, it remains only to choose a color drawing the user wants to get himself or black and white. Now follows click on create, then wait for the processing to complete, look at the result and, if it suits the user, save the pencil drawing back to your device.

cropper
This service is located at the link croper.ru. To take a photo with a pencil in this online photoshop, the user will need to move the mouse over the item Files menu, then select the desired source download option from the list and specify the path to the photo. Now it remains to find the section of the menu that will carry out the desired transformation, in our case it is worth going through the following items "Operations" - "Effects" - " Pencil". Several new parameters will appear on top, which will be responsible for the rendering methods, you can “play around” with them and decide which image will suit you best.

Now all you have to do is click on Apply, then wait for the conversion to finish. In the final drawing, you can slightly change the contrast, after which you can upload to your device a photo converted into a pencil drawing.

Programs for creating a picture from a photo
Now that the most simple and quick ways described, you can proceed to the description of specialized software that you want to install on your computer.
How to make a drawing from a photo in Photoshop
It is quite easy to make a pencil drawing from a photo in Photoshop. Unfortunately, there is no single filter that turns a photo into a drawing, so you need to follow the following procedure.
After the user installs Adobe Photoshop on his computer, you will need to run it and open the image there, on which work will be done. After that, you should find the tab " Adjustments" (Correction), which will be located on the style display panel, after that you should click on the tool " Hue» (Tint). 
After the actions taken, in the list that contains all the layers, another one will appear, allowing you to change the palette of shades. It's called Hue/Saturation.
You need to go into it and move the slider Saturation(Saturation) to the far left. 
This action will bring the image to black and white. Now again you need to go to the layers and select the background there. 
Now follows copy it. To do this, find the item in the main menu Layer (Layers), click on it, and then click on “New Layer” – “Layer via Copy” (New layer – Copy). 
Now again you have to use the main menu, in it you need to find Image (Image), then click on "Adjustments" - " Invert» (Correction - Inversion). These steps will display the photo as a negative. Now in the list you need to select a copy of the background layer and click on the item color dodge
Now you need to go to the layer menu. 
In this menu, you need to convert to " smart object» (Smart Object). It is now a smart object and has a label. 
Now we need to apply a few more menu items. To start, click on filter(Filters), then go to the item "Blur" (Blur) and click on " Gaussian Blur" (Gaussian blur). Set the radius to 12. 
On this, everything will be finished, you can save the result. 
If you need a color picture, you should activate the color item in layers. 
GIMP
This is a free image editor that will help you to make a pencil portrait out of a photo. You can learn more about it on the official website. After installing a program that makes a picture out of a photo, you will need to open the image that will be manipulated.
To make a thumbnail from a photo, you need to click on "Color", then click on " discolor". Next, you should go to the layers and make a copy of the background layer, and then work with this copy.
Now you should click on "Filter", and then click on " Edge Selection- "Edge". A window with settings will open, you need to set the same as in the picture. That is, Lightness, Laplace Algorithm, Magnitude 2.0, Blur. 
It remains to perform the last action, you should click on "Color", and then select the item " Invert». 
You can also watch the whole process in the video:
Paint.NET
The main advantage of Paint.NET is its ease of use. Pictures before and after processing are shown in the figure. 
To get started you need open image, then select it, go to effects and click on " oil painting". A window with options will appear. Here it is worth experimenting and choosing the values at which the picture will be most liked by the user.
After that, you can go to effects, select styling and indicate Bas-relief.
Now you should go to the layers, select the one in which the work took place, and then select the option blending mode and click on the cover. This will remove grey colour from the final outline drawing.
Programs for Android
For those who mainly use mobile devices, programs were also invented. This section will identify applications that can apply the desired effect, as well as provide instructions on how to use them.
Prisma
Prisma learns with every use, so no two images or effects are the same. All the user needs is to download it from the store and install it. After that, you can add photos and images to it. 
Once added, the user will be able to select below desired filters, you can select the drawing method of one of the famous artists as the style.
pencil drawing
In the case of the Pencil Drawing, everything is also quite simple. You need to download and install the program, after which you can add saved files to the application, or take a new photo. 
At the top you can set image type. For a color drawing, you should choose a colored pencil, and for a monochrome image, you should choose a black and white one.
Sketch Camera
You need to install Sketch Camera, upload a photo, and at the bottom select color scheme
. It can also be configured in the parameters, which are located a little higher. The painted photo effect is applied automatically. 
After completing the work, you can click on share and send the photo to social networks.