Photoshop drawn in pencil online. Photography: how to turn it into a painted portrait
AKVIS Sketch allows you to turn a photo into a pencil drawing.
Now you do not need to masterfully master the pencil to create an original work of art.
All you need is a little imagination and AKVIS Sketch!
The program turns photographs into thumbnails taken pencil or coal, allows you to create not only black and white pencil sketch, but also color drawing, as well as get the effect of watercolor and pastels.
The drawings created by the program can compete with real works. Sketch lets you get amazing quality result similar to the work of an artist.
If you've always wanted to learn how to draw but didn't know how, try AKVIS Sketch!

The program provides two basic styles that allow you to create drawings with different type hatching: Classical and Art. Each style comes with a set of ready-made presets.
An intuitive interface, the ability to select parameters using the quick view window, a hint panel and a rich collection of presets will help you quickly get used to the program and learn how to create your masterpieces.

The transformation of a photo into a drawing takes place before your eyes. Frame tape allows you to track the process of converting a photo at different stages and get pictures of different degrees of sophistication without changing the effect parameters.


Using the program, you can prepare illustrations for a book or article, create a unique greeting card, an interesting avatar, a poster or a picture on the wall, a print for a T-shirt.
The program is good not only for processing portrait photographs, but also for views of nature, architectural monuments. Sketch is used by professionals to demonstrate the features of architectural styles, preparing presentations. The program is indispensable when working on an advertising booklet or website, when you want to present a set of images in the same style.
AKVIS Sketch makes everyone feel like an artist!


Batch File Processing helps to quickly, automatically, turn into drawings great amount photos, create cartoons, comics.
Using bookmarks Background, Canvas and Inscription you can add additional effects to the image: get a combination of photography and drawing, imitate drawing in a different way
You can easily achieve this in a short period. In this tutorial, you will learn how to create drawings from a photo using brushes. If at work you use Graphics tablet then you can achieve even better results. In a similar lesson, another option for creating from a photo was considered. pencil drawing. So, let's begin!
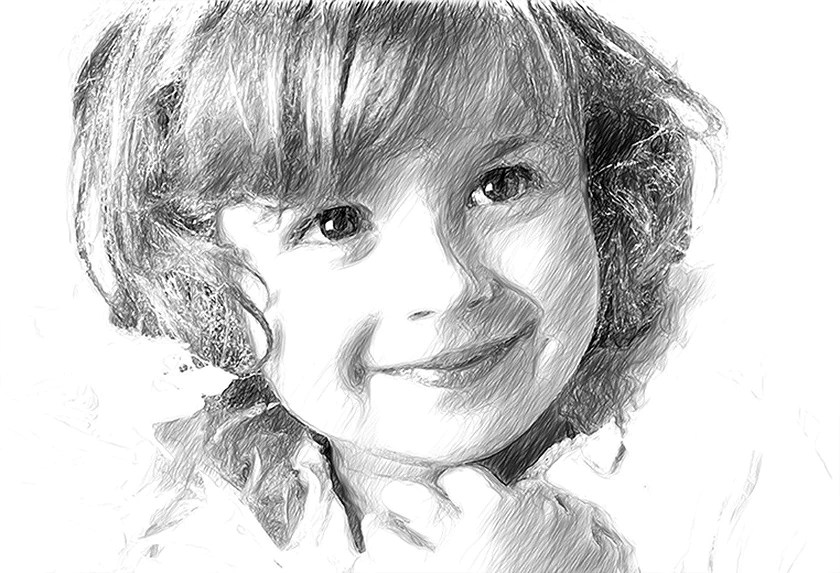
Here is the result you should get:
The lesson used an image from a paid resource, but you can easily find free photos of a similar topic on the Internet.
1. Image adjustment
Step 1
Open our source in Photoshop. Double click on the Background layer to unlock it and name it Layer 1. Create New layer and name it Layer 2. Set the color foreground white and then with the tool fill(G), fill it with white. Place Layer 2 under the source layer.

Convert the color image to black and white. Make the photo layer active and go to the menu Image - Adjustment - Hue / Saturation and in the settings window that appears, reduce the Saturation to -100.

2. Create a picture effect
Step 1
Let's move on to creating the drawing effect itself. Add a layer mask to the tiger layer. To do this, click on the layer mask icon and immediately fill it with black using the tool fill(G).

Next, switch the foreground color to white. The background color should be black. Activate the tool Brush(B). Choose from a set of brushes Flat blunt with short stiff bristles, set the size to 60 pixels. and start applying strokes on the black layer mask (you can experiment with brushes and sizes and choose another one you like).

Step 2
By continuing to paint strokes with a white brush on the layer mask, we restore the image, giving it the texture of the picture. Try to keep the brush strokes like hatching or cross hatching that mimics the technique of pencil drawing.

Step3
Tool moving(V) Center the image of the tiger in the document and add strokes until you are satisfied. When finished, duplicate this layer with the keys Ctrl+J.

Step 4
Now you need to enhance the effect of the picture. We go to the menu Image - Correction - Levels and set the settings for the RGB channel as in the screenshot, thereby enhancing the contrast and highlighting strokes. After that merge all layers together Ctrl+Alt+Shift+E.

Step 5
You can stop at the result, but it’s better to spend a couple more minutes and make the drawing as close as possible to the real one, made on paper. We will do this with the help of a gradient, we will try to achieve the effect of a photograph of a picture. Right-click on the layer with the picture and in the drop-down menu go to the option Overlay Options(you can just double-click on the layer with the left mouse). Choose a layer style Gradient overlay, set the values as in the screenshot.

Beginning Photoshop users can't wait to create interesting work but sometimes knowledge is not enough for this. In that case, they will help Photoshop effects. Quick ready-made effects of the program are in the "Filter Gallery". Perhaps you've seen the transformed pencil drawing from a photo in Photoshop? Such drawings are easy to make by applying effects to photos in Photoshop from the "Filter Gallery".
To understand how this gallery works, it is enough to consider a couple of effects from it. The rest you will learn just as easily.
First, let's look at an example of how to make a photo painted with paint. Next - how to make a pencil drawing from a photo.
Painting with paint from a photo in Photoshop
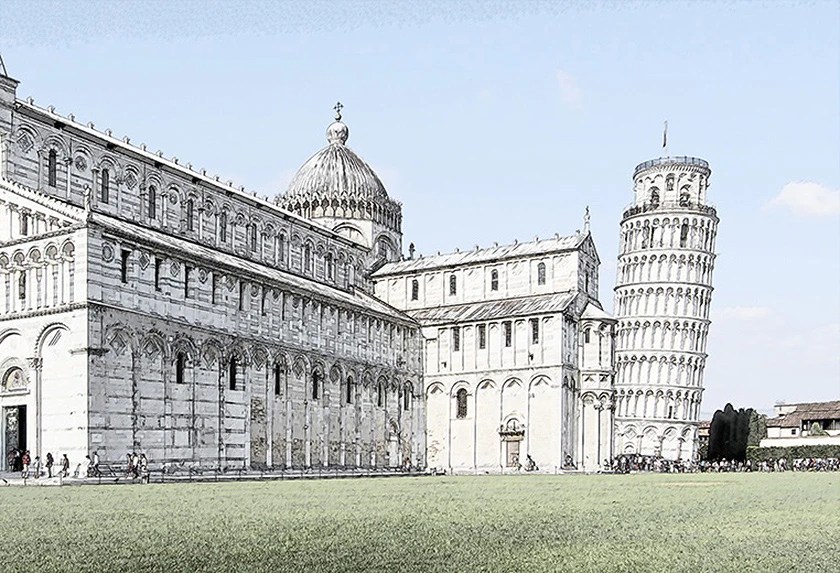
Landscapes and views of cities are best suited for painting with paints. Open the image in Photoshop. In the main menu, select the item "Filter" / Filter, .
A preview and effect selection window will open. By clicking on the plus and minus at the bottom left, you can scale the image. In the middle are lists of effects by theme. Lists are opened by clicking on the arrow next to the name. On the right are the effect controls. Basically, these are texture drop-down lists, stroke size sliders, and the like.
Let's transform a photo into a drawing oil paint. Selecting an effect group "Imitation" / Artistic, and in it - the effect "Oil painting"/Paint Daubs.

It remains to choose to your taste Brush Size, "Sharpness" / Sharpness(the degree of fusion of adjacent strokes depends on it) and "Brush"/Brush Type ("Simple" / Simple, Wide Sharp, "Light Rough"/Light Rough, "Wide Blurry" / Wide Blurry, Dark Rough, "Sparks" / Sparkle).
After completing the settings, click Ok, save the photo ( Shift+Ctrl+S) in any convenient format, for example, in JPG.
We will select the settings for this picture, as indicated in the photo below.

It turned out to be quite plausible. Can be used as a souvenir postcard. If such a photograph in processing is printed on canvas in a darkroom, it will be very similar to the real picture and may well serve as an interior decoration.


Learn more about Photoshop in courses.
Pencil drawing from a photo in Photoshop

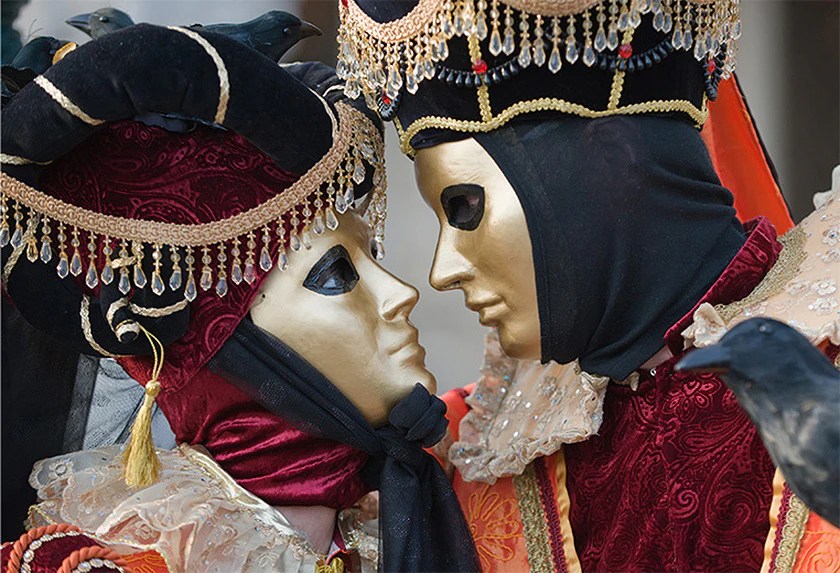
AT "Filter Gallery" you can pick up the effect of a sketch drawing with a pencil. It is most often used for portraits. This is an easy method, but it is important to consider the following: the higher the resolution of the photo, the better the effect will work. In addition, the photo should be contrasting (the background is uniform so that the model does not merge with it).
We select a photo big size(in this case 5472x2767 pixels). Open it up in Photoshop.
The color of the strokes of the sketch will correspond to the main color, which is selected from the toolbar at the bottom. You can call the palette for choosing a color by clicking once on the image of the squares superimposed on each other.

After choosing the main color, go to "Filter Gallery". Main menu, "Filter" / Filter, Filter Gallery, Sketch, Effect "Photocopy" / Photocopy. By moving the sliders Detail and "Darkness" / Darkness, you need to achieve an image that is as similar as possible to a pencil drawing. To this photo settings have been applied, which can be seen in the picture below.

You can add another effect from "Filter Galleries", which will enhance the similarity with a pencil drawing. To do this, in the lower right corner, click on the image of a folded sheet of paper. Another line will appear in the list of used effects.

Now you can go to another list of effects. Go to the filter group Brush Strokes, choose Crosshash/Crosshatch. In its settings, we select the parameters so that our sketch resembles pencil hatching as much as possible. Parameter Stroke Length, "Sharpness" / Sharpness, "Intensity"/Strength in our case can be seen in the photo below. After selecting the settings, press Ok.

As a result, you can refine the drawing. If suddenly not very attractive gray spots turned out against the background of the image, they can be painted over with a white soft brush. The tool is invoked by pressing a key B, on the control panel select "With feathered edge". We change the main color to white by clicking the corner arrow above the image of the squares superimposed on each other. Then just paint over the unwanted areas.
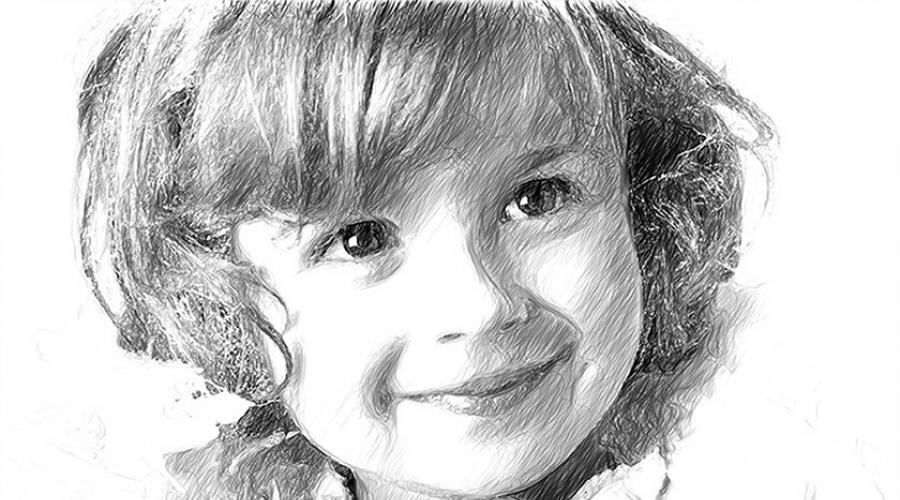
Hi all Photoshop lovers! Today we will look at a lesson on creating a pencil drawing from a photo in Photoshop. This drawing can also be called sketch(from English. sketch- sketch, sketch, sketch). Not everyone can draw a drawing with a pencil from a photo, for this you need to have drawing skills, know the anatomical features of a person, even when copying from a photograph.
The meaning of our lesson will be to learn how to create the effect of a pencil drawing from a photo without having the skills of an artist. Also using a similar Photoshop tutorial, you can create a quick sketch, which helps save a lot of time when creating many rendering jobs.
Let's start implementing our idea, open our graphics editor (Adobe Photoshop), upload a photo from which we will make a drawing and start processing.
First of all, we go to Filters > Sharpen > Smart Sharpen, thereby adding sharpness to our image. Thanks to this, the contours of the photo will become sharper and the picture will turn out clearer.
Our next step is to desaturate the photo, for this we go to Image > Adjust > Desaturate. You can also read an article that describes one of the best ways creating a black and white photograph.

After the photo is discolored we need to duplicate the layer and invert upper layer. To perform the inversion go to images > correction > invert.

Change the blending mode of the inverted layer to

After all the manipulations that we have done, we need to apply a Gaussian blur, so that the contours are clearly visible but in moderation. We will get some kind of pencil strokes. For this we go to filters > blur > gaussian blur.

Well, it seems like our drawing from the photo with a pencil is ready, but there is a lot of noise in it and it does not look very attractive. Let's refine it a bit with the Dodge and Burn tools. Select from the toolbar dimmer tool, set the drawing mode settings: shadows, and exposure: 10%. After that, on the bottom layer, go through the hair and dark places (shadows), contour lines.

Done, we have added dark accents to the drawing, now we need to remove the noise that we have formed, for this we select in the toolbar brightener tool, set the drawing mode settings: middle tone, and exposure: 10 — 16 %. And also on the bottom layer we make a correction, remove noise and highlight some places. Thus, with a little more effort, we get more realistic drawing photo pencil.

And finally, on our top layer, we will reduce the fill percentage, I reduced quite a bit to 95% . And our drawing is ready.

Today we have analyzed one of the ways to create a pencil drawing from a photo in Photoshop, I hope you liked the lesson. In conclusion, I would like to wish everyone creative success. Experiment with filter settings to get more realistic drawings.
FotoSketcher is a free graphic editor with which you can turn a photo into a drawing using a large number of effects. The program turns images into drawings made in pencil or paint in a different style. Instead of a regular photo, you will get a picture painted by the artist's hand.
With FotoSketcher, you can discover the artist in you by turning photo images into paintings. Photos taken in FotoSketcher will be noticeably different from pictures taken with a camera, if you try, you can create a real work of art in this wonderful program.
The name of the FotoSketcher program in Russian can be translated as a photo sketch (sketch or sketch). A photograph (image) as a result of modification becomes a drawing, or a painting.
In FotoSketcher, you can create images not only in the form of drawings made in different technique, in the photo editor, you can improve original photos: add or reduce brightness, increase contrast, color saturation, resize, crop the image, sign the picture, add watermarks, send to print, etc.
You can download FotoSketcher from the official website of the developer. The program works in operating system Windows, the application has a Russian interface language.
download photosketcher
Once launched, the FotoSketcher main window will open. There are two panels at the top of the program window: the menu bar and the button bar. The program is controlled from the menu bar.
The buttons provide access to the most requested functions of the program. Almost any graphic editor has similar functions: open an image, save an image, copy to clipboard, paste, undo, crop, resize, add text, send to print, etc.
By default, in the main window of the program for demonstrating the possibilities, the initial image is opened in the right part of the window, and the processed drawing, made in the form of a hand-drawn picture, is opened in the left part of the window. You can practice with this image, or add a picture from your computer to the editor.
The program can be controlled not only with the mouse, but also with the help of "hot keys". Click on the "Edit" menu item. In the context menu that opens, you will see which commands correspond to the keyboard keys.

Creating a drawing in FotoSketcher
Select the initial image, open it in the program, and then click on the "Picture Options ..." button. This will open a new Drawing Options window. Here you can load the settings (if the settings have been saved before), save the settings, or reset the settings to default.
First you need to choose a drawing style. Available in FotoSketcher a large number of various effects:
- 6 pencil sketch effects
- 2 ink pen sketch effects
- 10 painting effects (watercolor, oil)
- 7 stylized effects (cartoon, mosaic)
- 3 other effects
- 1 option without effects (frame, texture, text)
In the “Drawing Style” setting, you must select one of the presented styles: a drawing made in pencil, ink, painting, cartoon, mosaic, etc.

When you move the mouse cursor over a certain style, you will see that a fragment of the image is displayed next to it, made in this style. This makes it easier to choose the right option.
After choosing a style, a fragment of the picture will be displayed in the "Drawing Options" window. This snippet can be enlarged by showing full size images in a reduced window size. This thumbnail can be moved around with the mouse to see different areas future drawing.
Now you can modify the image according to the selected style: adjust the color intensity, contrast level, etc. Each style has its own settings. The Brush Guide button lets you change the size of the brush that will be used to paint.
Apply various filters to give the image the look you want. Experiment in order to create a picture made in a certain style based on your ideas. First, try to create a simple drawing, and then, after you have acquired the necessary skills, you can move on to creating more complex images.
After selecting the settings, click on the "Draw!" button. The project has been processing for some time, so please wait for it to complete.

After processing is completed, the image on the computer. If the result is noticeably different from what was intended, then you can try to create several options before settling on a more suitable drawing.
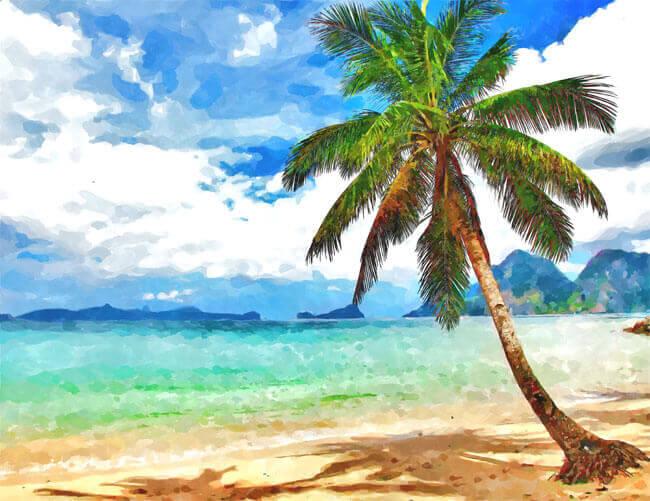
This image shows that this is no longer a photograph, but a painting painted in watercolor. The author of these lines in his childhood studied in art school, so I tried to make the drawing look like it was made watercolor paints(I liked watercolor the most).
Similarly, you can be creative by turning photos into paintings painted in different styles.
In the final version of the image, you can enclose it in a frame, add a caption to the picture. Try, create, create portraits, landscapes, etc. In order for you to succeed good pictures, requires independent experience in the program.
Article Conclusions
The free FotoSketcher program is a graphic editor for image processing. With FotoSketcher, ordinary images are transformed into hand-painted paintings by the artist. The program has a rich selection of effects in order to turn a photo into a drawing made in different styles of painting and graphics.