How to draw a birthday greeting card. How to draw a birthday card what you can draw in the middle of the postcard
Guys, we put the soul in the site. So
what you open this beauty. Thanks for inspiration and goosebumps.
Join us in Facebook. and In contact with
In stores today you can find New Year's postcards for every taste. But editors website It believes that homemade much warmer. After all, when we do for someone, do it yourself, we put our love in it.
Below we collected the ideas of the beautiful, original and, most importantly, the "fast" New Year cards, for the creation of which no rare materials are required - beautiful paper, cardboard, yes, the motley ribbons and buttons swam in the house.
Volumetric Christmas trees
Through white and colored paper Christmas trees are so simple performed that you can make them at the last moment. Learn more Bog & IDE blog.
3D Christmas trees do even faster. You will need only a ruler, sharp scissors and cardboard. This blog shows how to cut them.
Penguin
We really liked this penguin, successfully invented. You will need black and white cardboard (or white paper), a triangle of orange paper and 2 miniature snowflakes that we all know how to cut. Eye - this is, of course, the highlight of the postcard, and they will have to look at the store for a hobby (or tear off from an unnecessary children's toy, with the consent of children, of course).
Gifts
For this pretty and simple postcard, you need 2 sheets of cardboard, ruler, scissors and glue. And also pieces of wrapping paper, which you have left from packing gifts, ribbons and ribbons. The principle of manufacture is very simple, but those who want more details, we advise you to look into this blog.
Santa Claus
Friendly Santa Claus (or Santa Claus) can be made literally for half an hour. A red hat and pink face is a paper strip glued to a postcard or gift bag. Fur hats and beard are obtained like this: you need to take paper for drawing and just tear the strips of the desired shape to get uneven edges. Stick on a postcard on top of a red and pink strip. And then draw two slopes - mouth and nose - and two points - eyes.
Simple drawings
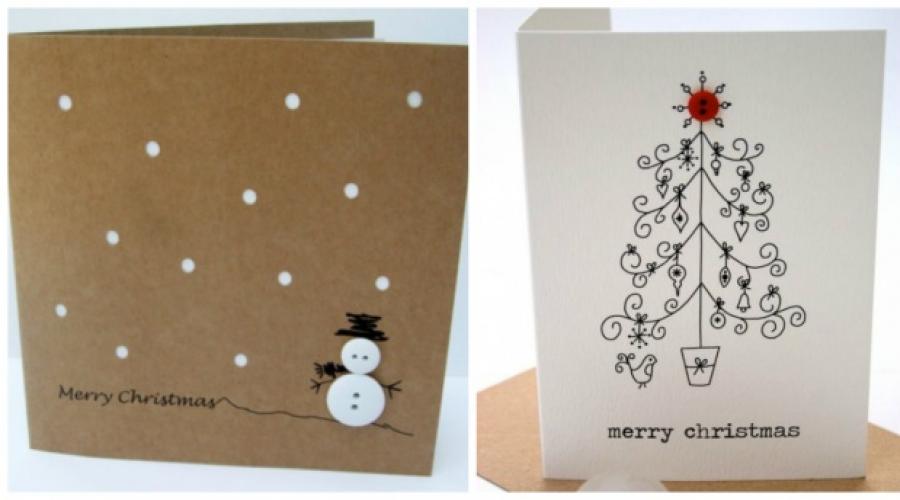
An idea irresistible in its grace is to draw a black gel handle Christmas balls with patterns. The main thing here is to draw the right circles and place lines for patterns. Everything else work will not be - stripes and progulinks that you draw when you are bored.
The same principle that underlies the card with black and white balls. Simple silhouettes painted with simple patterns, this time color - it is best to make it markers. Heat and very cute.
Many a lot of different trees
Here you will use paper or cardboard with a pattern that remain from children's crafts, or wrapping paper for gifts. Christmas trees are sewn in the center - it is not at all necessary, you can glue them. But if I really want, you must first make holes with a thick needle according to the ruler, and then flash the thread in 2 rows - up and down so that there are no passages left. Snowball draw white gouache.
The concise and stylish idea is a chosen of the Christmas tree, one of which is glued to foamed bilateral tape (and therefore towers over the rest) and decorated with a star.
For this postcard, you need 4 or 3 layers of cardboard (you can do without red). Not a cardboard can be used as a color layer, but paper. In the top, white, cut out the Christmas tree (the stationery knife can cope with it) and take it to double-sided tape for volume.
Horror of Christmas trees from a variety of cardboard residues, scrapbooking paper, wrapping paper is tied with a simple ribbon and decorated with an intersection. Try to play with flowers and textures - here you can find an incredible number of options using different colors of ribbon, paper and even cloth.
Wonderful watercolor so in the spirit of the New Year and Christmas! Uncomplicated watercolor sketch for everyone, even those who last painted paints in school years. First you need to mark patterns with a pencil, paint them, and when it gets dry - carefully post pencil sketches and supplement the patterns with felt-tip pen.
Winter landscape
For this postcard, it is better to use structured cardboard, and you can do and ordinary, smooth, it will still work out effectively. Cut with sharp scissors a snowy landscape and a moon and stick on a black or dark blue background.
Another, white-green, version of the winter landscape that will require a little longer. If you find velvety cardboard (remember, there were still crafts at school from this), it will be great if not - you can simply paint the Christmas tree with a felt-tip pen. Snow - disassembled foam on the peoras. You can also punch with cardboard circles and glue them to a postcard.
Huggy snowman
Snowy, inquisitively pebating in the starry sky, will look more advantageous if you manage to find a bright ribbon for Charfing.
For that postcard that on the left,you need a non-colored cardboard, white paper drawing and foamed tape, which you stick a snowman. Supports are made simply: you need to tear up paper for drawing so that it turns out a torn wavy edge. It is filled with a blue pencil and grow in anything, at least a finger or piece of paper. Also tweak the edges of a snowman for volume. For the second Buttons will be required, a piece of fabric, eyes, glue and colored markers.
Such a postcard will want to save for a long time. And just need circles from cardboard, nose and sprigs made of colored paper. All this must be collected using bilateral volumetric scotch. Draw black paint eyes and buttons, and white gouache or watercolor - snowball.
Balloons
Balls are one of the main symbols of the New Year and Christmas. These are made of velvety colored paper and ribbon. But the balls are so a win-win option that you can afford to fantasize: make balls from paper with a pattern, wrapping paper, fabric, lace, cut out of a newspaper or glossy magazine. And threads can simply draw strings.
Another option is to stick paper with a pattern on the inside of the postcard, and on the outer cut the circles with a sharp stationery knife.
Volumetric balls
For each of these balls, 3-4 identical circles of different colors will be required. Fold each in half and glue with halves to each other, and two extreme halves - to paper. Another option is colored asterisks or Christmas trees.
Multicolored balls
Wonderful translucent balls are obtained using an ordinary elastic on a pencil. It is necessary to start a pencil outline of the ball. Then lower the eraser in the paint and leave prints on paper. Fun and beautiful.
Postcards with buttons
Bright buttons will add volume postcards, and also laid calerable associations with childhood.
The main thing is to find buttons of interesting colors, and otherwise your business is "hanging out" to the Christmas tree, on a twig with cute owls or newspaper clouds.

For any person, regardless of age, the birthday means the beginning of something new, where cherished desires are carried out and, of course, the most hidden dreams come true. On this beautiful day, the birthday girl expects gifts and congratulations from his loved ones. After all, they are forcing the recipient to smile and rejoice.
Each of us without exception adores surprises. Consequently, if you are going for a birthday, you need to prepare in advance for this celebration. Let's look at a few options for postcards that you can do yourself and give your favorite person.

How to draw a congratulatory card for my mother's birthday?
Of course, the postcard should look beautiful and touching. Perhaps you want to do something concrete? Then we advise you to write an ordinary one on the product very much, but a very pleasant inscription: "Favorite Mommy". For the manufacture, take the scissors and glue, and also go to such objects:
- Billet for needlework (you can take a dense cardboard).
- The background image (you can take conventional colored paper, a piece of paper for scrap and so on).
- Chipboard for inscriptions (buy ready-made in advance or use the stapler, which draws up the edges).
- Decorative elements (flowers, butterflies, beads, leaves) - 2 pcs.
- Large decorative elements (bow, flower) - 2 pcs.
- Decorative tape.
- Lace or Fester Ribbon.

Manufacturing process:
- To begin with, make a sketch with an ordinary pencil. Add colors that will give you the opportunity to understand which shades you will apply during work.
- Stick the background to the blank postcard. Place large flowers. Complete the overall composition with decorative elements.
- Thoroughly dry work.
- When it dies, decorate it with sparkles.
- After that, write on the postcard of the wishes of an expensive mom.
- Inside the postcard can draw beautiful flowers or bows, and write a wish to a native person.
How to draw a greeting card for the birthday of dad?
Greeting card your favorite daddy for the birthday is at least touching. Pick up the topic for such a postcard is difficult, however there is one detail that you simply must apply - this is a style. If you have a stylish greeting card, believe me, your dad will definitely get to such a gift. Let even on the postcard itself there will be no symbols of "masculinity", for example, an image of cars, weapons or fishing.
You can make a postcard with embroidery, threads and so on. Try all patience and love to your own creativity. To begin with, pick up the postcard plot, for example, any element of a man's portrait, for example, beard, smoking tube, Hipster-style glasses. Select the desired shades. Ideal are calm and beautiful, which will harmonize each other.


Manufacturing process:
- Take the basis of the postcard. Cut for her shirt.
- In the center "Shirts" cut the triangle.
- Stick under the "shirt" rectangle.
- Take a satin ribbon. Tie a tie in the form of a note from it and get to the base.
- Top tie stick to the "shirt".
- Using a special circuit, make stitches.
- Stick to the button of buttons.
- Write congratulatory wishes inside the postcard, add more small pictures, for example, balls.
How to draw a greeting card for the birthday of the grandfather?
You can give your grandfather to give a beautiful postcard that you make your own hands. To create this craft, you will need to spend a minimum of free time, plus the sea of \u200b\u200bfantasy, as well as take scissors with glue, and stock as follows:
- Color cardboard
- Colored paper
- Paper strips for queening
- Buttons
- Double-sided scotch


Manufacturing process:
- To create a blank for a postcard, take the cardboard. You can apply two-way or one-sided cardboard. Fold it into two equal parts.
- Gently sell the line where the postcard will bend.
- Then at the top of the postcards make a small stubborn approximately equal to 2 centimeters.
- Fold the edges of the postcard so that you have a collar.
- Make a "vest" from color strips. Strips neatly glue to the outside of the product, while alternating the colors to their own discretion. You can draw strips instead of paper strips with pencils or paints.
- Take a brown strip. Stick in the central part of the postcard.
- Also such a strip will cross the edges of the vest
- Make a bow. Attach it to the collar with a tape or glue.
- On the right and left side are small pockets. And in the center, take a button (you can somewhat or immediately).
- Next, place the postcard inside for your own.
How to draw a greeting card for grandmother's birthday?
Grandma is exactly the person who is always ready to feed delicious pie and pies, listen and give a useful advice. If you want to surprise your grandmother's birthday with a unique gift, give her a beautiful postcard. But not the one you can buy in the store, but made with your own hands.
For the manufacture of the postcard, take the following materials and tools:
- Cardboard colored and white with black
- Lace - Approximately 12 cm, but not less
- White ribbon - 30 cm
- Artificial Flowers - 3 pcs
- Buttons matching paper - 3 pcs
- Scissors
- Line of glue
- The pencils
Manufacturing process:
- From the white cardboard, cut a 16 cm rectangle * 20 cm. Bend this rectangle into two equal parts. So you will have the basis of the postcard.
- Take a black cardboard. Cut 2 rectangles from it (15.6 cm * 9.6 cm and 8 cm * 3.2 cm).
- Take the color cardboard. Cut rectangles from it (15.2 cm * 9.2 cm and 7.7 cm * 2.9 cm).
- Stick color cardboard over black to get a black frame.

- Collect the substrate.
- Stick a smaller rectangle and the inscription "Happy Birthday" on a smaller rectangle.
- Then glue the lace. From the white ribbon, cut off the strip 12 cm. Stick it from above the lace.

- Make a bow from the ribbon, stick it to the substrate. Also glue flowers and buttons on a small rectangle.
- Enclose the substrate to the basis of the product.
- Next, decorate the postcard as you wish with colored pencils. Do not forget to write a congratulation.


How to draw a greeting card for a friend's birthday?
What can you give to your favorite girlfriend? The usual gifts, sometimes, are no longer able to please the birthday girl. But the postcard made by the personally can really surprise any person. Moreover, for the manufacture you will spend only 30 minutes, maybe a little more. So, you should have such materials in stock:
- A piece of bilateral cardboard
- A piece of snow-white cardboard
- Scissing
- Blade or knife
- Double-sided adhesive
- Measuring supplies (pencil line)
- Ribbon
- Decorating elements
- Hole puncher

Manufacturing process:
- Take the color cardboard. Cut a rectangle and bend it to 3 equal parts. On the cardboard, designate the circuit of the handbag.
- Cut the postcard form.
- Take the blade or knife. Cut the handle handle. Get it inside the product.
- In the inner part of the handbag with the help of a tape, cover a rectangle carved from snow-white cardboard. You can cut a rectangle edges using a hole.
- Decorate the product - tie a bow, stick it for a fastener seat. Stick decorating elements.
Please this postcard your favorite girlfriend!
How to draw a birthday greeting card to a friend?
If you have a very close friend you know almost from birth, you can draw an unusual and bright postcard for him. Try to imagine what your friend loves and depict it on your postcard. We suggest you make the next postcard. Take:
- Snow-white paper (landscape sheet)
- Ordinary pencil
- Multicolored pencils
- Scissors with ruler

Manufacturing process:
- Take paper. Bend it in the center.
- On the inside of the paper, with the help of a simple pencil, draw what you want, for example, balloons.
- Then write with multi-colored letters wishes a birthday room. Position the inscription on balloons or email pleasant words at the bottom of the postcards.
- After you accurately decide with the postcard, draw it.
- You can use multicolored pencils, and can water paints. It all depends on what's better you can work.
- If you want to draw a beautiful nature on the postcard, then for this you advisively apply paints. With them you can more naturally convey the shades of nature and its riotiness.
How to draw a greeting card for the sister's birthday?
Do you have a younger sister? Does she have a birthday very soon? Then you should bother in advance about the gift. To the end result turned out very colorful and beautiful, then take the following items:
- Colored High Density Paper - 1 Set
- Markers or markers
- Multicolored pencils
- Colored handles
- Simple pencil well-fulfilled
- Scissing with glue
Manufacturing process:
- Take paper. Bend it in half.
- On the outside, draw an image on the inside write the wish of the birthday man on the inside.
- Now proceed to drawing. Take a simple pencil. Draw an oval on the postcard. In the center of oval, draw the strip curve (it will be a center of a bear face). Then draw the muzzle and nose itself.
- Draw a spout, leave a small glare.
- Next, draw your eyes, mouth, eyebrows and ears of a teddy bear. Draw them with colored pencils.
- Draw a torso. Spend 2 parallel rounded strips from your head (so you get the body of the Mishutka).

- Draw a teddy bear 2 lower legs.
- Then depicting a cake in the figure and show off it. Add one upper paw.
- Then dorisite another upper paw.

- Place the background card. You can draw balloons, and on every ball write letters that make up the phrase "happy birthday".
- Finish the postcard - just paint it with multicolored pencils.

As a result, you will get a beautiful postcard, which your sister will definitely be delighted.
How to draw a birthday greeting card brother?
If you want to give younger brother an unusual gift, then make him a postcard yourself. You can draw an elephant on the postcard. How to do this below.
- On a clean sheet, draw a pair of circles that must be appointed to each other. Just keep in mind, these details must be different in size.
- In the center of the circumference of a smaller size, draw a trunk of an elephant. Above the trunk draw eyes and eyebrows.
- Cears are elephant with big. Apply smooth strips at the top and wavy below.
- At the bottom of the circumference of the larger size, draw the legs.
- Make folds (knees and claws).
- Draw an elephant tail, and on his tip a brush.
- Remove the extra lines using the eraser, and the main thing is thoroughly circled.
- Coloring the elephant at your request. Write wishes.

How to draw a birthday greeting card to the teacher and teacher?
Greeting card, which is done with your own hands is the best gift for the teacher from the student. There are a large number of options, but we offer you to use our. In order to create a postcard, stock materials:
- Cardboard (from it you will make the basis)
- Gouashe paints or watercolor
- Napkin

Manufacturing process:
- Make the basis for your postcard. Take a snow-white cardboard.
- Then take the prepared paints. Pulk your fingertips in the paint.
- In the central part of the postcard, you will show the flower using this method.
- Wait for the postcard completely dry.
- Inside the postcard write a beautiful poem. You can even come up with himself.
How to draw a birthday greeting card Tete, godfather, woman?
Flowers must be depicted on the card for aunt and the godfather. After all, all women without exception adore them. We suggest you make the next option of the postcard, which you can give not only a close person, but also a neighbor, my mom's mom and so on.

Manufacturing process:
- To begin with, draw a vase on the postcard. Mark the places that flowers will occupy.
- Then drew the flowers themselves, for example, roses. The amount is not so important. The most important thing is to be odd.
- Finish draw rose petals. Then draw a beautiful bow on the vase.
- Picture pink leaves.
- At the very end, add all the elements. Color the drawing with red or bardery paints. Vase can paint blue.
How to draw a greeting card for a man's birthday?
For a man, for example, for the Chef, you can make an interesting postcard in the style of antiquity. You can view drawings in advance that are very suitable for that time. After you select Figure, print it on the printer or snatch. Especially if you love to draw.
For the manufacture, take:
- Paper for the base (cardboard paper, color or white).
- Scissors.
- Knife.
- Elements for fastening.
- Decorating elements.
- Pencils or paints.

Manufacturing process:
- To begin with, decide on the color range and the main drawing.
- Make the basis for the postcard of any form. If you want the postcard to be opened, then bend it in the pressure.
- On the postcard, get a picture, pieces of material and other decorating elements. Make sure they are suitable for general topics.
- Start these elements in turn on the basis.
- On the inner and outer side of the product, draw in bright pencils of congratulatory words.
- If you want the postcard to be more interesting, tie it around a thin ribbon, and then tie a bow.
How to draw a greeting card for a birthday boy?
Any child dreams of having all the cherished desires. And who can execute them? Of course, the goldfish. You can make a greeting card, decorating her goldfish. The kid will definitely believe that she will fulfill his dreams. To execute, take:
- Blue cardboard (size as landscape sheet).
- Golden nail polish or gold jewelry is also golden.
- Glue.
- Gel pen (better than several different colors).
- Ordinary pencil.
- Eye (beads).
- Scissors with a ruler, plus double-sided tape.

Manufacturing process:
- Bend the cardboard input. The blue side should look out. Draw the outline of the fish in the center. Circle it with a handle. Draw the crown and fins.
- Picture a glazing with a simple pencil or get a prepared eyebreaker (bead).
- Lubricate fish glue. Sprinkle gold jewelry in the form of small balls.
- Then draw bubbles from the air.
- At the bottom of the postcard write "Happy Birthday".
How to draw a greeting card for the birthday girl?
Girls, as a rule, unlike the boys, when they give unusual and bright gifts. If you give a postcard that you make your own hands, you will definitely deliver the girl a lot of positive emotions. For your own creativity, take:
- Colored paper.
- Snow white paper.
- Glue with scissors.
- Cardboard.
- Paints or color pencils.

Manufacturing process:
- On snow-white paper with pencils or paints, you will depict the hedgehogs. Stick to a card with a circle of various sizes.
- If you want some balls to get volumetric, get into the picture similar to the size of the balls, but fold them in advance in the form of a book. Write a beautiful wish in the inside of each ball.
Is the wonderful postcard? You can also make it for a nephew or niece, for a gummy or a kid and so on.
How to draw a birthday greeting card to kindergarten?
Now let's try to make a postcard for the smallest kids who are still in kindergarten. Position the cute cat with a cake in the paws on it.
- Make to start a blank for a postcard.
- On the outside, draw the ball, fruit, eyes, spout and nurse of the cat. If you wish, you can draw a mustache cat.
- Dorisite the cat festive cap, ears and tail.
- Before the cat, depict a cake with candles.
- Add the animal strip on the body and on the tail.
- Behind the cat Picture Packed Gifts.
- Inside the postcard write "Congratulations".

Video: Greeting card with your own hands
YouTube Channel Red Ted Art
What do you need
- Dense blue or turquoise double-sided paper;
- scissors;
- line;
- simple pencil;
- dense white paper;
- color paper with drawings and patterns;
- glue stick.
How to do
1. Cut from blue or turquoise paper rectangle with a size of 15 x 11 cm. Bend it across in half. From a white leaf cut a rectangle in size 14 x 10 cm.
 YouTube Channel Red Ted Art
 2. Fold the white item across in half. From the fold of the fold, make four nurses at an equal distance from each other. The first two (at the bottom of the paper) should be the same. The third is about 1 cm in short, and the fourth is some more less than a length.
 YouTube Channel Red Ted Art
 3. Fold the cut parts as shown in the photo.
 YouTube Channel Red Ted Art
 4. Expand the strips and open the paper. Bend the cut parts inside the outlined bends.
 YouTube Channel Red Ted Art
 5. Cut three rectangle from colored paper in size to the layers of the future cake. Height they should be quite a bit more white stripes. Bend them in half and glue to the sheet.
 YouTube Channel Red Ted Art
 6. Bend again and break the white sheet so that the lines on the cake are visible more clearly. From bright paper cut out several candles in the form of small rectangles, and from yellow - as many figures-droplets. Get droplets to the candles, and they are to the cake.
 YouTube Channel Red Ted Art
 7. Lubricate white paper glue from the back and attach it to a blue base. The postcard can be signed next to the cake or outside.
What else there are options
Incredibly beautiful postcard with a bulk round cake:
Inside this option hide a piece of festive dessert:
Print, cut through the lines and create this postcard:
But perhaps the easiest option: with drawn cake. It looks simple, but very nice:

What do you need
- Dense gray paper;
- bilateral paper of different colors;
- line;
- simple pencil;
- scissors;
- double sided tape;
- compass;
- ordinary glue and / or adhesive pencil;
- glue gun;
- cheek or other thick threads;
- white paper;
- flomaster;
- glue stick;
- colored tape.
How to do
1. Bend gray tight paper in half in half. From the pink leaf cut the rectangle with the sides of 20 and 14 cm. Cut from gray dense paper cut the rectangle with a size of 16 x 10 cm.
With the help of double-sided adhesion, glue a small gray part to pink, and the last fix on the cover of the future postcard.
 YouTube Channel Crafting Hours
 2. Cut from colored paper a lot of strips of different thickness, but the same length. These are billets for balls. Conditionally divide one strip into three parts and bend twice along the lines.
Draw on the resulting item with a circulation. Cut along the contour - you will have three mug.
 YouTube Channel Crafting Hours
 3. In the same way prepare circles from the other color strips.
 YouTube Channel Crafting Hours
 4. From the remains of folded paper, cut small triangles. Stick them to the bottom of each mug.
 YouTube Channel Crafting Hours
 5. Fold a small strip of paper in half. Separate and fold each side by the accordion, as shown in the photo and in the video below.
 YouTube Channel Crafting Hours
 6. Make as many of the same details as you got the balls. Stick them to the circles so that the harmonic windows are on top.
 YouTube Channel Crafting Hours
 7. To each ball with the help of glue-guns, attach a piece of beeps or other thick threads.
 YouTube Channel Crafting Hours
 8. Generate the long edges of white paper about 2 cm and cut down the contour so that you get two bent along the strip. Fold every one of them across in half. Cut out the same triangles from them so that the bases of the figures are on bend. Details are in the video below.
 YouTube Channel Crafting Hours
 9. Write on each triangle in one letter from the phrase "Happy Birthday". Lubricate the flags from the inside with glue, put on two cuts of the rope and glue. Tie the ends of these two beeps.
 YouTube Channel Crafting Hours
 10. Lubricate the harmonic glue from the reverse side of the balls and beautifully distribute them inside the postcard. Leave several for the cover.
 YouTube Channel Crafting Hours
 11. Tie the ends of the beeps, twist and cut out too much. With the help of glue-guns, attach to the postcard checkboxes with letters.
 YouTube Channel Crafting Hours
 12. Write a congratulatory inscription at the bottom of the cover. Stick at the top of several balls. Cut the extra beep and tie her ribbon.
What else there are options
You can make a volume card with balls departing from the box:
Here is a similar option:
Here it is shown how to make balls in a quilling technique:
And this is a simple postcard made in the applique technique:
How to make cards with flowers for birthday

What do you need
- Dense raspberry double-sided paper;
- simple pencil;
- scissors;
- pink double-sided paper;
- glue;
- colored paper or;
- several beads;
- white paper.
How to do
1. Bend raspberry paper in half. Draw a smooth line ahead, as shown in the photo, and cut off the contour.
 YouTube Channel Tonni Art and Craft
 2. Divide the pink paper sheet with scissors across in half. Half must be the same size as the folded card. Stick paper to the back of the cover.
Along the edge of the cover, draw a semicircular on the pink paper. For convenience, you can circle a lid or something else. Cut on the contour.
 YouTube Channel Tonni Art and Craft
 3. Form three different squares from paper from paper for three different colors. You can use stickers without adhesive base.
Fold one diagonally. Then adjust the corners as shown in the photo or in the video below.
 YouTube Channel Tonni Art and Craft
 4. From the side of the corner, do something like a heart on the figure and cut down the contour.
 YouTube Channel Tonni Art and Craft
 5. Open the item and twist the petals with a pencil. In the same way, fold the second square of the same color, draw a heart on it and cut out. Expand, stitch the beginning of the petals and twist them out. Make a small incision in one place between the petals and stick one petal to another.
 YouTube Channel Tonni Art and Craft
 6. Secure the second flower on the first. In the middle place a bead. Similarly, make two more flower.
 YouTube Channel Tonni Art and Craft
 7. Cut a few small rectangles of green paper. You can split green stickers into two parts.
Fold the rectangle across in half, then - again. Draw half a leaflet on the details. Cut on the contour. You will have two sheets. In the same way, make six more pieces.
 YouTube Channel Tonni Art and Craft
  YouTube Channel Tonni Art and Craft
 9. Attachment on the cover, attach several beads. On white paper, write a congratulatory inscription, cut it out and stick to the back list of postcards in the part that is visible in front.
You can write a congratulation while incurred inside the white paper. Or complement the postcard from the inside with interesting inserts, as they did in the master class.
What else there are options
Here it is shown how to make a volumetric flower inside the postcard:
In this instruction, flowers are performed very simple - from twisted spirals:
But the postcard is a bouquet. Flowers are made by the same principle as in the previous video:
How to make a nominating card-keksik for birthday

What do you need
- Pink double-sided paper;
- line;
- simple pencil;
- scissors;
- glue;
- white paper;
- bilateral volumetric tape;
- paper of different colors;
- red ribbon;
- feltaster.
How to do
1. Fold a sheet of pink paper in half. Place it so that the bottom was bend. From one edge, attach a ruler under a slight tilt and swipe. In about the middle, spend another inclined line so that the figure resembles a pot.
 YouTube Channel Crafting With Rachna
 2. Cut the detail on the outlined lines. Lubricate the side edges inside the shape.
 YouTube Channel Crafting With Rachna
 3. Connect the items and press the poles on the sides so that it glues. Insert the ruler into the resulting pocket and measure the distance from the bottom to the edge. Measure also the length of the lower edge of the figure, slightly retreating on the sides. The author came 9 cm.
Draw on white rectangle paper. Two sides should be 9 cm (or another value that you succeeded), and the other two are several centimeters more than the distance from the bottom to the edge of the figure.
The resulting rectangle must easily enter pink pockets. Cut a white item.
 YouTube Channel Crafting With Rachna
 4. Insert the item in pockets. Measure the length of its upper rib and the height of the pocket together with the inserted white item.
Draw another rectangle on white paper. Its length should be 2-3 cm more ribs pocket, and the desired width is approximately half of the measured height.
 YouTube Channel Crafting With Rachna
 5. Cut the cloud. Attach it to the top of the white detail so that it covers the pink. For convenience, let's notice the places of their contact.
Remove the cloud. Stick to the prominent part of the white part several segments of the volumetric tape. Attach the cloud on them, attaching it to pencil marks.
 YouTube Channel Crafting With Rachna
 6. Cut out small circles of different diameters from colored paper. Stick them to the cream, that is, to the details in the form of a cloud. Cut from red paper and attach it at the very top.
Tie the side on the bow of the bow. From white paper cut out a small tag - a rectangle with cut corners. Write on it "for you" or congratulations.
Stick this item at the bottom of the postcard, and over the tag horizontally attach the tape.
 YouTube Channel Crafting With Rachna
 7. Ribbon ends stick to the back of the postcard. Write congratulations on the white removal item.
How to make a postcard in the form of a heart with flowers for a birthday

What do you need
- Dense pink or raspberry double-sided paper;
- scissors;
- line;
- simple pencil;
- white paper;
- stationery knife;
- glue;
- self-adhesive rhinestones;
- peach double-sided paper;
- stationery corrector in the form of a handle;
- hole puncher;
- pink tape.
How to do
1. Cut from pink dense paper Detail of 30 x 15 cm. On the sides Make a mark at a distance of 7.5 cm from the edge.
Vertically attach a ruler to these strokes on the one hand. Bend paper by line. In the same way, bend the sheet from the other edge.
 YouTube Channel Mukta Art & Craft
 2. Fold the future postcard on the lines of bend. Cut the item from white paper: its width must match the width of the postcard, and the height is to be slightly smaller. Bend it in half.
 YouTube Channel Mukta Art & Craft
  YouTube Channel Mukta Art & Craft
 4. Expand the heart, attach it to the postcard and circle the contour. Using the ruler, add two horizontal features from above and below where the figure ends. From above, next to the middle, spend two small vertical lines.
Lines are visible in the photo. And in the video below there are all the details.
 YouTube Channel Mukta Art & Craft
 5. Open the postcard and cut the paper on the lines on both sides by the stationery knife.
 YouTube Channel Mukta Art & Craft
 6. Cut the item from white paper to the size of the back of the postcard. The height should be slightly less so that the pink color was seen from above and below. Stick detail from the inside.
 YouTube Channel Mukta Art & Craft
  YouTube Channel Mukta Art & Craft
 8. Cut out three squares from peach paper from three squares with 5 and 4 cm. Bend twice every detail in half. You will have small squares.
On one of them, closer to the corner, draw a circle. In the corner, read something like a triangle.
 YouTube Channel Mukta Art & Craft
 9. Cut the detail along the contours and expand it - it turns out the flower. Make the same elements from other squares. Using a pencil, twist the petals inside.
 YouTube Channel Mukta Art & Craft
 10. Lubricate the edge glue of each petal of one small flower and glue them between themselves so that the bouton is. The detailed process is shown in the video below.
Lubricate the pellets of the petals of the second flower of the same size and stick to it the first bouton. Then the same attach the third part.
Get big parts to each other, and on top - ahead of the resulting lush bud.
 YouTube Channel Mukta Art & Craft
 11. Make two more flower: one same size, the other is smaller. Stick all three on the side of the heart.
 YouTube Channel Mukta Art & Craft
 12. Corrector on the other side of the heart write a congratulatory inscription. Inside the postcard, too, output pleasant words. Do a hole punch one hole in the middle of the heart, grind ribbon there and tie a bow.
How to make cards with a bow tie for a birthday
 YouTube Channel Tonni Art and Craft
 What do you need
- White paper;
- simple pencil;
- scissors;
- stationery knife;
- malinic bilateral paper;
- pink double-sided paper;
- bilateral volumetric tape;
- pink or red pencil;
- self-adhesive rhinestones;
- peach or pink tape;
- simple bilateral scotch.
How to do
On it the outline of the butterfly, as shown in the photo and in the video below.
 YouTube Channel Tonni Art and Craft
 2. Cut out the figure. Open the butterfly and divide it with scissors into two equal parts. One of them will serve as a template.
 YouTube Channel Tonni Art and Craft
 3. Put the pattern on the template, as shown in the photo or in the video below. Come on the pencil sketches by the stationery knife and remove excess paper.
 YouTube Channel Tonni Art and Craft
 4. Attach the pattern to the raspberry sheet and circle the contours inside and outside. Cut the detail with scissors, and remove the excess paper to the knife to get a pattern. In the same way, make the second wing.
 YouTube Channel Tonni Art and Craft
 5. Apply one wing to pink paper and circle external and internal contours. Next to attach the second wing and do the same.
 YouTube Channel Tonni Art and Craft
 6. Cut the pink items on external contours. Slide the edges of the patterns with a color pencil.
 YouTube Channel Tonni Art and Craft
 7. Enclose the raspberry parts to pink using volumetric tape. The details are in the video instructions below. Decorate wings with rhinestones.
Cut a piece of ribbon, at the edges, attach a simple bilateral scotch. Stick to them wings.
 YouTube Channel Tonni Art and Craft
 8. At the edges of the tape, from the opposite sides, make a small vertical cut. Write congratulations on white paper and roll it into the tube. Wrap it with ribbon and "button" for cuts.
What else there are options
Here is another similar composition:
Here it is shown how to make a postcard with an elegant carved butterfly:
And one more pretty option with a volumetric butterfly and an unusual cover:
The best gift is the one that is made with his own hands. And what can you pretend to my friend for your birthday? A gift can be anyone, and supplement it is worth a postcard. What to draw for a birthday? We have collected the best ideas of postcards, inspire.
Funny owl
What to draw for your friend's birthday or girlfriend? Try to portray the funny owl. This bird is a symbol of wisdom, and such an allegory will definitely deter to your close person. How to portray it? Everything is very simple. First you need to draw a big circle. It will be the sun. Now I depict oval is the body of the owl. Immediately reinstate the falling shadow from the bird. Accent will do eye. They are depicting in the form of two huge circles. Duplicate et. geometric figures Two two more times, gradually reducing them. Dorify the beak, it will look like a rhombus. Schematically depicting paws. They will be like a flower with three leaves. On the stomach, the wavy line is depicting feathers. And the image of the owls of the ears and a festive cap will be completed. All this is drawn by triangles. Two ovals depict wings. One of them needs to be bent so that it seems that Owl holds the thread wing from the balls. Now go to the image of the festive attribute. Draw balloons and plate. All this needs to be depicted by ovals. And it remains to draw a festive cupcake. Optionally, it can be changed on the cake. Do not forget about the candle. It is possible to schematically draw one, and you can also depict them as much as the birthday is fulfilled. It remains to paint the drawing. You can use our sample or use any other color gamut.
Bank jam

When you break your head over to draw mom's birthday or sister, you can depict something unusual. For example, jam can. How to draw it? We depict a big circle. Now reincut the exaggeration and erase the lines that turned out at the intersection. Slightly above the circle draw another oval. Pull down two rectangles down, from the last down the skirt in the form of a trapezoid should be dug. The edge of our lid is wavy. We decorate it with lace. The basis is ready. Now you need to decorate it. On the bank we draw raspberries or other berries for your taste. On a tape that adorns the jar, draw flowers, they decorate the space from below. You should not portray only one inflorescence. Draw several colors with leaves at once. Well, it remains the main thing - to portray the label on the bank. We write a beautiful handwriting "Happy Jam Day" and draw a berry. The label circuit can be "set" strokes. It remains to give our color image, and the greeting card will be ready.
Cake

If a child thinks to draw grandmother's birthday, then you can file an idea. For example, draw a cake, decorated with candles. On top of a sheet with multicolored pencils congratulatory words. This may be the phrase "Happy Birthday" or its English variation of Happy Birthday. We proceed to the image of the cake. We draw the semicircle and the lower part of it depict the wavy line. It should be something similar to the leaks of glaze. The cake itself is not necessary to draw, but if desired, it can be outlined by two straight lines leaving to the edge of the sheet. We put on the glazes of the candle. There may be an arbitrary quantity, but you can draw as much as the birthday age. We light on the candles of lights and add a decor in the form of wave-like lines that will symbolize the exploding flap. You can add a postcard with colored dots or asterisks.
Air balloons

How to draw a birthday card to look original? Everything is very simple, you need to combine the drawing and glue the application on it. Here with its manufacture and start. We take a sheet of paper, watercolor paints and toothbrush. Wash the brush in the water, dip in any bright paint and splash onto a sheet. We produce this operation several times with different colors. We are waiting for the paint to dry, and cut out the contours of the balloons from the sheet. In our case, they are 4, but you can do more or less. Now we need two sheets of paper: one color, another white. White The sheet should be slightly smaller. We glue two blanks so that the color edge looks like a passe. We stick our balls from above, and we spend the wavy lines from them with a black handle. From the bottom of the postcard we write a greeting phrase.
Laconic pattern

What can be drawn on a birthday? Today in fashion minimalism, therefore, we will depict a postcard in this vein. Draw a festive cake. But the image will be very schematic. With such a task, even a person who does not know how to draw. Visually divide the sheet into three parts. The first of them will occupy an image of a culinary masterpiece. Draw a thin rectangle with rounded edges. Top with the same geometric shape, only wider. In its center we depict a strip. Cake ready. Candle draw schematically. It will look like a rectangle with a thin rod from above. We supplement the candle of the lights. It will be a droplet with rays diverging in different directions. Now go to a congratulatory inscription. In English, she will look more stylish. Therefore, we write happy print letters on the second third of the sheet. From the word to the left and right we depict two fat stripes. On the last third part of the sheet we draw the word Birthday.
No longer worth thinking for a long time to draw dad for a birthday. Just give him such a postcard.
Congratulatory bear
How to draw a picture for birthday? There is nothing complicated here. I will depict a cute bear who holds a gift in her hands.

We will do it in the form of appliqué. To begin with, choose paper with a tree texture. Let it be inhomogeneous, somewhere with a turn, somewhere darker. Draw a rectangle on a sheet, a slightly expanding book. At the upper corners, you will depict two circles. This is a bear hull. On dark brown paper draw okal. It will be nose. Cut out our billets and glue them to a blank sheet of paper. Two points draw eyes and a big drop depict the nose. Optionally, you can draw a little bit a smile. Recovering 2-3 cm from the application, we write a greeting inscription. On the bear we glue the square, carved from any wrapping paper. From it, we cut the flags that "spend" at the top of the postcard.
Postcard with flowers

What to draw mom for a birthday? Well, of course, flowers. They can be depicted realistic, and it is possible, as in our case, decorative. At the bottom of the sheet, we carry out a line that will combine direct and zigzag segments. This is grass. Top writing congratulatory words. And in the middle draw sticks, on which we depict various flowers in the form. It can be bells, roses, chamomile. To look more gentle, it is necessary to paint everything in one color range. And in order to fill the space between the colors, you need to draw bizarre curls with a black handle.