Archive for the ‘Watercolor. Painting with watercolor 'Category
Read also
How to learn to paint with watercolors from scratch?
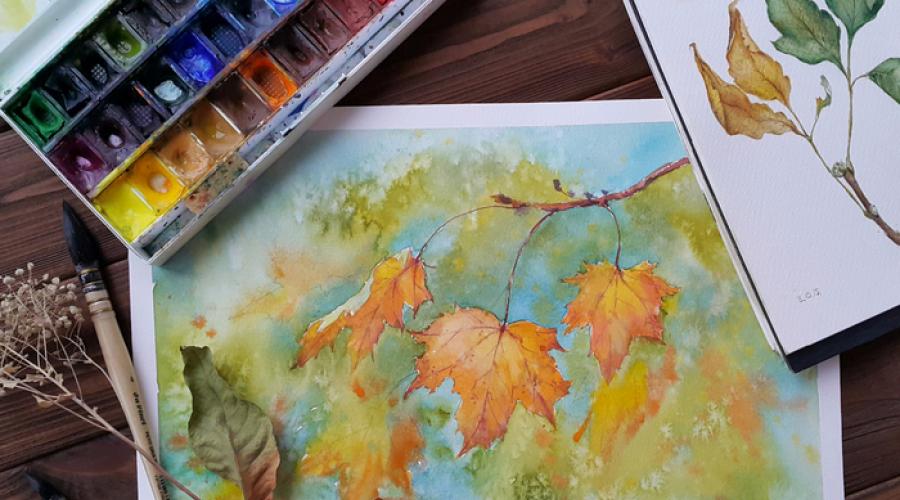
Watercolor painting is one of the most difficult in the world, but at the same time, it is the most delicate, fragile and attractive for novice artists. What's so special about her? The whole secret is in the transparency of the lines, thanks to which even the smallest color transitions are visible. The wateriness of the picture, which gives it volume. But how to comprehend this not simple art? How to learn to paint with watercolors from scratch? Before we start drawing, we need to select auxiliary materials. Art school for adults and children, on its courses, it offers professional training in drawing in any technique, but you can learn it yourself. Consider in the article the points that will help us with this.
On what paper and with what brushes to paint with watercolors?
1. Paper. It is better to immediately purchase a watercolor one, it is not expensive (about 40 rubles a notebook). Its difference from the usual one is in the dense texture of the sheets. Such paper will not swell with water and warp.
2. Brushes. At the paint shop, we start with two brushes. Small and large. Squirrel wool works well for watercolors.
3. Palette. The choice of the palette is not fundamental, we choose any. Some artists replace the palette with small glass, it is practical to use and easy to clean.
4. Paints. Children's honey paints with the addition of lemon and other things - put it aside right away. We won't need them. We take any professional paints in the shop for artists. Open them up and look at the colors, you should like them. It is not necessary to take the most expensive ones, it doesn’t matter.

How to learn how to paint correctly with watercolors for beginners in stages?
How beautiful to paint with watercolors? In order for our watercolor drawings to be of high quality, it is necessary to master a few basic techniques.
1. Uniform fill. Draw a square or rectangle on paper. It is better to choose a darker color, it will be better visible on it. Type it on a brush and draw it from one corner to the other. Pick up paint again. Draw the next strip so that it overlaps the previous joint. If the first strip does not completely flow into the second, then tilt the sheet of paper. Pick up paint and continue painting stripes, maintaining a uniform shade. Rinse the brush in water and squeeze out. Smooth out the dark stripes with a brush. Let the drawing dry. If you get a rectangle evenly filled with paint, you are good at it.
2. Dependence of the shade of paint on the amount of water. Let's take some paint on the brush and draw the first line, then lower the brush into the water and draw the second one 1 cm away from it. Let's continue to dip the brush in water and draw lines until they become as transparent as possible. This exercise helps you get a feel for how much water needs to be added to get the desired hue.
3.Gradient. The goal of this exercise is to get a uniform transition from dark to light. Draw some paint with a brush and draw a vertical line, then dip the brush in water and draw the second one so that it goes slightly behind the first and the paint starts to flow. We repeat the same thing again, adding water. We achieve a complete color transition. Run the last strip with just water. Dry the brush and slide the paint roller underneath the fill.

Learn to paint with watercolors in stages using various techniques for beginners
How to start painting with watercolors? It is necessary to comprehend the fundamentals of art. These are certain exercises, by performing which, you will master the first basics of drawing. watercolors.
1. Wet on wet. Dampen a small piece of paper with water. The sheet should be evenly saturated with water. Now take your paint with a brush and paint over the wet spot. Watch how the paint spreads. Practice adding more or less paint to the sheet of paper. This will be very useful to you.
2. Blending from color to color. First, draw any shapes with water. We take on a brush, for example, blue color and apply to the figure. Add some burgundy and yellow. You should achieve a smooth transition from one color to another. If not, add some water.
3. Overlay layers. Let's draw the background as in the first exercise. Let's wait a bit, let it dry completely. Draw on the background a couple of circles of different colors and let dry. Draw the third layer on the circles.
4. Reception using table salt. Draw the background and add some regular table salt on top. We wait. Salt crystals gradually absorb the paint and become like stars. The effect is most noticeable in dark areas.
5. Clouds with a napkin. Fill the background and while the paint is still wet, begins to apply a napkin, shaping it. Thus, we get a texture that resembles clouds. This technique can be used to fix mistakes that you get while drawing. Just blot off excess paint.
6. Splashes. We collect paint on a brush and run your finger over the brush over the paper or drip, forming uneven splashes over the entire surface. It is better to cover the table with a cloth to avoid contamination.

10 common mistakes aspiring artists make
1. Love yourself. Many artists begin to scold themselves and overly criticize their paintings. You don't need to do this. Draw something - praise yourself. Everything that you do is only for you and for the realization of your creative needs. The more you enjoy the drawing process, the better you will get.
2. Use materials that are comfortable. Quality brushes, paper and paint. Then the drawing process will only bring you pleasure.
3. Copy stories famous artists... They will serve as the foundation of your knowledge.
4. Show your paintings to all your friends, relatives and acquaintances. Present your painting. Gather like-minded people around you who will support you.
5. Warm and cold paints. Use more colder shades in the distance and warm shades up close. So will you show aerial perspective in his picture.
6. Do not paint the entire background with one paint. Change the tone, mix colors, add color to your picture. We made two or three strokes with one color, add another. The more shades you use, the more interesting your painting will be.
7. Let the painting dry. This will make it more elaborate and deeper.
8. Show volume up close. Apply more paint to nearby objects with a palette knife. Make them voluminous.
9. The more you mix colors, the more picturesque your painting will be. Mix in halftones.
10. Decorate pictures with a baguette. It gives the picture an extra dimension.
Watercolor painting is one of the most difficult in the world, but at the same time, it is the most delicate, fragile and attractive for novice artists. What's so special about her? The whole secret is in the transparency of the lines, thanks to which even the smallest color transitions are visible. The wateriness of the picture, which gives it volume.
But how to comprehend this not simple art? Before we start drawing, we need to select auxiliary materials. Consider in the article the points that will help us with this.
On what paper and with what brushes to paint with watercolors
1. Paper. It is better to immediately purchase a watercolor one, it is not expensive (about 40 rubles a notebook). Its difference from the usual one is in the dense texture of the sheets. Such paper will not swell with water and warp.
2. Brushes. At the paint shop, we start with two brushes. Small and large. Squirrel wool works well for watercolors.
3. Palette. The choice of the palette is not fundamental, we choose any. Some artists replace the palette with small glass, it is practical to use and easy to clean.
4. Paints. Children's honey paints with the addition of lemon and other things - put it aside right away. We won't need them. We take any professional paints in the shop for artists. Open them up and look at the colors, you should like them. It is not necessary to take the most expensive ones, it doesn’t matter.

How to learn to paint with watercolors from scratch step by step
How beautiful to paint with watercolors? In order for our watercolor drawings to be of high quality, it is necessary to master a few basic techniques.
1. Uniform filling. Draw a square or rectangle on paper. It is better to choose a darker color, it will be better visible on it. Type it on a brush and draw it from one corner to the other. Pick up paint again. Draw the next strip so that it overlaps the previous joint. If the first strip does not completely flow into the second, then tilt the sheet of paper. Pick up paint and continue painting stripes, maintaining a uniform shade. Rinse the brush in water and squeeze out. Smooth out the dark stripes with a brush. Let the drawing dry. If you get a rectangle evenly filled with paint, you are good at it.
2. Dependence of the shade of paint on the amount of water. Let's take some paint on the brush and draw the first line, then lower the brush into the water and draw the second one 1 cm away from it. Let's continue to dip the brush in water and draw lines until they become as transparent as possible. This exercise helps you get a feel for how much water needs to be added to get the desired hue.
3. Gradient. The goal of this exercise is to get a uniform transition from dark to light. Draw some paint with a brush and draw a vertical line, then dip the brush in water and draw the second one so that it goes slightly behind the first and the paint starts to flow. We repeat the same thing again, adding water. We achieve a complete color transition. Run the last strip with just water. Dry the brush and slide the paint roller underneath the fill.

Learn to paint with watercolors in stages using various techniques for beginners
How to start painting with watercolors? It is necessary to grasp the fundamentals of art. These are certain exercises, by completing which, you will master the first basics of drawing with watercolors.
1. Wet on wet. Dampen a small piece of paper with water. The sheet should be evenly saturated with water. Now take your paint with a brush and paint over the wet spot. Watch how the paint spreads. Practice adding more or less paint to the sheet of paper. This will be very useful to you.
2. Blending from color to color. First, draw any shapes with water. Take, for example, a blue color on the brush and apply it to the shape. Add some burgundy and yellow. You should achieve a smooth transition from one color to another. If not, add some water.
3. Overlay layers. Let's draw the background as in the first exercise. Let's wait a bit, let it dry completely. Draw on the background a couple of circles of different colors and let dry. Draw the third layer on the circles.
4. Reception using table salt. Draw the background and add some regular table salt on top. We wait. Salt crystals gradually absorb the paint and become like stars. The effect is most noticeable in dark areas.
5. Clouds with a napkin. Fill the background and while the paint is still wet, begins to apply a napkin, shaping it. Thus, we get a texture that resembles clouds. This technique can be used to fix mistakes that you get while drawing. Just blot off excess paint.
6. Splashes. We collect paint on a brush and run your finger over the brush over the paper or drip, forming uneven splashes over the entire surface. It is better to cover the table with a cloth to avoid contamination.

Common mistakes aspiring artists make
1. Love yourself. Many artists begin to scold themselves and overly criticize their paintings. You don't need to do this. Draw something - praise yourself. Everything that you do is only for you and for the realization of your creative needs. The more you enjoy the drawing process, the better you will get.
2. Use materials that are comfortable. Quality brushes, paper and paint. Then the drawing process will only bring you pleasure.
3. Copy stories from famous artists. They will serve as the foundation of your knowledge.
4. Show your paintings to all your friends, relatives and acquaintances. Present your painting. Gather like-minded people around you who will support you.
5. Warm and cold paints. Use more colder shades in the distance and warm shades up close. This will give you an aerial perspective in your painting.
6. Do not paint the entire background with one paint. Change the tone, mix colors, add color to your picture. We made two or three strokes with one color, add another. The more shades you use, the more interesting your painting will be.
7. Let the painting dry. This will make it more elaborate and deeper.
8. Show volume up close. Apply more paint to nearby objects with a palette knife. Make them voluminous.
9. The more you mix colors, the more picturesque your painting will be. Mix in halftones.
10. Decorate pictures with a baguette. It gives the picture an extra dimension.
What is watercolor? It is a paint that can be diluted and whose properties make it easy to wash off with water. Other properties of watercolors make drawings made with such paint especially transparent. If you are going to paint with watercolors, then you cannot do without special skills. Professional watercolors can determine exactly how much water needs to be added in order to get the exact shade that is needed.
Essential items for watercolor painting
To get started with watercolors, you will need the paper you usually use for painting. You cannot do without brushes, of course, watercolors. In addition, you will need a container in which you will have water, a tablet, and paper napkins.
What paper for watercolor to choose
In order to start working with watercolors, you need special drawing paper. The texture of this paper should be such that you get the most good result.
In general, drawing paper can be either smooth or textured. Its density can also be different - all this must be taken into account when choosing. Because thick paper is more resistant to water, it is more valuable. It can be pulled onto the tablet after wetting it. If you want grain in your drawing, get a slightly roughened paper. 
Choosing a brush: which brush to paint with
Buy a faux or squirrel hair brush. For a full watercolor painting, don't look at cheap brushes. However, its price itself will tell about the quality of the product in front of you.
What brush shapes do you need? The main tool will be a round brush. You will operate with it with large volumes of paint. It is very convenient to wet the paper with water using a flat brush. If you need to work out the details, then in this case it is the oval-shaped brush that will become your indispensable assistant. You can read more about choosing a brush in our article. 
Brush care
Prepare two water containers. You will need one of these to rinse your brushes. It will be nice if paper napkins lie next to you in the process of work - they are very convenient to remove excess paint from brushes. 
Preparing the paper
Now let's start preparing drawing paper. It should be moistened evenly. Take such paper and stretch it over the tablet. As the sheet dries, it will become flat and tense. It is in this form that it will remain all the time while you draw. 
Drawing on wet paper
You can start your drawing on dampened paper. This drawing technique has its own characteristics. Be sure to place the tablet with the paper horizontally, otherwise you risk getting ink smudges at the bottom. If you feel that the paper is excessively saturated with water, blot it with a tissue. Use a dry brush to remove excess paint. 
Apply paint
Wait a little before applying the next stroke - let the previous stroke dry. You need to start working with watercolors only after you have precisely selected the color you need on the palette. Keep in mind that the paper itself acts as the white paint, so outline the contours of the future drawing in advance. 
Need to know…
The fluidity of paint, transparency and the merging of strokes - these are the main nuances that are inherent in watercolors and which are the building blocks of creation. special charm techniques of working with watercolors. Your stroke must be wet, otherwise you will notice the movement of the brush.
Determine the tone of the picture in advance. If you applied a smear that you are not quite happy with, try to compensate for it in the next stroke. The stroke should have a stroke shape. And remember: when drawing In a similar way try to capture the border of the previous stroke. Using this technique, you will achieve a smooth transition between strokes. If the edges of the transitions need to be softened, use a dry brush. 
And this, too, you need to know
If you're just starting out as a watercolorist, try painting in one color using any dark paint. This is necessary so that you have an idea of what color the paint will take after drying.
To keep the tones in the drawing clean, rinse the brush often.
There are never many ideas for creativity, and if in creative process children are also involved - you must admit that it often becomes not only creative, but also research. WITH simple techniques the use of watercolors, which from a new side will show us the properties of some ordinary objects, introduces us today in Anastasia Borisova , blog author English4.me - English for me and my family... Anastasia's blog is not only about language, but also about creativity, so today we go on an excursion to creative storerooms and learn simple watercolor techniques and techniques.
How many creative and well-rounded moms are here on! And interesting finds await us at every step. Many moms seeing after any class incredible result the work of their 2-4 year old child - though not always the way it was intended - exclaim: “How original and simple! Where is it taught? " Everyone wants to become a little bit of a sorceress for their children.
So I, using the simplest techniques, I painted a winter landscape in 15 minutes, which my husband considered worthy to put up for sale. 🙂

The best children's books
The non-standard use of materials and the variety of created effects give the child the feeling "I can!"
Watercolor is fluid and naughty. We will use just these not always convenient properties, creating “masterpieces” mostly “wet”.
1. Crayon resistance effect - manifestations of wax crayon
This is perhaps the most common technique. A drawing or inscription is applied to a sheet of paper with wax crayon or a candle, and painted over with watercolors on top. Using white chalk or a candle, you can make secret notes or congratulations; yellow crayon creates a glow effect; bright blues, greens and pinks underneath dark watercolors - neon effect. You can also combine this technique with rubbing. We put a textured substrate under the sheet (everything that can be found at home) and rub it on top with the flat side of the chalk. If you do it carefully, and put leaves or some kind of embossed object, you get excellent prints.


2. Salt - salt on wet watercolor
Sprinkle salt on the still damp, painted sheet and you can achieve interesting effects. Medium coarse salt leaves "snowflakes" on the blue when it dries. On a green background, you get translucent foliage. Fine extra salt dries up almost tightly. So you can add texture to the road, stone, create a galaxy.


3. Blotting - bleaching paint.
By removing excess water and a layer of paint from the sheet with a dry napkin, you can paint winter spruces covered with snow, or sea foam. You get a pale moon or sun by wrapping a toilet paper tube with a tissue paper and blotting the watercolor sky. Even an already dried drawing can be touched up by sprinkling it with water and gently rubbing the desired area.


If you crumple a napkin and put it against a blue sky, you get very natural clouds.

A crumpled napkin also produces an interesting texture. Texture sheets can then be successfully used to create collages.


4. Pressing - pushing
In the picture above, you can see a clear inscription in dark letters (I ...). It was made on wet watercolor with the tip of a brush (the paint seems to flow down into the pressed hollows). In this way, you can label the drawing or add details. Placing a sheet of wet watercolor with a textured object on it under the press works on the same principle. It is best, of course, to print the leaves like that. But even from the feathers and branches of a Christmas tree, a good decorative picture comes out.


5. Splatter and spray - splashing
A toothbrush plus watercolor will help to make rain, snow, leaf fall, to depict the wind. It is interesting to just sprinkle different paints on a dry sheet. A dampened leaf will have a very different effect. It will be possible to observe how the droplets spread out, merging with each other into a whimsical ornament.

You can spray around the stencil, or vice versa inside it. A consistently original result is ensured. Just don't forget to cover it with newspapers. working space, paint flies far away.

6. Masking tape - drawing with masking tape
I was surprised to find that the aforementioned adhesive tape peels off the paper several times perfectly, which means we use it as the basis for the stencil. You can tear it with your hands into uneven strips and draw a forest.

Any geometric compositions... You can even cut something more detailed into the thickness of the tape, such as the houses in the first photo. The main thing is that this stencil does not need to be additionally fastened and held, and the likelihood of paint getting under it is not great if the edges are well smoothed.


7. Foam painting - painting with foam
Fun and beautiful texture in one bottle. In a container you need to mix water, a little liquid soap and a lot, a lot of paint. We give the child a tube and let him blow the bubbles. As soon as a high cap grows, we apply paper to it. At the same time, it is better to undress the child completely, so that later it will be easier to wash it.

8. Alcohol and citric acid - alcohol and citric acid
Both liquids, as it were, "push apart" and "eat away" the paint. A drop of alcohol has a fish-eye effect, and its volatility can create additional areolae around that eye, similar to a halo around the sun. Very unusual.

Lemon juice spreads well over fresh watercolors, but does not affect dried ones. It spreads quite a bit by itself, so it's important not to overdo it. Ideally, these "shaggy" blots are obtained. After drying, they can be turned into monsters or someone else by adding arms, legs, eyes.

9. Stamping - stamping
For my taste, it is better to work with stamps with thicker paints - gouache, acrylic. You can use whatever is at hand, as well as cut out stamps from potatoes, print cut vegetables, etc. Watercolor is good for creating textures. We take a napkin, dip it in paint and leave traces that are quite similar to stones, for example.

10. Plastic cling wrap - cling film
Did you know that film can draw too? It is enough to lay it on wet watercolor and move it. Ice crystals or other kinds of abstraction are obtained.

If you make one large even "window", framed by wrinkles, then after the paint dries you will see, say, a lake, or a wormwood. In the photo, it even looks like a rose.

11. Blowing - blowing up
Another technique for drawing with a straw. Blow again, but this time as hard as possible, dropping a drop of paint across the leaf, and you end up with intricate trees or just funny weirdos, or perhaps hair for a pre-drawn character.


If you want, you can let the paint flow on its own wherever it wants. Just turn the sheet vertically, and then fantasize with the child, it looks like it.

12. Light table - light table
Or a window, to put it simply. 🙂 This technique is not for toddlers, but mom can create a gallery of children's portraits if she wants. All relatives will be provided with gifts for a year in advance. As a child, I think, everyone "brought together" pictures, applying the original with a white sheet to the window. And if you take a photo? In photo editors, you need to ensure that there are 2 colors left - black and white (the posterize function).
Then there are several options for action. You can paint over all the white areas with wax crayon or a candle, and then go through with watercolors. It turns out interesting, but not very clean, because it is rather difficult to track where the chalk went.
You can simply circle all the white spots with a pencil, and then carefully fill the rest with paint. It's not as long or as difficult as it sounds. Just a little patience and accuracy, and you have 3-4 portraits for a child's daytime sleep.
If you decide to put the case on stream, then in hobby markets it is better to purchase a reserve liquid for watercolor paper. Apply it with a brush on white, go through it with watercolor on top, and then remove the reserve, like a film from a sheet. Fast, clean, original.


It was in this country that special paper was produced, suitable for working with watercolors. V Western countries the continent did not pay due attention to watercolor painting for a long time, and only at the end of the 19th century it was given a well-deserved place in the history of world painting. Using this technique, you can achieve amazing graceful lines, background translucency, interesting blurred details. All this can give a drawing a mystical effect.
What brushes are needed?
Before you start learning the technique watercolor drawing, you need to pay attention to the materials for its high-quality performance. Properly chosen brushes are a must for anyone looking to learn how to learn how to paint with watercolors from scratch. They must have the following properties: quickly absorb water, have flexibility and the ability to immediately return to their previous shape, and also have smooth, non-puffy hairs. Handles watercolor brushes always short. A wide flat brush is used to remove excess paint, since its hairs have increased rigidity. The blur brush is used to paint over the background. It is large enough and soft, so it easily changes its shape and does not dry out, keeping water and paint in the hairs. Brushes for work can be of various sizes, which vary depending on the technique used.
Watercolor painting paper
The paper you choose is also important. It is not difficult to determine its quality. If the paper is thick and does not delaminate, as well as well glued, then there is no doubt about its quality. At the right choice drawing papers can be painted with watercolors without fear that the water will slowly absorb and the paints will brighten. Pay attention to the graininess of the drawing paper. For accurate transmission small parts fine-grain paper will do. For routine work you can select medium grain paper. And to perform specific patterns, coarse-grained is required. It has a rough surface and a distinct texture. This type of paper is heavy and often handcrafted. Grain-free paper is not suitable for watercolor painting as it will warp.
Correctly selected paints are the key to success
Choosing the right colors is also important for those interested in learning how to paint with watercolors. For beginners, the usual school ones are also suitable. But if an immature artist is nevertheless aimed at a good result, it is better to give preference to professional ones. It will take some effort to get the paint in the trays ready for painting. First, you need to drop a little water from the brush into the paint so that it softens a little. The convenience of such paints lies in the fact that there is no need to look for additional containers. If the artist has some experience in drawing with watercolors, then paints in tubes are suitable for him. Then you can create the desired palette yourself.
On the other hand, amateurs can also use these paints if they buy ready set with many tubes. Although paint kits are sold in twelve and thirty-six units, not all colors are used. In any case, there is a need to mix different colors to obtain the desired or unusual shade. In principle, a novice artist will need no more than ten commonly used tones.

Warm or cold tones
Those who want to learn how to learn how to paint with watercolors need to understand warm and cold colors. If the paint is based on red or yellow, then it will be considered warm. And blue and purple shades belong to the cold. Please note that green, purple, gray and black colors have a unique characteristic and can be cold or warm. The initial tone may depend on the specificity of the color scheme and the influence of the surrounding shades. The main colors are considered to be blue, yellow and red. All others that can be obtained by mixing are called derivatives.

Stages of drawing
Learning to paint with watercolors in stages is not at all as difficult as it might seem at first glance. First you need to get a pencil, preferably with a solid shaft, so that the lines are only slightly visible. Next, sketch out the main details of the drawing. After that, you can immediately take up the watercolor. There is no need to rush here. First, you need to think carefully about what colors and shades are desirable for the selected pattern. Having decided on colors, paint can be started. The first step is to paint with translucent colors. After all, adding tone is easier than removing it. To do this, you need to dilute the paint with water. After the foundations are applied, you can add color to the drawing to get rich. To obtain dark tones, the brush is blotted with a napkin after soaking in water. Next, the brush is dipped in paint, and lines are drawn on the paper. It is important to remember about the shadows, which must be thought out before you start painting. This is important to know for future artists who are interested in how to learn how to paint with watercolors for beginners in stages.

Removing borders
In order to get rid of the difference between shadow and light, you need to create a smooth transition. This means that all colors must be mixed. To do this, the brush is dipped into the water so that all the remaining paint on the hairs is washed off. Next, dry the brush and make sure there is no paint on it at all. Then the bristles of the brush must be immersed in water again. After that, the brush is placed on the distinction between light and dark part, a line is drawn. Thus, the clear border will blur, and it will be impossible to determine exactly where the shadow ends and the light begins.

Draw a landscape
Nature lovers who want to learn how to learn how to draw should first outline the main compositional lines on paper. When drawing a zone of the sky, it must be remembered that this section of the paper is first wetted with water. Further, while the sky zone has not yet had time to dry, on its lower part thinned light yellow paint is applied. The upper part is painted red or Orange color... The shade borders are erased with a damp brush.

Experiments with green
How to learn to paint beautifully with watercolors and operate with ease different colors on the paper? This is much easier than it sounds. The only difficulty can arise with in green... Very often, artists have problems using this tone in their works. In order not to be mistaken and to choose the right shade correctly, you need to know a few rules. Green cannot be lightened with yellow color... To tone down rich greens, just add a drop of base red. And to give greens a darker shade, a cold blue tone... Knowing these basic rules on how to learn how to paint with watercolors, you can draw a great landscape from the very first time with a mysterious sky in the background and bright green foliage in the front of the drawing.
The most important thing in teaching watercolor painting technique is not to grab onto everything at once. It is necessary to gradually increase your level of brushwork, as well as the ability to correctly handle the color scheme. Some artists prefer to use only soft and warm colors in their works, while others, on the contrary, use cold and saturated colors. It is not easy to find your way in creating watercolor masterpieces. The main thing is that the drawing touches the senses, then the hand itself will begin to draw the necessary lines, and the brush will add graceful color shades. Consistency in learning how to paint with watercolors is very important. You always have to go from simple things to complex ones, at each stage of development, acquire new skills and consolidate knowledge with the help of constant practice.