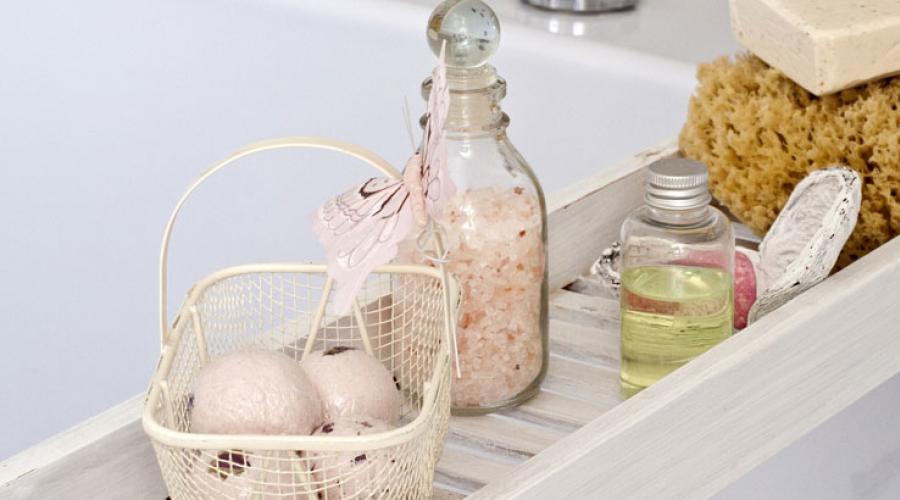
Bits of soap make liquid soap. Remnants soap - How to make at home? Recipes on how to make soap from soap leftovers
I am fond of carving with soap, and there are always small pieces left after work. It is also very common for soap makers to leave a lot of residue after trimming the soap. Perhaps, for some reason, some old remnants have accumulated in your home. Most of us, of course, throw away these little, ever-breaking bars of soap. But in vain! After all, they can be given a second life. I would like to tell you how you can make soap at home from the remains of factory soap.
So, in order to give a second life to remnants you will need:
- remnants (soap residues) 200 gr,
- grater,
- a glass container in which we will melt the soap,
- another container, for example, a saucepan (since we will melt the remaining soap in a water bath),
- 180-200 gr. milk,
- olive oil;
- molds in which you will pour your soap.
If you do not make soap from leftovers, but use factory soap as a base, then it is best to take baby soap, with a minimum amount of fragrances.
Sequencing:
Step 1: Grate the soap on a fine grater. Since the smaller the pieces are, the easier it will be to achieve uniformity.
Step 2: Pour the milk into the soap shavings. Leave this mixture for 2 hours.
Step 3: Add 1 tablespoon to the resulting mixture. olive oil and put in a water bath. Gently stir until the lumps are completely dissolved, avoiding boiling.
When the soap has dissolved, you can add various additives to it, for example, crushed oat flakes, ground coffee, etc. And hold it a little more in the bath, how to warm it up.
If there is a desire to add essential oils, then remove from heat and quickly drip a few drops. Essential oils evaporate when heated, so we mix thoroughly, but quickly.
You can add glycerin. It is sold in any pharmacy and is not expensive.
Add whatever your heart desires: honey, vitamin E, oils: jojoba oil, cocoa butter, sea buckthorn and others. Everything can be bought at the pharmacy.
Step 4: We pour everything into pre-prepared forms.
Any plastic container is suitable as a mold: a jar of mayonnaise, a glass, packaging for cakes, cakes, cookies. It is important that the diameter of the neck of the mold is wider than the bottom. Otherwise, the soap will be problematic to pull out.
Step 5: We set to cool. We leave for several hours (preferably a day) in the refrigerator.
When, when you press the soap, you see that it does not squeeze through and comes off well from the walls of the mold, you can try to remove it.
After that, it is better to put the soap on a newspaper in a dry, warm place so that excess moisture is well absorbed. Soap takes about 2-7 days to mature. You will know that everything is ready when it gets tough, like a normal bar of soap.
If you want to make the soap multi-colored, then for this you need to melt remnants of different colors separately, and then pour it into the mold layer by layer.
It remains to pack it beautifully, after which such original handmade gift, can be presented to friends and acquaintances.
This process is very exciting, try it and see for yourself!
Admire, rejoice, give as a gift !!!
It would seem, why do we need remnants? A seemingly useless product that most people just throw away. Perhaps, only those who are engaged in sewing (an irreplaceable product for cutting!) Or amateur soap-makers understand the full creative value of remnants. But from the remnants, you can make a solid new soap, which, if desired, will be more aromatic and much more useful than the old one, and saving the family budget will become a pleasant bonus to home creativity. So how to make soap from remnants, and why do you need it?
Why bother making your own soap at all?Homemade soap has a fair amount of advantages over the purchased one.
- Well-known composition. You can be sure that the soap will not contain only chemistry.
- Beneficial features. Soap making is famous for the fact that when cooking soap into the future, you can add absolutely any substances and products, be it essential oils, chocolate, coffee, milk, etc. - no one limits your imagination, and the product can turn out to be very useful for the skin.
- The creative process. A little creativity in everyday household things has not prevented anyone yet. Who knows, maybe inspiration will overtake you, and you will join the friendly destiny of soap makers, and later you will make your own business?
- Saving. Everyone remembers the phrase “the ruble protects a penny”. It would seem that soap is a cheap product that you can safely buy when the old one runs out, but soap made from remnants can save you a decent amount a year.
How to make liquid soap from remnants?
The easiest way to make liquid soap from remnants is to use ordinary hot water. You can add milk and butter to it, but it is not recommended to add solid components - the structure will be broken.
For liquid soap you will need:
- remnants;
- hot water;
- heat-resistant dishes (any thick plastic will do, for example, an old soap bottle).
- Finely chop or grate the remnants and push them into the bottle. The remnants should take up about 2/3 of the bottle. And remember: the smaller the pieces are, the faster they will dissolve.
- Pour hot water into the bottle, close the lid and shake vigorously. Leave the mixture to dissolve, shaking occasionally.
- After a while (depending on the soap, the time can vary from 12 hours to several days), a thick soapy mixture forms in the bottle. That's it, a simple liquid soap is ready to use!
Real scope for imagination opens up when making from remnants of solid soap. You can vary the color, shape, texture, composition and smell. For example, you can change the color with food coloring, baby tins or bakeware can be used for the shape, and the texture of the scrub can be achieved with natural ground coffee. If you want your soap to be antibacterial, add a few drops of tea tree oil, or sandalwood essential oil for a soothing effect.
Solid soap from the remnants can be made using hot water, a microwave oven or a stove - choose the method that is most convenient for you, fortunately, this practically does not affect the effect.
To make soap with hot water, you will need:
- remnants;
- hot water;
- heat-resistant mold (you can use a soap dish);
- additional ingredients.
- Put the grated remnants in a mold and pour a small amount of boiling water, cover and leave to dissolve. To speed up the process, you can periodically drain the cooled water and add a new portion of boiling water. Stir the mixture every 15-20 minutes to dissolve completely.
- After a few hours, the mixture will become almost uniform - this is the best time to add additional ingredients.
- Put the soap in the refrigerator and forget about it for at least two days - then everything will happen naturally. But if you decide to make a scrub soap, you need to add ground coffee when the mixture thickens. After adding the desired amount of coffee, stir the soap thoroughly and put back.
How to make soap from remnants in the microwave?
You need to use this method very carefully. Many types of soaps use strong fragrances and there is a risk that you will smell them later in food heated in this oven. If this circumstance does not scare you, then in order to make soap in the microwave, take:
- remnants;
- a container for a microwave oven with a lid;
- molds (if the shape is not important to you, you can get by with utensils for the microwave);
- additional ingredients as desired.
- Grind the remnants with a grater or shave them with a knife.
- Place in a microwaveable container, add a little water, cover with a lid and put in the microwave at about 600W for half a minute.
- Remove the mixture and stir, then microwave for 15 seconds. Repeat these steps until the soap is completely melted. Remember that soap cannot be brought to a boil.
- Add additional ingredients before putting the soap into the microwave for the last time.
- Open the lid and place the soap in a warm, dry place. It should dry out for several days.
- 1 liter jar of remnants;
- 1 liter of water;
- a small saucepan with high sides;
- molds (it is better to use silicone baking dishes);
- additional ingredients.
- Rub the remnants on a coarse grater. If the remnants are already dry, you can grind them with a chop hammer.
- Put the remnants in a saucepan and fill them with a liter of water, then turn on the minimum heat.
- Be sure to stir the melted soap to smooth it. Please be patient - this process will take you at least two hours.
- Lubricate the molds with vegetable oil. It is best to use silicone molds, as they are easier to get soap out of.
- Pour the melted soap into molds and place in a warm, dry place to dry. It is not necessary to use any special forms - after drying, you can trim the edges of your soap with an ordinary knife.
It would seem, why do we need remnants? A seemingly useless product that most people just throw away. Perhaps, only those who are engaged in sewing (an irreplaceable product for cutting!) Or amateur soap-makers understand the full creative value of remnants. But from the remnants, you can make a solid new soap, which, if desired, will be more aromatic and much more useful than the old one, and saving the family budget will become a pleasant bonus to home creativity. So how to make soap from remnants, and why do you need it?
Why bother making your own soap at all?
Homemade soap has a fair amount of advantages over the purchased one.
- Well-known composition. You can be sure that the soap will not contain only chemistry.
- Beneficial features. Soap making is famous for the fact that when cooking soap into the future, you can add absolutely any substances and products, be it essential oils, chocolate, coffee, milk, etc. - no one limits your imagination, and the product can turn out to be very useful for the skin.
- The creative process. A little creativity in everyday household things has not prevented anyone yet. Who knows, maybe inspiration will overtake you, and you will join the friendly destiny of soap makers, and later you will make your own business?
- Saving. Everyone remembers the phrase “the ruble protects a penny”. It would seem that soap is a cheap product that you can safely buy when the old one runs out, but soap made from remnants can save you a decent amount a year.
And if you are not yet inspired by the idea of cooking, start at least putting the remnants in a separate box. A creative mood can overtake you absolutely suddenly, and you always have time to throw it away.
How to make liquid soap from remnants?
The easiest way to make liquid soap from remnants is to use ordinary hot water. You can add milk and butter to it, but it is not recommended to add solid components - the structure will be broken.
For liquid soap you will need:
- remnants;
- hot water;
- heat-resistant dishes (any thick plastic will do, for example, an old soap bottle).
- Finely chop or grate the remnants and push them into the bottle. The remnants should take up about 2/3 of the bottle. And remember: the smaller the pieces are, the faster they will dissolve.
- Pour hot water into the bottle, close the lid and shake vigorously. Leave the mixture to dissolve, shaking occasionally.
- After a while (depending on the soap, the time can vary from 12 hours to several days), a thick soapy mixture forms in the bottle. That's it, a simple liquid soap is ready to use!
How to make bar soap from remnants?
Real scope for imagination opens up when making from remnants of solid soap. You can vary the color, shape, texture, composition and smell. For example, you can change the color with food coloring, baby tins or bakeware can be used for the shape, and the texture of the scrub can be achieved with natural ground coffee. If you want your soap to be antibacterial, add a few drops of tea tree oil, or sandalwood essential oil for a soothing effect.
Solid soap from the remnants can be made using hot water, a microwave oven or a stove - choose the method that is most convenient for you, fortunately, this practically does not affect the effect.
To make soap with hot water, you will need:
- remnants;
- hot water;
- heat-resistant mold (you can use a soap dish);
- additional ingredients.
- Put the grated remnants in a mold and pour a small amount of boiling water, cover and leave to dissolve. To speed up the process, you can periodically drain the cooled water and add a new portion of boiling water. Stir the mixture every 15-20 minutes to dissolve completely.
- After a few hours, the mixture will become almost uniform - this is the best time to add additional ingredients.
- Put the soap in the refrigerator and forget about it for at least two days - then everything will happen naturally. But if you decide to make a scrub soap, you need to add ground coffee when the mixture thickens. After adding the desired amount of coffee, stir the soap thoroughly and put back.
This is perhaps the fastest, but not the most reliable way to make soap from remnants. But then experimentation begins.
How to make soap from remnants in the microwave?
You need to use this method very carefully. Many types of soaps use strong fragrances and there is a risk that you will smell them later in food heated in this oven. If this circumstance does not scare you, then in order to make soap in the microwave, take:
- remnants;
- a container for a microwave oven with a lid;
- molds (if the shape is not important to you, you can get by with utensils for the microwave);
- additional ingredients as desired.
- Grind the remnants with a grater or shave them with a knife.
- Place in a microwaveable container, add a little water, cover with a lid and put in the microwave at about 600W for half a minute.
- Remove the mixture and stir, then microwave for 15 seconds. Repeat these steps until the soap is completely melted. Remember that soap cannot be brought to a boil.
- Add additional ingredients before putting the soap into the microwave for the last time.
- Open the lid and place the soap in a warm, dry place. It should dry out for several days.
To make soap on the stove, you will need:
- 1 liter jar of remnants;
- 1 liter of water;
- a small saucepan with high sides;
- molds (it is better to use silicone baking dishes);
- additional ingredients.
- Rub the remnants on a coarse grater. If the remnants are already dry, you can grind them with a chop hammer.
- Put the remnants in a saucepan and fill them with a liter of water, then turn on the minimum heat.
- Be sure to stir the melted soap to smooth it. Please be patient - this process will take you at least two hours.
- Lubricate the molds with vegetable oil. It is best to use silicone molds, as they are easier to get soap out of.
- Pour the melted soap into molds and place in a warm, dry place to dry. It is not necessary to use any special forms - after drying, you can trim the edges of your soap with an ordinary knife.
That's all - the remnants have found a useful use, you got a lot of unforgettable emotions and saved a certain amount of money. And if the process drags you out, try starting soap making from scratch - in addition to its direct functions, such soap is both a good gift and a wonderful decoration for the bathroom. And how many positive emotions is the realization that you have done an ordinary thing with your own hands! Experiment, try - and remnants in your hands will find a second life.
What for?
Perhaps you ask me: "Why cook something that can be replaced or just bought?" The answer is right on the surface!
1. Many preservatives are added to a common liquid product. Hence the frequent cases of allergies. For people with sensitive skin, gels are completely contraindicated. Experts warn that such products should not be used regularly. What's the point then?
2. Bars are generally cheaper, but they are not used very economically. You will get even more foam than you need from one drop of gel. The dispenser eliminates any unnecessary waste. From 150 g of remnants, you can make up to 4 liters of liquid product!
3. Soap making - a new scope for imagination. Prefer simple recipes? I will suggest some lazy cooking methods for you. Are you extremely gentle with your skin? I will help you find the optimal formula!
4. In the process, you can give the product any properties. If you take baby soap, you will end up with an excellent dishwashing detergent. It won't dry out your pens. Shower gels with a peeling effect are prepared from the scrub soap. By the way, you can also make body scrubs from coffee and sea salt. I have talked about them in detail in other posts.
Hopefully, the benefits of homemade gels are now clear. They have all the advantages of the store and are devoid of their disadvantages.
What are we preparing?

Instead of remnants, you can of course use whole bars. It doesn't matter. I will offer you several options.
1. Basic
The easiest and most common way.
Take lemon and glycerin. Grate about 200 g of the pieces on a fine grater. Put the shavings on the bottom of the container and pour 150 ml of boiling water. Add 1 tsp. lemon juice and 3 tbsp. l. glycerin. If you prefer a thicker consistency, reduce the amount of water.
Now let the preparation brew. The process will take 3 days. Shake the container at least twice a day to smooth out the mixture. At the end, pour the liquid into containers. You can cook right away in dispenser bottles, but the plastic often melts.

2. Quick recipe
Lazy soap making is good, but not everyone wants to wait. If you are limited in time, you will have to be more involved in the process.
Grind 100 g of raw material to shavings. In this case, it is permissible to grate on a coarse grater, you will still warm up the mass. Bring 250 ml of water to a boil. Transfer the shavings to the blender bowl, add just a little liquid and start whisking. Introduce boiling water slowly, otherwise most of it will be outside. If you don't have a blender, simply combine the water with the shavings and cook until they dissolve.
You have received a blank. You can stop there, but it is advisable to bring everything to the end. Glycerin perfectly moisturizes the skin, add 2-3 tbsp. l. into a liquid mass. If it is not at hand, and you do not want to go to the pharmacy, use olive oil. It has similar properties. Want to give your product a pleasant scent? Inject 7-10 drops of any ether. I prefer lavender, jasmine and ylang ylang.
3. Economy option
How to get 4 liters of the product from 150 g? No magic, just golden hands and a little time!
As a base, you need to take a coconut block or remnants. Grind very carefully so that the pieces practically turn into dust. Put about 2 liters of water on the fire. When it is hot, but not boiling yet, add shavings and remove from the stove. Mix well. It is advisable to use a blender. When done, add another 1.5 L of water and turn on the device again. If glycerin is present, enrich the mixture with 1 tbsp. l.
I give approximate proportions. For some, the mass turns out to be too thick, for others, on the contrary. What if the result is far from ideal? Either dilute with water or increase the amount of solid ingredients. You can also stir for longer, then the mass will become denser.
4. Herbal
I will suggest chamomile broth by default. It softens and soothes the skin well. If you prefer other medicinal herbs, then take them.
Prepare the decoction according to the standard recipe. Take as much raw material as the manufacturer suggests. If you collected flowers yourself, then take 2-3 tbsp for a glass of boiling water. l. Strain the liquid and combine with 100 g of shavings. Return the pot to the heat and heat until smooth. Remove the foam. At the end, slowly introduce 2 tbsp. l. glycerin and 4 drops of any ether. If you want to add a beautiful color, it's time to get food coloring.
5. Dishwashing
The number of components is calculated for 1 liter of the finished product.
You will need 300 g of the base. It is advisable to take a gentle Castilian or Marseilles soap, but any will do. Also prepare 1 liter of water and 4 tbsp. l. soda.
Put the liquid on fire. When warmed up, divide into 2 parts. Mix one with baking soda and leave the other on the stove. Pour the grated base into boiling water. Stir vigorously. After 3-5 minutes, combine with the second part and boil a little more. Ready!
If you are engaged in soap making or carving, you know that after work there are trimmings. Usually they are thrown away as unnecessary, but we suggest giving them a second life. There are several ways to make a complete product from unnecessary pieces. We will tell you how to do this, reveal a few secrets and show how a solid bar is obtained from factory remnants.
Ways to use remnants
When a small piece remains from the bar, you do not need to throw it away. Take out a separate sealed container and store leftovers in it. Even if you do not plan to use remnants for their intended purpose, they will make life easier in everyday life. We offer seven different ways to use trims and save money.
- Instead of chalk when sewing. If you are doing handicrafts, it is convenient to mark lines on the fabric with soap. They turn out to be clear, even and removed without a trace;
- As a needle cushion. Wrap a bar of soap in a satin ribbon and use it as a needle cushion. Due to the soapy texture, the needles will always be lubricated. This will make it easier to work with dense, fleecy fabric;
- For glasses. Wipe the glasses with soapy water to prevent them from fogging up in the cold;
- Instead of flavors. Fragrant remnants are perfect for scenting laundry. Leave them on the shelves of the closet or in the suitcase: an unpleasant smell will not appear;
- To improve glide. If you rub the back of the drawer with soap, it will move smoothly. The same is true for screws: when you cannot screw them into a wooden base, soap grease will help;
- In the country. Dirt and dirt will not clog under your nails if you soap your hands and let them dry first. You will get a thin protective film that will not interfere with work in the garden;
- For festive decor. Use remnants to firmly adhere the paper snowflakes to the window, and remove them without hindrance after the holidays.
Liquid soap from remnants

Liquid soap is the easiest to get: this method is suitable if it is a pity to throw away the leftovers, but you do not want to waste time either. Remnants and hot water are mixed in a bottle in a 1: 1 ratio - a liter of liquid is needed per kilogram of base. To achieve homogeneity, the contents are stirred 2-3 times a day. After about three days, the clippings will dissolve to form a thick soapy mixture. If it seems too stringy, add a little water. The finished product will become more aromatic if you drop 3-4 drops of any essential oil, and softer if you pour in half a glass of milk.
Life hack: to make the remnants dissolve faster, first cut them into small pieces or grate them.
Solid soap from remnants

To make solid soap you need:
- 1 liter of hot water;
- 1 liter of remnants;
- Silicone molds.
The bar is prepared in stages:
- The base is rubbed on a fine grater;
- Soap sawdust is poured with boiling water - one glass is enough. The temperature of the water must be monitored: when it cools down, change it to hot;
- The mixture is stirred every 15 minutes. This is necessary to achieve uniformity;
- When the remnants are completely dissolved, the soap is poured into molds and placed in a cold place;
- The product is ready in 2 days!
Life hack: to speed up cooking, put the saucepan with the mixture on low heat. Cooking will take 1.5-2 hours.
Microwave soap

Microwave cooking takes less than an hour. You will need:
- 1 liter of remnants;
- 250 ml hot water;
- utensils with a lid designed for the microwave oven;
- the form.
Soap is made like this:
- the base is crushed with a knife or grater;
- the resulting product is transferred to a heat-resistant dish, covered with a lid and placed in the microwave. Recommended power - 600 W;
- the soap is initially cooked for 30 seconds. Then the mixture is removed, mixed and sent back to the oven for 15-20 seconds;
- the process is repeated until a homogeneous consistency is achieved. Attention: do not boil;
- when the remnants are completely dissolved, the mixture is poured into a mold and removed to a dry place. In cold weather, the bar will harden faster, but we recommend leaving it at room temperature. Then it will not crack and retain its delicate texture;
- The soap will be ready to use in 2-3 days.

Life hack: it is easier to separate the bar from the form if you first grease it with vegetable oil. If you can't remove the soap, soak it in hot water for a couple of minutes.
Additives
The tool will be more useful if supplemented with additives. To make the bar aesthetically pleasing, we recommend using remnants of the same tone and harmonious aromas when preparing. If you take multi-colored leftovers, the finished product will turn out to be a dirty gray shade and is suitable only for household needs. Therefore, sort the base before cooking.

The following supplements are beneficial for the skin:
- poppy seeds, coffee grounds, coconut flakes - remove dead skin particles and allow you to use the product as a scrub;
- esters of mint and lavender - soften, soothe. Suitable for irritated epidermis and daily use;
- cream and milk - moisturize;
- cocoa powder, vitamins A and E - nourish;
- sage, medicinal chamomile extract - remove irritation and dry the skin.
Natural dyes will help to achieve the desired shade. It is better to use them when working with remnants from baby soap: this way the color will open better.

Natural dyes:
- chamomile ether gives a blue tint;
- coffee, cocoa - brown;
- beets - burgundy and red;
- sea buckthorn - orange;
- sage - green;
- activated carbon - graphite;
- curry and saffron - yellow;
- kaolin and milk are white.
Cooking with remnants is a suitable way to get acquainted with soap making. Experiment with ingredients, texture and color, and be creative. As a result, you will receive handmade soap: it is suitable for home use or will be a wonderful gift.