Drawn eyes. How to learn to draw eyes, draw a realistic eye
Read also
Instruction
Simple pencil Note the location of the eye based on the proportions of the face and the size of its other parts - nose, mouth, forehead. Mark the direction of the view that should not fall out of the overall picture. Take a look at the portrait again and make sure that your eyes are in your place and correspond in size.
Draw the boundaries of the lower and upper eyelids, mark the location of the pupil and the iris. As a rule, at the average human eye is placed just below the ear level, and the outer angle is on the line, which mentally spent from the wing of the nose to the eye depression (for the landmark you can end your eyebrows).
Picture eyelashes. Do not make them too long - the natural length of hairs should not exceed the border of the upper eyelid.
Do not paint the pupil completely in black - leave inside it a small white spot, imitating the shine and creating a living look.
Fill the rainbow shell with color. Lines draw in the direction from the pupil to the outer border - this is exactly what vessels are visible on the surface surface, draw the inner and outer angle.
Correct the folds that surround the eye. Of course, you can ignore several mimic wrinkles, if there is an opportunity to omit them and it will not affect the quality of the portrait. But, in general, it is advisable to convey all the details unchanged - it is only so possible to achieve maximum accuracy of the image.
Fix the shadows that fall on the face. Ignoring the direction of light will create a false impression that the eyes are located on the plane. Spread the length of the upper eyelid into three parts, dial the gap between the bridge and the first third, as well as from the outer angle in the direction of the eyebrows. Draw shadows and under the eyes, closer to the edge of the face.
Color your eyes at your discretion, give the rainbow shell needed color.
note
Let's start learning. How to draw an eye with a pencil stepmate. Step 1. In the first stage, we need to draw the shape of the eye. Although this is the first stage of the picture, but it needs to pay a lot of attention. Well, here's the end result: the lesson is small and, I think, not complicated. Leave your impressions about how to draw a person's eyes with a pencil, and send works.
1. First you need to draw simple contours For eyes. To make it easier for you to draw a person's eyes, we decided to draw only one eye. But you can immediately draw two eyes, placing them near in the mirror reflection. 2. Add another eye contour to the drawing. While the lesson, how to draw eyes, more like a geometry lesson. But it is precisely such figures that you will be easier to learn how to draw eyes correctly.
Big eyes - Main landmark of Heroes Anime. Children, women and men in Japanese cartoons are distinguished widely open, bright and slightly surprised eyes. Learning to draw them is easy - enough for this just a few lessons.
You will need
- - paper for drawing;
- - the pencils;
- - eraser;
- - brushes;
- - Paints.
Instruction
For a start, try to portray your eyes characteristic of most. On the sheet, put the point and spend up two straight lines from it. The larger the distance between the straight, the larger the eye. The lines spend very thin.
In the upper third of the resulting triangle, depict a curved arc with a little dummy, in which pressing the pencil is enhanced. This line will be the upper eye circuit. In the lower third, you will depict a second outline in the form of a line with a bend in the right corner. Make sure the size of the eye suits you.
Will erase the auxiliary lines, circle the eye contour soft pencil. In the left side of the line should be thinner, on the right - more fat. Inside the eye, draw a vertical oval - the iris. Part of it must be hidden by the upper century - it gives the eyes of the animation and characteristic of the expression for-perm.
In this lesson, I will tell you how to draw eyes in stages. To begin with, let's understand from what the eye consists, knowing all its components you can easily achieve its realistic image.
Eyes structure
We disassembled the structure of the eye, moving to the picture of the eye
Draw eyes
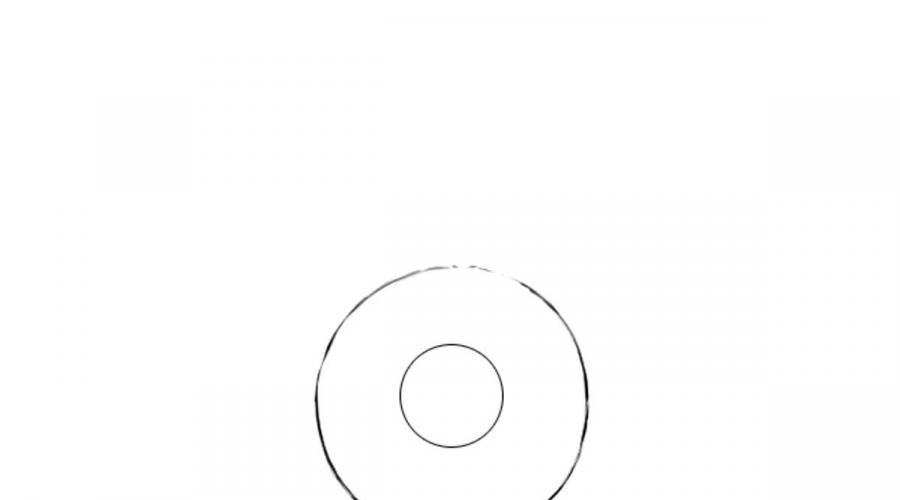
Let's start with the pupil, you can use the circle or draw it from hand. Draw a circle to more - it will be our irresoline, and in it the circle is less - pupil.

The next stage. We draw the top and lower eyelid. In order to do this correctly imagine that the form of the age resembles a fish. If a little strain our fantasy should get something similar.

Dorisite on our pupil somewhat glare - it will give the eye of realism. Do not forget about the 3th century, about the thickness of the upper and lower eyelid. After the form of our eye began to completely arrange you forget about fish and fins.

No less important item in drawing eyes - eyelashes. It is necessary for yourself to understand what a form of eyelashes, in which direction they grow and how not to draw them. Eyelashes are usually the form of a comma on the contrary. At the base, they are thicker, at the end they narrow. Eyelashes are not straight and one thickness, otherwise you will have rays sunshine as children paint. Please note how not to draw eyelashes and how to depict them correctly.

Practice separately until you get it.We now move on to the direction of eyelashes. In century, as a rule, eyelashes grow in different direction Depending on the location. In the figure below, I will show the arrows, in which place and in what direction they grow. Do not forget that closer to the corner of the eye (3th century) eyelashes reduce their size. In no case do not make them one size otherwise it will be not plausible.

In order for our eyelashes, you watched a little a little stroke into the floor of the force at the base of the eyelashes. Thus, eyelashes will acquire volume and luxury.

Let's start part of the tone, volume and realism of our eye. In this lesson, our eyes will be black and white in order to emphasize the basics and buildings. We split our eyes on the tone. The brightest part will be a glare on pupil. We will not touch it, but later and in general will move its contours. Please note that the most dark in our eye is the pupil, then the eyelashes go on the tone, then the 3rd eyelids, the iris and the brightest will be the bladge of the eye (do not leave it white, he also has a tone).

For proper application Tone I will note the red lines in the same place it is worth it to apply that you would not be mistaken. Remember that the glare should remain pure white. The arrows indicate the direction in which your tone should weak and merge with what you have applied before.

You have to go out similar image eyes

At the end, give contrast to your eye. If it is necessary to strengthen the tone where you have applied it. Optionally, you can draw in the amount of the upper eyelid that closes the eye. This will give our eye even more volume and realism. Pay attention to the building of the iris. Draw it, it will be only a plus for your eye.

And painting, depict eyes, most likely, he will draw two oval with a circle in the center. This is exactly the simplest sketch of the eyes. But in order to understand how to paint the eyes with a pencil correctly, you need to carefully consider each separate part.
What you need to know about the eyes?
It is necessary to consider the subject of its interest before asking the question of how to draw a pencil's eyes. For beginners, the structure of the organ of vision and the relationship of lighting on the iris will seem unusually complex, but from something you need to start.
SAMI dark part Eye is a pupil, it is a black circle in the center of the eye. Around the pupil is the iris, it is she determines the color of the eyes. If you carefully look at the iris, it will seem very difficult - the mass of shadows and glare, some lines, stains and an incredible set of shades. It is very difficult to convey this complexity in the pencil drawing, without the correct balance of the dark and light eyes will look flat and non-residents.
It is important to remember about the form of the eyeball - this is a ball, and that is why the shadow and glare on it are unevenly located. To the eye does not lose realistic volume, you need to learn how to properly apply strokes. Below is an instruction that explains how to draw a pencil's eyes in stages. To do this, you will need paper, pencils of different hardness and thickness, eraser and pressed cardboard blender.
Step 1 - Sketch

Drawing an eye with a pencil for beginners starts from drawing contour. We need to portray the minimum of parts, but in such a way that the shape of the eye, pupil, iris and the main glare can be visible. It is important to avoid deep fat contours, then it is difficult to get rid of them.
Pupil paint the soft pencil, 6-8b. It is better to apply several layers than hard to press the pencil. We try not to hurt the glare, because they must remain almost white.
Then a less soft pencil, for example, 2-4B, easily paint the outer part of the iris. Strokes smoothing a cardboard blender so that it turned out a smooth light layer of graphite.
Step 2 - add details
Do you think about how to draw an eye with a pencil most realistic? Simple and very short key to success will be the word "details". They are very important in any pencil drawingBut with their help is transmitted not only texture, but also the color, depth and form of objects.

On the shaded part of the iris, draw a line using a thin solid stylus. For this purpose, a mechanical pencil is perfect. The raw line, the more natural the result. We will focus on them when applying shadows and glare.
Using all the same solid pencil, easily paint the middle part of the iris, right around the pupil. Do not forget to gently avoid round glare. With the help of a blender, smoothed the last strokes, in parallel mixing them with the border of the pupil. This will add to the pupil of depth and realism.
Add a little shadow of the middle part of the iris of our eye. We try to make these shadows with random and uneven.
Step 3 - smoothing the details

Using a blender, pull the straight lines from the pupil to the boundary of the rainbow shell, while avoiding glare. As soon as the lines are uniformly, you can roughly see the future applying shadows and reflections.
Find out the contour around the rainbow shell with a pencil 4B, we try not to put pressure on the stylus, it becomes harder to erase it if necessary.
Using a curse, we define the first reflections of light around the pupil. To apply them correctly, you need to determine which side the light falls, that is, what part of the iris will be darker, and what is lighter. Accordingly, the reflections should be larger on the light part.
Step 4 - Complete the work on the iris
Thinking over how to draw an eye with a pencil, we subconsciously divide the whole process to the stages and try to predict the most difficult of them. So, work on a rainbow shell is the most difficult part. It is almost impossible to provide enough highlights, their intensity and contrast with shadows.

With the help of a blender smoothing the reflections and shadows so that they smoothly go to each other. If the result seems too light, add some more shadows. Now smooth the boundaries of the pupil, so that they mix a little with the middle part of the iris. The boundary of the middle and outer parts of the iris, of our eyes stands a little darkening.
With the help of a soft pencil, we make the outer border of the iris slightly darker, from the contour inside. We try to do it unevenly, creating an uneven, trembling circle. The outer side of the circle should not be much darker inner, and the borders are best smoothed.

Using a klyachka, add unevenly located lights of light around the perimeter of the border of the inner and outer parts of the iris. You can add more subtle glare coming from the pupil itself. The main thing is not to overdo it.
Step 5 - Eye Squirrel and Eyelo
The iris is finished. However, this is not the whole answer to the question of how to draw eyes with a pencil. Of course, you can also play with shadows and glare for the improvement of texture and the depths of the iris. However, now we do for giving the volume of the visible part of the eyeball. For this, light strokes apply a layer of graphite on the top of the proteins. With the help of a blender smoothing the strokes. For the eyeball, it is very important to convey the circle shape, for this add strokes in the corners of the eye. The part of the proteins on which the rays of light fall should be significantly brighter opposite. From the inner edge of the eye, it is necessary to leave an unschended angle, the texture and volume of the inner age are transmitted with it.

Now unevenly darken the outline of the lower eyelid and deepen the shadow of the top of the eye. The top eyelid, into which part of the iris, is derived dark and clearly. Also allocate relatively dark strokes fold of the upper eyelid.
On round glare, in the very center of the iris, add reflection of future eyelashes, draw them with a soft pencil, unevenly and towards the center of the pupil. After that, a very solid pencil, for example, 4H, we apply a simple fixing layer throughout the iris. The same pencil draw uneven capillaries from the corners of the eye to the center. We draw them very thin, but clearly, giving them the shape of cracks or lightning strikes. Add shadows to the upper and lower century.
Step 6 - Eyelashes

Lastly add eyelashes. Thinking about how to draw eyes with a pencil, many consider drawing eyelashes most complex stage Process, because they are so small and uneven. In fact, the process takes just a few minutes. Eyelashes must be on top of all layers, so drawn the last. The shape, length and thickness of the eyelashes are uneven, it is this that adds realism's eyes. The main thing is to show bending correctly.
In the latter queue, add thin bottom cilia. They should not only be thinner, but also lighter, so it is best to use a pencil 2n. Just like the top, the lower eyelashes are not direct, so it is important to correctly convey their bend.
Here is the answer to the question of how to draw a pencil's eyes in stages. At first glance, it seems difficult and time consuming, but the more often we draw, the easier it is the process, and the better the final result. Do not worry, if the first time it turns out not as good as you expected. The first pancake is always com. The main thing is not to despair and continue to draw.
In this lesson, it will be shown how to draw eyes in a phased pencil.
In fact, I love to draw eyes, I'm just delighted with this part. human faceAfter all, each of them is absolutely different and reflect our character, our mood and intention. At first, when I just learned to draw, and was completely novice, the drawing of the eyes seemed to me with something incredibly complex and unattainable. However, when I got acquainted with the textbooks explaining the whole essence of the eye drawing, it became much easier for me. So, in this lesson, I want to show how you can draw beautiful eyes Phased, and it will be very easy! We, except for those eyes, that above, it will turn out such an eye:

First, draw one eye, and then two at once, so that you understand how to draw them smoothly and correctly.
So, we start learning to draw first eyes, carefully read all the descriptions and repeat after me. If the first time does not work - it's not a reason to be upset, it's just a training.
The first thing we need to do is to determine the size of the eye, its length. Draw here such a line - it must be a little tilted. At the edges, limiting this line with two short strokes. Notice, the first lines should be very, very light and thin, and you need to have an eraser, if you decide to paint the eye with a pencil.

From the edges of the segment draw smooth lines. We should have a figure resembling almonds. Rounded a small line protruding corner - see, already starts to remind real eye Human, albeit drawn.

By the way, when you draw a person's eyes, it is very important that you have an example. Put a small mirror or open the photo of the eye - drawn or real. Carefully read - you see that the lower eyelid is not flat, but how do you drank? That is why I add another line from the bottom, cilia is growing at its bottom border. Now draw the iris and pupil - they are a little hidden by the top century, but not always.

Next, armed with eraser and erase all the extra lines - the upper part of the iris, as well as those strokes that we left at the very beginning. Now we need to draw a fold from above, as well as very small folds from the bottom and near the corner of the eye. note that appearance These folds may vary depending on what eyes you draw - for example, the Asians are almost imperceptible to these folds.

Our eye is almost ready, now I am drawing an eyebrow from above and add cilia.

Now you know how to draw an eye in a phased pencil, but that's not all. You need to add a little a little volume - I paint the pupil, as well as add a hatching on the eye protein.

We add the shadow to the painted eye - along the edges of the fold, but it all depends on the lighting. I also draw eyebrow hairs so that everything looks natural.


Here is such a picture of the eyes in gradually we turned out. You can practice with a pencil, and then try to paint with paints or colored pencils.
Happened? It's time to send a photo of painted eyes in the comments and try to draw two eyes with me at once.
The distance between the eyes is equal to the length of the eye, so we draw a straight line and divide it into three parts. You should get like this.

Add these oblique lines.

Focusing on the drawn base, draw the form of future eyes. Draw the lines in turn - first the upper lines of both eyes, then the bottom, then tear down the layer line - so you will have symmetrical eyes. Well, of course, we look at the base.

Now in turn draw and pupils and a rainbow shell of the eye. If you are afraid to draw crooked or oblique, first put on one point for each eye, look, even if everything, and then draw the circles so that the points are exactly in the middle.

We erase the extra lines outside the border of the eye and draw the upper folds in both eyes.

Add the angular and lower folds.

Next, I wash all those extra lines in the eye pattern. A little higher drawing eyebrows, I add a bridge between my eyes, so that the picture looks natural. When I painted these eyes, I looked at the photo of the celebrity eye, you can do the same or look at my drawing.

I have already said that the eyes and lips are the most important parts that you need to be able to draw a novice artist on a person's face. We have already portrayed, now I will tell you how to draw a person's eyes in a phased pencil for beginners. In addition to the fact that it is just a part of the person, you need to understand that it is necessary to depict various eyes under each form. You also need to understand that from the completeness of the eye and its color reproduction you can express your mood and mind. In fact, the eyes draw the most difficult, as it mostly develops on them total picture . It has great importance Pupil, eyelashes and corners of the eye, these moments we will pay attention and draw a less standard eye, novice artists usually train according to this figure.
We draw a regular pencil if we draw with colored paints, then you will have to work even more, as the color reproduction is a difficult moment in the picture. I give you a master class by phased drawing Human eyes.
We draw at once the lower eyelids, two lines, horizontal elongated and the floor vertical small.

Now many elements need to draw. On both centuries immediately draw a little eyelashes, very well if they will be carelessly depicted, for naturalness. Above the right century draw the floor arc, for completeness of the eye. And most importantly, in this step, we indicate the boundaries of the pupil, to the right vertical arc and on the left. On the left even draw a small bulge, it is needed for a variety of eyes and pupil in particular.

Then we need to portray the pupil. On the left, we make another arc, and it turns out as if the letter V. Draw a circle and in it another circumference, the central sketch. Also sketch the upper part of the pupil. And in the central part itself, the miniature oval is not sketched. Very important is the direction of the lines with which we sketch parts of the eye, they should be directed in different directions. For example, in the center of the pupil vertically, in a slightly above the lines look diagonally to the right down.

Slightly carry all the lines of the eye and very thin lines sketch a blank part of the pupil.
