How to draw realistic lips with a pencil girl. How to draw lips with a simple pencil: a phased lesson
So, this is not a lesson, it's just an example of how personally I draw lips. This does not mean that you have to draw the same way. This example is for those who wondered about how I draw lips.
I painted them very quickly, you can put more time in your drawing and better work it. And also, it seems to me here with the "light and glare" of the problem.
If you have any questions about the process of creating these lips, do not hesitate to ask them.
And here's another. I suppose you somehow studied lips. Personally, I do not, they came from the head - I think from observations of people or when looking at yourself in the mirror, cleaning the teeth or something else. I do not know.
I also know that there are other more comprehensive lessons on DA. A bunch of resources for you, artists.
Sometimes I do this sketch of lips. And sometimes I "throw" (shading) the main shape of the lips, in parallel, inflicting the basis of the skin. The only lines that I consider important on the lips is: the line of mouth, the Cupid arc and the line of the lower lip.

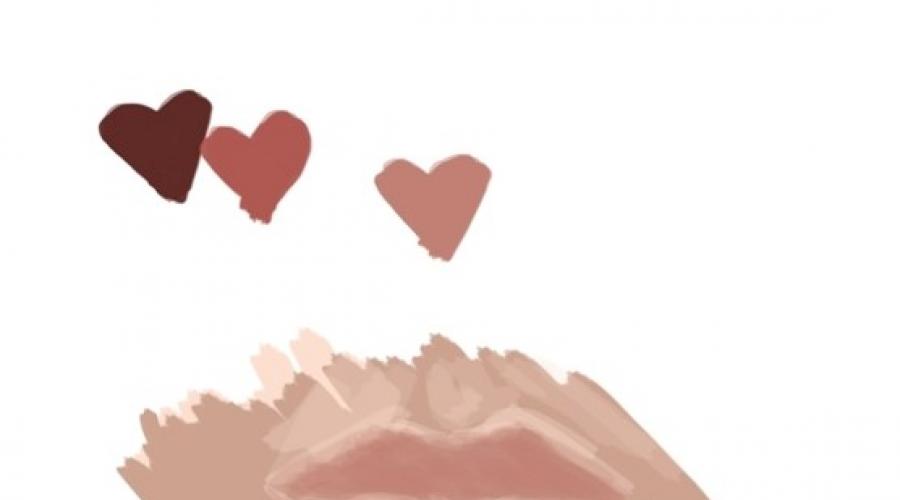
Choose several colors: light, medium and dark; And put the lips with a light or medium tint to give them fresh color. It often happens that women's lips are mostly dark, because estrogen makes blood intensively stick to the lips of the HD to achieve a pleasant color, you can mix reddish (closer to orange than pink) and skin color.

Now we start just give the lips shape. Some symmetry lines on the person's face are more obvious than the rest.

The darkening time came, and you can start adding shadows and texture. On the upper lip, I put the line from the bottom up, and from the center to the edges. I drew the bottom lip with circular movements, giving some roundness. Darkening of the mouth line is very important. The tips of the mouth should be darker.

Continue the shadows. Repeat movement for texture if you need to highlight it even more. Use the Pipette Tool (Eyedropper) to select colors from lips and drawing the lines of the upper lip. I advise you to do it at low opacity (OPACITY). I usually treat the bottom lip, as before selecting light, medium and dark shades of colors. Continue to do it until you like the result :) I usually do not particularly enjoy this stage of HD

Now add the necessary, in your opinion, glare! I also add some shadows. Select for them is not black, but, most likely, a shade based on a dark blue or dark purple.
That's how I draw lips using the PhotoShop CS # program.
All lips are very different, in shape, in size. There are thin, there are thick, there are sad, there are smiling. But all of them can be drawn according to the same principle. First of all, you need to find the location of lips on your face, that is, the remoteness from the nose, the chin, from the cheeks, and so on, also their tilt. Next, you need to find the ratio of smaller parts of the lips, that is, the width of the lower lip in relation to the top, as the teeth are located if you draw a mouth with a smile or a rodded mouth, the width of the most protruding parts and so on. And the last stage you need to give lips with the help of lighting. Of course, it sounds not very encouraging, encouraging, but actually draw lips is not difficult.
Linear drawing of lips - search for basic proportions and ratios
Suppose our lips are located on the face that is in a light turn and slightly tilted.
The first thing we do is find the dimensions of the lips in relation to the whole person. Since I have abstract lips from my head, I will introduce that these dimensions have already found. 
Further, we are looking for the attitude of the upper lip to the bottom - as much as the upper lip is already lower or vice versa. If a person somehow did not twist the lips, then the corners of the lips are located in most cases symmetrically. To pass this in the figure, spend a horizontal line through the corners of the lips. It will allow us not only to arrange the corners of the lips symmetrically, but also will show the slope of these lips. 
It is mistaken to believe that the corners of the lips are on one straight line with the place of closure of the lips. In fact, the face has a rounded shape, it is not flat. And on this, depending on the angle, the lip closure place will be higher or below the line on which the corners of the lips are located.

Of course, it happens that everything is located on one straight line, when the lips are tense, for example, or some specific angle. But most often the lip layout line is located above or below the line through which there are corners of the lips.
Now the most interesting line is the middle line. Regarding her lips are symmetrical. It passes between the upper triangles of the lips, and on the bottom lip it is advisable to spend it through the middle of the speaker point. 
If you delve into the anatomy of the lips, then they have three such balls, this line just passes through the middle of the top and between the two lower. 
This line needs to be attached. If you look into the profile, then with the normal anatomical structure of the skull, the upper lip hangs a little over the bottom. That is, the line of the middle is not perpendicular to the horizontal line through the corners of the lips. 
Of course, a person has different anatomical features that affect this slope. For example, the lower jaw swallows heavily, or very plump turned lips, missing teeth. All this affects the slope.
If you delay the line of the middle of the relief of the lips, it will show how rounded lips, as far as the lip closing point is, how much the hole is broken under the lip, or vice versa, everything is flat. 
As this line, weigh the lips, show the shadows. When we look at the FAS - this line is straight, and the stronger turn, the stronger this relief will be viewed.
Now we note two more sizes - the width between the corners on the upper lip and the width of the lower part according to the most protruding points.
Out to the upper lip. 
Compare with in kind, how the lines and forms are twisted, how the long-haired lip is worst - the more turn, the stronger this turn is visible.
These three balls define the nature of the lip of lip. The more they are expressed, the most likely it will be more curved. 
On my lips, I arbitrarily pretending these balls and draw a line of lips closure and outlines the bottom lip. That's the same chubby sponges turned out. 
Light on Gubach
The next stage is the volume. We look at the lobs on the lips. I assume that my light falls from somewhere. 
And this is such a scheme of distribution of lighting, I suggest. 
It usually falls on the upper lip, because it is wrapped in inside, so it is all darker than the bottom. We will lead the main bar in the form, just as cracks are located on the lips. Also add a falling shadow on the chin from the upper lip. And in general, a little we denote the area around the lips so that they are not stripped to the sheet. The most contrast and bright will be, of course, falling shadow from the upper lip. On the upper lip will have its own shadow with a bright reflex.
The main, base bar is on the shape of lips, I even turn it out slightly in their roundness. In addition to the form, it will also emphasize in the future minor folding skin lips. Barcode in the cross direction I impose at a small angle, just try to round. 
We cover the entire upper lip, sealing shadows cross strokes. Immediately somewhere I designate a stroke of large folds. 
The falling shadow on the lower lip smoothly goes into its own. The lower lip is very chubby, volume, pay attention, what is my big, rounded barcode. This place is the foreground, the contrast of the light and the shadows, so it needs to be made bright and expressive. I lead a job at once all over the lips area. Since I paint out of my head, I look at everything at once, in general, I bring the tone gradually. When you look from nature - you immediately see wherever, and in this case it is possible to work in parts. 
I will present that the lower lip is very wrapped in me to the bottom, it is very rounded, so I will take a rather tight-tight shadow below, and under it falling with the reflex. 
When you draw a hollow above the lip, do not make it cut with sharp and contrasting, she is not really sharp, sharp ribs, they stretch, in some people this hollow is not very expressed at all, so observe in kind. The edges of the lips almost always have a bright expressive strip, do not forget to leave it. 
If you want to add skin folds, then do it very carefully, without fanatism, without a busting. They can greatly crush the shape, so be careful.
As a result, there were such sponges.
Lips are two skin-muscle folds located between the nose and the chin. Lips are the beginning of the oral cavity and the entire human digestive system. These two folds are one of the most attractive parts of the human face, especially girls and women. Lips, exposing in a friendly smile sparkling white lips - what can be more beautiful on the face of a person? Well, is that eyes! Lips can be closed, and can be semi-open and exposed to the dental row. In this lesson, we will teach you how it is correct to draw a person's lips to the pencil. In our lesson, two ways to draw lips. Draw them, in principle, not so difficult. Follow our prompts and boldly begin the case.
Method 1 . We will draw a little half-open lips in a smile, exposing beautiful white teeth. First draw a smooth line curve, a little raised up. From her, around the middle will spend two traits. They are also a little curved. Under the line curve, we will spend another, more curved arc line. Then over the line curve, we begin to draw the contours of the upper lip. We have smoothly pencil, showing wider sections, then narrowing to the middle and making a sneake there, deepening. It is the middle of the upper lip. After that, we draw the contours of the lower lip under the same curve of the line. The contours are closed with the contours of the upper lip around the edges. In the disclosed gap between the upper and lower lips, we draw the line of the teeth, show each chisel separately in the form of small rectangles. The teeth are slightly peeled by a semi-column mouth. At the corners of the mouth dimming the edge. Coloring lips in a bright scarlet color, sections of visible gums make pinkish. Corners of the mouth are crouching. It turned out beautifully!

Method 2. Here we will draw closed lips. But, a little in a smile. We carry out the crooked line of the middle of the mouth. On it we draw two vertical lines crossing it. Then between these lines we build contours of closed lips. You can use a line for direct lines. We spend directly from the edge of the curve line to the top of the first segment, then we lower the line until the middle of the lips, they carry it to the edge of the next vertical line and lowered the line again to the other edge of the upper lip. At the bottom of the edge of the curve, we spend a segment to the first vertical, then approximately parallel with this curve we are cutting up to the next vertical and connect with another lip edge there. After these auxiliary operations. Draw smooth lines of lower and upper lips. The lower lip is thinner, with a heart-shaped protrusion in the middle. The lower lip is fluffy, convex. After that, the corner of the lips slightly shadow. On the bottom of the lips show the light glare. Commmition finally lip lines. Color them in a bright red color. Do not forget to show bright and dark areas and light glare on the bottom lip.

Related drawing lessons:
Welcome to the site "School of drawing", our slogan "Learn to draw easily". On our site are collected best drawing lessons, oil painting, graphics, drawing lessons with a pencil, drawing by temperaEasy to easily quickly learn how to draw still life, landscape, and just beautiful paintings Our art school for adults and children also offers to start learning remotely, right at home. We carry out the most interesting courses on drawing with pencil, paints and other materials.
Artists of the Site.
Our drawing lessons Describe the best artists World. Lessons clearly, in pictures explain How to learn to draw Even complex pictures.. Our teachers are highly qualified designers, illustrators and just experienced artists.
Site multiformation
In any of these sections, you will find interesting information about how to quickly learn to draw different material, such as oil paints, watercolor, pencil (color, simple), temperatures, pastel, mascara .... Draw with joy and pleasure, and let you accompany inspiration. And our art school will do everything necessary for maximum convenience in teaching painting with pencil, paints and other materials.
Lips, as in general, the whole human face is difficult to draw. Each feature feature has its own secrets, their parameters that directly depend on other parts of the person. Lips, despite the fact that we see them every day, it is also difficult to portray, like eyes, or hands, if! You do not know how to do it right. Well, if you read this online lesson, the problems with the image of the lip and the bottom of the person will not have.

1. Lesson how to draw lips, You need to start, of course, with a sketch of lips. The first thing we need to do is carefully examine and draw a line that shares the lower and top lip. Such a line is almost always bent up and down. Initially, it may not be quite accurate, in the process it's all corrected: somewhere arrived, somewhere dvorisu. The main thing is to start with this. Also at the first stage, you need to draw out the contours, the so-called cupid tubercle. This is the most memorous and protruding part of the upper lip. It depends on her a lot (it forms two vertices of the upper lip), so we point it with light strokes on an outline, which would be easier to work easier.

2. The second stage of our online lesson also belongs to the sketch. We continue to schedule the contours of future lips. Here we drew the characteristic depressures that are similar to the average line, all three are equally concave. So to speak, now the basic lines are ready, on which we construct a drawing.

3. Finish our sketch. We connect the upper and lower lines with the ends of the lips. Depending on the shape and line, respectively, it turns out different shapes.

4. What would be easier to understand forms, here I bring the side view of the lips. So what are we doing now? At this stage, with light strokes impose a shadow in those places where they should be. The lower lip is almost always substituted with the upper light, and therefore it is the brightest and most illuminated. However, the corners of the lower lip go into the shadow from the top. Also, the shadow from the top is partially falling on the top of the lower lip. Pay attention to how the cupid tuber is processed! We have already said that this is the most protruding part and the shadow on it already played in their own way. The upper edge of the lips is also lit by the upper light, if we paint it, the three dimensions will be lost.
Cemeter offers a different product according to the specifications of the galvanized grid welded. Road, masonry, wicker, etc. At affordable prices from the company, which is more than ten years in the market.

5. At this stage of drawing lips, we draw a surroundings or what is located at the bottom of the person. Look at the side view. Very noticeable space between the bottom lip and chin, which inevitably falls into the shadow, so that in this place there is always a swollen area. Above the upper lip is also a complex area to work. This is the distance where two convexities connect the vertices of the loose lip with the nose, and form a soft concave. The corners of the lips, almost always have some ties of muscles, which are highlighted with light strokes (with a smile or grin are expressed more strongly). These side muscles are always present on the face, they need to enter that the mouth does not work out into a flat face.

6. It remains to bring our drawing to the end, somewhere subtreated or a soft pencil emphasize some shadows and lines and lips. Pay attention to the line between the top and bottom of the lips, it is always the smallest. It remains only to practice, whatever you draw, it is not only like lips, but also looks like those you draw.

7. How to draw teeth. The usual error of novice artists is the idea that the teeth are perfect white. This is not true. In addition, they will look much more beautiful and realistically, if there are such a color that you can show bright glare on them. The front teeth should be the brightest, the further they go to the oral cavity, the more they go to the shadow. The guys must even be a little brighter lips and slightly contrast with them, whatever you get a merger.
Today everything. Watch out for the releases of the site and in the following updates of the article section, there will be new learning lessons on drawing parts of the human body.
Studio Svetlana Levitskaya offers drawing lessons for adults. Drawing courses will help you master the brush and comprehend the art of painting.