How to draw a Tatar national costume with a pencil step by step. How to draw a portrait of a Russian beauty
Often, on the eve of a holiday, children are asked to bring to school or Kindergarten drawings - Shrovetide, spring, bonfire, holiday. And if you visit with your baby at a festivities, he himself will be eager to transfer impressions to paper. But how to draw Shrovetide? How to portray not just a holiday, not just a bonfire or pancakes - but a cheerful holiday of welcoming spring? We will try to help you.
Step-by-step drawing of Maslenitsa: we draw together with children
Start by thinking about what will be shown in your drawing with your child. Choose the plot of the future picture and try to list and present all the elements that you have to portray. There shouldn't be too many of them, and they shouldn't be difficult, unless you are a professional artist.

Most likely, you decide to draw a stuffed carnival and a stack of pancakes on a plate - after all, these are the main symbols of the first spring holiday... But do not forget that the scarecrow must be burned. This means that you will also have to depict a bonfire. You can draw a fire around the stuffed animal, but you can also just draw it next to it. And one more required element your drawing is the sun. After all, both pancakes and the Shrovetide holiday itself since ancient times have been dedicated precisely to the arrival of spring, which means a warm and bright sun, driving away the annoying winter with its cold and snowstorms.

Now you need to outline with a thin pencil on a sheet of paper where the elements of the drawing will be placed. The younger your child, the more he has a tendency to fill the entire sheet with the first element of the drawing, so if he begins to draw a scarecrow, there may simply not be enough free space for pancakes and the sun. Therefore, the composition of the picture and the size of all elements must be indicated in advance. After that, start drawing.
How to draw a stuffed carnival

How to draw pancakes

How to draw a bonfire

How to draw a Shrovetide sun
In the picture on Shrovetide, the sun is not depicted in the way children usually do - it is not just a small yellow circle with rays. The sun must have a face, and the rays are painted thick, in the folk style.


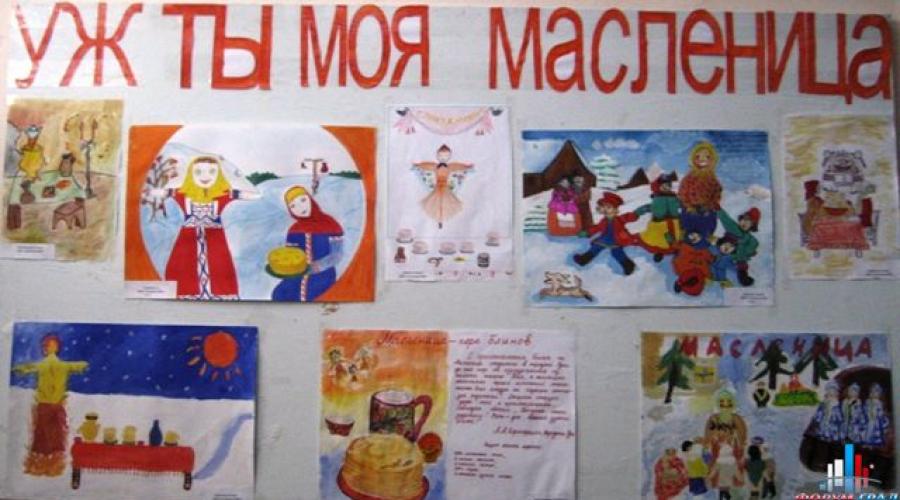
Shrovetide in the paintings of artists and in children's drawings
Shrovetide was drawn by many famous artists... Of course, no one will demand the same skill from a child's drawings, but pictures will help you choose a plot. These pictures can be used as slides or simply shown, illustrating the story of how to celebrate Shrovetide.
Often, artists depict a festive bonfire with a scarecrow burning on it.


Can be portrayed festivities during Shrovetide and sleigh rides.


Big festive table for everyone, with pancakes - on this topic, both adults and children draw with pleasure. 


Often artists depict traditional games and fun on Shrovetide - storming the snow fortress, agility competitions, carousels and ice slides.


And finally, the stuffed animal itself! After all, before it burns down, the scarecrow is destined to be the main figure in the holiday that lasts a whole week.


Cool drawings for Shrovetide
Contemporary artists keep up with the classics and also draw Maslenitsa with pleasure. Such images are not only understandable to children, they will not leave parents indifferent either, they can be used as postcards, decorate an apartment and classroom, and simply send to friends. After all, Maslenitsa is one of the happiest holidays of the year.


Now that you know how to create a festive drawing, Shrovetide will remain with you not only in memory, but also on paper. Draw, you will definitely succeed!
Not many people become professional artists, despite the fact that everyone draws in childhood. It's just that someone develops in himself Creative skills, but for some they remain in their infancy. But sometimes the desire to create abruptly wakes up in a person, and he wants to immediately draw a masterpiece. Of course, it is difficult to make such a dream come true, but you can try. Today we will talk about how to draw the coat of arms of Russia step by step with a pencil and get a little closer to your cherished desire - to master the art of drawing.
The history of the creation of the coat of arms of Russia
In this article, we will analyze in detail how to draw the coat of arms of Russia in stages with a pencil, but in order to draw something, you must at least know the history. Firstly, it is interesting, but secondly, after you study all the details, it is much easier to draw them.
The first drawing of the flag and coat of arms of Russia in the form in which we know it was mentioned in the chronicles of the 15th century. Under Ivan III, the eagle acquired two heads, turned in different directions. And how state symbol was it before? Russian princes borrowed the eagle from Roman culture back in the 12th century. But at that time the bird had only one head and its color was black.
Under Ivan III, the eagle not only acquired a second head. The belly of the bird began to decorate a shield, in the middle of which Andrey the Victorious dealt a fatal blow to the snake. Why did this change happen? Moscow becomes the capital of the state, and the shield with Andrey the Victorious was the symbol of the Moscow principality. The merger of the two symbols gave rise to what we see today on the coat of arms. Gradual changes state symbols happened with every king. First, each head of the eagle received a crown, and then the third crown began to decorate the coat of arms. In 1589, the eagle acquired almost modern look, in his hands was given a scepter and orb.

The value of the coat of arms of Russia
After reading about the history of the appearance of state symbols, you need to find out its meaning. How to draw the coat of arms of Russia in stages with a pencil, we will analyze in detail below, and now we will find out which hidden meaning trapped in an eagle. Many are interested in why the two-headed bird holds the orb and the scepter. Power represents power. Moreover, the power is complete and undivided over the entire country. The scepter personifies the power of the Church. Two bird heads show unity Christian faith and the power of the state ruler, now the president.
And what does George the Victorious mean? This legendary saint was known in Russia even before the adoption of Christianity. According to legend, he saved the city from a monster that devoured young maidens. The legend says that before the duel with the serpent, George offered up a prayer to God, and it was with his help that the knight managed to behead the monster. In 988, at the baptism of Vladimir, the Red Sun received christian name George. It is believed that this is why the symbolic hero appeared on the Russian coat of arms.
Composition correctness
How to draw the coat of arms of Russia in stages with a pencil? You need to start with building. In order for the drawing to look harmonious afterwards, it is necessary to compose the coat of arms immediately. We choose A4 paper size - this is a landscape sheet. You shouldn't draw a little eagle. In its center is St. George the Victorious, and this figure requires detailed elaboration. Therefore, we leave 5 cm from the bottom 3 cm from the top, and in the rest of the space we enter an oval. We divide with a thin line geometric shape into two equal parts. Now you can draw the outline of the eagle. Immediately outline the upper, central crown. If this is not done, subsequently it can go beyond the contours of the oval, and the drawing can slide up by itself. Visually, the coat of arms can be divided into three parts: the tail, the shield in the center, and the bird's head.

At this stage, you do not need to do a detailed drawing. You just need to proportionally build the composition.
Drawing rules
To answer the question "How to draw the coat of arms of Russia?", You need to know the basic rules of drawing. You need to start working on your creation from the center. Otherwise, there is a high probability that in the future the drawing can be smeared with your hand. To prevent this from happening, you need to put under the brush clear sheet paper. When working on the heads of the eagle, the sheet should be at the bottom, and when drawing the tail, the paper will cover everything drawn above. Hatching should be applied only after the entire drawing has been worked out in detail. Otherwise, the feathers on the wings will lose their presentable appearance, and dirt will turn out. Small details: eyes, mesh on crowns, etc. are drawn last.
How to draw an eagle
The work needs to be done in stages. How to draw a coat of arms so that it looks like the original? You need to start by drawing an eagle. We draw the bird's head, to make it easier to do, you can divide the oval we have already drawn. It turns out a semblance of a square.

In the upper left part, draw a semicircle from the center to the side. Here you need not get carried away and remember that there is a central crown at the top. Now we draw the left wing. This will be an arc that extends from the middle of the first square to almost the middle of the lower one. We mirror the workpiece in the other direction. Now let's move on to the paws of the bird. We mark in circles the places where the scepter and orb will be located. Be sure to observe the proportions. The symbols of power are located exactly in the middle of the wings. Next, draw the tail. Draw a shield in the center of the eagle. As already mentioned above, in proportions, it is equal to the height of the tail. We draw a clear outline of the bird and detail it. The crowns, scepter and orb should be drawn at this stage.
Detailing the drawing
We continue to reveal the secrets of how to draw a coat of arms. The description is step-by-step, so you need to follow the sequence of operations.

We have the outline of the eagle ready, now we need to detail our bird. Before you start drawing the feathers, you should thoroughly approach the image of the paws. it difficult task, therefore, first you need to depict the right paw, where there are only two "fingers". Then we move on to drawing the left limb. The main thing here is to realistically convey the capture. After examining the original picture, you can trace the tendency in the arrangement of feathers. Everywhere: on the neck, wings and legs, the plumage is located in three rows. We transfer this to our drawing. Feathers on the necks look like jackdaws. The feathers on the wings are oval, they are small at the base and gradually lengthen towards the end of the wing. The plumage on the paws is the most difficult to draw. Here you need to count the curls and copy them exactly. You must not miss the moment when the feathers smoothly pass from the neck to the wings, and from the wings to the paws.
We draw St. George the Victorious
The eagle is ready, now you need to depict the central shield. Answering the question "How to draw the coat of arms of Russia?", We have already said that St. George is the center of the composition. You need to start drawing with a horse. The animal occupies 1/3 of the entire space of the shield. His figure does not need a clear drawing, you can draw a horse as cartoon character... George himself is also miniature. His body is not entirely proportional, his torso is large, and his legs are short. The raised hand is level with the head. And of course, you must not forget about the raincoat. The final touch is the serpent, which is sprawled at the feet of the winner. The head of the snake is under the front hoof of the horse, and the tail is under the hind hoof. The wings will be located exactly in the middle.
Hatching
You need to finish the work by applying light and shade and working out small details that could be wiped off during work. To understand what needs to be done, you need to look at the various coats of arms. Russian Federation... How to draw the final part of the work in stages?

We start with a sketch of St. George the Victorious. We apply shadow to the horse, rider, snake. We slightly shade the shield itself from the eagle. There should be no sharp edges, the shadow should be soft. To achieve this effect, you can grind the lead with a piece of cotton wool. Next, draw the heads of the eagles. Here it is necessary to emphasize the eyes, tongues. To apply small parts on the crowns. The final action is drawing feathers. Here you can experiment and separate all three rows of feathers with a shadow from each other. If you don't want to do this, then you just need to draw one or two small strokes on each wing.
Drawing in color
So we answered the question of how to draw the coat of arms in stages with a pencil. Your family can be taught a lesson visual arts... After a few workouts, completely similar image even schoolchildren can do it. To make the work look brighter, you can draw it with watercolor pencils.

Then after completion creative process it will be possible to brush with a wet brush over the entire drawing. An interesting effect will turn out watercolor sketch... True, in this case, small details will have to be drawn again. And this is already worth doing with a gel pen.
Russian culture has always, but now, in modern times, especially interested in many people. Our history is rich in painters, writers, poets. Russian culture has always been very interesting for the whole world. National costumes are an integral part of the culture of any nationality or nationality. Interest in the Russian national costume is especially great today in connection with the recent Winter Olympics in. Sochi. All foreigners want to buy souvenirs for themselves - dolls in Russian costumes. But, you can also draw either dolls or figures of people in such costumes. What we will do today and teach you how to draw Russian national costumes - male and female - in stages.
Stage 1. First, draw the initial lines of the female and male figures. Two circles - heads, necks, quadrangles - bodies, lines of arms and legs.

Stage 2. We begin to outline the circles with smooth lines, gradually giving the outlines to the faces. Show the lines of the cheeks, chins, ears, and the beginning of the neck.

Stage 3. Now let's draw the facial expressions. Using the auxiliary line inside the circle, we show the eyes with eyelashes, above them the eyebrows, the outlines of the nose with nostrils and the lips in a friendly, benevolent smile.

Stage 4. Here we draw a beautiful thick braided braid for the girl, falling forward, circle her head in a semicircle - a kokoshnik - Russian national headdress. From under the kokoshnik, laces are visible, framing the forehead. We will show beautiful diamond-shaped earrings on the ears, the end of the braid is decorated with a satin bow. On the guy's head we put on a cap with a visor, on the side of which a rose is attached.

Stage 5. Let's start drawing exactly the costumes (clothes). On it, we draw a stand-up collar, a chest section of a sundress and a belt under the chest. There are two strands of beads on the neck, draw them in circles. He is wearing a shirt with a stand-up collar, the shirt is rather long, covers the top of the trousers, and is belted with a belt.

Stage 6. Let's show on right hand a sleeve from a shirt, caught at the bottom of the wrist with a cuff. The guy also has a shirt sleeve that covers the arm itself. With the same hand he holds the national musical instrument- balalaika. We draw a triangle, from which the handle of the balalaika departs, on it the strings.

Stage 7. Draw the left hands of both characters. The girl has a handkerchief in her fingers. With his left hand, the guy holds the handle of the balalaika, clamping the strings.

Stage 8. We finish drawing Russian national costumes, depicting the hem of a sundress and trousers. The dress is flared at the bottom, gathered in folds. Trousers - wide trousers, rather wide, tucked into boots. Draw the legs along the straight lines from stage 1.

Stage 9. Now draw patterns on the sundress - vertical and horizontal lines. A row of buttons in the middle. We make the guy's harem pants striped.
They say Russian girls are the most beautiful. Nature has endowed our compatriots with pleasant facial features, blond hair and a graceful figure. Thanks to good external data, as well as their own work, girls look beautiful even in retirement. It is not surprising that many painters and graphic artists wanted to capture our girls on their canvases. And today we will try ourselves as an artist and draw portraits of Russian beauties, as well as a full-length figure.
Draw with children
When a child paints a portrait of a Russian beauty, he usually depicts the face of his mother. After all, it is this person who plays big role in his life. Therefore, when reading fairy tales with a child, you need to develop his imagination and attention. After the tale has been read, you can invite the child to draw the main character... But how to do it?
The easiest way is to depict a girl in a skirt and draw a kokoshnik on her. Let us analyze the course of work in stages. First of all, draw the figure of a beauty. These will be two triangles connected by sharp ends in the middle. The bottom figure is a skirt, it should be 3 times larger than the top corset. The dress is ready, we add a circle-head and do not forget that every person has a neck. Draw hands with rectangles. Don't forget to draw the fingers. We put on boots on our feet. It remains to add some details to the drawing. This is the face of a beauty, a braid and, of course, a kokoshnik. The eyes and nose can be marked with dots, the lips - in a semicircle. And the last detail is the decor on the dress and kokoshnik.
Cartoon heroine

Portraits of Russian beauties do not have to be accurate. If you are drawing with children, it is easier to portray a comic character. So the child will be satisfied not only with the process of creativity, but also with the result. The character of our drawing will be a girl dressed in a fur coat, a long skirt and a fur hat. Standard Russian beauty in winter.
Let's start with the layout. On the sheet, we will depict not only a girl, but also a church, wood and stones. We outline the shape and divide it into three parts. Now we divide the upper sector in half again. Draw the lower half of the head in a circle, the upper one is a hat, draw it with an oval. You can immediately outline the facial features. We will draw the figure in three quarters, this is the easiest angle.
We start drawing the fur coat. To begin with, we outline it with a trapezoid. Next, we detail the fur coat by adding fur edging. Now we depict the hands. In order not to draw our fingers, we will put a muff on the girl. Now it's up to the skirt. To make it look more interesting, do not forget to depict the folds. We draw 5 vertical lines along the skirt, and draw the hem with a wavy line. It remains not to forget about the background - in the form of a church, trees, stones. Our drawing is ready.
Princess portrait

If a child has artistic talent, then, in principle, he can not display the whole figure on paper. How to draw a portrait of a Russian beauty?
It is necessary to outline the dimensions of the drawing. The face should cover half or one third of the sheet. We draw an oval, outline the hairline with two semicircles. Draw a kokoshnik straight away. It will look like a pointed semicircle. Princesses walk in dresses, so this part of the drawing needs to be given special attention. In order not to torment the child with the image of the decor, you can come up with a more complex style of clothing. The figure of the girl should resemble hourglass... But the sleeves can be drawn in the form of several interconnected circles or ovals. In the same way, you can depict a braid. We put beads on the neck of the beauty. Only the face remains. So that there is no problem that one eye is larger than the other, we draw a girl in a small spread, as if she turned away from the viewer a little. We depict the eyes in circles, and give them an almond shape due to the eyelashes. Draw the arches of the eyebrows, draw the nose in a small semicircle. It remains to outline the lips, and our beauty is ready. You can color the drawing if you wish.
Russian beauty in a kokoshnik

At school, when children learn about the national costume, they are often asked homework. How to draw a portrait of a Russian beauty? Grade 4 is a time when students can already portray people almost authentically. But painting portraits is too difficult a task. Therefore, it is better to choose a simpler topic, for example, to depict the whole figure of a girl in a national costume. In such a drawing, a portrait of a Russian beauty in a kokoshnik will also be present, but will not attract increased attention to itself.
In order to depict the girl, we, again, need to compose the figure on the sheet. So that our beauty is not bored, you can draw next to young guy... We proceed to the image of the girl. Divide the shape into 4 parts. The first of them is assigned to the image of the head and kokoshnik. Draw the face in a circle, and the headdress in a semicircle. Do not forget to make a small sharpening in its center. We represent a sundress with a trapezoid with a rounded edge. Take the second of our four parts under the arms. With the corners we add them to the trapezoid. We also outline shoes with triangles. It remains to detail the figure, draw the face and ornament on the sundress and kokoshnik. By analogy, we are trying to portray a young man.
Matryoshka

A classic Russian beauty can be depicted as a national doll. Even can draw a nesting doll Small child... A portrait of a Russian beauty, depicted in this way, will distinguish the child from the crowd that will copy the Disney princesses.
It is better to draw a nesting doll in parts. First, you should depict the right half, and then use the window to mirror your creation. Draw a semicircle to represent the face. The next step is to draw the outline. It needs to be copied from the example shown above. Now we need to fill in the empty space. First, we clarify the face: draw the eyes, lips, nose and cheeks. Now we draw a hand. It is an oval connected to the palm. It should be noted that a nesting doll can have 4 fingers, not 5. And now let's get down to creative work. We dress our beauty in an apron and draw flowers. The final touch is to transfer the image to the left side.
Modern interpretation

Abstraction is in vogue today. Therefore, a drawing-portrait of a Russian beauty in modern interpretation may look out of the box. For example, you can draw a beautiful bun, a pretty profile, outline the line of the neck and ear. But it is not necessary to draw a face. You can get by with non-trivial shading, or, in general, write a poem in place of the eyes and lips. It might even be a favorite verse.