Patterns from geometric shapes. Topic: "Volumetric geometric shapes
Groats through a sieve - each child should have their own sieve. Transfusion and water play Development motor skills, preparation of the hand for writing. Development motor skills are very important for children ... ... in a harmonious sequence. Simple Math: A Box Called Ten Creation... Joint classes creativity for children of different ages to organize not ... ... cotton wool - such an activity will entertain him for a long time. The older child can do at this time applique: glue pieces of colored paper onto a blank drawing. - Sculpt from plasticine ...
Updated date: 01.07.2017
I'd go as an artist ... Why do children need drawing
Which then need to be painted, multi-colored sand for paintings. IN last years such types are gaining popularity in Russia creativity like quilling (volumetric applications from rolled up narrow strips of multicolored paper), origami (national Japanese creation, folding paper toys), scrapbooking (design of photo albums, notebooks and various kinds of postcards applications). Of course, some of them are not easy for children. For example, excellent for quilling developed fine motor skills, and it can be difficult for the baby to hold and properly glue these narrow paper strips rolled up by a snail, which strive to turn around at the most inopportune moment ... But do not rush to lose heart: in some species creativity ...
Updated date: 20.10.2016
The biggest list of games for toddler activities
Depict other animals (walk like a bear, jump and croak like a frog, etc.). DEVELOPMENT logic 1. "Collect only" (learn to choose from scattered objects only ... ... (ant, bee, etc.) 20. Sun, clouds, moon, moon, stars, rain, snow, puddles. Creation 1. Drawing: with wax crayons, paints, felt-tip pens (it is better to take on the water ... ... the child will easily learn at the age of 1.5, something "will come" after two - everyone has it differently. 9. Application made of paper (of various textures), applique from torn paper, applique from...
Updated date: 20.06.2016
Creativity with two children: more fun together!
The ability to develop both children at once. During this lesson, you can maximize the development of fine motor skills, feeling colors, development fantasy and many other aspects of parenting. Also, this activity tends to delight absolutely everyone ... ... potato stamps. Arouse the imagination of children, infect them with a new idea - and enjoy the peace and happiness that is saturated creation with kids! Volumetric applications with a non-standard approach No child will refuse to do applique in the company of your brother or sister. Can...
Updated date: 11.06.2016
If you're tired of just drawing ...
The process is a lot of fun. And you need to create all the conditions for them. Along with the planar applique teach them how to make volumetric: volumetric is better perceived by a preschooler and ... ... will cut out of postcards, depict the sky and clouds with fabrics, etc. Limit to improvement and creativity in visual activity no. We draw on pebbles The very shape of a pebble ... ... them. Drawing only benefits your kid. Drawing has a beneficial effect on development memory and attention, development fine motor skills and imagination. Imagination and fantasy ...
Large selection of simple sweeps geometric shapes.
The first acquaintance of children with paper modeling always begins with simple geometric shapes such as a cube and a pyramid. Not many people succeed in gluing a cube the first time, sometimes it takes several days to make a truly even and flawless cube. More complex shapes of a cylinder and a cone require several times more effort than a simple cube. If you do not know how to accurately glue geometric shapes, then it is too early for you to tackle complex models. Take care of yourself and teach your children to crate these "basics" of modeling using ready-made sweeps.
To begin with, I, of course, propose to learn how to glue a regular cube. The sweeps are made for two cubes, one large and one small. A small cube is a more complex shape because it is more difficult to glue it than a large one.
So, let's begin! Download a five-sheet sweep of all the shapes and print on thick paper. Before printing and gluing geometric shapes, be sure to read the article on how to choose paper and how to properly cut, fold and glue paper in general.
For better printing, I advise you to use AutoCAD, and I give you a scan for this program, and also read how to print from AutoCAD. Cut out the sweeps of the cubes from the first sheet, along the fold lines, be sure to draw a compass needle under the iron ruler so that the paper bends well. Now you can start glueing the cubes.
To save paper and for every fireman, I made several sweeps of a small cube, you never know you will want to glue more than one cube or something will not work out the first time. Another simple figure is a pyramid, you can find its sweep on the second sheet. The ancient Egyptians cost similar pyramids, though not made of paper and not so small :)
And this is also a pyramid, only unlike the previous one, it has not four, but three faces.
Sweep of a three-sided pyramid on the first sheet for printing.
And one more funny pyramid of five faces, its sweep on the 4th sheet in the form of an asterisk in two copies.
A more complex shape is a pentahedron, although a pentahedron is more difficult to draw than to glue.
Development of a pentahedron on the second sheet.
So we got to the complex shapes. Now you have to strain yourself, glueing such figures is not easy! To begin with, an ordinary cylinder, its sweep on the second sheet.
And this is a more complex figure in comparison with the cylinder, because at its base is not a circle, but an oval.
The sweep of this figure on the second sheet, two spare parts were made for the oval base.
To neatly assemble the cylinder, its parts need to be glued end-to-end. On one side, the bottom can be glued without any problems, just place the previously glued tube on the table, put a circle on the bottom and fill it with glue from the inside. Make sure that the diameter of the pipe and the round bottom fit snugly together, without gaps, otherwise the glue will leak and everything will stick to the table. The second circle will be more difficult to glue, so glue the auxiliary rectangles inside at a distance of paper thickness from the edge of the pipe. These rectangles will prevent the base from falling inward, now you can glue the circle on top without any problems.
A cylinder with an oval base can be glued in the same way as a regular cylinder, but it has a lower height, so it is easier to insert a paper accordion inside, and put the second base on top and glue it along the edge with glue.
Now a very complex shape - a cone. Its details are on the third sheet, a spare circle for the bottom on the 4th sheet. The whole difficulty of gluing the cone is at its sharp top, and then it will be very difficult to glue the bottom.
Difficult and at the same time simple figure it's a ball. The ball consists of 12 pentahedrons, a sweep of the ball on the 4th sheet. First, the two halves of the ball are glued, and then both are glued together.
Enough interesting figure- rhombus, its details on the third sheet.
And now two are very similar, but completely different figures, their difference is only at the bottom.
When you glue these two figures together, you will not immediately understand what it is all about, they turned out to be completely imperceptible.
Another interesting figurine is a torus, but we have it very simplified, its details are on the 5th sheet.
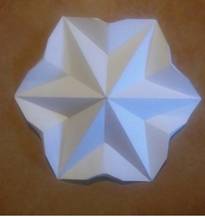
Finally, the last figure from equilateral triangles I don't even know what to call it, but the figure looks like a star. Sweep of this figure on the fifth sheet.
That's all for today! I wish you success in this difficult work!
CONSIDERATION AND METHODOLOGICAL SUPPORT OF THE LESSON (LESSON) ON PAPER PLASTICS.
Topic:"Volumetric geometric shapes".
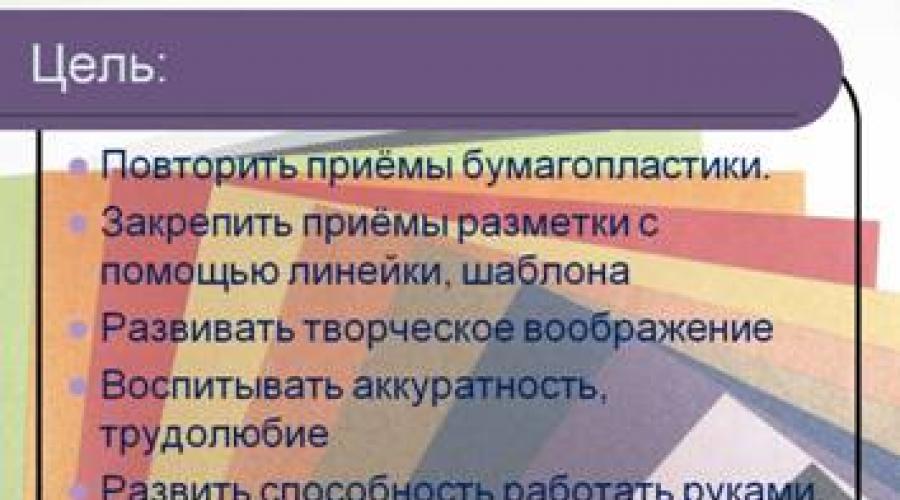
Goals and objectives of the lesson: To develop the student's figurative volumetric-spatial thinking and imagination. Completing the assignment involves familiarizing yourself with the material, acquiring the ability to carry out an accurate drawing, cut various forms, the ability to use sharp cutting objects (cutter, scissors), glue parts together and collect a volumetric geometric figure.
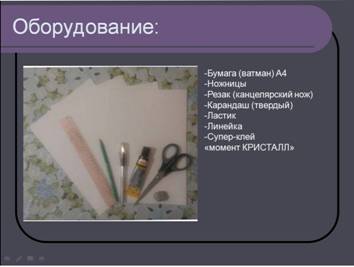
Equipment: At the teacher: computer and projector, product samples, tools (scissors, cutter, paper, ruler, pencil, eraser, glue), templates, safety instructions for working with cutting tools, presentation. Students: underlay wooden board (30 * 20 cm), scissors, cutter, paper (Whatman) A3 format - 2 sheets, ruler, pencil (hard), eraser, glue (moment "crystal").
Lesson type: mixed
During the classes:
1. Organizing time -1 minute.
Checking readiness for the lesson.
2. Explanation of the teacher - 9 minutes.
Communication of the topic of the lesson, goals and objectives.
Explanation of material:
In the course of the lesson, the teacher consistently tells and clearly shows about the construction of drawings for volumetric geometric figures and purposefully forms students' ability to work with their hands, teaches them to precise finger movements, improves fine motor skills of the hands, and develops the eye.
- « From a sheet of paper using a cutter, scissors and glue, you can quickly make a model of any product, a simple composition, a layout. Unlike sculpture made of clay, where mass is gained by building up and refining forms, there is no frame in paper products. Almost all products are hollow and look like a shell. However, this is not an imprint from the finished form, but a completely independent plastic shell, created by folding the paper along pre-applied lines - cuts. Notches are the structural basis of all products made of paper (they are called stiffeners). The sheet folded in half forms an edge. If the sheet is folded several times, then a different texture can be obtained from the number and nature of these rectilinear folds.».
The supporting qualities of the abilities formed by the lessons, on the one hand, relate mainly to the field of perception (the development of an analytical-synthetic view of the subject), on the other hand, to the field of motor skills (the optional area of the hand). The main form of conducting classes is a lesson mixed type(the lecture is combined with practical work).
3. Practical work of students - 1 hour 20 minutes.
For work, selected layouts of geometric shapes, different in size and shape.
Working process:
1. On a sheet of white paper (Whatman paper) we outline the dimensions and contours to create geometric shapes as indicated on the template.
2. Cut along the contour, make cuts on the inner edges of the figure from the front side. Remove the auxiliary lines with an eraser and bend them.
3. We grease with glue the areas indicated by the inscription "for glue" (as indicated on the template) and proceed to the design.
By the same principle, a task is performed with the following geometric shapes.
5 minutes before the end of the lesson mini-view and discussion of works.
Visual material for the lesson.
Lesson presentation: Paper and plastic. Volumetric geometric shapes.

Geometric pyramid.
http://pandia.ru/text/80/128/images/image005_30.jpg "width =" 447 height = 339 "height =" 339 ">
Explanation of the slide: 2. After drawing the drawing, cut along the contour (solid line) and make cuts with a cutter along the line indicated by the dotted line. Remove auxiliary lines with an eraser
Octahedron.
DIV_ADBLOCK219 ">
.
3.Additional inserts on the figure, indicated by shading, are lubricated with glue and glue the figure with additional inserts inward.
dodecahedron.
http://pandia.ru/text/80/128/images/image009_14.jpg "width =" 441 height = 340 "height =" 340 ">.
Explanation of the slide: 2. After drawing the drawing, cut along the contour (solid line) and make cuts with a cutter along the line indicated by the dotted line. Remove the auxiliary lines with an eraser.
3.Additional inserts on the figure, indicated by shading, are lubricated with glue and glue the figure with additional inserts inward.
ICOSAEDR.

Explanation of the slide: 1. The drawing of the icosahedron is transferred to the student's sheet with an accuracy of 1: 1, as indicated on the template. Construction starts with isosceles triangle one side of which is 4.5 cm, and the height is 4 cm. Further, as indicated on the template, we transfer the drawing of all the remaining isosceles triangles.
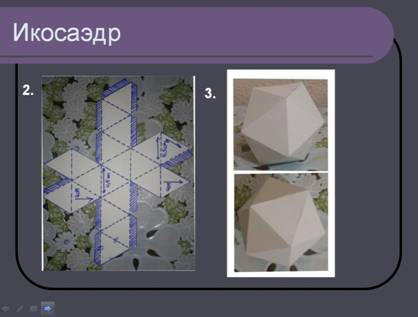
Explanation of the slide: 2. After drawing the drawing, cut along the contour (solid line) and make cuts with a cutter along the line indicated by the dotted line. Remove the auxiliary lines with an eraser.
3.Additional inserts on the figure, indicated by shading, are lubricated with glue and glue the figure with additional inserts inward.
teacher's pedagogical drawing.
examples of student work.
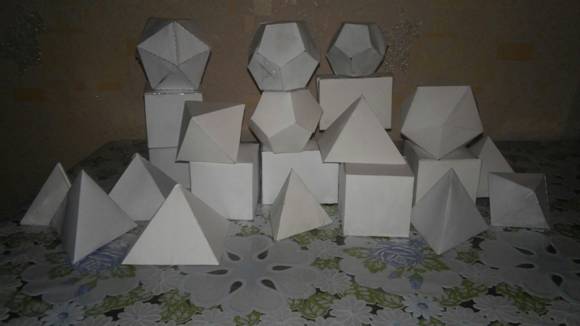
Volumetric geometric shapes senior group 2/4 class.
Teacher: .
Exercise "Star"
Lesson objectives | Methods and techniques |
|
· To give an idea of the history of paper plastic. To acquaint with the main methods of working with paper in the technique of paper plastic To acquaint with the main stages of the work, teach accuracy in the course of work · Develop a figurative volumetric-spatial thinking and imagination in the student. · To consolidate the students' understanding of paper plastic. |
Using visibility Self-execution Comparison |
|
Equipment | Materials (edit) | |
Multimedia Visual material | Drawing paper, stationery cutter, scissors, ruler, compasses, pencil, eraser | Exercise "Star" in the technique of paper plastic. |
Lesson plan | Sample work |
|
1.Organization 3 min. 2. Introductory conversation 10 min. 3. Independent work 30 min. 4. Conclusion 2 min. |
|
1. Organizational part.
Our task for today's lesson will be an exercise in the "star" paper-plastic technique.
2. Explanation of the material.
Paper and plastic. What is it: paper sculpture, architecture or design? This view artistic activities It is equally fashionable to refer to all of the above areas, since paper as a design material is widely used by artists, architects and designers. From a sheet of paper using a cutter, scissors and glue, you can quickly make a model of any product, a simple composition, a layout.
Paper plastic is close to sculpture. Unlike sculpture made of clay, where mass is gained by building up and refining forms, there is no frame in paper products. Almost all products are hollow and look like a shell. However, this is not an imprint from the finished form, but a completely independent plastic shell, created by folding the paper along previously applied lines - cuts.
Features of the technology. Notches are the structural basis of all products made of paper (hereinafter they will be called stiffeners). The sheet folded in half forms an edge. If the sheet is folded several times, then a different texture can be obtained from the number and nature of these rectilinear folds. In Japan, this method is called origami in papermaking.
Materials and tools. The main tool in paper plastic is a cutter (stationery knife). Scissors are needed for cutting paper, making various patterns, cuts, notches, etc. A ruler, preferably metal 25-30 cm long, since plastic and wooden rulers are not accurate and quickly fail. Compass, for building a circle and dividing it into six parts.
3. Execution of work.
Today we got acquainted with the paper-plastic technique, looked through multimedia presentation on this direction, and on visual aid viewed and touched what this technique is. Now we are going to try the star exercise. To do this, you should have tools such as a ruler, pencil, eraser, cutter, scissors at your workplace. The exercise will be done out of paper. Each of you also has a template on the tables for performing work with the given dimensions. Pay attention: the yellow line - construction, along the brown line - cut out, straight green lines - we cut with a cutter and bend away from ourselves, green lines-dotted line - we cut with a cutter and bend towards ourselves. We begin to work with a drawn circle with a diameter of 20 cm.After that, we proceed to drawing auxiliary lines and proceed to design.
4. Consolidation of the passed material.
So our creative lesson... We got acquainted with a new direction in art - the technique of paper plastic. So tell me please, what is the difference between paper sculpture and clay sculpture? In which country is this technique used abroad, and what is its name there? What materials can we need when creating a paper composition?