Learn to draw with a pencil machine. Step by step tutorials: how to draw cars
Read also
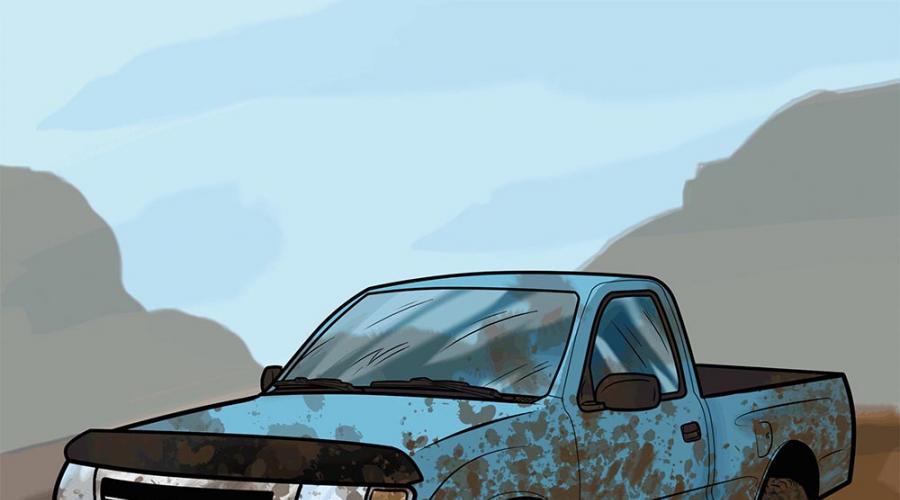
Good afternoon, we continue to publish collections of various interesting pictures collected from all over the world. Since we are an Internet resource that carries knowledge in fine arts, then for sure, our readers and subscribers will be interested in seeing unusual and original pictures and photographs that people take or draw. This will help you develop your horizons and get ideas for your own art ...

Good afternoon, today, as promised in the last lesson, there will be a lesson purely for boys. Today we will learn how to draw a jeep. Jeep is the collective name of all vehicles with high cross-country ability, those cars for which the element is not asphalt and comfortable smooth roads, but their elements are fields, forests, mountains where there is no good roads where there is no asphalt, but ...

Good afternoon, boys rejoice, today's lesson is for you! Today we are learning how to draw a truck with a phased drawing of each element. This drawing is very simple, so even a child or parent can easily draw it for their child. Our truck rushes on its delivery business on the highway. It's red with a van body, but you can make it ...

Good afternoon, today we will learn again How to draw a car. This is our fourth lesson on drawing cars, we drew a Chevrolet Camaro, Lamborghini Murcielago, and also a Chevrolet Impala '67. We receive many applications from our young artists, draw another car. And so, today we present new lesson How to draw a car and ...

WITH early childhood boys are not indifferent to toy cars. Therefore, they not only play them and assemble a body from a designer, but also depict them on a sheet of paper. Creative potential in drawing, it is manifested in the reproduction of modern and rare cars of famous brands, military land equipment and even cars of the future. The last point is especially interesting for its idea due to the fact that, in addition to sketching, the child is invited to dream a little, imagining how, in his opinion, the machine of the future should look like in a pencil drawing. For example, will it be mirrored, glass, or generally look like a spaceship on wheels.
If it is not a problem for an adult to draw a fictional car, then a child often needs small tips presented in the form of pictures. Therefore, in today's article, we decided to demonstrate options for already invented machines of the future, which can be sketched or taken as a basis for your drawing with a simple pencil.
To inspire a child to draw unusual and one might even say fabulous drawing, parents need to come up with a presentation that includes an intriguing speech and printed pictures (photo). As an idea, you can use the teaching style of art teachers or psychologists, who can even tell if they want.
There is no need to restrict the child in the objects necessary for drawing. It is good if the table contains not only white sheets of A4 paper and a simple pencil, but also markers, watercolors, gouache and colored pencils. This approach will not restrict the child's actions.
Do not limit your baby in time! Let him devote as much time to drawing as he sees fit.
Machine of the future - pencil drawing for children, photo
The article below offers pictures of cars that were invented by adults, children and even famous brands, annually replenishing their ranks with new cars. Among them: BMW (BMW), Audi (Audi), Volkswagen, Lifan, Toyota, Lamborghini, Porsche, etc.


Machine of the future pencil drawing step by step

Drawing is easy! Video
The video shows how children learn to draw.
This pencil car lesson is designed in stages for those who have just picked up a pencil. Here I suggest a couple of the easiest and quick ways drawing cars in stages.
Although if you have already passed the level of a beginner in drawing, then try to draw pencil machines step by step according to the more difficult lessons. You can see one of them on this one.
Well, if such lessons are still difficult for you, then let's look at the easiest ways to draw.
Pencil machines step by step method number 1
We draw a line and two ovals - wheels.

Draw the lines of the car body, add another front wheel in the background.

Car roof lines.

We continue drawing and now we need to draw the windshield and side windows.

All that remains is to draw the headlights, grille, front bumper and rear bumper.

The way of drawing cars # 2
We start in the same way - the base line and two wheels.

Draw the lines of the car body. Do not forget what lines of the body you draw, this is the shape your car will be.

Add a roof line and a side glass line.


Well, I'll also add a line of the air intake near the door to the drawing, and draw a lantern under the headlight.

That's it, the drawing is ready! The second way to draw the car again took only a few minutes!
So fast and very easy ways you can draw cars. Having turned on imagination, you can always complicate them by adding something of your own. I deliberately stopped at the silhouette of the car so that you can continue these drawings yourself.

Many children love to draw sports cars. Dynamic, beautiful design and attractive streamlined body attracts the attention of every boy who dreams of getting behind the wheel of a racing car. But draw sports and racing cars not easy. It is very difficult to convey its dynamic shape of the hood and other details. However, the lessons phased drawing facilitate this task and you can accurately draw step by step sports car and the drawing of the car will be similar to the original. In this lesson we will learn draw a sports car from Lamborghini Aventador in stages.
1. Let's draw the contour of the body of a sports car

First you need to draw the initial outline of the sports car body. Start at the front of the car. Draw the outlines of the windshield and bumper, and then draw the outlines of the side part with light pencil strokes.
2. Details of the hood and bumper

Continue to draw the outline of the hood and draw an arc to outline the convex fender of the sports car.
3. Headlights and wheels of a sports car

Now we will draw the headlights for our sports car. To do this, draw two other polygons above the two front pentagons. In addition, you need to "insert" the wheels into the square cutouts of the mudguards and mark the center of the wheel with a dot.
4. "Ribs" of rigidity of the car body

At this stage, you need to add some additional lines along the body, the so-called stiffeners. Thanks to these "ribs", the thin metal does not deform during overloading while driving at high speed and rigidly holds the shape given at the factory. Make ribs in the middle of the hood and on the side of the car. Add some additional elements bumper and side part of the body of a sports car.
5. How to draw wheels

Now we need to draw the wheels of the sports car, "refine" and correct the preliminary contour of the wheels. Pencil the tires and draw a small circle in the middle of the wheel. After that, the square cutouts of the wheel arch liners, made in the early stages, also need to be rounded, adjusting to the shape of the wheel. Further, from a rectangular roof, you need to make a streamlined body part of a sports car and add glass. Don't forget to draw the side mirrors.
6. The final stage of the drawing

In this step, the body of the sports car needs to be made three-dimensional and give the racing car dynamics. This can be done using a soft simple pencil... But first, let's draw some pretty wheel rims. This is fun because you can draw rims for a sports car of your own model, such as a star. Make branches from the center of the wheels a and paint over the voids between them. Then with a pencil you need to shade the glass, and the spaces in the bumper and side of the body. Add the Lamborghini Aventador badge to the hood. Hope you could draw a sports car ideally. Now, if you wish, you can make a small surrounding landscape and draw the road.
In this section we will try to draw a crossover car. The car of this class is much larger than its passenger cars and looks more like a sports car. Therefore, the wheels of this car are much larger and wider than those of passenger cars.
The tank is one of the most complex military vehicles in design. It is based on tracks, a hull and a turret with a cannon. The most difficult thing to draw in a tank is its tracked track. Modern tanks are very high-speed, of course it won't catch up with a sports car, but a truck can.
Drawing an airplane is not that difficult. In order to draw an airplane, you just need to know some of the features of its structure. Military aircraft are different from passenger aircraft. They have a different, more dynamic shape, since there is no passenger compartment, only the cockpit.
If you paint a drawing of a helicopter with colored pencils, the picture of the helicopter will be bright and attractive. Let's try to draw a helicopter step by step with a simple pencil.
Let's try to draw a hockey player in motion in stages, with a stick and a puck. You may even be able to draw your favorite hockey player or goalkeeper.
An article on how to apply beautiful airbrushing to a car body. The nuances of technology for applying images to the machine. At the end of the article - a video of beautiful 3D drawings on the car body.
The content of the article:
The car demonstrates the status, character and temperament of its owner. Many car enthusiasts want to stand out from others Vehicle, therefore, they apply various drawings to their cars. In fact, a whole art has arisen, which is called airbrushing. Now anyone can make a real work of art out of their car. In this article, we will consider the nuances of applying drawings to the body of your car.
Advantages and disadvantages of airbrushing

Before choosing a drawing and applying it to a car, you need to understand the pros and cons of airbrushing.
The pluses include:
- The opportunity to demonstrate your own individuality, your hobbies, catch the enthusiastic glances of passers-by and other motorists on your car;
- The ability to use drawings to hide small defects in the body, cracks and scratches;
- The presence of a picture on a car significantly reduces the likelihood of its theft. Few people will steal such a car, since it is easy to find it later, and getting rid of the picture is too costly and expensive.
- High cost of work;
- After Car accident it is more difficult to restore with a pattern;
- Selling a car with airbrushing is usually difficult because not all buyers will like the art on it.
What tools are needed

Naturally, certain tools are required to apply the selected pattern:
- Airbrush. It is the main device that sprays paint under pressure onto the surface of the car body. This ensures precise and accurate spraying.
- Compressor;
- Connecting hoses;
- Paints;
- Different skin;
- Fixer for varnish;
- Thinner and degreaser;
- Polishing machine with different circles.
Finding this equipment will not be difficult. All of this is sold in specialized stores. Pay special attention to paints. Can now be found different types mixes, but aspiring artists can use grades 646 and 647 versatile paints and solvents, which can be used to complete a wide range of tasks. In principle, working with car paints is similar to working with regular paints.
Typically, drawings are applied to the hood, doors, trunk lid, front or rear fenders. If you wish, you can paint the whole car.
The complexity of the drawing

Since airbrushing is an art, many nuances must be taken into account in this matter. First of all, a lot depends on the complexity of the drawing that needs to be applied to the car. There are three categories of complexity of drawings, which, in turn, require different training from the artist.
- First category. It includes simple graphic drawings: different lines, patterns, stripes, elementary geometric shapes.
- Second category. In this case, the drawing is limited to one art object, in the creation of which multicomponent paints are used.
- The third category includes complex art drawings with multiple objects and background applied. In this case, all variety of colors can be used. It is important for the master to mix the colors correctly and create a smooth transition of colors. If everything is done professionally, a simple car will become a unique masterpiece.
How to draw correctly

A special airbrush is used for drawing. But when creating an ornament, landscape and animals, brushes and paints are used, and the artist's manual labor is used. You can also stencil if you're using the techno style.
The applied paints must be of high quality, durable and resistant to the effects of various atmospheric precipitations.
Naturally, a wide range of colors should be used so that any desired shade can be created. Also, during the drawing, it is necessary to add reflective and light accumulative paints. To give more strength, the drawing is covered with several layers of varnish, which, among other things, will give the image "depth".
These are the basic rules for drawing. But at the same time it is important to strictly observe the technology of airbrushing.
The main stages of airbrushing technology

It all starts with choosing the desired pattern. At the same time, it is important to determine its theme, observe proportions, color range, style the image and ensure correct placement. It is also important to choose the right background so that the drawing looks beautiful and expressive. After that, you need to understand where it is best to place the selected image on the body.
When the theme of the picture is selected, you should start developing the sketch. Collections of drawings will help with this, Graphics tablet, camera, laptop, scanner. If you are good at drawing, paper and a pencil will suffice. Drawing using Photoshop, you need to apply to the photo of the car and add fragments of the selected drawing. That's it, the sketch is ready.
Then you should carefully study the nature of the image in order to choose the appropriate way to apply the picture. As mentioned above, each method needs its own tools. If it is “just a sticker” or a decal, then a stencil is enough. If you need to depict various complex objects with smooth color transitions, you will have to use an airbrush and brushes.
It should be remembered that it is important to correctly place the drawing, because what looks great on paper will not always look beautiful on the body.
Moreover, improper placement can "kill" the style of the entire car. Therefore, you need to be very careful about the choice of the placement of the picture on the car body.
The computer will help with this. The whole process of modeling and positioning the image on the car body is carried out using a computer.
If you are an experienced professional, you can do it all manually. However, it should be borne in mind that the body has a complex relief and shape. It has different ridges and transitions that can affect the appearance of the drawing. Therefore, it is still better to enter the image into the PC, impose on it different versions of the painting, the nuances of the body geometry. Now images can be presented in three-dimensional form, which will allow you to carefully see and edit all the flaws.
If everything suits you, you can proceed to preparing the car body for drawing the image.
Car preparation

The first step is to remove the door handles, mirrors, headlights, all rubber seals and other elements to ensure uniform application of paints and varnishes.
After that, matting is performed. You only need to process upper layer varnish so that the paint adheres well to the surface. All scratches and small chips should be repaired. You can do the work with special matting sponges that do not leave scratches.
All unused parts and elements must be pasted over with tape or paper so that they do not get paint or varnish. The place where the drawing will be applied must be cleaned of dust and degreased.
Drawing process

First you need to apply the main sketch. As a rule, in this case, stencils are used, which make it easy to make a base. It is advisable to make the very first lines not very bright and more blurred. It is important to keep the airbrush perpendicular to the body surface.
The drawing should be applied carefully and accurately, excluding sudden movements. The hand must be kept calm but firm to avoid smudges. Gradually (layer by layer) it is necessary to display the entire image. First, the base is outlined, and then new details are added.
Success in this matter depends on correct setting airbrush. It is necessary to adjust the required line thickness and pressure supply.
The paint should be applied in layers. Moreover, the next layer can be applied only when the previous one dries up. It is important to remember that light shades are applied first, since dark ones are difficult to paint over later.
At the very end, the finished drawing must be covered with several layers of varnish from a spray bottle so that the image is fixed. When the varnish has hardened, you need to start polishing. it The final stage in the procedure for drawing a pattern on the car body.
The durability of the drawing will depend on the observance of the technology and the quality of the materials used.

- When drawing, work in a respirator with a high-quality air filtration system. This will help keep you healthy, as paints and varnishes are quite toxic.
- In order for the drawing to preserve its beauty for a long time, it is necessary to periodically apply protective equipment to it. Be sure to buy protective and abrasive polishes. As a rule, if the technology has been followed, the image will last as long as the factory body paint.
- If you want to delete the picture in the future, there may be some problems. When applying temporary airbrushing, it can be easily removed with the help of special washable paints. But it is not so easy to get rid of constant airbrushing. You will either have to repaint the car, or cover it with a special film.
- If the image occupies more than half of the body's surface, you will have to reissue the documents for the car, since its color has changed.
- Airbrushing is considered to be a multi-color car paint. It must not copy the identification livery or symbols of special vehicles. In the passport of the car, the fact of the presence of the image must be noted.
- Airbrushing, if desired, can be insured with CASCO. In this case, the insurance company will cover all the costs of image restoration.
Let's summarize
If you decide to decorate your car with some kind of pattern, you should carefully consider whether you need it. If necessary and you have certain skills, you can draw a sketch yourself and apply a drawing to the body. If you have never held a brush in your hands, it is better to entrust this business professional craftsmen.
Video - beautiful 3D tuning of the car body: