How to draw a car with a seven with a pencil. Step-by-step lessons: how to draw cars
You can draw a passenger car without difficulty. After all, it has simple forms that can be denoted by simple lines. At the first stage, the "external box" of the car or its overall silhouette is created. From the next stage, the main components of any passenger car are added - wheels, windows, doors. You can also add a phased drawing of the machine with colored pencils with small details that only be embedded. And only then you can circle an image with a marker and apply color on it. Created as a result of a beautiful car. The lesson has an average level of complexity.
Necessary materials:
- line;
- pencil;
- eraser;
- marker;
- colour pencils.
Stages of drawing:
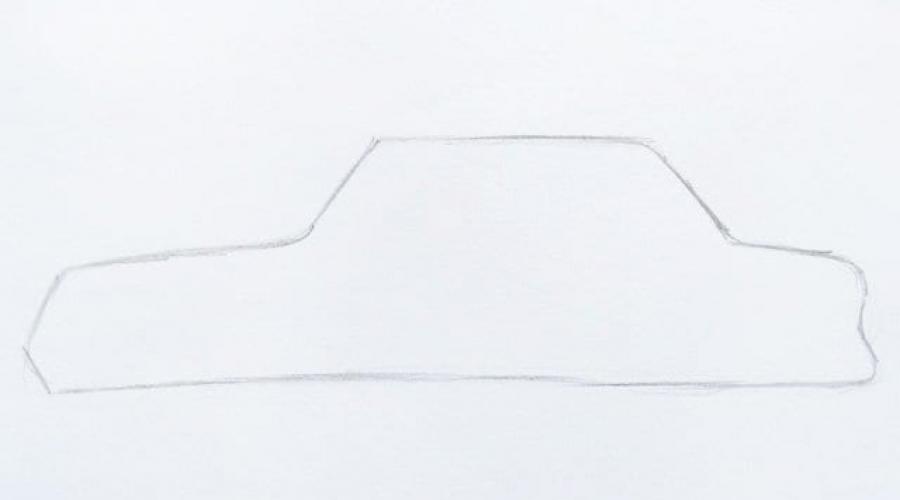
1. Simple pencil outlining the shape of the passenger car. For beauty and accuracy, you can use a ruler.

2. Despite the fact that in a passenger car 4 wheels we draw only two. Why two? Because the profile shows only one front of the front.

3. Around the wheels draw arcs.

4. Now draw the windows. They depend on the brand and type of machine. We also draw a small item near the front window, with which the driver can see the transport, which is behind his car. Between windows we will make a small partition.

5. We draw small details: headlights in the background and on the front, doors, partitions in the form of simple lines.

6. Obligate the drawing marker. Can be used with a thick and thin rod. Do not forget about small details that are in the middle of the drawing.

7. Light green pencil ransom fully the entire car, except windows, wheels and headlights. The darker color of the pencil will give the pattern of a volume type.

8. Blue pencil make glare on windows in the car, reflecting the clouds in the sky and good weather.

9. Gray pencil, which was used to apply a drawing sketch, deactivate the wheels. But red will make headlights.

Cars are one of the favorite for drawing by the guys, especially boys. Often they arrange a tight competition, who has an image of the typewriter and plausible. Not everyone has the art talent for performing such a task, but these skills are trained. If a person shows enough perseverance in the development of artistic wisdom, such a task, how to draw a car, will lose difficulty for him, turn into a completely satisfying and delivering pleasure from anticipation of an excellent result of the applied effort. Help our prompts are designed to help such plans.
How to draw a machine in a pencil in a pencil: some subtleties of the process
Before trying to draw the car in stages, it is worth deciding on its appearance. If a specific model attracted, it is necessary to study its images, study in detail, mentally divided into separate items: it is so easier to distribute the work into individual stages. In the case when the car looks unnecessary to drawing, it is desirable to resort to styling or simplification, leaving only key components, the main lines. Those whose artistic skills are not yet sufficiently high, it is preferable to avoid excessive product detail. The auxiliary lines and strokes carried out in the course of the creative process are necessarily erased when the need for them disappears.

How to draw a machine in stages for children
Difficulties with how to draw a car, for children there are just due to insufficient ease of form. They are not necessarily trying to repeat a certain model - it is necessary to portray a certain conditional chamber, like that. First delays an arbitrary rectangle with a smaller trapezing over it - it will be the body part. The windows are drawn in it, wheels are added, preferably with disks. Approximately in the middle of the rectangle pair of parallel vertical lines are indicated by the edges of the doors. Details are added in bed: peeling edge, bumpers, headlights from the window.

How to draw a racing car
If the task is to draw a racing or sports car, to act permissively as follows. A basic form of this type is created, consisting of the projection of parallelepiped and a volumetric trapezium in the desired perspective. According to it, the contours are specified. The first thing is delineated by the lower part, with recesses under the wheels, and then they are drawn and they themselves, a little oval due to the features of the projection. Now denotes the bottom of the transfer, slightly rounded and with a low fit, and in a similar way - rear. Slightly curls the top, the boundaries of the glasses are stuck, side mirrors are added, then several pairs of headlights. The edges of the doors, the hood, place under the number plate are indicated. Spoiler, other details are added. Detailed phased instructions - on this page.

How to draw a cool car: Dodge Viper
Learn how to draw a car with a pencil, many guys are rushing for the sake of further creating images of steep cars. One of the options, the detailed instructions for which will be found, now consider. First, the workpiece is created, like this, with a two perpendicular lines inside it, one of which will turn into the lower edge of the windshield. Now it is drawn by itself, then the bottom edge of the car, outlining the shape of the body, the top of the headlights, the covers of the hood, places for the wheels. Many details are added: a drawing passing through the body, fog lights, radiator grilles, tires with discs, ventilation holes, mirrors, headlights. Tips for their location will be available on the link to the instruction.

How to draw a police car
With such a task how it is easy to draw a car of this type, not everyone can cope. But it will be simple work if you find the appropriate instructions. Follow permissible instructions given in this video amphibian . The text version of the phased story about the process of creating an image of a similar service car is given on this website. In fact, a policeman will come up as a policeman, except for sports cars. There will be some distinctive signs on a simple body. On the roof, the flashing block, located parallel to the bumpers. Side bands are applied on the body, digital designations 02, the small inscription "Police" with a simple font.

How to draw a fire truck
Such a problem is not easy, and successfully resolve it will allow the following
This lesson is designed for those who are familiar with drawing and such concepts as: layout, perspective, shadow, etc. It addresses the nuances of drawing a car with colored watercolor pencils with a dry way and a conventional pencil.
Before starting our lesson, I will ask you - why do we need to draw a car if it is, for example, can you take a picture? Well, first, the photo is a separate type of art, secondly, the car you are going to portray - the fruit of your fantasy, thirdly, the hand drawn image allows you to more accurately pass the parts, features lighting, focusing on color, etc. Finally, you just like to draw.
How to draw a car with watercolor pencils
So, deciding, go to the case. What materials will be needed:
- watercolor pencils;
- collet pencils with colored stylus;
- simple (graphite) pencil;
- dense watman is approximately A3 or more;
- soft eraser;
- small-graffitable stack for sharpening colored griffel.
Note. Recommendations for drawing a black and white car are slightly lower in this article. Actually, it does not matter what kind of image of the car - photo, from nature, according to the presentation, the main thing is to get a realistic drawing, the metal should be similar to the metal, glass on the glass, etc.
Consider some features of color blending with watercolor pencils.
- When mixing two colors to obtain the third dark shade is superimposed on light.
- The clarity of the objects is achieved by strokes around the edge of the sharp chiffel of the collet pencil.
- Falling shadows are best made from several colors than from one black. Such composite shadows are also called "alive shadows".
Stage drawing
1. Go directly to the car. To begin with, we make an image of a car in contours of a simple graphite pencil. The final contiguous figure should not contain thick lines, since we are going to apply a color, and through light colored colors can peck graphite.
In general, than the lines thinner and paler, the better. In the course of the work, some lines will be removed at all. For contour images, an automatic pencil is used with a thickness of Gryuchil 0. 5 mm and softness "B".
2. Getting to paint. If you are right-handed, start painted from the left edge, if Left -sha is right. This is in order not to smear the drawing. Also, under the hands, you can put paper sheets of the size of A5, so as not to leave the prints on Watman.
Some artists, applying color, paint the entire drawing immediately, the layer at the layer specifying the image. I do differently: I choose some kind of image site or an element and bring it to mind, then I turn to the next one. But you can do it more comfortable.

1. Explicit borders of the color and contours of the elements are watched by a collet pencil with a sharpened tray of the same shade as the color of this item. This is for different colors clearly separated from each other, i.e. There should be no loose borders.
2. Smooth color transitions break the white pencil, in some cases, to create a transition, the adjacent colors can be trimmed with a cotton. In general, I recommend to decide on a white pencil drawing for greater smooth color. Try not to do flaws, working with dark shades, as they are not very well erased by the eraser. Some moments can be corrected by a white pencil. Multilayer sections can be scraped by a blunt cutter.
3. When you draw, more often evaluate your work, to detect and correct possible errors in time. I draw your attention to the fact that to obtain a good result, working with watercolor pencils, you need to show some zeal and patience. Over time, you will have your own drawing techniques. Upon completion, clean the eraser from the dirt if it is, areas around the drawing.
4. Well, of course, put your autograph!

How to draw a car with a pencil phased
1. So, for the phased drawing of the car, we need to start with the wheels. Spend for yourself a line that will be the main one. Draw two circles and discs for them. You can use a figured line or a circulation if you have a hard way to draw circles. You need to draw in a conventional soft pencil, make the lines thin so that you can be easier to erase.


3. Now, so as not to get confused, to draw first headlights, then, the room, the entire bumper, the door of the car and the rest of the small details.

4. In the last step, you need to draw everything in more detail everything that should be on our car. Headlights, license plate, doors line, etc.
How to draw a car - video
Modern auto industry surprises and pleases fans of cars with a colossal variety of models, which just a few years ago, even imagined it was difficult, respectively, and opportunities for the artistic image appeared much more. But to realize this creative impulse and draw a car, you need to know some subtleties.
What you need
In addition to patience and prettiness, it will take:
Useful tricks
What to do, if the drawing really wants, but the skills are missing?
You can use some tips that will allow to find a compromise between desires and capabilities.

Draw Lada Priua
The popularity of the car Lada Priora is explained very simple: a good price, a relatively good quality, but in the case of an unforeseen situation on the road, it is not particularly sorry. So for young people who only received rights, such a car is an excellent option. Here and teenagers are happy to engage in the graphic materialization of their dreams, namely they paint the BPPA.
It is interesting. Abbreviation BPPA is decrypted as a car without landing and denotes a community of motorists who prefer cars with a changed suspension towards reducing the road lumen.
Instruction:
- We start with the sketches of the machine, that is, we spend two parallel lines - at the top and bottom.
We start a drawing with drawing auxiliary lines
- Between these segments, we draw two curved lines on both sides.
- We take for the left wing, making it a slightly curved on the left.
- Under it arch for the front wheel. So that the line of the arch was more voluminous, we make it double.
For the arches, we make it a double line
- Draw the middle and side part of the machine.
Door line make curved
- The following task is to show the back door and wing. We make a line parallel to the bottom of the body.
- Show the arch under the wheel.
- We plan the rear bumper line.
Draw a bumper lines, arches under the rear wheel and bottom of the body
- We proceed to the roof. We make two perpendicular of the front and middle windows. We bring down the smooth line at the rear window.
Windshield lines and roofs must be smooth
- We draw the back of the body: the trunk with a small circle and oval - LED headlights.
- Below add a license plate.
- We work on the image of the rear bumper. Show a small rectangle reflective element.
Complete drawing drawing back of the rear bumper
- Under the arches, we draw double lines of the semicircles - wheels. We carry yourself a soft pencil wheel thickness.
- We draw a few strokes in the center and on the tires, and between these lines show small circles of stamped discs of the freight.
- I wipe the auxiliary lines, we carry out the outline and, at will, paint the machine with pencils, markers or paints.
Coloring the drawing can be placed with simple pencils.
Video: How to draw a bampan prior, starting from the windshield
Video: How to professionally draw a prior
Draw a phased racing car
You can hardly find a car amateur that would be indifferent to racing machines. Speed, mobility and beauty - that's what the barges are so popular. However, draw this product of the auto industry is not so easy.
Instruction:
- The main rule of the image of the racing car is to start passing the maximum simplified sketch on paper. In this case, we begin with the drawing of the elongated shape housing.
We start a drawing with auxiliary lines
- To give volume add the upper part - driver and passenger places. At the outer edge, based on the parallel outer edge of the line, we build a cabin frame.
To give the volume drawn the roof lines and the cabin frame
- We proceed to the bottom. We carry out the bottom line, making recesses for the wheels.
Draw a notch under the wheels, spin the rear bumper line
- Due to the fact that the car is located at an angle, wheels make oval.
Due to the fact that the car is located at an angle, wheels should not be round
- The bottom of the car is made curved.
To make the right form, turn the front of the housing
- Get to the top. Add a side mirror and soften the original lines with soft strokes.
Soften the top lines, tear off the side mirror
- We add on the side and behind the two lines of the car.
Add the line on the side and rear
- We erase the extra lines, work in the details. We start from the front lines, add headlights.
Remove the extra lines, draw headlights
- Draw a line at the bottom, as well as a rectangle for the room.
Testing the license plate, detailing the line of the car
- Add multiple lines to machines, as well as the door line.
We complete the picture of the drawing of doors and the details of the front of the car
Video: Two racing vehicles drawn through the cells of the notebook
How to draw a fire truck
Modern fire trucks differ significantly from those that first appeared in 1904. In old cars, 10 people were placed and practically nothing of the fire inventory. But modern samples are so spacious that there is plenty of extensively inventory to extinguish fire.
Instruction:
- We carry out three parallel horizontal lines that divide in half one vertical.
For the fire truck you need to make four auxiliary lines
- In one part we draw the cab, starting from the top, and then drawing almost half the outstanding lower part.
- At the bottom edge, we make a removal under the wheels.
- Body portray in the form of a rectangle, with recesses under the wheels along the bottom edge. The height of the body is half the height of the cab.
We start a drawing from the cabin and the outlines of the body
- Draw wheels.
- Cabin is placing two right doors.
- Dorify the staircase on the body.
In wheels, do not forget about the drawing of the disks, for the image of the stairs you can use a ruler
- We add headlights, as well as a remedy fire sleeve, which is mounted on the side.
We supplement the drawing by fire hose and inscription 01
- The drawing is ready, optionally it can be painted.
Machine can be painted with a simple pencil, but if you use paint, markers or color pencils, then the main shades will be red and white
The next way to draw the machine special equipment will be interesting even to those guys who are not too strong in drawing.
Instruction:
- We draw a rectangle and divide it vertically in half.
The basis of this car will be split vertically in half a rectangle
- In the left part, we draw a cabin, carrying double lines for drawing windows, draw the handles.
In the left part, draw a cab with double windows lines
- On the body we make windows. For this, the bottom limit is done just above the bottom of the windows of the cab.
Draw windows on the body
- Top add a fresh fire sleeve, tank.
Testing a tank and a fresh fire sleeve on the bodies
- Take the wheels, lines do double.
Draw the wheels
- On the roof of the cabin install a flashing beacon.
Testing flashlight light, inventory details
- Dorify the details of the car design of special equipment (for example, tools for extinguishing the fire, which are attached along the outer wall of the lower rectangle).
- We remove the contour lines, and the main ones are mild a simple pencil or felt-tip pen.
Machine can be painted or left in an embodiment with induced contours
Video: as a child older than 3 years old, draw a fire truck with a marker
Draw a police car
An image of a police car is not easy. To simplify the drawing process, it is recommended to start with auxiliary elements. In addition, for this picture, we will need a circulation.
Instruction:
- In the center of the sheet, we draw two rectangles connected by a common horizontal line. We will draw in the boundaries of this figure.
We start a drawing from two rectangles
- The top rectangle is the car body. Arc show his shape.
Show the body shape of the Arc
- Add the front of the machine - the hood.
Testing the line of the hood
- Soft smooth line connect body and hood. The auxiliary lines of the rectangle in this area are erased.
We connect the body and the hood of the smooth line
- Draw a form. We depict the holes under the wheels, and the line separating rectangles, turn into a line, "separating" top from the bottom of the car.
Slightly tilting the front line and draw a notch under the wheels
- Add a trunk line, rear suspension, as well as a line separating the windshield from the machine housing, and two vertical front door lines.
Add a trunk line and anterior door, as well as the hood from the windshield
- Eraser erase all the extra lines, leaving only the contour of the machine itself.
Remove the auxiliary lines
- With the help of a circulation, we make wheels.
Draw wheels with a circulation
- Draw the line of window frames, if necessary, using a ruler.
We carry out the contours and, at will, paint
Video: How to draw a police car without auxiliary lines
Photo Gallery: Draw Bugatti Veyron
We begin the drawing from the formal figure, we make the line of the supercar contour, as well as the bumper, side body kit, wheel arches and hoods depict the headlight contours, three front air intake, windshield and side windows, as well as the line of the driver's door and another air intake detail the model: start with grids The front air intakes, then go to the pharmaceans, rear view mirrors, the fuel tank cover, and we complete the wheels of the disks and the tread on wheels, we remove the auxiliary lines for the car line
Photo gallery: how to draw a convertible
We start with an outline of the contour: the upper part has an oval shape, and the bottom consists of straight lines of different angle of inclination. Checking the angles of inclination. We draw the front bumper, the right wing and well for the wheel of the car are drawing the windshield, the mirror from the passenger side and the cabriolet cabin can add fog lights and more. Draw a car hood in detail, the windshield draw the side doors from the passengers, the contours of the rear bumper, the interior of the car and seats for passengers, after which they draw a folded roof of the car that draw the wheels draw the wheels on the wheels of the machine, paying attention to the symmetry of the spokes, remove the auxiliary lines And on request, paint the car
Drawing a car with paints
If the picture is planned to be painted with paints, it is better to take a watercolor sheet of paper - so the smears will lie smooth and more beautiful. The rest of the recommendation on the implementation of the paint drawing will be such:
- fill out contours in color only after the pencil base is fully met;
- before coloring, wipe all the auxiliary lines - they will interfere;
- if, besides the car, there are still elements in the picture, it is better to start with large parts of the environment (roads, trees on the sideline), but those objects that are in the background are better to leave.
It is interesting. Models of toy machines can be drawn without pencil circuits, that is, immediately with paints. And it is more convenient to do this gouache, as the color is obtained saturated, and the contours do not break up as in watercolors.
Some newbies argue that gouache is lighter than watercolor
Video: An easy way to draw a toy machine with a gouache without pencil circuits
Few boys, and girls, too, who would not dream to drive a car. At a certain age it is unattainable, so you have to be content with drawings. And this creative process requires marginal care and patience to alterations if something is done wrong. With the help of detailed step-by-step instructions avoid errors much easier.
Higher philological education, 11 years of experience in teaching English and Russian languages, love for children and an objective view of modernity - the key lines of my 31-year-old life. Strong qualities: responsibility, the desire to learn new and self-improvement.
Hi friends! In today's lesson we will tell and show you how to draw a car. Learn to draw we will be on the example of BMW and many other modern popular brands of cars. So, let's start our step-by-step lesson about drawing machines.
Step 1
First, we need to draw an oblong rectangle. It will be the main part of the car.

Step 2.
On the right side of the rectangle, draw a trapezium. Using circles, draw the shape of the wheel.

Step 3.
With the help of a half-colt, depicting the arches of the wheel. On the left side of the rectangle sketch the hood of the machine. Round a little top of the trapezoid. Draw the back of the car.

Step 4.
On the front of the machine, sketch headlights and grille. Then, windshield and rear windows, as well as glass on the doors. Outline the side panels between the wheels.

Step 5.
We continue to draw. Erase the sketch line of the initial stage and go to the next step.

Step 6.
Using simple lines Draw the door and the border of the hood. Add swivel lights, side mirrors and rear headlamps, as shown in the picture.

Step 7.
We got to the last step of our classes. Draw door handles and wheels. Note, there are a large number of different car drives for wheels and you can draw any at your discretion.

We hope you liked the lesson. Let us know if you want more lessons about drawing machines. Read on and learn how to draw a variety of cars in any angles!
How to draw a sports car step by step

Here we will show you how to draw a sports car step by step.
Step 1
Let's start with basic lines. Since we draw a sports car and use as an example Lamborghini, you need to use a lot of straight lines and sharp corners. With the help of light lines, make a sketch of the "body" of our sports car.

Step 2.
Now add basic details. On the front of the machine, sketch long polygons of the front headlights. Just below add the lines of the lattice. From the bottom of the sports car. Draw the wheels, and on the side - side windows.

Step 3.
The main lines of the sports car are ready and now we start working on the details. We use straight, rich and clean lines and output headlights.

Step 4.
Let's go down slightly lower and draw the bumper and the radiator grille lines.

Step 5.
Now slightly higher, draw the hood lines. We also need to draw the logo of our sports car in the center of the hood.

Step 6.
We climb even higher and draw the roof and stele of the machine. Since this is a sports car, the roof should be very low and under the tilt.

Step 7.
We draw side windows and a long-range mirror. Another distinguishing feature of sports cars is narrow side glasses.

Step 8.
Add the lines of doors and door handles, also draw the back of the car, the air intake next to the wheel.

Step 9.
The most difficult step - you need to draw the wheel and the arches of the wheel. Lines must be round and smooth. It should be remembered that in contrast to ordinary cars, sports have large and wide wheels.

Step 10.
We got to the last stage, namely, we need to draw automotive drives. We have chosen such a type of discs, but you can choose your own.

How to draw bmw

Here we will draw a BMW car 7 step by step!
BMW The most common car brand in the world and is one of the favorite brands of cars of many people for many years. This brand is always competing another German automotive company - Mercedes-Benz.
Step 1

First draw the main Lines of BMW as an example. Pandel a pencil slightly to get soft lines. Remember, the lines should not be perfectly the same.
Step 2.

On the front of the car, sketch long headlights and the famous BMW grille. After, depicting the arches of the wheels, the wheels, doors and glasses. Lines are the same, should be very easy.
Step 3.

And now, carefully distort the headlights and grille. As you already know, the BMW grille is divided into two parts and reminds nostrils.
Step 4.

Using a long and curved line draw the hood. Then, bumper, fog lights and license plate. Do not forget to erase all the initial lines that we painted on the steps 1 and 2.
Step 5.

Refine the arches of the wheel using semi-walled and the wheel in the form of oval. Inside the wheel, add the rim in the form of another oval.
Step 6.

Outline the roof of the machine. Try to lead the line pure and smoothly. Exercise the windows, as shown on the example and draw the rearview mirror.
Step 7.

Finish to draw doors and door handles. Draw the bottom of the car and molding. Draw the trunk of our BMW and rear wheel, as well as we painted the front.
Step 8.

The last step remained to complete the drawing of our BMW. You need to draw wheels (you can use any form of disks), add parts and lines inside the radiator grille.
How to draw Range Rover

And in this lesson we will show how to draw Range Rover.
As you know, Range Rover is a full-sized, luxurious and all-wheel drive SUV. He is produced by the British company Land Rover and is the flagship model of the company.
Step 1
The first thing we draw a sketch of the "body" of our car, visually it is two parts - top and bottom. Please note that in this lesson for drawing Range Rover will be used a lot of straight lines /

Step 2.
Now, with the help of straight lines sketch the grid and the front part. The following, draw wheels, arches and a distant mirror.

Step 3.
At this stage, we will start using clear lines. Using straight lines, we draw the front headlights and the radiator grille, which is between the headlights.

Step 4.
Draw a hood with a clear and straight line. After, add a bumper, an additional radiator grille and fog lights.

Step 5.
Moving to the top of our Range Rover. There will also be a lot of straight lines, with the help of which we draw the roof and windows of our SUV. At the same stage, I drew the mirror.

Step 6.
Continuing the line of windows on the side of the Draw the doors. Following the roof lines, the back of the car. Further, add the back headlights and door handles.

Step 7.
Moving to wheels. But first draw the arches of the wheels, and then using smooth lines sketch yourself. They must be the same.

Step 8.
And the last stage, you only need to trick discs. In our example, you can see discs in the form of five rays, but you can use any. Also, you can add a hatching.

So, our Range Rover is ready. If you like our lesson, do not forget to visit our other lessons!
How to draw Mercedes-Benz SLC

We really like cars from Mercedes-Benz and we know that you like no less.
Here we want to continue to draw cars of this brand. As you already guessed, here we draw Mercedes-Benz SLC.
Step 1
First, draw the sketch of the "body" of the machine with light lines. Note today we draw a car without a roof. So, the first step of this lesson will be different.

Step 2.
Now add the basic lines and parts of the case of our Mercedes-Benz SLC. On the front, we draw headlights, grille and bumper. Next, draw wheels, mirrors and seats.

Step 3.
Starting from this stage, we will use clear and dark lines. With the help of these lines, we draw the grille and headlights. In the center of the radiator lattice, we depict a large Mercedes-Benz logo.

Step 4.
We continue to refine the front part of the Mercedes-Benz SLC. You need to try the bumper, license plate and hood line. Now you can erase all unnecessary lines of the machine.

Step 5.
Now moving to the top of the car. Continuing the hood line Dorisize the windshield. Then, deny the visible parts of the seats and the rearview mirrors.

Step 6.
And now we need to try the back of the car. Draw the door and door handle. Do not forget to add air intake on the side of the housing.

Step 7.
Now you have to try, since we will be wheels and arches. They must be the most round and smooth, as on our example.

Step 8.
Now we will draw discs. Please note that we drew classic Mercedes-Benz cars, but you, of course, can draw any disk design that you like.

Step 9.
Using intersecting lines, create a radiator grille texture. Then add shadows and glare using a dense hatching, as we did.

If you definitely follow our instructions, now you know how to draw Mercedes-Benz SLC. Do not forget to write your opinion about this lesson in comments or social networks.
How to draw Tesla Model s

Finally, a lesson: how to draw Tesla Model S. This is probably the most advanced machine of our time.
This car is very different from stylish cars such as Mercedes-Benz, BMW or Ferrari is the world's first full-fledged electric car.
Step 1
At the first stage of car drawing lessons, we always find the main contours of our future car. Apply very soft and smooth lines at this stage.

Step 2.
It is also a very standard pitch of all our car drawing lessons - we draw wheel arches with curved lines, and the wheels themselves - with the help of oval.

Step 3.
So, it's time to add details. And, as always, we will start doing it from the front of the car. First, refine the headlights and the hood.

Step 4.
Dorisinate oval radiator grille with the Tesla logo inside. Just below, continue to draw additional radiator lattices. But it is worth noting that these are just unreal grilles of the radiator.

Step 5.
We rise slightly above and draw the roof using a smooth curved line. Next, draw windows and side mirrors.

Step 6.
Continue the roof line and draw the trunk. Run slightly lower and draw the doors of our Tesla Model C and the bottom edge of the car. At the end of this stage, draw unusual door handles.

Step 7.
Very carefully draw the wheeled arches and wheels inside the arches. Please note that the lines should be as smoother as smooth.

Step 8.
A very simple step in which we draw wheels wheels (they can be of any form) and add shadows using hatching.

Well, our drawing lesson about how to draw Tesla Model S, walked over to the end. Share this and other lessons and subscribe to us on social networks.