Online photo editor to make pencil drawing. How to take a photo as drawn with PhotoShop
Read also
Good day to all, Dear friends, readers and everyone who came to my blog. Firstly, I congratulate you on a wonderful holiday - Happy Great Victory! Our grandfathers and grandmothers kicked the ass of the fascists in their time. And that's cool. There is a reason to be proud of Our Country (and not even one)! Well, secondly, let's get down to business. I just recently saw a portrait of a friend of him, drawn in pencil. And I thought: “But it's very cool to have your own pencil drawing».
But unfortunately, not everyone has such an opportunity: either they are too lazy to do it, or do not want to spend extra money, or there is simply nowhere, etc. But I want to please you. This process can be imitated, and I will be happy to show you how to make a drawing from a photo in Photoshop easily and in just a couple of minutes. It may turn out not one to one, but believe me it looks just great. So knead your fingers, crunch them and go!
- Open the image in our favorite editor and immediately duplicate the layer. To do this, press the key combination CTRL + J... Created exact copy layer? Fine!

- We need to desaturate the newly created layer, i.e. ... The easiest way - go to the menu "Image" - "Adjustments" - "Desaturate". Is the photo b / w? Fine.

- Now let's duplicate another layer, only this time we will not duplicate the original, but a black and white copy.
- The newly created copy needs to be inverted. To do this, go to the menu "Image" - "Correction" - "Inversion" or just click CTRL + I... Do not be alarmed that the picture has become negative. It should be so).

- Now, without leaving the negative layer, open the list of blending options and select "Lightening the base"... Everything should be filled with white light, but don't be alarmed, as Elena Malysheva says: “This is the norm!”.

- Now we go to the familiar filter "Gaussian blur"... If you do not remember where it is, then go to the menu "Filter" - "Blur" - "Gaussian blur"... Now move the slider so that it looks like a pencil sketch. I have this value equal to 2, but there is no standard here, so adjust as your case yourself.

For good reason, we already have a good imitation of a pencil drawing, but if you wish, you can do it even better. Want to? Then we look further.

In general, this is how we get a pencil drawing. There are, of course, other methods, and to be honest, they are more realistic, but also more complex, so I will talk about them in other articles. Well, how do you like this imitation? Has the right to life? I think yes.
But if you are still poorly versed in Photoshop and want to quickly learn it, then I recommend that you learn this video course... There is everything you need, and you watch everything in the format of video tutorials, which is much more convenient than text. In addition, everything is told in simple understandable human language in order from easy to complex. In general, be sure to take a look.
Best regards, Dmitry Kostin.
Photo stylization is always very entertaining for beginner (and not so) Photoshop photographers. Without long prefaces, I will say that in this lesson you will learn how to make a drawing from a photograph in Photoshop.
The lesson does not pretend to be any artistic value, I'll just show you a few tricks that will allow you to achieve the effect of a hand-drawn photo.
One more note. For a successful photo conversion, it should be enough big size, since some filters cannot be applied (they can, but the effect is not the same) to small images.
So, open the original photo in the program.

Make a copy of the image by dragging it onto the new layer icon in the layers palette.

Then desaturate the photo (the layer we just created) with the keyboard shortcut CTRL + SHIFT + U.

Make a copy of this layer (see above), go to the first copy, and remove visibility from the top layer.

Now we proceed directly to the creation of the picture. Go to the menu "Filter - Strokes - Cross Strokes".

Using the sliders, we achieve approximately the same effect as in the screenshot.


Then go to upper layer and turn on its visibility (see above). Go to the menu "Filter - Sketch - Photocopy".

As with the previous filter, we achieve the effect as in the screenshot.


As a result, we get something like this (remember that the results will be fully visible only at one hundred percent scale):

We continue to create the effect of the picture in Photoshop. Create an imprint (merged copy) of all layers with a keyboard shortcut CTRL + SHIFT + ALT + E.

Then go to the menu again "Filter" and select the item "Imitation - Oil Painting".

The applied effect should not be too strong. Try to keep as much detail as possible. The main starting point is the model's eyes.


We are coming to the end of the stylization of our photo. As we can see, the colors in the "picture" are too bright and saturated. Let's correct this injustice. How to create an adjustment layer Hue / Saturation.

In the opened layer properties window, muffle the colors with the slider saturation and add a little yellow color on the model's skin with a slider color tone.

The final touch is a canvas texture mapping. Such textures can be found in huge quantities on the Internet by typing the corresponding request in the search engine.
Drag the textured image onto the model image and, if required, stretch it across the entire canvas and click ENTER.

Change the blending mode (see above) for the texture layer to "Soft light".
Here's what you should end up with:

If the texture is too pronounced, then you can lower the opacity of this layer.

Unfortunately, the requirements for the size of screenshots on our site will not allow me to show the final result at a scale of 100%, but even at this resolution it is clear that the result, as they say, is obvious.

This concludes the lesson. You yourself can play with the strength of the effects, the saturation of colors and the imposition of various textures (for example, you can overlay a paper texture instead of a canvas). Good luck with your creativity!
Than only people do not seek to surprise each other by posting photos, for example, on Instagram: sunset at sea, outlandish animals close-up, cute couples, etc. But one of the most big problems user social networks- Exposure of the entire account in one style.
To solve this "problem", there are many applications or sites on the Internet. Your photos can be easily turned into paintings painted with watercolors, oils, acrylics, pencils and in absolutely any style - whether it be portraits of Van Gogh or masterpieces by Chagall.
Quite often people go the simple way and turn photos into pencil sketches, without using fancy programs like Photoshop. A special site found in a search engine can help make your photo a wonderful pencil drawing.
How to make a pencil sketch from a photograph
Turning a photo into a pencil drawing is easy enough - you just need to find a web resource that suits your needs. Maybe you just need to edit the photo in order to put it on your personal blog, or maybe you need to create a whole collage in a frame, in one style.
In this article, we will consider two options for solving this problem, using resources such as Pho.to and PhotoFunia.
Option 1: Pho.to
The proposed site contains a fairly extensive functionality and at the same time you can work directly in the browser without buying paid subscriptions and without downloading additional software. "Photo Effects", the section you need, allows you to automatically select an effect suitable for the photo. This section, in turn, has subcategories - the Pho.to website has many options for processing a photo. The photo effect you are looking for is obviously in the subcategory "Art".

This service is good because the processed photo is converted into JPG format and different high quality... The site contains many additional photo effects with several variations. For example, there are several options for the pencil drawing effect.
Option 2: PhotoFunia
This online resource does not work out your photos, but, as it were, pastes them in, stylizes them for a given environment. There is a whole category of effects that can be applied to pictures - and almost all of them place your photo on a specific third-party object.
Again, PhotoFunia provides the ability to "transform" your photo into a painting, even in several versions.

PhotoMania is a very popular service that processes great amount images every day. And with such a load, processing delays are minimal.
The site presents a large number of effects that will turn ordinary photos into extraordinary frames.
The services discussed in this article allow you to creatively process a photo. You can spend a few seconds to get masterpieces, while using professional services or utilities would have spent much more time and effort.
Let's consider how you can make a drawing from a photo using image editors or mobile converters.
Follow the instructions:
1 Open the photo you want in Photoshop and add a new layer of hue and saturation. To do this, find the style display panel in the program window and click on the tab Adjustments;
2 Click on the "Hue" icon shown in the picture below(hue-saturation);

3 A new layer will appear in the layers tab Hue-Saturation... This layer is an adjustment layer and allows you to change the color palette and structure of the photo;

4 Click on a new layer. A window for setting its parameters will appear. In the Saturation field, set value "-100"... This will reduce the saturation of the image;

5 The picture will now turn black and white. Next, you need to select the background layer. Click on it in the window Layers;

6 The next step is to duplicate the existing background layer. In the program header, click on the Layer tab. In the drop-down list, click on "New Layer" - "Layer via Copy";

7 As a result, on the layer display panel a copy of the background will appear;


As a result, the picture should be displayed as negative.
9 Let's change the overlay type of the layer. Select a copy of the background layer and activate the Color Dodge mode. This is necessary to brighten the base. The picture turns white with a few dark areas displayed;

10 Now we need to make a smart object from the resulting layer. Click on the duplicate background and then click on the button Layer menu;

11 In the drop-down list, convert the item to "Smart Object"... After that, an icon will appear next to the layer preview, which indicates the assignment of a smart shortcut to the object.

12 To apply a filter, click on the "Filter" menu. Then go to the tab "Blur" and select "Gaussian Blur". In the opened window, set the Radius value to 12.0 pixels. Save the settings;

The outlines of the silhouette will appear in the photo and the image will become exactly the same as the drawing we are used to.

If you want to add color to the picture, set the "Color" mode in the layer settings window. As a result, the layer will automatically accept color range original image.

EditorGimp
Gimp Is one of the most popular alternatives. In terms of its functionality and processing capabilities, GIMP is not inferior to professional paid applications.
Photo processing can be performed in any version of the program.
The process of converting a picture itself is simple and will take no more than 5 minutes.
First, open the original image in the program and desaturate. Click on the Color menu tab and select Desaturate.
Now copy the background layer and now work exclusively on the copy.
When wrong setting or to revert to an action, you can always go back to the original version of the layer.
Open the "Filter" menu tab and click on Edge selection- "Edge".
In the window that opens, configure the following parameters:
- The base of shades of gray is "Lightness";
- Algorithm - "Laplace";
- The value is "2.0";
- Action - "Blur".
Save the settings. As a result, the edges of the picture will take on the shape of the picture.

The only thing left to do is to invert the picture to get a realistic art design.
Click on the "Color" tab in the program header and select "Invert". The result of the action:

StandardPaint. NET
PAINT.NET is a standard graphics editor for Windows.
The convenience of working with this desktop program is that you do not need to install and configure it.
Everything is ready to go, and thanks to the simple functionality, even an inexperienced user can process a photo and turn it into a drawing.
A hand-drawn image from any photo.
Photo "Before" and "After" processing:

Follow the instructions:
1 Open the original image in the editor;
2 Copy the base layer of the photo and select an inline effect for it "Oil painting"... This option is available in all versions of the program;
3 In the appeared window for adjusting the parameters, set the appropriate blur value. Also. We recommend experimenting with brush sizes and strokes. You can always delete the copied layer and reuse the main one;

5 The bas-relief allows you to create clarity and boundaries of the drawing. To take away grey colour from a duplicate layer, in the settings window "Layers" click on "blend mode" and select "Overlapping".
In this article, I will tell you how, without much investment of time and any in-depth knowledge and tricks, to turn a portrait photography into a pencil drawing (sketch).
In this article I will be using Photoshop CS6, but the steps and commands used in this article will work for all versions of Photoshop up to CS3.
Below I have given an image with the original and the finished result. In the picture on the left you see the original photo, and on the right is the final image that we will get after applying the actions described in the article:


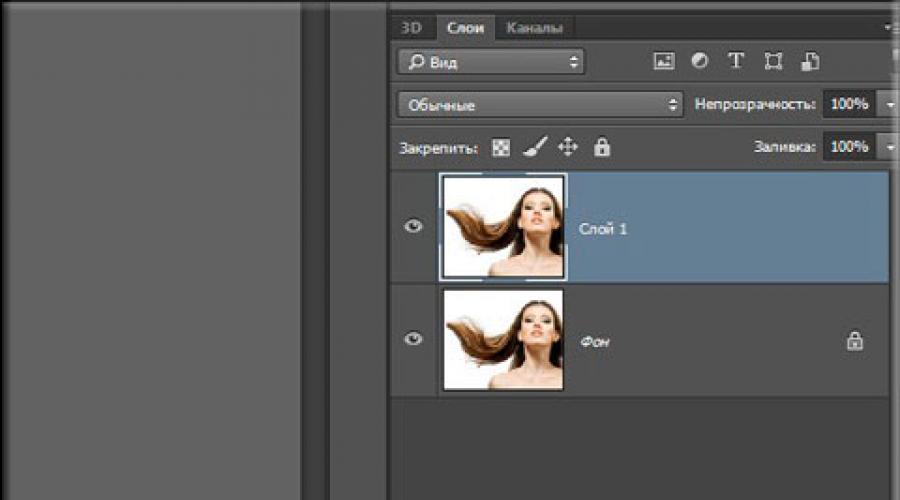
The first thing we will start with is making a copy of the original image. Open the photo in Photoshop, then open the layers palette (press F7) and press the key combination Ctrl + J, after which the background layer will be duplicated:

The copy will be positioned above the background layer and highlighted in blue, which tells us that this layer is active. Everything further actions we will produce with this copy of the image, leaving the original intact.
Now we need to desaturate the image. To do this, go to the main menu tab Image -> Correction -> Desaturate (Image -> Adjustments -> Desaturate) or just press the key combination Ctrl + Shift + U.
Now we need to create a duplicate of the black and white layer, in this moment we have it active (highlighted in blue), so to duplicate, press Ctrl + J again:

Invert the colors of the layer. Go to the main menu tab Image -> Correction -> Invert (Image -> Adjustments -> Invert) or just press the key combination Ctrl + I.
In our case, this action inverts the brightness values, which makes the light areas dark, and the dark ones - light, in other words, we get a negative of the photo:

Change the blending mode of this layer to "Color Dodge". This will fill the working document window with white. Depending on the image of your photo, there may be black areas in some places, but most of the document will be filled with white:

Now go through the main menu tab Filter -> Blur -> Gaussian Blur (Filter -> Blur -> Gaussian Blur)
This opens the corresponding filter dialog box. Start moving the Radius slider to the right and you will see the sketching effect begin to appear in the document. The further you move the slider, the more the blur effect will be applied and, accordingly, the intensity of the sketch effect will increase. However, if you move the slider too far, halftones will appear and the pencil drawing effect will disappear. In my case, I settled on a value of 12.5 pixels:

Right-click on the active (top) layer, this will open a context menu, in which hover the mouse cursor over the "Merge Visible" item, hold down the Alt key and left-click on this item. Thanks to holding Alt, we will have a new layer consisting of two merged upper (visible) layers. With this manipulation, the appearance of the photo in the working window of the document will not change. This is how the layers palette will look like:

Change the blending mode of this new layer to Multiply, this action will darken the lines in the sketch. If you find the lines are too dark, lower the Opacity of the layer. For myself, I lowered the Opacity to 50%:

At this stage black and white drawing ready, and if you just need a black and white drawing from a color photo, then you can stop. If you want to add colors to the sketch, then follow the steps below.
So, let's continue. Make a copy of the background layer located at the bottom of the layers palette, for which we left-click on this layer and press the Ctrl + J combination, while a new layer will be created directly above the original.
But we need this layer to give colors to the sketch, so drag it to the very top in the layers palette with the mouse.
Now all that remains is to change the Blending Mode to Color and lower the Opacity, in my example I set the Opacity to 65%:

Take another look at the final result: