Photoshop pencil drawing. How to make a realistic painting effect in Photoshop
Detailed lesson to turn ordinary photography into hyperrealistic painting in just a couple of minutes.
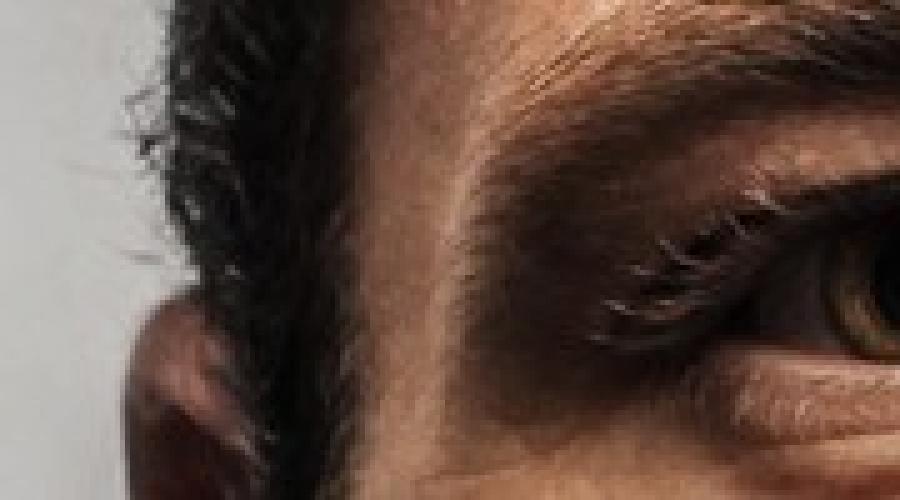
Some talented artists can paint in the technique of hyperrealism, but we, mere mortals, can only dream of it. Fortunately, there is Adobe Photoshop where you can create all kinds of cool effects and simulate hand-drawn styles. We found a great tutorial from Chris Spooner, designer and founder of Blog Spoon Graphics. It shows how you can make a real work of art from a simple portrait photo in just a couple of minutes with detailed strokes and highlights.

Of course, in the example of Chris, everything looks really masterpiece, but in Photoshop a lot depends on the original photo, and the effects that work great with one photo are not always suitable for another. Therefore, we decided to take a portrait of a slightly different quality and try to do all the same manipulations in the hope of getting something similar.

1. So open your chosen photo in Photoshop and add a Curves Adjustment Layer. We need to shade the shadows a bit and lighten the highlights to give the photo more contrast.

2. Press Ctrl + J to duplicate the background layer twice. Then add the High Pass effect from the filters menu to the top of the duplicates.

3. Adjust the radius of the High Pass filter between 1-3 px. This will be enough to create the desired effect. Larger radii can result in unwanted noise and halo.

4. Change the blending mode of the High Pass filter layer from Normal to Linear Light to make the photo sharp. The increased sharpness ensures precise strokes, especially on the hair.

5. Now merge the High Pass layer with the duplicate background layer below to solidify the resulting effect. This can be done using the MergeVisible command from the layers menu. Just to begin with, leave visible only the two layers that you are going to merge. After that go to Filter> Stylize> Diffuse.

6. Change the blur mode to Anisotropic - this is the key moment that actually creates this magical picture effect.

7. If you look closely at the result, you will notice ugly seams that scatter and repeat. But there is a way to solve this problem.

8. Go to Image> Image Rotation> 90 ° CW to rotate the image and press Ctrl + F (Cmd + F) to redo adding the diffuse filter.

9. Rotate the image again and apply the diffuse filter again. Repeat this step a third time to return the photo to the correct position.
10. The diffuse filter perfectly imitates the brush, but at the same time it blurs the image a little. Go to Filter> Sharpen> Smart Sharpen to add clarity. Set the Threshold value to around 100, but use a small radius so as not to overdo it.

11. The result already looks impressive, but you can make it even more interesting. Select Surface Blur from Filter> Blur and set the Radius to around 20 and the Threshold to around 15 (as you can see, a Radius value of 40 blurs the picture a lot) This will create flat areas and give the photo an even more painted look.

12. Well that's all, our Santa has turned from a photograph into a hyperrealistic painting. From a distance, one might think that this is still a photograph, but if you look closely, you will notice the numerous strokes and transitions inherent in painting.

We hope you enjoyed this tutorial as much as we did - a couple of simple manipulations to achieve a stylish effect. This can be useful to you for the contact section on the site, for example, when you need to combine different photos something in common to achieve harmony.
You can watch the original lesson by Chris Spooner. © PressFoto / Hasloo
Good day to all, Dear friends, readers and everyone who came to my blog. Firstly, I congratulate you on a wonderful holiday - Happy Great Victory! Our grandfathers and grandmothers kicked the ass of the fascists in their time. And that's cool. There is a reason to be proud of Our Country (and not even one)! Well, secondly, let's get down to business. I just recently saw a portrait of a friend of him, drawn in pencil. And I thought: “But it's very cool to have your own pencil drawing».
But unfortunately, not everyone has such an opportunity: either they are too lazy to do it, or they do not want to spend extra money, or there is simply nowhere, etc. But I want to please you. This process can be imitated, and I will be happy to show you how to make a drawing from a photo in Photoshop easily and in just a couple of minutes. It may turn out not one to one, but believe me it looks just great. So knead your fingers, crunch them and go!
- Open the image in our favorite editor and immediately duplicate the layer. To do this, press the key combination CTRL + J... Created exact copy layer? Fine!

- We need to desaturate the newly created layer, i.e. ... The easiest way - go to the menu "Image" - "Adjustments" - "Desaturate". Is the photo b / w? Fine.

- Now let's duplicate another layer, only this time we will not duplicate the original, but a black and white copy.
- The newly created copy needs to be inverted. To do this, go to the menu "Image" - "Correction" - "Inversion" or just click CTRL + I... Do not be alarmed that the picture has become negative. It should be so).

- Now, without leaving the negative layer, open the list of blending options and select "Lightening the base"... Everything should be filled with white light, but don't be alarmed, as Elena Malysheva says: “This is the norm!”.

- Now we go to the familiar filter "Gaussian blur"... If you do not remember where it is, then go to the menu "Filter" - "Blur" - "Gaussian blur"... Now move the slider so that it looks like a pencil sketch. I have this value equal to 2, but there is no standard here, so adjust as your case yourself.

For good reason, we already have a good imitation of a pencil drawing, but if you wish, you can do it even better. Want to? Then we look further.

In general, this is how we get a pencil drawing. There are, of course, other methods, and to be honest, they are more realistic, but also more complex, so I will talk about them in other articles. Well, how do you like this imitation? Has the right to life? I think yes.
But if you are still poorly versed in Photoshop and want to quickly learn it, then I recommend that you learn this video course... There is everything you need, and you watch everything in the format of video tutorials, which is much more convenient than text. In addition, everything is told in simple understandable human language in order from easy to complex. In general, be sure to take a look.
Best regards, Dmitry Kostin.
AKVIS Sketch allows you to turn a photo into a pencil sketch.
Now you do not need to masterfully own a pencil to create an original work of art.
It is enough to have a little imagination and AKVIS Sketch!
The program turns photographs into sketches made pencil or coal, allows you to create not only black and white pencil sketch, but also color drawing and also get the effect of watercolors and pastels.

The drawings created by the program can compete with the real works. Sketch lets you get amazingly quality result, similar to the work of an artist.
If you've always dreamed of learning how to draw, but didn't know how, try AKVIS Sketch!


The program features two main styles that allow you to create drawings with different types shading: Classical and Art... Each style comes with a selection of ready-made presets.
An intuitive interface, the ability to select parameters using a quick view window, a tooltip bar and a rich collection of presets will help you quickly get used to the program and learn how to create your own masterpieces.

The transformation of a photo into a drawing takes place before your very eyes. Frame tape allows you to track the process of converting a photo at different stages and get drawings of different degrees of elaboration without changing the effect parameters.


Using the program, you can prepare illustrations for a book or article, create a unique greeting card, an interesting avatar, a poster or a picture on the wall, a print for a t-shirt.
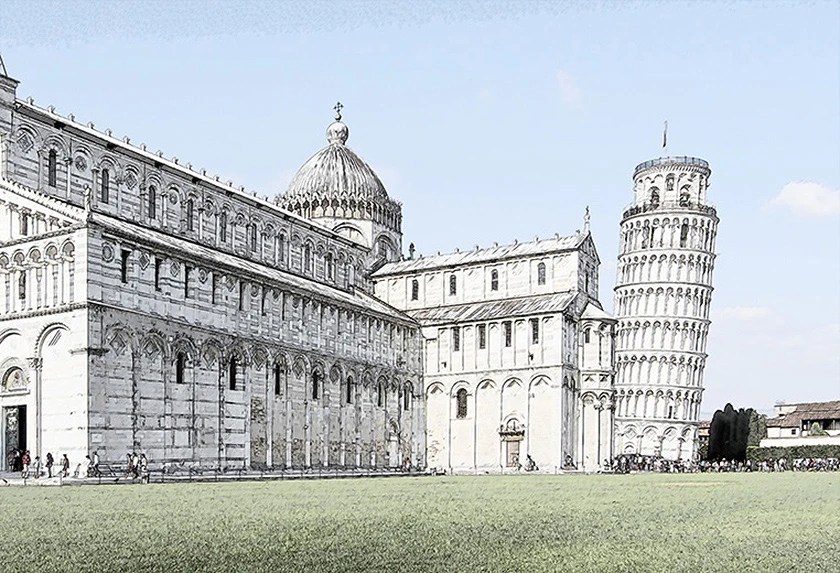
The program is good not only for processing portrait photographs, but also types of nature, architectural monuments. Sketch is used by professionals to demonstrate the features of architectural styles, prepare presentations. The program is indispensable when working on an advertising brochure or website, when you need to present a set of images in the same style.
AKVIS Sketch makes everyone feel like an artist!


Batch processing of files helps to quickly, in automatic mode, turn into drawings great amount photos, create cartoons, comics.
Using bookmarks Background, Canvas and Inscription you can add additional effects to the image: get a combination of photography and drawing, simulate drawing on a different kind
In this simplest lesson, I will show you the technique of how you can make a drawing from an ordinary photo using Photoshop, as if drawn with colored paints. The bet is on the circled edges. It turns out that at first the drawing was sketched with a pencil, and then painted over, leaving the underlined outline of the contours.
Original Image:
Final result:


Step 10
Activate the bottom black and white layer and set the blending mode or, depending on how your photo looks like.
With mode Overlapping:

With mode Soft light:

To lower the intensity of the color, you can lower the value on the second black and white layer or on the background layer.
TOTAL
The finished result should look something like this:
When choosing a photo for processing, please note that the best way This tutorial allows you to stylize images with nature or flowers. Also, images made using macro photography are suitable for the lesson. Editing portraits or photographs of animals is likely to be less dramatic.
If you noticed an error in the text, select it and press Ctrl + Enter. Thanks!
What if you don't know how to draw either with a pencil or with a computer mouse, but you want to create a digital drawing? Today, many people are interested in the question of how to take a photo as drawn. The answer to it is quite simple: all that is needed for this is to carefully study the material provided in this article and apply the knowledge gained in practice.
Let's talk about art
V old days Capturing the moment required an artistic talent and a long learning curve, but nowadays there is such a thing as photography, so it is not necessary to be able to draw. Thanks to modern technology we can instantly create our little works of art. Well, the presence of all kinds of graphic editors opens up a wide range of possibilities for creativity by drawing and processing photos and applying a variety of effects.
How can you draw a photo?
There are several different ways how to turn a photo into a real drawing. The easiest one is to convert photos directly in your browser online. It is clear that all the settings available there are general and cannot be adjusted for each photo. The second, more productive way is to use programs specially created for such purposes. On the Internet there is a large number of different editors aimed precisely at turning a picture into a semblance of a drawing. The number of available settings will already be greater, and you will be able to achieve an acceptable result. In the best way use of a graphics editor like PhotoShop (hereinafter - "Photoshop") is considered. In this case, photo editing takes place under your personal control, which means that the final product will be optimal.

Of course, you will get the most impressive result by ordering a portrait or landscape from an artist, but our goal is to familiarize yourself with the work of the editor so that everyone can easily understand how to take a photo as drawn. So we will leave the work with the brush to the artists, and we ourselves will deal with the principle of work of "Photoshop". There is nothing complicated in the task at hand: if you carefully read the instructions and step by step perform all the indicated actions, then everything will work out easily. The end result will be pleasing to the eye, and you will be able to learn something new.
drawn in pencil, in Photoshop?
There are many possibilities to make from using Photoshop tools. First, let's look at the easiest way, after which the photo will turn into black and white drawing pencil.

Working with paints
How to take a photo as painted with paints? With the help of a special filter developed by Adobe, which is freely available on the Internet - Pixel Bender. In the Ps6 version, it is already preinstalled, and in the Russian version it is called “ Oil paint"And is located in the top menu in the" Filter "column.
This effect looks especially good on photographs of some places: old buildings, landscapes and still lifes. You can also apply it to photographs of a person, but the result can be ambiguous.
Using this method of editing is even easier than the previous one: you just open the desired photo, then go to the top menu "Filter - Oil paint ...", after which an additional filter window opens, in which, changing the settings, you immediately see the future result. Two main parameters change - brush properties and lighting. The final picture turns out to be very beautiful, and most importantly, it seems that it is really drawn with brushes and paints.

And finally
As mentioned above, there are many options for how to take a photo as drawn, how to create a truly memorable drawing in the way of photo manipulation. You can achieve the effect of a cartoon, caricature, comic, painting, sketch. The list can be continued as long as your imagination lasts. The possibilities in the environment of graphic editors are almost endless - you just need not be afraid to learn. Install PhotoShop, start simple, work your way up gradually, and you will achieve great results!