Oco drawing with a pencil. Draw a human eye
Eyes is a man's soul mirror. Draw them realistic - very subtle business. It is about this that we will talk to this article. You will learn about how to draw
It is necessary to pay attention to every detail, otherwise the result will be unnatural. Prepare everything required tools: Acute pencil, eraser with a thin end and sheet of paper. Now consider how to draw realistic eyes.
In order to come out desired resultThe artist must understand it is a small sphere that is in the eyeboy and covered in centuries, the gap between them is the eye crack. The inner corner, which is closer to the nose, is always rounded and has a sharp end. The external is the one that closer to the corner must be pointed. The top eyelid should be at the level or slightly above the pupil, it slightly covers if you draw the pupil and in the center of the eye slit, then the eyes will look screamed, the drawing will be unnatural.
How to draw eyes a pencil
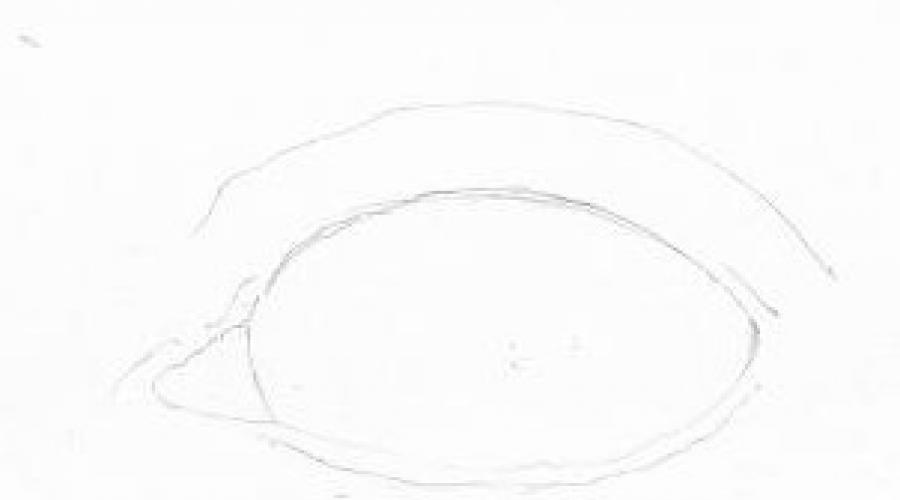
So, proceed to work. The visual body as a whole resembles an ellipse. We carry out the following actions:
1. Very light strokes begin to make sketches of the eye as shown in the picture.

If you are interested in the question of how to draw the eyes of the girl, follow the instructions below:
- the upper eyelid from the inner corner of the eye and the lower eyelid from the outer corner of the visual organ is a straight line equal to about 1/3 of the length of the visual organ;
- if spending horizontal line In the center of the eye, the external angle of the century will be slightly raised, which is not mandatory in drawing, but may give a look like a slight chin;
- the area of \u200b\u200bthe upper eyelid from the inner corner should be a little concave, which will give the refinement of the drawing.
2. Considering all the above, we create an outline of a rainbow shell, pupil and glare. Sharching as it shows the picture below.

3. Now you need to paint the darkest sections of the eye. First of all it is a pupil. Do not forget to leave a glare on it! Look at the original pattern and dictate the necessary places in your work.

4. Create dark rays, spending thin lines with a sharp pencil.

5. Slightly grow your finger with a rainbow shell, but do it very carefully.

6. Now take the eraser. His sharp end add several natural light races on the rainbow shell.

7. The artist who knows how to draw the eye with a pencil realistically, should understand that the eye protein cannot be all absolutely white! Add a little gray.

8. Now work with the centuries: add them dark and light tones, then we grow.

9. Now draw top eyelashes. They should be slightly arcuate and be sure to have a different length. They grow from the upper eyelid and eclipses slightly above the lower.

10. Light movements Create thin bottom eyelashes. If you are interested in how to draw your eyes with a pencil, so that they come out natural, it is important to know the following: eyelashes cannot be perfectly smooth. They are somewhere stronger, somewhere casually lie. This is a particle of natural beauty.

How to draw an eye with a pencil. Eyebrows
1. Make eyebrow sketches.
2. Strike and grow in the area under them until the upper eyelid. By the same principle, an area under the lower eyelid is processed.
3. Picture the main hairs, then add a bit small.

4. Slightly grow in your eyebrows.
Now you know one of the ways to create realistic eyes. You will definitely work out!
The most difficult thing in drawing a realistic eye is:
Compliance with all proportions;
Drawing a realistic pupil eye;
Drawing eyelashes.
In this article we will teach you to draw all these difficult moments.
Drawing realistic eyes - the task is not simple. In this case, the eyes have to draw quite often. We start drawing an eye with a pencil from the main lines (they must be thin, since then we will move them). Carefully look at the image, when redrawing, observe all the proportions, as it is very important. Our eye looks like a little up. When you understand the basic principles, you can draw your eyes as you need.
The pupil on the contour is described by a pencil (darke the contour) - we do this by the transition. The pupil is the darkest place, and closer to the outside - everything is lighter and lighter. It is best for these purposes a very soft pencil.

Now draw the inner part of the big circle. It is very important that strips and stains are located in a circle. Look at the picture below and try to repeat all the dashes and stains just like in the picture.

Next, you darken and hatch the entire surface of the big circle - try to achieve maximum realistic effect. Please note that some areas of the eyeball are darker, and others are lighter. This effect needs to be reflected in your drawing.
Fully paint the pupil with a pencil and remove the auxiliary circular lines.

Shed some parts of the eye to give volume.

We draw the bottom eyelashes. Do this exactly as we have in the picture. The growth line of eyelashes should not be perfectly smooth. Eyelashes are starting to grow under the bottom auxiliary line, and not on it. If you draw an eye for the first time, it is best to repeat each cilia. In the future, you can draw eyelashes without visual tips.

Draw the upper eyelashes. Do this exactly as we have in the picture. The growth line of eyelashes should not be perfectly smooth. The eyelashes begin to grow over the upper auxiliary line, and not on it. Eyelashes draw quite difficult. Each cilia is drawn separately - they will take a lot of time on them, but it is good and plausible to painted eyelashes make a picture of the eye with a pencil as spectacular as possible. For a better effect, squeeze the pencil and preference in this case you need to give a gentle pencil.

We remove all the remaining lines of tips so that the eyes look realistic. Something should you get:
Related drawing lessons:

Some think that transfer the image on a sheet of paper - higher artwhich is not available to the average man. Knowing little tricks of skillful artists, everyone will know how to draw eyes a pencil. The humoring body of a person consists of an eyeball, upper and lower eyelid. The eye is drawn in the form of an elongated ellipse, with light bends in the form of a drop near the nose.
The drawing technique is to create additional lines, on the basis of which each part of the body will be painted. First you need to draw 3 concentric circles. The first must have a radius, which is 3 times the radius of the middle circle.

The small circle is the pupil, the second is the rainbow part, and the third will limit the eyelid and the eyebrow line. We draw the line of the upper and lower eyelid in the form of an elongated ellipse. The upper part must close the movable part of the eye. Just below the top arc of a large circle, draw the line of the hindy edge of the century.

Little to carry some lines.

Draw a parallel line of the lower eyelid on which eyelashes grow. Black highlight the pupil, leaving the glare near him. Emboss the iris: draw lines of different lengths in the middle of the eye, follow them.

Around the middle of the century zone. Light strokes pay off each line.

Draw a series of eyelashes in the upper eyelid.

We do the same with the bottom.

It remains to draw eyebrows. It should begin at the level of the nose and a little further half of the eyes make a light bend. At the beginning of the line, we depict several hairs, shadow the zone, carefully separating the hairs in some places.
In this lesson we will look at Basics drawing a natural eye In the profile, in the side and closed. Then teach draw anime eyes Characters B. different angles, as well as consider the examples given different styles eye.
Eyes - Soul Mirror ...
After all, it is they who make all people unique, showing our inner world. And in order to draw them correctly, we will look at the foundations.

Consider a photo of the eye (front view).
This is a real middle-aged person's eye.
At the eyes of the almond shape, on the edge of which they pass, differently long eyelashes, and folds and wrinkles around the eyes emphasize the contours of the eyeball.

In the figure, I pointed out in which direction, from the edge of the eye, go eyelashes. Please note that the eyelashes of the curved shape and different are long. Also, I designated the Long Eyelashes Coka is located around the eye (B-big eyelashes, m- small). Eyelashes are usually higher in the center of the eye and less to the ends of the eye, but at one end (which is further from the nose) can also draw long eyelashes.

Consider a photo of the eye (side view).
Now the main form of the eye is triangular, and not almond-shaped.
The eyelashes of the curved shape and different lengths. In the side of the side, the location of the length of the eyelashes around the eye (B-large eyelashes, m-small) is clearer.


The eye is clearly visible half of the lower part of the almond-shaped form, on the edge of which they pass, different lengths of the eyelashes. Wrinkles on top of the eye emphasize the contours of the eyeball.
Eyelashes, longer than the center and less to the ends of the eye (B-big eyelashes, m-).

Eyes Anime Characters

Let's get acquainted with the basic shapes of the eyes.
With the help of the eye shape, the personality character is expressed. And also note that large eyes with big pupils are mostly suitable for girls and children, narrow eyes with small pupils for guys, men and women, and eyes drawn by one line for the elderly.

Drawing anime eye, always start with eyelashes. Deciding with the form, spend two straight lines that intersect at one point and relate to the edges of the top shape of the eyelashes. So we will define the contours of the apple eyes. Then complicate the eyelashes and draw the pupil.


If you want to draw round shape Eyes, consider the following example.
At the heart of such eyes, I always draw a circle first. Then I am determined with the shape of the eyelashes and complicate them. After that necessarily erase the auxiliary circle. Now trying the pupil.

Eye examples (front view) with different forms For familiarization.

Eye examples (side view) with different forms for review.

Mostly there are two types closed eyes: Flexing eyelashes up and down.
When the eyelashes of eyes are bending, the emotion of happiness, joy and laughter is passed.
Eyelashes with bend down is drawn when kissing, sleep, think, are in calm state.

Examples of closed eyes (front view) with different forms for review.

Examples of eyes closed (side view) with different forms for review.
You can also see how the eyes change, when the emotion rivers, going to the lesson How to draw emotions.
On this I finish the lesson! I hope he will help you in your work!
Eyes are not only the most expressive part of the face, but also an amazing man's soul mirror.
Most often, a person can be found in the eyes. And in order for it to do and on the portrait, you need to know how to draw eyes. Beginners artists often make mistakes when they draw eyes. You can draw realistic eyes Or portray them. Different artists Offer various options About, how to draw eyes a pencil. However, they all adhere to a certain sequence.
Eye location
First of all, you must correctly arrange your eyes on a piece of paper. To do this, draw a horizontal line across the sheet.
Do not press a strongly to the tool, because it will be auxiliary line that will be deleted in the future. Following the line, depict the almond-shaped eye in such a way that on one side of the line narrowed down the book.
Distance between eye

It is important to remember the distance between the eyes. It is believed that it equals one more eye. Therefore, you can measure or light line to draw an auxiliary eye in the middle, lay a second eye, and then remove the auxiliary eraser.
Eyeball
The next step will be the eyeball.

To begin with, remove the horizontal auxiliary line that you drew at the very beginning. Draw a circle inside eye shapes. Remember that the diameter of the eyeball should be equal to the width of the eye. But it is necessary to position it in such a way that there is a small space next to the lower age, and the top of the circle slightly went out of the upper eyelid.
Dailed ductures
No realistic depicted eye will cost without tear ducts.

Consequently, you need to portray them, by spending a line in the place where your eyes approach the bridge.
Borders of century
In order to make the eyes more natural, you need to draw the border of the eyelids, that is, show their thickness.

This concerns the lower century, so it will be necessary to draw on it. Draw the border that comes from the tear duct along the lower eyelid to the outside corner of the eye. Your line should go under the eyeball, but not touch it.
Pupil
Draw a smaller circle that is located inside a previously drawn eyeball.

It will serve as a border separating the rainbow shell and the dark place of the eye, a black pupil. Also, do not forget to draw an arc of the upper eyelid, which should ride the upper boundary of the previously drawn eyeball, but not touch it.
Erase extra lines
In order for the eyes of looking natural, you need to remove the top of a large circle, which goes beyond the upper eyelids and almost concerns its borders.

As a result, it turns out that the rainbow eye sheath is slightly covered with the upper century.

It is time to highlight drawn eyes. To do this, make a more expressive upper eyelid, making it a fastener line. The upper border of the century is also worth highlighting, but not as much as the very eyelid, in contact with the iris.
Iris
Special attention requires a rainbow shell of the eye.

There is no identical eye in nature. Each pair of eyes has its own unique drawing. You also need to portray the drawing on the iris. Draw the rays that proceed from the very depths of the soul, that is, from the black pupil, and strive for the edges of the iris, the upper part of which should be a little darkened.
Glare
In any case, when we draw eyes, we must understand that they have a glossy surface, and therefore reflect the light that falls from some of the parties.

As a result, part of the rainbow shell seems to us lighter, and some part are generally white. In order to reflect it on paper, use the eraser and slightly tap the bottom of the iris, adding the necessary glare. The same must be done with the shadows around the eyes, the upper century and the lacrimal duct.