Draw chicken with a pencil phased with flowers. How to draw chickens - three different options
In a new lesson, I will show how to draw chicken in two different ways. Both will enjoy both children and adults. So let's start!
Option number 1
This instruction explains how to draw a phased chicken with a simple pencil, wovers or paints.
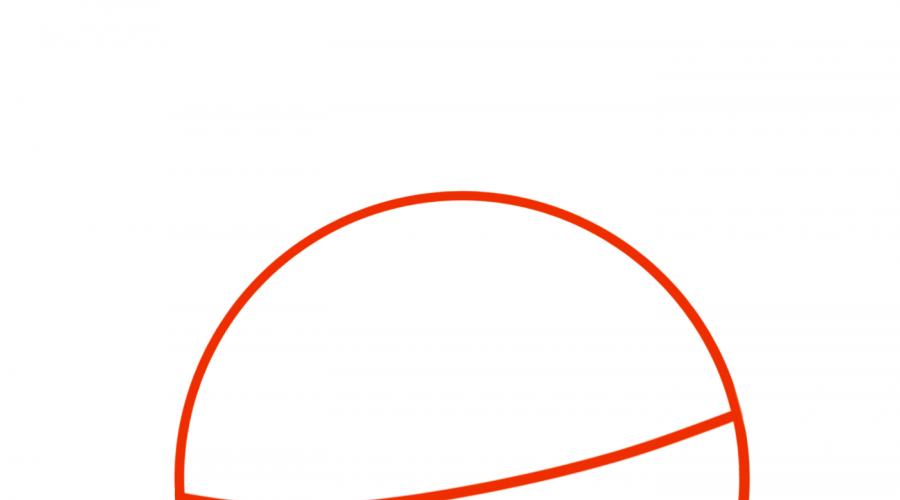
1. Drag two circles

To begin with, build two circles of different sizes, one over the other. It will be a torso and head of our baby. Upper circle divide the curve - eyes will be located on this line.
2. Main contours

Now create a drawing of a pencil chicken. To do this, draw the contours of the head, body, wings and paws with simple short lines. Do not forget about the eyes and beaks.
3. We work out details

Slide your eyes, add minor details, remove the construction lines. Now you know how to draw a chicken in stages of my instructions for children and adults. Go to the color?
4. Coloring

In drawings for children, chicken is always yellow. Krevik and legs can be made orange, but the eye color remains at the discretion of the artist. I chose blue.
5. Background
It's time to take a picture of the picture. I drew the sky and green herbs, but you can stay on something else.
Option number 2.

And now let's see how to draw a hatching chicken in an egg or shell. The second lesson will be easier. It is suitable even to young children.
1. Draw contours

Draw an oval and two paws - it will be the external contours of our chicken.
2. Details

Draw a wing, two eyes, a hooker and a chick of chick.
On a note: Do not try completely copy pictures of chickens drawn here. Let your work be individual!
3. Eggs shell

Add a half broken shell behind the bird. It seems as if our chicken just hatched out of the egg!
4. In the picture
Color the image to your taste. I will make my job gentle, in pastel colors. The chick will be pale yellow, eggshell - pinkish. Abstract background resembles a blue sky and juicy summer grass.
Now you know how to draw a chicken to a child in 5 minutes!
Today our lesson is simple and fascinating. We will learn with you. We have already painted several birds before:
You can try to draw them later. And now we will try to portray this excellent creation:
How to draw chicken pencil
Step one. In the upper left corner, draw a circle. This is the future head. In the center of the sheet will be placed large oval. So that he concerned the head of chicken. Challenge the beak bird with auxiliary line. Draw axial lines of the paws. Here, we got the main details. Go ahead.  Step second. Now we draw a keyboard. In chicken it is completely small and is similar to, only much less. The line, which we already outlined, should be at the bottom of the triangle. From the beak up led the line of the forehead. Next descend around the circle of the head. And on the back of the back, we will show a tiny joke. And now along the entire body of chicken, draw a zigzag line to give fluffy birds. () You can show individual hairs. Find the foot: it is sufficiently massive, with curls.
  Step Three. On the head, as you remember, we drew auxiliary line. We now need to draw eyes at her tip. Large, almond. Immediately paint it, leaving a small bright point - reflection of light. Further outlines the whole body of chicken: chin, neck, wing shape, leg. Zigzag line to get a "gun". Almost like . Extra lines will spend on the breast, on the forehead and on the cheek. Draw a second leg with curls.
  Step fourth. Almost everything is ready. It remains to erase all unnecessary lines. The contour will argue in brighter, and the lines on the body, the very important on the breast, on the forehead and on the cheek, will leave lightly. You can still add a couple of the same by the body.
  Chicken is ready, congratulations! It seems that I want to stroke it ... well, or paint. If you want the classes more complicated, I propose.
How to draw chicken with a pencil in just 5 simple steps, you will learn in our lesson, not only fascinating, but also very informative. Follow all the species of the phased instructions or simply carefully redraw the lines as in the picture.
How to draw chicken in stages
Draw chicken in stages can any child, even if he has no special skills. Find your brightest simple pencil, white paper sheet and erase - start to create!
Print Download

At the very beginning, we promised you that our lesson "How to draw chicken" will be informative, so let's now learn a few interesting facts about chickens.
- Unlucky chickens are reliably protected by a shell - a wonderful invention of nature. The shell is very strong to protect the chick and withstand the weight of chicken, and at the same time fragile so that chicken can break through and hatch. The shell has more than 7000 pores transmitting air.
- Cockerels get out of heavier eggs than chicken.
- Chickens from birth can get used to the presence of a person and consider it with their friend, following him on his heels.
In this lesson, learn how to draw chicken on Easter to then decorate a greeting card. Such a small chick is just recently hatched. Therefore, they draw it in the shell of eggs.
We use only bright colors to get a rich and solar pattern.
Necessary materials:
- pencil for outline;
- eraser and sheet of paper;
- colour pencils;
- liner black for stroke.

Easter chicken drawing stages:
Draw a circle that will become the bottom of the chicken body. 
Testing to the upper part of the arc circumference. Now the first figure turned into an oval. 
We remove in the middle of the arc. Draw at the bottom of the egg shell. For this, slightly increase the size of the oval and add a wave-like outline that will not have sharp corners. 
Then, on the sides of the body, we draw small wings that have a smooth line of the contour. On the top of the head of the chicken, we draw the bends in the form of semi-windows that create a cute man. 
Next, in the center we draw large oval eyes. We will add silhouette of eyebrows above them, and at the bottom I draw the beak. 
The finished contour drawing of the Easter chicken is starting to paint with colored pencils and the first thing takes the yellow shade. They are painted completely torso chick. Let us leave untouched eyes, eyebrows and beaks. 
For color of the beak and the volume of the body, we use an orange pencil. Light pressed on paper a gentle tone. 
We also use brown pencils of different saturation and shades. They crush the chicken torso and create a volume on a white egg shell. 
We take a black pencil, which we work out the areas of eyebrows and eyes. Also, they donate some details of the torso and facet and create a shadow on the shell. Next, we use a black liner with a very thin rod. They create a complete stroke of the finished drawing and, if there is a desire, you can work shadowing with hatching. 
So we get the finished drawing of the Easter chicken, which recently hatched from the egg. But such a bright illustration can be decorated with a postcard for the holiday!
Complexity: (3 out of 5).
Age: From three years old.
Materials: Wax crayons, watercolor, thick brush, tight paper sheet.
Progress: The child draws two large circles (torso) and a small (head). After you need to paint them with wax chalk. Then draw the eye, keyboard, horser and legs.
 Download the materials of the chicken drawing lesson
We take yellow wax chalk and draw two circles, big and small. If the child is afraid, then take a simple pencil and do the same. Next, reinstall the tail (as a triangle).

Now we paint the yellow small torso and head. Draw a tail (in the form of a triangle). And then draw a black chalk glazing. And red - nose, horser and legs.

Now we have left, just decorate the keyboard and joker shallow. Draw the grass (which whatever you want).

And the most interesting. We are proceeding with the final stage when chicken is ready. We take the palette and divorce watercolor in it with plenty of water. We take a large brush and start led by a brush horizontally from above to the bottom. Try to be on the brush there is enough water with paint. Then you can, do not fear for chicken. Water from it will roll to the edges, and if the droplets remain in the figure, they can be removed by a conventional napkin.