How to draw a smooth circle. How to draw an arbitrary circle or an even circle in Photoshop
The question is important not only for newcomers, but sometimes for experienced artists. Understanding how the circle is drawn in perspective, we can draw great amount Objects, not only pots and plates.
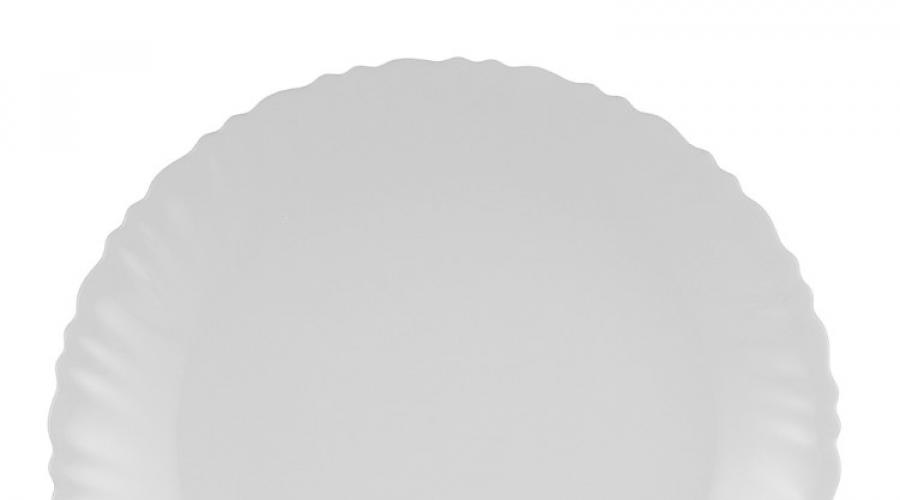
Generally brief essence: Usually we rarely see round items frontal. For example, a plate like that

We see much less often than this.

Therefore, we need to understand how to correctly depict a plate in a promising horizontal plane. For this there is a simple scheme.

The most important thing left. We see ovals and a line of the horizon, with respect to which they usually draw all objects. At the level of the horizon line, the oval either turns into a line, or very narrow. The higher or lower, the oval becomes a circle, all the lines that closer to us by the prospects will be thicker, all that is further thinner. If oval is much lower than the level of view, it can become almost round. It can be very clearly seen, taking Scotch's Motor, your ideal nature to work out this skill. We raise the dog to the eye level - ideally we will see a rectangle, raise above and below and immediately see visually all changes.
In the vertical plane, the story is absolutely the same, only the scheme must be flipped over 90 degrees.
Thus, all the plates and pots are subject to us, we look at the previous picture of the plates, taking into account new knowledge.

You can draw another oval to show the thickness of the plate, the end result depends on your observation. Oval drawing skills are very well trained in detailed drawing of simple items, perfectly suitable at first, all the same Scotch motility for example.
When drawing oval, there is another common error. Many paint two arcs instead of oval. This can not be allowed, even if your oval is very narrow, always draw roundings in the corners.

Over time, you will perfectly find a perspective in almost any object.


Well, after the circles are born, you can try to draw squares - the principle is the same. There is the truth of the nuance with a gathering point, but about that another time.

I hope you no longer have problems with a circle in the future and your drawings will be correct and accurate. In addition to this post, you can see the same
Thanks to the ability to draw perfectly smooth circle You can learn to draw a lot of other items. For example, you can depict a ball, ball, sun, as well as many other things on a sheet of paper. In order for the circle to be smooth, you need to use a circulation, which is one of the most important geometric tools.
Building a circle
Before drawing a circle, you need to take necessary subjects. To do this, it will take a ruler, a circulation, pencil and notebook. To draw a perfectly smooth circle, you need to know some nuances of its construction. To begin with, you need to mark the center of the circle. The center is the point to which the needle of the circulation will be installed. In addition, the points on the border of the circle will be equidistant to the center. This is the distance that the border point is removed from the center of the circle, is called a radius.
The size of the radius is set by the feet of the circulation. To build a circle, you can simply push the tool legs at any angle, but so that it is convenient to draw. If a specific radius is specified, then it is necessary to attach a leg with a needle to zero line of the line, and the second leg is on the desired figure.
Before drawing the perfect circle, you need to understand how to handle a circulation. To do this, put the needle to the center of the circle, and large and index fingers Grasp the top of the tool. In no case can not be taken behind the legs, since when rotating the circula, you can move them, which will lead to a change in the figure. After that, you need to gently rotate the circus until the boundaries are closed. These borders left by the chiffel of the circula, will be circle contours. You can shake the pencil all area inside the circle to get a circle.
Build a circle without a circulation
Many novice artists torment the problem of how to draw a circle without a circulation using auxiliary items. In fact, there is nothing complicated. To do this, it is necessary to arm a ruler, pencil and your own eye.
First you need to draw the axis of the coordinates to get the center of the circle. At the point of intersection of the axis of symmetry and there will be a center of the circle. Now with the help of the ruler you need to postpone from the center of the circumference in all directions the same segments that will be a radius of the circle. After that, you need to gently connect the dots smooth line to get a circle.
To understand how to draw a circle in isometric, you need to remember that an isometric projection creates a small tilt for all shapes. That is why the circle in an isometric projection takes the form of oval. To build such a figure, you will need a pencil, cirkul, square and transport.
Any line, any barcode should express in the figure a certain form. Thanks to the strokes, lines are applied, which, in turn, create depict various figures. Flat shape figures have a straightforward surface characterized by only two measurements - length and width.
The square is the right polygon, the four sides of which are equal, and all four corners are straight. Square to draw a pencil on a small sheet of paper is easy, you only need to have a hard and confident hand. It is much more difficult to achieve confidence when drawing a square in a large drawing. IN similar incident The most suitable tool for drawing is the coal. Calculate the size of the square, you should portray one vertical side. Now, from the top point of this straight line, it is required to carry out the perpendicular line of the same length. From the right point of this second line, read the line, perpendicular to it and parallel to the first. And finally, it is required to combine the extreme points of two parallel lines.
On the following scheme, the scheme showed two squares, one more (external), another smaller (internal). On the axes of the symmetry of a large square are eight reference points. The peaks of a small square are at a distance of two thirds of the diagonals of a large square from its center. The peaks of a small square are combined with smooth arcs, so the circle is formed.
1. In order to draw a square, you need to know the length of it.
2. From the top point of the vertical straight line, mark the line, perpendicular to the first and equal length.

3. Repeat a similar action, finding another top point of the square.
4. Finish the creation of a square by connecting parallel direct.

Rectangle
The rectangle is the right polygon, the opposite sides of which are equal, and all the angles are direct. When creating a rectangle, it is necessary to perform the same actions as when an image of a square, but considering at the same time considering the difference in the ratio of the parties.
A circle
When creating a drawing, an indispensable tool, no doubt, is a circulation. In the picture, it is extremely important to learn to draw without it. As long as the skill is not formed to portray the range of the right hand shape, it is allowed to use some of the remedies, for example, pamal or, as an improvised circulation, even a conventional cord. To achieve the goal, you can also mark the reference points on two concentric squares.
How to draw a circle of hand
In order to learn how to draw a circle of hand, you should start training, creating small circles with a radius of about 5 cm. As a rule, first the figures are obtained by several oval shapes, then, as we receive practical experience, Circles are acquired right outlines. For drawing circles bigger size It is advisable to outline on two concentric squares of the reference points or use the cord in order to facilitate the task.
When creating drawings, use the cigrough is not recommended.


Practical advice: how to draw a circle with a cord
To work out the skill of creating the right circle big size Useful to use the cord.
1. One hand hold the tip of the cord at the point that will become the center of the circle. In the other hand, hold a piece of chalk and the second end of the cord at a distance, which is equal to the radius of the circle.
2. Start drawing an arc from the point that allows you to perform the maximum wide movement chalk.
3. To close the circle, the hand in which the chalk is held, skip the cord at hand. At the same time, a hand with a chalk in the opposite direction.
4. Make sure that the cord is retained at the same distance from the center of the circle, achieve an accurate connection of the start of the second semicircle with the end of the first.
The circle is also drawn with the help of globes. The simplest lecturer can serve as the top of the glass.
The ability to create a circle is not a vital skill. And yet it is sometimes necessary to know how to draw a circle when there is no circular or some round item at hand. Therefore, it will be further proposed ways to draw different circles.
Smooth circle - what to do if there is no circulation
Everyone is useful to know how to draw a circle without a circular. Usually this subject is not at hand. This situation may be a student who left at home required tools For a drawing, which should have a lesson on a schedule. Or an adult, for some reason, you need to urgently depict a flat circle. What to do in these situations? For example, schoolchildren can replace the missing belonging to the transporter, which is often in the penalty. Just attach it to a sheet of paper, find the center in a straight part and put the point. This place is considered the center of the circle. Then you need to circle a semicircle along the inside, deploy the transportation for 90 ° and carefully to accurate another third of the circle. After that, once again repeat the instrument's turn and draw the remaining part of the figure.
If you are not a schoolboy for a long time, and therefore you do not have a foam with drawing tools at hand, then you can fix the situation with a CD. It is easy to create a figure as little size (If you bind the inside of the disk) and large (if you bring the outer part of the disk). Employees of the office in a similar situation will help the glass used for water. Just put it on paper and spend the bottom of the bottom with a pencil. Thus, we were convinced that it was possible to draw a circle without a circulat, using hard objects for this.

Ways to draw circles without using additional items
How to draw a circle if there are no drawing tools and other auxiliary things at hand? Everything is not so difficult, as it seems at first glance. Put and fix one hand on paper, while make sure that the Mysinette turns out to be the center of the planned circle. Two hand twist the sheet and see that it turns out a smooth circle. By the received contour, spend a pencil. To draw a larger diameter circle, you need to bend the little finger, as if you are trying to squeeze a fist. Next, the procedure is repeated, as with a smaller circle, leaf twist and spend the boundaries of the circle. If it is necessary to create a circle even more, then place your hand so that it touches the bone of the wrist to the sheet. Recommended for circles drawing, choose unshaw pencils.
These methods are considered light and simple. They cut down when there is no circular at hand. The main thing is to be able to keep your hand evenly and so that it does not move.

Draw a circle with a ruler
For those who have a ruler at hand, the next way to create a circle is useful. To the sheet of paper, you need to put a ruler, at this point there will be a center of the circle. Put another mark near the figure indicating the radius. Then you need to put the third point, for this move the edge of the drawing tool. But so that the 0st mark remains on the spot, and above the second mark.
Repeat these actions so that in the end it turned out a circle. It will consist of dasheds. The more small dashes, the easier it is to carry out smooth solid. This light wayBut rather long.
Any line, any barcode should express in the figure a certain form. Thanks to the strokes, lines are applied, which, in turn, create depict various figures. Flat shape figures have a straightforward surface characterized by only two measurements - length and width.
Square
The square is the right polygon, the four sides of which are equal, and all four corners are straight. Square to draw a pencil on a small sheet of paper is easy, you only need to have a hard and confident hand. It is much more difficult to achieve confidence when drawing a square in a large drawing. In a similar case, coal is considered the most suitable drawing tool. Calculate the size of the square, you should portray one vertical side. Now, from the top point of this straight line, it is required to carry out the perpendicular line of the same length. From the right point of this second line, read the line, perpendicular to it and parallel to the first. And finally, it is required to combine the extreme points of two parallel lines.
On the following scheme, the scheme showed two squares, one more (external), another smaller (internal). On the axes of the symmetry of a large square are eight reference points. The peaks of a small square are at a distance of two thirds of the diagonals of a large square from its center. The peaks of a small square are combined with smooth arcs, so the circle is formed.
1. In order to draw a square, you need to know the length of it.
2. From the top point of the vertical straight line, mark the line, perpendicular to the first and equal length.

3. Repeat a similar action, finding another top point of the square.
4. Finish the creation of a square by connecting parallel direct.

Rectangle
The rectangle is the right polygon, the opposite sides of which are equal, and all the angles are direct. When creating a rectangle, it is necessary to perform the same actions as when an image of a square, but considering at the same time considering the difference in the ratio of the parties.
A circle
When creating a drawing, an indispensable tool, no doubt, is a circulation. In the picture, it is extremely important to learn to draw without it. As long as the skill is not formed to portray the range of the right hand shape, it is allowed to use some of the remedies, for example, pamal or, as an improvised circulation, even a conventional cord. To achieve the goal, you can also note the reference points on two concentric squares.
How to draw a circle of hand
In order to learn how to draw a circle of hand, you should start training, creating small circles with a radius of about 5 cm. As a rule, first the figures obtain several oval shapes, then, as practical experience gains, circles gain the right outline. To draw larger circles, it is advisable to outline on two concentric squares of the reference points or use the cord in order to facilitate the task.
When creating drawings, use the cigrough is not recommended.


Practical advice: how to draw a circle with a cord
To work out the skill of creating the correct large circle, it is useful to use the cord.
One hand hold the tip of the cord at the point that will become the center of the circle. In the other hand, hold a piece of chalk and the second end of the cord at a distance, which is equal to the radius of the circle.
2. Start drawing an arc from the point that allows you to perform the maximum wide movement chalk.
3. To close the circle, the hand in which the chalk is held, skip the cord at hand. At the same time, a hand with a chalk in the opposite direction.
4. Make sure that the cord is retained at the same distance from the center of the circle, achieve an accurate connection of the start of the second semicircle with the end of the first.
The circle is also drawn with the help of globes. The simplest lecturer can serve as the top of the glass.
Your feedback:  9 reviews
You can construct oval in two ways, depending on the initially specified parameters.
2 Method: When only the width of the oval is specified.
1 way to build oval
You can download the video lesson number 1 with the author's explanations: here.
The construction of an oval on two specified symmetry axes (greater and smaller) is performed in the following sequence:
1. We carry out two axes of satiety intersecting at right angles.
2. On the vertical axis, I will postpone the width of the width of oval given to us Cd. (half of the size up and down from the point ABOUT). On the horizontal axis in the same way I will postpone the length of the oval AU. 
3. Connect the straight line of the point FROM and IN. 
4. From the center ABOUT Connect the horizontal and vertical axis by the radius OV (We plan point e.)
5. From the point with the arc with a radius Ce before intersection with inclined straight St. (We plan point f.). 
6. Plot between points f. and B. Inclined direct divide into two equal parts. To do this from the point f. We carry out an arc radius fBthen from the point IN We carry out an arc of the same radius, before the intersection with the arc, built earlier. 
7. Connect the intersection points of the arc. This line will be a perpendicular to the segment fB And will share it in half. We note the intersection points of the constructed line with the horizontal and vertical axes of the Symmetry ( l. and k.). 
8.
Build a point m. Symmetric point l.. 
9. Build a point n. Symmetric point k.. 
10. From the point k. We spend straight through the point m.. From the point n. We carry out straight measure point m. and l.. 
11. Radius equal distance kc. From the point k. We carry out an arc connecting inclined lines outgoing from the point k.. The same radius from the point n., like from the center, conduct an arc connecting inclined lines outgoing from the point n..
12. From the point m. and l.like from centers, conduct arc by radius mA. and closer to the previous arcs. 
2 way to build oval
The construction of an oval on the specified size of the larger axis of the oval is performed in the following sequence:
Axis AU We divide into three equal parts ( JSC 1.,O 1 O 2 , O 2 B.). 
2.
Radius equal to the distance O 1 O 2, from division points O 1. and O 2. We carry out a circle. Counting the circumference points indicate how m. and n.. 
3. Connect the points m. and n. With dots O 1. and O 2. We get straight, which we extend before crossing the circles. Points ( 1,2,3
and 4
) are points of arc pairing. 
4. From the point m. and n., like centers, radius Rmaxequivalent n 2. and m 3., spend the top arc 1 2
and lower arc 3 4
. 
On this, the construction of an oval can be considered adjacent.

How to draw a circle without a circulation
The ability to create a circle is not a vital skill. And yet it is sometimes necessary to know how to draw a circle when there is no circular or some round item at hand.
Smooth circle - what to do if there is no circulation
Everyone is useful to know how to draw a circle without a circular. Usually this subject is not at hand. In this situation, a student may be, left at home the necessary tools for the drawing, which should have a lesson on a schedule. Or an adult, for some reason, you need to urgently depict a flat circle. What to do in these situations? For example, schoolchildren can replace the missing belonging to the transporter, which is often in the penalty. Just attach it to a sheet of paper, find the center in a straight part and put the point. This place is considered the center of the circle. Then you need to circle a semicircle along the inside, deploy the transportation for 90 ° and carefully to accurate another third of the circle. After that, once again repeat the instrument's turn and draw the remaining part of the figure.
If you are not a schoolboy for a long time, and therefore you do not have a foam with drawing tools at hand, then you can fix the situation with a CD. It is easy to create a figure as a small size (if you encourage the inside of the disk), and large (if you bring the outer part of the disk). Employees of the office in a similar situation will help the glass used for water. Just put it on paper and spend the bottom of the bottom with a pencil. Thus, we were convinced that it was possible to draw a circle without a circulat, using hard objects for this.

Ways to draw circles without using additional items
How to draw a circle if there are no drawing tools and other auxiliary things at hand? Everything is not so difficult, as it seems at first glance. Put and fix one hand on paper, while make sure that the Mysinette turns out to be the center of the planned circle. Two hand twist the sheet and see that it turns out a smooth circle. By the received contour, spend a pencil. To draw a larger diameter circle, you need to bend the little finger, as if you are trying to squeeze a fist. Next, the procedure is repeated, as with a smaller circle, leaf twist and spend the boundaries of the circle. If it is necessary to create a circle even more, then place your hand so that it touches the bone of the wrist to the sheet. Recommended for circles drawing, choose unshaw pencils.
These methods are considered light and simple. They cut down when there is no circular at hand. The main thing is to be able to keep your hand evenly and so that it does not move.

Draw a circle with a ruler
For those who have a ruler at hand, the next way to create a circle is useful. To the sheet of paper, you need to put a ruler, at this point there will be a center of the circle. Put another mark near the figure indicating the radius. Then you need to put the third point, for this move the edge of the drawing tool. But so that the 0st mark remains on the spot, and above the second mark.
Repeat these actions so that in the end it turned out a circle. It will consist of dasheds. The more small dashes, the easier it is to carry out smooth solid. This way is light, but rather long.