Winter landscape watercolor. How to draw winter, winter landscape watercolor light winter landscape watercolor
Learning to draw a winter landscape.
Huge white drifts, fluffy snowflakes, snow-covered trees - the beauty of the winter landscape inspires to draw such a picture not only professional artists, but also lovers.
About how to portray the winter landscape on paper, this article says in detail.
How to draw a beautiful winter landscape of nature with a pencil phased for beginners?
First of all, you prepare:
- Pencils of different colors
- Elastic band
- Pencil simple
- White sheet of paper for drawing
Getting to work:
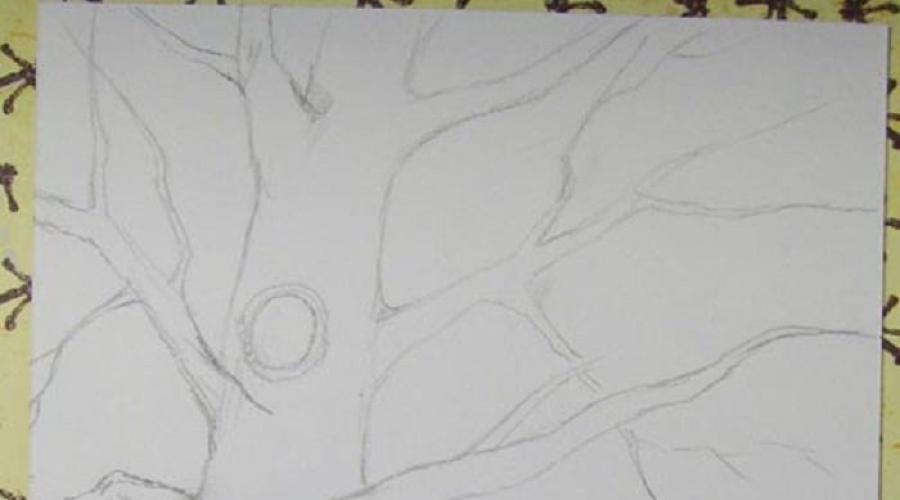
- Making sketches of Sugobov
- Add a large oak outline, with squeezed branches

First step
- Near the majestic tree, throw three circles of different sizes as descending to each other. So we form the figure of the future snowman

Second Step
- Ening the snowman: I draw him eyes, nose, mouth, handles
- Head decorating a hat
- On clothes picked off

Third Step
- Draw a trough
- Put the birds there
- On the twig we will define another bulk

Fourth Step
- Draw the basis for Christmas trees behind the snowman, in the form of a triangle

Fifth Step
- Form beautiful branches on the Christmas tree
- Add a bright bullfiner

Sixth Step
- Back plan fill in the Christmas tree
- On the forefront put a fucking bullfinch

Seventh Step
- Erase the contour lines of the tree

Eighth Step
- Color branches ate with green pencil
- Blue color bite greens in a snow raid

Ninth Step
- Remove excess contours
- Draw a trunk of a tree with brown pencil
- Snow paint blue and blue flowers

Tenth Step
- Back plan fill in a blue-green palette
- Ate paint like already painted Christmas tree

Eleventh Step
- Oaks we will have brown, and the resilience will highlight the dark brown

Twelfth Step
- Pain the Sky Dark Blue Paluit
- Add volume with blue, lilac and purple shadows on snowdrifts and snowman

Latest strokes
How to draw a beautiful winter landscape of nature with paints, watercolor, gouache stages for beginners?
We prepare in advance:
- Watercolor paper
- Paletrum
- Beliches brushes, size 4 and 9
- Any paints
- Simple pencil
- Eastern rubber
Begin to draw:
- Simple pencil wealth all the details of the landscape
- On the trees we allocate fir paws
- Lines indicate the horizon and mountain hills
- The contours should be slightly noticeable. So that they do not shine when painting

- Now go to the most responsible stage - coloring
- Dilute blue watercolor water to a gentle blue shade
- Draw a brush of the sky
- On the raw drawing, add pink and yellow shades in the sky
- We get smoothly passing, from one tone to another, heavenly background
- A little dried leaf

- Mountains and drifts, on the left side, illuminate sunlight. To do this, mix the yellow paint with water, and make a soft shade, as shown in the picture

- Blue paint color hills, and partially foreground
- Blue with blue cloths under the trees. After all, there can not be reached the winter rays of the sun

- Pale okra and gently pink tones Snowball Snowballs on the Christmas trees that are illuminated by the sun on the left side
- On the right side of the branches will make cold blue shades

- Add greens on branches free from snow
- Dropped places make dark green, sunny - on tone lighter
- Thin brush draw the details of the christmas trees. To do this, take a gentle green palette
- In the foreground, draw thin branches of the shrub. We do it with a tight brushes
- Dark blue shadow places under the tree. Some places add mixed green and black colors

- Dorify the contours of the branches with dark green

- Add density shrubs

- We plan a brush that is muted, the green mass of trees behind the big firs
- I compare it
- Fill in the clean sky flying birds

Video: Draw a winter landscape of gouache
How to draw a light landscape in winter pencil for beginners?
Even children of preschool age will cope with these drawings.
- Making sketches of snow hills. Lines can be arbitrary shape, because the drifts do not have strict boundaries

The first strokes
- Duplicate the outlines of the submissions of the second line to give volume

Add airiness snow
- Draw contours of simple trees, along the snow hills

We plan the main elements
- We write shaggy celestial clouds
- Small strokes, in the foreground, give pomp snow

We complement the landscape
- We erase extra lines
- Complete clear contours drawing
- Color drawing at your discretion

Give colored brightness pencils
Video: How to draw a winter landscape with a pencil and a swirl?
Simple and lightweight and beautiful winter scenery: drawings for drawing
If there is a certain drawing experience, take beautiful pictures as the basis, and just draw them.
Snowfall

Easy landscape paints

Starry sky in a forest village
- Step-by-step drawing lessons make it possible to get the first skills without much difficulty.
- With the help of simple drawings, you can create a postcard with your own hands, and give mom's gift.
- And if the drawing turned out to be very successful, then you can put it on the contest.
Video: Winter Landscape
In today's master class, we will show in detail how to draw Winter Landscape Watercolor. As a plot, we chose a snowy park.
To work, you will need:
- watercolor paints;
- paper drawing watercolor;
- synthetic brushes (round) No. 7 and 3;
- plastic palette;
- water clean;
- eraser;
- a simple pencil for applying an outline.

Stages of drawing
Step 1. Apply a simple pencil approximate sketch of a landscape. To do this, it will be enough to draw a park walkway, along it there are several high lanterns and several eats. 
Now that the translucent texture of the paint can overlap the sketch, discolor the pencil lines with an eraser.
Step 2. The cadmium yellow prescribe a warm light of the lanterns. 
Then we mix brown and black paint on the palette, we drag it with water. This shade draw the support and decorative parts of the lanterns. We carry out this operation fine and elastic brush. 
Step 3. To create darkened areas, indigo and black watercolor will be needed on the snow-covered seals. We mix them and plan the lower parts of spruce branches. The easiest tree (in the lower left corner) is prescribed by ultramarine and indanate blue. 

Step 4. To create shadows on the track and trees are needed more rich and dense shades. We comply first the bottom of the sheet with clean water until the water is absorbed into the paper, on the palette, we make an ignion from Indigo and cobalt blue. Before we proceed to applying shadow accents, we follow the road by translucent blue watercolor. Next, we apply the shadow created by the tint. 
Now the lower part of the drawing must be trimmed well, and therefore we turn to its upper part.
Step 5. For a beautiful gradient of the sky before applying the paint, we need to moisten the paper. Then right on paper we apply a few shades: turquoise, ultramarine and cobalt blue. Large wet brush mix the borders of the shades. 

Step 6. Neutral-black allocate the darkest sections of the nearest objects. But the background is complemented by high dark blue trunks of trees. 

Step 7. The upper part of the lanterns follow the cadmium orange. On the branches create a warm lamp light. 
Step 8. The farthest ate do not need a detailed drawing, but still adding a small contrast to them. We use the ready-made missed shadows. Ultramarin is saturated with shadows under the fir trees and teaching small branches. 
New Year and Christmas tie us on creative spirit and thirst for change. All salads are eaten, all the programs are revised, even all the jokes are told by friends. There are still a few festive free days, let's try to yourself and a native gift.
First, you will spend a great time, even if you are too critical to your picture, still in the process of work, you can still visit that the inspiration. This beautiful very deep feeling will remember you. Secondly, the result of your work will be a sign of tenderness and special attention to a person who you will hand it.
How to draw winter watercolor gradually for beginners

We will write a winter landscape. This option is suitable for people with different levels of abilities. Watercolor will give the work more turbidity and charm. All items that will help excellent write this picture in this master class.

All necessary art materials you will easily learn in the photo. It is desirable to purchase watercolor paper in advance that does not break from moisture. And also we will surely need white paint, you can absolutely any, even a silver gouache. It will give freshness, festivity and sophistication.
The main thing is to make a proportional schematic drawing with a pencil. Indeed, it may be the most time of the evening. Relax, plunge into the world, which is written in the sample pattern. Pay attention to the main shades and on bright details. Apply the initial drawing, use a ruler. Even professional artists do not neglect this tool or turn to the grid.


A large brush (size 4) boldly cover the blue sky and mountains and a dark green blossom. Take a cardboard or saucer to leave the remnant of water from the brush on the surface and then touch the paper.


To make it easier and faster to use the paint - gently fill the desired cells with several drops of water. It is better to use soft natural brushes, smaller - size 2.


Vertical brush movements will be needed only in buildings. Enjoy strokes and a unique color distribution in the smears. Color red and green elements. We impose snow and stars, flashing the space of white paint.


Here is our long-awaited result. Take a picture and you are your work. Perhaps in a year you will want to repeat this landscape. And you will notice what progress and style acquired for the year.


Good day!
In this video master class, I'm talking step by step, how to draw watercolor winter landscape.
We will need watercolor, brushes, watercolor paper either Watman A4, rag or napkin, water. Beginners can use a simple pencil and eraser to schedule a drawing. If you want to dry work faster, you can use a hairdryer.
The video in the video shows how to draw the main outlines, mix paints on the palette, how to portray the sky at dawn (wet), forest in the background, reflection in the river, how to draw trees, bushes and snow in the foreground.
When drawing watercolor, paint should always be mixed with water. The role of white paint plays paper. The more we add water, the lighter paint.
In bright places, add warm shades (yellow, ocher, orange), we enter cold paints (blue, purple, blue) in the shade.
The picture can be an excellent gift for the new year or Christmas, which can be made independently. Thanks to detailed explanations, parents can draw with children.
It is very useful to periodically go away and look at your work, analyze if you want to change something, add some kind of part or some color.
In this lesson you will learn how to draw a beautiful winter landscape, winter with paints, namely watercolor in stages. We will draw snow, trees in the snow, housed a house with a snow-covered roof, in the foreground a frozen lake. Winter is attractive and fabulous, although it is very cold, but sometimes it's very fun, for example, leaving snowballs or blind.
Very beautiful winter drawing you should succeed. This is. Is it really wonderful drawing. You will definitely like the paint drawing lesson with paints. The work is made on watercolor paper A3 format.
Thin lines sketched a landscape. Sprinkled some liquid to save white. Pulled the sky with blue paint, at the bottom of the "Wet" added Ohru. When the paint dried a bit, darker blue paint with the addition of red droplets drew a distant forest, carefully bypassing a house. While the paint was dry, washed off the brush, I squeezed and collected the paint from the place where the trees and smoke from the pipe would be covered with snow.

More rich color drawn trees for the house.

Drew a lodge mixing blue, red and a little brown paint. Where the snow is lying, left a non-colored sheet.

Drew a snowy tree in front of the house and flooded the lake, using Ohru, blue and red paint. Red must take quite a bit so that it turned out just a purple shade. On the left side of the sheet marked the trees of the second plan.

Drew snow and trunks of the trees, to the left clarified the group of the trees of the second plan and the forest behind them.

Now let's get to the right tree. We will draw from the "light-to-dark", first not very dark paint, we denote the trunk and branches, as well as the place where Krone is located.

For the study of the snow-covered twigs, I took a thin brush number0 and No. 1.

Gradually, more and more detailed, bypassing snow sprigs.

Between the trunks of the trees made the basis of a wet, using all shades of blue and ocher. At the same time, began to draw trees trunks.

Slightly clarified the darkest paint between the trees snow branches and a bush under the tree. When everything dried, I did not lose and quietly removed the dried liquid with a soft rubber band. A wide brush drew a snowdrift, so that the paints flow into each other.

Drew shore and allocated a darker paint bush under the tree.

On the other hand, the lake drew drifts and shadows from trees.

Drew snow in the foreground, sprinkled with dark paint with a brush. When all the work dried, removed the liquid to save the white.