Waterfall drawing with a pencil. How to draw a waterfall? Simple and visual fashion description
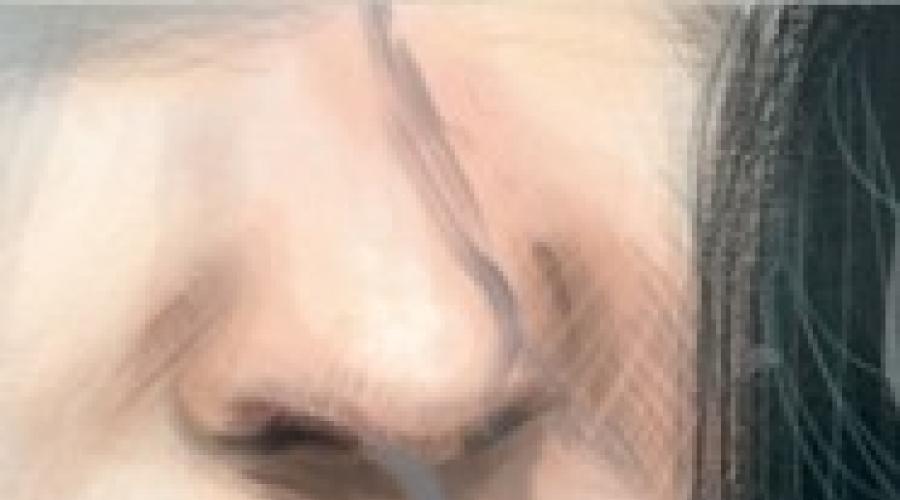
1. We start drawing from something, on whose surface water will be drained. In this case, this face. Water will flock over the nose. This is not a lesson for drawing a face, so we will not stop on it. Create a new layer for your water.

2. Basic color I draw the way to which water will flow. I chose a neutral gray-blue and painted abstract lines to show how the water jet would flow. For this purpose, you can use a standard round or textured brush, with opacity (OPACITY) at an average level.

3. Water has a property, both refracted and reflect. It is very important to add some shades of the face to a flowing jet of water. Pay attention to the water reflecting the bottom lip. Water changes the direction of light, which creates such little things that increase both under the magnifying glass, are curved, etc.

4. Using a brush with a small diameter, I draw a dark color of the edge of the jet. Do not find it completely. These dark plots are only hair reflection and other surrounding objects.

5. Now it is already more like water. With a small brush, I applied glare in some places using almost white paint. And again, do not draw them everywhere - choose places with droplets or, on the contrary, thin ridges to draw glare. Here you can use a brush with a fairly high level of opacity (OPACITY).

6. Water casts shadow. You can draw it on a new layer between layers with face and water. The shadow does not necessarily come into contact with water along the long jet. It happens only on the nose, because Water concerns him. On the chin and above the lips water is like in a "suspended" condition.

7. Here I added a little bluish shade. You may want to take another shade - it all depends on the lighting and the surrounding objects that you draw. This is a very thin jet of water, so it should be almost imperceptible.

8. It seemed to me that in the shadows in the water lacked contrast. Therefore, I, taking a high opacity brush and choosing a dark color, once again drawn some dark areas on the water. Well, I only slightly emphasized these areas.

9. Drops on the face. They can be drawn with simple techniques of glare and shadows. You can add highlights on one tip of drops using almost white color with medium opacity (OPACITY). Most people draw a drop of color, too different from the color of the skin - remember, the skin is visible through the water!


10. Drops can also have a small shadow, and again - create it on a new layer between layers with face and water. Do not shade from a drop too big, it should look like a thin line on one side of the drop, because they are on the face are practically flat and do not discard many shadows.

1. Apply this reception on a larger picture. I will draw a small waterfall on a small hanging rock. Create a new water layer again. If you want, you can use a whole bunch of water layers; One layer on each step done, in case you are afraid to do something wrong, or, if you just want to experiment and save the opportunity to easily return to the steps you need.

2. I use a textured brush. You can find a bunch of brushes already available in Photoshop, or download them or create your own (try to draw a few "scratches" on the new layer, select them and click Edit (Edit) - Define Brush (Define Brush) for a quick experiment). When I quickly scored the form of the waterfall, I turned on the scattering mode in the brush settings window (Brush Preset) and made angle oscillation (angle jitter) sensitive to the pen. You can experiment with the brush panel (windows (Windows) - brushes (Brushes)) to be preserved which effects can be achieved with them.

3. I worked for cliffs from above, where the waterfall begins. Water flows on them very quickly, so do not need to draw them strongly, such as dry rocks on the sides. It would be nice to impose a little "wet" color on them to smooth the gaps between the stones.

4. Different parts of the waterfall fall in different ways. I decided to walk with a dark brush with "scratches", and reducing the opacity (OPACITY), in those places where there will be less water. It looks not very neat, but the next stage will cause a little in order and will make those dark spots behind the waterfall visually remote places.

5. Like on the face, almost white glare were important, so they could not do without them! There is also a lot of snow-white on splashes, especially at the bottom of the waterfall. To create a foam at the bottom of the waterfall, you can use a large brush, and one more is small - to draw individual small pips, which are splashing from the beginning of the decline of the waterfall, near the rocks.

6. We continue to add glare. A little foam aside from the total mass of the foam will look spectacular. The easiest way to draw it to use the tablet: use the advantages of your tablet, namely the sensitivity to the nazhima - with a sensitive appendix of the pen perfectly operate the size of the size of the brush and opacity (opacity).
9. It will be not bad if you "drip" with some colors from the environment to the waterfall. Open them with very low opacity (OPACITY) and only in some places. You can give a little foggy effect with a large, soft brush at the foot of the waterfall, and several wet spots on nearby stones.

Because Water does not have a form, I think there is no specific methodology for drawing it. It would be possible to continue to work on the result obtained for a very long time. And of course, all the waterfalls are different - you can want to draw a high waterfall, smooth, not low and with big splashes and splashes, as in my picture. You can have more stones so that foam and splashes will take off as much as the middle of the waterfall. If you draw a stream of water that flows from some object, like on my example, remember the more water, the more distorted the surface at which it flows. And yes, I have not yet touched the topic of a quiet stroit, waves ... etc.!
But still hope that these two examples will give you an idea of \u200b\u200bhow I draw water. Each drawing is individual, but perhaps you will better understand some of the principles of drawing this fluid.
This drawing lesson will be devoted to drawing nature, or rather, how to draw a phased waterfall in a pencil. We will draw a beautiful Niagara Falls, for this we will need several pencils of different softness: for light tones we will use 4N, for medium tone - B, and for a darker - 2B.
1. 2V pencil with a cross-hatching of a different sheet of paper, then grow.
2. Before we draw, the tone of the sheet should be as smoothly and evenly rustushered. Then with the help of an eraser (klyachki) make the basic background of the waterfall. All pictures increase.

3. Lightly pass the eraser, creating the shape of the clouds in the sky.

4. Now it is necessary to highlight the base of the clouds, for this make brighter shades with the Klytka (Klyachka) from the clouds.

5. Draw common forms of nature (2B).


6. Add a white waterfall white.

7. We need to complete the reading of the sky, for this use eraser and decisive, to give the form of the clouds, and to highlight the cloud contours, use 4N pencil. We work to the left of the right.


8. Using the combinations B and 2B, draw the shape of trees and terrain along the river and waterfall.


9. With the help of elasty and decisive, make a more fluffy foam and a common spray spray background.

10. We make smoother water in the foreground.

11. Draw a bushes and part of the stone (land) in the foreground on the right. So we drew a waterfall pencil.

Immediately move to watercolor and Guaashi should not, it is better to first master the technique of creating a picture, individual parts with a pencil.
We make a pattern of drawing
First, a sketch of a waterfall, relief and related objects of the landscape is made. In the top of the sheet, mark the cliff. It is from her top will flow down the waterfall. Mark it schematically. Let it still be a rectangle stretched down.
Draw a small lake at the foot of the mountain, which formed the falling water element. Let it be a circular or slightly oval shape. On the right and on the left of it designate 2-4 boulders. They will lie at the foot of the mountain.
Give the picture volume
The drawing must take more volumetric forms. At the place of the rectangle, which schematically depicts a waterfall, draw a few vertical lines. Subsequently, it will be water flows.
Make a more realistic right, and then the left side of the rock. Add the volume to them. If consists only of stones, the currens of the rounded shape are drawn. Perhaps your rock is full of vegetation. Then it can still be schematically draw on her grass, small bushes, trees.
Next, you need to shake some parts of the drawing using a pencil. Strokes will help you become a paint picture. If they are applied to the edges of the boulders, it will be noticeable which realistic these large stones become, they acquire a convex form, lighting appear.
Determine which side the picture will be the sun, so that with the help of a pencil, identify the shadows and light in the figure.
Vertical strokes will turn out schematically waterfall into a dynamic, flowing. In the place where he flows into the lake, spend some wavy lines. Then it will be noticeable how the waterfall strikes the surface of the water.
Small details - stones, grass is better to stroke short lines. And large - waterfall, lake - long.
Draw an accompanying landscape
If you are schematically portrayed at the top of the figure, the trees, then it's time to give them greater realism. Let fir erect on the upper background.
You can simply portray them. First draws the trunk. Further, from the tops to the right and left at an angle of about 50 degrees, branches depart. Passe Fluffiness will also help the pencil.
Make very small strokes first on one, and then on the other side of the branch. So the needles are created on the whole tree. At the very long background, trunks can be seen with outlines of branches without needles.
Around some boulders who are not on the shore, but in the lake, draw circles. It will seem that they are walking along the water that the waterfall is brought from the top of the mountain.
It's so easy to draw a waterfall with a pencil. If a child made a child for his parents and signed his first picture of Vadapat, they will still understand what he meant, and hang a picture of a prominent place.
Water is one of the most interesting and at the same time complex scenes for drawing. In several previous classes, we have already painted water with watercolor, depicting it in different states. You probably noticed that the water drawing technique in each plot is different. And therefore in today's lesson we will show how to draw waterfall watercolor. The flow of water is not more difficult from height, but still has its own characteristics that we will tell about in this lesson. For drawing, we chose the picturesque waterfall of Iceland - Skogafoss. The plot is simple, because there are practically no secondary details - the waterfall is surrounded by rocks and hills.
For drawing a waterfall you will need:
- watercolor paper (200-270 g / m2);
- tablet and adhesive tape (for fastening sheet);
- simple pencil with eraser;
- soft big brush for pouring (protein number 8);
- palette;
- watercolor paints;
- napkin;
- glass with clean water.

Stages of drawing
Step 1. The plot consists of three plans, and the main thing will be considered the furthest. In the short terms, I will show a small piece of plains, on the second (on the right side) - the hill, and in the later plan draw the rocky rocks and the water flow of the waterfall itself. All parts of the picture indicate light strokes, without drawing. 
Step 2. Let's start with the sky. We wat the area over the rock with clean water and on damp paper we are deploying ultramarine color of a clear sky. Multitious clouds in the sky are followed. 
Step 3. When drawing a waterfall, we use the same tones as for the sky. The upper part of the stream is highlighting clear strokes, passing the direction of water, and the bottom is blurred, creating a light fog created due to a large amount of splashes. The largest flows of the waterfall separated from the other dark tint. 
Step 4. While the sky and the waterfall dried up, lay the color of the rocks and hills. We use warm green shades with the addition of Siena Luzheny. Immediately, on the wet foaming, we put the shaded stains. 

After that, we enhance the saturation of the hills with green watercolor. 
Step 5. After drying, drawing a clear outline of the rocks. 
Moving water is an inexhaustible source of natural energy. Especially this can be fought, looking at her freely drop-down flows. How to portray waterfall alive and realistic? In this article, we will look at one way. Follow the instructions with step-by-step pictures accompanying the material.
How to draw a waterfall quickly and just? The main thing is to properly apply bold lines.
Initially, you need to think about the proportions of the future drawing. What will be the sketch? For example, how to draw a waterfall in the form of beautifully flowing water from high rocks located among the dense forest area? Or maybe it will be a wide open space with multiple down flows? In this example, you must first apply the main dumping lines, denoting the contours of the waterfall standing at the top of the trees and lying at the foot of the stones. After that, more clearly outline the line of all items. Observe the zone of moving water not only along the rock, but also among the lower cobblestones. Distribute several aqueous streams in more detail. In this example there will be two. Between them and around the edges, place large boulders. To the picture came out more realistic, go to the stage of thorough drawing of a common landscape with specific details.

How to draw a waterfall so that he harmonized with the surrounding landscape?
Sharply falling water lines will be a gross continuation of the harsh landscape of Taiga. Trees located on the upper edge of the waterfall, place in the form of large fir trees with the sick branches. You can depict them densely standing in a row. Multiple similar trees draw with one or both edges. Thinking on how to draw a waterfall, do not forget about the raining stream at his foot. To do this, with a few rounded strokes, apply curls at the base of water flows. Then smooth lines show the movement of the "living" water mass at the bottom of the pattern, directing it to the sides. Particularly original and colorfully looks like a foam decorated in bright shades.

Features of paint design
Several otherwise work is carried out if another drawing technique is used - paints. How to draw a gouache waterfall gradually? Similarly described above technology, start with pencil sketches. Approximately denoting the main lines, show the movement of water, changing the shades, in different ways decorated with the transition from one color to another. Need a raging stream? Use a few contrasting brush strokes on the tonality. Want to show the smoothness of flowing water? Make a natural color shift. In any case, a more winning result will be where skillfully felt and the total energy energy is shown. Otherwise, even many, it would seem at first glance, living lines will not "breathe" the movement and special rhythm of water. Experiment, trying to breathe into his creation to a part of the optimism and the great power of nature! After all, each drop is a special energy integrity, not to mention a large waterfall. We hope our advice helped you, and now you know how to statenly draw a waterfall.