Painted boxes do it yourself: master class and ideas for creativity. Painted boxes do it yourself: master class and ideas for creativity Music box drawing for children
Let's a little complicate this task. To teach you to really feel and control this empty flat sheet of paper, I want to open complex for you, but interesting objects - empty boxes.
1. So, depict a cube.
2. Then draw a slightly inclined two parallel lines.
Parallel lines - These are two lines going in the same direction and located at the same distance. When I say the word "parallel" I imagine 2 lines in one word.
Perpendicular lines - Two lines that intersect at right angles. For example, in this row you see the text, perpendicular to the edge of this page.
3. Attention! See how this top edge of the box cover is drawn, in accordance with all inclined lines under a slight bias up to the left. I will refer to this angle as a direction to the northwest. Imagine a compass.
The four most frequently used areas for which I will refer throughout the lessons will be directions: northwest, northeast, southwest and southeast. Take a look at this compass.
Now I will turn the compass. I repeat that the prospect distorts and flattens the object, creating an illusion of depth, making one edge of the object closer to the viewer.
Pay attention to this drawn tilt compass and four specified directions - SZ, SV, YUZ and SD - all these lines coincide with the lines of your cube.
I call it a "3D compass." This is a wonderful tool for proper consistent lines alignment. Without properly built corners, your drawings will look sideways.
4. Draw on the other side of the box cover with two parallel lines.
5. Using the bottom line of the box in the direction of the SV, drew the top of the box cover in the same direction (SV).
6. Draw oblique lines, denoting the boxes of the box at the bottom.
7. Once again, using the lower edges of the box as the guides, complete the box cover, by carrying out lines in the directions of SV and SZ. I will repeat it constantly: use drawn lines as a sample to draw the following. Always referring to the already built corners with the corresponding 3D compass, your drawings will look hard, focused and, most importantly, three-dimensional.
8. Draw a short penetrating line of the back of the box. Notice how one small line affects the total three-dimensional illusion of the pattern. This little line on the back of the box makes "BAM!" And at this moment our drawing turns from a two-dimensional sketch into a three-dimensional object.
9. Apply the horizon line and determine the position of the light source.
10. To correctly draw a falling shadow, use a 3D compass. Draw a guide line at the bottom of the box in the SEA direction. ATTENTION! This is the most common mistake that newbies make - they begin to lower the shadow below the guide line. Please note that the shadow should be on the same line with the guide.
11. Dimming under two box lids give reality to the image. These are wonderful small details that successfully demonstrate the volume, refined parts and borders. In this example, these shades help "pull out" covers towards the eyes, pressing the box deeper in the picture.
12. This is the most spectacular step in each lesson. Suffer your sketch with an eraser, removing extra lines, and give sharpness to the edges of the picture using the contour stroke. This will move away the image away from the background. Complete the falling shadows on the left side of the box and inside the box, away from the light source.
I always urge you to have fun in the lesson process by adding many additional details, neat little ideas that are capable of your creative imagination to revive the drawing. I put a few small items in the box so that they would barely be visible. Please note how even these small details add a sketch of the highlight.
Lesson 5: Practical task
Speaking about additional details that improve your drawing, let's upgrade the lesson with a cardboard box? What about the treasure chest filled with pearls and coins? We are so dissatisfied with today's economy, mortgage payments, loans and taxes .. So let's depicting your own wealth!
1. Let's start with the base form of the cube, only a little bit down the sides. Now specify the guide lines and sign them for better memorization.
2. Draw two parallel lines, slightly open the treasure chest cover.
3. Using already drawn lines as a sample (sounds familiar?), Draw the top edge of the cover in the north-west direction.
4. Now draw the near the curved edge of the lid.
5. With the help of already drawn lines (I repeat?) Draw the top edge of the cover in the direction of the North-West, but just below. It is necessary in order to, ultimately, all these lines of one direction converged at one point. I will explain this concept of the disappearing point in one of the following lessons. Now just repeat after me and tilt your lines slightly below.
6. Now drew two internal lines. This is our "BAM!" 3D effect, you need this moment!
7. Divens your drawing. Will erase all the extra lines, place the light source and plug the opposite surface, the inner side of the chest and add a falling shadow. Enjoy drawing additional details. Overflow the chest with money, precious stones, pearls and everything your heart!
Share your works in
Caskets and caskets appear in many literary works. The box is a symbolic thing, it is a kind of storage that can hide a variety of treasure things, to all sorrows of humanity. As it was in the case of a Pandora drawer. Draw the caskets are not so difficult - mostly they have clear geometric shapes and are made from a variety of materials. For example, one of the most famous is a malachite box of Bazhov's malachite box.
You will need
- Paper, simple pencil, eraser, ruler, painting materials for your choice, images with malachite products.
Instruction
The box can be any form - parallelepiped, cylinder, truncated pyramid and even ball. The most traditional form for the image of the malachite box is a parallelepiped at the base and a truncated pyramid cover.
Follow the direct horizontal line - it will be the line of the table to which you put the box. Then draw the parallelepiped - under the angle of view that you like more. Do not forget about the laws of perspective.
Now you need to draw the lid. You can make it simple flat, in the form of a parallelepiped, truncated pyramid or semicircular - in the form of half of the cylinder. It can be closed, ajar or thrown back. If you draw a shut-off lid, remember the prospects and shadow laws.

Shago and decisive draw shadows. Now a turn behind a malachite pattern. Consider images with malachite products - the drawing on the stone is different. Sometimes it is located circles, like on a cutting tree cut, sometimes stripes, sometimes mosaic.
Draw minor details - accessories, decorations. Often, malachite boxes are depicting the gums - lizards to bring closer to the Bazhovsky product.

And now the most interesting is painting the picture. Pay attention to which colors have malachite - light green, emerald and other cold shades of green alternate, form patterns, accommodation. The ideal option for painting such a box - watercolor paints, although the gouache is also suitable. Sketch can be painted with colored pencils.
You can draw any other boxes - wooden, trimmed with beads, decoupage or dad-mache. You can experiment with color gamma, materials, forms.
Newbies in decorative work should pay attention to the painting of the box with their own hands. The master class will help prepare the necessary materials, and will also tell how to re-establish a box in various techniques of painting.

What is necessary
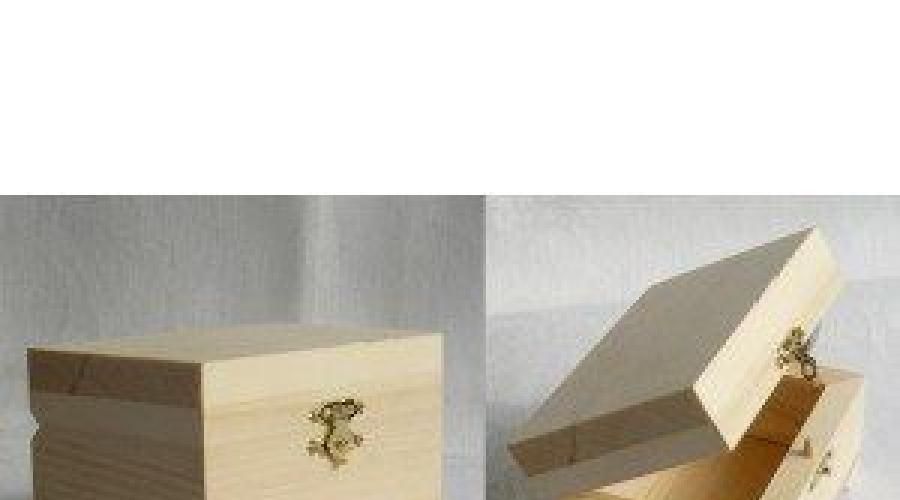
Caskets are traditionally made of wood. Find a wooden casket under the painting will not be difficult: in modern stores for a hobby you can choose the preparations of rectangular and round boxes of different sizes. You can also adapt any wooden boxes with a lid, externally resembling boxes.
The painting is usually performed by acrylic paints for wooden surfaces. They are well applied, keep color and dry enough. Set of colors can be bought in any stores for creativity. You will also need natural or synthetic soft brushes of different sizes and shapes.

To obtain lacquer caskets, it is necessary to cover with varnish into one or more layers. It is worth noting that wooden products are coated with glossy varnish exclusively for wooden surfaces, such as parquet or furniture. As a rule, it is placed on a water basis, does not have color and smell. Varnish will not only protect the painting and the box, but also give it a pleasant shine and smoothness.

We start creating
Consider what painted and how can be done on a wooden box.
You can write a casket in different ways using various techniques: from free painting to folk traditional styles. Painting and painting can be added "aging", decoupage or all kinds of fittings.


Before you begin directly paint and decorate the box, you should process a blank or a wooden box and prepare it under the painting. To do this, follow these steps:
- Sanding the surface of the future casket so that it is completely smooth, without roughness and burrs;
- Protect acrylic soil outside and inside (can be in several layers) and dry.


The primer is needed for a more even and bright collapse. If the blank is quite smooth, smooth and white, you can skip this item. You can also not primitive if it is originally planned to make a dark common background.
Perhaps one of the easiest, but at the same time labor-intensive techniques - a point painting. It is performed using contour paints. The essence of the technique is to fill the drawing with multi-colored points. The most suitable images for this painting are complex patterns and ornaments that are applied by stencil or pattern.


Artistic painting is made from hand to free themes and may contain any plots and elements. If we are talking about a box, then most often on it are pictures, leaves, berries, birds (you can use stencils and patterns). However, the sophisticated masters can give the will of fantasy and portray on a small casket format all that your heart.


You should also not forget that there are different styles of popular painting. Caskets and chests for the dashed painted by simple ornaments in the Middle Ages. Each locacy existed its own tradition of painting wooden dishes and utensils. Many types of paintings that have come down to this day can be considered a cultural heritage.

Traditions from the people
What kind of folk painting can you decorate the box?
Painting from the countryside Pale (Vladimir Province) is perhaps the most recognizable. Not only the caskets, but also brooches, trays, dishes, etc. were decorated with such a painting. The main feature is a thorough detail and drawing, while the format for painting is usually small. Frequent plots - illustrations of life and fairy tales.

Palekh painting Usually performed by tempera paints on a black background. Prevailing colors - green, yellow, red. On the sides, as a rule, the box is decorated with a gold-plated ornament.

Gorodetskaya painted Decorate caskets by birds, flowers and whole plots. The painting can be found in bright colors, rounded colors and frequent images of horses and people.


Even a newcomer is easy to make such a painting. Enough to use templates:


Khokhloma painting It is best to decorate round and large caskets, as Khokhloma is a lush flowers, berries and birds, as well as fancy curled patterns and ornaments.

Make such a painting is quite simple. On the example of Khokhloma, consider how to paint the box.
First you need to prepare:
- wooden blank;
- multicolored acrylic (red, black, green, yellow, white colors);
- golden or bronze paint jar for background;
- brushes (wide, thin);
- malyary Scotch;
- ready template or sketch;
- traction and pencil;
- varnish and brush.

Progress:
- Prepared workpiece covered with golden paint and give dry;

- The main elements (large parts) of the Khokhloma pattern are transferred to tracing;

- Fasten the sale on the cover of the box and with a small pressure of circulating the drawing (should remain a track as in the photo);


- Cut the drawing of black paint with a thin brush;

- Pack the edges of the cover with painting scotch, designating the equilateral frame, and paint the black pattern of the pattern;
Casket - Useful thing for storing other things. In most cases, these are jewels. For some jewelry, this is gold and diamonds, and for other letters of your loved one and photographs of old friends who have long been not with us. People have always been and will be sent to such things, so they created special places to store memories. After such a lyrical entry, I am now obliged to teach you how to draw a casket with a pencil. In my example, it is wooden, but there are other modifications from different available materials. I guess your grandparents also have a wooden box. Do you have?
How to draw a styled pencil box
Step one. Rise parallelepiped and a rectangle near it. The first will turn into the box, and the second in the cover for the box.  Step second. Both of these subjects are connected using a non-complex metal mechanism that is used in the doors, windows and any opening items.
  Step Three. I add a chain and buckle the contours of the box.
  Step fourth. Inside the box always forms a shadow. The deeper, a capacity of the box, the darker there will be its inside. Here's how to add shadows on the box:
  Let's reserve yet? I advise you to portray.
, Blue, white, "acrylic art" Blue FC, cobalt green dark, yellow medium, "Acryl-hobby de luxe" Egyptian papyrus;
Instruments:paraffin; sandpaper; line; a piece of chalk; Synthetic brushes round and wide flat; palette.
Step 1. Preparation of the surface.
All surfaces of the wooden billet box are coated with acrylic soil with a wide synthetic brush. Envy.


Step 2. Furiousness.
All the edges cover the brown paint "acrylic hobby" and after drying with paraffin.


Step 3. Basic colors, background.
The casket cover is painted in the "acryl-hobby" blue, the rest is in the color "Acryl-Hobby de Lux" Egyptian papyrus.


Step 4. Painting.
Drawing Hydrangea easy. We begin with a form of inflorescences. Through the thick layer of paint draw uneven oval. The left side of the "Acryl Art" of the Blue FC, the right - "acryl-hobby" blue.


To the right edge we make a lighter shade, adding a little white in blue.

Without waiting for the drying of the paints on the surface of the casket, we recruit on a round synthetic brush only white color. And we begin to fill in the circle, starting from the edge of the light side, flowers of four petals. Each petal smear is created by the movement of the brush from the edge to the core of the flower.


We work quickly, in the process of drawing petals paint with tassels gradually mixed with the background and we get beautiful divorces. Shifting to the middle, to dark shades of the background, add to the brush to the white-hobby blemis, and with the approach to the darkest edge of the circle - the blue FC. This will allow the comprehension of hydrangea volume. Draw all the colors and leave for drying.
In this case, it is impossible to use a hairdryer, since we used paraffin to separate the colorful layers.


Step 5. GREEN.
We recruit the green brush (cobalt green dark) and yellow (yellow medium) paint at the same time.


We draw leaflets with arcs, from the edge to the design of the leaf, with each smear reducing the radius.


Step 6. Pattern on the lid.
With the help of chalk and ruler, mark the casket cover. First, we hold the line diagonally, then the diameters of the line at an equal distance from each other in parallel with the previous one. We get a grid.


We recruit a little white paint on a thin brush and draw a pattern, step by step following the scheme:


Sketch of the diagram for repetition:

Step 7. Lost.
Eye paper handle all the edges of the casket. Thus, we get scratch and emphasize the shape of the box.


If you wish, you can paint the inner walls of paint or arrange in any other way.


Step 8. Lacation.
We cover the entire box with several layers of finishing varnish. Envy.


Step 9. Trivia.
The contour of the glass or gold paint we denote the cores in the colors of hydrangea and in the center of each rhombus in the pattern on the lid. Envy.


The casket with the painting of hydrangeas, supplemented with pattern and scuffs, is ready.


Artist: Sebilkova Anna