Proper brickwork for foundation. Construction of a brick wall: brick laying technology
The one who doubts their abilities to the brick is important to learn the theory and only after that begin to practice. Each professional was in his time a newcomer, ineptly put bricks and began his way to the basics of skill through acquaintance with the basic principles of work with this material.

Laying brick is a complex and time-consuming process, not only the appearance of the construction depends on its quality, but also its service life.
Since everyone may learn, it is easy with due diligence to build any construction.
Basics of work

Varieties of wall masonry: a) solid laying of ordinary brick; b) lightweight walls of ordinary brick with vertical transverse walls (well-masonry); c) lightweight walls of chipped bricks with horizontal bonds in the form of tychkins (brick-concrete masonry); d) a wall of ceramic target brick.
The masonry produce layers, rows, connecting stones with cement-sandy solid, which also need to learn how to cook. Each subsequent row is slightly shifted towards the previous one. So get a dressing needed to ensure the strength and stability of the wall.
The first row should be laid on the foundation. If its surface is uneven, then this flaw is corrected using a mortar solution. Before proceeding to work with stones, shut-off waterproofing should be made: any water repellent material is laid on a concrete foundation: Ruberoid, glass cholester, bituminous mastic, etc. is applied.
Next is the markup of the perimeter of the walls. It is performed using a marking cord and hydroelectric background. Lightweight bricks are exhibited in the corners, places of crossing walls, nodes of window and doorways. Long walls are exposed intermediate beacons that will prevent the cord from saving. He is attached to these stones. The evenness (horizontal of masonry) is checked by bar and level bricks.
Professionals first "call corners": build 3-4 rows of bricks directly on the foundation. This allows you to transfer the cord to the level of the next row and greatly simplifies the masonry process. If the wall thickness should be greater than the distance to the Pollipich, then the first row is traditionally performed by the "twist", that is, the stones need to be put on the wall direction perpendicular. If you use this technique, it will quickly learn to lay brick walls.
Devices and Tools for High-quality Masonry

- The newcomer is difficult to withstand the same thickness of the seam. It will help in this one simple device, which is manufactured independently. You need to take a small wooden bar and to nail a piece of plywood with a thickness of 1 cm. Plywood should repeat the circuit of the letter P. Inner opening should be equal to the length and width of the brick, and the height of the "legs" - the thickness of the seam. The solution is styled inward the device, and its excess is removed by a trowel.
- In order to simplify the work, the "order" is used, which is also manufactured independently. This device is two identical rails with a length of 1 to 1.5 m. In the rails are made of propulsion under the lace. They must be from each other at the height of the brick + the thickness of the masonry seam. When using the order, the transfer of the marking cord is significantly simpler, and the masonry is flat and beautiful.
- For marking and checking the correctness of the corners, you will need a template in the form of a metal or wooden triangle.
- To check the verticality of the wall uses a plumb.
- The solution can be laid using a cell or trowel.
- Stone alignment is made by Cyan.
Preparation of masonry solution

Basic requirements for binder: plasticity and lack of small stones. Main components: cement, sand and water. Cement must be a brand not lower than M300, sand - sifted and medium grain. Spectacle: 1: 4, where one part of cement and 4 - sand. Professionals are added to clay, which gives a mixture of plasticity and better viscosity.
If the scope of work is small, you can use dry ready-made building mixtures that are very convenient in operation. They have all the necessary additives for plasticity and the desired fluidity of the solution. It remains only to add the amount of water specified by the mixture by the manufacturer and thoroughly move it. Bricklayers check the quality of the cooked solution as follows: thrust with a tank with him with a blade down. If the tool enters a mass for the entire length of the blade and its immersion will stop at the knob itself, the composition is cooked correctly.
How to start corners

- the solution is laid and levels, etc. "bed";
- in the right place, the brick is descended vertically;
- we apply the construction level, we take a queen and tapping on the brick, align it to the horizontal plane;
- when erecting the next row, the vertical of the masonry is checked with a plumb;
- if it is impossible to put a stone strictly horizontally, remove it, clean the ribs from the solution and start everything first;
- when the corners are erected, the bandage must be taken into account: the upper stone is stacked into the two lower ones, thereby ensuring the strength of the masonry and communicating between the underlying stones;
- the correctness of the angle is checked by a special triangular pattern;
- when two angles of one wall are derived, nails with a strained strainer are fixed in the seam under the upper bricks; It will help to withstand the vertical when laying the walls;
- while the solution does not harde it, the angle can be aligned, picking up bricks in the desired side.
Rules for masonry of brick walls

- First, the solution is laid and levels.
- At the end of the brick before it laying is made with a smear solution. The next building stone will be pressed to this place.
- It is necessary to monitor the coincidence of vertical seams, which will prevent the need to insert small pieces of bricks to the space remaining after the masonry of a number and will retain the aesthetics of the wall.
- Align the brick masonry on the solution is not only inquiry, but also the handle of the trunk.
- The solution that stands beyond the edges of the stone is removed by a trowel and is reset either upstairs walls or in a container with a bonding composition.
- The solution on the end of the brick does not need to smear it, it is recommended to lay out and leave in the form of a tubercle.
- It is necessary to ensure that in the process of masonry do not form emptiness in neither the end parts of the bricks or on the front side of the wall.
- To make the construction of a more aesthetic species, it is performed: they are carried out by a special tool (extender), which can replace the segment of a suitable diameter tube. The use of this reception allows you to get durable and high-quality seams, beautiful masonry, which we will soon and learn.
The strength of the walls of a brick building directly depends not only on the quality of the building material, which includes brick and cement mortar, but also from weather conditions during which walls are constructed. And the most important condition, this kind of construction work, is the professionalism of a bricklayer, which does not know how to put the brick.
At first glance, it may seem that the option, except for just putting a brick, does not exist, which is simply impossible to arrange it crooked, in the end, the brick has a form of a rectangle and therefore laying it into rows, you can achieve an ideally smooth wall. But this is a completely mistaken judgment.

In order to be put on laying a brick wall, you must comply with the following requirements:
- monitor the same amount of the applied solution under the brick, otherwise it will be difficult to achieve a smooth edge of the external row of masonry;
- the brick, located on the prepared working surface, should lie in parallel to the row, as a result of which its outdoor side will coincide with the plane of the brickwork, that is, it will be oriented in three axes of rotation;
- observe the three basic rules: the correct linear position of the brick, the same laying height with other rows, dense adjacent to the adjacent brick.
But even when complying with these requirements, if there is no work experience by a mason, then it can not work out at once. In this case, in this article, we present information on how to learn to lay a brick yourself.
In order to properly organize the workflow on the laying of brick, in addition to the building material, you must have a whole set of special tools and devices.
Required tools

- A mortar or a mixture for masonry of bricks (about the composition of the solution and the method of preparation we will tell a little lower);
- Bricks (building material);
- Construction volume (needed for easy brick delivery from the place of storage to the working area);
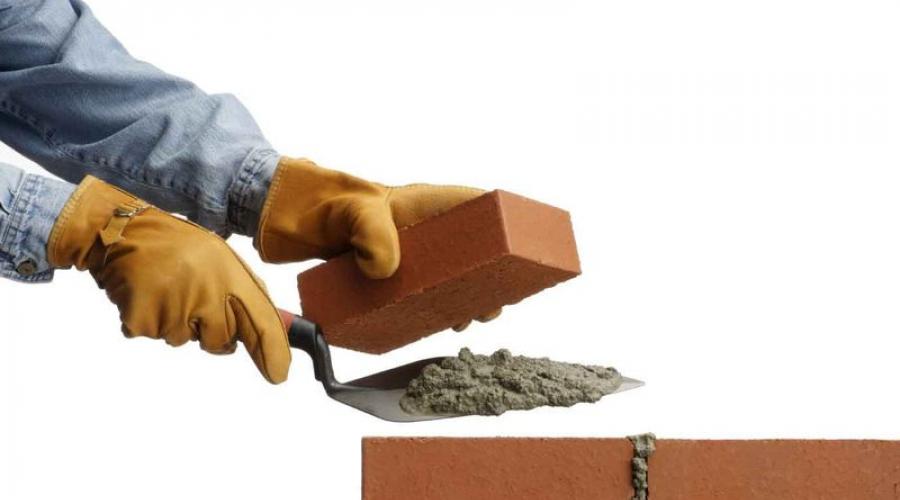
- Trowel or Kelma (with the help of this tool on the working surface of the brick, the solution is laid out and excess the mixture are removed);
- Building glasses (used to protect the eyes from mechanical damage and dust);
- Carpentry kit (for connecting the angular parts of the brickwork);
- Level (helps to exactly lay out both the first layer of masonry and subsequent);
- Kirk hammer (designed to split bricks);
- Roulette (for linear measurements during work);
- Mellic cord (help determine the line of laying a brick);
- Mason cord (allows you to create straight lines of horizontal rows of brickwork).
Preparation of solution

Prepare a mortar for masonry brick is easy. It consists of cement and sand, the optimal ratio between the 1: 5 components, that is, we take one part of the cement and five parts of the sand. Sometimes in the mixture to give plasticity to add clay or lime.
At the first stage of the preparation of the solution, it is necessary to mix cement and sand in a dry form, to take the mixture in small parts and to connect with water, thoroughly mixing. This will avoid solidification of an unnecessarily cooked solution and, accordingly, to save on the purchase of an additional batch of cement.
To save a solution, it is better not to use the "hollow" brick, since most of the mixture will go into the hole and for the mounting bricks of the solution will not be enough. Read more about the preparation of the masonry solution can be found.
Currently, during the construction of houses or cottages, not everyone resorts to the help of professional builders. Someone is limited in finance, someone wants to fulfill one of the three life rules, which says that a real man must "build a house, plant a tree, grow a son." It is for such people and the following section of our article is intended.
Brickwork technology do it yourself

If it still arose to build a brick house yourself, then you need to know how to put the brick wall right. If a certain number of requirements fails, it may be so that the design will be unreliable. And the first rule suggests that the laying of bricks should be started only after the full frosting of the foundation, otherwise, the wall can be a story in one of the parties and all work will be a pump.
- In order not to have no doubt in the correctness of the start of construction work, It is necessary to watch the video on our site, which will tell in detail how to learn to lay a brick.
- Getting Studying First Layer Brick, it is necessary to put on the foundation, rolled in two layers, rubberoid. It should be previously defined as the wall will be erected: in one brick, one and a half or two bricks.

- It is easy to guess that if the first row of bricks go crookedly, then all the subsequent will be the same. therefore it is necessary to use special construction toolsthat will help correctly and smoothly carry out bricks.
- Next requirement from the series how to put a brick wall It is the following, it is necessary to strictly observe the gap between the bricks, which should be at least 3 cm. It is necessary so that the solution is evenly distributed between them during the laying.
- Need with enviable periodicity Check the building level direction horizontal and vertical laying.

- From the correctness of the design corners 50% of the success of all work depends. Before you begin to lay a brick, first of all, you must lay out the angles in several rows. It is very important to work with the use of horizontal and vertical level, as it is precisely from the angles that the walls will be laid. And throughout the work it is necessary that the angles were a number of two above the main walls.
- If there is plaster in the future Erected brick walls, it is necessary to use the "Pustovka" method. It lies in the distribution of a certain amount of solution between bricks so that it does not fill the gaps between them.
- Laying out the fireplace pipeIt is necessary to ensure complete filling with a mortar of empty spaces between bricks. This is necessary so that in the pipe does not set out soot. Fully filled seams are used and with facing laying.

brick coach
- To create truly smooth and straight corners Constructions, you will need a "order", which is a metal corner, helping to determine the accuracy of laying. To consolidate the coincisions to the angle, use special brackets that ensure the design accuracy.
- Provide even laying of bricks in the ranks Special construction tools such as level, mason cord, roulette, melted cord. And neglect their use should not.
If, in some moments, when conducting independent construction work, questions arose with regard to the right masonry of the brick, the video presented on our website will help to understand everything.
- When laying out the walls of the brick, it is necessary to ensure that the seams in other rows do not coincide, otherwise the wall will lose its stability and under the influence of force will fall apart.
- It is necessary to approach the construction with a special care and before laying a brick wall, it is best to draw a work plan, where the required amount of bricks and the number of rows laid out will be indicated.
- If there is no practice in laying out facing bricks, but such a need arose, then you can resort to the traditional masonry of ordinary building bricks - the result will be the same. Facing brick is different from the usual only more aesthetic species and its destination. If there are still doubts, the laying of facing bricks is shown on our website in a phased video, looking at which you can easily fulfill the conceived.
- When calculating the required amount of brick, you need to add a percentage of 10% of the total amount to the resulting number, this is because about the tenth of the bricks breaks down when laying.
- In order for the solution and brick to have the greatest degree of clutch, it is necessary to monitor the brick in the tank with water before laying on the solution.
- To properly learn to lay a brickwork, you need patience and a hurry here inappropriate. The building mortar does not dry out immediately, so if necessary, you can correct some shortcomings in the work.
If, after reading the article, you did not have confidence that you can independently lay out the brick wall, we can advise watch a video about how to put brickwork. Video will clearly and detail all stages of work.
Let the walls of your house always be strong and reliable!
This time-consuming and complex process, from which the strength of the entire structure completely depends. If you break the technology, then cracks may appear in your own rebuilt construction or it will collapse at all. It is also important to observe accuracy and accuracy in the process of laying a facing material, as it is a finish coating and face of all at home.
The following tools will be needed:
- capacity for kneading the solution and bucket;
- soviet shovel;
- kelma (trowel);
- kirk-ham;
- cord (for determining the border);
- exercise;
- construction level and plumb;
- order;
- templates.
Before you begin to lay bricks on your own, it is necessary to properly prepare the foundation of the building. The surface on which walls or other structures will be erected should be carefully cleaned from garbage and dirt. The construction level is checked with evenness, since if it has deviations, then the walls will be tilt.
Before carrying out the laying of the base on the foundation or other design, it is necessary to close it with a waterproofing layer. The upper part is covered with two layers of rubberoid. The second roll rolls over the first one with the alternate at least 10-15 cm. Printed it either with a special mixture or heating. Waterproofing will protect against moisture that can move from the foundation.
The next stage is the laying of the first row without a solution. The walls look well if they are only posted from one-piece blocks, without inserts of segments (halves or quarters). First, they are placed with a standard weld width of 10 mm. So that it was the same everywhere, a metal pattern is used. If, after layering on the edge of the row, it stands or lacks a brick, then you should either increase the width of the seam, or reduce (but not more than 2 mm for both cases). Since the maximum seam width for construction standards is 12 mm. If you still need to add a cut part, then you need to immediately decide on the place of its installation. If the masonry is produced above the basement, then it is possible that he partially opposed it, as the base will later be plastered.
After everything is decomposed and the desired width of the seams is defined, it is necessary to make markers on the foundation or base, indicating the location of the vertical seams. Start uploading the first row follows from the same material that was used for laying into dry, as some of them may have an error in size.

Technology kneading solutions
The most often used cement-sand composition. You should not do too much mixture, as it freezes for two or three hours. Before laying, a full-length red brick can be moistened with water, then it will not extend water from the solution, and the seam will turn out more durable.
For cooking, you will need 1 part of the cement and 4 parts of the sand, as well as a liquid dishwashing agent. It will make it more plastic. Cement and sand are poured into the mixing container and are thoroughly mixed. The mixture should become homogeneous and without lumps. After it is added to it in such a quantity so that the solution is similar to the thick sour cream. Simultaneously with it, the dishes or liquid soaps are poured, divorced in water.

Instructions, methods and schemes
The most common masonry methods - use and letters. In the first case, the cement-sandy solution is not applied to the edge from the outer side of the brick, and the indent is 2-3 cm. Due to this, the mixture after pressure will not be released. When placing a spoonful row, the technology is as follows: the block is kept under the tilt and the twist part of the composition at a distance of 8-12 cm from the previously installed. The laying scheme is exactly the same.
The row is called spoonful if the material is placed along the foundation, tychkov - if across. In order to lay a brick using the method, the cement-sandy solution is applied to the surface in such a quantity so that it is possible to install 5 thak or 3 spoon. At a distance of 1-1.5 cm from the outer edge, the mixture is not necessary for this scheme. Then the seam will be neat and beautiful after the grout.
Method Lettering:
- A cement-sandy solution is superimposed by a trowel.
- Part of the mixture is simply asked to the end of an already installed simple or facing brick.
- The next is installed and pressed to the trowel.
- Kelma is drawn and the block is pushing.
- Clean surplus.
The masonry of the facing brick or simple should be started with the corners, as they will be used as landmarks. For this, the cord is tensioning between adjacent angles. It must be located horizontally. After that, a solution is applied to the surface of the foundation. Smooth up to a thickness of 2-2.5 cm so that after laying it has become 1.2 cm. Do not cover the mixture at once all the area, but only for two blocks placed by a spoonful method, or four for the tile series.

So that the seams turned out exactly such a thickness, a special metal pattern is used for a solution, its diameter is 12 mm. Locked the template along the edge of the foundation from the outside. After the cement-sandy mixture is smoothed, the brick is placed and slightly attached. It is checked by the flatness of its installation, and if it lies unevenly, then tapping with a picka-hammer align.
Lowned rows need to be checked for vertical, for this it is used. To control the horizontal level, order is applied. Rake with marks to fix brackets. The distance between divisions should be equal to the thickness of the block along with the seam. In order for convenience, you can make holes and through them to stretch the cord. With the help of it, it will be much easier to monitor the horizontal level of brickwork.
Dressing Guide
For the wall to be durable and the load on it is distributed evenly, you need to ensure the dressing of the seams. For this purpose, the next row is placed with half or one third of the brick. Neighboring rows (from above or below) should not coincide vertical seams. To tie up parallel rows, it is necessary every 3-5 row to start laying a tile method, and not spoonful. At the same time, the seams should not coincide with the lower side.
There are also many other dressage diagrams with different laying technologies and patterns. The most common is single and multi-row. The first category includes such dressing systems as a Dutch, chain, cross. The instructions of them are the same, the difference is only in the tonchikova and spoon-laying. For tychkins, a solid brick is used, and for spoonful - half. With multi-row laying, an alternation occurs, for example, in a three-row every 3 spoon, one twist is placed.

Facing Brick Masonry Nuances
The main difference of facing from the ordinary block is its decorative characteristics. It is applied as an finishing coating. Therefore, it is extremely important to immediately and gently carry it out. Just as for the usual, it is necessary to lay the first row of facing material in dry and define the places where the segments will be located. For sawing, a Bulgarian with a stone disk is used.
Guide:
- From one corner and to the second one ranks one row.
- After that, begin to form corners, laying 5-6 rows.
- So that the seams were even and the cement-sandy mixture did not enter the building material, the metallic pattern is applied.
- As soon as the angles are formed, the cord is stretched between them so that the next rows are smooth.
- In order for the vertical seams, too, used, use a metal template with a smaller length.
- Each next row is placed with displacement so that the vertical seams do not coincide.
- If the mixture got on an external decorative direction, then it is immediately removed, since after drying it is difficult to remove the solution is much more complicated.
- So that the brickwork made by their own hands was durable, it must be connected to the main wall. For this, metal connections are used, for example, spiral nails. For 1 m2 there should be at least 4 pcs. Nails are screwed into the main wall so that they are in the seams between bricks.
Beginner errors
Due to non-compliance with the requirements and rules of construction, emergencies often occur. Cracks appear in the walls, in places building materials at all begins to fall off. If the laying is carried out without using templates, plumbing and building levels, then the probability that it will be uneven, extremely high. It will be difficult to separate this wall with the finishing coating and will require increased costs.
- Many novice builders put a brick, without measuring the thickness of the seam, or do not use a solution for vertical seams at all. Walls laid on this principle will be badly held heat in the house, since the vertical seams will be blown away.
- You can not put a brick under the tilt. It should only lie in a horizontal position. Inexperienced builders often do not follow the location of vertical seams, as a result, they begin to coincide, and this leads to fragility of the design, which is why it can collapse.
- Another common error is poorly filled seams. Outing a solution, builders do not count its rate or are also saved. The house built with your own hands will have reduced thermal insulation characteristics.
- When laying a facing material, it is necessary to carefully monitor its cleanliness, since it is precisely the entire appearance of the house depends on the accuracy.
To hold the brick laying with your own hands is quite possible even in small-minded builders. If it is necessary to strengthen the design, then the reinforced grid is used. It is placed every 4-5 rows.
Caring for the family, expressed in the construction or restructuring of the house, requires the owner of certain skills. Brick masonry is something sooner or later, it is necessary to deal with most men. Because if you have the need to work with brick and mortar, but you do not have the idea how to do it, it's time to learn how to put a brick.
Preparation for construction
Before you start posting, make sure that you have everything you need.
Tools and materials
- bricks;
- cement and sand, or a special dry mix for masonry;
- trowel (Kelm);
- level;
- bucket for solution;
- construction mixer / shovel / concrete mixer;
- water;
- cord, fishing line or thick thread;
- pair;
- roulette;
- kirk or Bulgarian.
How to make a solution?
The solution provides excellent resistance with load on compression and offset, because the masonry is performed very strong.
If you purchased a ready mix, then, following the instructions on the package, simply mix it with water. Use a building mixer for this, then the solution will be homogeneous.

If you have separate sand and cement, you will need to choose the proportion yourself. For one part of the cement you will have about 4-6 pieces of sand. To get the mixture also plastic, you can add clay or lime to it. Take the water about half of the part, but do not leave all right away. Depending on what thickness you did, you can always add more.
All components must be distributed evenly, and the mixture itself should turn out sufficiently dense, so that it sticks to the bricks and not slip down from the seams. You can stir the solution with the Kelma if you make it a bit. If you decide to prepare several buckets of the mixture at once, then take the shovel. Here you will have to sweat a little, because the mixing of the cement mortar is not a slight lesson. Even when using concrete mixers, load and unload the content is quite difficult in terms of physical exertion.
Stroke work
If you are new to you still do not know how to put the wall of the brick, then you may have difficulty in compliance with the vertical and horizontal levels of masonry. But it does not matter. Just do not hurry and do everything extremely accurate by rechecking yourself.
Build a wall
- To begin with, install a plumb. This is done in order not to take the level every time. Take a cord or fishing line and tie to one side of the ship, for example, a big nail. The other end is tied to anything higher so that the cord coincides with the start of the masonry. Thus, the cord will indicate you the side face that every new row of bricks need to be smoked.
- Before putting the first row, put the solution on the floor and evenly distribute it so that it turns out a layer with a thickness of approximately 8-15 mm.
- Place a row of bricks. The seams between them filled with cement should also have a thickness of 8-15 mm. It is best to make them as thick as possible and not to leave hollow places inside the seams.
- Check with the level. You have to get a horizontal. If it is not, then you must end the bricks. Remember if the first row came out curves, everyone else will also work uneven.
- Now instead of level, you can use a cord with two nails at the ends. Put the extreme bricks in a row, and put nails on them and prescribe other bricks. Cord must be stretched! Thus, you will see at what level you need to put the current series. Of course, there are other devices for setting the horizontal level. You can purchase them in a construction store.
- Continue to put one row after another until you build a wall completely.
How to make corners?
If your masonry should be corners, then lay out them first. They are laid out immediately into several rows and as the walls grow the steels also grow in height. They must be as smooth as possible, because it depends on the entire wall with the levels of horizontal and vertical.

If you are a lover in brickwork, do not rush. Do each step, thinking about it carefully, and everything will turn out. In any case, the solution will dry for a long time, and therefore if an error is detected, you can fix it.
Brick houses are still popular due to their reliability and durability. And, although often the construction and masonry of the walls are entrusted by specialists, it is not difficult to independently.
Varieties of brick masonry
Brick masonry not only is distinguished by durability and quality. Through this material, you can create a large number of drawings.

However, the complexity of the pattern involves more skill when performing work. Consider the most common masonry options:
The chain masonry of the brick suggests a permanent series of tychk and spoonful rows. Mandatory condition: joints must coincide vertically.

The crushes is distinguished by the dressing of spoonful masonry with seams horizontally.

Dutch masonry includes the connection of the tychk and combined rows. The last of them is formed by horizontal brick alternation supplied by a yard and spoonful way.

Gothic laying is based on mixing the basic principles of masonry.

To get masonry in English style, one brick is needed to lay with a dressing of two. Another condition is the alternation of the tychk and two spoonful rows.

Well-masonry is considered the simplest and rational. It is formed by the construction of two walls in half of the brick and connecting their bridge vertically or horizontally.

That the result was appropriate, it is worth choosing a template for brickwork and follow it.
How to determine the correct brick masonry
For beginner bricklayers, ordinary difficulties are the laying of bricks in a single level and receiving direct angles. In order for the process to proceed correctly, you must follow the following:

- Special attention requires the first row. Put them at a distance of three mm. The evenness of the number is checked using a special tool.
- Lay the brick is needed exactly as horizontally and vertically.

Equipment
Each master has and uses the following brickwork fixtures:

- For alignment of products, a hammer-Kirk and Bulgarian is used.
- To check the smoothness of the wall, the master uses a plumb, level and roulette.
- Kelma is used not only for applying a solution, but also a preliminary fit of bricks.
- When performing an angle in brickwork, an ordinary is needed.
- Safety is provided by special points in the form of glasses.
- Since the work requires a solution, a container is needed.
Preparation of solution
Sushing the solution is an important part of the work. It consists of sand, cement and water. For greater plasticity, a washing or clay powder is added to it.

The laying of hollow bricks using this solution is prohibited, because their hermetic properties are disturbed.

To work in a small team, the acquisition of concrete mixer and the purchase of 300 or 400 cement marks will be useful.

Laying corners
Choosing, where to start brickwork, pay attention to the corners. Experienced masters usually remove the corners above half the wall prior to work on smooth sections of the wall. This is not surprising, since half the correctness of the design depends on the levels of angles.
Note!


The perimeter of the future house is determined by tightly stretched cord. For the incidence of the angle beginner bricklayers, the order is used. It helps to fix and properly lay the first bricks.
Experienced masters can do without this tool, relying on experience. For vertical regulation, a plumb or level is used.

Stevov execution
Since each row of brick masonry is mixed with a solution, you need to know the basic principles of working with it:

When choosing a void solution, the solution not only should not be found outside the wall, but also leave the slots, which will then be twisted.

Convex seds belong to decorative. They are performed using a special tool. From the primary materials you can use cut along the pipe.

Note!

Went seam is not considered difficult in execution. For him, a wand or tube is needed.

The most optimal is the smooth seams, since after them do not need to additionally align the surface. They are often used in the manufacture of chimneys and fireplaces.

Main masonry
Immediately after removed angles, you can start laying the wall. Corners will rise with the construction of walls. But it is important that the cord does not resist. The brick is placed tightly to the corner of the solution previously applied with a gap of 3 mm.

If there is a need to trim bricks, it makes sense to use the grinder. In the absence of this tool, this work can be made by pickle.

To ensure the density of masonry, the solution takes a little more than necessary, and each brick is pressed well. What performed must be collected by a trowel. Do not be discouraged if you immediately did not achieve the desired result. Sometimes to perform work correctly, workout is necessary.

Note!

To make sure of the obtained results, pay attention to the photo of the brickwork.

Strengthening masonry
Such work is necessary for those who wish to extend their lives to the old house instead of building a new one. Whatever the brick laying scheme with your own hands before proceeding with this work, it is necessary to check the reliability of the foundation. If there are cracks in it
Or the rupture your facility does not like long.
After you have verified in the reliability of the foundation, it makes sense to strengthen and wall with fittings and wire plaster. To other necessary tools are required for this work include a chain grid, a special solution for plastering walls, trustees, nails and wire.

Wall Strengthening Technology
The first stage of work is to purify the wall. Then it is necessary to clean the seams and score nails with a distance of no more than 100 mm so that the height of the cap was above the level of the wall at 20 mm.

Now it is necessary to mostly put a rubber grid on cooked nails. Instead of such a grid, you can use ordinary wire. Only in the formation of cells is worth paying special attention to the corners, avoiding holes in these places.

The next stage is to shrank the wall. The composition necessarily includes cement and sand in a ratio of 1: 3 or 1: 4, as well as polymers to increase viscosity and plasticity.

For the base part of the wall, a cement-lime mixture, characterized by water resistance, can be applicable. To avoid lumps, the composition components must be sifted. The layer of plaster should be so that it closes the frame.

Conclusion
If you first decide to master the profession of a mason, do not hurry in the process of performing work. Carefully prepare materials and tools.

Make a plan, and calculate the number of bricks. And if you have determined with the masonry method and theoretically imagined the end result, you can proceed to the process.

Stock Foto Masonry brick do it yourself


