Unconventional drawing (77 ideas for kindergarten). Unusual drawing techniques for children various drawing techniques for children
Hot enamel (from Fr. Email) - Enamel technique, in which the pastal mass painted by oxides is applied to a specially treated surface and undergoes a firing, as a result of which a glassy color layer appears.
There are several types of enamels depending on the technique of its manufacture:
- Miniature on enamel, finifesty - artistic enamelography technique that uses the reception of brushed easel painting. The first image can be performed on a white enamel background of a copper plate base. After the famolder, the plate is dried, burned in a muffle furnace at 800 degrees and prescribed again. To obtain the maximum color sophistication and detail of the drawing, this process artist-enameler repeats repeatedly.
- Painted (picturesque) enamel - On the front side of the enamel paint saturated color, the contour of the image and its details are prescribed. Since enamel is imposed by fragments, the firing is 10-15 times, given the different level of melting point of the enamels used.
- Septo enamel - For its manufacture, a thin metal plate is taken, on which the outline of the future image is cut through the contour. Then, on this contour, thin metal stripes are attacked, obtaining an image from a variety of cells in shape and size. Each cell fill in enamel of different colors to the upper edge of the partition and produce enamel firing.
- Enamel on Skani (Filigners)- Plant or geometric ornament from the transit metal wire, which forms cells is attacked on a metal surface. Each cell is filled to the edges of the enamel of different colors, which after the firing is settled and it turns out below the scoop ornament. As a result, the enamel is not polished.
- Loved enamel - On the metal plate is deeply cut (removed) scene or ornamental image. The recesses obtained at the same time are filled with transparent or opaque enamel and enamel enjoyed. In the technique of the lavetled enamel, several techniques are known to achieve an artistic effect.
- Enamel on engraving It is a variety of equipment with a lavety enamel.
- Enamel in guilloche background - Variety of enamel enamel technique. Engraving is performed by a mechanical manner using a special machine. The technique of enamel in Guiloshire uses exceptionally transparent enamels of the widest color gamut.
- Enamel on casting - The image is obtained by its castings together with the metal plate - the basis. Then the recess on the plate is filled with enamel.
- Enamel on relief- Technique used for artistic enamellation on high relief when the enamel coating repeats the shape of a metal embossed image, acting as a watering glaze.
Ecology of consumption. Children: If your child is periodically frustrated, saying: "I don't know how to draw it" or "not beautifully happened," leave attempts ...
If your child is periodically frustrated, saying: "I don't know how to draw it" or "not beautifully happened," leave attempts to draw according to the pattern, as they do on different drawing circles, and try spontaneous drawing techniques, not standard.
We offer you 20 options for similar techniques revealing.
Pasparta.
This is when the baby's kaleaks are inserted into a sheet with a cut out of any form. Those. Cut the template, for example, butterflies and superimpose on the "Cherka" baby. As a result, the child's work forms a unique pattern of the butterfly wings.
Drawing legs.
Fasten the paper sheet on the floor with adhesive tape. Insert the baby between the fingers of the feet of the pencil and ask for something to draw. You can create simultaneously with two legs on one sheet of paper. Attach a large sheet of paper to the wall and ask the child to portray something, lying on the back.
FRROTTAZH.
A sheet of paper is located on a flat relief subject and then moving out not sharpened color pencil over the surface, you get an impression imitating the main texture. You can trim the pencil crumb in the same way along the embossed surface. Who tried to draw on the table with a relay coating knows how this drawing technique can engage in the drawing completely inspired. And you can create drawings combining a lot of several items.
Air paints.
To make paint mix in a small cup:
- one tablespoon of "self-refined" (pancake) flour is flour with already added baking powder. You can simply add to the flour (for 500 gr) 1h.l. soda and 1h.l. citric acid
- a few drops of food dye,
- one tablespoon salt.
Then you need to add some water to give the necessary consistency to "air" paint.
It is necessary to apply paint to the thick sheet of cardboard (if you do not have the right brush, you can use cotton sticks).
Attention! Cardboard should not contain synthetic materials and films, use the usual cardboard or very dense paper.
Place the picture in the microwave, turning on the maximum mode by 10 to 30 seconds until the paint becomes dry. The drying time depends on the thickness of the paint layer and its consistency.
Marble paper.
Need: Cream (foam) for shaving, watercolor paints or food dyes, flat plate for mixing foam for shaving and paints, paper, scraper.
Work plan:
- With a uniform thick layer, apply foam for shaving on a plate.
- Mix the paints or food dyes of different colors with a small amount of water to get a saturated solution.
- With brushes or pipettes, you hammer the paint of different colors on the surface of the foam in an arbitrary order.
- Now everything is the same tassel or a wand, smear the paint on the surface, so that it forms the bizarre zigzags, wavy lines, etc. This is the most creative stage of all work, which will enjoy the children.
- Now take a sheet of paper and gently attach it to the surface of the resulting patterned foam.
- Put the sheet on the table. You can only scrape all the foam with a sheet of paper. For these purposes, you can use a piece of cardboard or in half the lid cut.
- Under the shaving foam layer, you will find stunning marble patterns. The paint managed to quickly appreciate the paper, you just need to give it to dry for a few hours.
Drawing by the food film.
Apply the stains of several colors of watercolor or gouache paint on the entire surface of the sheet. We put the film from above and draw, slightly pressing the film, a variety of lines. We give paint to dry and remove the film. I bring the drawing to the end, markers or pencils.
Soap painting.
Paints you can mix with soap solution and then apply patterns with a tassel and forms. When drawing, soap bubbles are formed, which create the texture of colorful smears.
Cleaxography.
Let the kid droplet paint onto the leaf, tilt it in different directions, and then draws a bliss so that it turned out any image. Or the child is dipping a brush into the paint, then puts a bliss on a sheet of paper and folds the leaf twice so that the "bliss" is imprinted in the second half of the sheet. Then turns the sheet and tries to understand who or what is like.
Drawing on raw surface.
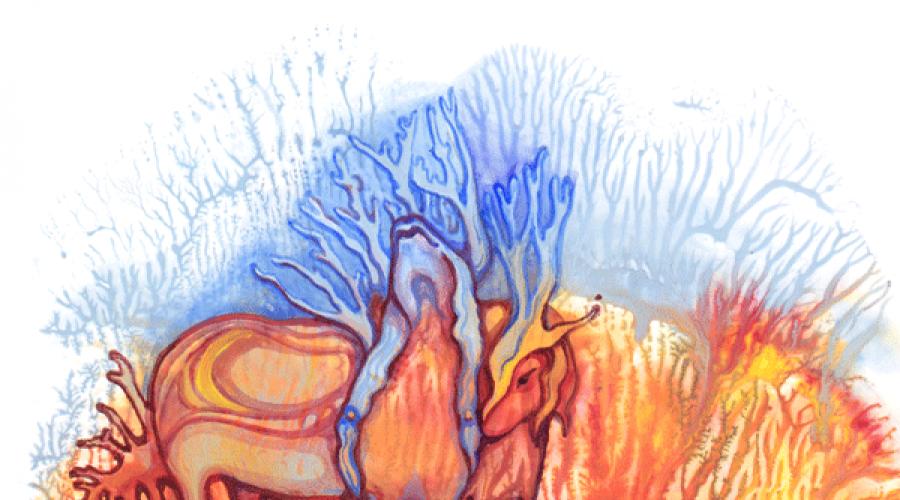
The technique is very simple: wipe the paper sheet with water, let's dry for 30 seconds and start drawing with watercolor paints. Paints spread in different directions and are obtained very interesting divorces (dawn, clouds, trees, rainbow).
Salt.
Pre-draw on paper sketch. Moisten it with water with a brush, sprinkle with salt, wait until she keeps himself water, sustain. When everything gets free, draw the missing items and color. Salt draw the dragonfly, birds, jellyfly, butterflies, snow, smoke.
Wax.
Prepare a sheet with animal silhouettes that you draw a candle in advance. Painted paint drawing, the child unexpectedly "will create" images of animals.
Foam or sponge.
Saving a sponge into a thick gouache, a child can draw landscapes, flowers bouquets, lilac branches, apple trees.
Bunch of pencils.
Securely secure a large sheet of paper with a sticky ribbon. Collect colored pencils in a bundle - so that the sharpened ends are on the same level. Offer the child to draw.
Small and starch.
Pour a lot of starch on a sheet of paper and uniformly swear on the surface evenly. Suggest the baby to draw shameles on slippery surface. It is better to use the main colors of chalk so that they give you new colors.
Color glue.
Pour glue to empty vials, add to each several drops of different colors to each, and you are ready to create artistic works. Draw with colored glue on dark paper using the "drip" technique.
Gauze tampon.
Offer a child to dip a gauze tampon in paint and draw clouds, soap bubbles, snowy drifts, ducklings, butterflies. The missing details should be drawn with a brush or felt-tip pen.
Corn cobs.
Come up with any image. Pulse the pillage into the paint and roll on the sheet of clean paper. Make an imprint of the "tail" corn score.
Prints.
We make drawings fingerprints.
Drawing points.
The kid with a light pressure of the pencil outlines the preliminary contour of the object, then the spot technique fills the space inside it, using markers or pencils of different colors.
Drawing by splashes.
The most basic here is to master the spray technique. Apply gouache with a dry toothbrush with a sufficiently rigid bristle, just smaller than you usually put the toothpaste. Consistency of paint is a little bit of pasta, so the water is usually not needed here. Keep the brush in the left hand of the bristle down at a distance of 3-4 cm from the paper and lodge the bristle towards yourself.
Very beautiful multicolored "spray" (salute) and yellow-red (golden autumn) on a white sheet; White "spray" on a dark blue background (winter landscape).
Magic balls.
Material: Cover from box, balls, paint, paper, brushes, water.
Progress. In the box to place a sheet of paper, there are several multi-colored or monophonic paint droplets on it. Put the box 2-3 balls and shake the box so that the balls ride, mixing the paints, creating a pattern. Published
In this article you will find 11 interesting drawing methods with children.
Monotypia
Draw something on cellophane or glass with a child, and then reprint on a sheet of paper.

Cleaxography
Put a few bold klex or draw the lines of the one half of the sheet. Then bend it in half. Expand again. Now, look along with the child to this drawing to see images, objects, or come up with a whole plot.

Drawing on wet paper
Moisten the paper with clean water. Next draw paints.

Drawing points
You will need a cotton cosmetic wand and paint. With the help of scams, draw flowers, berries or whatever you wish.

Drawing threads
To do this, you need a woolen thread to suck in a thick paint and then climb between two sheets of cardboard. Next, stick for the end and tell the thread inside the cardboard. It turns out an interesting image in which you can see a lot of interesting images.

Print
Make different figures from the foam rubber. Then, dip in the paint and put prints. To begin with, chaotically, then draw the ornament. Prints can be installed with vegetables or fruits. Cut the apple in half, or take the Kochan of the Beijing cabbage. Lower in the paint and put the stamps on the paper.


Drawing foam
Mix in a glass of water, shampoo and a little paint. Take a cocktail tube, lower it into the glass and blew into it until the bubbles rise above the glass. Then apply paper to this foam and see what happened.

Magic pattern
Draw on white paper with a wax candle or a wax pencil image. Then apply paint on top of this image. The paint will not go to the oily image from the candle. The drawing you make seems to be manifested.

Finger drawing
You can draw with your fingers, fists, palms, feet, and even nose!

Drawing Solu
To start, refine the glue. And then sprinkle with salt.

Relief drawings
Add flour to the paint. Draw this paint, and when it dries - you will see the result.

Drawing with a secret in three pairs of hands
When your child is 4 years old, we strongly advise you to resort to this method. It is as follows. A rectangular sheet of paper is taken, 3 pencils. Adults and child are distributed: who will draw the first one who is the second who is the third one. The first begins to draw, and then closes his drawing, reducing the sheet from above and leaving a little bit, some part, to continue (neck, for example). The second, without seeing nothing but the neck, continues, naturally, the body, leaving the visible only part of the legs. The third finishes. Then the entire sheet opens - and it is almost always funny: from the inconsistency of proportions, color hammes.
Cleaxography
It is to teach children to make blots (black and multicolored). Then a 3-year-old child can look at them and see images, objects or individual details. "What is like yours or my blots?", "Who or what does she remind you?" - These questions are very useful, because Develop thinking and imagination. After that, without hosting a child, but showing, we recommend proceeding to the next stage - Circuit or Dorivovka Kleks. As a result, a whole plot can be obtained.
Drawing together on a long paper strip
By the way, the paper format is useful to change (i.e., to give not only the standard). In this case, the long strip will help draw together, without interfering with each other. You can draw insulated objects or plots, i.e. Work nearby. And even in this case, the child is warmer from the elbow mom or dad. And then it is advisable to go to collective drawing. Adults and the child agrees who will draw that will draw in order to be one plot.
Drawing yourself or drawing from nature favorite toys
Drawing from nature develops observation, the skill is no longer done, but to depict according to the rules, i.e. Draw so that it looks like the original and proportions, and forms, and color. Offer at the beginning to draw yourself, looking into the mirror. And certainly, after looking at the mirror. And even better, show how you, adults, will draw yourself, by sure many times looking in the mirror. Next, let the child himself choose the subject, it can be a favorite doll, a teddy bear or a car. It is important to learn to observe a long time, comparing part of the subject. And further. If the child goes away from nature, will make something his own, as a result of which there will be a completely unlike items or a toy, "do not be mistaken. Praise your baby: "You drew a new car today! Probably, you want this? " But necessarily at the end of such drawing it is important to ask: "And what drawn the car differs from this?"
"I draw mom"
It would be nice to continue drawing from nature or memory drawing (family members, relatives and friends can become objects for such an image). Photos or conversations about the characteristic features of the appearance of missing relatives are taken as an auxiliary material ... Photos are taken and considered. A conversation is held: "What grandma Valya? What is her hair? Hairstyle? Favorite dress? Smile?" And the process of creation begins. After a while, you can offer to draw a memory of the girlfriends. When there are enough drawings with the image of relatives and friends, we advise you to organize a mini-exhibition "My relatives and friends", where the first portraits of the preschooler are estimated.
Spot drawing
Children like all unconventional. Drawing points belongs to unusual, in this case, receptions. To implement, you can take a marker, pencil, put it perpendicular to a white sheet of paper and start portraying. But it is best to get point drawings with paints. That's how it is done. The match, purified from sulfur, is tightly covered with a small piece of cotton and dip in thick paint. And then the principle of applying points is the same. The main thing is to immediately interest the child.
Poropolone drawings
For some reason, we all tend to think that if we draw paints, it is necessarily a tassel. Not always, TRizov say. Porolan can come to the rescue. We advise you to make a variety of small small geometric figures from it, and then attach them to thin wire to a stick or pencil (not sharpened). The instrument of labor is already ready. Now it can be dipped into the paint and the method of stamps to draw red triangles, yellow mugs, green squares (the whole foam in the difference from the wool is well clean). Initially, children will draw geometric shapes chaotically. And then propose to make the simplest ornaments from them - first from one species of figures, then from two, three.
Mysterious drawings
Mysterious drawings can be obtained as follows. Cardboard is taken in size about 20x20 cm. And folded in half. Then the half-walled or woolen thread is selected with a length of about 30 cm, its end is 8 - 10 cm is dipped into thick paint and clamping inside the cardboard. It should then be taken inside the cardboard with this thread, and then remove it and open the cardboard. It turns out a chaotic image, which is considered, dreamed and draw adults with children. It is extremely useful to give names to the resulting images. This complex mental speech work in combination with the visual will contribute to the intellectual development of preschool children.
Drawing shallow
Preschoolers love diversity. These opportunities provide us with ordinary shames, Sangin, coal. Smooth asphalt, porcelain, ceramic tile, stones - this is the foundation that chalk and coal goes well. So, the asphalt places to the capacious image of the plots. Them (if there is no rain) can be developed the next day. And then according to the stories to make stories. And on the ceramic tiles (which sometimes are stored in the residues somewhere in the storeroom) we recommend depicting patterns or coal patterns, small objects. Large stones (type of boulders) are asked to decorate them under the image of the head of the animal or under the pecks. It depends on what or who the stone is reminded.
Method of magical drawing
This method is implemented. The angle of wax candle on white paper is drawn image (Christmas tree, house, and maybe a whole plot). Then brush, and better by cotton or foam rubber, the paint is applied on top to the entire image. Due to the fact that the paint does not fall on the fat image of the candle - the drawing seems to appear suddenly before the eyes of the guys, manifest. You can get the same effect by drawing first by stationery glue or a piece of economic soap. At the same time, not the last role plays the selection of the background to the subject. For example, the snowman drawn candle is better to paint blue paint, and the boat is green. No need to worry if when drawing will begin to crumble candles or soap. It depends on their quality.
Drawing small kameshkov
Of course, most often the child depicts Pa Planes, on paper, less often on asphalt, tiles of large stones. Plane image of the house, trees, cars, animals on paper does not imply like the creation of bulk their own creations. In this regard, marine pebbles are ideally used. They are smooth, small and have a different shape. Herself the shape of the pebble sometimes will tell the child which image in this case is to create (and sometimes adults will help the kids). One pebbles are better to prick under the frog, the other is under the bug, and a wonderful fungus will come out of the third. Bright thick paint is applied on the pebbles - and the image is ready. And it is better to complete it: after the pebbles dry, cover it with a colorless varnish. In this case, glitters, brightly overflow the volumetric beetle or a frog made by children's hands. This toy will not participate in independent children's games yet and make a lot of favor to its owner.
The method of finger painting
Here is another way to portray the world around: with your fingers, palm, leg feet, and maybe the chin, nose. Not everyone will perceive such a statement seriously. Where is the line between prank and drawing? And why should we draw only a tassel or felt-tip pen? After all, a hand or individual fingers are a helping. Moreover, the index finger of the right hand is listening to the child better than a pencil. Well, if the pencil broke, the brush was laid out, the felt-tumbers were over - and I want to draw. There is another reason: sometimes the subject just asks children's palm or finger. For example, the drawing of a tree a child will better fulfill with his hands than other guns. He will bring the trunk and branches with his finger, then (if) will apply yellow, green, orange paints on the inner side and draws a bugland-red tree on top. Well, if we teach children to use your fingers rationally: not with one index finger, but by everyone.
Method of nitcography
There is this method mostly for girls. But this does not mean that it is not suitable for children of another sex. And he lies in the following. Initially, a 25x25-dimensional screen is made from cardboard. The cardboard passes or velvet paper, or a monochrome flannel. It would be good to prepare a nice bag with a set of woolen or half-walled threads of various colors. At the heart of this method, the following feature is based: threads that have a certain percentage of wool are attracted to flannels or velvet paper. You only need to attach them with light movements of the index finger. Of these threads you can prepare interesting stories. Imagination develops, feeling taste. Especially girls learn to skillfully pick up colors. Some colors of thread are suitable for light flannels, and to dark - completely different. So the gradual path to the female craft begins, the needlework very necessary for them.
Method of Monotype
Two words about it, unfortunately, the rarely used method. And in vain. Because he trays a lot of tempting for preschoolers. If you briefly say, this is an image on cellophane, which is transferred then to paper. On the smooth cellophane draw paint with a brush, or matches with a cotton, or a finger (one should not uniformity). Paint should be thick and bright. And immediately, until the paint dried, turn the cellophane down the image down onto white thick paper and, as it were, the drawing is wet, and then raise. Two drawings are obtained. Sometimes the image remains on cellophane, sometimes on paper.
Drawing on wet paper
Until recently, it was believed that it was possible to draw only on dry paper, because the paint is sufficiently diluted with water. But there are a number of objects, plots, images that best draw on wet paper. I need an ambiguity, blurry, for example, if the child wants to portray the following topics: "The city in the fog", "I had dreams of dreams", "It's raining", "night city", "Flowers behind the curtain", etc. You need to teach a preschooler to make paper a little wet. If paper is excessive wet - the drawing may not work. Therefore, it is recommended to wet watts chicks in clean water, squeeze it and spend it either throughout the sheet of paper, or (if necessary) only in a separate part. And paper is ready for the work of unclear images.
Fabric images
In the bag we collect the remains of the tissues of all sorts of drawings and of various quality. It will be useful, as they say, and sitheria, and a brocade. It is very important on specific examples to show how the drawing on the fabric, as well as its release can help portray something very bright in the plot and at the same time easily. We give a few examples. So, on one of the fabrics depicted flowers. They are cut along the contour, glue (only with a hubber or other good glue), and then patted the table or vase. It turns out a capacious colorful image. There are fabrics that can well serve as a house or animal body, or a beautiful umbrella, or doll hats, or handbags.
Volumetric Applique
Obviously, children love to engage in appliqué: cut something and stick to get a lot of pleasure from the process. And you need to create all the conditions. Along with the plane applique, teach them to do bulk: the volume is better perceived by the preschooler and more realistically reflects the world around. In order to obtain such an image, it is necessary to remember the applicative colored paper in children's hands, then straighten straightened and cut the desired shape. After that, hardly stick and, if necessary, draw individual details with a pencil or felt-tip pen. Make, for example, so favorite kids turtle. Remember the brown paper, slightly straighten, cut out the oval shape and stir, and then try your head and legs.
Draw with postcards
In fact, almost every house is stored a lot of old postcards. Take old postcards with children, teach cut the desired images and stick to the place, in the plot. A bright factory image of objects and phenomena will give even the most simple unpaired drawing quite a decoration. Three-, four- and even five-year-old child sometimes difficult to draw a dog and beetle. They can be prepared ready, and let him draw a sun, rain and will be very happy to the dog and bug. Or, together with children, cut out of the postcard and stick a fabulous house with a grandmother in the window, then a preschooler, focusing on his imagination, knowledge of fairy tales and visual skills, undoubtedly, draws something to him.
Learning to do background
Usually children are drawn on white paper. So more clearly visible. So faster. But some plots require the background. And, I must say, on the background made in advance, all children's work look better. Many children make a background with a tassel, besides ordinary, small. Although there is a simple and reliable way: make a background with a wool or a piece of foam-moistened in water and paint.
Collage
The very concept explains the meaning of this method: it's several described above. In general, we ideally seem important to the following: well, when the preschooler is not only familiar with various techniques of the image, but also does not forget about them, but uses the place by performing a given goal. For example, one of the children is 5-6 years old decided to draw, and for this he uses the point drawing (flowers), and the child drew a finger, fruits and vegetables, he will cut out of the postcards, fabrics will depict the sky and clouds, etc. There is no limit to improving and creativity in visual activities. English teacher Anna Rogovin recommends everything on hand to use for exercises in drawing: draw with a cloth, a paper napkin (folded many times); Drawing with dirty water, old tea brewing, coffee grounding, squeezing from berries. It is also useful to paint banks and bottles, coils and boxes, etc.
Elena Nikitin
Painting One of the most favorite children's activities. Drawing by unusual ways Causes even more positive emotions in children. Using non-traditional drawing techniques There is a development of thinking, imagination, fancy, creative abilities. The child appears interest in drawingAs a result, the desire to create.
Today I will tell you and show how paintwithout using a brush.
1. Drawing with cotton chopsticks. We recruit paint on a stick and dots decorate the image on a sheet of paper. (Christmas tree, snow, kettle, sundress, rowan branch).


2. Drawing palms. Pour paint to flat container. Focus palm and press it to a sheet of paper. (Flowers, Fish, Grandfather Frost, Swan, Carrot).

3. Drawing with cotton disks. Cotted discs paintBy folding them in half, a quarter or whole. (Moon, drifts, a variety of flowers).


4. Drawing prints. Plain method of drawing: Paint is applied to the printed surface and put on a paperprint paper sheet. (Used: Flowers, shells, fruits, vegetables).


5. Cleaxography. On a sheet of paper, a stain is made or put a blots from watercolor paint. We take the tube and blow the air on the klyaksu.

6. Drawing fork. In the plug, we type paint from a flat plate and a flat surface of the fork made a print. Can draw grass, fence, flowers, hedgehog.

7. Drawing thread. The best thing draw woolen thread. The thread is loose in the paint and apply it to a sheet of paper and create a pattern by printing with the movement of the thread. Woolen thread creates a fancy pattern, which is suitable for the image of clouds, clouds, lambs, an unusual flower.
8. Painting Sponge or piece of foam rubber. A piece of foam rubber clamping a clothespin, omit in the paint and applied prints that create the texture of the subject. They draw animals fur, fluffy bunches of colors, clouds, crowns of trees.


9. Drawing spray. It will take a toothbrush and comb. We take a little paint on the brush and spray with a comb. Above a sheet of paper with a brush on a comb. You can apply paints of different colors, it turns out very beautiful.

10. Drawing stamps. The stamp is easy to make plasticine. Plasticine is applied to a lump, a cube, etc. Any sharp subject we depict some object or abstract pattern on it. Stampik ready. We make a pad from a sponge. Put the paint on the sponge. Apply the stamp to a sponge with paint. Now you can make prints. The stamp can be made from the bottom of the plastic bottle, beautiful flowers are obtained.

11. Painting Fingerprints of cups and necklies of different diameters. Paint the paint in a flat plate. We lower the cup into the paint and apply a drawing on a sheet of paper.

12. Drawing Commercial. We will need a comb with frequent tooths. Apply multicolored paint (next to each other) On a sheet of paper in the form of a drop. Then we spend the comb on all drops of paint, connecting and swinging them. It turns out a stunning rainbow. You can also draw different patternsBy adding drops and leading the comb in different directions.


13. Drawing with wax crayons. Color wax pencils or wax shallow patterns on a sheet of paper. Then cover one or more watercolor layers. It turns out an unusual and bright drawing. (Can draw stars, Flowers).
14. GRITAZHTA (Wax). The surface of the entire sheet of paper is painted with wax crayons, then cover the sheet with black gouache. When everything dry sweat the paint and create the drawing lines. It is possible to pump a pointed stick, a skewer, toothpick.

15. Drawing marley. We apply a layer of gauze to the wet sheet of paper, straightening it. Marla must be fixed on paper. Top of gauze draw a brush with paint. Leave the drawing to dry. We remove the marla - the paper remains on the paper in the form of a marlevary fabric texture. (Landscape, Sky, Tree, Grass)

16. Painting Using a plastic film. Draw a drawing. While the paint did not dry quickly apply the film to the drawing in the right place and neatly, rotating movements, create wrinkles of the film on paper. In wrinkles collected paint. Give dry and gently remove the Lenka.

17. Monotypia. We draw symmetric items. To do this, we fold a sheet of paper in half and on one half draw an item. While the paint did not dry, fold the sheet again in two. On the second half it turns out the imprint, after that the image can dorisy or decorate.


18. Painting Air-bubble film. With the help of this wonderful material, you can very just draw falling snow. We apply a white or pale blue paint on the film and apply it to a paper sheet with a pattern. With this techniques You can make an unusual background for winter appliqué.


19. Drawing Solu. On a sheet of colored cardboard we apply a drawing with PVA glue. Play picture on the topic of winter. Spring salt from above. When everything dry extensive salt shakes.

20. Drawing a semolina. For drawing in this technique Used colored paper or cardboard. On the contour drawing is applied PVA glue. The glove of paper is poured on top and tightly apply a sheet of paper from above. Then remove the paper and shake the extra bath. Thus fashion The following item is created.
21. Drawing candle. On a dense sheet of paper or cardboard, children draw a candle on the plan. The sheet is painted watercolor paint. Through watercolor will perform wax images. (Christmas tree, snowflakes, animals).
You can also use such techniques unconventional drawing: drawing a shot, drawing finger, painting By stencil Thomson, drawing by pumping method, drawing soap bubbles, drawing mint paper, drawing leaves.
Publications on the topic:
Acquaintance with non-traditional techniques 1. "Familiarization with non-traditional equipment" 2. Slide children should live in the world of beauty, games, fairy tales, music, drawing, fantasy,.
Consultation "Drawing with unconventional ways" The development of the creative potential of the individual should be carried out from early childhood when the child under the guidance of adults begins to master.
 I really liked the children of our group to get acquainted with various artistic creativity techniques. The guys were so plunged into.
 Abstract for drawing by non-traditional appliances "Autumn leaves" Age Group: 2-youngest Type: Productive Activities Organization Form :.
I know children of preschool age with non-traditional drawing techniques Municipal budget pre-school educational institution MBDOU №33 »Malinka» Methodical development: "I know the children of preschool.