Learn to draw pencil animals. Drawing on drawing "My favorite pets"
Writing on drawing "My favorite pets".
(With children of senior preschool age.)
purpose . Teach children to transmit objects in drawings, different in shape and magnitude, based on the results of their impressions; Navigate the paper sheet space.
Tasks.
Educational.
Learning to depict animals from rounded shapes: allocate in the subject the main form of large parts, transmit their position (animal in motion, add small parts, transmit proportions).
We work out the skill of arbitrary regulation of Pressure force on a simple graphite pencil when creating a preparatory pattern.
Learn children to paint the image of the subject by its contour.
Correctional-developing
Develop eyemeter, mental activity of children. Consolidate knowledge of children about pets, passess Active and Passive Dictionary.
Educational.
Relieve responsiveness in children, attentiveness, kindness to others, the ability to empathize and help them in case of trouble.
Vocabulary: four-legged friends, cut out, body parts, silhouette.
Equipment. Card - silhouettes with pictures of pets; Demonstration material - pictures with the image of the same domestic animals; easel; magnetic board; album leaf for each child; Envelope with a letter; The riddle of the dog; Simple and color pencils.
Methodical techniques:
motivation to activities; riddling riddles; Questions for children; Problem situation; Exercises for the development of shallow motility; finger gymnastics; exercises for the development of lexico-grammatical categories; exercises for the development of logical thinking; Fizminutka; conversation with children; Surprise moment; Outcome.
Connection with other activities .
Cognitive-research: observations on a walk for a dog and a cat; Reading books, learning of finger gymnastics about pets, viewing illustrations in books, riddling domestic riddles; Construction of buildings for pets. Musical: singing songs and learning muses for pets.
Structure occupation .
See what I brought the postman. What is it? (letter)
Guys, you want to know from whom the letter came? Then guess the riddle:
With the owner is friends
House worshi
Lives under the porch,
Tail ring.
The educator praises children: "The riddle gone correctly. The letter came from our acquaintance - the dog of the ball. And how can I find out what in this letter? (You can read. You need to open the envelope at first). Who will read the letter? (You can ask for an adult). How can I ask, with what kind of polite words? (Help us please read the letter) I am glad to help you and of course now I will open an envelope and read. That's what he writes: "Dear guys! I woke up in the morning in my booth and immediately went to spend my friends. Yes, here is the grief - then what! It turns out that while I slept, an evil wizard wolked them all, turned into a silhouettes (contours). Soon the owner will return and will be very upset. How now to be? I know that you are big friends of pets, so I appeal to you for help. Help, please argue all my friends. Thanks in advance, the faithful dog of the ball.
Well, like children, help our four-legged friends, pets.
Guys, the dog of the ball sent us the silhouettes of all enchanted pets. Let's look at them carefully.
Did. The game "contours".
Please go to the first easel. " The tutor puts on the easel pictures with contours of enchanted animals, asks questions: "Who is it? Why are you (you) think so? What do you know about a cow? What does it benefit? How can I call it affectionate? (Cow). And so on. About all pets: horse, pig, goat, cat. dog.
Children, we looked at all silhouettes. You are well done, immediately guessed, whose are they? Since we are all very loved by our four-legged assistants, domestic animals are friends with them and everyone knows everything about them, they can easily help them. To do this, we need to draw them with magic colors and pencils. Let's say a fabulous spell so that miracles come to us. "
Children utter words:
Sloves, Topney, worship,
Turn around yourself.
Let the magical will become a brush!
You draw and do not be lazy.
Let your pencils
True from the soul.
Evil charms
All friends are free! "
The educator continues: "So, children, our paints, tassels and pencils have become magic, but not everyone can draw them. Only the one who can and knows how to draw. Only then wonders will appear. And after all, we can draw animals with you, right? Let's remember the basic rules for drawing pets.
Come to the second easel, see who you see here? (pictures with domestic illustrations.)
Tell me, what parts of the body have all the animals? »Children list:" Torchish, head, paws (legs), ears, tail. " At the same time, the educator shows these parts in the pictures and finds out in children what form they are. Which part of the body will we start painting the animal? That's right, with the biggest, from the torso. And when do we draw small details? At the very end of its work. Well done! You all remembered, you know everything. So that the magic is accomplished in your drawings, your fingers must be charged.
Fingering gymnastics "Pets".
One, two, three, four, five,
How can animals name? (Alternately bend fingers on your left hand)
The closest, most faithful
Everyone knows them, probably (slam in your hands).
Horse, cow, goat, dog and cat (index finger of left hand bend fingers on your right hand).
How do you call them?
Think a little (we will drag your hands to the sides, as if asking others).
In the house with the owner, they live together (we depict the hands of the roof of the house above the head),
So, home all their names are.
Guys, think about whom you will draw, what kind of pet you like most. Well, now we go beyond the tables. It's time to cut out animals from trouble.
(Children sit down at the tables and draw, the teacher reminds how to sit at the table, helps the council.)
Children, the magic spell helped us. Everyone has wonderful works (portraits). Let's take them to the exhibition and consider. Quietly, do not hurry, carry your drawings on the table (to me).
Analysis of finished work .
The educator causes for analysis of 2-3 children. Children show the drawing like them and explain why they liked him.
Outcome.
Who did you help today? Why are pets from our four-legged friends?
Painting drawing is beautiful art. It is difficult to believe that with the help of such a simple tool you can create entire pictures on paper.
Even if you are not going to become professional artists, the ability to make pencil drawings can come in handy you later. For example, when children appear. The ability to draw will help in their upbringing and training. Pictures of animals in this case will be as impossible by the way. Of course, it is not so beautiful to draw, but if you try, everyone can learn this.
Pictures of animal pencil for beginners: photo


To finally complete the work on the drawing, erase all the auxiliary lines and mark the shadow figure.
Figure Dolphin Pencil for Beginners
Draw this amazing animal is not difficult at all. The most important condition for obtaining a beautiful Dolphin drawing is compliance with proportions.

The first stage of Dolphin drawing is that it is now that you should lay in your future drawing of its grace and plastic. To do this, you will have to try as accurately as possible to portray the arcuate body, an elongated face and fins.

At the first stage, depicting the top line of the body of oval shape, as well as accommodate the location of the fins and tail.
At the second stage, be careful with the proportions of the body and head. Almost parallel to the upper contour of the body, which you were depicted at the first stage, draw the brute line. At first, for this you can use simple straight lines, placing them at an angle.

If you are confident that you retain all proportions, you can begin to give the dolphin streamlined shape. To do this, you have to smooth out the contour, that is, an angle formed by two lines should be more smooth, and the straight lines themselves need to be a little bend.

Remember that the main task of our drawing is to show the edge of the animal. This effect can be achieved by using smooth lines and compliance with proportions. First of all, we must provide accurate proportions of the heads and fins.

By the word about fins. They should not be too large or small in relation to the size of the entire drawing. Try to make the fins be depicted on your drawing as much as possible. It will be better if you will draw fins in a specific sequence: first depict the fin, which is located on top, then two lateral, and then the tail fin should find your shape in the picture (remember that the tail fin is divided into two parts). Then it is necessary to make a more rounded nose of dolphin and draw the line of his mouth.

In order for the drawing to purchase the volume, it is necessary to impose shadows and correctly arrange the light. To do this, you should use the hatching. As soon as the Dolphin acquires his visible volume, you can read your drawing completed. If you do not satisfy a simple Dolphin drawing, come up with some landscape that will surround it. Then you will have a whole picture.
Drawing Cat Pencil for beginners
Cat is one of the most common pets. In addition, cats can be found on the pages of many fairy tales. It is not surprising that this particular character is often found in children's drawings.

Like any animal, the cat should draw step by step so that the image is more reliable. The structure of the painted cat is based on three circles. Start the image is needed from a mug intended for the animal head. You should also add several lines to this circle to get the correct face of the face.

The next part will be a big oval, which will later become the torch of the purr. The last detail will not be completely rounded. You need to draw two curves of the lines that below will connect the base that is the line. This figure is a blank for the hips of the cat.

Now start to work out each item separately. The first one will be the head. You need to chant the shape of the animal head. Do not forget to draw several lines on the front side of the neck and heads that serve as a cold fur. An animal must be with ears and cheeks. Draw them. For earlier contours, sketch eyes and cat's mouth.

On the ears of the cat, draw along the line, which will help directly arrange the ears of the sinks. It is also necessary to add some wool and fluff on the crotch's forehead. An integral part of the animal drawing should be a mustache.
Start drawing the front paws. To do this, first notice the support from which they will go out. When the base of the paw is scheduled, draw a small bone, which comes out of the cat's breast.

In order for the drawing to become completed, you will have to draw the back of the body of the animal, back and its front paws. Then draw the tail and rear paws. You can now delete all auxiliary lines that are no longer needed in the picture.

When a linear drawing is finished, do not forget to make a little lighting into it than you make your creation more attractive.
Draw an animal with a pencil is not so difficult. The main thing is to observe all the proportions and the stratification of the drawings. You will succeed!
Learning to draw animals.Artists who depict animals are called animalists (from the Latin word Animal - Animal). When drawing animals, first of all, it is necessary to determine from which parts are their torso and which form these parts of the body.
For example, consider the picture on which the elephant is depicted. How is his trunk? How are your legs, ears? What size is it? Which color will be painting an elephant? If there is no gray in the colors, then how to get it?

Rabbit.
The drawing of the rabbit starts from large parts (torso and head). Pay attention to the shape of his head and body. How much does the rabbit have ears? What colour is he?

Hare.
Now let's try to statenly draw a hare. First, let's see what the hare is different from the rabbit. How much is the lap hare? What paws are longer - front or rear? Which color we draw a hare in the summer, and what - in winter?

And even a hare can be painted as using familiar figures (circle, oval, etc.).

Hippopotamus.
What else; Animals are gray? This is a hippopotamus, a goat, hedgehog. Let's look at the hippopotamus torso: what parts it consists of? What is the form of hippopotama legs? What is the hippopotamus the largest part of the body?

Hedgehog.
Hedgehog can be painted with an apple. Hedgehogs love apples very much, and we already know how to draw fruit.

A lion.
What animals are brown or yellow colors? Bear, Giraffe, Lion, Squirrel, Olenok. Let's look at the drawing of the lion. He has long and thick wool on the head, it is called mane. Thanks to her, the lion looks so huge. By the way, the lioness has no mane.

Leopard.

Olenok.
Draw a little funny deer. Pay attention to the structure of his legs. What is the bottom of the head of the deer? What is the form of a torso?

Giraffe.
Draw a high giraffe. Pay attention, what is his long neck and a small head with horns. The feet at the giraffe are also very long, and at the ends - small empty.

Zebra.

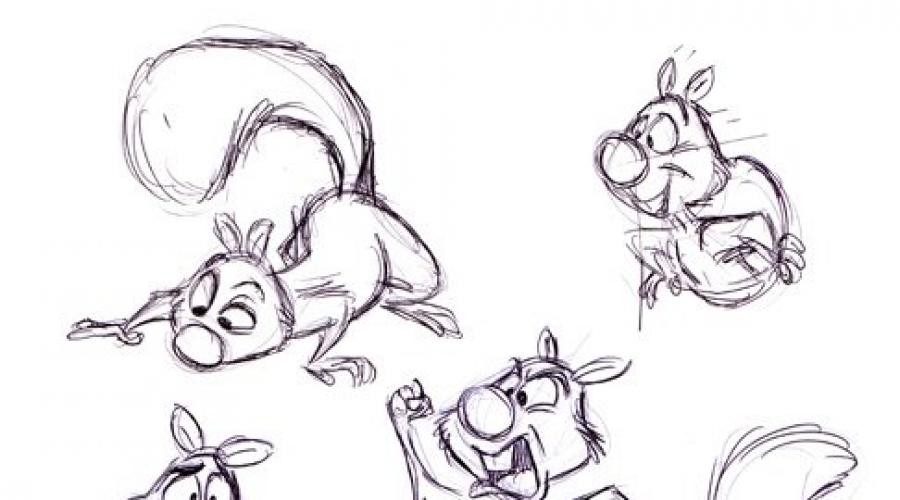
Squirrel.
Let's look carefully on the drawing. What is the shape of the head of the protein? The tail has a long, wide, bending up and raised high above its back. The ears are sharp and with tassels on the tips. And the paws of different lengths: the rear is long, and the front is short. Draw a piece of fungus.

A monkey.
What other animals are and what color are they? For example, a monkey. We note that the front paws of the monkey are longer than the rear. She uses front paws.

Turtle.
The turtle can be drawn from ovalchors, similar to balloons - "sausages". Pay attention to the turtle shell. It is divided as if on the checkered.

Snake.
Learning to draw a snake very simple. Snake has a thin elongated body that is drawn by wavy lines. The head of the snake is very interesting: it is small and narrowing, similar to a small triangle.

Lizard.
What animals are green? Lizard looks like a snake with legs. She has an elongated head, an elongated narrow torso and a long, tavering tail.

Hamster.
Let's try to draw a hamster. His body consists of two oval.

Goat.
Draw a goat. Pay attention to the shape of his head. Do not forget to draw him a beard. Pay attention to the drawing of the goat's legs. We draw the animal so that it is more larger and to know it.

Mountain goat.
And this is a big horned goat. Such goats with branched horns live high in the mountains. They are called the mountain goats.

Cow.
Animals who live near man are called pets. These include a cow. The head of the cow is small, and the torso is very large. It connects with a head wide and large neck. The cow has a horns.

Bull.
And this is a bull. He looks like a cow, but only her neck he is much shorter, the horns are located at a greater distance from each other. The bull itself is more powerful, and his feet is shorter than that of the cow.
 img src \u003d 586
Pig.
Pay attention, what a pig in a thick torso. It is an oval, the tail of the crochet, the legs are small, and the head with the torso is a single whole, only a patch protrudes - the nose of pigs.

Lamb.
The head and torso of this funny lamb are similar to two oval: small and large. Horn is enforced by a circle, and legs like columns.

Sheep.
Carefully look at the sheep. What figures can you draw it? What color is the sheep? What lines are straight or waving - need to draw its wool?

Horse.
Let's try to draw a horse. First, it is necessary to draw a sheet as shown in Scheme No. 1, then according to Scheme No. 2, draw all the bends of the horse's body, legs, ears, tail. In Scheme No. 3, a finished horse drawing.

You can draw a running horse.

You can draw a running horse.

Dog.
Before drawing a dog, think about how to position the drawing: vertically or horizontally. In the inclined line you must first chateen the slope of the dog's body. Then three ovals designate her body. The top oval is the head, the lower oval is the body itself and the average (transverse) oval is the upper part of its paws. Next, you need to outline other parts of the dog's body - the paws and tail themselves. Ears draw triangles. The bottom of the pawp is spinning.

Cat.
The cat draws the same way as the dog, three ovals. She has ears, too, triangular, but, unlike doggy, are located on one of the other.

You can draw such a funny kitten playing with glomers.

And you can, from the cartoon.

The drawing process begins to interest the kids from the first years of life. Pictures of most children are animals. To create a young painter picture on paper complied with the fact that he wanted to portray, you need to show and teach it how to draw animals in stages.
When teaching the baby to the Azam drawing animals, take the three main points as a basis:
- Explain to him from which figures will consist of the selected animal. Most often it is a circle, oval or rectangle.
- Show the child how to perform sketches that will later turn the items.
- Start learning from mastering the simplest plots. Only having mastered the technique, proceed to more complex objects.
To create simple drawings, you will need paper, simple medium stiffness pencil and soft eraser, as well as a set of colored pencils for coloring the finished picture.
Animals from circles
The easiest way to teach a child to draw domestic and wild animals is to use ordinary circles as the basis. This option is perfectly suitable even for the kids of the age of the preparatory group.
See how easy it is easy! Each time a starting point when creating a picture will be the usual circle. The task of a young artist is to strictly observe the sequence of actions.
Start from the most simple characters - a puppy and a goldfish, either rolled in a cat breach and a cute countertile


Want to portray a forest inhabitant? Why not draw a fruit of a good bearish. Please note the basis of the picture constitute only a few circles of different diameters.
And how do you like such a snail with a house on the back? To create it, you need to fulfill only 6 simple actions: to paint the drill pieces of the torso, bring eyes and mouth, make a twisting the spiral of the house.

It will not cause special difficulties and creating a drawing of residents of the underwater kingdom. It is only necessary to draw a head and limb to a round torso.

The idea of \u200b\u200bsuch drawings is simple: the circle simply "faces" ears, noses, eyes, legs and tails. Applying this simple technique, will not work to portray not only animals, but also loved by many animated characters, for example, the same sinky.
Draw raccoons
Some animals are striking their unusual appearance and funny habits. Handsome of raccas include. These cute creatures bribe the fact that skillfully depict emotions. We bring to your attention two options, how to draw these animals.
Cartoon character
A simple version of the version will master both novice artists and young creative parts.

We will perform work with a simple pencil, and small flaws to remove with a soft eraser that does not leave traces on paper.
- First of all draw a torso. To do this, in the lower half of the sheet closer to the center we appline the contour of the extended vertical oval.
- We plan the place of placement of the head. At the initial stage, this will be an oval, slightly stretched horizontally. Its size in relation to the body is 2/3.
- Give the head of the outline, highlighting the area of \u200b\u200bthe face. In shape it will resemble large lips. Side contours of the top of the head give a concave form. As a result, a figure resembling a cap should be. The initial contours of oval wipe the eraser.
- At the top of the head with a small displacement in the side, we draw the ear of the raccoon. First, we carry out the outer contour of the ear shell, and then internal.
- We attach the right outline to the body of the animal. The left part is carried in the form of a curved line, making a small narrowing in the central part. By the same principle we bring the right side. Both lines should turn out symmetrical.
- We draw the second ear of the animal, placing it at the same angle. Oval, who initially identified the torso, carefully wipe the eraser.
- We proceed to drawing limbs. Left paw depict a bent in the elbow and pressed to the body. After that, we carry a thin inner line, the outlines of which duplicate the outer.
- The inner line is the contour of the border of the fur of the raccoon. It should be performed in the form of waves or zigzag.
- We draw up a racket raccoon. To create a contrast combination, we highlight the eye of the eye of the eye. Inside the stains, we pour round eyes. Under them place an oval nose and spread in a smile mouth. The contour of the cheeks is drawn by uneven lines imitating strands of wool.
- We draw the bottom paws of the raccoon. In shape they resemble human, only very small size. They are depicting in the form of the stop deployed on the sides. The brush of the upper paws is depicting in the form of a clapped cam.
- The tail near the raccoon is as long and fluffy as the protein. His main decoration is a painting painting. At the final stage, it remains to launch the right paw. She is raised up in a friend of friendly greeting.
The picture is almost ready. It is only necessary to remove unnecessary lines, draw small parts and paint, using black, white and gray shades. If you wish the raccoon, you can even portray in the form of a loved one by many characters by the rocket from the "Guardians of the Galaxy".
Realistic image
Want to portray a real forest inhabitant? Take as the basis of the Guide below, in which it is painted in detail how to draw animals in stages.
The first thing we plan the location of the main elements on the sheet. We carry out the contours of the tree trunk and the branches on which the raccoon is sitting.
We plan the dimensions of the animal shape. The body is depicting in the form of an oval, thigh and head - circles. Focusing on the circle contour, sketch the animal expanding to the bottom. In the central part of the oval placing eyes and nose.

Draw contours of the body, leaving their interruption line, imitating wool. To obtain the desired effect, they should be placed close to each other, withstanding the direction towards the growth of animal wool. The same lines highlight the front and rear paws hanging the tail.
We proceed with the drawing of the face. Stages of work are clearly presented in a step-by-step scheme.
At the final stage, it remains only to perform drawing wool on the other parts of the body, and then highlight your fingers with tiny curls.

As a final stroke, give the relief of the tree trunk. Finance the picture by blossomed foliage and fluttering butterflies.
Lion is the king of the animals
Representatives of the Feline family rarely leave indifferent. These graceful animals in the form of pets are very pleasing to children, supporting the company during games. But the true delight causes a truly royal cat - lion. So why not offer your child to draw it?
Cute lionok

There is nothing complicated to draw charming lion.
- First, at the top of the sheet closer to the centerpoint, we draw an animal head. It has a circle form. To withstand the symmetry, the circle divide the two perpendicular lines into 4 sectors. Since the lionon is located at an angle, lines are curved and slightly shifted on the left side.
- To the head we draw a torso, depicting it in the form of a slightly curved oval. Note that the oval is somewhat narrowed at the top and expanded in the bottom. In the area of \u200b\u200bthe lower head sectors, we draw a margin smaller. This is the basis for the future fruit.
- In the lower part of the oval, we highlight the area of \u200b\u200bthe rear paws, in the upper part - we carry out the contour of the reprehension of the front paws. All paws are tightly adjacent to the body of the body. We draw a tail, depicting it with two parallel walking curved lines.
- Draw the pieces of face. To do this, closer to the crossing of the lines we plan an eye contours, just below - the nose, on the form resembling a heart. They reinstate the lower jaw to the head of the head, forming the outer contour first, and then the inner - the lower lip. Around the nose with an area of \u200b\u200bcheeks around the nose. Cheeks should be symmetrical.
- Can there be a lion without mane? To highlight the cosmode head, retreating 2-3 cm from the contour, we plan another round of a little more diameter. Its framing is attached to the toothed form.
- At the final stage, it remains only to remove the auxiliary lines. After that, paint the tail of the tail, paint the pupils in black, and the main contours make clearer.
Draw an adult lion
If the child has mastered the basic drawing skills, it is worth trying to portray more complex in performance, but at the same time a realistic figure of king beasts.

Initially, the sheet should be divided into 2 parts: left and right. In the left - we plan the outline of a large vertically located oval. This is the future head of an animal framed by a luxurious mane. On the left side of the upper part of the oval depict the circle - the muzzle of the beast. Slightly below oval outlines the place of placement of the front paw.
In the right part, we draw a circle of 2/3 with respect to oval. This is the pelvis part of the body. From the circle down, 2 connected oval is lowered - a bent back paw.

We connect the basic elements of the shape through smooth lines. Testing the back paw, we derive a curved long tail. Each paw is complementary by oval - feet.

We decorate the head of the animal. We highlight a pointed nose, we make a direct transition to the abnormal arcs. We form a beautiful smooth bending of lush mane. Slightly above the above-handing arcs, we draw your ear.
We carry out the outline of the second front paw. We make a clearer contour of the hip area by connecting it with the shin.

We plan the place of placement of the eyes, mouth, sharpen the nose. We highlight the transition to the back of the back. Curved line emphasize the developed chest. Draw the details of the limbs: we highlight the knee formulations, fingers on the feet.

Deculating the mane of the lion, making clearer and bright lines. Parallel curved lines create a thickness effect.

The drawing is almost ready. It remains only to perform a hatching. She will give the volume and abilities to the image.
Finally, a small advice: do not be upset if the first drawings do not meet expectations. The main thing is to teach the child to abide by the stage of work and use the billets in the form of lines and geometric shapes. This will save the proportions and avoid gross errors when drawing an animal elements.
How to draw a squirrel:
How to draw a cow: