Draw children. We teach children to draw a person: Simple schemes and recommendations
The first attempts to draw appeared in early childhood when the child takes a pencil into the hands. He still does not understand that this is a drawing, but the process itself is interesting. As you grow and awareness of the surrounding world, there is a need for more detailed environmental mapping. One of the key figures are people. To help the child to transfer the desired image on the paper, even parents who do not have art talents can simply studying such a technique as a phased drawing for children of 7-9 years. It is not worth neglecting such creative classes with your chance, because through the picture the child shows his feelings, emotions, attitude towards others.
As already mentioned above, one of the ways of the image of a person is phased drawing. For children of 7-9 years old, it is most accessible and easy enough to understand. At this age, the need for not only a schematic image, but also to achieving similarity with the original. You can help the child, explaining the basic rules and clearly demonstrating the image process.

Basic rules for drawing a person
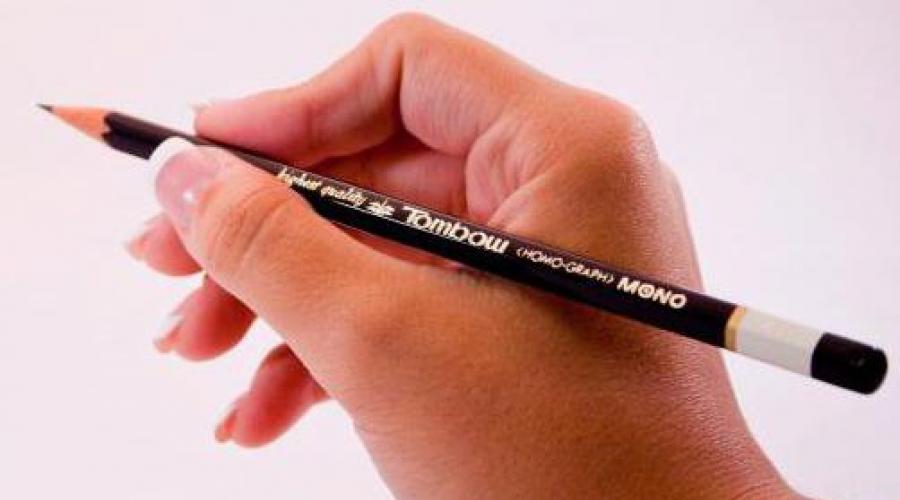
It is best to start drawing with a pencil. For children, this method is most appropriate, since it is possible to correct the error, erase the lastic lines.
Before proceeding to work, it is necessary to explain the difference between an adult man and a child. One of the mains is the growth and proportions.

Simple rules:
- The measurement criterion is the head. From its own observations, the child at this age is already known that adults are higher, but at the same time proportions are not violated. This is due to the ratio of the head to the body. In children, the head in relation to the body will be greater, respectively, in adults less.
- The length of the hands should not be larger than the length of the legs.
- The elbow is at the level of the belt, and the hand can not be lower than the knee.
- Palm less feet.
- In men, the wider shoulders, in women - the hips.
Stages of drawing a person figure
The phased drawing of a person begins with the definition of the size and location on the sheet. Noting the upper point (head of the head) and the bottom (feet) to carry out auxiliary line by connecting them. Now it should be noted if it is a child, it should not be less than the fifth of the whole line, if an adult should not exceed the sixth. The head is depicted in the form of an oval. The remaining part of the auxiliary vertical line with small dishes is divided into parts equal to the size of the head.
Deciding with your head, we draw with the children in stages other parts of the body.

Features of drawing kid
Between the neck and the belt conditionally fit 1 - 1.5 sizes of the head (it is approximately the middle of the auxiliary line). At the same level, elbows will be located. We celebrate.
The knees will be located at the level of the second hole below (the first is the end point).
The width of the shoulders at the child almost does not exceed the width of the head. A slightly retreating from it, hold the line of the shoulder (length not more than 1.5 from the size of the head).
Conduct lines from shoulders to the line of the belt and the same size below - it will be hands.
Recovering the belt, conditionally halflons, carry out the pelvis line.
From the pelvis line and the lines of the legs are carried out.
"Frame" kid ready.
Now, knowing where various parts of the body should be located, you can proceed to the drawing. At the same time, it is necessary to take into account the muscles of the hands and legs, the chest, and when drawing the pants - the distance between the pelvis line and the end of the body. To make it easier to determine the width of the chest, you can draw oval from the head to the pelvis line, slightly taped to the bottom.
Approve the volume of the frame, draw clothes. It may be tight or spacious, it no longer matters.
When working, it is important to take into account the phased drawing. For children of 7 -9 years, an understanding of the need for alternate image is quite available.
Draw adults
Drawing an adult is carried out by the same principle.
After separating the central line to parts equal to the size of the head (7-8 parts should be obtained, depending on the growth of the person's image), the belt line marks. It is, conditionally, on the third mark from the head (or the fourth from the top point, the crown). Like the baby, the elbows will be on the same line.
Location of the knees at the level of the 6th screenshots (if the person is high) or between the 5th and 6th (with average height).
Thus, in an adult, in contrast to the baby, part of the body from the belt to the feet is longer.
The width of the shoulder on average accommodates two heads. In men, they will be a little wider, in women - already.
The designation of hands and legs passes through the same scheme as in the baby. Apparently and draws clothes.
Phased pencil drawing as the basis of the future composition
Schematic phased drew by a simple pencil makes it possible to portray the child most believable. Using the initial framework (schematic image in the form of lines and cigro), the figure can be given any position. Thus, in the figure, a person can move, sit, etc. This will help build the right composition and get a full drawing.

Phased drawing for children of 7-9 years is it possible to properly form a child's idea of \u200b\u200bthe structure of a person's figure. At this age, children are capable not only to master this technique, but further improve their skill.
For children of the older kindergarten group, it is important to pay enough time not only to intellectual and physical development, but visual creativity.
In the picture, the child manifests itself, fantasies and at the same time develops its abilities. Children 5-6 years are still quite difficult to transfer all the subtleties of one or another item, so the parents' help here is simply obligatory.
Trees and plants are not so difficult to draw, but with the figure of a person things are more difficult if the task is its drawing in motion.
We will help you in this and tell me how to teach a child to draw a person with a simple pencil in stages. For this purpose, you can choose several ways, they will die any child 5-6 years.
Before you begin to draw a pencil figure, it is worth considering that it is not necessary to distort the intermittent lines, and then climb them. To draw a person, even for beginners will not be so difficult, if you spend the lines with just one movement, without fearing at the same time.
Drawing a figure in motion, it is worth presenting his image mentally, and then transfer imaginary lines on a sheet of paper. The basic rule for beginners is not only to adhere to the accuracy of the outlined lines and comply with the proportions of the body, but also to convey the essence and significance of the drawn image.
The main advantage of any artist is the ability to pass the character and inner mood created on a sheet of paper.
Quite often, during the drawing of a person, it is not possible to observe the proportion of the body, as a result of which the drawn figure does not look plausible. The main problem is the incorrect length of the upper and lower extremities, too large or very small head.
Such errors are very characteristic of 5-6 years old, so it is recommended to draw a pencil drawing in stages, learn to break the drawing into several separate parts.
Often the figure of a person is conditionally divided into 7 of the same parts, which can be equated to 7 head circles, including neck.
Having learned theoretical foundations, we learn to draw a person in motion along with children.
The process of creating a picture
Option 1
- At first it is necessary to draw an oval with the child, which will further fold the head of the man in the future.
Slightly below oval draw the neck, this part of the body should not be too long, it must be placed strictly in the middle. Then give a rectangle, it will be a reference to further drawing the body.
- Next, it is necessary to draw the same rectangle, the width should be equal to the first, but the length is slightly more. We divide the second rectangle in half, thus make sketch for the lower limbs. The angles of the top rectangle are slightly spinning, therefore, we form the shoulders.

- Now it is necessary to remove the excess lines using the lasty, which are indicated in the figure with a red arrow, this procedure will be interesting for children.

- So that the child fully learned the drawing lesson, it is worth telling him in detail how the parts of the head are drawn. All unnecessary lines can be easily removed by elastic.
In the middle of the previously harvested oval, draw your eyes, as well as the nose and mouth. Do not forget to draw eyebrows, make an outline of a hairstyle.

- At the very end, make some oblique lines that will depict the folds on clothes, draw the necessary elements of the shoes.

The drawing is fully ready, each parent will be able to teach his child to draw a person in stages.
Option 2.
This simple way image of a figure in motion will like the fidget children.

- First, make on paper outline of lines, which will be further a guideline for drawing the body, upper and lower extremities.
At the top of the sheet we depict your head (draw oval). The child will be able to fulfill this task itself under the leadership of the parent. Do not forget to designate inside an oval line, for which eyes will be placed, nose, as well as mouth.
- Relying on the guides, draw a person's body. Next, you can proceed to the drawing hairstyle. Do not exclude some details, let the kid independently drawn a thing in man's hand. Detail your face, gently depict your eyes with a nose and mouth.
- Now it remains only to remove the remaining lines.
This is so easy to draw a person, such a procedure will delight not only parents, but also to children, thanks to this, the child will master some skills in the visual arts.
Drawing children is a practically independent branch in visual art.
But if you understand the principles of the structure of the baby's head, it will not be difficult to draw it. It is only necessary to deal with proportions and design.
Children's head can not be drawn as a reduced copy of the head of an adult. The proportions of the child's face and the shape of his head differ from the proportions and forms of an adult.
Child's head is somewhat wider, the chin is more rounded, the baby's muscles are deeply hidden, his face is soft, cheeks are high and full.
Since the bone structure of the child's head (especially the baby) has not yet been fully formed, the bridge, cheekbones and jaw will be significantly less than an adult.
Therefore, a children's person occupies a proportional to ¼ part of the head, while in an adult, this ratio is 1/3.
The nose of the child due to the physiological characteristics of the age is usually smoky, the nose is low and concave. The upper lip is longer. And the insufficiently developed chin is usually attached and does not reach the level of the lower lip.
The eyes are big and, it seems that they are located a little further from each other than an adult person is connected only with a smaller face size.
Below is a drawing: the child's head is fully placed in the circle. In the profile only the upper lip and chin goes for the redistribution of the circle. 
The shape of the head resembles a dull egg.
Please note that the person is below the horizontal line of the middle of the circle. 
1 - line of the top of the head.
2 - the chin line (the line passes in the field of the bone of the lower jaw, and not a soft fabric under the chin!)
3 - Brow line, passes in the middle between the chin and the top of the head.
4 - line of the bottom of the nose, passes in the middle between the line of eyebrows and the linen of the chin.
5 - The line passes in the middle between the line of eyebrows and the line of the bottom of the nose.
6 - Line passes in the middle between the line of the bottom of the nose and the chin line. 
In this way,
Eyebrows are located on line number 3
Eyes between lines №3 and №5
Nose - between lines №4 and №5
Mouth - between lines №4 and №6
Chin - on line number 2
1. Draw a square and divide it into four equal parts.
2. In the lower left quarter, draw a circle.

3. Also draw a large circle in the original square.

Big circle is the size of the future head.
The small circle is the size of the child's face.
4. Draw a curved LBA line.
5. Using guide lines, draw your eyes, eyebrows, nose and mouth.
6. In the right quarter, draw the ear (ears as a rule drawn quite low)


7. Draw parts and remove the auxiliary lines.

8. To give the volume to highlight the dark and bright sections of the face with hatching.
If at school in drawing lessons, you could not portray anything but a sun, a house or tree, if your painter level can be compared with the work of a four-year-old child, if you are an artist from the word "bad", We offer you simple lessons on how to draw a phased pencil for beginners: for children, for adults and for all-all.
Perhaps, every person who does not have attitude to the visual arts, at least once in his life I had to take a simple pencil or a piece of chalk and draw a hard picture from scratchwithout spilling in the manual or tutorial.
People who have no fantasy and spatial thinking problems will probably agree that this task is not from the lungs. And if you have long forgot about drawing lessons at school, you may have a sudden need to find out how to draw a pencil in stages for beginners. Pencil stages - it already sounds more pleasant than from scratch without benefit or textbook. After all, if you are not a great artist, you are enough correctly convey the form of the subject, depict the main lines and draw the main details. Claims to the realism of the image, to the color and shadow ratio, as well as other professional requirements, leave for real artists, we learn how to draw the simplest pictures: cartoons, animals, plants and people. Schemes of images that await you below are designed for the most adult "teapots" from the drawing area, as well as for children of 5-6 years, so difficulties you will have no difficulty.
How to learn to draw a pencil: from scratch in stages for beginners
Drawing may seem complex and unbearable assignment for those who want to get the result right away without making great efforts. But you remember that we draw in stages and set ourselves initially simple tasks so that the wait coincided with reality. 
In the first stages of preparation you will need simple pencil, sheet of paper and patience. You also need to know that almost all simple drawings consist of lines, circles, ovals, rectangles, squares, zigzags and other people of Zagun. If for any reason your drawing came out imperfect, you can erase it part or start everything from a clean sheet. This is the whole charm of drawing.
Let's start with you from the brothers of our smaller, that is, from animals 

How to draw a person's face in a phased pencil for beginners?
Perhaps the most difficult for a beginner painter is a task in which you need to draw a human face. From the first time to reproduce all the details and accuracy of human physiognomy, you probably will not succeed. It is better to start with less realistic drawings, for example, with anime.
Learning to draw anime
The genre of Anime won not only children, a and adults. Large expressive eyes, an unusual face shape and magnificent falling hair - it characteristic signs of heroes anime.
 However, there is something interesting in them - these are emotions. We invite you to familiarize yourself with the process of creating a face in the style of anime, as well as study all the shades of anime emotions.
Draw a pencil portrait
After a small workout with emotions, we will tell you how to draw a person's face in a phased pencil for beginners. We will not invent a bicycle and draw all the basic lines with you. 

How to draw a person a pencil phased for beginners?
You have already acquired a little knowledge how to learn to draw a pencil from scratch in stages for beginners. Simple pencil is the most practical tool novice artist. With it, you can depict whole landscapes, flowers, tanks, people. And if we have already figured out a picture of the human face, then with a figure of a person still needed to work.

The figure of the standing person will interest novice artists.
Woman who takes a step.

Figure of a woman in different positions.
What else can you portray a simple pencil?
In fine art it is necessary to take into account the proportions, as well as the symmetry of the location of all parts. Yes, when you draw a cat, you should accurately calculate where the ears, foot, nose and eyes will be located. Marking will help you.

Simple pencil you can draw a beautiful house, palace and even the Kremlin.

Drawing animals, you can use the elementary technique, for example, to portray the usual circle.

At the age of 7-9 years, the child is experiencing increased loads. Classes at school and adaptation in the new team. New tasks and classes. It is this age that determines the development of mental functions in children: memory, attention, thinking, perception and imagination.
Therefore, it is important to make sure that these elevated loads have the possibility of psychological discharge.
Author
Methodik
Contemporary
STUDIO
all materials
we provide
Development of creativity and art therapy.
Drawing is not only an excellent way to psychological discharge, but also the development of spatial thinking, creativity and aesthetic taste.
The child can spill up all his fantasy on a white sheet, when the rainbow or fabulous animal "comes to life" on a white sheet, he experiences genuine joy.
The duration of the lesson is 1 hour 30 minutes. In order for the child to not be tired, 1-2 changes for 5 minutes. You can switch attention and relax.
First lesson
In the first lesson, your child will be asked to draw a still life of 3-5 items with the basics of building in picturesque technique.
The genre still life combines a classic drawing and painting.
The child will learn how to build the composition, mix and select colors, will explore the foundation of drawing, painting and prospects.
The lessons of painting and drawing are held in an easy-to-child form, are excellent memory workout, shallow motility, perspective feelings.
Individual program.
An individual program is selected for the child, taking into account capabilities and interests.
In other words, if he wants to draw a person, the teacher will teach him, but he controls that the young artist acquires the necessary skills in the process.
The use of drawing for children is 7-9 years old with the right approach:
- Soothes and pacifies.
- Develops creative abilities.
- Improves memory and intellectual abilities.
- Drawing classes contribute to the improvement of intermetrous bonds.
- Developing aesthetic taste.
- Makes it possible to express your experiences through the drawing.
- Introduces a variety of colors.
- Developing creativity. In the process of drawing, the student will always want to improvise, it helps the child to liberate, become independent and successful.
- It gives the opportunity to look at the world around the world through the prism of creativity.
- Improves small motility. Works of the brain, which are responsible for speech, memorization, coordination.
- Develops spatial and compositive thinking. It is extremely useful, as it helps better understand mathematical, physical models, as well as master other disciplines. (for example, drawing, mathematics, physics, geometry, etc.)
- Increases self-esteem. The child understands that he is now the Creator.
- Helps to work out protection. An important skill for a young schoolboy.
We always give work to our little students.
This is important, because the child not only gets a positive charge at the lesson, but also takes the finished work that gives him confidence in himself and he can be deserved to be proud of her.
He will gladly give this work, and then you also get a charge of a good mood.
Come to us for the first lesson and see for yourself. Draw, sculpt, make toys. To delight your loved ones with your works, get a positive attitude and creatively develop. And be sure your child will like it.