How to draw a festive postcard for a birthday. How to draw a birthday pencil phased
For any person, regardless of age, the birthday means the beginning of something new, where cherished desires are carried out and, of course, the most hidden dreams come true. On this beautiful day, the birthday girl expects gifts and congratulations from his loved ones. After all, they are forcing the recipient to smile and rejoice.
Each of us without exception adores surprises. Consequently, if you are going for a birthday, you need to prepare in advance for this celebration. Let's look at a few options for postcards that you can do yourself and give your favorite person.

How to draw a congratulatory card for my mother's birthday?
Of course, the postcard should look beautiful and touching. Perhaps you want to do something concrete? Then we advise you to write an ordinary one on the product very much, but a very pleasant inscription: "Favorite Mommy". For the manufacture, take the scissors and glue, and also go to such objects:
- Billet for needlework (you can take a dense cardboard).
- The background image (you can take conventional colored paper, a piece of paper for scrap and so on).
- Chipboard for inscriptions (buy ready-made in advance or use the stapler, which draws up the edges).
- Decorative elements (flowers, butterflies, beads, leaves) - 2 pcs.
- Large decorative elements (bow, flower) - 2 pcs.
- Decorative tape.
- Lace or Fester Ribbon.

Manufacturing process:
- To begin with, make a sketch with an ordinary pencil. Add colors that will give you the opportunity to understand which shades you will apply during work.
- Stick the background to the blank postcard. Place large flowers. Complete the overall composition with decorative elements.
- Thoroughly dry work.
- When it dies, decorate it with sparkles.
- After that, write on the postcard of the wishes of an expensive mom.
- Inside the postcard can draw beautiful flowers or bows, and write a wish to a native person.
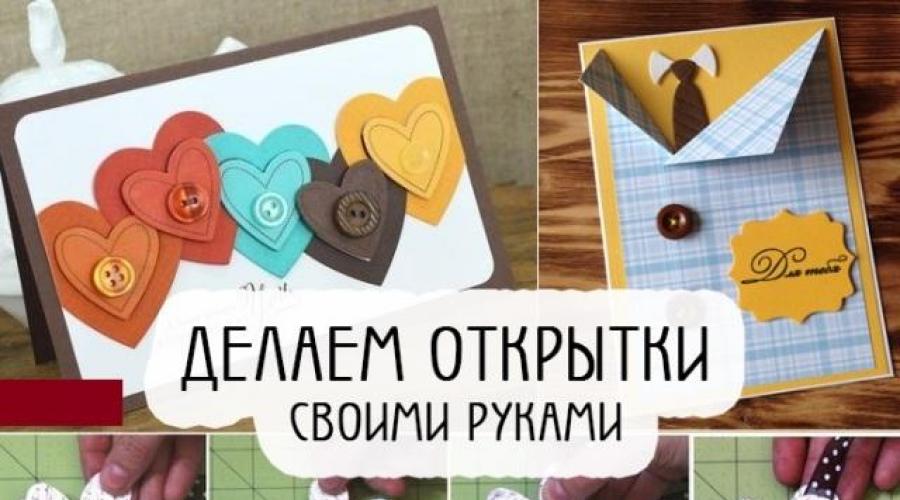
How to draw a greeting card for the birthday of dad?
Greeting card your favorite daddy for the birthday is at least touching. Pick up the topic for such a postcard is difficult, however there is one detail that you simply must apply - this is a style. If you have a stylish greeting card, believe me, your dad will definitely get to such a gift. Let even on the postcard itself there will be no symbols of "masculinity", for example, an image of cars, weapons or fishing.
You can make a postcard with embroidery, threads and so on. Try all patience and love to your own creativity. To begin with, pick up the postcard plot, for example, any element of a man's portrait, for example, beard, smoking tube, Hipster-style glasses. Select the desired shades. Ideal are calm and beautiful, which will harmonize each other.


Manufacturing process:
- Take the basis of the postcard. Cut for her shirt.
- In the center "Shirts" cut the triangle.
- Stick under the "shirt" rectangle.
- Take a satin ribbon. Tie a tie in the form of a note from it and get to the base.
- Top tie stick to the "shirt".
- Using a special circuit, make stitches.
- Stick to the button of buttons.
- Write congratulatory wishes inside the postcard, add more small pictures, for example, balls.
How to draw a greeting card for the birthday of the grandfather?
You can give your grandfather to give a beautiful postcard that you make your own hands. To create this craft, you will need to spend a minimum of free time, plus the sea of \u200b\u200bfantasy, as well as take scissors with glue, and stock as follows:
- Color cardboard
- Colored paper
- Paper strips for queening
- Buttons
- Double-sided scotch


Manufacturing process:
- To create a blank for a postcard, take the cardboard. You can apply two-way or one-sided cardboard. Fold it into two equal parts.
- Gently sell the line where the postcard will bend.
- Then at the top of the postcards make a small stubborn approximately equal to 2 centimeters.
- Fold the edges of the postcard so that you have a collar.
- Make a "vest" from color strips. Strips neatly glue to the outside of the product, while alternating the colors to their own discretion. You can draw strips instead of paper strips with pencils or paints.
- Take a brown strip. Stick in the central part of the postcard.
- Also such a strip will cross the edges of the vest
- Make a bow. Attach it to the collar with a tape or glue.
- On the right and left side are small pockets. And in the center, take a button (you can somewhat or immediately).
- Next, place the postcard inside for your own.
How to draw a greeting card for grandmother's birthday?
Grandma is exactly the person who is always ready to feed delicious pie and pies, listen and give a useful advice. If you want to surprise your grandmother's birthday with a unique gift, give her a beautiful postcard. But not the one you can buy in the store, but made with your own hands.
For the manufacture of the postcard, take the following materials and tools:
- Cardboard colored and white with black
- Lace - Approximately 12 cm, but not less
- White ribbon - 30 cm
- Artificial Flowers - 3 pcs
- Buttons matching paper - 3 pcs
- Scissors
- Line of glue
- The pencils
Manufacturing process:
- From the white cardboard, cut a 16 cm rectangle * 20 cm. Bend this rectangle into two equal parts. So you will have the basis of the postcard.
- Take a black cardboard. Cut 2 rectangles from it (15.6 cm * 9.6 cm and 8 cm * 3.2 cm).
- Take the color cardboard. Cut rectangles from it (15.2 cm * 9.2 cm and 7.7 cm * 2.9 cm).
- Stick color cardboard over black to get a black frame.

- Collect the substrate.
- Stick a smaller rectangle and the inscription "Happy Birthday" on a smaller rectangle.
- Then glue the lace. From the white ribbon, cut off the strip 12 cm. Stick it from above the lace.

- Make a bow from the ribbon, stick it to the substrate. Also glue flowers and buttons on a small rectangle.
- Enclose the substrate to the basis of the product.
- Next, decorate the postcard as you wish with colored pencils. Do not forget to write a congratulation.


How to draw a greeting card for a friend's birthday?
What can you give to your favorite girlfriend? The usual gifts, sometimes, are no longer able to please the birthday girl. But the postcard made by the personally can really surprise any person. Moreover, for the manufacture you will spend only 30 minutes, maybe a little more. So, you should have such materials in stock:
- A piece of bilateral cardboard
- A piece of snow-white cardboard
- Scissing
- Blade or knife
- Double-sided adhesive
- Measuring supplies (pencil line)
- Ribbon
- Decorating elements
- Hole puncher

Manufacturing process:
- Take the color cardboard. Cut a rectangle and bend it to 3 equal parts. On the cardboard, designate the circuit of the handbag.
- Cut the postcard form.
- Take the blade or knife. Cut the handle handle. Get it inside the product.
- In the inner part of the handbag with the help of a tape, cover a rectangle carved from snow-white cardboard. You can cut a rectangle edges using a hole.
- Decorate the product - tie a bow, stick it for a fastener seat. Stick decorating elements.
Please this postcard your favorite girlfriend!
How to draw a birthday greeting card to a friend?
If you have a very close friend you know almost from birth, you can draw an unusual and bright postcard for him. Try to imagine what your friend loves and depict it on your postcard. We suggest you make the next postcard. Take:
- Snow-white paper (landscape sheet)
- Ordinary pencil
- Multicolored pencils
- Scissors with ruler

Manufacturing process:
- Take paper. Bend it in the center.
- On the inside of the paper, with the help of a simple pencil, draw what you want, for example, balloons.
- Then write with multi-colored letters wishes a birthday room. Position the inscription on balloons or email pleasant words at the bottom of the postcards.
- After you accurately decide with the postcard, draw it.
- You can use multicolored pencils, and can water paints. It all depends on what's better you can work.
- If you want to draw a beautiful nature on the postcard, then for this you advisively apply paints. With them you can more naturally convey the shades of nature and its riotiness.
How to draw a greeting card for the sister's birthday?
Do you have a younger sister? Does she have a birthday very soon? Then you should bother in advance about the gift. To the end result turned out very colorful and beautiful, then take the following items:
- Colored High Density Paper - 1 Set
- Markers or markers
- Multicolored pencils
- Colored handles
- Simple pencil well-fulfilled
- Scissing with glue
Manufacturing process:
- Take paper. Bend it in half.
- On the outside, draw an image on the inside write the wish of the birthday man on the inside.
- Now proceed to drawing. Take a simple pencil. Draw an oval on the postcard. In the center of oval, draw the strip curve (it will be a center of a bear face). Then draw the muzzle and nose itself.
- Draw a spout, leave a small glare.
- Next, draw your eyes, mouth, eyebrows and ears of a teddy bear. Draw them with colored pencils.
- Draw a torso. Spend 2 parallel rounded strips from your head (so you get the body of the Mishutka).

- Draw a teddy bear 2 lower legs.
- Then depicting a cake in the figure and show off it. Add one upper paw.
- Then dorisite another upper paw.

- Place the background card. You can draw balloons, and on every ball write letters that make up the phrase "happy birthday".
- Finish the postcard - just paint it with multicolored pencils.

As a result, you will get a beautiful postcard, which your sister will definitely be delighted.
How to draw a birthday greeting card brother?
If you want to give younger brother an unusual gift, then make him a postcard yourself. You can draw an elephant on the postcard. How to do this below.
- On a clean sheet, draw a pair of circles that must be appointed to each other. Just keep in mind, these details must be different in size.
- In the center of the circumference of a smaller size, draw a trunk of an elephant. Above the trunk draw eyes and eyebrows.
- Cears are elephant with big. Apply smooth strips at the top and wavy below.
- At the bottom of the circumference of the larger size, draw the legs.
- Make folds (knees and claws).
- Draw an elephant tail, and on his tip a brush.
- Remove the extra lines using the eraser, and the main thing is thoroughly circled.
- Coloring the elephant at your request. Write wishes.

How to draw a birthday greeting card to the teacher and teacher?
Greeting card, which is done with your own hands is the best gift for the teacher from the student. There are a large number of options, but we offer you to use our. In order to create a postcard, stock materials:
- Cardboard (from it you will make the basis)
- Gouashe paints or watercolor
- Napkin

Manufacturing process:
- Make the basis for your postcard. Take a snow-white cardboard.
- Then take the prepared paints. Pulk your fingertips in the paint.
- In the central part of the postcard, you will show the flower using this method.
- Wait for the postcard completely dry.
- Inside the postcard write a beautiful poem. You can even come up with himself.
How to draw a birthday greeting card Tete, godfather, woman?
Flowers must be depicted on the card for aunt and the godfather. After all, all women without exception adore them. We suggest you make the next option of the postcard, which you can give not only a close person, but also a neighbor, my mom's mom and so on.

Manufacturing process:
- To begin with, draw a vase on the postcard. Mark the places that flowers will occupy.
- Then drew the flowers themselves, for example, roses. The amount is not so important. The most important thing is to be odd.
- Finish draw rose petals. Then draw a beautiful bow on the vase.
- Picture pink leaves.
- At the very end, add all the elements. Color the drawing with red or bardery paints. Vase can paint blue.
How to draw a greeting card for a man's birthday?
For a man, for example, for the Chef, you can make an interesting postcard in the style of antiquity. You can view drawings in advance that are very suitable for that time. After you select Figure, print it on the printer or snatch. Especially if you love to draw.
For the manufacture, take:
- Paper for the base (cardboard paper, color or white).
- Scissors.
- Knife.
- Elements for fastening.
- Decorating elements.
- Pencils or paints.

Manufacturing process:
- To begin with, decide on the color range and the main drawing.
- Make the basis for the postcard of any form. If you want the postcard to be opened, then bend it in the pressure.
- On the postcard, get a picture, pieces of material and other decorating elements. Make sure they are suitable for general topics.
- Start these elements in turn on the basis.
- On the inner and outer side of the product, draw in bright pencils of congratulatory words.
- If you want the postcard to be more interesting, tie it around a thin ribbon, and then tie a bow.
How to draw a greeting card for a birthday boy?
Any child dreams of having all the cherished desires. And who can execute them? Of course, the goldfish. You can make a greeting card, decorating her goldfish. The kid will definitely believe that she will fulfill his dreams. To execute, take:
- Blue cardboard (size as landscape sheet).
- Golden nail polish or gold jewelry is also golden.
- Glue.
- Gel pen (better than several different colors).
- Ordinary pencil.
- Eye (beads).
- Scissors with a ruler, plus double-sided tape.

Manufacturing process:
- Bend the cardboard input. The blue side should look out. Draw the outline of the fish in the center. Circle it with a handle. Draw the crown and fins.
- Picture a glazing with a simple pencil or get a prepared eyebreaker (bead).
- Lubricate fish glue. Sprinkle gold jewelry in the form of small balls.
- Then draw bubbles from the air.
- At the bottom of the postcard write "Happy Birthday".
How to draw a greeting card for the birthday girl?
Girls, as a rule, unlike the boys, when they give unusual and bright gifts. If you give a postcard that you make your own hands, you will definitely deliver the girl a lot of positive emotions. For your own creativity, take:
- Colored paper.
- Snow white paper.
- Glue with scissors.
- Cardboard.
- Paints or color pencils.

Manufacturing process:
- On snow-white paper with pencils or paints, you will depict the hedgehogs. Stick to a card with a circle of various sizes.
- If you want some balls to get volumetric, get into the picture similar to the size of the balls, but fold them in advance in the form of a book. Write a beautiful wish in the inside of each ball.
Is the wonderful postcard? You can also make it for a nephew or niece, for a gummy or a kid and so on.
How to draw a birthday greeting card to kindergarten?
Now let's try to make a postcard for the smallest kids who are still in kindergarten. Position the cute cat with a cake in the paws on it.
- Make to start a blank for a postcard.
- On the outside, draw the ball, fruit, eyes, spout and nurse of the cat. If you wish, you can draw a mustache cat.
- Dorisite the cat festive cap, ears and tail.
- Before the cat, depict a cake with candles.
- Add the animal strip on the body and on the tail.
- Behind the cat Picture Packed Gifts.
- Inside the postcard write "Congratulations".

Video: Greeting card with your own hands
Now you will learn how to draw a beautiful postcard for the birthday of the Phased Pencil. The birthday is only once a year, and some people may have twice, a lot of things and reasons for this. Birthday is always fun, joy, gifts and a festive cake, like without him. So I accidentally met this picture and really liked, bear cakes with a cake.
But that we should succeed.

We draw an oval at a low angle, carry a curve in the middle (show where the middle of the head), then we paint the face and the nose, everything is also in the form of oval, only a different value.

Pain your nose, leaving a big glare, then draw your eyes and mouth., Further ears and eyebrows. Will erase the auxiliary curve and we must hold the lines of the head of the head, it passes almost there, only we need to spend from the middle of the nose until the middle of the mouth, from the middle of the head to the middle of the nose, only to the nose do not bring, and before the face, and the curve under the muzzle.

Draw the body.

One leg.

Then the second leg, erase the part of the previous leg, which is in this. Next to the side of the head at the level of the neck, which we do not see Draw a plate.

We draw three parts on the plates, the higher, the higher it becomes less. Erase all unnecessary lines (part of the bear's head) that are in the cake. Place the front paw that holds a plate. Slightly back from the body contour to the left and from the head down - this is the beginning of the hand.

We draw cream elongated wavy movements from the top of each embers.

Draw the second hand, which is only quite a bit visible and lines of stitching on the body and on the paws. I showed the dotted line that the curve is one, but does not need to draw dotted, it is for visualization, so that the part of the seam was not incomprehensible where.

Now let's start the background, here you can strip anything. We have a birthday, and this day is a lot. I attached a rope to the Mishutka on the ear. And hearts and mugs for beauty, so that the background is not empty, and if it is all painting in color, it will be beautiful in general. That's all the drawing on the birthday of mom, grandmother, aunt, uncle, brother, sister, girlfriend is ready. You can also give this drawing to mom and on March 8.
Everyone wants to make such a gift for his beloved milf that will delight her. Sometimes it is very necessary to prepare for her drawing. About how to draw a gift mom will tell this article.
Figure "I and Mom"
Very little kids really want to express their limitless love and affection for mom. Therefore, before them usually does not arise the question of a gift for mom. Of course, it will be a picture where the most beautiful woman in the world happily smiles and tightly keeps the hand of a better child in the world, that is, the author of this masterpiece.
But you should not limit the specified theme by the age framework. And enough adult kids may well refer to this topic. And they can even get a pretty good picture. And if it is not very good with artistic talents, it is not very good, then the picture will come out with humor, as you can draw a gift to mom in the style of "Kalyak-Malyak", imitating kids.
Colors Mom will be glad, this is a fact!
But you should not too much to zealous, showing your humor. Perhaps some kind of attitudes of the image on paper at the child still have, as it is beautifully drawing a gift - it means to make a pleasant person a pleasant person. Moreover, you can not just give mom a sheet of paper with a pattern, but to paint, for example, a glass or a tray, a wall plate or a kitchen board.

So how to draw a gift in total in the floral subject, here is a master class image of the rosette. If desired, the donator can own a postcard with its own pattern.
Step-by-step instruction drawing roses
The one who does not know how to draw a gift will cope easily with the task if it is clear to follow the instructions.
- At the top of the sheet, a slightly depicted oval with a horizontal extension.
- From the edges in the widest place, there are two asymmetric arcs, which are parts of the circumference of a large diameter.
- From the bottom the ends of the arcs smoothly connect - the lower part of the flower is drawn up.
- Below are two opened rose petals.
- The middle of the flower can be made in the form of a folded roller. He is depicted like a snail curl.
- Several small flower leafs will decorate the bottom of the bouton.
- Since to draw a gift to mom in the form of roses is best naturally, you should depict the flower stem.
- Several spikes and leaves on the stem - and practically ready.
- Now everyone has become clear how to draw a gift to my mother in stages. And you need to paint the rose with pencils or woven, but you can use paints.
Cute little animals will delight mommy!
If the question is not yet solved about what kind of gift to mom, experts advise: there is nothing more pleasant than getting a picture with a picture of a cute animal. It can be anyone - a bunny or a fox, a puppy or kitten, a squirrel or a bear. Perfectly, if an animal in the front legs will hold a flower, a heart, a cake or a beautifully knotted box with a gift. Since you can draw a gift for my mother not only on paper, but also on the fabric, for coloring the contour of the image you can use acrylic paints or specially intended for matter.

As a gift mom
- Head depicts a circle.
- At the bottom of the circle placed horizontally oval.
- Inside oval fits another oval, smaller. They must come into contact with the upper parts. It will be the tip of the nose.
- The eyes are painted with small circles, paint into the black color, leaving the little plots unwrapped - glare.
- Cooks bear - semicircle. They are drawn in the top of the head.
- Oval, a little large in size than the head, draw a bear torso.
- Inside the different sides fit two small oval - the front paws of animals.
- Rear paws are depicted by segments of direct parallel lines. Foot feet too oval.
- The incision of the mouth, the claws on the legs are depicted by smooth lines.
- In the hands of a bear can hold any gift symbol.
- You can paint the animal as the artist suggests his fantasy.
Wonderful postcard made by hand
It is appropriate to draw a birthday present on a dense cardboard, make a bright greeting inscription and folded the sheet in half. So it turns out an excellent greeting card. Inside, you should write the warm words of congratulations and wishes.
Moms are diluted when they see funny why not draw in this case a cute elephant with a gullible look and naively raised brings?
Sketch of the head and feet of the misunderstand
Not everyone can make a beautiful drawing. But I really want to make a pleasant mom! Just how to draw a gift in stages? A simple and detailed master class of an elephant will help to cope with the task.

- At the top of the sheet, the circle is drawn.
- From the sides in it make "dents", highlighting the toddler's cheeks of an elephant.
- On the top of the top of the circle - the vortices are drawn.
- Schedule the direction of the back of the seated animal line from the head down.
- Quite just to portray the front leg of the elephant.
- The second front leg is a bit of male to the first, they seem to be crossed, and the first one comes a little forward in relation to the second.
- Arc from below is the thick of the toddler's tummy.
- The hind legs are spread in different directions, the elephant seemed to sat on the twine. At the foot, which is slightly turned to the viewer of the foot, do not need to draw the foot.
Full outline of the elephant without paying his "face"

- The feet of the animal is depicted in the form of an oval. The artist draws arcs on all four elephant feet.
- The ear in the elephant has an egg shape, lowered by a sharp end down. The head line near that ear, which turned out to be closer and is in complete visibility, an eraser should be erased at the junction.
- In each ear, the inner circuit should be conducted, repeating the external.
- Mentally should be divided by the head vertically into four parts. At the bottom there is a base of the trunk, and the upper line just falls on the division point.
- On the trunk there are small arcs depicting skin folds.
- At around the end of the bottom line of the trunk, a small arc is designated smile.
- At the end of the trunk, the oval is drawn - the nasal hole.
The final stage of work on the drawing

- Two oval, slightly tilted in opposite sides with the upper parts, depict eyes.
- Inside them are the same oval, but smaller.
- In each eye, in the upper part of it, they draw it in a small circle. These circles should be slightly shifted to the side, and in both eyes in the same.
- Above the eyes draws eyebrows.
- Charmingly looking cilia in the corners of the eyes. And even if the elephants do not have either eyebrows, nor eyelashes, people often endile their appearance on animals.
- Since draw a gift is best in color, you should paint the picture. The inner of the ears is made up with pink color, pupils (internal oval) - black. Mugs in the eyes will play the role of reflections, so they should be left without color. But the elephant itself can be painted in any color, because it is not a real beast, but symbolic. Therefore, it may even be in polka dot or stripes, as in the real fairy tale.
The best gift is the one that is made with his own hands. And what can you pretend to my friend for your birthday? A gift can be anyone, and supplement it is worth a postcard. What to draw for a birthday? We have collected the best ideas of postcards, inspire.
Funny owl
What to draw for your friend's birthday or girlfriend? Try to portray the funny owl. This bird is a symbol of wisdom, and such an allegory will definitely deter to your close person. How to portray it? Everything is very simple. First you need to draw a big circle. It will be the sun. Now I depict oval is the body of the owl. Immediately reinstate the falling shadow from the bird. Accent will do eye. They are depicting in the form of two huge circles. Duplicate these geometric shapes twice two times, gradually reducing them. Dorify the beak, it will look like a rhombus. Schematically depicting paws. They will be like a flower with three leaves. On the stomach, the wavy line is depicting feathers. And the image of the owls of the ears and a festive cap will be completed. All this is drawn by triangles. Two ovals depict wings. One of them needs to be bent so that it seems that Owl holds the thread wing from the balls. Now go to the image of the festive attribute. Draw balloons and plate. All this needs to be depicted by ovals. And it remains to draw a festive cupcake. Optionally, it can be changed on the cake. Do not forget about the candle. It is possible to schematically draw one, and you can also depict them as much as the birthday is fulfilled. It remains to paint the drawing. You can use our sample or use any other color gamut.
Bank jam

When you break your head over to draw mom's birthday or sister, you can depict something unusual. For example, jam can. How to draw it? We depict a big circle. Now reincut the exaggeration and erase the lines that turned out at the intersection. Slightly above the circle draw another oval. Pull down two rectangles down, from the last down the skirt in the form of a trapezoid should be dug. The edge of our lid is wavy. We decorate it with lace. The basis is ready. Now you need to decorate it. On the bank we draw raspberries or other berries for your taste. On a tape that adorns the jar, draw flowers, they decorate the space from below. You should not portray only one inflorescence. Draw several colors with leaves at once. Well, it remains the main thing - to portray the label on the bank. We write a beautiful handwriting "Happy Jam Day" and draw a berry. The label circuit can be "set" strokes. It remains to give our color image, and the greeting card will be ready.
Cake

If a child thinks to draw grandmother's birthday, then you can file an idea. For example, draw a cake, decorated with candles. On top of a sheet with multicolored pencils congratulatory words. This may be the phrase "Happy Birthday" or its English variation of Happy Birthday. We proceed to the image of the cake. We draw the semicircle and the lower part of it depict the wavy line. It should be something similar to the leaks of glaze. The cake itself is not necessary to draw, but if desired, it can be outlined by two straight lines leaving to the edge of the sheet. We put on the glazes of the candle. There may be an arbitrary quantity, but you can draw as much as the birthday age. We light on the candles of lights and add a decor in the form of wave-like lines that will symbolize the exploding flap. You can add a postcard with colored dots or asterisks.
Air balloons

How to draw a birthday card to look original? Everything is very simple, you need to combine the drawing and glue the application to it. Here with its manufacture and start. We take a sheet of paper, watercolor paints and toothbrush. Wash the brush in the water, dip in any bright paint and splash onto the sheet. We produce this operation several times with different colors. We are waiting for the paint to dry, and cut out the contours of the balloons from the sheet. In our case, they are 4, but you can do more or less. Now we need two sheets of paper: one color, another white. White sheet should be slightly smaller. We glue two blanks so that the color edge looks like a passe. We stick our balls from above, and we spend the wavy lines from them with a black handle. From the bottom of the postcard we write a greeting phrase.
Laconic pattern

What can be drawn on a birthday? Today in fashion minimalism, therefore, we will depict a postcard in this vein. Draw a festive cake. But the image will be very schematic. With such a task, even a person who does not know how to draw. Visually divide the sheet into three parts. The first of them will occupy an image of a culinary masterpiece. Draw a thin rectangle with rounded edges. Top with the same geometric shape, only wider. In its center we depict a strip. Cake ready. Candle draw schematically. It will look like a rectangle with a thin rod from above. We supplement the candle of the lights. It will be a droplet with rays diverging in different directions. Now go to a congratulatory inscription. In English, she will look more stylish. Therefore, we write happy print letters on the second third of the sheet. From the word to the left and right we depict two fat stripes. On the last third part of the sheet we draw the word Birthday.
No longer worth thinking for a long time to draw dad for a birthday. Just give him such a postcard.
Congratulatory bear
How to draw a birthday pattern? There is nothing complicated here. I will depict a cute bear who holds a gift in her hands.

We will do it in the form of appliqués. To begin with, choose paper with a tree texture. Let it be inhomogeneous, somewhere with a turn, somewhere darker. Draw a rectangle on a sheet, a slightly expanding book. At the upper corners, you will depict two circles. This is a bear hull. On dark brown paper draw okal. It will be nose. Cut out our billets and glue them to a blank sheet of paper. Two points draw eyes and a big drop depict the nose. Optionally, you can draw a little bit a smile. Recovering 2-3 cm from the application, we write a greeting inscription. On the bear we glue the square, carved from any wrapping paper. From it, we cut the flags that "spend" at the top of the postcard.
Postcard with flowers

What to draw mom for a birthday? Well, of course, flowers. They can be depicted realistic, and it is possible, as in our case, decorative. At the bottom of the sheet, we carry out a line that will combine direct and zigzag segments. This is grass. Top writing congratulatory words. And in the middle draw sticks, on which we depict various flowers in the form. It can be bells, roses, chamomile. To look more gentle, it is necessary to paint everything in one color range. And in order to fill the space between the colors, you need to draw bizarre curls with a black handle.
Birthday is the brightest and kind holiday in the life of every person. His celebration is always fun, feast, dancing, contests, a solemn cake and many other pleasant events. On this day, each of us returns to the past, in childhood, where everyone loved to receive gifts and postcards. Especially if they are made with their own hands. If we speak modern tongue.
Today we will tell how to draw, which will be pleased to get both a small child and an adult person.
Preparation and inventory for independent postcard design
In order for the result of your work, it turned out bright and attractive need to get:
- A set of colored and white paper (enough for a couple of sheets, in case the first time it does not work. The density of sheets should be high);
- Markers and markers;
- Colour pencils;
- Set of colored handles and one acutely compatible pencil;
- Glue and scissors (if the postcard will be decorated with appliqué).
Standard postcard. It is a folded sheet of paper, on which the drawing is located on the outside, and with internal congratulations. If desired, such a product can be decorated with appliqué, make a frame and so on;
Non-standard solution. In this case, the sheet is not needed. After the postcard is ready, you can put it in the frame. Today we will draw a postcard of this format.
Now you need to choose the image that will be the main advantage of our postcard. We wanted to draw a bear cub.
We take a solid simple pencil and draw an oval under a small angle, then in the middle of the figure spend the curve line (it will be the middle of the face, from which we will draw) and depict the muzzle and spout. It turns out three ovals located in each other of different quantities (step 1).
I sketch a nose with a simple pencil, leaving not a big glare. Further goes, mouth, brow and ears. All these elements are drawn very simply - this can be seen in the figure, so you will not stop at this stage (step 2).

Draw a torso. From the head we spend two parallel rounded lines, which will be the body of the bears (step 3).

After proceeding with the image of the first leg. From the place where the line of the body ends, draw a hook-shaped line and above it an arc, which will continue to act as a lumen between the legs (step 4).

In the same way, we draw a second paw. At the level of the neck on the left side, depict an inverted narrow trapezoid. In the future, it will serve as a plate under the cake (step 5).

Then we draw a cake on our dish, which consists of three different figures in size. After drew the cake, take the eraser and erase the unnecessary part of the head of the bear. Draw the upper paw start on the left side towards the festive cake (step 6).

Wavy lines draw a cream-flowing cream. After, teaching the second top leg. And here is the protagonist postcard ready.

Next, proceed to design the background, which depicts a character. We made a decision to make the background exactly, because the birthday is always associated with balloons, serpentine, and the hearts were portrayed only in order to have a shared picture. After such a work done, you can proceed to the decomposition of the postcard. Here, turn your fantasy to complete: color pencils, markers, markers. From above, write "Happy Birthday !!!".

Such a wonderful postcard can be presented as an addition to the main gift for your mother, grandmother, aunt, uncle, girlfriend, dad and other your loved ones.
Now we know our own hands!