How beautiful to draw a simple pencil in stages. Pictures for drawing a pencil: Beautiful and light images
I am glad to imagine an improved and supplemented manual abouthow to learn to draw. I hope that he will cover the majority of questions that I regularly specify in the VKontakte group. For example, such as:
- why should I start learning to draw if I never painted?
- how can I learn to draw people?
- how to learn to draw on a computer?
- what books on drawing should be examined?
- how can I learn to draw acrylic, butter, pastel, other materials?
I collected the most useful tips from artists from the sitewww.quora.com. and turned out excellent Step by step guide, thanks to which no one can hide the type of type "I don't know where to start, I can't do it, I dozen, etc.," Believe me,
you will finally recognize
how to learn drawingbL!
Just follow this manual step by step and dedicate practice enough time, and you can come from this level of drawing
to that

A little lyrics
Painting- This is a skill that develops as practices. You are not alone when you think you are terrible in drawing! All the great artists began with drawing figures in the form of sticks like this:
The reason why they went on from these so-called "figures Sticks » something much more is that they had insatiable desire to draw Everything is better and better with each new touch pencil to paper. This desire separated them from the rest, and this is the only reason they have become successful.
First of all, the fact that you decide to devote your time to improving drawing skills is already a great achievement. Why do you ask? This is really important because there should be a passion, interest, curiosity and dedication to the art and creativity, without which the learning process will not be so effective.
So in your case the biggest obstacle is already behind, and you can start drawing, watching things around you! That's how it's simple!
The next steps I'm going to offer should help you find the desired drawing skills, and also show you the way through which you have to go for the sake of desire to become an artist.
But before blindly follow the path below, always remember that you are free to choose your own unique path - the path that is suitable for you. The real task is to regularly practicing with the intention to learnTherefore, it does not matter where you start your way in drawing.
note that each step mentioned below may take weeks, months or even yearsTo achieve perfection in it. It all depends on how really I want to improve your skills and how much effort you are ready to attach.
For each step given below, a lot of materials are available on the Internet, including YouTube. I recommend checking various sources, study different styles and practicing the style that you most suitable.
Let's start!
Step 1. We study ordinary forms
First, take the paper and pencil (or handle), sit at a comfortable position, clean your mind from thoughts and just focus on the task.
Now try to create a simple form.. For example, draw a circleAnd then keep practicing it.
Each time try to draw perfect circle. If you really react to this task seriously, it can take us a few days or even months. Draw a flat circle using only your hands, harder than you imagine.
Just start drawing circles and keep practicing these circles until you reach the stage where you can draw the perfect circle without using any auxiliary tools.
Your attempts will begin with something like this:

After regular training, your coordination of the hands and the eye will improve, and you will start to draw better:

This is a pretty good result. Now move on!
The same way, start working with other basic figures, such as a triangle, square, cube, octagon, etc.
It should take you again for a while. Remember that this is a titanic task if your first drawing was a circle from this lesson.
But after you give a certain amount of time (say, 6 months or one year), as soon as you pass this strict exercise, and when you become a champion in drawing any of the simple figures at will, another interesting line will appear.
At this stage there are two approaches you can follow:
Approach 1 - self-study
You can learn to draw yourself, taking advantage of free articles on the Internet, video on YouTube, books and benefits.

The most easy for assimilation drawing lessons for beginners I consider the lessons brand cystler on the book.
After passing all the lessons, you will achieve significant success. However, even by the author and announced a period of 1 month, I would advise you not to hurry and devote at least 1-2 hours for each lesson, performing all practical exercises.
Approach 2 - sign up for art school or online courses
If you do not like to engage in self-learning, I advise you to sign up for paid courses, where you will tell you everything in detail and show, and will also be forced practically.
The most high-quality and interesting I consider courses and master classes at the Veronica Calacheva drawing school.
This school has learning both in the studio and online. There are also useful Free Materialswho.

In this school often pass free webinars Or open lessons to explore for a while.
Register so as not to miss them!
Veronica Calacheva SchoolAnother site with paid, but cheaper drawing courses, which I like - arttsapko.ru. On this site you can also pass some courses for free. There are one-time classes that pass in Moscow.
Arttsapko drawing schoolFurther tips are more suitable for those who chose the first approach and decided to study art art on their own. But your creative way can contain both approaches.
Step 2. Shadows and Shades
Now that you know how to draw simple forms perfectly, let's let's start shadow these forms.
I will continue on the example of a circle.
So, yours first attempt to shading a circle, not understanding how to do it right, it would look like this:

Please note, despite the fact that your image is not too realistic, you have already subconsciously knew about the imaginary light source and placed it in the upper left corner and, given this source, you drew a shadow on the opposite side in the lower right corner.
That is, in order to shadow objects you need common sense and nothing more.
Now keep practicing shading. It may take several months before you get something like this:

Now this circle looks like a bulk sphere.
Further you need to show that the sphere does not hang in the air, but is located on some surface, and you will begin to portray the shadows that the subject throws away to other surfaces. In this case, the drawing should already look something like this:

Always remember one simple rule that has been demonstrated in the figure below:

In addition, continue practicing shading and other forms that you have studied.
During practice, pay attention to how shades vary depending on the availability of light. Look at the tone scale with a hatching from light to the dark below. You can navigate it when you draw a figure.

Keep practicing. This is an infinite process!
Step 3. Perspective
The main law of perspective says:when the object is closer, it looks more and if it needs to be further, it will need to draw less. If you understand this, you understand the basic law of perspective.
Now let's figure it out with the so-calledpoint of departure.
I will explain this concept on the example of Cuba.
When we draw a cube, why the length and width of this cube narrowed to its end or tilted inside the paper? Look at this picture below for reference and ask yourself why it happens?

As you can see, the ribs are narrowing both to the right and left, as if they go inside the sheet of paper. That is how Cuba creates the illusion of "3D" on two-dimensional paper. And this is possible, based on the basics of building a perspective and such a thing asvanishing point.
Now consider the same cube again.
In Cuba, we took the point of departure somewhere far from our eyes to the right and to the left of the cube. That is why the sides narrowed to the inside of the paper on the right and left. In the figure below, it is clearly shown like the edges of the cube, if you extend them, it will comply at one point on both sides. These two points are called points of departure:

Now look at the green point in the following drawing of the cube:

This green point is alsopoint of departure.
Imagine how the cube will look without this concept of the point of departure. It will be more like a square in 2-d.When we draw a cube, it should always be remembered about the point of departure, because it is it that gives us the opportunity to portray the bulk figure.
So, I hope that the concept of a gathering point has become more clear to you, as for any good pattern, which is drawn taking into account the space and the distance between each object, the concept of the departure point must be respected by default.
Here are some more examples of the concept of the point of departure, for your understanding.
- Top view (or view of a bird's eye view):

- Linear perspective (landscape):


- View with many points of depot (any real plot):


Thus, as depicted on the third example, in real scenes, there are usually several points of departure, and these points give the figure desired depth or 3-D effect, and the feeling of space that separates it from 2-d.
Too complicated? Just do not panic now, good? At this stage, it is enough just to understand the concept of a point of departure. Just try to show the point of departure to your drawings without any drawings and measurements.
This "step 3" was only a prerequisite for studying the laws of perspective, just that you know about its importance in drawing. In the course of a brand of a cystler "learn to draw in 30 days," there are several step-by-step lessons on building a perspective, you can start with them.
Step 4. Draw complex forms
Now using your confidence in drawing and shading simple forms, as well as the knowledge of the shadow effect and the point of departure, go to the next level, that is, to drawing various complex forms.
Rules of the game remain the same:
- Keep practicing.
- Observe the nuances.
- Each time try to surpass yourself and not repeat the previous errors.
So, for a start, what about the egg? It is not so different from the circle, right?
Let's just start. Practice until you reach perfection!

Well, it looks like an egg. Now try different fruits. For example, strawberries.

Excellent! It is really a good strawberry. And look at this detail.Strawberry on the last figure looks quite difficult to draw, but we already have experience in shading from "Step 3". This is the same, only on the micro level. Believe me and everything will work out!
The same way, Continue drawing different random shapes with shading. Place the shadow on these drawings, given the effects such as reflection, refraction, transparency, etc. and just continue practicing.
There are many different items around. Learn to draw what you see. This is one of the most important steps to become a professionally artist. Do not worry, if you first do not really get very good. Sometimes, when you start to draw what you see, the beginning of the sketch may look pretty terrible, but the result may turn out to be stunning. So start doing it!
Try to draw two random objects per day. The drawing should be solid: drawing + shading + incident shadow + any other special effect.
Something like what is shown below:


Every day just repeat this process. You are on the right track!
Step 5. Draw a living beings
Since we now know how to draw and shadow various objects with relative accuracy, it's time to draw moving objects and living organisms. Now it is necessary to include in the drawing of the movement of objects, their posture and facial expression, this is a real challenge!
The most important advice is to keep your eyes and mind wide open. You must watch everything around.
So watch all the nuances - walking people, flying birds, dog pose, etc. And when it is possible create a quick sketch This particular position, movement, expressions, etc. And work on the items later in your free time.
You must have something like this:

This is a quick sketch that is performed in minutes. Select in the park or cafe and just sketch people who came across you. In this case, the main thing is not quality, but the quantity. You need to see and pass the object's posture.
Examine anatomy.Yes, the anatomy is the same as in the lesson of biology. It is necessary to study the bones of the skeleton and the location of the muscles. It may seem strange and terrible, but, on the other hand, it means that you can draw a skeleton and a skull for decoration on Halloween 🙂 It will also help in the study of human proportions and body movements. The same applies to animals - read books on animal anatomy. Almost all artistic books on animal drawing will have anatomy section.
Try to start with my article:
Then try to quickly draw several different facial expressions:

Watch and remember the differences in the facial lines. Later, continue adding shadows and make them look even more realistic as here:

Do the same with trees, flowers, animals, birds, etc.

Now that you already know quite a lot, using your surveyed skills you can draw something like this:

Perseverance, difficulties and pain will then lead you here:

And in the case of people (a little better or worse):

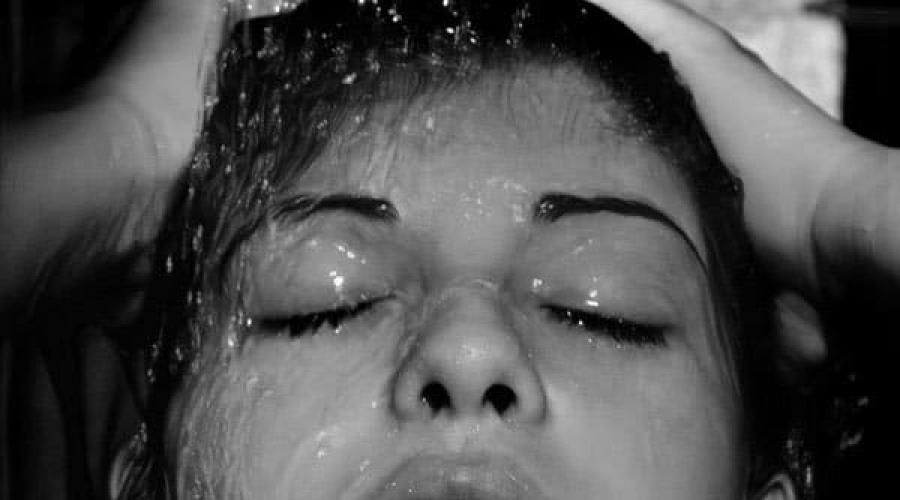
And now it's time to make a pause and take a look at the image below, on this beautiful woman. She really looks very beautiful, isn't it?

And if you ask yourself, can you be sure enough that you draw it as beautiful as it is? Most likely, the answer will be big "no", right? If so, then you still have where to strive!
Thus, your drawing is still in the infancy, and there are many opportunities to improve.For example, you will have to work on the details of the human eye and its movement, human hair, their shine, etc. I think you understand what I'm trying to say, isn't it?
So, mostly, at this stage you all the time must surround yourself with these difficulties to move forward, and not stick at the average level.No one will help you in this, besides you!
Step 6. We try different tools and materials
Very good if you know how to draw a pencil, but it will be much more interesting and more useful if you also learn to use ink, paints, markers, pastel, etc. You should try different materialsAt least because you may encounter what you especially like. Add colors to your sketches!

Of course, artistic goods are now expensive, so you should not take professional materials immediately, suddenly they will not let you go and want something else? To begin with, there will be enough tools from the average price category. Now a very large selection of inexpensive artistic materials can be found onAliexpress.
Do not use fashionable artistic boards or moleskins. Buy a large notebook or album with white sheets. Your goal is to make as much as possible the sketches as possible without worrying about spending expensive paper.
Also, if you decide to try yourself in Digital-Art, it is not necessary to immediately take on a licensed photoshop when you can start with free editors, such as MyPaint, Sai, Gimp.
 Posted by: tsaoshin.
 Step 7. Landscapes
Now fold everything together. You must start drawing landscapes on which there will be people, plants and many animals. In this step you will have an excellent opportunity to practice your knowledge perspective laws.
To begin with, you can try to draw panoramas, such as a view from your window.Try first drawing landscapes more "rough", for example:
 After that, you already detail objects.
After long training, your drawings will be approximately such:

Step 8. Draw from imagination
Start with something simple, for example, from an apple. Just move your pencil on paper, only representing that you draw an apple before drawing it. Then make a quick preliminary sketch to get its shape and form of its shade in proportion to the page. Then start shading and detail.
After try drawing something more complicated, for example, flowers, trees, a glass, handle, etc. Each time you try to choose objects more complicated. In this step, I can no longer give any recommendations except Practice regularly.
Step 9. Form your style
Now you know about everything. At least enough to start developing your own artistic style.Your style should be uniqueAnd you must continue to develop it with enhanced practice.
Please note that I can no longer add anything to this step, because I do not know what your own unique style will be. I can only advise
On the Internet is full of materials that will help you with inspiration and ideas, such as Pinterest, Instagram, Tumblr, YouTube. I recommend to check these sources regularly, study different styles and practicing the style that you most suitable.
Step 10. Improve
This step is about improving to the level where your drawing will be indistinguishable from a photo or real image. Of course, it is optional. But if you are still you wish to bring your skill to drawing in the style of hyperealism, it will also require a lot of practice.
Although pictures that do not distinguish from the photo are signs of amazing mastery of authors who have made a lot of effort, there are equal examples of stunning works that not similar to photos. Therefore, you must also remember this.
Here is an example of a hyperealist drawing:
Sensazioni, author: Diego KoyStep 11. Practice, practice, practice.
Artistic skills do not come with bizarre sketches and pencils. This happens with practice. It is considered to be a professional professional, it is necessary to devote a certain amount of time to him - from 2000 to 10,000 hours!

Every time, when you have free time, sit down and draw something, or train your hatching, tone, etc. There are so many things you want to master - you always need to practice. Draw light items and complex. Draw people in detail or rough lines. Collect everything as far as you can, constantly improve your skills.
Moreover, it is desirable that the practice is accompanied by feedback. It is only necessary that these spectators tell you the truth, so there are no dad and mom on this role.Alternatively, you can upload your work in some art community, or forum. Such a place can serve our
In the previous article, how to learn to draw from scratch, I talked about general councils, rather about tune to learning. Now, I want to tell about those things for which ... I often ask a question - how to learn to draw? Are there any secrets, training, a certain tactics of learning for beginners ...? In this article, I would ... Pictures with pencil stages. So, a couple more way to lung drawing flowers for beginners. I really hope that these simple lessons will help you learn to draw ... Pictures with pencil stages. Despite the fact that some flowers draw quite easily, for those who only picked up a pencil, drawing flowers - this is ... Pictures with pencil stages. The second lesson from a series of simple class drawing lessons of the queen of flowers is how to draw a prank with a pencil. He will be a little more comfortable ... Pictures with pencil stages. The complexity of drawing such a flower as a rose is to draw the plexus of petals. For beginners, this task is sufficient ... Pictures with pencil stages. Another lesson for drawing trees - how to draw a tree in stages for beginners. A tree that we will draw in this lesson ... Pictures with pencil stages. In this lesson for newbies, I will try to tell how to draw a palm tree with a pencil. Palma is drawn very easily, and now ... Pictures with pencil stages. The next lesson for beginners to draw trees - how to draw a tree in stages. You will be interested in drawing a tree, because Ural ...
So that a man's portrait had the maximum similarity with the person depicted, first of all you need to correctly draw his eyes. In this lesson you will learn to draw a person's eyes in a stages of a simple pencil.
If you are going to draw someone's portrait even a simple pencil, prepare for the fact that you have to do a few sketches and spoil a lot of paper sheets.
On the eve of the New Year, the drawing of Santa Claus and Snow Maiden becomes very relevant. I hope this phased lesson in a simple pencil technique will help you correct Santa Claus.
The drawing portrait is often enough just to correctly draw eyes, lips and nose and a certain similarity of a positive person will appear.
Each person's nose has unique features, so give accurate tips how to draw a girl's nose, a child or a man.
Draw a hand completely simple, especially in full size. For this, it is enough just to circle the contours of your hand.
Do not complicate the drawing of comic mines. The image of the figure and faces of people should be without much detail, almost a schematic, slightly in the cartoon, comic tone.
If you know how to draw a person's face, then the mermaid will be easy to draw, because instead of the legs of the Fishe tail.
The eyes of girls drawn in anime style are unnaturally large, with long eyelashes and huge black pupils.
The lesson, how to draw a Cartoon Hero Sonic, is designed for very small children. The lesson is made by a simple pencil, but you can draw markers or colored pencils.
Draw Winnie the Pooh gradually quite simple and the picture of Winnie the fluff must be fine.
This spider man drawing is made by a simple pencil, but you can draw it with markers or colored pencils.
If you draw an iron person in a phased pencil, then you will definitely get a beautiful picture of this hero. To the Iron Man turns out to be more spectacular, be sure to color the drawing.
This drawing in the style of manga is made by a simple pencil, but on the site there is almost the same color drawing made on a graphics tablet.
The hero of this lesson was the character of the famous cartoon about Pokemon. The picture is made step by step, so even small children will cope with these tasks.
Since Patrick is a starfish, then his body shape resembles a five-pointed star. This lesson is designed for the youngest visitors to the site.
Another lesson is designed for children. I hope to draw a sponge Bob will not be difficult for even young children, just begin to learn to draw.
This doll is more like a small princess with a high collar and numerous lace on the dress.
Smesharikov a lot and all of them are similar to each other, as the body resembles the ball or ball. Try to draw a sthadowed pencil.
Smesharik Hedgehog differs from Smesharica Crock only by the fact that on the contour of his body you need to draw a needle.
In this lesson, we will draw a monkey chimpanzee gradually. If you need a drawing of a monkey of another species, you can draw it in a photo.
Try to draw this graceful cat having the name of Jaguar. Of course, such a "cat" like jaguar only looks like a domestic cat and hunting not on mice, but onto the brafice.
If you like to draw animals, be sure to draw a phased pencil of this cute and pretty bear coal.
Bear in children's drawings has friendly and peaceful character. In the Wildlife, this is a dangerous and aggressive animal.
The fox looks like a dog, but in addition to the lush tail, the original bright redhead of the fur has a number of other differences, such as a narrow and long muzzle.
Elephant draw quite easily. You will make sure that if you try to draw an elephant with me a stages of a simple pencil.
If you tried to draw a snake and bird, then draw the dragon you will be easy. Dragon drawing, made of black and white pencil, can not even be painted.
Drawing a camel, be sure to draw the surrounding desert landscape. It is easy to draw sand and bright sun, but you will have a real picture.
Figure spider is not necessarily painted. It is enough to sharpen the spider with a simple pencil, and for realism, paint the spider web.
Snake, many inspires panic fear, as some snakes are very poisonous. But in fact, this is an ordinary animal from the family of reptiles using poison for self-defense.
Figure For children, a simple pencil is better to do in gradually, at first there is only common contours of the frog. And after, step by step, draw the whole picture.
The most difficult thing to draw the bee transparent wings with streaks. I think with this lesson you can easily handle it
The black and white feature of the ant, made by a simple pencil will look quite realistic.
The main thing is to correctly draw a long and narrow fruit of the hedgehog. Numerous hedgehog needles draw easy. So that the hedgehog looked more realistic, draw next to the mushrooms or fallen apples that the hedgehog collects in autumn.
What only unusual animals are not on our planet. Panda's Bear is an extraordinarily beautiful and unique animal living only in China.
Draw a crocodile with an open mouth. So it will be easier for you to express the fierce and predatory character of this very ancient being of our planet in the picture.
The protein can be drawing "from nature", because in any park you can find this wonderful animal and even feed with your hands.
No one knows exactly what a dinosaur looked like. Perhaps he looked exactly as in this picture.
Externally, Scorpio resembles cancer, only a smaller scorpion claws, and there is a dangerous poisonous sting on the edge of the tail.
Think, you will not be able to draw such a beautiful dragonfly, like on my drawing? And you try. The main thing, take a fool's pencil so that the lines are thin and clear.
All dogs are similar to each other and at the same time there are no identical dogs. Let's draw a very pretty and good-natured dog Senbernar, saving people who fell under snow avalanches.
Many children hold houses of hamsters, funny and cute animals. Take a piece of paper and a simple pencil and let's try to statenly draw your pet.
If you need to draw a pony, this small pretty horse, then this lesson will help you to do it in stages.
Donkey is very similar to the pony, that's just why he should have such long ears? However, it does not matter. It is just important that you can correctly and beautifully draw a donkey with this lesson.
Beginners artists paint the horses back legs as well as the front. Do not make this standard error. Look carefully, the horses bend the horses bend on the contrary.
I really like the assignment lesson. He is very simple, and at the same time allow any person to accurately draw a horse's head.
In this lesson, you will learn to draw a rabbit in a stages of a simple pencil. With the help of simple steps, you can quickly and easily draw the rabbit, try.
Draw a kitten fascinating, especially when the drawing "turns out". Try to stale to draw a kitten on this lesson.
Do you need to draw mushrooms? Then take advantage of this lesson. Step by step, you draw the most popular white mushroom in the mushroomnikov.
The maple leaf is very beautiful, especially in the autumn, when it changes its green color on shades of yellow and red.
This lesson is quite simple, just enough to draw a "house" snail. So that the snail pattern was realistic, draw a piece of grapes yet.
What patterns do not happen on the wings of the butterfly. Wings even a regular cabbage butterfly as if the artist's palette with multicolored paint stains.
Sea messenger is easy to draw, it is much more difficult to convey the depth of the color, breaking about the rocks of sea waves.
Often we do not notice what surrounds us and without which we will not be able to live. Trees, plants - the basis of our nature. Protect the environment!
Flowers, green grass, leaves of trees not only cleans our air from harmful impurities, but also decorate our life. Look around the "other" eyes and you will understand how carefully needs to be related to our nature.
Figure Christmas tree you may need closer to the new year. In addition to the drawing of the festive Christmas tree, there is a lesson on how to draw Santa Claus.
There is not a single identical snowflake, so you can come up with any shape of the snowflake, the main thing is that its "rays" were absolutely symmetrical.
God's cow must be painted with colored pencils or paints, and even better to draw it against the background of the surrounding nature: green leaves, bright bud buds.
Against the background of cosmic darkness, the shuttle will be especially impressive. This spacecraft can turn into an airplane and falling out of the orbit will land on the ground independently.
Helicopters as well as aircraft are civil and military. In this lesson, you can gradually draw the most common brand of the civil helicopter of our country.
Drawing a military aircraft You will definitely get beautiful if you can correctly draw your wings correctly and symmetrically.
Figure English military fighter times of World War II. The lesson is made by a simple pencil.
You will draw the car much easier if you do it in stages. First you need to make a body markup, and then, step by step, draw other parts of the car.
All children love to draw, but not everyone can. It is very important in the early stages to support the child in his endeavors. If the baby does not work something and no one helps him, then he, just rather, just abandon this occupation. Therefore, teach children to draw, strengthen their faith in your abilities. If you think that you do not know how to draw at all and you can not teach anything, they are very mistaken. You will probably be able to master the drawing with a pencil. Today I will show you some simple animal drawings.
How to teach a child to draw a pencil?
When you need to take a small child something, I always draw it to draw it. True, as it turned out, some children do not imagine what to do with colored pencils. I remember the case when the little girl bit off all the rods from the pencils, it was worth it to be distracted for a minute. For a long time I had to explain why you need a blank leaf, which side of the pencil led on paper. Sad to remember this case. As it turned out, the parents did not give her to draw ... But at this age, many children are meaningfully drawing objects, men and even simple plot drawings. I believe that a child must be acquainted with pencils from about 1 year. And a little later you can give paints, of course, watching the process. .
How to teach a child to draw correctly?

It is simple enough. Our cow cheers the grass and curiosity is watching someone. First draw an impaired circle, then head. The muzzle at the cow at the bottom is wider. Let's draw the border, separating the nose. At the top there will be eyes, at the bottom of the mouth and nostrils. The expression "eyelashes like a cow" was invented not just like that. Cows are really very long cilia and beautiful eyes. Do not give up horses. Therefore, draw the cow of cilia, ears, tail and, of course, horns. Feet in a cow ends with forked hooves. Do not forget about udder - it is one of the main "attributes" of the cow. I wanted to add a cow bang, flowers in the teeth and specks. It turned out a very cute image.

How to draw a pencil deer?
We draw a cartoon deer. Judging by the expression of the face, he is offended by someone. But you can draw a deer for children who smiles. Master's business. First draw the torso and neck, then the head with a narrow chin. The deer has a small tail, 4 legs, raised ears and special horns. Horny deer branch. It is thanks to branching horns in the figure you can unmistakably find out the deer. If instead of the horns draw the mane, the deer will become a horse. Draw a triangular nose, little mouth and eyes. So we painted the reindeer, on which Santa Claus goes. Stop, or Santa? Of course, Santa! Santa Claus Spokon centuries rode the sleigh harvested by the top of the horses.
The basis of artistic art - drawing with a pencil, and to be more accurate - sketching with a pencil. After the main exercises with a pencil (for example, on the touch) you need to take it precisely for drawing to acquire drawing technique, put your hand and understand how certain things are drawn. How lighting and shadow drawn, how to create a "skeleton" of the drawing and hang the detail on it. We offer you Pictures for drawing a pencil: Beautiful and easy images that will help develop all of the above. The pictures are collected throughout the Internet both Russian and foreign.
The author of the selection was engaged in drawing at the initial level. I was not easy to draw drawing, but zeal brought my fruits. The pictures presented in this selection are suitable for both beginners and advanced beginners. Get ready to scroll down long, because in a selection of more than 60 pictures!You will surely find yourself something like and by skills.
Big selection of beautiful and light pictures for drawing with a pencil
Simple desert ship-ship circuit for painting with pencil sketch.
Beautiful and simple for drawing silhouette of a cat.
Kawai hamster with glare in front. But they do not make it much more difficult in sriska. Beautiful and simple drawing!
The contours of anime cats for drawing, accessible to drawing even a newcomer.
Frog - small animal, with a small amount of bends. Try to work the shadow as much as possible to the original, and you will have a great sketch.
Another frog with a more detailed eye and muscles. But you have already trained on the previous frog?
Simple and surprised volume. Surprise him even more, drawing it well!
Cat draws this muzzle is very simple, the main thing is to immediately estimate the symmetry lines, place the ovals. In the image itself there is nothing complicated (except if the eyes), so just make it symmetrical.
Elementary drawing of a bird with a pencil. You can not stop on this and continue to detail it by adding feathers, shadows.
How to draw an elephant: step-by-step instructions.
Figure for drawing a pencil for advanced beginners. Lion's muzzle from Disney cartoon.
Zebra is the perfect animal to draw it with a simple pencil. We suggest to draw this zebra, in which there is no difficult detail. Light and beautiful image!
Big teddy bear. The main thing here is to follow the rhythm and direction of the stroke. The bear should be hairstyle, as on the original. If it turns out to draw the same cool income, like the original, then you are no longer bad in drawing!
Figure without detail, but which will require a confident hand and a clear distinction of space. You may first draw a cup more freely, causing a lot of extra strokes, and then remove them with an eraser.
Owl under the plaid with a cup of hot drink. Excellent autumn drawing will be able to develop it and detail. But for this you need to draw at least such! You know what to do.
Cute kitten plays. Fully from the point of view of anatomy and shadows drawing, although the minimum of the strokes is used. Cat as a living! You also get to convey it in the picture, try it!
Ballerina with a minimum of detail and a very abstract figure, and even with closed eyes. A real gift for the srinker.
Panda looks out of the cup. You can make shadows better than in the original, but you have the basis for sripet.
Cat-scrabblers in the original rice style. Large eyes, on which you will be very convenient to work out glare. The shadow and rhythm of the stroke are also very important here. Pay attention to how the barcode is expelled where the shadow is thickened, and how it is rare in a lit place.
The foxes from the zlyoshopolis depicted in the style of light negligence. You can first depict it in harsh carelessness, and then remove unnecessary.
Beautiful drawing for drawing with a pencil: a pretty girl on the shoulder sits picamach. But he has a minus: he is not so simple. We will have to try to draw qualitatively. But the detail is not so much, so forward!
Easy way to draw a horse.
A simple way to draw Winnie Pooh into Russian manner.
Winnie to the overseas, Disney manner. Both options are pretty and simple in sketching with a simple pencil.
Cute kitten is almost without detail, simple in sketch.
Boots with lacing on heels. Try to start syrolate only one shoe.
Sad, but funny sits in the branch and waits when you start it to sink by a simple pencil.
Simple landscape, without unnecessary detail. But there is, on what to practice in the application of the shadows, and in the hardness of the hand.
Little penguin under the sketch.
Belchonok with potions in hand. Eyebrows - the final touch in the transfer of emotions, like the Mimic wrinkles at the bottom of the picture.
Stylish, beautiful street pattern. His drawing pencil will be the first step to portray something similar to the paints in the city.
Pretty girl's face in a profile that does not burden you excessive detail. Only contours, only the basics.
Waist and feet ballerina. There must be very subtle work with shadows. Make everything in your power: eraser, fingers, barely touching a sheet of paper movement.
Snegir sits on a branch.
Another bird on the branch. Here you have to try to shake the bird as it should. Please note where and how the lines become denser and darker.
Great picture for drawing, which will develop your skills. No special detail, only a game with strokes, dimming.
Writing for painting bird feathers. Perfect angle for these purposes.
Key with Deviantart.com; Vermarka does not hurt drawing with this picture.
Landscape with two boats, trees, silhouettes of mountains in the background. Light picture, but requiring initial training
Half detailed house. Try to syrove it at least half. Pay attention to how the roof tile is made. Stones are a smaller problem here.
Cute parrots communicate, and you draw them, because they are really light and beautiful.
Funny pattern with abstract girl silhouette with shapes.
Landscape with trees, stones, bridge and mountains in the background. The picture is lightning, which does not require any super technical skills, but checking your diligence and preceptability.
Buds flowers for drawing
