Divinity Original Sin 2 Cemetery of the coast of the reservoir. The island of bloody moon
During the study of the cemetery (StoneGarden Graveyard), located on the coast of the reservoir, you will probably notice a couple of dilapidated statues of angels outside the tomb. Thanks to the repair of these stone figures and adjusting their location, you can get into the tomb, where there is a very valuable lie. In this guide, we will tell you how to fix the statues of angels in Divinity: Original Sin 2.
Location of angelic statues
The cemetery is one of the main locations of the coast of the reservoir, which we strongly advise you to visit. In addition, it is here that you have to solve most of the tasks of the quest "Family".
So, in this location you can find two extremely curious angelic statues that guard the gate to the east of the teleportation point. One of them is turned insight, and the other lost his head. If you fix these statues, you can easily go into a closed tomb, which they guard.
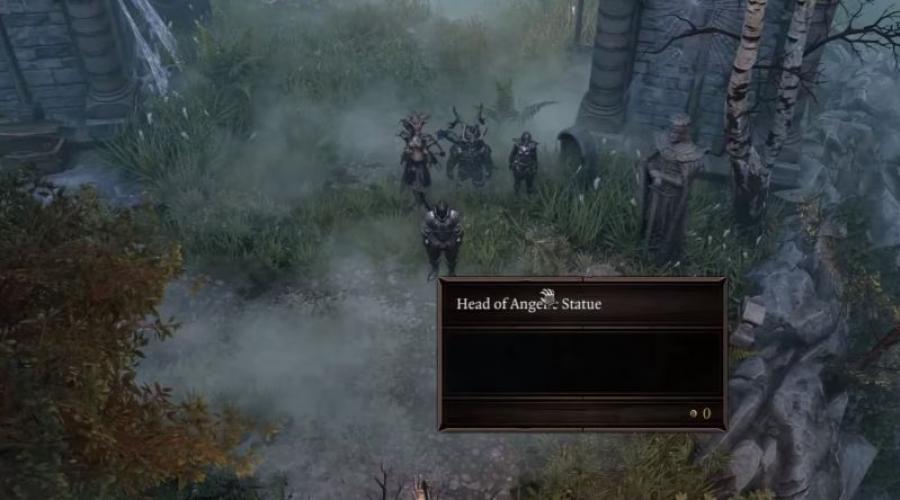
How to find the head of the statue of angel
The head of an Angelic statue lies on Earth a few steps away from it - just climb into the top along the road located west of teleportation point. Not far from it will stand the statue of the knight. Raise your head and go back to the angel.

Turn the angelic statue
After the repair of the headless statue, you will need to turn in the right side the second figure of the angel standing on the left. Select it and click the Rotate Statue option. Continue to change her position until it looks in the opposite entrance to the side.
Then the door to the tomb should be opened and you can go inside. Do not be afraid, you don't have to fight with anyone, so you can take everything that is not screwed to the floor. For example, here you can definitely find the book of Sleeping ARMS skills.
Now that you know how to repair Angelic statues in the cemetery, make sure that you carefully researchers the remaining part of the location by activating the skill of ghostly vision. The fact is that here you can find quite a few ghosts that can give you interesting quests.
On the coast of the reservoir, talk to the boy named Barin, who stands on the edge of the destroyed bridge. Or contact the defender of Mary Bridge. So the task will begin.
Go to the Keepers House of the Bridge (through the Paladinov Fortress and Cemetery) and deal with the secessions. To open the gate, you will need the lays and a good hacking skill.
Mary will provide for this award (if surviving). Inside her house, you can also find the key from Luke Mary.
LED CARAVAN
You will receive this quest after not far from the starting point of the coast of the reservoir, find the caravan of masters. Talk to the surviving gnomehi to find out that Issucia captured the sorcerer and dragged it into a special cave called Wrecker Cave. After talking to Reimond on the territory of the Drift, tell Magist Juliano about what happened to the caravan.
Hypersca
In Driftwood, talk with two children standing around the docks - Ben and Garietta. You will learn that their friend Joe tried to swim in the Fort of Joy, but disappeared. They are concerned about his lies.
Go down the coordinates (x: 450, y: -46) to find the sharp sharp on the coast of the coast of the reservoir (by the way, not far from the starting point). She does not want to go back to the water, as some monsters are afraid. Concederate the shark in any way, a highlights of her body and find a torn leg. Choose an elf and eat this leg in order to find out that it belongs to the dead boy. This is Joe.
Return to children and tell them about Joe's fate. You will receive the usual award and complete the quest.
Council. If you do not have in the elf group, but there is Fane, then use it a multi-faceted mask to turn into an elf. So you will get his ability to see the memories of the dead people.
Reward: 3000 Points of experience, if you eat leg and find out about Joe's fate, as well as ordinary lie.
When to count chickens
On the coast of the reservoir you will find a chicken coop with several chickens. If one of the team members has a "friend of animals" talent, you can chat with the main chicken and find out that their eggs were stolen. Large Marge and put the task before you return stolen eggs.
Move into the specified location marked on the map, which is just north of the chickens, and deal with the dissensions of the emptiness. All eggs will be spoiled, but there is one surviving - a little further, on the very edge of the shore. Take the egg and return it to the big margin.
In a reward for this, you will learn about the place where the treasure buried is behind the chickentellite. Drop it.
Return to the chickens a little later, to find that the hatched chicken pipir killed everyone else, but for some reason it belongs to you friendly towards you. He will follow you just as the black cat on the shore of the Fort of Joy.
Use the vision of the spirits to appear the Spirit of Big Mount, which will say that you have to find the father of Pipira. Go to the specified place on the map by X: 437, Y: 304 coordinates to find Pipir's father - Magicockerel.
He will tell you that you have to kill PIPIR, since the one he sees in front of himself - only the murderer, not his son. You can agree and kill pipira or refuse it.
If you decide to kill PIPIR, then get a reward in the form of mining, and next to Magicockerel, a chest with legendary and epic objects will appear. If you decide not to kill PIPIR, then it will turn into a monster and causes dozens of chicks that will fight with you. Already after you get the chest. In any case, the quest is completed.
Reward: 5000 experience points (regardless of choice), chest with legendary and epic objects.
Scientist skrop
Jook three fish that are infected with poison. In the fishery zone of Driftwood, the rogs studies infected fish, infected with emptiness. If you agree to eat it, you can get for this experience and another award.
He will give you a choice among poisoned fish - brown, red and yellow. After you eat, a poisoning will be applied for several moves. You will get a mixture from it from plants, depending on what kind of fish, eat - the duke for bream, etc. He will also say that it would be recommended to mix this grass with the fish you ate to strengthen the action of the potion.
One character can eat only one fish of three. Eat every fish, for which three characters will need. When talking with the punch of the fourth hero, the quest will be completed because the scientist admits that there is no more fish.
To complete the quest, you can use even hired heroes (if there is no complete command).
Losses in Grossbukh
Return Garvan's property.
In the tavern driftwood there is a man named Garvan, who asks to investigate the missing reserves along the trade route to the west of Drifwedwood. Go to the specified location where there is a troll guarding the bridge. You can kill him or agree to help within the quest "Business Competitors".
Move the bloody tracks and meet the gnomes and their pet Pash. You can tell Garvan that the property was destroyed, or returned to him a wooden box with or without content. Or you can continue in this place the investigation.
From a shallow grave, you can dig up the remains, allow Elf from the detachment to eat them to find out that the merchant did not have sacred, and his companions. Activate the vision of the spirits and the ghost of the merchant will appear. You can agree to take revenge on it, which will lead to the beginning of the task "Aggressive Capture".
Garvana only needs his drawer, while the award will be different depending on its contents (what you leave inside).
Business competitors
Trolli Gorg and Marg are engaged in the same business, being competitors each other. Each of them will ask to kill the other. You can help one get rid of the other. But be very careful in this, because Troll Gorg is a dangerous opponent who can kill a weak member of the party with one blow. Before fighting trolls, make sure that you were prepared and saved the game.
The use of fire on the mountain and poisoning for margas will remove the effect of regeneration of their blood.
Aggressive seizure
In the west of Drifwood, near the bridge, there is a bloody trail. This location we pointed out in the quest "Losses in Grossbukh". In the end of the bloody path, you will find the property of Garvana, but also get into the ambush enemies.
After the fight, apply the vision of the spirits to discover the ghost of the Liam Trader. Talk to him to learn the truth about his death and agree to take revenge on it. If you want to kill Garvana, not attracting attention, then they must raise him the poisoned meat chowder made from ordinary meat chowder and any fish infected with the void. Then he will go to Lazare for the tavern and will attack you immediately, as will see. Searing his corpse, you will get a cut off Garvan's head. Pass it with Liam, and he will mark the place on the map, where Zakopano treasure, which Garvan could not find. This is your reward.
However, havan's head with an elf from the detachment, you will get a unique talent of the "secrets of a merchant", which enhancing the option "Exchange" by one score. If you decide to do this, Liam will not give you a reward.
If you decide to kill Garven, but it is inside the tavern and did not become your enemy, then do it without warning anyone. You need to have poisonous weapons, rain skills and about 1000 gold coins "Prointer." Squake the rain near him, and then infect the puddle using a poisonous weapon. After that, go out to the street and return to the tavern, so that no one has seen you. Wait for Ganvan dying, while no one will know who did it.
1000 gold will need to bribe anyone who is trying to interrogate you (probably there will be about 400-500 coins, but just in case it is better to have more). Or you can try to convince such people. After that, do not close to the tavern, until the situation calms down, and all NPC will not return to its places. So you can safely pick up Garvan's head.
Buy Stew meat at lifting in the tavern and combine it with any caught fish. Pass the rotting Fish Garven. To begin with, it may have to give Garventus the usual stewed meat, after which he will ask for the third (you can slip poisoned fish).
Liam Treasures You can detect yourself.
Network of desire
At the bottom, under the driftwood you will meet a strange woman named Dorothea. Agree to look at her ring and select one vision, each of which will cause a reaction. She will ask to meet her in the corner, so you have to divide the squad (in a well-known way) and hold satellites somewhere away. After you meet with a woman, she will turn into a giant spider, and you will have to decide, let her kiss the hero or get a weapon and fight the enemy.
If you select the second option and defeat the spider, then your satellites will receive 4000 points of experience, and on her corpse you will find the idol of Renaissance (resurrect the character who has it in its inventory, if he dies), two unique daggers and the key.
If you allow you to kiss yourself, then she will bite the character in the neck, and you will get the talent of Spider Bite, the effect of which depends on what kind of vision you have chosen to:
- Towering oak (+2 to strength, -2 to the physique).
- Curved pen (+2 to intelligence, -2 to the physique).
- Golden chest (2000 gold, -2 to the physique).
- Dragon (+2 to intelligence, -2 to the physique).
- Cocoon (-2 to the physique, one idol of revival).
After a kiss you can attack the Dorota, and you can let go.
Although it is required to meet with the Dorothem one, you can use other characters in battle (if it starts), which are controlling. Therefore, the battle will be sufficiently easy. To maximize the experience, kiss with spider by all four characters, and the last one when Dorota tries to leave, attack her.
Drowning her sorrows
On the second floor of the tavern in the driftwood you will meet with the captain by Ablwezer, which will ask to stop tormenting her ringing. Apply the ability of spirits in her room and see one ghost trying to a woman. Be sure to leave it, after which the torment Ablwezer stop.
Ablweather will mark the location of its compass on the map. When you go there, you will need to teleport one satellite to open the hatch. Inside the cargo you will find a compass surrounded by fog. You need a character-undead to obtain a compass or teleport spell.
Strange cargo
After finding Higbu (Quest "Missing Masters") in a barrel with fish in a fishing room, you can help him escape or return it.
If you decide to help with escape, you should accompany the character outside the driftwood, while tracing it to be not caught by master. Use your mini card to track the location of the rest of the masters, and use the securities for escape. Or just take the character to the western port and apply teleportation skill to move to the other side of the river.
For this you will receive a reward and a new prompt about who is a real criminal (cook in the tavern), and where to find Masters Khananga. In addition, you can teleport over the marker and get a reward. Do not forget that when you try to run away, you can still return the characters to the Master.
Love has the price
A man named Telrik in the tavern driftwood promised you to try something exotic. If you pay it the specified price, it will provide you with the key to the upper apartments.
Go there alone and spend the night. The next morning they will suddenly appear thugs when you will be naked and require money. If your character is Iphan Ben-Mortals, then the thugs will recognize you and just leave. Otherwise, you either die or lose money. If you play for the Red Prince, then the Lizard, with whom to meet, will turn into a red princess instead.
Returning to the Lover, you will learn from him that all this he did for his daughter. If you ask the cook, you will find out that he is lying. Unfortunately, the Lover will have time to escape.
Arena Driftwood
This quest can be taken in the basements of the tavern in a driftwhere. In the first battle you will fight blindfolding, which reduces the range and accuracy, so carefully prepare.
Mourge, which is to fight in the second battle, fights like a scoundrel. After her second move, the processes will appear, which you both will have to destroy. After the secession perished, it will be necessary to defeat Murge to get a champion title.
In both battles, you definitely say the shields and various buffs in advance. Be careful with your transformation: eye bandage will not allow using different skills.
The first battle can be facilitated by creating creatures, whose account did not say anything to you.
If Mourga does not get to you before the appearance of the sacchadge, it will attack your overall opponent. Get away from her. The worm will not be as dangerous as the one that appeared in battle with Alexander, but it is not so bad as the one with which you could fight on the swamp. He will try to impose on you shackles of pain. Sebilla can break the shackles, but this requires the source point.
Are you a third-level geomant? Invest the gold and source point in the artillery installation that you can buy on the market. I used it in order to defeat Murge after she finished off the worm.
Burning prophet
On the Drifwood Rock there is an unusual statue, next to which there are several torches. You need to simultaneously light all the torches, but they will not burn too long. Create an oil surface and apply a fireball or other spell on it (or a weapon with a fiery damage) to light torches.
A rainbow will appear and statue will speak with you. You can choose your award and get a few experience points.
Ugly small chick
North of the driftwood on the farm there is a sick chicken. If you have a "scientist" tag and the talent of the "friend of animals", then you can convince her that she is actually a Phoenix. All you need to turn the chicken in Phoenix is \u200b\u200bto burn it. Apply any fiery spell, and the chicken will really turn into an egg of the Phoenix. You can decide how to do - leave an egg or eat it.
Scot's appeal
On the farm north of the driftwood you will come across a couple of cows, which are actually people - they turned them into cows and enslaved a certain witch. You will need the talent of the "friend of animals" to talk to cows. They want to return their human appearance, so they ask you for help. The quest can be launched, just picking up the width home, which is located on the left of the house, on a big rock.
The witch's house is located right in front of cows. Sign in to it (the location of the key we indicated above) and take the witch eye (which is used to create the potion and return to the cows of the human appearance). Then open the hatch leading to the dungeon (the fourth level of theft is required). If you do not have the necessary scope of theft, you can meet with a witch in the monastery forest to get the key from the basement. But keep in mind that the battle will be difficult.
In the basement you will find a variety of exploding rats. Attack the holes in the walls to stop their appearance. You can also find the lever, opening the door, although it can be unlocked by the fourth level theft. Either even teleport inside!
In the basement, be sure to take the witch's potion (which will turn you forever in the cow if you use it). You can also find a witch book on a giant frog. You probably have to kill the frog to pick up a book, because it will not give up her. The presence of tag "scientist" and "mystic" will allow you to decipher the recipe book that dropped out of the frog to create the right potion. Otherwise, use our recipe: Growth Stimulator + Mushroom Bolt + Winthin Eye.
If you drink a witch's potion to turn into a cow, the quest will be completed automatically, and you will receive 10,775 experience points. It is not recommended to do as you can create only one potion, and you will have to return two cows to the form.
Take the potion so that you have in the end of them two (one was scratched, the other found in the witch's house). Return both potions cows and get 13,450 experience points for each. In total, you will be rewarded 26,900 points of experience.
Reward: 10,775 experience points, if you drink the potion and turn into a cow; 13,450 Points of experience for each cow who returned the human appearance is two of them, therefore there will be 26,900 xp.
Test for all times
In the east of the altar of wanderings, driftwood can be found by the elven structure, behind the river. There are four statues surrounding tiny (coordinates - x; 450, y: 340).
To pass the test, it will be necessary to attack four statues with the help of different skills of elements:
- Winter hero - Spells "Winter Explosion" or "Crack".
- Autumn hero - static cloud arrow or manually impose fire spells on a pool with water, then attack the cloud with a zipper with a zipper.
- Summer Hero - Use the Laser Beam spell.
- Spring hero - use "bloody rain" or the ability of the elven race "victim of the flesh".
Be ready! As soon as you blame the last totem, the four hero will appear and the battle will begin with you. Each applicant (winter, summer, spring, autumn) has immunity to its respective elements. These are pretty strong rivals if you are at the same level with them. Win all the enemies to talk to you to talk to you, congratulating the victory and creating a chest with the heart of Phoenix. So the quest will be completed.
Reward: 20,775 Points of experience for each killed opponent - in the amount of 83 100 XP; 51 900 Points of experience for completing the quest; The heart of the Phoenix (which gives the skill "flaming languages", if it is elf) and the chest.
Tips:
- Call a fiery slug (ring magician) to activate the statue of summer, because it also uses a laser beam.
- Slide the blood to activate the spring statue. You can do this, attacking the satellite standing near the statue.
Speaking in Forked Tongues
In the cemetery, you can find the lizard chest, between two breathable fires. Let the lizard talk to him, and you will learn that a password is required to open. Fain transformation in the lizard will not help you.
The password can be found from Salamandras in the Raicker mansion, but at the same time you need a character of a lizard with the talent of the "friend of animals". Teleport chest of flame. After breaking it, you will get prey, but do not decide the quest.
Family
The gate of the cemetery is located Tarquin, who asks to explore the family crypt and get a family relic. You can get the key to the petrified sorceress found in another underground room. The first room has two buttons on the wall to which you need to approach to detect them. Click on these buttons, which will allow you to open a stone gate.
Allow one of your satellites to enter the third room and get up on the pressure plate. Then use the vision of the spirits (which will examine as part of the Quest "Sharp Awaken") to detect three lever on the wall. Press sequentially on the middle, left and right levers to open the secret hatch. If the levers already touched before the use of our combination, then you need to "reset" the middle lever. Pull the average until the water comes out, then interact one time with the left and right.
Under the hatch is a treasury. Use the character with the highest luck to get prey. Artifact lies in the coffin. If you have a lizard, then he will understand what language is engraved inscription. When you try to leave the tomb, then all clay guards will come to life and attack you. Tell Tarkina about the completion of the task, after which a man will say that there are other artifacts on the island of the bloody moon. When you go to the island of the bloody moon, you can find a hatch in its northeast corner. He is hidden in a rather witty place.
Inside the repository is another half of the artifact. When both halves are on the hands, then talk with Tarkin. Sometimes he will not be at the gate of the cemetery, but on the "mistress revenge", near the boat. If you go to "Mrs. Revenge", moving around with a quick journey, then Tarkin will be directly near you.
Tips
You can destroy clay armor before robing the room, which will avoid battle.
If Tarkin disappeared, then one of the possible solutions - to go on the marker to "Mrs. Revenge", taking a boat from the side of the coast, after which it will re-use the boat on the gallery. Tarkin should appear near the boat.
There is much more simple way to enter the crypt:
- Look at the staircase leading down the glue.
- Go left.
- As soon as descend from the hill in front of the gate, you will see the crypt with the statues of two knights with shields.
- Destroy or open the gate (there is a lever on the right side).
- Enter the tomb.
- As soon as descend to the tomb, then do not touch anything, or petrol.
- Use the "Blessing" or "Ice Armor" spell.
- Or kill Cannes to get the key to the tomb to get inside.
Strangers in someone else's edge
Apply the vision of the spirits near the altar of wanderings in the cemetery to see the ghost of the lizard near himself. He will ask to dig up his remains and burn in eternal fire. Place the remains of the Lizard in that part of the cemetery, where they bury representatives of this race - where two heads of the dragon are located, exacerbating fire. A ghost of the lizard will appear and thank you.
Existential crisis
In the cemetery, you will hear a voice pouring about help - X: 625, Y: 153 coordinates. He asks to dig the remains. Agree to do it. After the character dutches, the skeleton named Kryspin will appear, applying for the role of a philosopher, causing you to duel. At this moment, if the character talking to him is not the undead, it will be necessary to prepare and defeat it. Otherwise, you can not be shy and immediately join the battle.
He will have three questions for you. An erroneous answer to any of them will lead to the instant death of the character. The most common way to win for characters that are not believed to read the "Essence of Genesis", three volumes to destroy the skeleton.
However, if your character is the undead, just choose the "Undellity" labels in all three questions and automatically win (for example, if you have a fain). You can also give the right answers to questions, consistently using the tapes, mystic and a scientist. Unfortunately, due to the inability of any character to have all three tags at the same time, reading at least one book will still be necessary. In the first volume is the answer to the first question, in the second - on the second, and in the third - on the third.
You can find all three volumes in the Raicker mansion. The first Tom is found where Ricker is, in his personal account. The second is located in the living room on the lower floor. The third volume can be found on the second floor in the Biker's bedroom. Please note that if you take the book, it will be reversed. And in order to get into the bedroom on the second tier, it will be necessary to hack the door.
If you correctly answer the first question, you will see how the skeleton trembles. If you answer correctly on the second question, he will shout. If you answer correctly and on the third question, the skeleton will explode. The correct answers to all three questions will lead to the successful completion of the quest, for which you will receive 21,525 experience points and a book with a skill with Krispina.
Remember that Faine, being the undead, can answer right on all three questions.
Louus can answer the first and second questions, being a joke and mysticism, but for the third, the third volume of the "Essence of Being" will be required. It is located near the bed in a room with a cat and a dog, on the second floor of the House of Raker.
Heroes shelter
South of the altar wanderings of the cemetery there are coffins with four heroes. Inspect them to learn four places where the treasures are buried. But if you study all four coffins, the heroes of non-resident and attack you will reap. Go after that in the marked points and find the heroes to complete this quest.
Kill every hero in one, because after the first death they will be resurrected in a more powerful form. Therefore, first kill one hero twice, then - the other, etc.
Resisting servants
In the cemetery, you will find a graveman Farim, who begs to kill Rakeker. After you do it (the Riker is in the mansion personal account), please inform Farima. You will be able to kill the Raker after performing a "generous offer" quest, which will maximize profits.
Generous sentence
The mansion in the cemetery is the character named Riker, who will ask you to get a special sign, in return, which he will express the source management. The sign is inside the caves in black specks. In the Rusta Room (on the sawmill), you will find a contract suggesting that Ricker is a lonely wolf killer who is entrusted to destroy all the believers with whom he faces.
Go to Blackpit on the south-east of the coast of the reservoir to find that the gate guard magicians, blocking the future path. If Reimond gives you the authority to help master, you can go through the gate without any obstacles. Otherwise, you will have to defeat the guard.
Behind the gate, you will see a white magician who interrogates a mason (Hannag's student needed by Quest on the Ropes). By killing a master, you will lose the thread of the tasks, after which I will also appear.
On the other side of the harbor, Apartment Master Anna guards the entrance to the mine. Win her to get inside. This mine is filled with traps and oil pipes. Use drawers to block pipes and disarm them. Or apply teleportation to go through this place. If you have two pyramids for teleportation, which you could find in the hidden room Dalles on the "mistress revenge", then leave one pyramid from one satellite, and the other is another. So you can teleport with the whole team.
In the depths of the cave there is a yeast, guarding the altar of wanderings. Use the ability "Source of Vampirism" to destroy it (there is a corpse on a broken bridge - if you have teleported there, you will find a note and key).
Note. If you have a special rod, which you found in the Fort of Joy, you can use them in order to kill the screaming. If not, then you need to master the source and complete the ritual in the quest "Sharp awakening" to explore the skill of the "Source of Vampirism".
Moving forward, you will see some martial masters fighting with the exhaustions of emptiness (at the site of the excavation). Imprit sacchadia, after which you can convince the masters (if any of them survived) so that they just passed by. If it does not work, you will have to kill them. From one of the corpses of the masters, take the room from the room nearby. Inside the room there is a hidden stone door - to see it, you need to get closer to a fairly close distance. Behind the stone door there is a strange device that will tell you the creation of a mask (one point of the source is required).
Leave the place of excavations by going to the workshop where there is a group of masters. You need to defeat them and destroy the gate (apply fiery skills on oil barrels) to open the way to the ancient temple. Interact with the device in the ancient temple to get more information. Tip to the puzzle is in the book on the corpse inside an ancient temple. On the second page it will be said that every God is an element or force:
- Roller - Earth.
- Duna - air.
- Tire - Blood.
- Zorah - fire.
- Wrogir - fire.
- Xanessa - Mind.
- Amadia - Magic.
The correct order will be like this: Amadia, Tir, Danube, Zorl, Xanesse, Wrogyr and Roller.
After you hit all the pillars in the correct order, the power field will disappear. The subject you need is in one of the boxes near the sarcophagus. Get it back and return to Rakeer. Touching the sarcopagu will ultimately lead to difficult struggle.
Return to the Raicker mansion, go to his personal account through the hatch. Raircher sacrifies the souls of farmers to provide you with more source points (increase the source glasses, but not more than three). Then he will attack you, so be prepared for battle.
If you just pass the artifact raiker, then it will provide you with a drawing. The door without a keyhole can be opened with a switch near the Raker, next to the mirror. Apply the spell of the spirits of spirits during the battle with the ricker to see the souls of their defenders, allowing you to instantly kill them using the source of vampirism.
On the ropes (on the ropes)
Hannag, one of the masters of the source, will give you this quest after you save it from masters (near the stratum altar in the monastery forest). In return, she will traine you to manage the source. Impriser Hannag can be found on the location of black copy. However, when you get to him, you will find that he has already escaped, and a group of masters grabbed his family and preparing to execute. You can fight them or leave alone.
Before continuing the study of a black hole, you need to overcome the protection at the gate in the form of masters. If Reimond (Order of the Order) empowered you to investigate the incident, you can go through the gate without any violence. Otherwise, you will have to fight enemies.
Guidian, a student of Hannag, is connected and interrogated with white magicians. Now you can free it, but because of this, everyone will become hostile and attack you. This is a very difficult battle, so prepare, select water-related skills, because there will be a lot of fiery and oil sacchas. After you free the Guidian, apply the waypoint for teleportation into the monastery forest and report Hannag about it. Hannag will teach you the knowledge of the source, increasing the maximum reserve for one point. If you already have two points of origin, now they will be three.
Three altars
Go to the monastery forest and go along the coordinates of X: 115, Y: 269, where the character Lamenting Abomination is located. When you approach it, the wolves will appear that attack your squad. Kill opponents, and then bow the knee in front of the altar.
The second altar is located along the coordinates of X: 414, Y: 301, on the river.
The third altar is located along the x: 482, y: 260 coordinates, also on the river. When you approach, then you are attacked.
Elven Providian
- Sawmill - Saheyl.
- The coast of the reservoir - the elf camp.
If you managed to convince the elves to let into the venue for the ritual, in this case, after its completion, you can talk to them. You will learn that Saheyl is abducted by a lonely wolf Rust and is held in captivity on the territory of the sawmill. If you have a high level of belief, you can convince the elves to leave it there.
Your next goal is to go to the sawmill and get inside. Saheyl is held in captivity on the floor of one of the buildings. Most of the territory is well guarded by the people of Rusta, which means that it is either you have to pay a good one, or to fight with serious enemies.
Another fight is waiting for you on the floor. This time you will come across Rust and his bodyguards themselves, including two wolves and crossbars. If you stay throughout the battle in a small room, you will significantly simplify your task. When the battle is over, you can free Safel. She will ask you to accompany her back to the elf camp. If you defeat the people of Rusta, who met before, then there should be no problems with this task.
Talk to Sahaila immediately, as soon as you get to the camp. She will teach you the collection of extra points of the source.
Award: Four guaranteed items and one subject of three powerful to choose from - depending on the class class.
Lost and found
The coast of reloads - lagan
Not far from Drifwedwood, you will be stumbled upon a fishing hut, in which the character named Lagan lives. He will tell you that he lost his ring, and asks him to return it.
At the same time, you will not need to go far and search uncharted territories. The ring is located in the area marked below. It will also be automatically detected as soon as you and your team approach as close to its location. However, when you pick up the ring, I will appear.
If the lagan survives, then you can decide how to do with the ring.
Selection 1. - Relief the ring.
Talk to Lagan and confirm with him in a conversation that you really want to bring him a ring. If your belief is large enough, you can convince him to give extra gold.
Reward: 5000 experience points and extra gold.
Choosing 2. - Leave the ring yourself.
You can also decide what you want to leave a ring for yourself.
Reward: Copper Ring.
Saheyl tribe
Coast Znztsa - Elves Camp
If you saved Amiro in the territory of the Fort of Joy, then he will definitely ask you to tell the story of Sahele to all the remaining elves, which are just living in the coast of the reservoir. You can do it on this location, because there is an elves camp here.
When you appear in the camp, then find an elf that makes the mysterious ritual. If you try to get closer, then a conversation with a security guard will begin, which can end in two options.
Ending 1. - get permission.
If your belief is high enough, then you will be missed to the venue of the ritual. This is allowed to unlock the Burial Rites quests and The Elven SEER (elven provisions).
Reward: 5800 experience points.
Ending 2. - You refused to pass.
If you fail to convince the elves, they won't want to listen to you. In addition, you will be asked to leave the earth.
Reward: absent.
Funeral rites
If you were admitted to the sacred land, then one of the participants of your squad will take part in the ritual. You must raise an elf if you can (ideally it may turn out from Sebilla). Your task is to choose those options for dialogue that can maximize elves. In the dialog box, it is always the top phrases!
Award: The number of points of experience that you get depends on how much you impressed the elves; Four guaranteed objects and one of the four powerful to choose from depending on the class class (only if the ritual ends well).
Take the desired for valid
Coast Znztsa - Lamp Ginna
You will see a mysterious lamp lying on one of the beaches of the coast of the reservoir.
If you interact with it, then Jean will appear. It turns out that the lamp was thrown away because Ginn behaves very aggressively. There are two ways to solve this problem.
Ending 1. - Performance.
If you have a fairly high level of belief, then you can convince Ginny to make a desire and do not pester you. You will be able to choose which desire for Ginn must perform.
Reward: 9750 Experience points and the subject you will be commended in desire.
Ending 2. - Battle with jinn.
If you could not convince Ginna, then he attacks your squad. The battle is not so complicated, but ending with the death of Ginn, and hence the lack of award.
Reward: absent.
Bite
Activate the ghostly vision on the sawmill to see the ghost of the elf, located in the timber. He will ask you to help him in overthrowing the spirit of the master's sawmill. The spirit of the former master of the sawmill is located southwest of the bridge near the same sawmill. Location will be marked on the map! Apply the source of vampirism on it to finally destroy and absorb the source point. Examine this skill can be a sharp awakening in Quest.
Return to the Spirit that issued you to task, talk to him and complete the quest.
Reward: 25,950 Experience points and a unique shield called LiveWood Shield.
Resistant Spirit
Activate the ghostly vision on the sawmill to find a silent spirit and find out that his name is Syrus Outs (Syrus Oates).
He was burned with a lonely wolf Pygsbane (Pigsbane), which is still alive. Now the Spirit wants to kill his killer. After you figure it out with PIGSBEIN (its location will be marked with a marker on the map), go back to the sirus and take the reward.
Former lovers
Apply a ghostly vision to see the ghost of a woman named Edie Engrim, located on the sawmill.
She was killed by his former lover named firewater. And he did it in order to undergo a dedication and join the ranks of lonely wolves. Now she wants to hear how he utters her name to be able to be rest. Come on the man to pronounce Edie's name, and then go back to the woman for reward.
Forcibly recruited
In the camp of lonely wolves you will meet a person named Corbin Day.
Rust An Annon forced him to come here and work on wolves. After you kill lonely wolves, talk to Corbin and tell me that it is free. Invite it on the gallery "Mrs. Revenge."
Award for murder
Deer Spirit will ask you to find you a wreath of wildflowers. Drop the burial place of deer and poacher who killed him.
An eye for an eye
Apply the spell of the ghostly vision, being on the sawmill (at the headquarters of lonely wolves) to find the master's spirit. He will ask you to take revenge on the archer of lonely wolves who killed him. After killing a dead eye, go back to the spirit of remuneration.
You can get a different reward:
- Tell him what you like air (Pressure Spike).
- A splash of pain around (global cooling).
- Tell me, looking for earthly power.
- You can also choose a fee in the form of source - you can absorb the ghost of the master.
Bitter medicine
Being on the sawmill, activate the spell of the ghostly vision to face the spirit of the lizard named a black widow (approximate translation) is a famous poisoner of single wolves.
He was deceived by a representative of single wolves SnakeRoot, which made him absorb poison. He wants her to die. You can absorb the spirit of this lizard or kill a "lonely wolf" marker on the map. Find out the character at the expense of the award in the event that I helped the lamb.
No reason for jokes
While on the sawmill, activate the spell of the ghostly vision to see the spirit of Mudbarrow. He wants you to make the sleeping lonely wolf show where she hid her gold after killed him.
Talk to the sawmill with the desired character (marker marked) to find out where mining is located, and then kill it. If you have already killed lonely wolves before performing this task, it seems to be executed this task. Return to the quest for a reward.
Remuneration is found
Apply a ghostly vision on a lonely wolf sawmill.
Then talk to the Spirit of Paladin. After you take the Mummy's head, then pass it by Paladin to complete the quest. Task Easy - the desired points are marked with markers.
Dangerous for themselves and surrounding
To the northeast of the disease (cemetery) you will be stumbled upon the healer's house. Convince him that he can trust and tell you about his problems, allowing you to enter the house to cure an infected prosperity.
Move for the healer in the basement (or hack it), where you will have two options: kill a girl or cure it. If you approach it a character that has no tag "scientist", then the opportunity to cure the girl will not. The only option in this case is to kill all opponents that will appear on location. However, if you approach it a character with a "scientist" tag, you can point out that it suffers from a trepanic wound. The healer asks not to kill it during the battle, so that he could cure her. In any case, both ways will lead to a distorter who attacks you along with the four sealing of her nightmares (Natalie's suffering, the rage Natalie, the despair of Natalie and fear of Natalie).
In the subsequent fight, you will encounter four monsters created by their emotions of Natalie, and with Natalie itself. Every killed opponent will reward you with 10,775 points of experience. If you decide to cure Natalie, you will have to weaken it, lowering the health bar to the minimum level. However, as soon as this is done, all emotions will disappear! Thus, to get the highest possible number of points of experience, first it is recommended to kill monsters, and after attacking the Natalie itself. Of course, if the battle seems too difficult, then do not pay attention to the monsters, and attack Natalie.
After you successfully weaken the girl, the dialogue associated with the operation will begin. To ensure that Natalie does not die during the operation, you will need help the healer, which must hold it, so you should not immediately start the operation. Select Dialog Options:
- Ask the healer to hold her.
- Select a couple of thin tweezers and try to safely remove the larva.
- Slowly close the wound.
You successfully cure Natalie and get 13,450 points of experience for your efforts. Talk to the healer to get as award +50 to the attitude and epic subject to choose from. From now on, it will also be available as a healer and a merchant (do not forget that healing spells cause damage to undead, fan). After that, you complete the quest.
If the girl does not survive during surgery, then you will not get experience points and lower the relationship with the healer to a minimum. The quest will also be completed after you just kill the girl in battle (if you did not come to her characters with a "scientist" tag). In this case, in addition to the experience of the destruction of each of the four monsters, nothing will get.
If you decide to kill it, then just finish all opponents.
Reward:
- 5800 experience points for convincing healer to run a detachment into his home.
- 10 775 Points of experience for the murder of each monster from Natalie emotions - a total of 53,875 experience points, if you decide to "kill it".
- 10 775 Points of experience for the murder of each monster from emotions Natalie and 13,450 experience points for a successful operation - a total of 56,550 experience points, if you go to "heal it."
- Gregory will be available as a healer and merchant, you will automatically get +50 units with it to the relation, as well as one epic subject at your discretion (if you manage to cure a girl).
Bury the past
To start this task, you must go south from the driftwood, along the coordinates of X: 380, Y: 274 - inside the burning house or in front of it. If you start the quest in the X: 380, Y: 274 area, you will find a gature standing above the old friend, White Master Jonathan. After a short dialog, you will be given the opportunity to convince Gareth (check of intelligence or memory) or free Jonathan, or kill it. Regardless of the result, you can still attack and kill Jonathan, who offended Gareth and makes him go.
Otherwise, Gareth will show mercy and go to Paradise Dawns.
After convincing him in mercy, you can choose the lowest option to get around the check. As soon as your magazine will be updated and the phrase will appear "we convinced Gareth that ..." (the continuation depends on what exactly you convinced Gareth), then you can advance across the quest.
If you start a task in Paradise Downs or find Gareth after the above phrase, then he wants you to kill silent monks as a mess. These monks are located on the farmer's house, you will have to convince Paladins to let you inside. You can do what he asks, or talk and convince him that this is a nebody.
Opposites are attracting
In the basement of the Raicker mansion, you can detect a rat and a turtle. If you have the talent of the "friend of animals", then you will learn that the turtle is in love with the rat. You can use various products to lure the rat to the turtle. Treating products from inventory and throw it on the ground, forming a path from food.
Evil spirits hunter
In the house located east of the monastery forest, there is a demon of the demon named Jahan (the same Jaan from the original Divinity: Original SIN). Come to it to automatically get 14,975 points of experience for research.
Jahan will ask you to explore the island of the bloody moon and kill the mighty demon called the lawyer. If your team has Louus, you can allow the girl to talk to him to increase the reputation of 10 units. He agrees to help Louus in exchange for the murder of a lawyer's demon. In any case, you will move in the passage of the quest and earn another 7,500 points of experience.
It is strongly recommended to perform three other quests along with this task, since they are all partly connected by their location - "The Secret Island of the Bloody Moon", "lawyer" and "forgotten and damned." Awards and quests will be listed separately.
In the House of Jaan there is a book called "Decorated Psaltry", which is necessary for the fulfillment of the "Forgotten and Cursed" quest. After reading this book by the character with a "scientist" tag, you can get 14,450 experience points (but if you have not read it another hero).
Go to the island of the Bloody Moon through the port in the monastery forest or apply the spell of the ghostly vision near the broken bridge next to the awesome altar on the trigtwood fields. You can safely teleport, using the ghost bridges that appeared. In any case, after you find yourself on the island of the bloody moon, talk to a lawyer in the demons camp and agree to fulfill his personal task, because in this case you can get a large number of experience points and move on the main storyline. You can also kill a lawyer right here and now, at the first meeting, but it is not recommended to do it - it is better to kill him after fulfilling the task and collect the highest possible experience points and award.
Having understood with the Magistrants of the Black Ring, surrounding the tree, you can kill the lawyer itself. In battle, he will help three characters and a dog (another dog will stay on the beach - you can kill her and get 7225 experience points). Before attacking a lawyer, deal with the pocket of the Basatan. The murder of a lawyer will give you a pitiful 7225 points of experience, but a rather powerful mining falls out of it. You will also earn 7225 points for the experience of killing a dog and 28,900 experience points for the destruction of each of the four other characters (pockets of Basatan, dummy, Mrs. Agony, Airen Havok and Knight. Once all of them are dead, do not forget to search the Basatana and pick up a scroll. Also clean the territory from the remaining enemies to get experience points and prey.
After you kill a lawyer, you will need to find out the name of the demon. When we read before Jahan, you can come to the trees of ancestors, activate the spell of the ghostly vision and talk to the spirit of this tree to find out the name of the Jaan Demon Army.
To talk to the tree, you will need to know his name you will find if you read the archive log in the archives located in the figure below (this archive is actually associated with the quest "Secrets of the Bloody Moon Island"). Call the name of the tree and earn 66 200 points of experience, and also recognize the name of the arch-demon who settled in Dr. Daeva.
On the above screenshot, the entrance to the archives is shown. You will need a sufficient high level of intelligence to detect the embankment and dig it. Entering the archives, you will receive 50,575 experience points. Tell Jaan that the lawyer is killed and earned 36 100 points of experience. As the dialogue develops, you will get another 36 100 points of experience, and in the total amount - 72,200 XP. After you open the name of the Demon Dzhaan, then officially complete the quest and get something from the legendary lute to choose from. If there is a lawn in Swami, then Jahan will try to cure her, but ultimately will fail. Then he will agree to join you on the "mistress of revenge" and meet a daemon later.
Reward:
- 14,975 experience points for approaching the house of Jahan.
- 7500 points of experience for agreeing to explore the island of the bloody moon.
- +10 To attitudes with Louus, if you let her talk to Jahan.
- 14 450 Points of experience for reading the book "Decorated Psaltry" Character with a "scientist" tag (the book is associated with the quest "Forgotten and Cursed").
- 7225 Points of experience for the murder of a lawyer and two dogs (for each opponent). A total of 21,675 experience points (one dog is likely to stay on the beach, and have to go to her).
- 28,900 Points of experience for killing each of the four lawyer servants during the battle with him. A total of 115,600 experience points.
- 50 575 Points of experience for penetrating the archives and search for the archive magazine (associated with the quest "The Secrets of the Bloody Moon Island").
- 66 200 Points of experience for the fact that you call the name of the ancestors (associated with the quest "Secrets of the Bloody Moon Island").
- 36 100 experience points twice (a total of 72,200 XP) for telling Jaana a real name of the demon after the attorney will kill the lawyer.
- Selecting an item from the legendary category upon completion of the quest at Jahan.
Secrets of the island of bloody moon
This quest can be obtained after you learn about the attempt of the Black Ring to go through the fog of death surrounding the island of the bloody moon. After you find yourself on this island, go to the place indicated in the figure below is the entrance to the archives.
Just hitting the inside of the archives, you will get 50 575 points of experience. You can also apply a ghostly vision and talk to the Spirit of Archivist. No matter what kind of dialogue you select, 14,450 experience points will be enrolled. In the archives, find the archivist magazine and read it to find out the name of the end of the ancestors - Elenesse.
Go forward and find that in fact the wall is an illusion, the hidden door will need an intelligence to see it). Choose an unusual blade to get 50,000 points of experience. If you interact with it a character-lizard (red prince), then you can understand the words engraved on the blade. Here, there is also a blocked Tehovenchium chest, which, with each interaction, will consume one source one character from your character. But if you use the launder, then in this case the source will not be consumed. If you are a seafood chest, you will find the green pyramid of teleportation. The first two you could find in the rest of Dalyce on the "Mrs. Death" (one on the table in the rest, and the other in the secret room).
The ancestors are located in the center of the island of the bloody moon, but at the same time surrounded by the Magistraces of the Black Ring, which will attack you immediately, as soon as they see (if you are not passing check during the conversation). Approach the tree to attack enemies. It is recommended to launch the "lawyer" quest, after which they kill the same masters, but for a much larger number of experience points.
If you have not yet killed a lawyer, he will not allow to talk to the tree, so it is likely to have to deal with the demon. The murder of the demon is also part of the quest "Hunter for evil things", so it is recommended to kill it in combination with this task.
Kill the lawyer and say a ghostly vision to talk to the ancestor of ancestors. Name his name (Elenesse) to start a serious conversation. Tree thanks for making it easier for his pain. You will receive 66 200 experience points for what you call the name of the ancestors. Then the tree will ask to kill Dr. Daever, in which a powerful ADRAMALIH ADRAMALIH arch-demon set (this quest will launch another task of the doctor's prescriptions).
Like many other tasks of the island, after these actions, the quest will be completed.
Reward:
- 50 575 Points of experience for the fact that you will simply find and enter the archives.
- 14,450 Points of experience for communicating with the spirit of archivist.
- 50,000 points of experience for finding an unusual blade.
- The green pyramid of teleportation - lying in the chest Team Ham near an unusual blade.
- 66 200 Points of experience for calling the real name of the Tresh ancestors.
Lawyer
Go to the island of the Blood Moon, using the port in the monastery forest (you have to pay a little gold) or the spell of the ghostly vision on the destroyed bridge near the altar of wanders on the trifwer fields. In the second case, a ghost bridge will appear, which will allow teleport to the islands of the bloody moon. You can also use the ability to "reprieve your wings" to move between the supports of the place and cross it.
When you get to the island of the bloody moon, then talk with a lawyer demon. It is located in the West, not far from the beach. He will ask you to help him in the destruction of the Black Rings forces, which surrounded the ancestors located nearby. By calling him the king of the excess of emptiness, you will call the appearance of monsters that attack your squad. Fortunately, the lawyer together with its allies will take your side in battle.
Note. While the ebony appears, you can use chaos on the battlefield to kill a lawyer. In this case, you will stay without quest reward.
Agree to help a lawyer, and he will immediately tell you the possession of the source. You will receive another score to the maximum source. If you already have the highest possible three slots, then instead of a lawyer, your character will receive a book with a random skill.
Go to the tree of ancestors located north from here, and prepare for the battle. There will be four Master of the Black Ring, two of which will cause the golems (two) to help them in battle. Bone golems will allow you to earn 14,450 experience points for everyone. At the beginning of the battle, a powerful destroyer will also appear (undead) of the Black Ring, but for his murder you will not get experience points.
After all opponents are dead, the lawyer will immediately appear, with whom the conversation will begin. Ultimately, the lawyer will indicate the location of the Unnamed Island, as promised before. In fact, the quest is completed, although you can still attack a lawyer right now.
Reward:
- One point to the possession of the source or a book with a random skill (if you already have three slots for the source).
- 14 450 Points of experience for the murder of each of the two bone goals, which are called by two Masters of the Black Ring near the treave of ancestors. A total of 28,900 experience points.
- 28,900 Points of experience for the murder of each master - a total of 115,600 experience points.
- 194 550 Points of experience for the destruction of all representatives of the Black Ring, as well as information on the location of the Unnamed Island.
- One subject to choose from a rare category (after the completion of the quest).
Forgotten and damned
On the island of the bloody moon will appear a brilliant sculpture, standing in front of the camp of demons. You can interact with the statue to start this task. This quest can be activated by another way - take the book "Taming of the Holy Fire" and read it a character with a "scientist" tag.
There are three sculptures on the island of the bloody moon. To activate them, you will need to read the book called "Taming of the Holy Fire". This book also has the name "Decorated Psaltry" (approximately such a name will be up to how you decrypt the book by the character with the "scientist" tag). You can find a book in one of these places:
- Jaan House (read the first quest of this location).
- Archives in the northeastern part of the island.
- On one of the corpses of the masters after killing them around the tres of ancestors.
You will need a character with a "scientist" tag, which can decipher the book. After reading the book by a scientist you will receive 14,450 experience points. However, before entering the repository, first go to the northern part of the island and find an ancient blacksmith (by the coordinates of X: 317, Y: 479). Take advantage of this blacks in order to combine it with a silver slider and create a silver lever. You will need two silver levers for the second and third storage facilities. Silver bars can be found next to the blacks and on a black rings inside the unfinished crypt.
In the southern part of the island, three storages are scattered around the camp of demons. Use the Psaltry to destroy the statue and get into the storage. Quests "Majiya" and "related pain" require that you set a special lever from a silver ingot. More information is shown below.
Here you will find the green pyramid of teleportation and medical notes, which will begin to begin the tasks of "Majoria" and "silent". For more information, see the description of the "Secrets of the Blood Moon Island".
If you read notes, you will understand that in these repositories, people affect the demons who were not able to cure healers in these storage facilities. Thus, these sufferers were locked together with the healer, so that the demon could never become a threat to humanity.
This crypt is not completed and actually does not contain anything valuable with the exception of one silver ingot. However, its study may be required to complete the current quest.
When entering this storage, you will encounter a broken lever for which the lever made from a silver ingot will be required. It is necessary for repairing and opening the door. Unfortunately, when you try to take advantage of the lever, it will not work. Activate the spell of the ghostly vision to see the Spirit of Brother Robert, located near the statue. Talk to him, go through the verification of the conviction that he opened the door and asked to kill the creature inside.
Enter the room and go a little ahead. If any character absorbs the source energy from the puddles in the room, then the conversation of the lizard will begin. So be careful! If you agree to free the lizard, I will rejected the whole source of your hero and breaks out, which will lead to the beginning of the battle. Be careful also in the fact that after the release and start of the battle, your opponent will throw a powerful storm from arrows, which will cause a huge damage to the detachment, especially if the heroes are grouped at one point - it is possible that this spell will even kill two or three heroes. In any case, you will need to kill obsessed.
If you refuse to free it, then, in the end, you will have to check the speech. If successful in the dialogue, Rajarim will not be able to kidnap the points of the source from your character, and will not be able to break free. Then you can quickly shoot in it arrows or use long-range spells to safely destroy the enemy.
Ultimately, the simplest way here is the attack of the lizard from the height at the very beginning. Do not even bother the search for source and its absorption so that the lizard will not speak with you. Regardless of the method that you choose, as soon as the lizard perits, you will earn 36 100 and 21,675 points of experience, which will give 57 775 XP in total. So the quest "Mania Majesty" will end. Do not forget to talk with the Spirit of Brother Robert, tell about the decision and pick up the award.
This refuge is the main location in Quest "Balad". Go to it, activate the spell of the ghostly vision and talk to the Spirit of Brother Kalvina. In any case, move forward and repaired the broken lever using the lever created from the silver ingot. Then talk again with Brother Kalvin and convince him to open the door for you. You will need to check the speech check to convince Kalvina that it needs to be done. Be careful: speech check requires intelligence. It seems that you fail even with the conviction, equal to seven points. Memory check can be passed with five units of belief.
In any case, as soon as the door opens, you will find yourself face to face with obsessed gnome. He will ask you to destroy the pillars - when they are destroyed, of course, the Gnome will free, which will lead to the beginning of the battle. Unlike Rajarim from the second asylum, a much weaker opponent. You will not need too much effort to destroy it, and for this you will receive 28,900 points of experience.
After the gnome perits, a demon will appear and immediately attacks your squad. It is a little stronger than obsessed dwarf, but still relatively light opponent. In this case, the danger is that when applying damage, the demon is a chance that he instantly wrap one of the members of your squad and makes fight against you (this effect is manifested as a "demonic invasion" and is not cured). Just attack an obsessed ally to return it to feel or kill. So the demon will leave the body of the comrade. Attack him, and after death, get 21,675 points of experience.
In addition, there is an error at which if you allegedly apply the last, mortal blow, it disappears, placing a Debuff "Demonic Invasion" on one of the members of your squad, but this character actually "does not go crazy." In this case, the battle is completed, and Debuff on your character remains until the character be caused to death damage, because of which the demon will suddenly appear, and the battle will begin again.
Alternative, the best option is just saving the gnome from the invasion. The cunning lies in the fact that you can be the same character to damage the darkness, but do not kill it. It is likely that healing spells should be applied to dwarf so that he does not die. Continue while it does not fall anymore, and then destroy the pillars.
At that moment, when the pillars are destroyed, the daemon must leave the gnome body, leaving the dwarf unharmed. At this stage, all the same as above will occur. Attack the demon, and if he is settled in one of the members of your squad, then kill him to make the enemy show yourself. After the Demon will perish, you will receive 21,675 points of experience. In this case, however, the dwarf will survive, and the conversation with it will lead to another 36 100 points of experience. The quest will be completed.
When you leave their asylum, do not forget to talk to Kalvin's brother about your choice to get a reward. If you failed to save the gnome, then Kalvin's brother, most likely disappear, leaving you with anything.
This storage is connected with the quest "silent." Log in to it and activate the spell of a ghostly vision to see the spirit of the healer, Morgan's brother. Talk to him and he will ask you to release a poor girl enclosed in refuge. Agree or solgita him, and it will open asylum.
Inside to talk with a girl, you will need to first check the speech of speech with a cat (the talent of the "friend of animals" is required) so that it allowed you to talk to your mistress. In the event that you cannot undergo speech check, there will be no choice but to kill the cat and get 1,400 points of experience. Destroy the source chains connecting the girl, and talk to her, but note that if you won't go through speech check, then the girl will not be able to get out of sleep. If you did not check the speech check by each of all the four characters of the detachment, then nothing remains to do, except to leave the quest unfinished (or not change the satellite). You also need to pay attention to the fact that you cannot kill the girl - in the game it is invulnerable to attacks of all types.
If you go through speech check, then you will receive 14,450 experience points and you can teleport the girl on the side of Mrs. Revenge, where it will be possible to cure it and complete the last stage of the quest. Quest "Silent" will be completed. Talk to Brother Morgan to get a reward for your efforts.
After studying all four repositories, the quest must be automatically completed. The last record should be "we found and cleared all four asylums on the island of the bloody moon."
Reward:
- 14 450 Points of experience for reading the book "Decorated Psaltry" Character with a "scientist" tag.
- 57 775 Points of experience for killing an obsessed lizard and the completion of the quest "Mania Majesty".
- 21,675 Points of experience for the murder of a demon, who was united to dwarf from the third repository, as well as 36 100 points of experience, if you leave dwarf alive by completing the quest "related pain".
- 14 450 Points of experience for being able to wake up a girl from the fourth shelter and complete the quest "silent."
Druid
Read the archive magazine found in the archives in the northeast of the island of the bloody moon. So you will learn the name of the Tresh ancestors.
On the ruins in the western part of the island (where you encounter with some demons) apply the spell of the ghostly vision to see the spirit of the Druid. He will ask you to alleviate the suffering of the ancestors. The tree is located in the center of the very island of the bloody moon, but to get there, you will need to defeat the members of the Black Ring.
To talk with a tree ancestors, activate the spell of the ghostly vision, which will make it easier for his suffering. Perhaps you will also have to kill demons who are objects of personal quest Luos "Hunter for evil spirits."
Then the tree will ask to kill the doctor who is obsessed with a demon (the quest "Doctor's prescriptions" will begin). After you are freeing the ancestors, talk to the Druid Spirit and complete the quest.
Doctor's prescriptions
The name of the demon you can learn from the tree of ancestors on the island of the bloody moon. If you talk to Jan, then he will tell you that the doctor is currently hiding on the Locations of ARX. Examine the place of marriage in Quest "The Secrets of Dwarfs" to find out what this doctor sent a blast wedding cake as a gift.
Outside school location ARX, an unfortunate citizen will tell you that the doctor thanked you for serving him on the island of the bloody moon (if a lawyer helped). In addition, you will need to kill Iszbeyl (Quest "Mystery of Dwarfs") or Lord Kemma (Quest "Refuge Linder Kemma") to get an invitation to the meeting from Dr..
You can find a doctor (level 20) in a black house in the north-east of the ARX location. Near him will wait for you. Talk to her, and she teleports a detachment to the measurement of the demon. When you walk with a happy ring, you will see the candles. Smoke them, make a moral choice, but even after that, the health of the health will be in the region of 11,000 hp. After you smell all the candles, go inside and first finish off all the nurses that restore the doctor's health. Attacking them, use physical damage, because the enemies have a very strong magical armor.
When you destroy all nurses, then talk to the doctor for the first time to open my true form. Try to spend the entire stock of the source as soon as possible, since the daemon can suck it out of you. Win the enemy, and then talk to Louus.
You can visit the pedestrian basement and find inside the locked jaana. There is also a huge number of locomotive magic, which you can open a simple hone. In one of the chests lie armor Quina, which will give you the opportunity to fly.
prompt. If you leave it a box with a fatal fog, then he will be instantly killed.
Related pain
To start this task, you need to get into one of the sealed storage statues on the island of the bloody moon. To open a statue, you should allow one of the characters with the "Scientist" tag to decipher the book "Decorated Psaltry" so that it has become the "Taming of Sacred Fire". This book can be found in several places, including the archives in the northeast of the island and representatives of the Black Ring near the eldest tree.
Go to the ancient forge in the north of the island of the bloody moon to create a silver lever from the silver ingot. Apply this lever to the slot inside the asylum, then activate the ghostly vision and ask the Spirit to open the door. If he refuses, then you will need to use the "Source of Vampirism" (skill that will be studied during the task "Sharp Awakening").
Behind the door you are waiting for an obsessed with a gnome, which will begging to destroy poles. If you do this, then free the demon. You need to attack the gnome until it can no longer stand on the legs (when it remains about 10% of its overall stock of HP), after which it is possible to free it by destroying the pillar.
Note. You may have to heal the gnome during the whole process. If you kill dwarf, the quest will automatically be completed. To accidentally do not kill the gnome, think about using the "Life on the Edge" spell.
As soon as the daemon is released (can be done during the battle, and to do this, defeat the gnome), attack it. After a while, he can adjust to one of your satellites located within the radius of eight cells (but it cannot enjoy the villages called).
When you can help dwarf, you can find its treasure on locations by X: 193, Y: 379 in the western part of the island, where there are three graves (cross).
Silent
To start this task, you need to get into one of the storages sealed by the statue and located on the island of the bloody moon. To open a statue, you should allow one of the characters with the "Scientist" tag to decipher the book "Decorated Psaltry" so that it has become the "Taming of Sacred Fire". This book can be found in several places, including the archives in the northeast of the island and representatives of the Black Ring near the eldest tree.
Apply the anthem to destroy the statue, log in to the repository, and then apply the ghostly vision. Surprise the spirit of the defender to open a stone gate. If you do not be able to do this, then you will need to use the source of vampirism - this skill is studied in the quest "Sharp Awakening".
Be sure to kill the undead cat so that you can get closer to the obsessed girl (to convince the girl, you need a character with high strength). You can teleport it to Mrs. Revenge, where it will be possible to continue her treatment.
Megalomania
In one of the storage facilities on the island of the bloody moon, you will find a note on the bookshelf. It tells in detail about this case.
To open a statue, you must allow one of the characters with the "scientist" tag to decipher the "decorated Psaltry" so that it turns into the book "Decoration of the Holy Fire". This book can be found in several places, including the archives in the northeast of the island or the Master of the Black Ring in the tree of the ancestors in the center.
Go to the ancient blacksmith in the north of the island, where from the silver ingot make a silver lever. Apply the lever on the storage slot, then activate the ghostly vision and ask for the guard to open the door. If he refuses, then you need to apply "a source of vampirism" on it, which you will study in the quest "Sharp awakening". Win the demon located inside.
In the game Divinity: Original Sin 2 there are moments that put in a dead end - talking statues that open the door switches and the like. This note will appear advice to their passage ...
In this part about those interesting locations where you can get some kind of valuable. For this, truth will have to either solve a simple puzzle, or to fight with several opponents.
Island of Joy
The first island, where the character turns out, after the shipwreck is the island of joy. There are no joy from this, because the character goals like falcon. Dressed will have long and thoroughly. In accordance with the selected development direction - improve physical skills (and, accordingly, the physical shield), the skills of ownership of the bow or crossbow (which by and large the same thing) or magic skills (and the magic shield). The main source of experience is plot quests, but in the game and many additional secrets, where you can also get experience points.
Misterious Cave - Mysterious Cave
Quest is plot. Therefore, you will have to visit the mysterious cave. The statue of the cave is an additional task. It can not be done and tritely knock out the door. But then you will not get experiences.
This cave is located on the beach behind the Fiery Mobs Female. Inside will have to fight the ghost and its copies. In one of the halls will meet a speaking statue. Such statues are characteristic of the world of Rievellon. So in the answers you need to choose first the first option, then the second option. You can specify your questions in an arbitrary sequence. As a result of all these actions, the door to the chests will open.
In the mysterious cave from the last room, do not forget to grab the fire rod, which destroys the "cries" in the ruins.
Statue in a mysterious cave, Misterious Cave will task two riddles, and then respond to two questions ...
Other materials about Divinity: ORIGINAL SIN 2
Rescue Historian (Historian)
This quest is not required to fulfill.
In ruins not far from the beach behind the locked doors, a certain creature, embraced by fire. Doors to it are locked. One way to penetrate inside is to use teleportation (in general, there are two kinds of such skills - one tolerates any member of the detachment, another of your character only; anyone will fit). In addition, the ability to bless and bleeding will be required. So, penetrate inside, fight with a few or by ghosts, or skeletons, and then port the creature historian outside and throw in a puddle next to the ruins. Then use bleeding spells and blessings.
To open the door, you need to act together: one rises on the button, another televalpal, the third takes the skull. Each such skull opens the door. In any case, without teleportation can not do!
As a gratitude, the hot creature gives access to a major labyrinth. There you can pick up some inches. Well, experience, of course, you get for salvation.

Remove the curse from the burning creature with the help of blessing.
Secret room in castle ruins
In the ruins you will find a passage to the dungeon. Here masters tried to open the damned door, but failed - all died. To go to this dungeon makes sense when the blessing spell is studied (Bless). On the side of the bank with the Source liquid, it restores the action points for the blessing.

Activate the strange mechanism in the ruins. And take the helmet.
You need to bless the lever. In the room you will see a strange design, activate its left platform. To activate the design, however, you need to still have a source. Inside - helmet and other junk.
Help statue
In the sea cave, where the rescued robber of orange went, there is also a small puzzle. There playing a couple of guys playing. You can join their game. The first time to find the hidden simply - he, in fact, is visible on the map as a yellow point. The second time he becomes invisible. It is necessary to run in the direction of the rocky wall, in one place which is a narrow hole. Fresh there will fail.

The boy will lead to a statue. She can help ...
However, as soon as you find a boy, he will point to the location of the secret Laza in the ground. Get it and inside there will be a cave with a speaker statue. Weapon stuck in it, pulling out which someone can strong enough. This statue will tell about the need to destroy the jug of the shower. This task is to see below.
Ship
Control over the ship
Quest is plot. Perform it will have to be sure. Actually, you need to find a dusty book (she is on the table in the hall with a trader), in which the words of a certain song are recorded, and then fulfill it near the dragon statue on the stern of the ship. Additionally - for experience and money - you can visit the working office.
In the second chapter you will have to return control over the magic ship, which does not swim anywhere. To do this, you will have to choke all the catches. The most important thing is to gain access to the Cabinet. The talking door does not miss, but it can be trapped with a password - catch up with a fool and ask to remind him. One password (next to her there are two nozzles) is not enough. The second ingredient is a kind thing that can be taken from the prisoner sleeping behind bars, carefully searched for it.
In order to find out the password - this is Fortitude - it is necessary to pump the Persuasion parameter at least up to 4 levels.
Inside you will meet a merchant, as well as another puzzle, can cope with which you can only in the group. If you have not yet collected a group again (let's say, from the same characters who have already been with you), then you can help with a dwarf. Someone must put on the floor button next to the shelving and bed and at the same time separate from the group, so that he did not run after you. And go to the office themselves. Inside the wall there is another button that opens this patterned inconceive door.
On the ship, by the way, two fairly serious enemy will meet, which are applied physical damage. In the room with a prisoner, something like a cellar will be revealed. Before the fight should take care of sufficient quantities.
By the way, before you part with the dwarf, it can be ridiculed, and the thing to mark the merchant.

On the ship alone you will not cope - the helper will be required.
After you sang a Dragon Statue song, the foul will begin. There are several sufficiently strong monsters. They first attack not you - you will see everything. Your task is to hold out a few moves before it works for powerful witchcraft. To do this, in every possible way, you frowze, shock, teleport enemies. If someone gets to kill - it will be in plus, experience will add.
A small video will help in passing this part of the game.
The coast of Zhnets
The second large location, where the character turns out is another island, known as the coast of the reservoir. The riddles here are no less than in the fort of joy.
Divine source
Siva is one of the few nescript that will traine your character (as well as other in the party) a very useful skill: see and destroy ghosts. For this is the source point for blessing. Previously, you needed a special rod, now it will become your basic ability.
To get this skill is very simple - you need to spend the ritual in the basement of Siva. To do this, take the necessary ingredients from the box, then use the lancet, so that a drop of blood appears and lay in the ritual container with a black root (by combining). The resulting mixture lay on the burner, turn it on and inhale steam.

For the ritual, take objects from the locker next to the can with a source. Collect yourself and combine all objects, as recorded in the book.
After you, takes place to the otherworldly world, where a new skill will be issued. Looking ahead, I will say, this skill will help when the cave passes near the sawmill. The path there is solaring crying. You and the assistant (someone from your group - he, alas, will die) Should you clean the way: Assistant distracts attention, you are casting a spell pulling out the source.

A new skill in Divinity: Original SIN 2 is given after the ritual - it will allow you to see the souls and cast them out.
By the way, subsequently the ritual must be held again. For this you will get the whole 3 points of the source. Do not forget to replenish them.
Shatter tonging chest
Sociable furniture items - Divinity's branded chip. As a rule, they need to say some password to open. Earlier with a similar task - to open the door on the ship - you already faced. New very similar, but now you need to open a chest in one of the rooms of the hotel on the second island, where you arrive on the ship. Of course, it lies some junk. But the opening process itself is very interesting.
So, at the beginning, do not write with all sorts of questions. He mumbles something in response, but immediately falls asleep again. Once all replicas are completed, "Try" the chest. With him, however, nothing will happen to the initial options for answers. None is suitable.

How to convince the chest to open? It's not easy.
Again we climb sleeping. And ask him a question about the chest. He responded about the "Magic Word" - this is a password. Not about the "Magic Word", but just "the word".
The tomb of Joanna
The tomb is located in the area called the graveyard. You can go here after a second visit to God. He will hand over the main character and the oppitians to the ability to see the other world - this is a ghostly vision. It turns out Many unshaven spirits roaming around the ground. They must be sent to that light forever ...

Ghostly vision received from God will help in solving some tasks ...
The abdominal vision will help in this task. Apply it in the first room and three switches will appear on the wall. In the next room in the center there is an outdoor button. It is necessary that someone standing on it. The grille when someone or something stands on the button closes, but it can be broken in general. There is no sense to put the character there, one of the jugs can be transferred to the button (several pieces stands along the walls). And after you need to deal with the wall buttons. In what sequence to click on the diary, in the task "family case" - it is 2 - 3 - 1, that is, the average, right and left buttons.
The sarcophagus in the center of the room will move and the hatch will be discovered under it. There are statues here and the desired artifact is located. Statues naturally come to life when you take artifact. They should be killed before you touch the artifact.
The island of bloody moon
Getting to the island of the bloody moon is not easy. This can be done only in one place - where the destroyed bridge is there (near the portal drifwood - fields). Once you are approaching the bridge, it will be dissolved in the air. Remember the approximate configuration from afar.

You can overcome the bridge by the teleportation spell. There are several species. The first is the usual teleportation. In the previous chapter, it became available at the expense of gloves. These gloves can be transmitted. And thereby getting the whole path to the end of the bridge. The penultimate pillar will have to take a little walk along the invisible bridge to shift the teleport zone and get to the last pillar, and from it to the island of the bloody moon.
The second way is the cloak and dagger. This skill the character throws himself. The third method is intermic gate. You specify the starting point and the output point. Together with you from the gates and other oppartents come out.
Gods in the underground temple
The tip on what sequence includes the statues of gods can be found in the books. However, if you are too lazy to search for something and read - see the following scheme. This sequence does not change from the game to the game - she is "sewn" tightly.

All of these manipulations with statues will remove the protective cube and get a spit-reliable scheme. This scheme can be given to those who want, and can be used independently by clicking on the sarcopagu. In the latter case, get ready for difficult battle. The designed dogs cause a tangible physical damage and quite a lot of them ...
Unnamed Island
The island is relatively small - in fact it is a volcano. There are several divine temples here. To enter the main, you will have to know, the moon or the sun worship the gods. After you can print the lunar temple.
Lunny temple
Before the temple is the statues of the gods. Their seven. They need to set the moon or the sun according to a specific scheme. Unfortunately, this scheme is fixed, so you can immediately stall to the temple, set this sequence, feed power using the battery from the robot from the cave on the shore and enter the lunar temple.

Lunny temple from the inside ...
- Elf - Luna
- Damn - Moon
- Gnomes - Moon
- Orcs - Sun.
- Wizards - Moon
- Lizards - Sun.
- People - Sun.
The lever should be pulled only after the correct sequence is set. Otherwise, you begins to beat various elements.
ARKS
ARKS is a fairly large location. The city that you will find here do almost half of the territory. Naturally there are many caches.
LAZ in barracks
In one of the caches, White Magister Reymond is hiding. To do this, find barracks. In one of the room in the corner, many boxes were filled. If they are clearing, the hatch will be discovered.

Just so it will not open. We will have to show a mixture and answer correctly for four questions. The sequence of answers is such 1 3 2 4 (with the correct option, a click is distributed):
- purity of thoughts
- phone discipline
- order in society
- loyalty to Divine
Probably, these are motto masters who are not very observed. In the basement (descending even below) you will find Raymond. With him and his servants will have to fight.
POST Views: 9 745
The new Creation of Larian Studios expanded not only deep into, but also styling, so the locations became extensive, and merchants, opponents, treasures and caches turned out twice as much as in the original. However, find all the treasures, interesting characters and the hidden entrances to the cave is not so simple, as it may seem at first glance. For this reason, we decided to publish detailed locations maps on which the location of all treasures, secrets, traders, hidden entrances and enemies in Divinity is indicated: Original SIN 2.
Fort joy
Start - From this place the player begins his adventure after the completion of the prologue.
Potential enemies
- B1 - Voadling (level 1).
- B2 - recently buried corpse (level 1). To encounter him you will need to start to spread the grave.
- B3 - A group of skulls, which is initially not configured hostile to the player, but can attack it if it approaches too close (level 2).
- B4 - Crocodiles - a collision with them is associated with the quest "Teleporter" (Level 3).
- B5 - Narin - a character who attacks you if the red prince is in your party or any other lizard character (level 3).
- B6 - Master's fencer - a character who will be hostile to you after you leave the Fort Joy, or you can remove the collar at least with one of the characters (Quest "Collar").
- B7 - Master Captain Tripplel (level 4) - a character that will be hostile to you after you leave the Fort Joy, or you can remove the collar at least with one of the characters (Quest "Collar").
- B8 - Master Dave (level 4) - a character that will be hostile to you after you leave the Fort Joy, or you can remove the collar at least with one of the characters (the quest "Collar").
- B9 - Supreme Judge Orivand - a meeting with him can occur inside the Fort Joy barracks (level 4).
- B10 - Kniles The Fencer - one of the most difficult battles in the early game. Numerous monks and golems will help the enemy.
- B11 - a group of three living dead (level 4).
- B12 is a group of four living dead (level 4).
- B13 - A group of Vizlongov - opponents will attack you in 3 waves. You will need to defeat 12 opponents. The meeting is quite trivial, but you can get a large number of experience points for it.
- B14 is a group of salamander strings (level 6).
- B15 - A group of living dead - enemies are not far from the historian (level 6).
- B16 - the inhabitant of the depths - a group of five dead boss accompanying (level 6).
- B17 - Krikun (Shrike) - a unique enemy, which cannot be attacked and who is able to kill the main character from one strike. This monster can be made disappear using the "Cleansing" spell given by the cleansing rod.
- B18 is a group of masters fighting with Gareth. Meeting with them will occur when trying to remove collars from satellites (level 5).
- B19 - Creamers (Shreikers) - a group of enemies with which it is impossible to fight ordinary methods, as they can kill the main character from one strike. You can get rid of them using the "Cleans" spell or by performing the "Purged Dragon" quest.
- B20 - Bishop Alexander (Bishop Alexandar) - the final battle in Forte Joy, during which you have to fight with a boss and a few magistrants. On half of the battle, a new opponent will appear, an underground void worm, which will be hostile to everyone (level 8-9).
- B21 - Tromptoy (Trompdoy) is the first meeting with Trompla, during which you will fight with 3 enemies.
- B22 - Trompea (TROMPDOY) - the second and last meeting with Trompla, during which you will fight with 4 opponents.
- B23 - Witch Radeka (Radeka The Witch) - This character is associated with the quests "Purified Dragon" and "Krikuna".
hidden treasures
Treasures on the map are placed in small green circles. These icons show the exact location of hidden treasures. In them you can find the chests, to open which the keys and launders are not required. However, for a start, you will have to dig them with the help of a shovel.
Passages to the dungeons and exits of them
- E1 A - Entrance to the dungeon (underground) - it will be visible only during the quest Soul Jar Withermoore.
- E1 B - Exit from the dungeon in Fort Joy.
- E2 A - Entrance to the Arena Unified.
- E2 B - Exit from the Arena single in Fort Joy.
- E3 B - Entrance to the cave.
- E3 B - exit from the caves in Fort Joy.
- E4 A - Entrance to the underground tunnel. The entrance is hidden, and therefore it must first dig up - you will need a shovel or a hero of the lizard.
- E4 B - Exit from the underground tunnel in Fort Joy.
- E5 A - Entrance to Fort Joy Prison.
- E5 B - Fort Joy prison.
- E6 A - Entrance to Fort Joy Prison. It is inside the building.
- E6 B - Fort Joy prison.
- E7 A - Entrance to an ancient passage.
- E7 B - the path from an ancient passage to Fort Joy prison.
- E9 A - transition to conclusion cameras.
- E8 A - Entrance to the room with detention cameras.
- E8 B - Exit from the room with cameras to the beach in Fort Joy.
- E9 B - Exit from room with Fort Joy Prison Cameras.
- E10 A - pipe to the swamp, located outside the Fort Joy prison.
- E10 B - passage through the sewer pipe leading to Fort Joy.
- E11 A - Entrance in dilapidated ruins.
- E11 B - Exit from dilapidated ruins in Fort Joy.
- E12 A - Entrance to the Dark Cave.
- E12 B - exit from the dark cave in Fort Joy.
- E13 A - Entrance to the Echo Hall: To enter inside, you must interact with the statue.
- E13 B - a place where you will appear by entering the echo hall.
- E14 A - entrance to the forgotten cage.
- E14 B - Exit from the forgotten cell in the cave.
- E15 A - Entrance to the Labyrinth of Gargulia.
- E15 B - exit from the Gargilla labyrinth in Fort Joy.
- E16 A - Entrance to the Witch Cave.
- E16 B - Exit from the witch cave in Fort Joy.
- E17 A - the transition to the next part of the Gargral labyrinth.
- E17 B is the passage leading to the main part of the Gargilla labyrinth.
Traders
- S1 - Gavin - a character selling books on the art of Aeroturgia (air) and associated with the quest "Teleporter".
- S2 - Rezk - a character selling books on hydromanty (water).
- S3 - Butter - a character selling books for hunters.
- S4 - Hilda is a character selling books for killers. She also has a lot of weapons and armor for sale.
- S5 - Dr. Leste - a character selling books on polymorphia art.
- S6 - Maal - a character selling books on geomantia (land).
- S7 - Margo - a character selling only one book, "Restoration" (Hydromantia).
- S8 - Mona - Character selling books for necromancers.
Note: Do not overlap the "Blessing" spell on it. If you do it, then the mona will be hostile to you and the battle will begin.
- S9 - Neubor - a character who sells books, as well as a lot of crafting materials.
- S11 - Calias - a character selling books in a military case, as well as armor and weapons.
- S10 - Stingtail - Character selling books on Pyromania (fire).
- S12 - Zalevar - a character selling high-quality weapons, armor and accessories.
- S13 - Bahara - a character selling books for hunters.
- S14 - SAMADEL - a character selling books on Pyromania.
- S15 - Simon - a character selling books on hydromanty.
- S16 - Exter - Character selling books for killers and claries, as well as various types of weapons, armor and accessories.
- S18 - Grazian - a character selling books on the art of aeroturgia, as well as various types of weapons and accessories.
- S19 - Kerban is a character who sells books on call and necromancy, as well as various accessories.
Note: Starting with Samadiya, these characters will leave their places with the rest of the camp, as soon as you achieve the quest "Call for Arms."
- S17 - Gareth - a character who sells books in military business and geomantia.
Note: It will be here only if you save it during the quest "Danger on Turning." In addition, he will go to the collection point if you promote the quest "Call to Arms."
- S20 - SAMADEL - a character selling books on Pyromania.
- S21 - Kerban - a character that sells books on call and necromancy, as well as various accessories.
- S22 - Simon - a character selling books on hydromanty.
- S23 - Gareth - a character who sells books in military business and geomantia.
- S24 - Exter - Character selling books for killers and claries, as well as various types of weapons, armor and accessories.
- S25 - Grazian - a character selling books on the art of aeroturgia, as well as various types of weapons and accessories.
Note: These characters can be found in these places only after you pass the quest "Call to Arms" to a certain point.
- S26 - Feder is one of the pigs that you will need to save during the passage of the Kesta "Burning Pigs". Pig can offer rare and powerful items for sale.
The coast of Zhnets
Traders
On the second island - the coast of the reservoir - there are not very many merchants who can offer books of skills. Most of them are in the driftwide, the only and unique city of this location. Below you can see the list and location of all sellers of skill books.

- OVIS (OVIS) - He can buy books on aeroturgia, geomantia, pyromanty and polymorphia.
- Brie (Bree) - He can buy skills books on necromancy, call and hydrosophistic.
- Haran (Haran) - He can buy books on military creation and hunter.
- Pope trash - he can buy books on the skills of murder.
- Eight (eithne) - it will be possible to buy books of skills on call, necromance and polymorphia.
A generous proposal is a side quest in Divinity: Original Sin 2. Mighty sorcerer named Raker instructed us to find a special screen in a kind of cave in black specks.
Passage
Find the Raiker in His mansion "Raycker's shelter" on the graveyard. Talk to him, and he will ask to find an ancient Skrizhal for him (this artifact is also needed and Almera in the task "Request Almy"). As a reward, he will traine you the magic of the source.
You can perform this quest simultaneously with the "Midnight Oil" and "Last Scroll" tasks. Therefore, it is recommended to first talk to Hannag so that she told about Gvidane, and then go to the black copy after that.
After you have a screen, go back to the Raicker mansion, and go to his personal chambers through this hatch.

Raircher will donate several shower, which will increase your source to one point (if you still do not have the maximum three). Then he will attack you, so be prepared.

The use of "ghost view" during the battle with Ricker will allow you to see the soul of his bodyguards. You can instantly kill them using the "extrusion of the source" (task "sharp awakening").
The door without a keyhole can be opened by a switch next to the mirror.

Task structure
The mighty sorcerer named Raker instructed us to find a special screening in a kind of cave in black specks. Helping him, we clearly be able to count on a good reward.
IFAN knows Riker:
- From Ifana, we learned that Riker was associated with single wolves. We should be careful.
Refuse to offer Raicker:
- We refused to help Riker.
Learn about betrayal:
- It turned out that Riker - the killer from lonely wolves, and his contract prescribes to kill all the awakens that he would meet.
Talk to a ricker about the contract:
- We talked to a ricker about his contract for the murder of all the awakened who will meet, but he convinced us that we had nothing to worry about.
"Promise" Rayker:
- We learned that Raker at one time accepted a certain "vow" or "covenant", and now trying to find a way to get rid of it. It makes sense to ask him about it.
Touch with Riker about his "promise":
- We tried to find out from Raiker, that this is for the "promise", from which he wants to free himself, but he left the answer.
- We tried to endure more information from Raker, however, as a result, he attacked us. Apparently, this is not some ordinary promise - this is the covenant for which he is ready to kill. And it seems, he was hardly afraid to talk about it out loud.
Black copy:
We arrived in a black copy.
We descended into the Cave of Black Space. Skriegalal, which is looking for Riker, should be somewhere here.
In the depths of the caves in black specks, some ancient temple was found.
Found an ancient Skriegal:
- We found a srician that Riker wants to get. We can now give a srician to him ... or not. She can still come in handy.
Other screened:
- We found in the caves a few sketches, but it seems, it is not the ones that we need. We continue to search.
Give a screech to raiker or refuse:
- We fulfilled our part of the transaction, Skriegali now at Rayker.
- We decided to abandon the persuasion and not to give the screened to Riker.
Riker Napal:
- Riker attacked us and tried to kill.
Riker killed:
- We killed Rakeker.
Agree / refuse to learn source:
- Riker offered us assistance in mastering the force of the source. To do this, he wanted to hold a ritual who urged all the spirits of the experience and would give us all their source. Despite the dark nature of the ritual, we agreed.
- Riker offered us assistance in mastering the force of the source. To do this, he wanted to hold a ritual who urged all the spirits of the experience and would give us all their source. We could not go to this, but therefore refused.
Leave the coast of the reservoir until the task is completed:
- We left the coast of the reservoir, and without talking to souls with a ricker.
- We left the coast of the reservoir, and without fulfilling the terms of our transaction with Ricker.