Exhibition of crafts "Fairy tales Wrong light. "Christmas story"
Chukovsky K. I. - Biography

Its creativity is diverse, so the rooting Ivanovich is called a children's writer, a journalist, a Russian Soviet poet, a publicist, translator, literary criticism, literary criticism.
But the present name of the writer is Nikolai Kornechukov, and Chukovsky's roots are a literary pseudonym. He was born in St. Petersburg in 1882 19 (31) Martha. The mother of the future writer, the peasant Ekaterina Osipovna Korneyukhukov was serving in the family of his father Emmanuel Solomonovich Levenon.
As it is now customary to speak, they lived a civil marriage, officially he was registered. Nikolai is a second child in this family. Marusya was born before him. After three years of civil marriage, his father threw this "illegal family" and married a woman who was from "his circle".
The mother of the future writer moved with children to Odessa. Here and in Nikolaev his childhood passed.
Kei Ivanovich began his creative activity in the Odessa News newspaper, for which the articles wrote. Then he married Maria Borisovna Goldfeld and together with her in 1903 left to London as a correspondent of the "Odessa News".
Chukovsky independently learned English on the tutorial, was the only English-speaking publisher, so he was sent to work in London.
The correspondent was walked large in the time money - 100 rubles per month. This business trip contributed to the further development of the writer, because here it was able to read in the original book of English writers Chukovsky, the biography of the writer was replenished with the fact that he studied the works of Tekkesey and Dickens.
But on arrival in Odessa on the outcome of 1904, it was waited for even more global events - the revolution of 1905.
Korea Ivanovich seriously engaged in criticism and after the revolution of 1917 published two books - about Mayakovsky and Akhmatov, about the block. At the same time, he began a long-term work about Nekrasov - his beloved poet. And in 1908, he published works about Chekhov, Block, Balmont, Bryusov, Kuprina, Sergeyev-Visk, Arzybashev, Gorky, Merezhkovsky, etc.
The root of Ivanovich Chukovsky wrote his first fairy tale "Crocodile" in 1916. And "Tarakanische" and "Moydodyr" published in 1923. A year later, a poetic work was published for children "Barmalei".
In the early 1930s, the roots of Ivanovich will pass on to the study of children's psychology, how they learn to speak and write the book "from two to five."
In the 60s Chukovsky conceived to write a Bible for children. But at that time, the authorities led an anti-religious propaganda, and the project was not realized. At first he was told not to write in the book of the word "God", "Jews." The roots of Ivanovich replaced the word "God" on the "Wizard Yahwe".
The book was printed, but did not see the light, since the entire circulation was destroyed. That's what Chukovsky survived, whose biography is full of drama. After all, he lost his beloved daughter Masha, who died in childhood. Her writer often mentions in his works, calling the purple.
In addition to her, the poet had a daughter Lydia, who also became a writer. Son - Translator and Prose - Nikolay and Son Boris, who died during the Great Patriotic War.
In memory of the great writer, the streets are named, he and heroes of his works were placed monuments in different cities. In honor of "Chukocolls" is called an asteroid.
How to make a wonder-tree from the work of Chukovsky?
Now, when you found out and told the children about the biography of Chukovsky, together travel his poems. So that they are better remembered, during the creative process, make a miracle tree with the children.

To make it, prepare:
- thick wire;
- salty dough;
- paints;
- thin ribbon;
- artificial moss;
- glue;
- green corrugated paper;
- scissors;
- ending or pencil;
- tassel.
From the corrugation of the rectangles with a side of 2 cm. Having twisted the blanks on the pencil, make one of them. Attach those to branches as leaves.
Now you need to give the test to dry completely, only after this coloring wood and shoes. The child will do it with pleasure.
Down on the base. Stick Moss or paint the rolling circle into green. You can cut the cat out of the test, put it under a miracle tree.

Mucha Costume - Crafts, Volume Application, Costumes
Read the children from the infancy of the line from this work that the children developed well. When they can speak, the rows may repeat. So that they memorize them, make a character from a fairy tale in verse - Muhu Cocotuhu.
Cleather

You will create just 15 minutes from the cast material, taking boxes from the eggs. Here is a complete list of necessary:
- cardboard boxes for eggs - 2 pcs.;
- gouache;
- color cardboard;
- wire flashers;
- scissors;
- pompona;
- ready eyes;
- glue pistol;
- tassel.

Now he will incite more superfluous.

The flagella flashes so as to give them the shape of the wings: a round, triangular, square, heart.

To attach them to blanks from cardboard, do it yourself in those 3 pairs of holes opposite each other.

You need to go here and fasten your paws. The eyes are glued on the pumps, and these billets are on the head of the fellow ground. Get the back of the wings.
Silicone rods of the hot pistol are very hot. So that the child does not dive, stick the items themselves, and it will look and learn.
It turned out a wonderful craft of a mug of cloakoha, or rather, several characters immediately. More children can create a bulk application. This kind of needlework is suitable for younger kindergartens.
Volume Applique
If the kids are small, draw them a simple pencil elements of the future picture. Prepare together with them the following materials:
- paper napkins;
- cotton disks or cotton wool;
- glue;
- dark yarn;
- colored and simple pencils;
- cold cardboard.
- cocotuhu;
- samovar;
- trees;
- cobweb;
- mosquito, other guests.

Then they will do it themselves. Instead of apples you can also stick crumpled pieces of napkins, but pink. Let the trunk of the tree brown with a brown pencil, the samovar can be angry with yellow. Make a basket with flowers from the napkins, because the basement has a birthday.

When all the characters become color, show the child, how to stick the yarn to get a web. Spider need to draw on cardboard, cut and glued to a web from threads.

To make clouds, let the children rolling cotton wheels or pieces of wool in a circle. Fill with a pencil sketch of clouds. It will remain to place the volumetric application into the frame and you can hang on the most prominent place.
Costume Fly Costochi
If you need to quickly make an outfit flies of a clook, put on the child a yellow blouse, a black skirt and dark takes. It needs to do 2 holes, insert black mustache made from soft wire.
It will be left to make wings. Here are 2 options for their manufacture.
Option number 1
Pour the wings from the white grid. Turn the edges, step up to stay a small gap from all sides. To the Wire here, give the shape of the wings.
Option number 2.
He will suit those who have no sewing machine.

For these will be required:
- pink Capron;
- aluminum wire;
- gray marker;
- pink satin ribbon;
- scissors.
It is possible to sew a piece of white fur to one and the second wing to connect them upstairs and decorate.
Well, of course, the fuelboard need to make a "money", which she found. To do this, take:
- cardboard;
- foil;
- glue;
- scissors;
- marker or wooden wand.
You can still add the costume of the fly of the cloak of that mask on the head.

To do this, cut 2 bands from black paper - one in the volume of the head, the second will be transversely. Leave the reserve to glue the tips. Cut 2 circles-eyes from gray paper. Using a ruler and black felt-tumbler, apply a mesh on them. Stick these "eyes" to the base.
Experienced craftswomen can sew a suit flying clook.

Required:
- black fabric;
- silver knitwear;
- silk tape;
- braid;
- wire;
- white organza or tulle.
Wings are created by the method described above, but the edge is finished from the braid. It remains to put on a girl white tights, black lacquered dolls, and the character image is created.

With the help of the fishing line, you can create amazing outfits, including the costume of Fly Costohah. If you make wide ruffles, from all sides on the edge to turn them and hover in the resulting scenery, then there will be beautiful volanesses. You can go and in a different way using knitted fabric. She is cozy at the edges of Overlock, she climbs, Ryushy turns out.
It remains to add them wings. Increase the next template or transfer it to the paper into a large cell.

If you have a crochet, then you can connect the costume of the mug of cloakos with this tool. Cosmetic makeup will complement the image.

Here is an example of a costume of a mug of clook from black and yellow fabric. On the head - eyes from cardboard. The grid is applied on them, then they are glued to the paper strip, the mustache from the wire is fixed.

Its image can be made of paper or newspaper tubes.
They are painted when it dries, turn the blanks with various knots to create a fly from a fairy tale. From the same material, make a samovar who bought flies in the bazaar.

The kids can make it from plasticine. To play a puppet play, they will blind characters from this material, they attack the wooden spanks. Holding for those, teach heroes to move.
All this consists in a wire basket, and its sides are torn off thread.

"Dr. Aibolit" Kornea Chukovsky - DIY
This is the work of K. I. Chukovsky, the children will also know perfectly well if you make thematic crammed with them.

For this you are needed:
- cardboard box from under shoes;
- plasticine;
- white cardboard;
- wool;
- felt;
- maple seeds;
- glue pistol;
- bandage;
- toothpicks or wooden sticks;
- wrapping paper or wallpaper;
- paint.

How to do the doctor Aibolit pictures show.
The master class will tell about two options for its creation. For the first, cut a triangle from white cardboard, turn it with a cone, stick the sides to each other. Let the child draw a felt-tip pen of the doctor's facial features, sticks cotton wool in the form of a beard, hair. Rolling the strip of cardboard, paints the red cross on it, sticks this cap on the head of Aibolit.
You can sew it and a headdress from felt, embroider a red cross, features a face, stick cotton, which will be a beard and mustache.

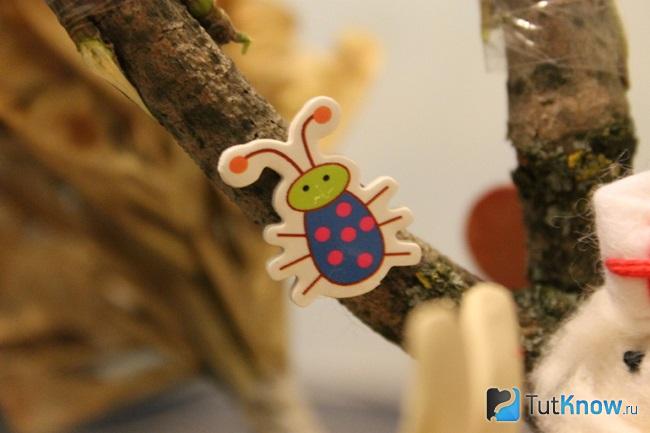
Plue the box with wrapping paper or piece of wallpaper. Stick to this ABolita, tree branches along with seeds. At the branch, attach a bug sticker. After all, not only large beasts, but also bugs, spiders came to the good doctor, according to the plot. Repeat the strings of the fairy tale, craft masters along with the child so that he remembers them well.
He will be happy to make a fox, which also used the services of a fabulous doctor. The body is a bump, but which you need to stick your head, ears, tail, paws from orange plasticine, and make a bunny from white.

Cut wooden sticks so that they become the same length. Color them or cut from the upper side of the toothpick. Stick or stuck this fever. Decorate it with a flower.

Make a bunny stool from wooden sticks. Stick to the "tree" painted wand from ice cream, on this pointer written "Limpopo".

When good doctor Aibolit arrives there, his African animals will meet. Among them is an ostrich. His body will make a child from a foam ball to which neck, head, paws from plasticine, wings - from maple seeds, and legs - painted wooden sticks. You need to tie on the neck of the bandage, since the ostrich is sick.

The giraffe is not difficult to make a plasticine, looking at the photo suit.

You can make it possible to make a craft for a fairy tale consisting of two parts. On the left side, lay out one Aibolita, and with the right - second. Near the first will be domestic animals, near the other - African. Then to the head of the ocean, from where the shark saves, stick the shells.
If you need to play the play "Dr. Aibolit", you can use the existing soft toys of the child - these are characters-animals. You can turn into a doctor with a doll by making it the appropriate makeup and sewing clothes.

Other fairy tales Chukovsky
"Taracanishche"
This is another fairy tale in verses of the Great Writer. Drawing is a great way to remember it. The work will turn out even more interesting if the child sticks the plastic fork and knife to the hands of this negative hero.

You can use kwill technique to create another job in the Chukovsky fairy tale. The remaining details are described.
Next handicraft teacher guys first sewing skills. Use:
- sufficiently dense fabric;
- sintepon;
- soft wire;
- cardboard;
- glue.

Head and body - single-wall. You will need 2 identical details from a porous brown fabric. Still them at the edges, leaving an unimoice space from above. In it, to put the syntheps, squeeze, after putting 2 mustache from the wire here. From it, make the front and rear paws, put their upper tips in the side seam, the trick.
Paws are made from the fabric, they look like home slippers.
Put the nose from the border canvase, stick it to the mord of the insect, and on it - eyes from white, and pupils from black cardboard.
Here is such a soft and fluffy, and not a terrible fairytale character "Tarakanische" came out.

After this story, you can tell the children and the other.
"Stolen Sun"
This poem begins with the fact that the crocodile sun swallowed. Read the children these rows and show how to make the cracker for which you need to use:
- green cardboard;
- pink colored paper;
- 2 Wooden sticks;
- black marker;
- glue.

For crafts, you can take wooden ships for kebabs or sushi sticks. The swipes cut sharp tips.
The front and back of the alligator cut out the green paper. On these details, the circles are drawing - the drawing on the skin. The face is depicting eyes. Cut 2 strips from colored paper. Put 2 sticks between them, glue the paper, turn the harmonica. Holding behind the skewers, you can change the size of the crocodile, making it more or less.
But then the bear helped return the sun beasts. Let the children show this moment on paper. The daylight can be depicted very interesting, dipping one side of the matchbox in the paint, it is leaning to paper in a circle, making rays.

"Confusion"
And a good crocodile helped to extinguish the fire, truth, cakes, salty mushrooms and pancakes. Such a fun picture can also be created by children's hands. Invite them to make implication on cardboard from paper or fabric using felt.

"Moydodyr"
Another fairy tale of the root of Ivanovich Chukovsky. The kids will like to make a fighter for purity of a rectangular tank from yogurt. That's what you need:
- jar from yogurt;
- plasticine;
- blue cardboard sheet;
- scissors;
- wool.

And here is another Moydodyr. Crafts are created in an interesting way. Take:
- 2 Small cardboard boxes of different sizes;
- PVA or other glue;
- colored paper;
- pass;
- markers;
- scissors;
- handkerchief or fabric;
- plastic basic toys.

Let the child draw on the big side of the green box the door and the handle of the locker, and from above - the sink or makes it from light paper and sticks to the top. White box face Moidodyra. It draws: eyes, mouth-crane, harsh eyebrows, nose. Now this bright box is glued to the green, on the end.
From the fabric, cut the towel or put a handkerchief on the hero shoulder. To another place the basin. And if you need for a matinee, you will also create it from cardboard boxes.
That's what crafts can make it easier for the fairy tales of K. I. Chukovsky. To interest the kids, show them cartoons on the books of the children's writer. Looking through entertaining stories, crawl together.
![]()
Crafts on the topic "Tales": Mastery with children from natural materials of the panel and composition.

Crafts on the topic "Tales"
Today we continue with you our autumn workshop of children's crafts. We have already done with you crafts for children's fairy tales - detailed master classes in step-by-step photos with step-by-step descriptions you will find in the articles:
And today in this article - more ideas for crafts on the topic of "fairy tales" with children of preschool age. They sent them to the "native path" Petushkova Lyubov Anatolyevna, a teacher of the Central Group No. 11 of "Star." Star "from the city of Yugorsk Tyumen region (MBOU SOSH No. 5). In the "Star group" held a family contest of crafts from natural materials on the topic "Fairy Tales". Here are some crafts on the topic of fairy tales created parents along with children.
We will be glad if these ideas and photographs of the works of children and parents will help you make your interesting crafts on the plots of different fairy tales with children.
Crafts on the topic of fairy tales about Baba - Yaga
Baba Yaga

Baba - Yaga with broom

Crafts on the topic of the tales about the kolobka


Crafts on the topic of the fairy tale "Three Piglets"

Crafts on the topic of fairy tales: Masha and Bear
This workman is made in the technique of appliqués from natural material.

Crafts on the topic "Tales of Golden Fish"
Crafts - Goldfish - also performed in the applique technique. Make it very simple. On the cardboard sheet, draw a sketch of the future craft. Introducing PVA glue one of the details of the sketch and fill out the contour with natural material. Next, fill out other details until it turns out the picture.
You can upload all the image only from natural materials, and it is possible - only a part by adding a story-drawn marker or paints with details or appliques from colored paper.


Crafts: Fabulous Hut on Courish Legs


Crafts for a fairy tale: miracle

You can learn from the detailed step-by-step master classes from the detailed step-by-step workshops in the Children.
Elena Barsukova
Children of the senior group participated in the competition dIY"Fairy tale marvelous light", which every year holds a home of children's creativity. The guys tried very hard and work turned out to be interesting. In the course of the work I remembered a lot talesSome even staged. In some tales Invented new plots, endowing the heroes with completely different qualities.
"Geese - Swans" Plasticine, Natural Material Bulistin Dima 6 years

Rolls a bun "Colored paper, color cardboard, tangle thread popov alesh 6 years

"Bouquet" Beans, Plasticine, Color Cardboard, Paradescent Borms of Polina 6 years

Story"Geese - Swans" Plasticine, Natural Material, Cardboard Zevakhov Sasha and Katya 6, 7 years
In the manufacture dIY Most different materials were used.

Golden Fish Computer Disc, Colored Paper. Self-tech Becker Bogdan 6 years

"Theatre Story"Cardboard, small toys, Scheglov Fabric of Dasha 6 years

"Country of Smesharikov" Plasticine, details of Lego Zevakhov Sasha

"Rolls a bun" Tape. Cardboard Ivanina Albin

New Year story"Salter dough Walter Diana

"The Adventures of Luntka" Felt Kokok Savva

Moidodyr "Cardboard, thread, dishes Becker Bogdan

"Magic Mirror" Decorations from Satin Brais Baikal Vova
Publications on the topic:
"There are many fairy tales, sad and funny in the world, do not live in the world, without your favorite books." In order to attract the attention of society to literature.
On July 8, in Russia there is a very soulful and deep on the idea of \u200b\u200bthe holiday - day of family, love and loyalty. Family - as a lot of pleasant emotions.
Crafts from natural material "Here is my village," performed artikulov Ilya, age 6 years old, teacher Satokhina V. V., Samara region, O.
Each year, the House of Children's Creativity of the city of Surska holds an urban exhibition of applied and technical creativity. Our group "Sunflowers".
Every year, an exhibition of crafts from natural material "Autumn Fantasy" is held in kindergarten. The main goal is to combine children and parents.
"Victory Day, as he was far from us." (From the song) for 70 years, it has passed since the solemn and great day, and the Soviet people are still more painful.
In the leaf fall, bright, what a miracle? - Asking - -th gifts rich time of the year Autumn! With the onset of autumn in gardens and vegetable gardens.
Nina Chasyna
Who does not know famous fairy tales of Kornea Ivanovich Chukovsky"Muha-Tsokutuha", "Phone", "Moydodyr", "Tarakanische", "Barmalei". All these fairy tales are familiar to each of us from childhood. These work Children love and listen with great pleasure. These are real literary masterpieces for young children who are printed to this day. About the literary writer, poet, translator, children learned in class. Real Surname Nikolai Vasilyevich Kornechukov. He was illegitimate, his life put him in a predicament. From the gymnasium, it was expelled due to low origin. Chukovsky Engaged in self-education, studied English. I wrote a lot about other Russian authors - Nekrasov, block, Mayakovsky, Akhmatova, Dostoevsky, Chekhov. Chukovsky remained in memorylike a children's writer. He felt perfectly, understood the children, was a good children's psychologist.


Publications on the topic:
Today I decided to show you through the photo report process of your work on the new didactic game - multifunctional educational.
Purpose. Develop visual and auditory attention, memory, observation, resourcefulness, fantasy, imagination, figurative thinking. Form
A summary of speech development for children of the younger group. Reading the work of K. Chukovsky "Miracle tree" Purpose. To acquaint with the work of the Chukovsky "Miracle - Tree". Educational task: consolidate the ability to distinguish and call the leaves of acquaintances.
"Autumn fairy tale." I love you, autumn, beyond the beauty, for the elective leaves and the warmth is late, for the random of the yield, we fly, flying.
The works of K. I. Chukovsky have a huge educational, informative and aesthetic, since they expand the horizons of the child, affect.
Fall. Beautiful season. About this year, poets compound poems, artists write paintings. This year, autumn especially pleased us.
In our kindergarten between the groups, there was a contest of crafts on the topic: "Autumn Fantasy". The first contest held work with his parents, invited.
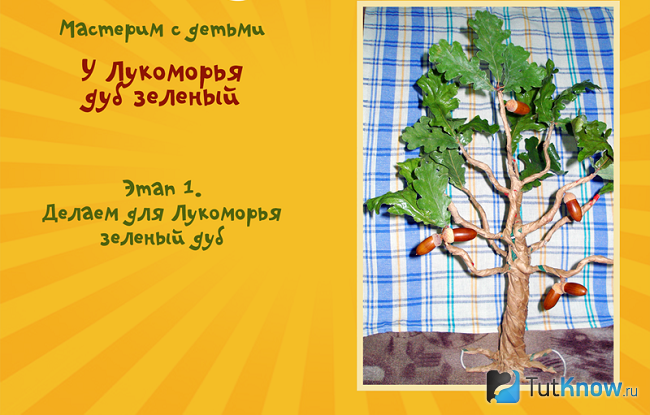
Read the works of Pushkin "At Lukomorye Oak Green" and "Fishing about Fisherman and Goldfish" and make it easy to make crafts on this topic.
Crafts on the topic "At Lukomorya Oak Green" do it yourself
These lines begins the fairy tale of Alexander Sergeyevich Pushkin "Tale of Tsar Saltan." Guys will better remember these lines, if you, together with them, make your crafts for the fairy tales of Pushkin.

To illustrate this story, you will need the following materials:
- dense cardboard in size 24 by 35 cm;
- white cardboard sheet A4 format;
- paper towels;
- pVA glue;
- oak leaves;
- acorns;
- paper package in which the coals for the grill are sold;
- acrylic lacquer;
- hot adhesive gun;
- acrylic paints;
- sealant silicone colorless;
- pebbles and shells;
- manka;
- bath salt;
- rectangle of artificial grass;
- golden chain;
- dough for modeling;
- rhinestones;
- toys Kinder surprise;
- small chest;
- shinces for kebab;
- drunks;
- cardboard box.
In order not to wait for drying the layer of varnish on the reverse side, hang out the leaves for the cutters on the rope using the clothespins. Paint them in this position at once from both sides.
To glue acorns to your lids, do it with a hot gun. Pliers Cut the pieces of wire of the desired size, fold them, twist closer to the bottom, benting these segments in the form of roots. Upstairs twist simultaneously to several wires to make branches.
Remove the package from coal to the opposite direction or use another paper, put this tree trunk here. By releasing the package, glue it to the bottom frame of the tree in the form of a trunk. For branches you need to cut strips from this package, also glue them to the branches of trees.

Further, to create this craft of Pushkin, you need to attach to hot silicone from the adhesive gun of acorns and leaves.
Now you need to think where to place the craft. For this, a big cardboard box is perfect. From the sides, stick to it paper towels, moistened in PVA and water glue, which are taken and divorced in the same proportion.
To make a blank for the seashore, you need to cut a trapezium from white cardboard. Its smaller side is 6 cm, large 16, the base is the same as the width of the box. The right edge of this figure is located to the base at an angle of 90 degrees, and the left is a curved line of the shore.
Decide where it will end where the sea is located, cover this place blue paint. Mix green and yellow bath salt with semolia and plow glue. This mass should be applied to where you will be located on the cardboard. While the glue does not dry, press the small pebbles and shells here. Put this work near the heating device so that glue is dry.

When this happens, proceed to the next stage. He is very interesting. Show children how to achieve 3D sea effect. You have already identified it blue paint, now squeeze the sealant here. Make a wave of it, forming them with a teaspoon moistened in water. Where you want waves to be foamy, put pieces of wool under them, helping yourself toothpick.

Now it's time to assemble individual elements of this craft on the topic of fairy tales. With the help of hot glue, attach the base of the craft to the cardboard, while the sea blank and the sandy shore will be right. Get the rug made of artificial grass, by the way, it can be bought in the Fix Price store.
To this basis, you need to attach a tree from artificial grass. To do this, write it with its roots-wire, start from the opposite side, secure them. Hang the golden chain on the oak, stick to the tree a mermaid, a cat to the tree. If there are no finished figures, make them out of salt dough, color.

This is such a wonderful and unusual work. By doing it, say the famous lines of poem, then the child will quickly remember them.

If you want him to learn more, then Make Koshiya, taking a suitable figure from the Kinder Surprise. Put a small chest next to it, fill it with coins.

To make the hut on the bitter legs, make out of wooden sticks or matches, at the bottom, attach the wire with paper in the form of a curiy leg. Decorate the building with dried sets.

Crafts of the heroes of the fairy tale Pushkin "On Tsar Saltan"
After the child remembered the entry of this magic story, it's time to introduce him to the main characters, but at first let it prepare the necessary scenery. The kingdom can be done using:
- burlap;
- fabric flaps;
- glue stick;
- scissors;
- needle.
- Help the child cut from burlap rectangle. Together with the kid, place the edges. To do this, first, on the one hand, you need to remove horizontal threads with the needle, to form a beautiful fringe. So do from all four sides.
- Now you need to cut out of the fabric fragments of houses, roofs, windows, doors. For the elements to be smooth, it is better to first draw them on cardboard, then use these templates.
- The child will lay out tissue elements on burlap. If everything suits, you need to glue them. If the work is small, then the burlap can be pasted on a cardboard sheet so that the base is dense.

To make ships on which guests sail in the fairy tale, take:
- styrofoam;
- colored paper;
- wooden spanks or toothpicks;
- scissors.

When spring is coming, the child will be happy to let them on the melting puddles formed by the streams. For the bathroom, it is also a great entertainment.
Repeat the child a line that the squirrel song sings and the nuts nibble. Squirrel here is a soft toy, you will make nuts from the foil, which you need to give a round shape.

To make the main heroes of the fairy tale, use ready-made dolls. It is enough to sew a corresponding robe, and now the king, Guidon, the beautiful swan, who turned into a princess, appeared before our eyes.

You can make a decoration of Pushkin's fairy tale right on the table. It is enough to lay a tablecloth here, put a transparent fabric in the form of a lake, put swans from paper on it.

How to make a swan of paper for a "tale about Tsar Saltan"?
This skill is useful to the child, in the "tale of the Tsar Saltan" this noble bird is one of the main characters. If you are flying with young children, show them a simple way to manufacture swan.

- Draw on the cardboard the outlines of the bird, downstairs will extend her body to form a small strip here. It is needed in order to give swan stability.
- If the cardboard is white, leave the workpiece in this form, if gray, then let the child plays it on both sides with white paper. From her it is necessary to make the tail of the swan. For this, a rectangle is cut out of white paper, it must be collapsed by the harmonica. The bottom of the turn is folded in the form of a veser, glue them with each other, stick to the bird so that it will get such a beautiful tail.
- Let a child draw eyes and nose, now he knows how to make a swan of paper.

As you can see, you need to take a square sheet, minimize it first diagonally, then by the second diagonal. Following the photo suit, turn this billet into an excellent bird.
There is another wonderful option. Having made such a swan, place it in the country area, play with children a picture of Pushkin's fairy tale.

Before making a swan, take:
- thick sheet of foam;
- light bags;
- scissors;
- wooden skeletal;
- 2 rod reinforcement.
The next ending place as close as possible to this. Thus, we place the swan, paint his nose.
In the lower part of the birds, stick the reinforcement along the pru, their ends are in the ground. But it is better to first lay on the soil Synthetic fabric of a blue color or a substrate of such a color, cut this material in the form of a lake. Already then consolidate the swan and flowers from plastic bottles.
If the child is more adult, show him how to make a swan of paper origami. To do this, you first need to collapse a lot of blanks as follows.

Each of these triangular elements has two pockets and two angle, so they will be easy to combine each other. The following phased photos show how to make a swan to illustrate Pushkin's fairy tale.

Collect the origami modules, starting below, lay out here in a circle. After you make the body of the bird, you need to make two wings, after which make your neck, head and beak.
You can make a swan in the technique of torching.
For this, the strips are cut from a white napkin, then bounce on squares with a side of 1 cm.
Each is screwed to the pencil, glued on the swan drawn on cardboard. Previously, this base must be lubricated with glue. You can use to attach plasticine tracing. It needs to be demolished, to deceive the swan drawn on cardboard. If it is a picture, then in the technique of a carriage here attach rolled squares of the desired colors to decorate the background.

If you have enough time, then the swan for the fairy tale of Pushkin can get here such chic feathers, they are cut out of paper, glued on the prepared foundation. The bird's neck can be drawn by cotton disks.

The topic of the fairy tale Pushkin "About Fisherman and Fish"
Another story in the verse of Alexander Sergeevich Pushkin. Crafts for this fairy tale can be from the most unexpected material.

To make such a bulk picture, take:
- cora;
- beresto;
- cones;
- sticks;
- plasticine;
- yellow cardboard.
- Put the large bark on the work surface, clean it from dust using a rag. Let the child put here a piece of cream plasticine, will place Chagu from above.
- Grandfather make from a big cone, which will become his body and small, it will turn into the head.
- With plasticine, the child will attack the sticks, they will turn into the hands and feet of the character. Waves are made from bark pieces to be spinning, fix in that position on the crust with plasticine.
- Goldfish The child will cut out of the yellow cardboard, draws the scales, eyes, other elements of the felt-tip pen. Let him attach the fish to the wave with a piece of plasticine.
- Using natural materials, such as acorns, baby will make a grandfather from a fairy tale. Just let adults drieve a hole in the acorns so that you can put a match or toothpicks here, which will be hands, legs, the neck of the hero Tazzle Pushkin. A stick with a rope will turn into his fishing rod.
- Put the old man on the moss, and the sea cut out of the paper blue.

The topic of the fairy tale about fisherman and fish in the crafts continues the next master class. From it you will learn how to make a picture of threads. For such a craft you need to take:
- cardboard sheet;
- glue;
- tassel;
- threads of different colors;
- openwork braid;
- bead for the eye.
- First of the threads need to weave the pigtails. Now let the child draw on the cardboard the outlines of the fish.
- The perch of a thin brush in the glue will circle them with this substance, then stick a pigtail from the yellow thread along the contour. On the body of the fish will lay them out in the form of scales. Sponges-bows are made of red pigtails, waves - out of blue and blue.
- Here you can use as a pigtail from yarn, and just glued the threads. Endress your work by performing a beautiful frame. Let the child glue the eye from the beads, the tail will make from openwork braid.

Here is such an interesting goldfish from the threads turned out. It can be made of other materials.

To make such an inhabitant of the seas, take:
- foam egg;
- satin ribbon;
- beads;
- eyes for toys;
- color pebbles;
- shells;
- titan glue;
- white seeds;
- alabaster;
- wire;
- acrylic paints;
- sequins;
- polymer clay;
- patch;
- pallet;
- transparent enamel for nails;
- pencil.
From the wire and beads gossip the upper and two lower fins.

Instead of scales, glue seeds, sending them to one direction so that the narrow tips are near the body. Start attaching from the tail side, gradually moving towards the head. The location of the junction of the scales with the face limit the red beads, I will attach it here.

Carefully apply glue on the tips of the seeds, sprinkle them with red and yellow sparkles. In the same way, decorate the face of a marine resident using only yellow sparkles. Secure all this with a transparent varnish.

That's how to make a fish further. From thick wire, twist the loop, wrap it with the plaster. Pour a diluted alabaster to the pallet, stuck here the bottom of the wire. Another segment of the wire wrap the blue ribbon, here you attach the fish. Also put it in this solution. Paint a wave and frozen blue acrylic paint alabaster.

To make a beautiful tail of goldfish, stripped on wire beads of different colors and generate this workpiece in the form of a tail, take it to a seaweed.

It remains to decorate the bulk operation by algae made of polymer clay, shells, pebbles. And here is the final result.

Now you can show children how to make crafts for Pushkin's fairy tales. If you want them to see how you can make a goldfish, turn on the next plot.
It is suitable for very little children. If you need to learn how to make a swan for more adult children, this will help the video lesson.
If you were interested in the origami swan to understand the intricacies of the process, check out the third video.
![]()