Drawing lessons from scratch with a pencil. How to learn to draw? Phased plan
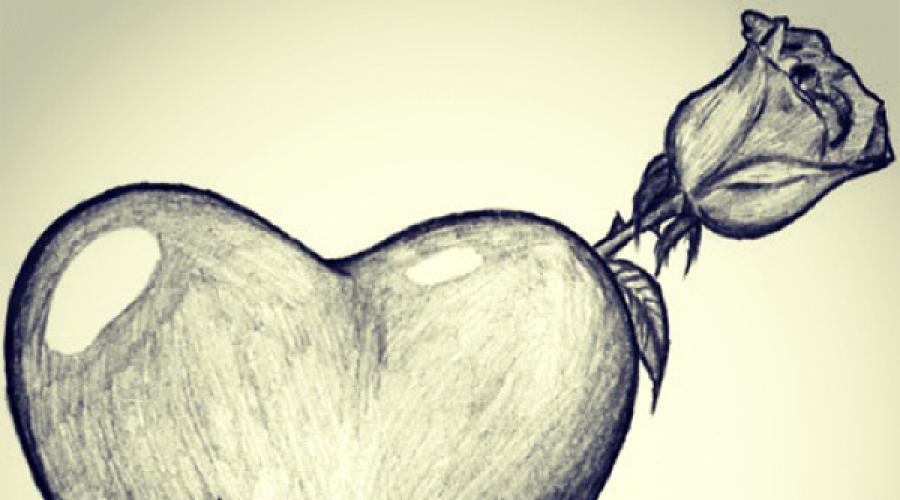
Most likely, everyone has a periodically desire to draw something, but not just a kalyak-blossom, and so that everyone liked. In particular, often such desire appears when looking at a beautiful and talented picture. It would seem that difficult? I want to learn how to paint the pencil cool, take the paper and draw the masterpiece. But if it comes to incarnation, difficulties appear: the center is shifted, the scale and the ratio of the parties are incorrect, then the details did not work. How to quickly learn to draw a simple pencilIf immediately, because of your own inefficiency, the desire to create masterpieces disappears?
Remember that even the most talented masters learned not immediately: everyone went through a long way, in order to improve the skills and delight other beauty. This is preceded by no one year and not one month of hard work - it will take quite a bit of time, and here we already draw simple pictures and people.
Pencil is considered the simplest tool for drawing, because to start learning worth it from it.
You need to get used to wearing a pencil and notepadin order to make sketches. Only work and perseverance will help achieve the goal. But what to do if in addition to the desire and some abilities, there is nothing?
Drawing: As for beginners, draw something beautiful and easy
So, for drawing pictures, you need to know where to start. remember, that for beginners, the pencil acts as the most convenient means. This is due to the fact that it is easy to erase, but with the wrong line, it can be changed. Moreover, there are different types of pencils, with the help of them you can easily create a beautiful picture.

Chief Council for future artists - never do not start drawing from complex and large paintings until you study the details. You hardly do something, and the desire to draw again will simply disappear.
First learn to portray individual items. To do this, highlight one element from others. Then visually appreciate the form and magnitude. Next, select where it is better to place it, given the amount and shape. Do not forget that high elements are located along the length of paper, and wide - width.
Also, note that the real object is usually more than a piece of leaf, therefore draw it is required, given aspect ratio and scale. This is a difficult task for a beginner. Therefore, to generate skills, below will be offers simple exercises that will help highlight the place for the picture.
Exercises for drawing
In these drawing exercises, we draw objects as schemes, without creating small parts - this is what a newcomer can be drawn simply and beautiful. It is important to see here how the use of unpaired figures are created objects, their dimensions are taken into account. Getting similar skills, in the future you can find the location and size of the drawing on the machine.
Exercise number 1: So, the first task is that it is required to draw the subject not from the natural value, but from the picture. It greatly simplifies the task, because the element is not selected and the search for its placement is not required - everything has already been done. You need to reproduce the same thing, but in another size, in order not to copy it.
Repeat similar exercises with other images, developing an understanding of proportions and space.
Draw a mountain. First, look closely at the picture. Visualize it on your sheet. Now spend a straight line. It will be the foundation. Examine the shape of a hill, its slopes. If the mountain has the same sides, depict it as the correct cone, whose height in size is less than the base width. To understand how many times the part differ in size, you can take a ruler, but the main thing is to be able to do it on the eye. In this situation, the proportions of height and width are 1: 3.

To properly determine the ratios of the parties, create a top first. Find a place on the horizontal where you place it. Create on line 3 equal segments. Next, find the middle and draw a perpendicular. Then mark the top of the mountain at a distance of 1 division from the base. If the image matches - everything is done correctly. Now try to create the same mountain, but in another size.
Do not forget that for the correct definition of the ratios of the subject parties, it is necessary to start from separation to the same parts of the base, and already go further. Such a task will teach you to accurately determine the ratio of various elements of objects. And this is the basis of drawing.
Exercise number 2.: Another task is that it is required to portray the mountain with other proportions of width and height. Here they will be 1: 4, and the peak is rejected on the right side. The task is more complicated, but not impossible.
First, repeat the actions of the first exercise: Draw a straight, sharing it on the same parts (here 4). Then there is a feature - the peak will not be in the center of the segment. It seems to be over the third segment, because it is carried out by a perpendicular line. Then the top is postponed. Usually, when creating a pattern, the base is divided by 2 or 3, by 5 rare.
Exercise number 3.: This exercise will need to portray on one sheet. profiles of different mountainswhich possess different vertices by location and altitude. Do not be afraid, the task is not too complicated. Represent each hill separately, spend a mentally dotted line to the grounds. And then you will realize that the first exercise is simply repeated several times.
Other skill - skills draw straight lines without fixtures. It's not too simple, workouts will be required. First draw a vertical line using the ruler. Now exercise, trying to create a maximum parallel by hand. A similar exercise is repeated with a horizon.
Mastering hatching
When creating masterpieces, a pencil will need to master hatching skills for the volume of the subject. She will show where the shadow falls, and where is the light. Start with simple figures: cube, ball, cone, etc. In addition, if you look carefully, then it is noticeable that there are fevering on these figures.

In order to get the smoothness of the transition from light to the dark, you will need pencils with different density. After mastering this skill, you will easily learn to draw volumetric parts. For classes, you can choose interesting and stylish drawings for beginners - not very complicated, but beautiful they will delight the result and support confidence in their abilities.
How to draw a person correctly
If you have achieved success in previous tasks, we'll figure it out now, how to draw a man. This is not the easiest task. Consider phased drawing. First try creating people on paper that cost is important to distinguish between the ratios of the parties.
Spend a vertical direct, repel from it to create a grid, i.e. Main lines waist, shoulders, heads, hands and feet. But how to understand the size of these lines? When drawing from nature it is important to use a pencil as a measuring instrument. For example, you want to determine the gap from the belt to the head. Take a pencil, viewing its tip with a top of the crown, then check on it where the waist is located. Transfer the size of paper. So it turns out to measure all items.
Drawing people - a challenge complex. Start by creating the basis, then draw the items.
To check yourself remember that the body is visually divided into 8 parts. One piece is equal to the size of the head. Representatives of the strong floor the length of the body is 3 heads, and the border is located on the chest, chin, crotch and belt. Feet - 4 heads, and the center near the knees. Shoulder width reaches 2 1/3 head size. Hands in length reach 3.5 sizes of the head. Women's proportions are different - the body is more elongated, and the hips are considered the most wide part.

If you have determined the proportions of a person, draws marks, then add the body shape. For this, all elements in the form of cylinders and ovals are drawn. If you all like, then draw contour. Now it will only remain creating details - fingers, hair, face, clothes.
How to draw a portrait
The greatest difficulty creates the creation of portraits. The difficulty is that to obtain similarities, it will be necessary to correctly draw all the details and features. So, we'll figure it out how to draw a portrait of beginners.
First Council: Think that you can easily draw or draw with a photo with a pencil? Separate facial zones: nose, eyes, lips in various angles, even ears. Then go to the creation of a full image. For beginners it will be easier to work on the photo, it is gradually possible to move to personal observations, sketches and sketches from nature.
Tip Second: Start with creating oval head. Then spend the vertical centered. She will divide the face to the same parts. Then divide it into 2 parts horizontal - this is the line of eye location. Eyebrows are located on the line of the upper edges of the ears.
Third Council: The length of the nose can be determined as follows: divide the gap between the eyes and the chin on 2 is the place of the tip. Its width corresponds to the gap between the edges of the eyes. These ratios are not an axiom, but most often the face is exactly what they draw.
There is a certain concept of a person proportions that can be taken as the basis.
When there are parts of the person, it is required to create the contour of the lips, the nose, ears, hair. If the details were arranged, then start drawing. Now it remains only to add concluding strokes.
Graffiti style
If you like the inscription, then you should think about. There are different directions and stylistic exercises for drawing the word, letters, phrases. And in order to understand what specifically the direction you will create, you will need to study them all.

Train first on paper. Create a word. Letters are required to be located at a distance corresponding to the ½ height of the letter, because they will need to circulate along the contour. Now give each letter to the volume and bulkness of the hatching.
Selection of tools
A considerable role in drawing plays the choice of tools and sheets. So, what to choose fixtures:
there are different types of pencils. Simple pencil happens with different levels of softness. Often they are marked with Latin letters: B - the most soft, n is the most solid, and HB is firmly soft pencils. In addition, there are still numbers from 2 to 9. They show the tone;
beginning will need different pencils with different hardness. In addition, when drawing will need soft erase;
paper Plays not the last role. Better use white dense sheets - they are able to withstand corrections. The pencil is suitable grainy leaf, because shades are noticeable on it.
We considered in detail how to learn to work with a pencil and how to draw something beautiful at home, but now we will bring a kind of outcome. Consider short tips How to fill hand for drawing - the list, of course, is not full, but summarizes the experience:
Create outline.
This is the main point. Per day you need to create not less than 5 sketches. It is worth working at the maximum. Use each chance of creating drawings: on the road, in the office, at home. It snaps down his hand, develops fantasy, the ability to understand the size ratios. It is useful to draw ruskends, comics.

Copy the work of the masters.
Imitate masters, it develops taste. Do 1 copies every 3 months. This should include the originals of good artists. Try to get closer to the source to the maximum, study not only the technique of masters, but also the features of the culture of that era.
Experiment, do not be afraid of errors and do not postpone the creativity for later. So you will rather learn the creation of masterpieces.
Draw a memory.
Even when drawing from nature, you have to create an image from memory. Moreover, it is important to draw small elements - It will improve the visual memory and fantasy.
Repeat errors.
Often, people at the first problems throw labor: they are afraid to repeat the error. But you should not do this. Does not go out - Start again. Do not avoid mistakes, you should look close to them - it is possible that it is your personality that is.
Do not draw in the photo.
Yes, at first, this is the only way to stretch, but then it is not worth doing this. The lens is not capable of transferring the depth of the forms.
Take a break.
Do not concentrate on one, it is important to be able to switch. Does not come out something - do breaks. Start other drawings, change the point of view, equipment.
Conclusion
Even if for you draw with pencil or paints (pastel, watercolor, butter, etc.) - a completely new direction of vital activity, do not be afraid to put goalslike modest and global. It is important to remember for what you have decided to learn drawing: whether it will be a future profession or hobby, do you want to please friends or relatives presented as a gift to the scenery or portrait, did you just master the new creative niche?
The fears of their own ineulsion do not give rest, constantly buzzing in the ear "Don't get anything anyway"? You should not postpone the ideas and plans for later, gradually buying boxes of pencils and paints or spending the weekend in search of the stores of the best paper. Imagine your desires today - Just take a notebook and pencil and start doing let it still be very skillful, but then your own sketches.
January 23, 2014, 15:22Guys, we put the soul in the site. So
what you open this beauty. Thanks for inspiration and goosebumps.
Join us in Facebook. and In contact with
David Revua, Illustrator and Concept-artist, shared with novice artists list of knowledge that need to be purchased to work realistically. It does not matter what you draw - pencil, brush, crayons or on the tablet - these laws remain unshakable.
website The supplies for you, where it is clearly and understandable is the action plan for a novice artist who decided to learn independently.
"It is difficult to choose what you need to study those who are going to do drawing ... I get a lot of letters on this topic; Newbies usually feel lost, lost among all this. Therefore, I decided to compile a kind of table of contents - a list of what needs to be studied and what you need to practice to create quality work and learn to draw better. Each item is provided by my simple comments that answer questions "what", "why", "how." Thus it will be easier to find the necessary material using your favorite search engine. Also, this material can be useful for those who want to improve the quality of their works. I will use these starting points in my exercises and when searching for errors in your works. If you are just starting to draw - here's my advice: be erudites, learn the foundations and focus on separate elements in turn.
1. Perspective
What is it: Art transfer three-dimensional space on a flat surface.
What is the goal: Do not draw flat, depict the depth on two-dimensional paper.
What we need to know about it: Mesh perspective, as simple forms (cubes, balls, etc.) behave in perspective and how to maintain proportions.
Work on the basis of two disappearing points (green and red).
2. Proportions
What is it: The ratio of the size of all objects on your drawing.
What is the goal: Draw recognizable objects due to stereotypical views on proportions.
What we need to know about it: Learn to memorize proportions, find a way to easily memorize the ratio of the parts of the object, to compile a dictionary "of proportions.
Orange lines show key proportions and ratios in the figure (left) and outline (right).
3. Anatomy
What is it: Studying the structure.
What is the goal: Draw objects realistic (people, animals, plants, technique, etc.).
What we need to know about it: Joints, bones, muscles, how they work, how they behave, as the parts are connected, etc.
Exercise for hand drawing (left), on drawing a skeleton (centered), examining muscles (right).
4. Composition
Various sketches before work; Search composition.
5. Lighting
What is it: Light and shadow transmitted in color.
What is the goal: Create the illusion of light, display the correct shadows, achieve the volume and pass the mood.
What we need to know about it: Flower values, discarding the shadows, the effect of surface materials, reflection of light, light characteristics (refraction, scattering materials, etc.).
Left: The light shows the difference in the material. Right: use of light to show the second character (discarded shadow).
6. Region
What is it: The way to highlight the silhouettes of objects on your drawing.
What is the goal: To facilitate reading, split objects and background, strengthen the effect of depth.
What we need to know about it: Edge style (clear / soft / lost) in drawing, lines styles (weight, speed, softness) for contours.
Left and in the center: edges in the figure, right: the thickness of the contours.
7. Colors
What is it: The art of choosing the right shades (middle tones, shadows, light).
What is the goal: Add more movement, mood and emotions to your work.
What we need to know about it: Color systems (monochromatic, complementary, etc.), features of the influence of colors for mood, stereotypes.
On top of the left: 3 color circles reflecting the palettes for this work; Three additional colors.
8. Posy.
What is it: Art capture active movement on a static sheet.
What is the goal: Add life, energy, movement and show the dynamics.
What we need to know about it: Emotional strokes, sketches, quick drawings, studying all moving, frequent "warming" exercises.
On the left: Penguin posture in the zoo, in the center: Study of poses when driving, right: warm-up sketches of the figure.
9. Style
What is it: Aesthetics, sense of style. It often depends on the fundamental standards (ethical, historical, social, symbolic), art of cultural groups, art market.
What is the goal: Make the work path to viewers.
What we need to know about it: Your own taste, culture, creative team as a public and creators at the same time.
Left: Classic black and white portrait, centered: Stylishly stylized (and strange) style of character and drawing, Right: My comic style.
10. Idea
What is it: Drawing abstract concepts, ideological associations, invention and supply of new design. This is mostly the development process.
What is the goal: Suggest new images of objects, characters and creatures to entertain or inform the public.
What we need to know about it: How things work, how to create a new, association of ideas, funny situations, creative process.
A new type of technology (left), a new kind of dragon (centered) and a medieval house, which no one has seen before this picture (right).
11. Communications
What is it: The image can transmit a large amount of comprehensive information quickly. The proverb "Picture costs thousands of words" well explains this.
What is the goal: The artist can communicate (internationally or not) with the audience.
What we need to know about it: Reading images (decrypting sent messages, non-verbal signs), transmitting meaning, history, information.
The drawing of the sheet does not carry special information (left), but the complex of details and the expression of the face can already tell the story (centered). Such a symbol, like a vulture of newspapers (right), can make deeper to think about the problem of unethical journalism.
Conclusion: meaningful illusion
If you can correctly merge all the above, then you will achieve feelings, depth, texture, light, movement and life on a static surface. It will immerse your audience into your world, and you can easily transfer them your ideas, messages or tell the story. And finally, as I see the result: art of creating significant illusions. All this skill palette will serve as your intellectual (memory, control, determination), as well as emotional development (feelings, emotions, subconscious). This is a complex exercise requiring knowledge, observations, imaginationbut first of all you need Practicing, practicing and practicing. The drawing skill is similar to the muscle (and you, of course, do not become stronger from the fact that you read the book about lifting weights or watch the video), so good luck in the drawing and painting, build your unique experience".
We all painted sometime in childhood. Then it was easily, regardless of what we were drawn - with colored pencils, a stick or a finger on a stuffing glass. But even then you can, have noticed that some children have painted you better. Not that you would know what "Better" means - everything you understood is joy from praise. When you heard someone praise, and you don't pay attention to your work, you felt worse and worse. In the end, you threw the drawing. After all, why continue, if no one is doing?
Now, no matter what reason you want to take for drawing again, but it scares you. Those children who have never thrown to draw, have now become professionals, and their work looks almost magical. How can you overcome this abyss? Will you catch them ever?
The answer is that no one knows. But not them You must try to catch up. That's it yours Dream - draw what you want, in that style in which you want, without constant criticism for misses. This "future you" should be your ideal, because you will become as good as he or she depends on you, and not from the abilities / opinions of others.
As soon as you make a future yourself with your example, you will constantly grow. Your goal is to be better than yesterday. Doesn't it sound more realistic than becoming the same good artist as anyone else in one moment? If you agree with me, join me in this great task. I will not show you how to draw - you would not even want! Instead, I will show you how to study paint. I will spend you through the four large stages that you will gradually master.
This is the first level. If you thought how to start drawing after a long break, here's your answer. I will introduce a set of exercises for beginners - some of them will seem to you obvious, but it will only mean that your level is somewhat higher than you thought. Ready?
Tune in
When you decide to learn something, the correct attitude is much greater than all books in the world. I already gave you one small advice - compare yourself to the future with you, and not with others. More advice awaits you ahead, so read this part carefully before starting the exercises.
The ideal does not exist
When you set a goal, it may look quite real and achievable. "This is me today, and this is me when I reached the goal", that's what you imagine. There is a certain path between these two points, and it seems to you that you are quite able to go through this path. However, you overcome one important detail - your needs change with you.
Today, the ability to draw a little man from sticks may seem amazing, but just because you do not know how. As soon as you achieve your goal, it loses its strength and you are looking for something else, something stronger. You can't want that you already have. That is why you can complain about the inability to draw a little man out of sticks, as if it is some kind of valuable ability, and someone who can draw it, complains about the inability to draw a real person.
There is no such moment when you become good enough. So we are created, so just accept it. You will never think about your abilities like this: "I am a magnificent artist, and I don't need to learn anything else, now I'm doing it just for fun." This will not happen! There will always be something that you can not do something that would make you perfect ... And as soon as you achieve this, it will open something a whole new world of things that have to learn before your eyes.

When you think you know 99% of something, the remaining 1% will show you how you were wrong
If there is a way to become perfect, then it's just stop trying. You must understand that no matter how good you are in drawing, it will not make you better, meaning than at the moment. This is truthful and on the other hand - it doesn't matter how bad you are in drawing, it does not make you less significant. This leads us to the next stage:
Do it for yourself
If you want to draw beautifully, only in order to feel joy from praise, prepare for the mass of suffering. Do you remember this feeling of pride for your work, until someone started to criticize you? Why is your satisfaction so easily dissipated only from the fact that a random stranger expressed his opinion?

If your satisfaction depends on the other opinions, you will never be completely satisfied. Moreover, you will allow you to manage your mood to people who do not even care! Even if it makes you a good artist, in the end you will be in constant tension from the fact that you are not good enough. And what would you choose - to be a beautiful artist in constant tension, or be bad, but satisfied with the artist?
I looked at the topic of criticism in another article, so if this is a burning topic for you, be sure to read it. Remember: You do not want to become a great artist. You just want to rejoice at your work, and sometimes you think that for this you need to be at the level of the professional. This is not true! Stop comparing yourself with them, and instead, think if you can become better than yesterday - that's all you need to feel satisfaction.
You yourself put your goals, because do not make them unattainable. Your goal should be " nice enough"You. Do it for pleasure, with ease, and do not be too strict to yourself, for what you are not as good as someone who trained for years. You do it for yourself and only for yourself. Learn to rejoice at little successes, regardless of what others think about it. In the end, what do they understand?
There is only one goal
You may have a lot of reasons to start learning to draw, but you only have one goal. it to study,how to draw! "Learn" here is a key word, because once and forever learn how to draw, in fact it is impossible. This is a permanent, infinite process. Consequently, if your goal is to "be able to draw anything realistic 100%", you are waiting for disappointment, because this goal depends on what you want to see, not from what you can draw. And what you want to see is changing with the development of your abilities, together with your vision of 100% realism.

The feeling that somewhere is the endpoint is only an illusion.
It is important to understand that this journey never ends. While you will seem to be that there is a goal that needs to be achieved in order to be satisfied with your drawings, you will never be satisfied! Learn to appreciate each, even a small progress rate, and just enjoy the journey. Learn is the only thing you will do constantly, and this is the only goal that will no longer move.
If you really need more specific goals - please put them. However, do not make any of them the reason for your happiness and confidence - it is meaningless. And even following these small goals, do not forget that all this is just for the sake of the process, and it is not so important when you achieve them.
Basic skills
The easier looks like a drawing for you, the most likely, weaker your abilities. It may sound funny, but for this there is a rule, and it is called the effect of Dunning-Kruger. In short, the less you know about something, the more you think you know. This is because knowledge of what you not You know - also know!
You can say "I know it is not easy to draw - if it were simple, I would know it!" But at the same time you almost cry when your drawing does not work as you would like. If you really knew how difficult it is to draw something right, you would not be upset so much - for you it would be obvious that this difficult!
When you look at a skilled artist, drawing your masterpiece, and can not understand how he does it, so I want to blame the talent. This is a clear sign that you are a beginner. If you were the level above, even just a little, if you only tried learn how to draw - you would understand that the case not only in abilities.

When you are an absolute novice in drawing, you think that draw - It's all that is required
Stage 1: Draw what you want
This applies to the main definition of drawing: Leave traces on something. It concerns the workout of the hands to draw almost automatically, with any material you want to use. Beginners usually see it as one single drawing skill, but in fact it's just the foundations. Keyword: physical exercise.

Stage 2: Draw what you want
This applies to the use of the tool intentionally, avoiding guessing. If after drawing something beautiful you are afraid that you will not be able to repeat it, perhaps you need to work on this stage. It also applies to you if you cannot copy well from the source until it outlines. Keyword: accuracy.

Stage 3: Draw what you want
This part is less related to drawing, and in greater memory. I described the basic idea in another article, but there are also other exercises that make it easier for you. While the previous level concerned drawing on imagination, this regarding the location of things in places. Keyword: visual database.

Stage 4: Draw what you want
This is the most difficult, the most blurred part. How can you draw something exactly as you want this, regardless of what the rest can expect? How can you draw something unrealistic, but still worthy praise? Note that it comes after how you master realism! Keyword: style.

How to learn
Of course, today we work on the first stage, from here and follows so long entry. You need to understand that this is not a lesson in the literal sense of the word - these are exercises that will help you go to the next level, but how to use them - your business.
I assume that for this lesson you will use a simple pencil and sheet of paper. Beginners are often interested, whether they should start with a pencil, or from a graphic tablet, but in the second case it will complicate the task. The likelihood is that you are already familiar with the pencil - there is no need to add a new tool that you have to study from scratch.
However, if you are experienced enough in traditional drawing and want to start your adventure with drawing electronic, these exercises will help you get used to the special movements of the stylus. If you want to draw another hand (for example, due to injury, or just for fun), they will also be useful!
Now there are only you and a good pencil. Start by which you write, and then, if it is not clear / convenient, select the one that is suitable. All exercises are your playground, do not put on yourself, test your abilities, and do not compare them with any abilities that you imagined.
- Exercise B. short time intervals (from 5 to 15 minutes), but regularly - at least once a day.
- Do not cause inconvenience to her hand - She can get tired, and even more - in this case, find a more convenient version of movements.
- Let your hand always will be relaxed - Do not click on the pencil / pen away. Your job is to leave traces, no more.
- Do not use some special paper. or notepad. You can draw on the back of the sheets where something is printed, and which you were going to throw away, or on the cheapest paper for the printer.
- Turn on good music, or even audiobook - no need to fully focus on what you do. Our goal is here - make movements automatic for your hand.
- Never forget why you do it. Do not feel about it as a duty - You can stay at any time if you no longer want!
Enough conversations, let's go to work!
1. Draw the doodle
Let's start free - just do something. Believe you or not, you already you can Draw, you just want to get a bigger control over this. Allow yourself to have fun and just draw, as if you are sitting on a boring lecture and you have nothing to do. Do not draw anything concrete, and do not judge yourself strictly!

This exercise:
- heats up your hand;
- relaxes your hand;
- reminds you what drawing is;
- allows you to free your thoughts.

This is an exercise for heating, so do not put on yourself!
All examples on the illustration above are drawn by my left hand (I'm right-hand). The hand you write is probably more skillful because you are using it (at least sometimes) in order to write. However, not a trained hand of an experienced artist clearly shows us the mechanical part of the drawing process.
2. Control the direction
Draw a bunch of points, or the starry sky. Then play the snake! Try to move smoothly, and do not make sharp turns. If you want to complicate the task, use more points, and first connect them diagonally.

This exercise:
- teach you to smoothly change the direction;
- allows you to get control over the direction of the line - this is the first step in achieving accuracy;
- adapts your hand to several positions;
- allows you to check whether a pencil / feather is convenient in all positions.

This is a fun exercise to which you should take on how to play.
3. Draw any lines
Drawing straight lines for the untrained hand can be complicated, so it is very important to draw them to draw. Do not strive for perfect directness - draw the lines quickly, easily using different directions. Some of them will be more convenient to draw than others, and this is normal. For this reason, I draw my creatures to the face left!

This exercise:
- trains a stable pencil / pen position in hand;
- is the extension of the previous exercise;
- allows you to find the "rhythm" of your hand - the most convenient direction of your lines.

Do not worry if the lines come out uneven - this is normal to start
When you find the most ideal direction, use it in the future. Turn the sheet if necessary, but still continue to work in this favorite rhythm - it will be your first step to convenience in drawing.
4. Draw an oval
I specifically did not say "circles", because the circles are also scared as straight lines. Draw an oval, and not even perfect. Paint them with big and small, quickly and slowly, and do not worry about their ideality. The goal here is to continue turning and complete the line where they started.

This exercise:
- practicing hand rotation in large and small ranges;
- teaches you how to cope with a pencil / pen when rotating;
- this is the next step in receiving control over the direction.

Forget about the ideal circles for sure - they are rarely needed in drawing
5. Train in stroke
Strinking is a technique that is used for shading, but also it is based on a very important movement of the hand. Draw a series of fast, short lines in one direction, and then crosswise with another series of lines. You can also try the technique of "com hair", or any other hatching techniques. If it is difficult for you, start slightly slower, but never focus on one line!

This exercise:
- allows you to recreate the movement that you used just that;
- trains your hand for quick, but conscious movement;
- trains the movement "quickly and clearly";
- makes you to search for ways for the repeat, which will not be tired;
- teaches you to think in the "Space" key instead of the "line";

This technique will always be a little tedious, but try to find a way that does not require effort more than necessary
6. Fill out closed spaces
Let's connect two exercises. Draw an oval, and then quickly fill them with a hatching. Here your goal is not to cross the contour, which can be very difficult if you work fast enough. Do not try to fill the gaps - instead, try to make it so that they do not appear.

This exercise:
- expanding the exercise "Drawing lines" - trains a stable position of the pencil / feather in hand;
- increases your confidence regarding control;
- includes several different exercises;
- trains your accuracy both at the beginning and at the end of the line.

It's more difficult than you think!
7. Lighten pressure levels
For perfectionist, only developing drawing release the situation is very difficult. They seemed to be imprinted that each line should be ideal from the first time, without corrections. This exercise is the first step to the "rule" to violate. Draw lines and doodle using different levels of pressure. Change them, and see if you can do it gradually. You can even make a gradient from the lines!

This exercise:
- gives you freedom!
- teaches you a very important vertical movement, and how to combine it with a more familiar horizontal movement;
- teaches you to "feel" pencil / feather;
- the most important thing from all.

Soft pencils (B) have more pressure levels than solid (H) - check them, and select those that fit you.
8. Repeat lines
Let's continue the previous exercise. Now you will learn a very important trick, the trick, about which not all newcomers know.
Draw a short Low Pressing line. Then draw on top of it again and again. As the last stroke, you can click stronger. Do the same with different lines, quickly, and do not worry, if you first fail. This is a complicated exercise, but it creates wonders!

This exercise:
- trains your accuracy;
- gives you complete control over the line;
- gives you a higher level of accuracy;
- gives you the confidence that you can draw - lines begin to go out like you have conceived, and not just "get acquired."

Do not perform this exercise too slow, otherwise it will not raise any effect.
9. Draw "Soft" Figures
All these exercises should prepare you for the latest exercise. Circles or long lines are almost impossible to draw at times, without any additional adjustments. The truth is that the artists rarely paint something with long lines - short lines control is much easier.
Learn to this - and you are free, - draw different shapes, constantly raising and moving a pencil / pen. Do it quickly, and do not strain your hand too much.

This exercise:
- allow you to get rid of the most limiting start-up habits
- really allow you to plan yourself how to send your line, instead of allowing you to solve it with your hand
- will prepare you for the next level

With this technique you can draw anything - look at yourself how it can change.
Like this!
Use these exercises to train your mechanical skills every day. The progress they will give you completely depends on your diligence and discipline. Make them until they become a children's game before proceeding to the next stage. The order is very important here - without a good base, you will be more difficult to learn something new in the future.
It can all be boring, but remember why you do it - you learn your hand movies that are the basis for the most complex drawings. It is akin to buying ingredients for a new, amazing recipe. You can invest more money and get a delicious dish you want, or try to save, and get a sad result. Nothing valuable comes easily!
Remember: the repetition is the key here. What you train is called muscle MemoryAnd, like the "ordinary" memory, it requires constant, regular practice, so that anything remains in it for a long time. Therefore, continue to train and wait for the lesson about the next stage - intention and accuracy.

You can print this image to remember all exercises.
there are answers to all these questions. We bring an Aza where to begin painting. Follow these tips, do exercises and you will no longer be afraid of a clean leaf. You will get the necessary knowledge and basic skills. Painting will get closer, clearer and will deliver the sea of \u200b\u200bpleasure.
Part 1. Preparatory
1. Find an inspirational object for drawing
It happens that you have already prepared everything, but you can not find an object that would inspire you. It is worth taking care in advance. Something interesting probably fell in the closets and drawers of the table. Watch out objects on sales, commission and grocery stores. Learn pictures of your favorite artists.
The selection should include objects that are nice to watch: it is important for creating successful work.
Interest in color and form will motivate you during the work on the picture. There is a link between feelings for the object and the ability to reveal your abilities. You can more than you think.
For the first picture, a simple single-color symmetric vessel, such as the ordinary coffee cup, will be used. Illustration of a book
2. Meet brushes and paints
Take a soft round and bristle brush and compare their pile. Squeeze a little acrylic paint from the tube on the palette. Try to apply undiluted paint with different brushes on canvas or watercolor paper. The smears should get bright and relief. Feel the differences in strokes with different brushes. Add some water and apply strokes again. Average paint consistency has the same color intensity as undivided, but its texture is smoothed. And do this exercise again with a weak paint solution. Note how quickly dry paints in the first, second and third time.


Illustration of a book
Try to apply paint with different brushes - oval soft, synthetic thin, bristle flat. Try every brush until you are sure that you know what brush to use to realize the intended picture.

Illustration of a book
3. Useful techniques for working with palette
Colors in the pictures that we see are usually obtained by mixing: pure color from tube is usually too intense. These techniques will facilitate you getting the right color.
- 1 Deliver paint from tube to the edge of the palette, leaving the distance between the colors. Center Palettes Use for mixing. Beams make apart from each other to prevent unwanted mixing.
- Pure color on the brush, dial from the edge of the palette, and not on top and not from the middle of the extruded "sausages".
- Intensive dark colors, such as black (although it is not considered to be color from a scientific point of view), add with caution: even a small amount can significantly change the mixable color.
- It is necessary to mix the colors with each other until the kneader becomes completely homogeneous.
- Do not regret paint. Squeeze as much as you need, - usually it is a circle size with a ruble coin (for Belil - with a pentrule). Painting consumption is an integral part of the painting process. You will be excessively saving - you do not learn how to use the paint.
4. Learn to get neutral colors.
In any picture there are neutral colors - "visually gray". Because of the low intensity at first glance, they are invisible, but this is the most useful tool for creating a harmonious color composition. Let's see how to achieve it.
Mix blue and orange in any proportion. Now let's try to change the color temperature due to the proportional ratio of warm and cold colors in the mixture. If the result is more purple, try to make a rusty color, adding more orange paint, and then bleel for lighter peaching color. If a rusty color was formed in the first step, add blue to get cold, close to purple, and then bleel to get a light purple-gray.
Repeat the previous steps for another pair of additional colors - yellow and purple, red and green.

A pairs of additional colors are connected short vertical strokes. The colors of each pair are mixed with each other to obtain two neutral colors, in each of which one of the parent colors was dominant - they are located to the right of the relevant parent. Illustration of a book
5. Basic, secondary and tertiary colors
Draw a circle, then scroll it into three identical sectors. The upper sector fracture with a yellow middle cadmium, the right lower - blue ultramarin, and then mix the main red of the naphtol of the raspberry and cadmium of the red light and fill them the left lower sector.
On the color circle of the main colors, draw half-circles with centers in the intersection of the sector boundaries with an external contour of the color circle. Slide these semicircles by secondary colors, placing the "parents": the cadmium red light above the border between red and yellow, purple dioxazic over the border between red and blue. Add yellow to the green FC and fidgeting the green semicircle over the border between yellow and blue.
The main color when mixed with lying next to secondary gives tertiary. Add one triangle on each side of the semicircle, all of them will be six. Skin each triangle, focusing on the signature.

Basic, secondary and tertiary colors. Illustration of a book
Part 2. Raming
6. Start with abstractions
Abstraction is an interesting and easy way to prepare for work on a realistic work. It is important to choose 3-4 colors that you like to feel the emotional connection with the picture. Draw over the entire surface of the sheet with a simple pencil, a continuous angular or rounded line. It can intersect several times.
Slide the shapes in the figure of the colors and shades, the consistency of the paint and the brush that you like. Listen to your inner voice. The main task is to make as you like, forgetting everything else.

Illustration of a book
7. Maskov scheme
Beginners are often not sure how to apply strokes. In the figure, the arroders show the direction that will help achieve a good depth of the image of the space on the example of the circle.


Scheme of smears and result. Illustration of a book
8. How to apply shadows
A key role in creating a surround image is played by shadows: they first need to learn how to see and write. There are four types of shadows:
- Own shadowlocated on objects. These are areas of dark tone, contrasting with the illuminated parts of the shape depicted. Usually they have a sharp boundary on the outer circuit and a smooth transition on the border with the areas of the light tone of the object. They own the main role in creating volume.
- Haltone area - Narrow, with soft contour, located on the border between your own shadow and illuminated area of \u200b\u200bthe object. These shadows are a middle tone between contrasting dark and light tones of the object.
- Falling shadow - Silhouettes of the object, "fallen" or discarded on any surface, except for themselves. They create the impression that the object is on any surface.
- T. eNI at the point of contact - the darkest area of \u200b\u200bthe falling shadow lying next to the object. They are responsible for "stability" and a mass of the object. These shadows are also called an emphasis - the darkest domain among dark tones. Accent is a dark twin flare, the most bright area among light tones.
To draw shadow, put a black paint or paint of a darker color than the main color. And the second stage, cover this darkened section of the main color. Black color in the halftone should be shifted under a new layer of paint, creating a colored shadow. If you want to make a shadow darker, apply black from a clear shadow border and mix with color on the halfone.

Shadow on the example of the cylinder. Illustration of a book
9. How to apply flare
To create a realistic glare, designate a dry brush with a whites the brightest area on the subject as many times as needed for sufficient brightness. In the middle of the glare, put a small stroke of thick paint for greater brightness.


Two examples of blades. Illustration of a book
10. Write pictures in the imagination
Catching up everyday affairs, write pictures in the imagination. Mentally, look for match between surfaces and textures that see around yourself, and ways to work with a brush and paint imposition.

Since you got here, it means at least a little believe that you can learn to draw. And indeed it is! Even if you painted quite a little bit, did not paint or doubt or doubt your abilities, find a simple pencil and 20 minutes a day - And in a month you will learn how to create striking images.
The most difficult thing is to start
To learn how to draw, man first need to just start. You need to push it to get a pencil into the hands and began to spend lines on a clean sheet of paper. Many believe that a blank sheet of paper is a problem, to cope with only a talented artist. In fact, having mastered, you will gain sufficient self-confidence to enjoy drawing.
Passing this course for thirty days You will achieve first creative success, get a stimulus for constant practice, strengthen self-confidence and keep interest in drawing for life.