Souvenirs from the vine do it yourself. Weaving from the vine for beginners: lessons, step-by-step guide
From the vine that will be interested in beginners in the field of this art. You will receive answers to questions:
- How to collect and handle rods for weaving, vine blank.
- Where to start learning weaving from the vine.
- What instruments need a novice wikler.
Weaving from the vine - Art known for a long time. Since ancient times, our ancestors saw from this material are a wide variety of baskets, furniture, fences and even buildings. Despite the development of technical progress, which brought into our lives plastic dishes, basins and other utensils needed in everyday life, wicker from the vine things continue to enjoy in great demand. Moreover, those tired of all artificial, people began to appreciate the natural things made from natural materials, which is the vine. Woven products of the product stored in themselves the energy of the sun and the warmth of the master of the masters. They fit perfectly in, bringing the comfort and peace to the house. That is why more and more people give preference to wicker furniture and interior items woven from Willow branches.
How to collect and process the vine, vine blank
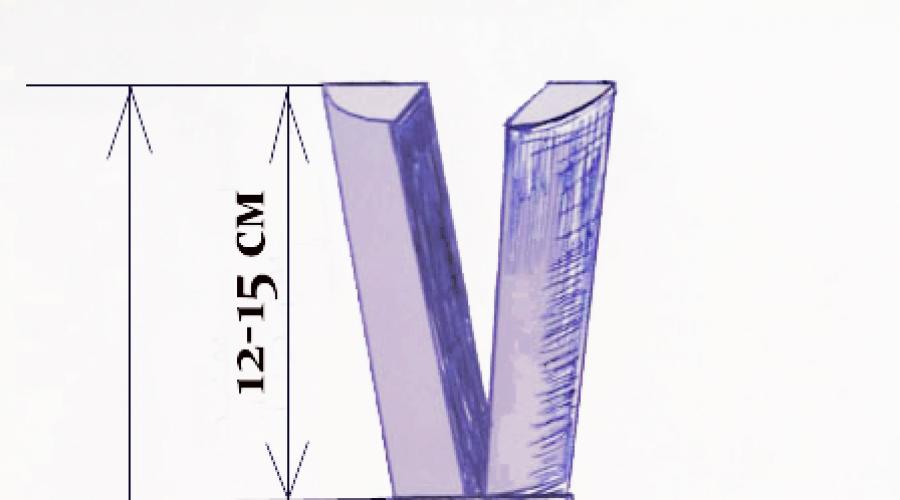
Willow grows almost on all continents. There are many types and forms of willow. Almost all of them are suitable for weaving. You just need to properly collect and process the bars. It is necessary to harvest them in the period from November to February. In this cold period, the sealing in the tree stops. An obvious sign of this is the lack of leaves on the branches. Cut both thin and thick year-old shoots with a well-sharpened knife or a secateur. Twist rods should be long and not branched. The cut should be done at an angle, leaving the intact 3-4 kidneys so that the next year they could grow new branches. Such trimming is useful for wood if you do everything right.
More experienced bribers from the vine do not collect his own rods, but buy them, preferring to pay more time directly creative process weaving from the vine. Other masters, if possible, grows a vine on their own sections, which is even better. The beginning of the braider is better to collect rods on their own to enter the course of the case and gain knowledge and experience billet vine.
Welders from the vine use both pond peel and crude. From the untreated rods, the hedge and other items intended for long-term use on the street. Purchased bars over time acquire a warm yellow-orange color. Things from such rods look more presentable and elegant. Sometimes wide rods are split by special colleas on 3 or 4 parts, getting the so-called "tires". From the tires later make a thin ribbon, cutting off the core from it. Such tapes are used by experienced masters when weaving furniture and other products.
Of course, the tires beginners will be  it's hard to do. This will be happening later by taking a certain experience. Clear the bars from the peel can anyone. In order for the twigs to be easily cleaned, they must be pre-boiled to boil over 1-2 hours. It would be better for this to use the container in which the rods would be easily placed throughout its entire length. The twisted rods will retain her shape after cooking, which will make some inconvenience in the weaving process. After the rods are challenging, they need to be cleaned. Some masters use a special tool for this - jeweller.
Beginner welter can  dofully and with your own hands. You just need to clean the bars, starting with a thick end, gradually throwing the peel towards the thin end of the rod. If there is no possibility to clean the rods immediately after they have been welded, you can leave them for a day in the water. If you remove the rod from the water, then the peel will dry up and they will have to re-cook. After cleaning the rods, they need to dry in the sun. The deceased rods are sorted by length and width and bind to Khpanka. This will greatly facilitate the process of selection of the rod during weaving.
Where to start
After the material for work is assembled and decomposed on the shelves, you can proceed directly to weaving. Those who face this kind of skill for the first time need to start with the simplest -. It is Rodyshko that is the basis of many wicker products. It is it that will often appear in the further works of the plaider.
Immediately before weaving, the rods selected for the peduncle should be soaked for 15-30 minutes in hot water. This will give the rods of flexibility. You need to be prepared for the fact that it will not all be obtained. Many newbies, rods often break and crack. This is normal. Over time, experience will be purchased, and the hands will learn to feel a rod. It is necessary to focus on the fact that the better the rods are twisted, the less they will crack. In the process of weaving, it also takes from time to time to wet the rods and the product so that they do not lose flexibility.
After the weaving the Ponishka is mastered, you can move to on the basis of the same Punchka. During weaving, the baskets will be mastered the main techniques and techniques of weaving: ropes, bends, knobs, locks, etc. Each new job will be better than the previous one. That is the way to the top of the skill.
What instruments may need for weaving from the vine
Here is a set of tools that will need every nice wikler from the vine:
- scissors and a secator for pruning the rod;
- boiling capacity of rods;
- pliers, clothespins, tweezers, sewn, knife, blades, rag - need when weaving;
- pencil and ruler;
- lobzik, drill, drills, plywood - some products may contain wooden parts that will need to be prepared using these tools;
- morilka, varnish and brushes for painting finished products.
But the most important tool is the hands of the plaider and his perfection. Modern wizard for weaving from the vine make a variety of household items. Among them can be found not only simple baskets and spreads, but also elegant jewelry boxes, glamorous handbags for ladies, openwork caps, chests and even huge sizes of statues. Fortunately, the artist's fantasy does not limits, what the photographs of the work below speak for themselves. ( click on the photo to enlarge)


Weaving from the vine It takes a lot of time, but the result is worth the effort. As a mom's mom, I know how the road every minute of free time. I think you can pay more time to weaving or any other hobby, buying Meries Japanese premium diapers for their Chad in Merse.Ru. While your baby will sleep sweetly you will have an overnight minute.
Creative success and let the most courageous your fantasies come true in the process of weaving in the most exclusive items!
The art of creating various products from the vine or IV roths was known to another thousand years ago. Then it was a necessary skill associated with the satisfaction of human household needs. Currently, weaving cane baskets for beginners and experienced masters is, rather, a fascinating hobby, allowing to get beautiful products designed not only to collect and storing mushrooms, berries, fruits and vegetables, but also for decorating premises.
Modern designers are increasingly resorting to the use of all sorts of baskets, as they allow you to fill the space with the unique rustic "spirit" and comfortable inherent in rural homes. It is especially true in Rustic, Country and, which are now becoming increasingly popular among residents of various private houses.
Weaving basket technology
For weaving baskets, you can buy ready-made scying rods or collect them yourself. Freshly cut rods filled with juice, it is necessary to dry well, and before starting to weave the product, soak in 30-40 minutes in hot water to make more flexible. Tools that will be needed for work is a secateur, a sharp pocket knife, scissors and a sewer or screwdriver.
In the art of weaving baskets there is its own simple terminology. If you look at the bottom of the basket, the thick straight rods will be visible, which diverge from the center in the form of the rays and are called "Spokes". After the process of forming the walls of the basket in the process of work, they become "racks" (or "box").
All areas of thin ventilation rods that are bent between the knitting needles and racks are called "knitting" (or "weave / ducks").
Usually baskets begin to weave with the bottom. Sometimes it is also called reason. Then weave walls, bending and, if necessary, handles.

Weaving Caskets from Willow for Beginners Step
Consider one of the weaving methods of the basket with a diameter of approximately 28 cm and a height of about 12 cm.
We will need the following materials:
- 6 thick IV branches (future needles);
- 24 rods of medium thickness (for side parts of the bottom);
- 50 thin twigs (25 for racks and 25 for walls);
- 12 rods of the middle thickness (for a special weaving designed to connect the base and walls).
In total, five stages of weaving baskets are distinguished.
Stage 1: Basic
Cut from thick escape to cut with a 12-rod struts a length of 35-40 cm. They will serve as basic spokes.

In the center of each of these three rods with a knife, make a split length of 4-5 centimeters. This split is called a "slot".


Fold together three rods with swizzles, and insert the remaining whole bars in the slots so that it turns out the cross.

Now we start to weave the base itself (bottom).
Select the longest and thin rods. Take two rods and insert their fine ends into the slot slot, as shown in the photo.

Disconnect the twigs, skip thick knitting needles between them and soak them like that, passing from above and below alternately. Thus, two circles need to be made to make a weaving of two thin ventiors


Then continue to make the same interlacing, only single, tightening twigs and flexing each of the spokes outwardly in turn. It is necessary to try that the distance between major branches is uniform, since the design should be obtained, resembling the spokes from the bike wheel.


In the following picture, it can be clearly seen how the pattern obtained in the process of weaving around the spokes should be.

In the description of the method of weaving baskets from willow and vines for beginners, one important part is often missing, from which the quality of one of the most important elements directly depends on. This is the need to tighten the twigs as much as possible after each weave knitting needles, without shifting them up or down!

Using the described method, continue the work, moving in a circle until the twist end.

For extension of length, you should not use two new twigs at once. Just impose a twist in advance by a pointed end between older plates from the last rows, adjust it in the right direction and continue weaving at least a few moves in advance before changing the second twist. The remaining ends doomed gently. As a rule, the replacement should be made when there are about 10 cm before the end of the branch.

The base at the finished product should be slightly concave that the basket can firmly stand on the veranda or the execution technique of the Pedoshka clearly demonstrates that when the diameter is reached at 7-8 cm, it is necessary to tightly grab it with his hands and "push" the most center to the big fingers a little. However, it is important not to overdo it here and do not untap the base too much.

Continue weaving until the bottom will reach about 22 cm in diameter. It is desirable to verify that this moment be coincided with the end of the next twigs whose ends should be fixed by reflecting between the branches of the previous series.

The ends of the prutikov cut off the secateur as close as possible to the wicker base itself, but so that they still rest in the needles.

Here is donyshko and ready. For beginners, the result may turn out a bit different, as in the photo, but it is completely normal.

Stage 2: Base breakdown
At this stage, new branches add to each needle in the weakening of the base, which will then play the role of racks for further creating a basket.
It is important to take into account that each Yves rod has a natural bending with the inner and foreign part.

For high-quality weaving our basket will require 24 such branches. Each of them will cover with scissors or a secateur to get a pointed and long oblique slice located strictly on the inner or outer part of the rod, but not on the side.

Holding the base with a concave side down, push the shell or screwdriver to the weave next to the needle in such a way as shown in the photo.

Remove sequel and immediately paste the prepared rod with its inside down and another rod on the other side of the knitting needles. Using the same method, insert the will of each needle in two branches.

In different descriptions of weaving durable canes from willows for beginners, it is always indicated that the rods must be inserted into the inner side, so that the product itself is beating beautifully. If instead insert them outwardly down, the basket will drive around to the sides.
At each rack, take a break at a short distance from the beginning of the releasing base (about 5 mm), simply pressing the thumb on them.

Raise all racks upstairs, secure them with a hoop or tie, watching no bending inside and skew to some one side.


Basic spokes Punches Cut on the same level with the edge of the interlacing slightly lower racks.

3 Stage: Connection Punchka with walls
One of the most important stages in weaving baskets is the connection of the finished bottom with racks with a side part. In order for this transition to be uniform and looked neatly, use the most soft bright twigs of the medium thickness in the number of three pieces.
Position the basket on the knees the base to yourself - it will work easier with it.

Take three twists uniformly medium thickness and overcall their length so that it is the same. Insert them with the tips in those weave on the bottom, which are adjacent to vertical racks. So that the rods were tightly held, their tips should be deepened into the base of approximately 5 cm.

Start the creation of a wicker pattern from the left twist. Hook it and roll through the first, and then through the second rack of the second row. Consider the fact that weaving should be not on the side, but from the edge. This will allow to get the most aesthetic compound.

Take the next twig, moving from left to right and braid it around the racks in the same way.

Continue weaving around the entire base, always choosing twigs alternately and watching that the branch that is in the work was on top of other twigs.

It is important in the process to always tighten the twigs, which will allow the product to get a beautiful form due to good fixation of the racks at the bottom of the bottom. After the first circular weaving, place the basket vertically on the table or any other comfortable surface. This will facilitate the further work process.

The small end of the rods leave to hang out, as shown in the photo. Adding new twigs start from left to right, just a slightly moving the old twist and inserting a new weaving in the resulting gap. Make a few weaving before adding the next twist.

As a rule, several circular interlacing happens enough to create a beautiful transition from the base to the walls. The remaining ends stretch down all the resulting weaving, and then cut off with sharp scissors.

4 Stage: Wall Weaving
There are many patterns of rods of varying degrees of complexity, but when weaving the baskets of willow for the most beginners it is better to use the most simple variant, the scheme of which is presented below.

With an odd amount of racks, it is permissible to use one rod as the basis of weaving, but we obtained 24 racks, therefore the optimal option is to weave from two branches.
Basket blank put on a vertical surface, place some weight in it that will prevent the drop in the product, and start weaving. First add one twig, and only after several drops of it through the front and rear racks (about the middle of the basket diameter) add the second one. Next, the twigs should be alternating, using one by one, then another.
When the twitch is over, add a new one in this way, as shown in the figure. Always cut off the branch before it starts to be excessive narrowing so that there is no too thin parts in the weaving.

By making several circles, remove the hoop that supports the rack. If they start tallowed too much to the sides, return the fastening into place. You need to move up to about 9 cm.

After completing the main weaving, take three of the same twists that were used to create a connection of the bottom and walls. Secure them by simply by looking at the tips at the rack.

Make several circles of weaving light rods of the middle thickness and firmly fasten the ends as the same method that was described above at the stage of compounding the base and walls.
Weaving from the vine - very ancient kind of needlework. Such weaving is quite exciting. And although now some and replace the vine with ordinary newspaper tubes, weaving from the vine remains quite popular among modern needlewomen. In this article, you will find a master class on weaving from a regular vine, which is perfect for beginners.
Before starting to weave things from the vine, find out a little about the billet of the vine. Vine blank for weaving requires special knowledge. Typically, the vine is harvested in winter, it is necessary that the vine is from ridden wood. Next, you need to handle the vine: Clean it from the bark, for the lightness of this process, it is necessary to immerse the vine in hot water, it is hot, and not in the cold, bring to a boil and cook for 20 minutes. To properly choose a vine, look at the color of its bark, if it is red or orange, you can check for strength: bend, forming a straight angle if the vine sustain these tests, you can safely take it yourself.
Weave from the vine of the product with a description of work for beginners
From the vine creates a variety of baskets and VAZ. There is also a weaving from the vine of furniture with their own hands. But to heat the furniture, you need a huge desire and experience in this matter. Beginners are better to do the usual basket, which can also be very useful in everyday life.

For weaving from the vine you will need:
- Hot water container
- Acute knife
- Yves Prut
For a start, it is necessary to weave the bottom, to do this, to decide which form it will be. In our case, the bottom will be round. So, let's begin!

We take five sticks and make in their middle of the hole in which you insert other five sticks. So we got a cross. In the same holes insert the rod for stuffing and begin to swell the center of the rope in two rods. We ride so two rows. Next, we spread two rods, we leave the central on the spot, again we flourish two. And again we ride so two rows. Now we are tired by one twist two rows.

Having finished moving the risers of the crossbars, proceed to the braid by their laying weaving, as shown in the photo.

We insert under each riser on the tip of the rod, selected for layer-by-layer weaving, we continue to weave until it reach the desired bottom of the bottom.
In order to evan the walls of the basket, you need to raise the rods and start them to be tired. Raised twigs are called risers.

There are many weaving techniques. The most common - rope. It is for it that we will weave our basket. Do this will be a rope in two rods, i.e. Two rods. The previous rod presses the next and, rich rod base from the inside, comes out. Then the same is repeated by the second rod and so on. Pleeten so gradually expanding your basket. Be sure to imagine what a height will be your product and, reaching half, insert the ends of the rods bent in half, which will serve the handles of your basket. Such handles most often consist of three or four twigs.

Next, continue weaving the walls of the basket. When you reach the desired height, we will fly away the side of the basket and her handles, it will give a basket a completeness and prevents its fast breakdown. Weaving this edge also has its secrets. To competently blame the edge, you need to take any riser and start over the two subsequent outdoor. Next, take the next riser and do the same. And so on, with all the others. Extra rods carefully cut the sharp knife. And all, your basket from the vine is ready!

Please note, it is important that the rods lay to each other as close as possible. To do this, many masters during weaving must be inquiring them.
And this is represented by the basket created by layer-by-layer weaving. Such weaving is also very popular among the needlewomen. For things, we will need the same number of twigs as risers. This weaving is made at the same time with all the rods: each rod envelopes the next riser from the outside, then the subsequent riser is enveloped from the inside and is displayed out. We repeat the same alternately by each rod participating in weaving. Shooting so until you reach the desired height. In the same way, gradually expanding if it is a basket.

Thematic video on the topic of the article
Weaving from the vine is shown in the video provided below, you will find many secrets that will be very useful to you in your work.
In Russia, weaving baskets were quite common. Almost every peasant could wean a good basket if necessary. Well, the baskets flew up for every taste: small and large, round and rectangular, oval and conical, simple and complex weaving, with lids and without them. Without baskets in the farm, it was difficult to do. They wore underwear to the river; took on the road, going to the far path; they collected a crop; Mushrooms went with them.
In modern life, the baskets also find different applications, and a real mushroom skill is difficult without it and submit. And best for mushrooms is suitable. IV branches, of which the basket is woven, contain a large number of tannins. Thanks to them, the mushrooms are not spoiled for a long time, and the air passing through the rods both through the filter is cleaned of harmful microorganisms. In addition, IV's rods absorb excess moisture and thanks to the heat-insulating properties, mushrooms are protected from overheating.
First of all, it is necessary to prepare the good raw materials. In our country, more than 170 types of IV grows in a wild form. Rods of many of them after appropriate treatment are quite suitable for weaving. Yves wood is famous for its flexibility and high plasticity. Only some types of Yves, for example, WIA brittle, are not suitable for weaving because of its fragility. From wildlying willes, young shoots of willows three thousand, basket and winds are harvested most often for weaving.
IVA Three tight, called in the people of Belotal, Belolaz, or just a Lose, is a small shrub growing along the banks of rivers, lakes and other reservoirs in almost all parts of our country. Belotala leaves are oblong, long and shiny. The bark is greenish and yellow outside and lemon yellow from the inside.
Iva is a basket, also called a riquitox and a white car, a shrub or a small tree. Sevective young branches yellow or olive brown. The leaves are long, lonelynolinene, on top of smooth, and from the bottom of silky-felt, whitish. Eye vein, passing along linden, yellow, and sometimes slightly drowned.
Roads, on the banks of the rivers and ponds or not far from housing, you can often find a large spreader tree, which is sometimes thirty-meter height. This isva white, or vehicle. Branches at the winds of green-yellow, the bark is covered with silky hairs resembling whoreish flare. You, probably, more than once had to observe how in a matter of seconds, only it is worth a busty wind, the crown of winds from the green turns into a silver one.

In the old days, the peasants were harvested by the so-called absenter way. Lights growing near the house, they saw the top, which went on firewood and various crafts. By the autumn, the part of the trunk of the trunk is densely turned by young escapes suitable for weaving. Most of the rods were cut off, and the next autumn in their place they grew new ones. Approximately also come on modern baskets, spreading in special sections of willows of cultural species - twisted, purple and others.
For weaving, rods aged from one to two years are usually used. For small elegant weaving, annual shoots are taken, which in individual types of Yves are thin and long like a cord; For weaving large things, as well as for the manufacture of a skeleton of baskets - two-year. Yves rods intended for weaving should be long, thin, flexible, viscous, straight and well split along the fibers. It is necessary to harvest only those rods whose surface after removing the bark looks clean and glossy.
For baskets, try to harvest the rods with a length of at least 60-70 cm with a diameter of a comula (in a cut-off) 5-10 mm. Usually, on one bush, IV shoots have approximately the same physical and mechanical properties. Therefore, before cut off the rod from the bush, first check the quality of one of them. If the IVOV branch on the cut is too big core, and even with a brown-reddish tint, do not take a rod from such a bush - they are usually brittle. For our purposes, you need branches that in the cut is small, barely distinguishable core. And, of course, you need to choose enough shoots, without growing and bitch.
It is almost possible to harvest the vine for weaving baskets every year.
But most often the baskets harvest it in spring or autumn. Spring rods are easily removed without preprocessing. But if the rods are cut at another time of the year, then in order to remove the bark, they need to soak or evaporate. In the summer and autumn, the bars are soaked in running water rivers or streams; You can both in a barrel or trough, but in this case you need to change water every day. The harvested vine is binding to a beam, inside the cargo - stones and immersed in water. So that the rods did not take the flow, they are tied by a rope to a peg, in a shore. Ponds are soaked one or two weeks.
Instead of soaking, they can be disappeared. Then the processing time will be reduced from one or two weeks to one or two hours. Place the rod into the tank or trough, fill with water and put on fire. Bring water to boil and boil one or two hours. Then remove the rods, wait until they are cooled, and take a cerebral to the bark (Fig. 5).

Silent designs are a lot, but the simplest of them is a metal slingshot, drove into a massive bench, a table or a log. Chemille can be made of two metal rods. The pointed rods of the same length score simultaneously into a wooden base from below, turn them into a thick wire, laying the turn to the turn, to a height of 5-7 cm. Free upper ends are driving - it turns out a slingshot.
To remove the boring from the rod, insert it a thickened comral part in a chemale and, pressing the rod to the undertaker with his left hand to the undertaker, right pull over. If the bark was filmed only on the one hand, skip the rod through the chemistry again. Purified bars sort over thickness. If the thin bars failed to prepare you, then thicker split on the strips - halves and quarters. Remember that too raw wood splits badly, so driving it at room temperature.
Part of the rods intended for artistic weaving, spend or proceed. A grayish brown is obtained if the rods are plunged into a solution of iron vapor for a while; Brown color - in a solution of mangartsy or in a decoction of alder bark.
If you want to get bright colors, then take ordinary aniline dyes for fabrics or colored ink. On the bucket of hot water it is necessary about four packages of aniline paints. In a colorful solution, add several spoons of acetic acid. So that the rods are well attacked, to withstand them in the colors of the hour. Then we rinse with clean water and dried at room temperature. Immediately before weaving, soak the rod in cold water.
To weave the basket itself, you need, first of all, master the various types of weaving and methods of seelings.
The most common simple weaving. In some cases, to speed up the process, it is performed at once with two or three rows (Fig. 1). Although simple weaving is performed quite quickly and easily, its strength is not high.

A variety of simple weaving is weaving by inclined rows (Fig. 2). Alternating rows of multicolored rods, you can achieve a large decorative expressiveness.

Weaving the "rope" (Fig. 3) are used in cases where in some areas the baskets want to obtain special strength. For example, in the flowers "rope" intersect intersecting or parallel bars.

Weaving "Chess" (Fig. 4) are used mainly with decorative purposes. The rods of two contrasting colors alternately laid as in the usual simple weaving, just not through one rod-riser, but after two.

The beauty and strength of the basket is largely dependent on the proper sealing of the board.
The easiest and fastest way is through one rod-riser. The first rod is set for the second, the second for the third and so to the last (Fig. 6).

Also close the board with two bars, only after two rods-riser (Fig. 7)

or one rider - after two rod-risers (Fig. 8). Using these ways, the ends of the rods need to withdraw the inside the baskets, and the remaining neatly cut through the knife.

Inserting the side of the "pigtail" takes more time, but the basket gives a special beauty and expressiveness. To put the pigtail, the board first close in a simple way through one rod. At the same time, all the rods are associated with threads of three together and intertwined as it is done when weaving ordinary braids. The brazed pigtail around the side, the rods used are cut, closeing their ends under the pigtail, and successively including weaving all new and new group of roths (Fig. 9).

Simple and at the same time charming baskets from IV routines are a trendy trend. They have an impressive history and were once quite a common subject in the farm. Now weaving baskets from Wawa brought to the level of art. They can be a wide variety of shapes, sizes and colors. Handmade is expensive, so why not try to make such a colorful and bright not only decor element, but also a convenient container for collecting mushrooms, berries, fruits, etc.
Material and tools
The technology of the workpiece of raw materials remained the same. Modern masters still use one-year rods willow of any kind of those that grow in our country. The workpiece of the material can be done almost all year round, but Ideally advise you to do it in early spring or late autumn. Weaving Caskets from Willow involves the choice of long and straight, even shoots that have healthy wood, without bitch and various growths. The rod base thickness should not be more than 1-1.2 cm. For simple baskets used in the farm, you can not remove the bark, if you plan to use it in decorative purposes, it is necessary to do this.
From the tools you will need a secateur and a sharp knife, cheerlets and cloinks, sewing.
Growing willow
Wizards with experience know that in order to create a beautiful product, you need to make certain efforts. To obtain a suitable material, they independently grow an indulged IVI. For this, the prepared cuttings of the early spring (immediately after the snow saving and thawing the Earth) are planted in small racks or shorts with high humidity. Their length should be about 25 cm. If you are planning the weaving baskets from the pruhnov willa as a long-term occupation, and not a single action, we recommend using this method. Cherenters stick into the ground at an angle of 45 degrees on 2/3 lengths at a distance of 50-70 cm from each other. With a favorable outcome, after three years, you will get smooth rods up to 2-2.6 m long. To work, cut them off either in May until the flowering period, or in August, when you grow up fresh shoots. On the same plant for the season they can form up to 20 pieces, leave under the winter 6-8 strong branches.
Processing of IV rods

Weaving baskets from willow and vines implies a certain preparation of the source material. From freshly cut shoots, it is necessary to immediately remove the bark. If you have not done this on time, then the filtering rods will have to pre-moisten with water. Purified blanks for 5-6 days dried outdoors, but not in the sun, in the shade.
If you do not plan to use the material immediately, it does not make sense to soak it, the twigs can turn and spoil. They are dried, and then stored assembled into large bundles in a well-ventilated room. If necessary, the branches are soaked (but no more than a day), and as soon as they acquire elasticity, wrapped in a wet tissue, and from there are taken out as needed.
Autumn blank material
In this case, you will need to soap the rods for 3-4 hours and the subsequent rank. Then they should be cooled in water and neatly with a deception (special device) to remove the bark. Sometimes weaving the willow basket is carried out with the help of the so-called ribbons, that is, split into 24 parts of the rods. Such technology will require a certain skill, and the first time does not all happen. Use a special device - a spellock. It can be made independently of solid wood or purchase a metal, plastic. In order for one rod to split into 4 parts, it is necessary to make a cruciform incision and insert the wedge-shaped part of the colunky into it. When promoting the tool deep into the wood starts to be divided.
Weaving Caskets from Willow: how to make a flat bottom?

These models are intended mainly to collect fruits, vegetables, berries, mushrooms. In addition, you can use them for a hike on a picnic or put inside a vase with flowers. The algorithm of action is as follows:
- First begin to determine the bottom. To do this, take eight branches of the middle thickness. In four of them, in the middle, make the gap with a knife and insert the remaining rods into it, as on the second photo.
- The resulting cross is gently soaring with two thin twigs. After you make 2-3 turns, spread the branches. You will get something like a sun with 16 rays. Weaving Caskets from willow for beginners seem to be quite difficult, but if you study the technology once, in the future you will not have any difficulty.
- Next, each twig is fine separately, try to locate them at the same distance from each other. Make several rows. When the twigs begin to end, you will need to additionally increase them. At the same time, two new twigs should not be added, it is better to do it one by one. A new twist in the two last row of braid, as on the third photo (indicated by the arrow), and the old one can cut. Then we get two more rows of twisted method, and then you can use an ordinary method. He lies in the rod of the spokes from the outside and from the inside alternately.
- In total, you have 16 rays, and this is not entirely convenient, so we recommend inserting the seventeenth. To do this, with the help of sewing, place it between the rods of the few last rows and continue the job until you receive a ditch of the desired diameter. Weave Baskets from Willow with their own hands - a fairly painstaking lesson, requiring care and accuracy.
Transition to walls
In order for the basket to appear Boca, 17 smooth and not too thin roths will be required. Thick base to sharpen with a knife. Each rod Place in weaving along all the spokes. If you pay attention to the branches, then notice that they are a bit twisted, so there are their concave side down.

The ends of the old rods cut the secateur right at the base. Next, take a new knitting needle, climb it left, skip under two adjacent rods and bend it up. Do this manipulation with all branches. Further weaving baskets from willow (the photo of the process is presented in the article) more clearly. All the knitting needles in the top in the beam - it will make it easier.
Wall weaving
The formation of the walls we advise to do in three rods, so you will achieve a more beautiful base. To do this, place them along the spokes located nearby (photo below). Take the left rod and gently bend it back in front of the two adjacent branches and start it for the third, and then come back forward. With the remaining two, repeat the same procedure. When two smooth and beautiful rows are obtained, you can unleash the upper beam. Further weaving baskets from Willow with their own hands continues in a simple way. In this case, in the photo you see a French rant. It allows you to get a beautiful embossed surface and does not cause difficulties even for newbies.

For each of the spokes, it will be necessary to add another twice. Pick up approximately the same twigs of the same length. Add them one by one, taking into account the direction of their growth goes along the left hand. Purge a clove end of the rod, then print it forward and start following the following, as shown in the photo. Start the next Yves twig behind the spoke to the right and continue to add new ones in a similar order until the entire basket is braided.

Further actions are in the usual mating. Start from any rod, turn it on the left side by the same scheme: back and forth. Next, take the right twig and in the same way throughout the circumference. Increasing the Basket by French Rights you can up to the height you need.
How to weave the edge?

When the desired sizes of the basket are achieved, there is a completely reasonable question about what to complete this work and how. Methods exist in the most different and possibly even that you invent your own. This weaving baskets from the willow assumes the following method of completion. Choose one of the spokes and bend it to the right down, placing two next straight rods, then output in front of the pair of the following and again for one first ago, and then forward. Repeat all this with the rest of the racks. Ends of branches Carefully cut from the inside of the basket. And now you have already received a finished product.
Making a handle

In order to do it, it will take some more time and effort. For the main part of the handle, the basket take a thick flexible branch. Pre-bend it and measure how the value of the handle you need, do trust unnecessary. From the ends of the rod pointer and stick from the opposite sides between the individual rods. Next, prepare thin Willow shoots, 4-5 pcs. from each side. Insert them into the gaps next to the ends of the handle. Wrap the rods of the thick branch several times and the tight of the edge of the basket. Display them out and tighten, and next to insert a thin twig and turn it around the handle braid, and the ends gently hide, as shown in the figure.

This stage is the weaving baskets from willow. Everything is not so difficult and with due effort for everyone.
Spherical basket: how to weave?
It is based on a special framework consisting of a pair of round hoops. Tolstaya Spaled IV Rods are bend on any foundation that has the form of the sphere when they are dried, they will retain this outline. Circles are perpendicular to each other. The horizontal hoop is bonded by a mustache and a thin ventilator. From the opposite sides it is cleaved by a knife. In the resulting gaps are inserted at a right angle vertical hoop, fix with a mustache. The braid is made by ribbies, divided in half. Work starts from the place where the hoops intersect. The scheme of weaving baskets from the willow of this species is somewhat different, however, the principles are the same.

Pay attention to the first photo, it will help you get started right. After 4-5 rows of ribbons are laid at the intersection of the hoop, the ends should be fixed. Between the circles from thick rods lay the ribs from six branches. From the flirt on a simple scheme - on the spiral. As soon as the ribbon is suitable for the edge of the hoop, it is wrapped around him and continue in the opposite direction. As you remove from already ready-made handles, you will need to add new ribs.

Weaving baskets, dishes, furniture and other items from IV Brutes - An interesting and fascinating occupation. Having tried it once, you can hardly stop, and your hands will be drawn to a new job, and creative ideas and ideas will arise in my head.