Salted dough for smearing the recipe for kids. Cozy World - Information Portal
Read also
The best pickup recipes for modeling decorative products There are many pick-up recipes. Recipe 1. For simple figures: 200 g of flour, 200 g of salts 125 ml of water. Recipe 2. Gentle salty dough for filigree treatment (small parts and products up to 300-400 g): 200 g of flour, 200 g of salts, 100 g of potato starch, 150 ml of water. Recipe 3. Solid salt dough for coarse figures: 200 g of flour, 400 g salts, 125 ml of water recipe 4. Classic recipe: 1) 150 GG of water + 1 tbsp. Wallpaper simple glue mix, give glue to solve it well; 2) 200 grams of flour + 200 grams of thin salt + 2 tbsp. (With a riding) of potato starch mix separately; 3) All connect + 2 tbsp. Rast. Oil. Recipe 5. Also classic. Pour into a bowl of 1 cup of shallow salt and 1 cup flour, mix. Then pour 1 tablespoon of vegetable oil and half a cup of water, mix the spoon and place your hands until a homogeneous state just like the usual dough. Water can be replaced with a kissel from starch, then the mass will be much plastic. Kissel is done like this: 1 tablespoon of starch dissolve in 1/2 cup of cold water. And another 1 cup of water heats in a small saucepan to a boil. Pour the starch solution in boiling water, stirring. When the contents of the pan thickens and turn transparent, turn off the fire. Give the sail and pour it into a mixture of flour with salt instead of water. Recipe 6. 200 g. Wheat flour 100 g. Salts 2 teaspoons of cream 1 tablespoon of vegetable oil 300 ml. Water mix flour, salt, cream and oil in a saucepan. Pour water and mix thoroughly, avoiding lumps. Put a saucepan on a slow fire and constantly stir. Initially, the dough will be liquid, then immediately starts thick. Continue to stir up to full thickening. Remove the dough from the heat and the wooden spoon shock it on a smooth surface. Give the test to cool. Check the dough until it is soft and suitable for modeling and will keep well. Recipe 7. For large models (like plates or ceramic tiles): 200 grams of flour, 400 grams of salt, 125 ml of water, 2 spoons of the wallpaper glue recipe 8. For particularly durable products. The best recipe !!! With the product there will be no problems in general! This is a master's recipe from Arbat (unfortunately do not know for details). Instead of water and glue, add bustilat (it is liquid). 1 cup of shallow salt, 1 cup of flour - mix. Add bustylate until the dough is wetted! No water and no flour add during the mixing process! With the use of bustilat, toys will not be chewed, they are not deformed when firing, do not break down when falling - become stone! Dry on a very small fire in a half-open oven. Bustylate (400x423, 30kb) I took the "Bustilat-3", it is even thicker sour cream, as pudding, so kneading the dough is hard, but the result is just wonderful !!! It cannot be compared with anything with a wallpaper glue, nor with PVA, etc. Costs 25 UAH. - 1.3 kg in a plastic can. Malva (120x120, 15kb) Since I tried this recipe, I do not use others! Recipe 9. Dough for drying in air, not in the oven: 200 grams of flour, 200 grams of salt, 2 spoons of wallpaper glue, 125 ml of water. Recipe 10. Dough for drying in the air or in the oven, from which waterproof, unbreakable products are obtained: 1 cup of flour, 1 glass of salt, 1 cup of vinyl glue, 1 tablespoon of molten vaseline, 1 tablespoon of lemon juice. All mixed in teflon dishes on weak fire and interfere. How evenly mixes, cool slightly and you can sculpt. Dry in the oven at a temperature of 50-60 degrees with a root door, if on gas. If the electric oven, then 75 degrees, the door can not be opened. In the microwave it is impossible! At the pallet put better foil silver, because the black surface gives the heat and the figure can crack. The slower will dry, the safer, it does not crack. Under the end, it is possible to give 200 degrees, then the protruding details are seen and will be brown, such an effect is aesthetic. If you do not have the opportunity to burn your product in the oven, be patient. On the battery or in the sun, the product (especially large) is dry no earlier than in a week. After firing or drying, the product from the dough can be painted and varnished. For coloring, you can take acrylic paints, but it is best to use the artistic gouache, in which a little plow glue is added. After drying, this mixture shines slightly and does not pack hands. Use acrylic varnish for varnishing. It is water soluble, non-toxic and dries 6-8 hours. You can also add a dye into the dough itself when it is cooking, cocoa, for example, or turmeric. General recommendations of salt completely in water will not dissolve, its grains will be felt in the test and glitter in the product. Therefore, do not try to dissolve the salt, mix it with flour, and then knead the dough, adding water or bustylate. Any salt is taken, although more often is a large grinding. If the dough it turned out too soft, then do as follows: Mix at the bottom of the bowl of a tablespoon of flour with a tablespoon of salt. Press the test to this mixture, and then doubt it. Apply so until the dough becomes more dense. Put the resulting mass into a plastic bag and place in a refrigerator for 2-3 hours. After that, you can sculpt from the test. If, after classes, you still will remain the dough, then keep it in the refrigerator in a polyethylene package. Sometimes it is recommended to add vegetable oil into the dough for elasticity, but the oil gives the salt dough. Be ready for this! Drying outdoors Drying time depends on the thickness and volume of work and can reach several weeks. Drying outdoors is better carried out at room temperature. Remember: than the product is thicker, the more it will take time. It is recommended to turn the product of a uniform dryer, but if it is with a convex volume ornament, it is impossible. So that the bottom fucked simultaneously with the top, dry the product on the metal grid. In the oven (gas or electric stove). Seeing the crawl first outdoors (2-3 days), then in the oven at a temperature of 50 degrees, gradually increasing the temperature, but not higher than 150 degrees. With too high temperatures, the product may decide, sometimes cracks appear. The unexploded crafts will not be able to correct, and the cracks are easy to smell. To do this, intellite some glasses of PVA, mix well and apply this mass on the crack, then stick this mixture. I will say honestly, I fail without deformations to dry the product in the oven for your gas stove (((landing in air and using this great device http://www.liveinternet.ru/users/yakusha/post226410282 Drying time in the oven electric stove: 1 hour - at 50 degrees, 1-2 hours at 75 degrees, 1 hour - at 100 - 125 degrees, 0.5 hours - at 150 degrees. Board Stretten with food foil, put salted figures from the dough and put in the oven to it Drying. To check whether the figures dried well, you need to knock on them with your finger. If the sound is muffled, then you need to dry, and if the ringing, then, it means, dough is dry. Evenly dried apostle without "raw" spots. On the heating battery. In this way, it is convenient to use in winter when the central heating batteries are well heated. Put the craft onto the foil or fabric and leave on the battery to complete drying. So that the crafts are well preserved, after they are succumbed and painted, cover them about with an inferior liquid varnish. This will reliably protect them from moisture. If you do not like the mirror glitter, then use a matte varnish.
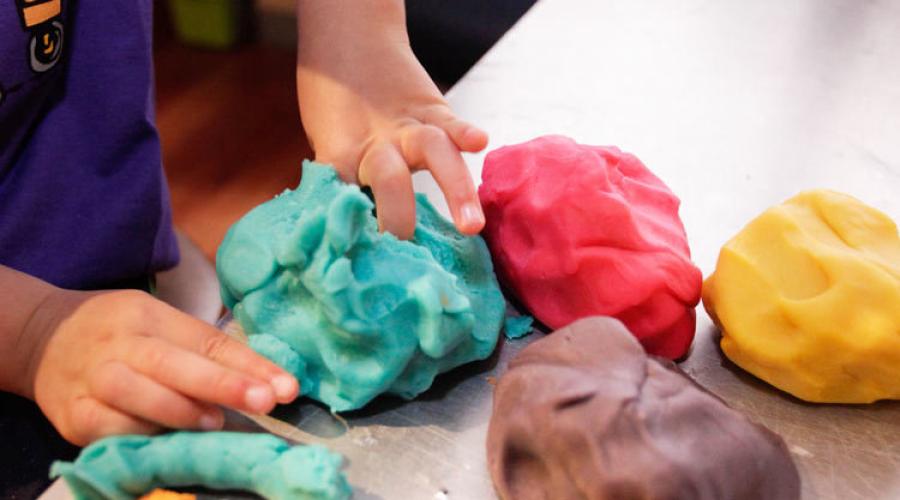
From home "plasticine" creates toys, crafts, souvenirs and even whole pictures, together with the kids. The dough turns out beautiful, elastic, soft and most importantly safe, even for the most young masters! Prepare the original mass under the power of every mom, which has a handful of white flour, a glass of cold water and a little small salt!
How to make dough for modeling - classic recipe
Thanks to the simple composition, the mass is done quickly, and you can immediately begin to occupy! From the finished material, small toys and small crafts are well obtained. We will need:
- Glass of white flour.
- A glass of shallow salt.
- 120 ml of cold clean water.
Dry ingredients are well stirred in the prepared bowl, after which the water is pouring. The dough is intensely smeared until the elastic and militant mass is obtained.
How to make color dough for smearing
Unusual colored dough will cause the baby with a stormy emotion, interest and a great desire to engage in creativity! It is possible to open up a small piece with natural dyes: from carrot juice will be orange, made of beets or cherries - red, if you add cocoa powder - it turns out a brown or beige, from grated spinach - green, and from the resistant tea carcade - blue. But if we are talking about large volumes, it is better to add gouache or a food dye. So, the necessary ingredients:
- 250 grams of sifted white rye flour.
- 250 GR shallow salt extra.
- 1 tbsp. L sunflower oil.
- 150 grams of purified water.
Flour, oil and salt are well stirred, after which the water is added and smeared. Must get soft and plastic dough!

How to make edible plasticine
Yes, yes, it is edible! The novelty came to us from the West and helps parents make a pleasant much more useful - cheer and enjoy your favorite child! Unusual berries, fruits and toys, pose with great pleasure of kids and older babes, but the most interesting thing is that it is all possible to eat! The manufacturing process is extraordinarily simple and can even be reached! Tasty modeling will bring the sea of \u200b\u200bpositive and laughing with the whole family, so rather proceed.
Ingredients:
- 100 grams of admitted not salty drain. Oil.
- 1 st. Composition of fresh fat cream.
- 600 g of sugar powder.
- Pinch vanilla.
- Food helium dye, but you can do without it if the kid is small.
Cooking method:
- With the help of a mixer, we beat the oil and cream to a homogeneous state.
- We gradually fall asleep powder and vanilla, wash the dough.
- The resulting mass we divide into 3 parts, for each drip the required amount of dye and wash again.
- If you do not want to add dyes and vanilla, you can leave "plasticine" white. Dough is ready - the country is fantasy and edible modeling waiting for you!

How to make a custard dough for modeling
In order for the removal of the glitter without a coating varnish, the craftsmen came up with tricks - add glycerin to the dough. Consider an interesting recipe, we will need:
- 2 glasses of boiling water.
- 400 grams of white flour.
- Half of the glycerin teaspoon.
- 2 tbsp. Spoons of wine stones and as many sunflower oil.
- 100 gr. shallow salt, dye.
We make the basis - connect the oil, wine stone, flour and salt. Water must be touched to a boil, after which they pour into it the resulting flour base. Next, add glycerin and dye, cook until the mass becomes homogeneous. The resulting dough must be cooled and read it again, if necessary, you can add some flour.


Methods drying dough for modeling
So that the finished handicraft was more durable and did not crack, it is necessary to dry it. There are many ways, but we will consider the most popular:
- Drying in a hot oven - the craft is placed on a stained baking sheet and put in a preheated oven, not more than 80 degrees. Drying should pass with a dutched door, about 1 hour.
- Drying in a cold oven - all actions are similar to the previous method, only first the crafts put in the oven and only then include to warm it.
- Natural drying is the longest, but proven and the most reliable way of drying. The product is laid out on a wooden or plastic surface and dried within 3-4 days.

The shelf life of home plasticine is exactly a month, keep it only in the refrigerator, wrapped in a food film or putting into a closed container.
"We have already affected the modeling of salt dough. There was a single recipe for the manufacturer of salt dough and all pair of tips. Whereas the modeling of salt dough - an extensive area in which to deepen and deepen. Therefore, the topic Salted Dough - Recipes and Methods - This is the topic in which it is really worth understanding. Especially if you work with it directly, or just want to work with it in the future.
Salted dough - recipes and modeling methods are different and multivariates, as sculpt from salt dough - great pleasure and joy! And therefore, almost every wizard creates its own recipe. And also the name of its technique - testoplasty, boss, biocheramics, mucasol.
So, salted dough recipes
The recipes describe the volume proportions of ingredients. The most commonly used such a simple recipe that is used for simple models - without thin parts and complex work.
- 200 g \u003d (1 cup) flour
- 200 g \u003d (0.5 cup) salts (shallow, not stone).
- 125 ml of water
Please note that the salt is heavier flour, so by weight they are the same, and in terms of volumes, it takes about two times less.
For thin embossed figures, add to the choice:
- 15-20 g (tablespoon) plow adhesive or
- starch (tablespoon)
- glue for wallpaper (pre-stirred it with a small amount of water)
Strong dough for large products:
- 200 g of flour
- 400 g Soli.
- 125 ml of water
Dough for thin works:
- 300 g of flour
- 200 g Sololi.
- 4 tbsp. Glycerin (can be purchased at the pharmacy)
- 2 tbsp. Adhesive for simple wallpaper + 125-150 ml of water to pre-mix.
For the knead, it is better to use a mixer - it will simplify the task, and the dough will get better.
Universal salted dough recipe: 2 cups of flour; You can in flour, without leaving the norm of two glasses, add dry starch. For example, 1.5 cups of flour + 1/2 art. Starch. With the addition of starch, the dough will become more elastic. From such a test, fine details are especially well obtained, for example, flower petals.), 1 glass of salt, 1 incomplete glass of water, about 180 g, you can add 2 table. Spoons of plow glue. Instead of water, you can cook the hubber from the starch.
Mix all components. Knead the dough until the mass becomes uniform and elasticIf the dough is liquid, then you can laugh further by adding flour gradually until it becomes elastic.
Water can be replaced with a kissel from starch, then the mass will be much plastic. Kissel Make this:
One tablespoon of starch dissolve in 1/2 cup of cold water. And another 1 cup of water heats in a small saucepan to a boil. Pour the starch solution in boiling water, stirring. When the contents of the pan thickens and turn transparent, turn off the fire. Give the sail and pour it into a mixture of flour with salt instead of water.
Methods painting salted dough
Torture salted dough can be edible, watercolor or gouache. You can also paint when cooking a test, introducing the dye when the kneading, and the finished product itself - on the surface.
Excellent chocolate color is obtained when adding cocoa. You can experiment with other natural dyes - soot, beet juice, carrots, ocra, etc. It is possible to smooth the product from salt dough into the oven for natural color.
When tinted, it should be borne in mind that, after drying, the color will become less saturated, but if you cover the craft of lacquer - will again become brighter. What varnish can be used? Acrylic and artistic is very good. It is possible to apply the usual construction on a water basis for breathable surfaces. For parquet or wood.
Features and methods for making salted dough:
There are several things that cannot be done with the salt dough. For example, a pancake flour (or flour with any other with additives cannot be added to the salt dough with additives), since drying figures will rise like a good dough for pies and crack.
Also, it is not possible to add salt iodized large intersions not soluble, and the dough is not uniform - into the grain. Similarly, a stone salt is not added without prior dissolution.
About water. So, in the test it is best to use very cold water; You must add 50 ml parts after each addition to mix (due to the fact that for different flour, there may be different amounts of water).
The salt is first mixed with flour, and only then water is poured into the finished mass.
Salted dough is stored in a polyethylene pack or a tightly closing container. Salted dough from the plastic bag is better to get small pieces, as the peak lumps are quickly covered with a crust and with rolling or modeling these dry crusts spoil the appearance.
And one more thing if the figures are thick (more than 7 mm), then after the first stage, it is necessary to remove the test from the test on the reverse side (the drawing is in the book at Cananov, on the page - in the books)
The dough can get too soft. Then do as follows: Mix on the bottom of the bowl of a tablespoon of flour with a tablespoon of salt. Press the test to this mixture, and then doubt it. Apply so until the dough becomes more dense.
Sculpt or cut figures can be right on the contrary. The baking sheet should be predetermined by water, in which case bubbles are not formed between the product and the surface, the surface of the product will be smooth and stable.
All that falls off - just wonderful and the main thing is not noticeably glued with PVA glue.
Pumping or crackling crafts from salt dough occurs in three cases:
- If the flour is incorrectly selected. For greater strength, you can add to the dough of rye flour (the color will be warmer and crackle should not be) (for example, a glass of the usual + glass of rye, 1 to 1), 50 gr. Starch - also give the test elasticity and do not crack. You can also add PVA glue, because it also gives plasticity and does not allow to climb the test.
- If drying is incorrectly performed (see the next section)
If the crackling occurred after painting, this means that the product is not fully dried (the product continues to dry and the air should be used somewhere) Therefore, the surface of the paint or varnish is cracking. Do not rush to paint or cover the product with a varnish, so that then do not regret and not redo.
Frequently asked question: How to dry salt dough?
It is best to dry in the air in vivo, but it is long (full drying can take a week and more - especially if the humidity is high with drying - since the salt pulls moisture), so you can dry in the oven, observing several rules.
- The oven must be at the minimum temperature.
- Ok if drying goes with a dutched oven lid
- It is impossible to put products in a hot oven immediately, the heating should occur gradually. Just like pulling out the product out of the oven, it is better if it cools gradually instead of an oven
- Ideally produce drying in several stages: the hour crashed on the one hand, turned the craft, dries off the inside. I still do breaks between dryers, the hour dries in the oven - the day dries itself - then again an hour and a half in the oven on the reverse side.
Drying time products made of salt dough depends on the thickness of the product itself. As well as from the applied manufacturer's recipe. So, the dough with the content of oil, cream, etc. It dries a lot longer dough without oil-containing additives.
In order to avoid cracking, it is possible to dry in three - four stages, in the oven at the very minimum and necessarily with an open lid at about an hour and a half, then a break of an hour for two - three, or for the whole night, the craft is dry, and then again Turn on the oven to a minimum with an open lid.
With natural and oven drying, the craft must be rotated at each stage of drying. The hour dries the front side, resting, the stage in the stage turned over and dries up the opposite side.
Thus, we lit the main recipes and methods of modeling salted dough.
Successful creativity!

According to the materials http://solo-nebo.narod.ru/recept-s Ovet.html http: //www.mama-pa Pa.com.ua/page/170.html
From 2-2.5 years old, the daughter began consciously interested in salty dough modeling, make various crafts. Then I acquired wonderful and very interesting play-doh sets. However, those jars that went in the set catastrophically lacked, had to look for an alternative. And it so happened that I was not at all satisfied for the purchase analogs in the quality - some were too sticky, others were too hard, it was impossible to roll out, the third crumble, etc. ... Of course, I was interested in the question of how to make salt dough for modeling for children do it yourself at home.
Without thinking, I decided to knead the dough for modeling flour and salt by adding water to the desired consistency. The first experience was quite successful, however, I did not like that the next day you need to add flour and knead again) Because, if the salt took a moisture, then some kind of chemistry occurred and the dough became liquid and sticky. Then the recipe for the "custard" dough on fire was caught, it was necessary to mix dry ingredients, add water and inscribing on the plate. 😌 Everything would be nothing, the dough turned out very pleasant, but the sauceous. 🙁🙁🙁 No matter how hard I tried to interfere, then I had to soak it and launder to launder.
Therefore, I will get rid of you from unnecessary trouble and write a pick-up recipe for modeling, which you will succeed at 100%! ☺ The proportions I picked up a long method of trial and error, but it was worth it!
So, let's go.)
Immediately I will say that for my recipe you will need kitchen scales, if there are no such, it is worth thinking about buying even for the test, because their cost will pay off after 1-2 times its preparation.
How to make salt dough for modeling
Ingredients:
- Flour - 100 gr.
- Salt Extra - 25 gr.
- Lemon Acid - 1 Tea Spoon
- Vegetable oil - 1 tablespoon
- Boiling water - 80 ml.
- Food dyes and flavors - taste and color.

We find a plastic salad bowl in the kitchen utensils or a bowl, the most smooth inside, mix dry components. I note that I grind salt in the coffee grinder - immediately pack, I spend in a jar with a lid and take as needed.
100 grams of flour. I have the cheapest 26 rub. For 2 kg! 😯 Magnet. Normal, by the way flour, white, without surprises. 😁 
25 gr. Salt. Fritting in a coffee grinder or Extra.
1 teaspoon of citric acid. 

Mix well.)

We put the kettle boil. Take a measuring cup, pour 80 ml steep boiling water. 
Add food dyes there. I have kreda. Bought in the store for confectioners, a small collection has been gathered)). I will immediately say that my child is no longer trying to try Mesaore to taste, so I prefer to buy purchased food dyes, they can also be bought on ozone, for example. Colors are saturated. For kids, you can use natural - juices of plants and vegetables. ☺ 

 In the tinted boiling water add one tablespoon of vegetable oil. This stage mandatoryThe oil makes the dough soft, slightly even gentle, elastic.


In a dry mixture of flour, salts and citric acid, we gradually add boiling water and immediately interfere with it. 


Such a lump is obtained immediately after connecting dry and liquid components. In hand, you must take a little carefully, not forgetting that we knew on boiling water. 😊 As you can see, it is slightly inhomogeneous, but it will not for a long time, because It must be elevated). 

The table is sprinkled with flour (no more than a teaspoon), we are first at the same lump, and then wash your palm, somewhere 1 minute. 🙂🤗 

And here it is)) the dough from flour and salt for modeling is ready! It turned out 211 grams.

 You can use after complete cooling, but better the next day. It is possible to store the dough made in this way up to 1 month in a closed container, but it is consumed for several days or even hours. 😁

The dough turns out to be moderately soft, perfectly rolled out, keeps the form. Very reminds purchased Play DOH.


Now you know how to make salt dough for modeling, without leaving home. I hope everything will work out! Creative success. 🎨
I brought a simple pickup recipe for modeling. Superior recipe differs from him next to additional ingredients. I will talk about this in this article. So there is a remarkable analogue of mass for modeling, where instead of flour and salt are proposed to use corn starch and soda. As a result, it turns out a very pleasant and comfortable plasticine - plastic and soft. It turns out beautiful thin products - flowers, magnets, key chains. If you plan to make large products that require additional strength, you can add pva glue, wallpaper glue or bustience to normal dough. But never make a similar mass for the canopy to children!
Ingredients:
- Soda - 2 tbsp.
- Corn starch - 1 tbsp.
- Water - 1.5 tbsp.

You also need a saucepan or frying pan with a non-stick coating and a wooden blade for mixing the mass. Instead of a shoulder blade, you can take a conventional spoon. In this recipe, be sure to use corn starch, since the potato will not give the desired result. So, we embarked in the pan all the ingredients, put on fire and stir.

A few minutes later the mass starts to stick near the bottom and gather in com, because do not stop it to interfere. Ready mass is similar to consistency on a thick cream.

Remove now a saucepan from the fire, lay out the dough on a plastic board or in a bowl and wait a little while it will cool down. There is a small trick here - so that an unnecessary crust is not formed from above, cover the saucepan with a wet towel. After that, lubricate your hands with a fat cream and start to wash the dough.

All, the mass for modeling is ready!

Store it packed in the food film or in a tightly closed plastic container in the refrigerator up to five days.

The finished figures from this plasticine dried at room temperature. You can put them on the battery, settling on the wax paper. Dry the crafts dry very quickly, literally for 1-2 days. Now they can be painted and decorated.
The mass based on soda and corn starch is very beautiful and pleasant. It is porcelain white and products from it are "rich".

In fact, I like such a home plasticine more than salty dough, but here there are features and nuances. So corn starch at times more expensive than ordinary wheat flour. In addition, it is quite difficult to buy. It is not sold in all stores. Also, the starch-based mass is more suitable for fine products, such as colors, and the bulk figures when drying can begin to crack. Therefore, for bulk products it is better to use salt dough.
Superior Corn Starch Dough Recipe
Ingredients:
- Soda - 1 tbsp.
- Corn starch - 0.5 tbsp.
- Cold water - 2/3 of Art.
- Vegetable oil - 1.5 cl.
- Food coloring
- Food flavoring
So, we mix starch, soda, water and dye in the saucepan. We put on fire and stir until thickening. After that, we make a saucepan from the fire and wait until the mass cools down a little, the cover with a wet towel (in this way, you prevent the formation of the crust). After that, add some vegetable oil into it, the food dye and flavor and smear well. If the mass is too soft, add more starch.

Salted dough recipe for rye flour
There is also another interesting recipe for salted dough - based on rye flour. She gives the crafts a wonderful brownish shade, similar to the color of the rustic bread. It should only be noted that rye flour should be confused with wheat flour, otherwise the dough will be too hard and it will be very difficult to make something from it.
Dry the product at room temperature. You can use the oven. But at first, anyway, dry the dough outdoors.
Ingredients:
- Wheat flour - 3 tbsp.
- Rye flour - 1 tbsp.
- Salt "Extra" - 2 tbsp.
- Water - 1.5 tbsp.
Store the mass in a tightly closed container or in the cellophane package. Crafts from rye dough are in interesting texture and color. You can make the original panel into the kitchen in the country style, beautiful vintage magnets or stands under hot.
Recipe for salted dough for modeling plow glue
Ingredients:
- Flour - 1 tbsp.
- Salt "Extra" - 1 tbsp.
- PVA glue
Check the dough on the glue. If glue is too thick, you can add some water.
Recipe with wallpaper glue
Ingredients:
- Flour - 200 g
- Salt "Extra" - 400 g
- Water - 125 ml
- Wallpaper glue - 2 tbsp.
Emboss all the ingredients. Store in a refrigerator in a tightly closed package to one week.
Recipe with bustilat
Crafts from similar material are obtained very durable, they do not break, do not deform and do not fight.
Ingredients:
- Flour - 1 tbsp.
- Salt "Extra" - 1 tbsp.
- Bustilate
Bustilat add so much to get a plastic dough that will not stick to the hands and crumble.
Recipe test with vinyl glue and vaseline
Ingredients:
- Flour - 1 tbsp.
- Salt "Extra" - 1 tbsp.
- Vinyl glue - 1 tbsp.
- Vaseline melted - 1 tbsp. l.
- Lemon juice - 1 tbsp. l.
Mix all the ingredients and warm on low heat. Then mix well, cool and sculpt. You can dry them like just at room temperature and on the battery. After drying, the product is ready for painting and varnishing. For coloring, acrylic paints are ideal and gouache with the addition of PVA glue. For varnishing, you can use acrylic varnish.
Additional natural ingredients
Wonderful salt dough is obtained with the addition of vegetable oil. Just need it quite a bit - 1-2 teaspoon on a glass of flour. Due to this, the mass for the modeling is obtained plastic, soft, militant.
Lemon acid or juice lemon is a good preservative. If you add them to the dough, it will continue much longer. By the way, in foreign recipes, salted mass is often found such an ingredient as a wine stone. It is problematic to buy it problematic, because replace with citric acid.

If you add cinnamon and other spices in the dough, then it will be fragrant. Such crafts can become wonderful ornaments and gifts for the new year. It remains only to sew linen bags for them and give to the holiday to friends.
You can face a lot of either when kneading the test by adding paint into the water, or paint the finished dough, well mixing it. If you decide to make color salt dough, think about what dye to use. If you do plasticine for kids, then use only natural substances, such as spices, cocoa or berries juice. For older children, food dyes are suitable. If you do the dough for school age or adult children, you can add a gouache, watercolor paints, etc.

Food dyes are powder and gel. As I can judge on the basis of my experience, they are well suited to those and those paints. At the same time, the first option is cheaper, and therefore is accessible to most.
If you decide to stop on natural dyes, depending on the need to get one or another shade, we can recommend the following ingredients:
- Turmeric - Yellow
- Paprika - Orange
- Blueberry juice - blue
- Coffee - brown
- Saffron - yellow
- Chile Pepper - Orange
- Coffee - Dark Brown
- Black Currant Juice - Burgundy
- Cranberry juice - pink
- Spinach Juice - Green
- Spirulina - Light green
Drying crafts
After you finish work, dry the product from the dough on a flat surface at room temperature. This is the perfect option in which the crafts do not crack and are not deformed. You can also apply an oven option. Place the products in a cold oven, and then turn it on and set the temperature of about 50 degrees. Keep the doors of the oven open. Dry about half an hour. After that, turn off the oven, and the doors are still open to the complete cooling of the products. Then turn on the oven again. Similarly, the procedure is repeated 4. This allows you to dry products without deformations and cracks. Another drying method is the use of a battery in the heating season.
Decor and decoration of ready-made crafts
When the products are dried, you can begin to decor. To do this, all sorts of paints, beads, rhinestones, beads are suitable. Also often an interesting effect is obtained using stamps, markers, oil pastels. If you take multi-colored napkins and cut pictures, separate the upper colorful layer, and then the resulting fragments are glued to the product, you will get a wonderful artistic effect.

So now you can decide what dough to do, and choose a simple pick-up recipe for modeling, or an improved recipe. Experiment, successful you creativity!