How much virtual memory to set. Swap file: What size to choose, how to increase and change the swap file in Windows
Read also
Hello dear readers! Today we open a series of articles about optimizing a computer on Windows OS. We'll start with something like . In this article you will find answers to such questions: Where is the paging file?; How to properly configure the swap file?; How to set the optimal paging file size for different amounts of RAM?. Go!
swap file (pagefile.sys) is a system file on the hard disk (usually on the system disk) of a computer, which serves as an addition (extension) to the RAM. This extra memory is also called the computer's virtual memory.
Virtual Memory- a method of managing computer memory for executing programs that require large amounts of RAM than is actually on the computer. Such programs get the missing RAM from the paging file. In other words, the paging file offloads RAM during periods of heavy load.
RAM is many times faster than swap file memory. If you simultaneously run several applications in the system that consume a lot of RAM, then the data of unused ones will be unloaded from RAM to a slower virtual memory. Active applications will be served directly by random access memory (RAM). Also, if, for example, a minimized application is expanded, then the data from virtual memory will again be transferred to RAM.
How to customize the swap file and change its size?
Competent, Proper configuration of the paging file will help significantly speed up your computer.. It would be a sin not to use it. Where can you set it up?
- For Windows XP:
Start > Settings > Control Panel > System > Advanced > Performance > Settings > Advanced > Change - For Windows 7/8/Vista:
Start > Settings > Control Panel > System > Advanced System Settings > Performance > Settings > Advanced > Virtual Memory > Change
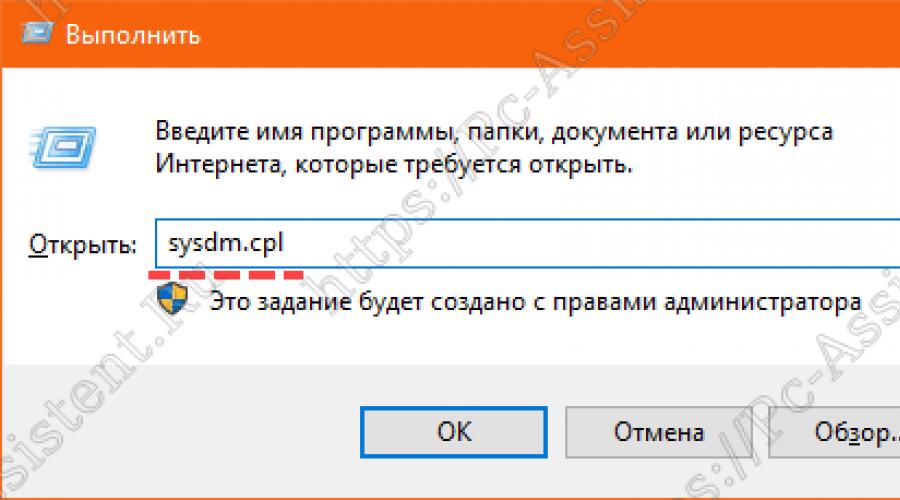
Up to point Performance can also be reached by entering the sysdm.cpl command at the command line Run(command prompt can be opened by pressing WIN+R).

If you did everything right, you should be in the window Virtual Memory.  By default, in Windows 7/8/8.1/10, the size of the paging file is determined automatically by the system itself.
As you can see in the picture, the paging file can be configured for each partition (and each disk) separately. To set your swap file size:
- At the very top of the window, uncheck the box Automatically choose swap file size.
- Select the partition (or physical disk) for which the paging file is configured.
- Put the radio button in the item Specify size , specify the Initial size and Maximum size(indicated in megabytes)
- Be sure to click the button Ask.
To disable the paging file, set the switch to No swap file.
The size of the Windows paging file. Which one is correct?
There are different versions on the account of the optimal swap file size. I will give my point of view on this subject, which is based on my observations and experiences with the swap file on various hardware. It may coincide with the opinions of some IT professionals. I am a supporter of the version that if a computer has 6-8 GB or more of RAM, then paging file can be disabled altogether. I think that large volumes of the paging file only slow down the computer. Of course, if the amount of RAM is less than 6 GB, then of course it is better to set a certain amount of additional virtual memory.
How to correctly set the size of the swap file? The minimum swap file size must be the same as the maximum. For example: 512-512 , 1024-1024 , 2048-2048 is correct padding, while 512-1024 , 1024-2048 is incorrect padding.
The same indicators of the minimum and maximum size of the paging file reduce this file, and this consequently speeds up the process of reading information from it.
Now, depending on the amount of RAM, let's see what size of the paging file you need to set. There are the following examples:
- the optimal swap file size for 512 Mb of RAM is 5012 Mb;
- the optimal swap file size for 1024 Mb of RAM is 4012 Mb;
- the optimal swap file size for 2048 Mb of RAM is 3548 Mb;
- the optimal swap file size for 4096 Mb of RAM is 3024 Mb;
- the optimal swap file size for 8 GB of RAM is 2016 Mb;
- the optimal swap file size for 16 GB of RAM (and more), - no swap file.
Of course, this is a subjective view and these indicators cannot be absolutely accurate, recommended, but in practice they were the ones that gave the effect. You can experiment and find the best combination for your computer. There are some notes here as well.
For example:
- Some applications require a swap file. Disabling it may cause errors in such applications. If you disable virtual memory on the system drive, it will also become impossible to write a memory dump during BSOD's (Blue Screen of Death).
- If, as a rule, you minimize several applications, leaving them running, and switch to others yourself, then here you may also need a large amount of swap file, since the data of minimized applications is written to it. Although, here it all depends on the volume RAM.
Correct location of the swap file. Which disk to include?
If you have several physical disks on your computer, then you need to install the paging file on the fastest disk. It is believed that the swap file is divided into 2 parts:
- The first part on the system disk (partition) (just for writing debugging information during blue screens of death)
- The second part on the fastest drive
In this case, the system during operation accesses the least loaded partition, without touching the first one.
It is also recommended to create a separate partition for the swap file, with the amount of memory equal to or close to the size of the swap file (for example, 2024 MB). This trick allows you to get rid of the fragmentation of this file.
Results:
I hope the tips in the article will help you properly configure the paging file on your computer and optimize its performance. If you have any questions, write in the comments, I will try to give exhaustive answers to them.
Good day, my regular readers, guests of the site, as well as just lovers of gadgets and computers.
Today I noticed that in some games my computer starts to slow down. It seems that the firewood is new and the disk is large and the processor is powerful enough. Everything turned out to be simpler, the geodata of the game did not have enough space. Therefore, I decided to write an article on how to increase the paging file in windows 7.
Why you need a swap file
Any system in both 64 and 32 bits allocates a certain space on the disk in order to convert it into a high-speed cache.
For example, it has a very positive effect on graphics software and is great for games. Especially for those that are online projects with a large map. The card itself is just loaded into the swap file. That is, when moving a character, you do not need to reload the graphics and thereby overload the video card.
How to increase the swap file?
Whatever computer you have, with 8 GB of RAM, 6 GB or 4 GB, you still need to configure the swap file. It is done like this.
We go to Start, and there in Control Panel.


Now you need to go to the bottom line. In advanced properties or system settings.


Now go to the Advanced tab. We are looking for a block performance and press the button parameters.


Now we poke on the tab in addition. We go down to the virtual memory block and poke the button change.


It is advisable to leave the paging file not on the system drive. But this option is not suitable if you have one disk in total implemented in a laptop. In general, go to any local disk and then specify the size. Then we click the button ask.


By the way, here is a video with great instructions.
Where is the swap file located?
Many are interested in where the paging file is located? As I showed above, we ourselves can choose its location. That is, on any logical partition. The file itself will be one hidden segment that cannot be deleted or renamed, and nothing can be done with it at all.
What should be its size?
Here it all depends on the system settings of your computer. Let's say if you have 8 GB of RAM, while there is a hard drive of 50 or more gigabytes, then here I recommend either not setting the swap file at all, or setting its size automatically by the system.
With such power, it is in principle not needed. But if the system is 64 bits, plus 6 GB of RAM, then here I recommend setting the swap size to 9 gigabytes. With 4 GB of RAM - 6 GB of swap, and with 2 - 4 GB of swap. Here is the suggested optimal size.
Conclusion
That's all the useful information.
For everyone who asks questions about what it will give and what it is for (paging system), I will answer simply - it gives a performance boost. That is, you can add power to your PC for free.
That's all, I hope you liked the material and found it useful. Share this article in classmates, facebook and other networks, and also subscribe to updates of publications on my website. All the best to you and see you soon, my dear readers and young programmers!
A paging file is a disk space allocated for the operation of such a system component as virtual memory. It moves part of the data from RAM that is necessary for the operation of a particular application or the OS as a whole. In this article, we will talk about how to create and customize this file in Windows 7.
As we wrote above, the swap file ( pagefile.sys) is needed by the system for normal operation and launch of programs. Some software actively uses virtual memory and requires quite a lot of space in the allocated area, but in normal mode it is usually enough to set the size equal to 150 percent of the amount of RAM installed in the PC. The location of pagefile.sys also matters. By default, it is located on the system drive, which can lead to “brakes” and errors due to the high load on the drive. In this case, it makes sense to move the paging file to another, less loaded disk (not a partition).
Next, we will simulate a situation where it is necessary to disable paging on the system drive and enable it on another. We will do this in three ways - using a graphical interface, a console utility and a registry editor. The instructions below are universal, that is, it does not matter at all from which drive and where you transfer the file.
Method 1: GUI
There are several ways to access the desired control. We will use the fastest of them - the line "Run".
- Pressing a keyboard shortcut Windows+R and write the following command:

- In the window with OS properties, go to the tab "Additionally" and click on the parameter settings button in the block "Performance".

- Next, switch back to the tab with additional properties and click the button shown in the screenshot.

- If you have not previously manipulated virtual memory, then the settings window will look like this:

In order to start the configuration, you must disable automatic swap management by unchecking the corresponding checkbox.

- As you can see, the paging file is currently located on the system drive with the letter "WITH:" and has the size "According to the system".

Allocate a disk "WITH:", put the switch in position "No paging file" and press the button "Ask".

The system will issue a warning that our actions may lead to errors. Click "Yes".

Do not restart the computer!
Thus, we have disabled the paging file on the corresponding drive. Now you need to create it on another drive. It is important that this be a physical medium, and not a partition created on it. For example, you have an HDD with Windows installed ( "WITH:"), and an additional volume has been created on it for programs or other purposes ( "D:" or another letter). In this case, moving pagefile.sys to disk "D:" won't make sense.
Based on all of the above, you need to choose a location for the new file. You can do this using the settings block "Disk Management".
- Launching the menu "Run" (Win+R) and call the required equipment with the command

- As you can see, partitions are located on the physical disk with number 0 "WITH:" and J:. They are not suitable for our purposes.

We will transfer paging to one of the partitions of disk 1.

- Open the settings block (see items 1 - 3 above) and select one of the disks (partitions), for example, F:. Put the switch in position "Specify size" and enter data in both fields. If you are not sure which numbers to enter, you can use the hint.

After all the settings, click "Ask".

- Next click OK.

The system will prompt you to restart your PC. Click here again OK.

Click "Apply".

- We close the options window, after which you can restart Windows manually or use the panel that appears. At the next start, a new pagefile.sys will be created in the selected partition.

Method 2: Command line
This method will help us configure the paging file in situations where, for some reason, it is impossible to do this using the graphical interface. If you are on the desktop, then open "Command line" you can from the menu "Start". You need to do this as an administrator.

The console utility will help us solve the problem. WMIC.EXE.
- First, let's see where the file is located, and what is its size. Execute (enter and press ENTER) command
wmic pagefile list /format:list
Here "9000" is the size and C:\pagefile.sys- location.

- Disable paging on disk "WITH:" with the following command:
wmic pagefileset where name="C:\\pagefile.sys" delete

- As with the GUI method, we need to determine which partition to move the file to. Here another console utility will come to our aid - DISKPART.EXE.

- “We ask” the utility to show us a list of all physical media by running the command

- Based on the size, we decide on which disk (physical) we will transfer the paging, and select it with the next command.

- We get a list of partitions on the selected disk.

- We also need information about what letters all partitions on the disks of our PC have.

- Now we determine the letter of the desired volume. Volume will also help us here.

- We complete the work of the utility.

- Disable automatic parameter control.
wmic computersystem set AutomaticManagedPagefile=False

- Create a new swap file on the selected partition ( F:).
wmic pagefileset create name="F:\\pagefile.sys"

- We reboot.
- After the next start of the system, you can set your file size.
wmic pagefileset where name="F:\\pagefile.sys" set InitialSize=6142,MaximumSize=6142
Here "6142"- new size.

Changes will take effect after a system restart.
Method 3: System Registry
The Windows registry contains keys that control the location, size, and other parameters of the paging file. They are in the thread
HKEY_LOCAL_MACHINE\SYSTEM\CurrentControlSet\Control\Session Manager\Memory Management

- The first key is called
ExistingPageFiles

He is in charge of location. In order to change it, just enter the required drive letter, for example, F:. We click RMB on the key and select the item indicated in the screenshot.

Replacing the letter "C" on the F and press OK.

- The next parameter contains information about the size of the paging file.

Several options are possible here. If you want to set a specific volume, you should change the value to
f:\pagefile.sys 6142 6142
Here is the first number "6142" this is the initial size, and the second is the maximum. Don't forget to change the drive letter.

If you enter a question mark at the beginning of the line instead of a letter and omit the numbers, the system will turn on automatic file management, that is, its volume and location.

The third option is to enter the location manually, and entrust the size setting to Windows. To do this, simply specify zero values.
f:\pagefile.sys 0 0

- After all the settings, you should restart your computer.
Conclusion
We have analyzed three ways to configure the paging file in Windows 7. All of them are equivalent in terms of the result obtained, but differ in the tools used. The graphical interface is easy to use, "Command line" will help you configure settings in case of problems or need to perform an operation on a remote machine, and editing the registry will allow you to spend less time on this process.
In cases where the computer does not have enough RAM, the Windows 7 paging file is used. You will find out where this file is located by reading the article. In addition, following the advice of experienced users, you can determine the optimal size of the swap file required for the correct operation of the OS.
In some cases, this file is not recommended at all, as this will affect the performance of the computer. Therefore, the swap file is sometimes disabled. But first things first.
What is a swap file for?
There are situations when RAM (physical memory) is not enough. For example, you want to install a game that requires 4 GB of "RAM", but you only have 3 GB on your computer. In this case, the OS uses virtual memory, that is, the paging file (hereinafter FP).
It is worth noting that today the cost of RAM is not very high, so it is better to purchase and install several sticks of physical memory, since the virtual one is on the hard drive and it takes longer to read it.

As a result, your computer will "slow down". In addition, due to such loads, the HDD or SDD will be reduced.
However, if you configure the FP correctly, it will not increase, “eating up” free space on the hard drive, and the fragmentation of the hard disk will also be significantly reduced.
By the way, the paging file in Windows XP7 can be transferred from drive C (system) to another drive, although some users do not advise doing this.
Where is the swap file located?
It is located in one of the sections of the hard drive and is called pagefile.sys. This is why, if you want to see it, you will need to activate the visibility of the files as well.

Click "Start" and open the PU. Go to the "Folder Options" section, and then to the "View" tab. Scroll the slider down and check the box next to the "Show hidden files" function. Now click Apply.
Now you can find the Windows 7 paging file. You already know where it is located (partition of the system disk). But you can't do anything directly with it. However, there is another way.
Deactivate the paging file
If you have enough "RAM" installed on your computer, then most likely you will want to deactivate the paging file in Windows 7. To do this, you will need to right-click on the "My Computer" icon and select "Properties". There is another way - the "Start" menu, then enter the PU and open the "System" section.
On the left is a menu where you will need "Advanced system settings". Here you are interested in the "Advanced" tab, subsection "Performance". Click "Options" and select "Advanced" again. Click "Change" and in the window that opens, uncheck the box next to the option to automatically select the paging file. Check the option "No paging file" and confirm the settings by clicking "OK". Restart OS.

So, you have learned where the paging file is located in Windows 7 and how to deactivate it.
Swap file setup
For the correct operation of a laptop or computer, you will need to correctly configure the swap file. First of all, you need to know how much space to allocate for the Windows 7 paging file. You remember where it is located, so you can change its value yourself. Open the "Virtual Memory" section again and click "Specify Size".

Note: the maximum amount of VP should be approximately 2 times the amount of "RAM". It is better to set the initial size to the same as the maximum one. Alternatively, specify the value that is indicated opposite the “Recommended” item.
Another important point is the transfer of the swap file from the disk on which you have the OS installed to another hard drive, which will increase performance.
Now that you know what the swap file is for, optimization shouldn't be a problem.
- It has already been said above that it is better when virtual memory does not take up space on the system hard drive, since it is already loaded. The ideal option is a separate hard drive.
- If possible, install additional RAM sticks so as not to use virtual memory. As a result, the speed of the OS will increase. For the “seven”, 6 GB of physical memory is enough, which will not greatly shake your financial situation.
- Set your swap file size as the system keeps increasing it. This is the reason for the fragmentation of the hard drive. It is recommended that you set the maximum and initial amount of virtual memory to the same value.
By the way, the minimum FP size should not be less than 1 GB to prevent HDD fragmentation.
Conclusion
So, now you understand why the Windows 7 paging file is needed, where it is located and how to set it up correctly. Of course, it would be better not to use a swap file at all, especially since physical memory is not so expensive now. However, if you have an old computer that does not have additional slots for RAM strips, then using a swap file in most cases is a necessity, since modern games and programs use a lot of “RAM”.

As for optimization, you can make all the settings yourself, while following the recommendations of experienced people. It's not that difficult, so you won't have any problems. When communicating with experienced users, ask questions, and you will definitely get answers to them.