Serious drawing plan. Perspective plan Mug according to drawing in the older group "Rainbow of Krasik" Unconventional drawing equipment Planning for drawing in the senior group on GEF
I am glad to imagine an improved and supplemented manual abouthow to learn to draw. I hope that he will cover the majority of questions that I regularly specify in the VKontakte group. For example, such as:
- how to learn to draw on a computer?
- what books on drawing should be examined?
- how can I learn how to draw acrylic, butter, other materials?
I collected the most useful tips from artists from the sitewww.quora.com. and turned out excellent Step by step guide, thanks to which no one can hide the type of type "I don't know where to start, I can't do it, I dozen, etc.," Believe me,
you will finally recognize
how to learn drawingbL!
Just follow this manual step by step and dedicate practice enough time, and you can come from this level of drawing

to that


A little lyrics
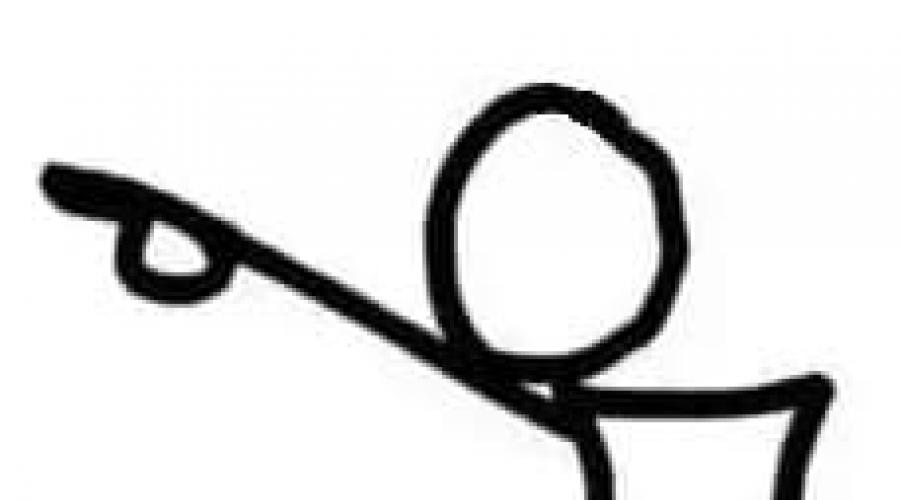
Painting- This is a skill that develops as practices. You are not alone when you think you are terrible in drawing! All the great artists began with drawing figures in the form of sticks like this:
The reason why they went on from these so-called "figures Sticks » something much more is that they had insatiable desire to draw Everything is better and better with each new touch pencil to paper. This desire separated them from the rest, and this is the only reason they have become successful.
First of all, the fact that you decide to devote your time to improving drawing skills is already a great achievement. Why do you ask? This is really important because there should be a passion, interest, curiosity and dedication to the art and creativity, without which the learning process will not be so effective.
So in your case the biggest obstacle is already behind, and you can start drawing, watching things around you! That's how it's simple!
The next steps I'm going to offer should help you find the desired drawing skills, and also show you the way through which you have to go for the sake of desire to become an artist.
But before blindly follow the path below, always remember that you are free to choose your own unique path - the path that is suitable for you. The real task is to regularly practicing with the intention to learnTherefore, it does not matter where you start your way in drawing.
note that each step mentioned below may take weeks, months or even yearsTo achieve perfection in it. It all depends on how really I want to improve your skills and how much effort you are ready to attach.
For each step given below, a lot of materials are available on the Internet, including YouTube. I recommend checking various sources, study different styles and practicing the style that you most suitable.
Let's start!
Step 1. We study ordinary forms
First, take the paper and pencil (or handle), sit at a comfortable position, clean your mind from thoughts and just focus on the task.
Now try to create a simple form.. For example, draw a circleAnd then keep practicing it.
Each time try to draw perfect circle. If you really react to this task seriously, it can take us a few days or even months. Draw a flat circle using only your hands, harder than you imagine.
Just start drawing circles and keep practicing these circles until you reach the stage where you can draw the perfect circle without using any auxiliary tools.
Your attempts will begin with something like this:


After regular training, your coordination of the hands and the eye will improve, and you will start to draw better:


This is a pretty good result. Now move on!
The same way, start working with other basic figures, such as a triangle, square, cube, octagon, etc.
It should take you again for a while. Remember that this is a titanic task if your first drawing was a circle from this lesson.
But after you give a certain amount of time (say, 6 months or one year), as soon as you pass this strict exercise, and when you become a champion in drawing any of the simple figures at will, another interesting line will appear.
At this stage there are two approaches you can follow:
Approach 1 - self-study
You can learn to draw yourself, taking advantage of free articles on the Internet, video on YouTube, books and benefits.
The most easy for assimilation I consider the lessons brand cystler on the book.

After passing all the lessons, you will achieve significant success. However, even by the author and announced a period of 1 month, I would advise you not to hurry and devote at least 1-2 hours for each lesson, performing all practical exercises.
Approach 2 - sign up for art school or online courses
If you do not like to engage in self-learning, I advise you to sign up for paid courses, where you will tell you everything in detail and show, and will also be forced practically.
The most high-quality and interesting I consider courses and master classes at the Veronica Calacheva drawing school.
This school has learning both in the studio and online. There are also useful Free Materialswho.

In this school often pass free webinars Or open lessons to explore for a while.
Register so as not to miss them!
Veronica Calacheva SchoolAnother site with paid, but cheaper drawing courses, which I like - arttsapko.ru. On this site you can also pass some courses for free. There are one-time classes that pass in Moscow.
Arttsapko drawing schoolFurther tips are more suitable for those who chose the first approach and decided to study art art on their own. But your creative way can contain both approaches.
Step 2. Shadows and Shades
Now that you know how to draw simple forms perfectly, let's let's start shadow these forms.
I will continue on the example of a circle.
So, yours first attempt to shading a circle, not understanding how to do it right, it would look like this:

Please note, despite the fact that your image is not too realistic, you have already subconsciously knew about the imaginary light source and placed it in the upper left corner and, given this source, you drew a shadow on the opposite side in the lower right corner.
That is, in order to shadow objects you need common sense and nothing more.
Now keep practicing shading. It may take several months before you get something like this:


Now this circle looks like a bulk sphere.
Further you need to show that the sphere does not hang in the air, but is located on some surface, and you will begin to portray the shadows that the subject throws away to other surfaces. In this case, the drawing should already look something like this:


Always remember one simple rule that has been demonstrated in the figure below:


In addition, continue practicing shading and other forms that you have studied.
During practice, pay attention to how shades vary depending on the availability of light. Look at the tone scale with a hatching from light to the dark below. You can navigate it when you draw a figure.


Keep practicing. This is an infinite process!
Step 3. Perspective
The main law of perspective says:when the object is closer, it looks more and if it needs to be further, it will need to draw less. If you understand this, you understand the basic law of perspective.
Now let's figure it out with the so-calledpoint of departure.
I will explain this concept on the example of Cuba.
When we draw a cube, why the length and width of this cube narrowed to its end or tilted inside the paper? Look at this picture below for reference and ask yourself why it happens?

As you can see, the ribs are narrowing both to the right and left, as if they go inside the sheet of paper. That is how Cuba creates the illusion of "3D" on two-dimensional paper. And this is possible, based on the basics of building a perspective and such a thing asvanishing point.
Now consider the same cube again.
In Cuba, we took the point of departure somewhere far from our eyes to the right and to the left of the cube. That is why the sides narrowed to the inside of the paper on the right and left. In the figure below, it is clearly shown like the edges of the cube, if you extend them, it will comply at one point on both sides. These two points are called points of departure:

Now look at the green point in the following drawing of the cube:

This green point is alsopoint of departure.
Imagine how the cube will look without this concept of the point of departure. It will be more like a square in 2-d.When we draw a cube, it should always be remembered about the point of departure, because it is it that gives us the opportunity to portray the bulk figure.
So, I hope that the concept of a gathering point has become more clear to you, as for any good pattern, which is drawn taking into account the space and the distance between each object, the concept of the departure point must be respected by default.
Here are some more examples of the concept of the point of departure, for your understanding.
- Top view (or view of a bird's eye view):

- Linear perspective (landscape):


- View with many points of depot (any real plot):


Thus, as depicted on the third example, in real scenes, there are usually several points of departure, and these points give the figure desired depth or 3-D effect, and the feeling of space that separates it from 2-d.
Too complicated? Just do not panic now, good? At this stage, it is enough just to understand the concept of a point of departure. Just try to show the point of departure to your drawings without any drawings and measurements.
This "step 3" was only a prerequisite for studying the laws of perspective, just that you know about its importance in drawing. In the course of a brand of a cystler "learn to draw in 30 days," there are several step-by-step lessons on building a perspective, you can start with them.
Step 4. Draw complex forms
Now using your confidence in drawing and shading simple forms, as well as the knowledge of the shadow effect and the point of departure, go to the next level, that is, to drawing various complex forms.
Rules of the game remain the same:
- Keep practicing.
- Observe the nuances.
- Each time try to surpass yourself and not repeat the previous errors.
So, for a start, what about the egg? It is not so different from the circle, right?
Let's just start. Practice until you reach perfection!

Well, it looks like an egg. Now try different fruits. For example, strawberries.

Excellent! It is really a good strawberry. And look at this detail.Strawberry on the last figure looks quite difficult to draw, but we already have experience in shading from "Step 3". This is the same, only on the micro level. Believe me and everything will work out!
The same way, Continue drawing different random shapes with shading. Place the shadow on these drawings, given the effects such as reflection, refraction, transparency, etc. and just continue practicing.
There are many different items around. Learn to draw what you see. This is one of the most important steps to become a professionally artist. Do not worry, if you first do not really get very good. Sometimes, when you start to draw what you see, the beginning of the sketch may look pretty terrible, but the result may turn out to be stunning. So start doing it!
Try to draw two random objects per day. The drawing should be solid: drawing + shading + incident shadow + any other special effect.
Something like what is shown below:

Every day just repeat this process. You are on the right track!
Step 5. Draw a living beings
Since we now know how to draw and shadow various objects with relative accuracy, it's time to draw moving objects and living organisms. Now it is necessary to include in the drawing of the movement of objects, their posture and facial expression, this is a real challenge!
The most important advice is to keep your eyes and mind wide open. You must watch everything around.
So watch all the nuances - walking people, flying birds, dog pose, etc. And when it is possible create a quick sketch This particular position, movement, expressions, etc. And work on the items later in your free time.
You must have something like this:

This is a quick sketch that is performed in minutes. Select in the park or cafe and just sketch people who came across you. In this case, the main thing is not quality, but the quantity. You need to see and pass the object's posture.
Examine anatomy.Yes, the anatomy is the same as in the lesson of biology. It is necessary to study the bones of the skeleton and the location of the muscles. It may seem strange and terrible, but, on the other hand, it means that you can draw a skeleton and a skull for decoration on Halloween 🙂 It will also help in the study of human proportions and body movements. The same applies to animals - read books on animal anatomy. Almost all artistic books on animal drawing will have anatomy section.
Try to start with my article:
Then try to quickly draw several different facial expressions:

Watch and remember the differences in the facial lines. Later, continue adding shadows and make them look even more realistic as here:

Do the same with trees, flowers, animals, birds, etc.

Now that you already know quite a lot, using your surveyed skills you can draw something like this:

Perseverance, difficulties and pain will then lead you here:

And in the case of people (a little better or worse):

And now it's time to make a pause and take a look at the image below, on this beautiful woman. She really looks very beautiful, isn't it?

And if you ask yourself, can you be sure enough that you draw it as beautiful as it is? Most likely, the answer will be big "no", right? If so, then you still have where to strive!
Thus, your drawing is still in the infancy, and there are many opportunities to improve.For example, you will have to work on the details of the human eye and its movement, human hair, their shine, etc. I think you understand what I'm trying to say, isn't it?
So, mostly, at this stage you all the time must surround yourself with these difficulties to move forward, and not stick at the average level.No one will help you in this, besides you!
Step 6. We try different tools and materials
Very good if you know how to draw a pencil, but it will be much more interesting and more useful if you also learn to use ink, paints, markers, pastel, etc. You should try different materialsAt least because you may encounter what you especially like. Add colors to your sketches!

Of course, artistic goods are now expensive, so you should not take professional materials immediately, suddenly they will not let you go and want something else? To begin with, there will be enough tools from the average price category. Now a very large selection of inexpensive artistic materials can be found onAliexpress.
Do not use fashionable artistic boards or moleskins. Buy a large notebook or album with white sheets. Your goal is to make as much as possible the sketches as possible without worrying about spending expensive paper.
Also, if you decide to try yourself in Digital-Art, it is not necessary to immediately take on a licensed photoshop when you can start with free editors, such as MyPaint, Sai, Gimp.

Step 7. Landscapes
Now fold all together. You must start drawing landscapes on which there will be people, plants and many animals. In this step you will have an excellent opportunity to practice your knowledge perspective laws.
To begin with, you can try to draw panoramas, such as a view from your window.Try first drawing landscapes more "rough", for example:

After that, you already detail objects.
After long training, your drawings will be approximately such:

Step 8. Draw from imagination
Start with something simple, for example, from an apple. Just move your pencil on paper, only representing that you draw an apple before drawing it. Then make a quick preliminary sketch to get its shape and form of its shade in proportion to the page. Then start shading and detail.
After try drawing something more complicated, for example, flowers, trees, a glass, handle, etc. Each time you try to choose objects more complicated. In this step, I can no longer give any recommendations except Practice regularly.
Step 9. Form your style
Now you know about everything. At least enough to start developing your own artistic style.Your style should be uniqueAnd you must continue to develop it with enhanced practice.
Please note that I can no longer add anything to this step, because I do not know what your own unique style will be. I can only advise
On the Internet is full of materials that will help you with inspiration and ideas, such as Pinterest, Instagram, Tumblr, YouTube. I recommend to check these sources regularly, study different styles and practicing the style that you most suitable.
Step 10. Improve
This step is about improving to the level where your drawing will be indistinguishable from a photo or real image. Of course, it is optional. But if you are still you wish to bring your skill to drawing in the style of hyperealism, it will also require a lot of practice.
Although pictures that do not distinguish from the photo are signs of amazing mastery of authors who have made a lot of effort, there are equal examples of stunning works that not similar to photos. Therefore, you must also remember this.
Here is an example of a hyperealist drawing:
Every time, when you have free time, sit down and draw something, or train your hatching, tone, etc. There are so many things you want to master - you always need to practice. Draw light items and complex. Draw people in detail or rough lines. Collect everything as far as you can, constantly improve your skills.
Moreover, it is desirable that the practice is accompanied by feedback. It is only necessary that these spectators tell you the truth, so there are no dad and mom on this role.Alternatively, you can upload your work in some art community, or forum. Such a place can serve our
Perspective plan for drawing mug in the senior group "Fantasy"
Unconventional drawing equipment
Purpose:
Develop interest in the creative process, to the desire to achieve the best results, develop the visual creative abilities in children using unconventional drawing technique.
Tasks:
To introduce various ways and techniques of non-traditional drawing techniques using various visual materials.
We instill an interest and love for visual art as a means of expressing feelings, relationships, attachment to the world of beautiful.
Track the dynamics of the development of creative abilities and the development of the visual skills of the child.
Create all the necessary conditions for the realization of the goal.
Develop a sense of form, composition, colors, rhythm, proportions in children.
To form knowledge, skills in the field of visual activities in pupils.
Develop a desire to experiment, showing bright cognitive feelings: surprise, doubt, joy from recognizing new.
Rail up hard work and the desire to succeed with their own difficulty.
Types and techniques of non-traditional drawing.
Given the age characteristics of preschoolers, mastering various skills in different age stages, for non-traditional drawing it is recommended to use special techniques and techniques.
Senior Preschool Children can master the following non-traditional drawing techniques:
Monotype subject
Means of expressiveness: stain, color, symmetry.
Materials: Dense paper of any color, brushes, gouache or watercolor.
The image of the image: The child folds the sheet of paper twice and on one half of it draws half the item depicted (items are selected symmetrical). After drawing each part of the subject, until the paint dried, the sheet is again folded in half to get an imprint. Then the image can be decorated, also folding the sheet after drawing several decorations.
Monotype landscape
Means of expressiveness: stain, tone, vertical symmetry, image of space in the composition.
Materials: paper, brushes, gouache either watercolor, wet sponge, tile.
The image of the image: The child folds the sheet in half. On one half of the leaf, the landscape is drawn, its reflection in the lake, the river (imprint) is obtained. The landscape is performed quickly so that the paints do not have time to dry. Half of the sheet, intended for the imprint, is wiping with a wet sponge. The initial pattern, after the impression is made from it, is animated with paints so that it is more distinguished from the imprint. For monotype, you can also use a sheet of paper and tile. The latter is applied with paint pattern, then it is covered with a wet sheet of paper. The landscape is blurred.
Cleaxography with tube
Materials: paper, mascara either liquid diluted gouache in a bowl, plastic spoon, tube (beverage straw).
Method of obtaining an image: The child scoffs with a plastic paint with a plastic spoon, pours it onto a sheet, making a small stain (droplet). Then the stain blows from the tube so that its end does not touch the spots or paper. If necessary, the procedure is repeated. The missing details are described.
Prints of leaves
Means of expressiveness: texture, color.
Materials: paper, gouache, leaves of different trees (preferably fallen, brushes).
A way to obtain an image: The child covers the wood sheet with paints of different colors, then applies it with a painted side to paper to get a print. Every time the new sheet is taken. Packers in leaves can be drawn with a brush.
Drawing fingers
Means of expressive: stain, point, short line, color.
Materials: Bowls with gouache, tight paper of any color, small sheets, napkins.
A way to obtain an image: The child lowers his finger into the gouache and puts points, specks on paper. Each finger is gaining paint different colors. After working, the fingers are wiped with a napkin, then the gouache is easily flushed.
Drawing palm
Means of expressive: stain, color, fantastic silhouette.
Materials: Wide saucers with gouache, brush, dense paper of any color, large format sheets, napkins.
The way to obtain an image: The child lowers the palm in the gouache (the whole brush) or paints it with a brush (from five years old) and makes a print on paper. Drawn and right and left hands painted with different colors. After work, the hands are wiped with a napkin, then the gouache is easily flushed.
Wax crayons + watercolor
Materials: wax shallow, dense white paper, watercolor, brushes.
Method of obtaining an image: The child draws wax shames on white paper. Then paints watercolor sheet into one or more colors. The drawing of crayons remains not painted.
Candle + watercolor
Means of expressiveness: color, line, stain, texture.
Materials: candle, dense paper, watercolor, brushes.
The image of the image: The child draws a candle on paper. Then paints watercolor sheet into one or more colors. The pattern of the candle remains white.
Spray
Means of expressiveness: point, texture.
Materials: paper, gouache, rigid brush, slice of dense cardboard or plastic (55 cm).
Method of obtaining an image: The child picks up the paint on the brush and hits the brush about the cardboard, which holds over the paper. Then paints watercolor sheet into one or more colors. Paint splashes on paper.
Stick of hard semi-dry brush.
Means of expressive: Texture coloring, color.
Materials: hard brush, gouache, dense paper.
The way to obtain an image: The child lowers the brush in the gouache and hits it on paper, holding vertically. When working, the brush does not fall into the water. Thus, the entire sheet, contour or template is filled. It turns out imitation of the texture of the fluffy or barbed surface.
Nitcography.
Means of expressiveness: color, line, texture.
Material: Pulling thread, paper sheet, paint, brushes.
A method of obtaining an image: Children lay on the half of the sheet of paper scratched in the paint of the threads, close the second half of the paper, holding the sheet sharply pull the thread. You can use threads of different colors.
Drawing on wet.
Means of expressiveness: stain.
Materials: watercolor paper, water, watercolor, soft brush.
To perform work, it is necessary to moisten a sheet with clean water, and then bring an image with a brush or drops. It will work out as if blurred in the rain or in the fog.
Bubble.
Means of expressiveness: color, texture, stain.
Materials: gouache, liquid soap, water, cocktail tube, dense sheet of paper.
In the lid mix 5 tbsp. l. Gouache, 1 tbsp. l. Soap, 1 tsp. Water. Lower into the mixture with a tube and pour so that soap bubbles come. Take a sheet of paper, and carefully touch it to bubbles, as if carrying them on paper.
Crushing with a confused cloth.
Means of expressiveness: stain, texture, color.
Materials: saucer, in which a stamp pillow made of thin foam, impregnated with gouache, dense paper of any color and size, crumpled tissue.
Method of obtaining an image: The child presses a crumpled fabric to a stamped pillow with paint and puts off the paper. To get another color, change and saucer, and fabric.
Fruit prints.
Materials: Any fruits cut in half, saucer with gouache, dense paper.
Method of obtaining an image: The child dipping fruit in a paint saucer and inflicts on paper.
Pointertism (paint drawing).
Means of expressiveness: color, stain.
Materials: tank with gouache, cotton wand, sheet of paper.
Method of obtaining an image: The child dip in the container with paint, cotton wand and causes an image to the sheet. Thus, the entire sheet, contour or template is filled. If necessary, the image is described with a brush.
September (1 week)
Subject: "Butterflies".
Objective: to acquaint children with monotype technique, learn to create an expressive image. Develop figurative thinking, accuracy. Development of monotype technique (subject).
September (2 weeks)
Topic: "Autumn Bouquet".
Objective: to acquaint with this way of image, like a kleaxography, show its expressive opportunities. Learning to teach the details of objects (colors) obtained during the spontaneous image, to give them completeness. Encourage children's creativity, initiative. Mastering the technique of klyaxography.
September (3 weeks)
Topic: "Balloons".
Purpose: consolidate the presentation of children about the color of the manifold, familiar with chromatic (basic) and achromatic colors. Expand the knowledge of the color scheme by introducing new shades, mastering the methods of their preparation. Mixing the mixing of the main colors of paint to obtain new shades, more complex.
September (4 weeks)
Subject: "Compote and jam".
Objective: to introduce children with a new type of visual technique - fruit printing. Exercise in printing. Develop the feelings of the composition light perception, memory, observation. To summarize knowledge about fruits and berries. Mastering equipment printing fruit (writing).
October (1 week)
Topic: "Magic Forest".
Purpose: to bring up interest in autumn phenomena of nature, emotional responsiveness for the beauty of autumn. To introduce a new type of visual technology - "Print Plant".
Develop in children the vision of an artistic image and plan through natural shapes.
Develop a sense of composition, color perception. Development of printing techniques by plants.
October (2 weeks)
Topic: "Motley kitten".
Objective: to introduce children with tytom drawing technique (Pointelism). Learn to draw a gouache with a cotton wand, mix paint and get different shades of color. Develop a sense of wonderful. Mastering the technique Pointelism.
October (3 weeks)
Subject: "Red Currant".
Purpose: to bring up aesthetically moral attitude towards nature through the image of its image in its own creativity. Expand the knowledge and presentation of children about the world around, introduce the appearance of red currant.
To form a sense of composition and rhythm. Learning to combine different techniques in one work. (Schedule, printing with leaves.) Mastering the combination skill, combining two techniques in one work (Pointelism and printing with leaves).
October (4 weeks)
Topic: "Underwater World".
Purpose: to acquaint children with drawing technique with soap bubbles. Continue to teach children to work with gouache.
Rail interest in creativity. Promoting the development - creative imagination, thinking, artistic and aesthetic skills, shallow motility, eyelash, attention. Mastering the equipment of drawing by soap bubbles. (Billet background for the poorer collage).
November (1 week)
Topic: "Multicolored fish".
Purpose: Call interest in drawing with watercolor pencils. To strive to transfer the image of the fish, seek an expressive image. Introduce children with appliances collage. Secure the ability to use scissors, stencils, glue. Develop accuracy, independence. Mastering the skill of drawing with watercolor pencils, technicians collage.
November (2 weeks)
Topic: "Sad time! Ocho charming. "
Purpose: Teaching children ability to reflect signs of autumn corresponding to the poetic lines. Use various ways of drawing trees (spot closed by contour, detailed detail, wood shown by cam, palm).
Develop emotional and aesthetic feelings, imagination. Fasten the ability to distinguish the landscape from paintings of another content. Drawing with palms, fingers.
November (3 weeks)
Topic: "Draw on the template."
Purpose: to expand the representation of children about the structure of complex objects, develop the ability to find the relationship of the main and secondary. Teach children to look at the same shape from different sides, help see the variety of objects, develop imagination. Training in ways of images of different objects to receive out the presence of ready-made patterns of different geometric shapes.
Develop coordination of movements, fine motility hands. Mastering drawing on the template.
November (4 weeks)
Topic: "Invisible animal".
Objective: to acquaint children with candle drawing technique. Continue to learn to draw on the template. Fasten the ability to use various materials, an idea of \u200b\u200bthe composition, a combination of colors. Develop imagination, creativity, independence in choosing a plot. Mastering the technique of drawing with a candle.
December (1 week)
Topic: "Snegiri on branches."
Purpose: To introduce children with a drawing technique, a tight semi-dry brush. Learn to draw bullfinings. Secure knowledge of the winter birds of our Motherland. Educating love and caring attitude towards birds, the idea that everything in nature is interrelated, a sense of responsibility for the world around. Mastering equipment drawing with a dry, hard brush.
December (2 weeks)
Topic: "Winter patterns".
Objective: to introduce children with image methods as monotype (imprint), drawing strings. Show expressive features, features drawing in these ways.
Develop imagination, figurative thinking, color perception, creative abilities of children. Call interest, responsiveness, emotional response to creative activity. Continue mastering monotype technology.
December (3 weeks)
Topic: "Letter for Santa Claus."
Purpose: Create a pre-holiday trick. Learning to portray children their desires and emotions through the drawing, choose and performing work in your favorite technique. Independent work of children.
December (4 weeks)
Topic: "A Christmas tree was born in the forest."
Objective: Continue to teach children with different unconventional drawing methods, introduce a new unusual fine material. Develop a color perception, the ability to select the corresponding color combinations for its composition. Learn to carefully use glue, apply it to the contour of the pattern with a thin flowing. To teach spread the thread exactly along the drawn contour, develop the coordination of movements, a small motorcy of the hands. Drawing threads.
January (2 weeks)
Subject: "Wizard Wizard".
Purpose: to introduce non-traditional spray drawing technique. Learn new ways to obtain images. Develop attention, thinking. Educate accuracy when working. Mastering the drawing technique - spray.
January (3 weeks)
Subject: "Fabulous Winter Forest."
Purpose: Continue to teach children to independently transfer the plot of the winter landscape using non-traditional drawing techniques. Develop the interest of children to visual creativity through the use of non-traditional drawing techniques. Learn to draw a cabbage leaf print. Learning to conceive and include familiar items (Christmas trees, snowmen). Mastering technology - print (cabbage leaf).
January (4 weeks)
Topic: "Snowman family."
Purpose: To introduce children with the technique of drawing an impression cloth. Create a joyful, pre-holiday mood, cause positive emotions in children. Continue to develop fantasy and figurative thinking. Mastering the technique of drawing an impression cloth.
February (1 week)
Topic: "Musical Figure".
Purpose: Develop a feeling of color through music and drawing. Improve the ability to relate color with music, relying on the difference in the most striking means of musical expressiveness (tempo, dynamics, rhythm, etc.) to stimulate the work of children to improvisation with a color spot. Develop composite skills in the layout of the general panel. The work of children on impressions of listening music. Selection of equipment at the request of children.
February (2 weeks)
Topic: "Multicolored sky".
Purpose: Exercise children in wringing on wet paper. Develop a feeling of color, shape and composition. To bring up the desire to admire the phenomena of nature. Mastering the technique of drawing on wet paper.
February (3 weeks)
Topic: "Salt Sea".
Purpose: Teach a new image to design images: Sweeping salt on wet paint to create an image volume.
Continue to develop fantasy and imagination of children.
Create paint drawing skills, the ability to mix on the paint palette to get the desired shade. Mastering equipment drawing with salt on raw paint.
February (4 weeks)
Topic: "Beautiful pictures of multicolored thread."
Objective: Continue to teach children with different unconventional drawing methods, introduce new technique - nitkography (drawing thread). Develop a color perception, the ability to select the corresponding color combinations for its composition, develop fantasy, creative thinking. Development of drawing technology - nitkography.
March (1 week)
Topic: "Lake Landscape".
Purpose: consolidate the knowledge of children about the landscape as a genre of fine art.
Continue to acquaint with unconventional technique of the landscape - monotype, show its visual features, consolidate the concept of symmetry. Tell children to the fact that the landscape can be drawn not only from nature, but come up with himself. Develop the ability of children to create a composition, independently select the color gamut in accordance with the invented plot. Continue meets drawing technique - Monotype (landscape).
March (2 weeks)
Topic: "Transformation of the palm".
Purpose: Improve the ability to make palm prints and draw them to a certain image. Develop imagination and creativity. Drawing with palms.
March (3 weeks)
Subject: "Gift Mom".
Objective: Improve the ability of children in various visual techniques. Develop a sense of composition and rhythm. Independent work of children.
March (4 weeks) "Spring Fantasy" exercise in drawing by the method of erosion of paint on glass and glass outturis on a sheet of paper. To determine what colors uses "Spring", develop fantasy, imagination. Development of drawing technology - writing glass.
April (1 week)
Subject: "Spring tree".
Purpose: Continue to acquaint children with unconventional drawing equipment "Klyaxography". Learning to combine two techniques in one image (claksography and pointelism).
Fasten the ability to use familiar types of technology, to create an image, develop a color perception, a sense of composition, the ability to draw conclusions. Develop the respiratory system, imagination and thinking. Development of drawing techniques - kleaxography, Pointelism.
April (2 weeks)
Topic: "Planets".
Purpose: consolidate the ability of children in the technique of collage. Improve the ability to use scissors, stencils, glue. Develop accuracy, independence. Production details for the future collage, exercise in cutting.
April (3 weeks)
Topic: "Space Dali".
Purpose: Learning to create an image of the starry sky using the mixture of paints, spray. Develop a color perception. Exercise in drawing using this technique and technique collage. Develop the ability to independently position the image on a sheet of paper. Develop a sense of excellent, the desire to create something unconventional. Call an emotional attitude to the image. Mastering technology collage. Continue to master spray.
April (4 weeks)
Topic: "Festive willow".
Objective: To tell why the willow is a symbol of Easter, replenish knowledge about the holiday. To acquaint children with a new drawing material (pastel). Learn to draw the willow on the tonodated pastel paper. Pastel drawing.
May (1 week)
Topic: "Festive Salute".
Objective: to introduce children with new drawing technique - wax crayons + watercolor. To clarify and replenish the knowledge of children about the upcoming holidays (1, 9 May), learning to draw a festive salute, comply with the rules of composition and color flavor. Development of drawing technology - wax shallow + watercolor.
May (2 weeks)
Topic: "Dandelions - Fluffy Miracle of Nature."
Purpose: Continue to develop artistic and creative abilities in children with the help of technology - "spray." Teach the features of the objects of objects with the help of the "spray" technique, develop a small motorcy, color perception, aesthetic perception,
brigade careful attitude towards the nature of art. Continue to master the technique - spray (multi-layered).
May (3 weeks)
Subject: "That's the summer it came."
Purpose: Fasten the ability of children to draw your favorite technique. Develop interest in independent artistic activities. Rise aesthetic feelings, preferabity, accuracy in work, the desire to bring the work started to the end. Independent work, drawing technique for choosing children.
If you are up to 25 and there is an opportunity to spend 5 years, forward to enter an educational institution. If you don't have enough money to enter the budget and work. Many do this and not even died. A young organism can withstand student boys and sleepless sessions, which means that it will endure and combining studies and work.
Also in many educational institutions there is a possibility to sign up for a free listener. Very advise. If you make enough effort, you can negotiate with teachers to go to the production. Try it to ask yet.
If there is no option with study, I think the majority of such a majority, I propose myself into free teachers - advisors. You work - I check. I do not control, I do not rub the tears. I give clear and clear advice.
Of course, I wrote it for averaged newcomer person in vacuum. You can stretch or on the contrary to run ahead of the locomotive, but the minimum needs to be done.
Plan the following days months and years will change and supplemented. I set a goal to make a clear and understandable plan of study. So suggestions, tips and reviews are welcome.
The plan is divided by months. Each month has 4 items. Sketches, art history, plastic anatomy and Training drawing.
About FAQ sketches.
An hour of sketches per day. Why an hour, not 50 pieces, like Yana Frank. Because in the first month you still do not know how to keep the pencil, and the digit will kill you 50. Draw an hour. How much will happen - you are so well done, do not chase for quantities. See how much you get and do more the next day. Now you learn, and do not dial a portfolio.
What to draw? All you see. Your cat, grandmother, husband, beloved man, flower in a pot, neighbors in the subway, colleagues at work, classmates, a mustache on the table and in the house, house outside and inside.
I strictly categorically forbidden to draw with photos and video. The most important thing to draw with living objects. Alive, in the sense of non-photographed. Let's agree to be old-fashioned.
I advise you not to use erasing rubber bands in sketches. Let them remain alive, so faster will become a solid hand.
Pencils Versus handles. If you have the ability to draw liners or markers, knobs with markers so that there is no possibility to fix.
Paper. The most familiar and convenient A5 format is not spent on paper. Conventional print sheets folded in half. But for full-fledged tasks, you need pencils, erasing gum and good paper, the state will end.
What do you need (materials)
Pencils from 2V to 8V.
Flots (suitable common wide painting brush)
Textbook "Basics of academic drawing" N.Li
Paper, lot of paper. The usual writing A5 and A4 and is better and better than Quality A3.
Nature.
Dare!
Plan for a year.
In the plan I give clear and variable tasks. It is best to dedicate classes at least two hours a day, at least three months. An hour of sketches, hour of tasks per day. Then the time itself will be adjusted. Someone will increase to six, and someone plits and throw. This is just 60 hours per month, and this is a little less than two full-fledged labor weeks. Theory and history of arts read in your free time.
How to find time? And simply replace mindless sitting on the Internet for thoughtful learning drawing. The plan will work if you draw every day, literally each.
Put yourself at least and every day a little exceed the plan. The five-year plan in three years is your motto now.
I prohibit a strictly setting to sign academic work, and even more so sell, no customer needs to be deceived. Put the date - put on the shelf. You can give.
In the spring it is time to get out of the film. As soon as the fingers of the hands stop mooring on the street, take any pencils and / or watercolor with paper and a march to draw the street. Go to the parks, to the forest, go out simply into the courtyard.
First month.
Basis foundation. In the first month it is important to realize the importance of the decision to learn how to draw, and realize that all is tlen. Get frightened, cry, get angry with yourself and start. In one month you need to understand the basics of composition, prospects and lighting. Immediately it will not be clear, it will understand at the end. First you just need to know: where to place the object in the sheet, where the light comes from and how the shadow falls, with surprise to learn about the reflex. Love and start seeing the air perspective.
Everything will be described in more detail in the following posts about the first month.
- Draw everything that see. We do not particularly understand it or not. We carry with you a stack of sheets and with any possibility we make sketches. Learning to keep a pencil, process the combat corn. What specifically: cups, your room, kitchen, simple still lifes of two - three items, vases, cats, tables, owls.
- We begin to read the "Basics of Academic Figure" N.L. Right from the first pages. Fear but read. It is necessary and boring. 15 minutes per day is quite enough. Before the head "Studying and image of a man's head" (p. 128)
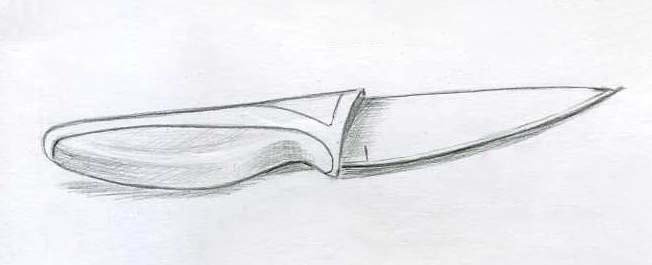
- The task. Light + composition + perspective. "Your city street" - apply in practice science about the future. "Jug with construction" - learn to draw complex objects with simple forms. "Still life from simple figures" - we work out knowledge about the constructive construction of forms and reveal the volumes of lights of light. All this is well described in the textbook.
- Task on the composition. We take any colored paper. Cut different sized triangles, circles and squares. We make 5 works: Static, movement, symmetry, asymmetry, recognizable item from simple forms.
The first fear was gone. The first month passed. We start learning the history of the arts. We take into the hands of the skull, wonder God's plan and conciseness. Take out the outline from January and compare the first and last (for a better effect I advise you to compare the same topics). Differ considerably? Widden progress? I give the floor if the difference between them was harmful. We praise yourself with something forbidden, chocolate there or an extraordinary purchase of a book.
- All the same day at least an hour of sketches. For the second month you are already getting used to. Make more thoughtful. Drawing a person Look at its light-shadow spots. Do not try to do it seems. Learn to see the light and shadow, loop line silhouette. Where is the shadow? Start notice that the windows in the shade on the building are a lighter wall, and on the bright part of the building. Size ratio. and proportions.
- Open the art history textbook. February - a month of antiquity art. Right from primitive art and to ancient Rome inclusive. We carefully study and consider all objects of art. We try to learn to distinguish one statue from another. There's just awesome. Yes, most likely you will become boring. Maybe you will force yourself to read yourself. But we have to. Without history nowhere. Yes, all antiquity for the month. Not scary. You need to run through the basics.
- We start learning the human head. (Page tutorial 128-141, 148-162) Skull (it would be very cool if you can turn in your hands and draw a skull from nature if there is no nature with pictures). We remember all the main bones of the skull. We learn that at night wake and you could answer where there are dark bugs. We look attentive and insane glad to familiar and see the X-ray of their skull. Let's scare friends and become happy.
- The task. Format A3. Play 5 still lifes. Two stop at the construction stage. The remaining three are drawn with lightness. Learning to stroke. Do not rub pencil on paper. We put the right hand, not by Elozim at work. Remember: Dirty Rib Palms - Dirty Work. Bind the sheet of paper or napkin. Katovka from the gum remove the flab and not hand.
The most exciting and pleasant moment comes. We proceed to attentive and thoughtful learning parts of the face. We read about the boring Middle Ages. If at the end of the month you begin to shive from anyone who g. ovivit that loves gothic and villevallSo everything goes as it should.
- Sketches. For the third month, the hand is already harder, it is no longer scary to spend the line and designate the eye just a stain. We look and notice how many different eyes your nose and ears in humans. You can exit, drawing people. It is important to understand the plastic of the face, from which a portrait is built, as it all transmits character.
- Art of European Middle Ages
- Plastic anatomy of man face. (from 142-148, 164-199) We study and understand the structure of the eye, mouth, nose and ears. According to the experience, I know that the most difficult thing for many is a person's ear, many spit on it, and in vain. Poorly painted ear gives a newcomer in the artist.
- The task. Format A3. One portrait, only head and shoulders. We are not very trying to make a person similar (it will not work), now the main thing is to draw correctly, observing the proportion, the rules of construction. If it is difficult to find nature, draw a self-portrait. We put the mirror (preferably great to be visible to the whole head).
This month, we exhaust the construction skills.
- Sketches. Complete outline. We introduce multifigure compositions. Learning to have figures for figures, allocate the fore. We have stains of objects in the sheet.
- Revival
- Anatomy "Gypsum heads". If you do not have the ability to draw Laocoon, Socrates, Hercules, David, Zeus, Venus and Voltaire from nature. That is, two ways. First - make copies from classic drawings of plaster heads (there will be a link to the cloud with pictures) . The second option: Find in the city of monuments, draw from the nature of our leaders, pioneers)) or to resemble museums, search.
- The task. Format A3. Two portraits. One angle, but different light sources. We look at how the person changes if the light comes from different sides. How deep shadows define a certain mood.
Fall in love with Titian, Caravaggio and Durera. From this month we study the most important - compositional sketches. Search and improve composition, material development. Search for life, thinking of the plot and transmission methods. All these are essential daily affairs of any artist.
- Sketches. We begin to make tasks for composite sketches. Five topics for five sketches. We try to solve the tasks of the composition, transfer themes, tone solutions.
- New time. Baroque and Rococco
- Anatomy. Live head. We fold knowledge received before. We understand that the eyes, nose, ears and mouth are not a portrait. These are simply individual parts of the face. The structure and methods of construction are now understandable. It remains to learn everything to fold together.
- The task. Format A3. We find three people and write their portrait. It is advisable to find older people, grandparents. People up to 30 years are not suitable for training portrait. In a smooth face, it is not for what a look clings. No human texture. I assure to draw a young and beautiful face you will still have time. If you do not find three, write from one in three classic angles: in half turn, in three-quarters, FAS.
Sixth month.
Approximately this month you have to start to hide your hands to start drawing pictures, no less. Lifting the creative forces and the opening of the second artistic breathing.
- Sketches. We work on the choice of 2 themes from the previous month. What is meant: We make separate sketches of the details of the overall picture, we work out the angles, improve and try other composite solutions. And we take another three new topics.
- Classicism and romanticism
- Anatomy. Anatomy of hands (upper extremities)
- The task. Format A3. Again looking for nature, draw a portrait with hands. We are looking for such a position of hands that will improve the portrait will complement the character, it will show what only one portrait can show. Three works, better if it is a portrait of one person, solved in three versions. Try to find such positions of the head, torso and hands that will tell your original story.
Seventh month.
Half the path is passed. Praise yourself. No longer afraid to draw in public places and the other day. Always and everywhere with you notepad and pencil. Curiosity and thirst we consider unfamiliar people on the street. I admire noded fingers and fleshy noses.
- Sketches. And again. We work on the choice of 2 themes from the previous month. What is meant: We make separate sketches of the details of the overall picture, we work out the angles, improve and try other composite solutions. And we take another three new topics.
Sentimentalism, Prerafaelism, Historism (Eclectics)
Anatomy of legs (lower extremities)
- The task. Format A3. Draw a portrait in the interior. Sadim to the table near the table / bookshelf / window sill, arrange the objects of the vase of the cups of the cups, which looks like and looks beautiful. Play two such works. We try to allocate the main thing and lower the minor. Show a person surrounded by objects, not a person and objects on one sheet.
Eighth month.
On the eighth month, we begin to study the human torso. We try to understand the mechanisms and fastening of the muscles.
- Sketches. Now it is interesting to get old sketches from nature and draw new in the same angles, compare them. The result will be impressive, I assure. We continue to make sketches from nature.
- Realism
- Anatomy. Plastic torso.
- The task. Format A3. 2 portrait in full growth, one standing, one sitting, preferably nude nature. If there is a loved one - draw it. Srouting your nature that it turns out anyway does not look like, and you will not show it to anyone.
Ninth month.
- Sketches. We come up with 2 of your topics and work in them. We continue to make sketches from nature.
- Modernism and Avangard
- We study the skeleton.
- The task. Format A3. We take the most interesting and worked out of the sketches and draw on a large sheet without using the simulator and references from the Internet. Create a real sketch for picturesque work. Just one work, but so thorough and good so that it was not ashamed to boast.
Tenth month.
- Sketches. Invent your topic and work in it. We continue to make sketches from nature.
- Modern Art.
- Learning the muscles
- The task. Format A3. We make a sketch on the invented theme from the sketches made this month.
Eleventh month.
They got to drawing a person in motion.
- Sketches. Making people sketches in motion. We try to capture through a couple of lines and spots feeling movement. In Kom.positional sketches work on the topics of sports.
- Art of East
- Figure of man / Figure in motion
- The task. Format A3. Draw a full sketch on the topic where there is a movement
Twelfth month.
The year came to an end. You can already praise yourself. We dedicate a month of summing up and drawing up plans for the future.
- Sketches. Draw what your heart.
- Give all the work, admire. Critically inspect each. We solve its value. Can some sketch pour into a real picture? If the sketch or work does not cause any emotions, then just rotate it and throw it away. This is one of the most valuable lessons. You need to be able to get rid of unnecessary, and do not cherish each of your rags. If once you could draw it, then you draw another thousand, and even more.
- We take format A3. And draw a self portrait. Happy and tired man.
- For the sake of the experiment, you can make the same task as in the first month: compositions from simple figures.
I will be very grateful for any help in distributing free and good knowledge.
Develop interest in the creative process, to the desire to achieve the best results, develop the visual creative abilities in children using unconventional drawing technique.
- To introduce various ways and techniques of non-traditional drawing techniques using various visual materials.
- We instill an interest and love for visual art as a means of expressing feelings, relationships, attachment to the world of beautiful.
- Track the dynamics of the development of creative abilities and the development of the visual skills of the child.
- Create all the necessary conditions for the realization of the goal.
- Develop a sense of form, composition, colors, rhythm, proportions in children.
- To form knowledge, skills in the field of visual activities in pupils.
- Develop a desire to experiment, showing bright cognitive feelings: surprise, doubt, joy from recognizing new.
- Rail up hard work and the desire to succeed with their own difficulty.
Types and techniques of non-traditional drawing.
Given the age characteristics of preschoolers, mastering various skills in different age stages, for non-traditional drawing it is recommended to use special techniques and techniques.
Senior Preschool Children can master the following non-traditional drawing techniques:
Monotype subject
Means of expressiveness: stain, color, symmetry.
Materials: Dense paper of any color, brushes, gouache or watercolor.
The image of the image: The child folds the sheet of paper twice and on one half of it draws half the item depicted (items are selected symmetrical). After drawing each part of the subject, until the paint dried, the sheet is again folded in half to get an imprint. Then the image can be decorated, also folding the sheet after drawing several decorations.
Monotype landscape
Means of expressiveness: stain, tone, vertical symmetry, image of space in the composition.
Materials: paper, brushes, gouache either watercolor, wet sponge, tile.
The image of the image: The child folds the sheet in half. On one half of the leaf, the landscape is drawn, its reflection in the lake, the river (imprint) is obtained. The landscape is performed quickly so that the paints do not have time to dry. Half of the sheet, intended for the imprint, is wiping with a wet sponge. The initial pattern, after the impression is made from it, is animated with paints so that it is more distinguished from the imprint. For monotype, you can also use a sheet of paper and tile. The latter is applied with paint pattern, then it is covered with a wet sheet of paper. The landscape is blurred.
Cleaxography with tube
Materials: paper, mascara either liquid diluted gouache in a bowl, plastic spoon, tube (beverage straw).
Method of obtaining an image: The child scoffs with a plastic paint with a plastic spoon, pours it onto a sheet, making a small stain (droplet). Then the stain blows from the tube so that its end does not touch the spots or paper. If necessary, the procedure is repeated. The missing details are described.
Prints of leaves
Means of expressiveness: texture, color.
Materials: paper, gouache, leaves of different trees (preferably fallen, brushes).
A way to obtain an image: The child covers the wood sheet with paints of different colors, then applies it with a painted side to paper to get a print. Every time the new sheet is taken. Packers in leaves can be drawn with a brush.
Drawing fingers
Means of expressive: stain, point, short line, color.
Materials: Bowls with gouache, tight paper of any color, small sheets, napkins.
A way to obtain an image: The child lowers his finger into the gouache and puts points, specks on paper. Each finger is gaining paint different colors. After working, the fingers are wiped with a napkin, then the gouache is easily flushed.
Drawing palm
Means of expressive: stain, color, fantastic silhouette.
Materials: Wide saucers with gouache, brush, dense paper of any color, large format sheets, napkins.
The way to obtain an image: The child lowers the palm in the gouache (the whole brush) or paints it with a brush (from five years old) and makes a print on paper. Drawn and right and left hands painted with different colors. After work, the hands are wiped with a napkin, then the gouache is easily flushed.
Wax crayons + watercolor
Materials: wax shallow, dense white paper, watercolor, brushes.
Method of obtaining an image: The child draws wax shames on white paper. Then paints watercolor sheet into one or more colors. The drawing of crayons remains not painted.
Candle + watercolor
Means of expressiveness: color, line, stain, texture.
Materials: candle, dense paper, watercolor, brushes.
The image of the image: The child draws a candle on paper. Then paints watercolor sheet into one or more colors. The pattern of the candle remains white.
Means of expressiveness: point, texture.
Materials: paper, gouache, rigid brush, slice of dense cardboard or plastic (55 cm).
Method of obtaining an image: The child picks up the paint on the brush and hits the brush about the cardboard, which holds over the paper. Then paints watercolor sheet into one or more colors. Paint splashes on paper.
Stick of hard semi-dry brush.
Means of expressive: Texture coloring, color.
Materials: hard brush, gouache, dense paper.
The way to obtain an image: The child lowers the brush in the gouache and hits it on paper, holding vertically. When working, the brush does not fall into the water. Thus, the entire sheet, contour or template is filled. It turns out imitation of the texture of the fluffy or barbed surface.
Nitcography.
Means of expressiveness: color, line, texture.
Material: Pulling thread, paper sheet, paint, brushes.
A method of obtaining an image: Children lay on the half of the sheet of paper scratched in the paint of the threads, close the second half of the paper, holding the sheet sharply pull the thread. You can use threads of different colors.
Drawing on wet.
Means of expressiveness: stain.
Materials: watercolor paper, water, watercolor, soft brush.
To perform work, it is necessary to moisten a sheet with clean water, and then bring an image with a brush or drops. It will work out as if blurred in the rain or in the fog.
Bubble.
Means of expressiveness: color, texture, stain.
Materials: gouache, liquid soap, water, cocktail tube, dense sheet of paper.
In the lid mix 5 tbsp. l. Gouache, 1 tbsp. l. Soap, 1 tsp. Water. Lower into the mixture with a tube and pour so that soap bubbles come. Take a sheet of paper, and carefully touch it to bubbles, as if carrying them on paper.
Crushing with a confused cloth.
Means of expressiveness: stain, texture, color.
Materials: saucer, in which a stamp pillow made of thin foam, impregnated with gouache, dense paper of any color and size, crumpled tissue.
Method of obtaining an image: The child presses a crumpled fabric to a stamped pillow with paint and puts off the paper. To get another color, change and saucer, and fabric.
Fruit prints.
Materials: Any fruits cut in half, saucer with gouache, dense paper.
Method of obtaining an image: The child dipping fruit in a paint saucer and inflicts on paper.
Pointillism(Drawing with a torsion).
Means of expressiveness: color, stain.
Materials: tank with gouache, cotton wand, sheet of paper.
Method of obtaining an image: The child dip in the container with paint, cotton wand and causes an image to the sheet. Thus, the entire sheet, contour or template is filled. If necessary, the image is described with a brush.
| Month(a week) | Subject | Software content | Type of work |
| September (1 week) | "Butterflies." | To acquaint children with monotype technique, learning to create an expressive image. Develop figurative thinking, accuracy. | Development of monotype technique (subject). |
| September (2 weeks) | "Autumn Bouquet" | To acquaint with this way of image, like kleaxography, show its expressive opportunities. Learning to teach the details of objects (colors) obtained during the spontaneous image, to give them completeness. Encourage children's creativity, initiative. | Mastering the technique of klyaxography. |
| September (3 weeks) | "Balloons" | Secure the presentation of children about the color of the manifold, familiar with chromatic (basic) and achromatic colors. Expand the knowledge of the color scheme by introducing new shades, mastering the methods of their preparation. | Mixing the mixing of the main colors of paint to obtain new shades, more complex. |
| September (4 weeks) | "Compote and jam" | To acquaint children with a new type of visual technology - fruit printing. Exercise in printing. Develop the feelings of the composition light perception, memory, observation. To summarize knowledge about fruits and berries. | Mastering equipment printing fruit (writing). |
| October (1 week) | "Magical forest" | Rail interest in autumn phenomena of nature, emotional responsiveness for the beauty of autumn. To introduce a new type of visual technology - "Print Plant". Develop in children the vision of an artistic image and plan through natural shapes. Develop a sense of composition, color perception. |
Development of printing techniques by plants. |
| October (2 weeks) | "Motley kitten" | To acquaint children with tych drawing technique (Pointelism). Learn to draw a gouache with a cotton wand, mix paint and get different shades of color. Develop a sense of wonderful. | Mastering the technique Pointelism. |
| October (3 weeks) | "Red currants" | Rise aesthetically moral attitude towards nature through the image of its image in its own creativity. Expand the knowledge and presentation of children about the world around, introduce the appearance of red currant. To form a sense of composition and rhythm. Learning to combine different techniques in one work. (Tick technology, printing with leaves.) |
Mastering the skill of combination, combining two techniques in one work (Pointelism and printing with leaves). |
| October (4 weeks) | "Underwater world" | To acquaint children with drawing technique with soap bubbles. Continue to teach children to work with gouache. Rail interest in creativity. Promoting the development - creative imagination, thinking, artistic and aesthetic skills, shallow motility, eyelash, attention. |
Mastering the equipment of drawing by soap bubbles. (Billet background for the poorer collage). |
| November (1 week) | "Multicolored fish" | Call interest in drawing with watercolor pencils. To strive to transfer the image of the fish, seek an expressive image. Introduce children with appliances collage. Secure the ability to use scissors, stencils, glue. Develop accuracy, independence. | Mastering the skill of drawing with watercolor pencils, technicians collage. |
| November (2 weeks) | "Sad time! Ochoes charming » | Teaching children to the ability to reflect signs of autumn corresponding to the poetic lines. Use various ways of drawing trees (spot closed by contour, detailed detail, wood shown by cam, palm). Develop emotional and aesthetic feelings, imagination. Fasten the ability to distinguish the landscape from paintings of another content. |
Drawing with palms, fingers. |
| November (3 weeks) | "Draw on the template" | Expand the presentation of children about the structure of complex objects, develop the ability to find the relationship of the main and secondary. Teach children to look at the same shape from different sides, help see the variety of objects, develop imagination. Training in ways of images of different objects to receive out the presence of ready-made patterns of different geometric shapes. Develop coordination of movements, fine motility hands. |
Mastering drawing on the template. |
| November (4 weeks) | "Invisible animal" | To introduce children with candle drawing technique. Continue to learn to draw on the template. Fasten the ability to use various materials, an idea of \u200b\u200bthe composition, a combination of colors. Develop imagination, creativity, independence in choosing a plot. | Mastering the technique of drawing with a candle. |
| December (1 week) | "Snegiri on branches" | To acquaint children with a drawing technique, a tight semi-dry brush. Learn to draw bullfinings. Secure knowledge of the winter birds of our Motherland. Educating love and caring attitude towards birds, the idea that everything in nature is interrelated, a sense of responsibility for the world around. | Mastering equipment drawing with a dry, hard brush. |
| December (2 weeks) | "Winter patterns" | To acquaint children with images like monotype (imprint), drawing strings. Show expressive features, features drawing in these ways. Develop imagination, figurative thinking, color perception, creative abilities of children. Call interest, responsiveness, emotional response to creative activity. |
Continue mastering monotype technology. |
| December (3 weeks) | "Letter for Santa Claus" | Create a pre-holiday trigger. Learning to portray children their desires and emotions through the drawing, choose and performing work in your favorite technique. | |
| December (4 weeks) | "The Forest Raised a Christmas Tree" | Continue to teach children with different unconventional drawing methods, introduce a new unusual fine material. Develop a color perception, the ability to select the corresponding color combinations for its composition. Learn to carefully use glue, apply it to the contour of the pattern with a thin flowing. To teach spread the thread exactly along the drawn contour, develop the coordination of movements, a small motorcy of the hands. | Drawing threads. |
| January (2 weeks) | "Wizard Winter" | Enjoy unconventional spray drawing technique. Learn new ways to obtain images. Develop attention, thinking. Educate accuracy when working. | Mastering the drawing technique - spray. |
| January (3 weeks) | "Fairy Winter Forest" | Continue to teach children to independently transfer the plot of the winter landscape using non-traditional drawing techniques. Develop the interest of children to visual creativity through the use of non-traditional drawing techniques. Learn to draw a cabbage leaf print. Learning to conceive and include familiar items (Christmas trees, snowmen). | Mastering technology - print (cabbage leaf). |
| January (4 weeks) | "Family of Snowmen" | To acquaint children with technique of drawing prints with cloth. Create a joyful, pre-holiday mood, cause positive emotions in children. Continue to develop fantasy and figurative thinking. | Mastering the technique of drawing an impression cloth. |
| February (1 week) | "Musical drawing" | Develop a color sense through music and drawing. Improve the ability to relate color with music, relying on the difference in the most striking means of musical expressiveness (tempo, dynamics, rhythm, etc.) to stimulate the work of children to improvisation with a color spot. Develop composite skills in the layout of the general panel. | The work of children on impressions of listening music. Selection of equipment at the request of children. |
| February (2 weeks) | "Multicolored sky" | Exercise children in wet paper drawing. Develop a feeling of color, shape and composition. To bring up the desire to admire the phenomena of nature. | Mastering the technique of drawing on wet paper. |
| February (3 weeks) | "Salt Sea" | Teach a new admission of image design: Sweeping salt by wet paint to create an image volume. Continue to develop fantasy and imagination of children. Create paint drawing skills, the ability to mix on the paint palette to get the desired shade. |
Mastering equipment drawing with salt on raw paint. |
| February (4 weeks) | "Beautiful pictures of multicolored thread" | Continue to teach children with different non-traditional drawing methods, introduce new technique - nitkography (drawing thread). Develop a color perception, the ability to select the corresponding color combinations for its composition, develop fantasy, creative thinking. | Development of drawing technology - nitkography. |
| March (1 week) | "Lake Landscape" | Secure the knowledge of children about the landscape as a genre of fine art. Continue to acquaint with unconventional technique of the landscape - monotype, show its visual features, consolidate the concept of symmetry. Tell children to the fact that the landscape can be drawn not only from nature, but come up with himself. Develop the ability of children to create a composition, independently select the color gamut in accordance with the invented plot. |
Continue meets drawing technique - Monotype (landscape). |
| March (2 weeks) | "Transformation of the palm" | Improve the ability to make palm prints and draw them to a certain image. Develop imagination and creativity. | Drawing with palms. |
| March (3 weeks) | "Mom's gift" | Improve the ability of children in various visual techniques. Develop a sense of composition and rhythm. | Independent work of children. |
| March (4 weeks) | "Spring Fantasy" | Exercise in drawing by paint erosion on glass and glass output on a sheet of paper. To determine what colors uses "Spring", develop fantasy, imagination. | Development of drawing technology - writing glass. |
| April (1 week) | "Spring tree" | Continue to acquaint children with unconventional drawing technique "Klyaxography". Learning to combine two techniques in one image (claksography and pointelism). Fasten the ability to use familiar types of technology, to create an image, develop a color perception, a sense of composition, the ability to draw conclusions. Develop the respiratory system, imagination and thinking. |
Development of drawing techniques - kleaxography, Pointelism. |
| April (2 weeks) | "Planets" | Secure the skills of children in the technique of collage. Improve the ability to use scissors, stencils, glue. Develop accuracy, independence. | Production details for the future collage, exercise in cutting. |
| April (3 weeks) | "Space Dali" | Learning to create an image of the starry sky using the mixture of paints, spray. Develop a color perception. Exercise in drawing using this technique and technique collage. Develop the ability to independently position the image on a sheet of paper. Develop a sense of excellent, the desire to create something unconventional. Call an emotional attitude to the image. | Mastering technology collage. Continue to master spray. |
| April (4 weeks) | "Festive Verba" | To tell why the willow is a symbol of Easter, replenish knowledge about the holiday. To acquaint children with a new drawing material (pastel). Learn to draw the willow on the tonodated pastel paper. | Pastel drawing. |
| May (1 week) | "Festive Salute" | To acquaint children with new drawing technique - wax crayons + watercolor. To clarify and replenish the knowledge of children about the upcoming holidays (1, 9 May), learning to draw a festive salute, comply with the rules of composition and color flavor. | Development of drawing technology - wax shallow + watercolor. |
| May (2 weeks) | "Dandelions - Fluffy Miracle of Nature" | Continue to develop artistic and creative abilities in children with the help of equipment - "spray". Teach the features of the objects of objects with the help of the "spray" technique, develop a small motorcy, color perception, aesthetic perception, brigade careful attitude towards the nature of art. |
Continue to master the technique - spray (multi-layered). |
| May (3 weeks) | "That's the summer came" | Fasten the ability of children to draw the technique you like. Develop interest in independent artistic activities. Rise aesthetic feelings, preferabity, accuracy in work, the desire to bring the work started to the end. | Independent work, drawing technique for choosing children. |
Work plan Mug "Magic Paints" in the middle group
Yakovleva Olga Vasilyevna Educator GBOU "School № 842", city MoscowWork description: I offer you a work plan "Magic paints" for children of the middle group (4-5 years). This material will be useful to educators, additional education educators working with middle preschool children. This is a work plan for the use of non-traditional drawing techniques in visual activities, aimed at developing the creative abilities of children.
purpose
Development of creativity in children by means of non-traditional drawing techniques through murguities.
Tasks
Teach use in drawing a variety of materials and non-traditional techniques, different ways to create an image.
To acquaint with genres of fine art, their features.
Develop a feeling of shape, color, rhythm, compositions, proportions.
Educating interest in fine art (non-traditional drawing), aesthetic attitude towards the world around the world, enrich the emotional scope of the child.
Work plan Mug "Magic Paints"
September"Amanitory"
Unconventional technique:Drawing with fingers, background - monotype.
Tasks: Exercise in drawing with fingers. Machine with monotype technique to create a background. Relieve accuracy.
Equipment: Sheets of paper, gouache, brushes, plastic boards, napkins.
"Rowan Branch"
Unconventional technique:Drawing with fingers, background - pastel.
Tasks: Exercise in drawing with fingers. To acquaint with the new material - pastel. Learning to create background pastel. Develop a feeling of composition, color perception. Relieve accuracy.
Equipment: Sheets of paper, gouache, pastel, rowan leaves stencil, markers or pencils (for leaf painting), napkins.
"Apple Compote"
Unconventional technique: Stamp, drawing with a cotton wand.
Tasks: Learning to decorate a can be decorated with a white cardboard using apples printed. Learn to use in drawing cotton wands for image currant berries. Learn to decorate the crawl.
Equipment: Cut silhouettes of white cardboard cans, gouache, apples, cotton wands, brushes. For decoration: Napkins, braid.
"Trees in the fall"
Unconventional technique: Fingerprint with leaves, pen crumpled paper.
Tasks: Learn to draw trees using the leaf print; The sky that fell foliage is a print of crumpled paper. Develop a sense of composition, colors.
Equipment: Sheets of paper, gouache, brushes, trees leaves, print paper, napkins.
October
"Autumn forest" (collective work)
Unconventional technique: Drawing with napkins.
Tasks: Teach children roll balls from napkins, gently glue them to the base. Develop a shallow motor.
Equipment: A sheet of paper tinted in yellow (A-3), napkins (red, yellow), carved silhouettes of trees, glue, brushes, rags, markers (for Dorisovka).
"List Fall" (collective work)
Unconventional technique: Pointelism (drawing by points).
Tasks: Encourage Pointelism technique, learning to draw in this technique. Learning to gently stick the leaves on the overall work. Develop composite skills.
Equipment: Paper sheet toned in blue color (A-3), gouache, cotton wands, cut silhouettes of leaves, glue, brushes, rags.
"Fruits" (still life)
Unconventional technique: Drawing using cotton disks.
Tasks: Machine with drawing technique using cotton disks. Teach Still Life. Develop a feeling of color, composition. Relieve accuracy.
Equipment: Sheets of paper, gouache, cotton disks, brushes, napkins.
"Web"
Unconventional technique: Drawing with a painted ball.
Tasks: Maxue with drawing with a ball. Develop imagination, creativity.
Equipment: Sheets of paper, cover from box, gouache, balls.
November
"White in Dupel"
Unconventional technique: Drawing with palm, fingers.
Tasks: Learning to draw palm, improve the drawing technique with a finger. Develop composite skills. Relieve accuracy.
Equipment:
"My favourite toy"
Unconventional technique: Pointillism.
Tasks: Improve the ability of children to draw with cotton chopsticks. Develop a feeling of color.
Equipment: Sheets of paper with the image of toys, gouache, cotton wands.
"Magic umbrellas"
Unconventional technique: Plasticography.
Tasks: To acquaint plasticism with technique. Develop a feeling of color, shallow motorcy. Relieve accuracy.
Equipment: Sheets of color cardboard, plasticine.
"Kitty"
Unconventional technique: Color a semi-dry rigid brush.
Tasks:Learning to work in this technique. Learn to display in the figure the appearance of the animal. Develop a sense of rhythm, composition. Relieve accuracy.
Equipment: Sheets of paper, hard brush, gouache, napkins.
December
"House"
Unconventional technique:Polyfoam inspisted.
Tasks: Improve the skills in this technique. Develop a sense of rhythm, composition, colors.
Equipment: Sheets of paper, gouache, brushes, stamps from foam.
"Winter tree"
Unconventional technique: Drawing toothpaste.
Tasks: Introduce a new non-traditional drawing material. Relieve accuracy.
Equipment: Color cardboard (black, blue), toothpaste, napkins.
"Fir-tree"
Unconventional technique:Drawing with palms.
Tasks:Improve the skills to draw in this technique. Develop composite skills. Relieve accuracy.
Equipment: Sheets of paper, gouache, brushes, napkins.
"Decorate the Christmas tree beads"
Unconventional technique: Drawing with chopsticks, writing cork.
Tasks: Exercise in the image of the Christmas buses using the drawing of the finger and printing the plug. Teach alternate beads in color.
Equipment: Images of Christmas trees (previous occupation), gouache, corks, napkins.
January
"Beautiful snowflakes"
Unconventional technique: Candle, watercolor.
Tasks: Introduce this technique. Develop imagination, creative thinking.
Equipment: Sheets of paper, candle, watercolor, brushes.
"Snowman"
Unconventional technique: Stamp, drawing with cotton chopsticks.
Tasks: Improve the skills in this technique.
Equipment: Blue paper sheets, carrot stamps, cotton wands, gouache, brushes.
"Winter"
Unconventional technique: Drawing on crumpled paper.
Tasks:Machine with drawing technique on mint paper. Develop composite skills.
Equipment:
"Misel"
Unconventional technique: Nitcography.
Tasks: Machine with technique Nitcography, learning to draw in this technique. Develop imagination, associative thinking.
Equipment: Sheets of paper, gouache, thread.
February
"Decorate mittens"
Unconventional technique: Stone with a rigid brush, drawing with cotton chopsticks.
Tasks: Improve the skills in the technique of a tight brush technique. Learning to decorate mittens using cotton wands. Develop a sense of rhythm, colors.
Equipment: Sheets of paper, gouache, hard brushes, cotton wands.
"Northern Lights"
Unconventional technique: Monotypia.
Tasks: Improve the skills in this technique. Help in creating an expressive image. Develop a feeling of color.
Equipment: Lita paper, watercolor, brushes.
"Come up and Dorisui"
Unconventional technique: Creating images.
Tasks: Teach children to create new images. Develop a creative imagination.
Equipment:Sheets of paper with unfinished drawings, pencils, wax crayons.
"Ship"
Unconventional technique: Plasticography
Tasks: Improve work in this technique. Relieve accuracy.
Equipment: Color cardboard, plasticine.
March
"Flower for mom"
Unconventional technique: Pointillism.
Tasks: Improve the skills in this technique. Develop a feeling of color, composition.
Equipment: Sheets of paper, gouache, cotton wands.
"Magic flower"
Unconventional technique: Pastel drawing.
Tasks: Learn to draw flowers pastels. Develop imagination, feeling color.
Equipment: Sheets of paper, pastel.
"Clouds"
Unconventional technique: Drawing on raw.
Tasks: Introduce a raw drawing technique. Help in creating an expressive image. Develop imagination, observation. Emotional responsiveness.
Equipment: Sheets of paper, watercolor, brushes.
"Spring Sun"
Unconventional technique: Drawing palms
Tasks:Secure the skill to draw palm. Create a cheerful, joyful mood.
Equipment: Image of sky, clouds (previous occupation), gouache, brushes.
April
"Trees look in the puddle"
Unconventional technique: Monotypia.
Tasks: Improve the ability of children to draw in this technique. Continue to learn to create a tree image.
Equipment: Sheets of paper, gouache, watercolor, brushes.
"Space"
Unconventional technique: Groat.
Tasks: Introduce the equipment of the GRUTAGE. Develop composite skills.
Equipment: Prepared base (wax chalk, candle, gouache black, blue), wooden sticks.
"Spring Landscape"
Unconventional technique: Crushing with crumpled paper.
Tasks: Continue learning to draw in the technique of writing paper crumpled paper. Develop a feeling of color, composition.
Equipment: Sheets of paper, gouache, paper for prints.
"Flowering branch"
Unconventional technique: Blowing with a tube, appliqué.
Tasks: Teach children to draw in this technique, complement the work with carved colors. Develop imagination, associative thinking.
Equipment: Sheets of paper, gouache, brushes, tubes, cut flowers, glue, brushes for glue, rag.
May
"Festive Salute"
Unconventional technique: Wax crayons, watercolor.
Tasks: Learning to depict salute using wax chalk, watercolor for the background.
Equipment: Sheets of paper, wax crayons, watercolor, brushes.
"Beautiful butterflies"
Unconventional technique: Drawing palm.
Tasks: Improve drawing technique with palm. Learning to decorate a butterfly using cotton wands. Develop a feeling of color.
Equipment: Sheets of paper, gouache, brushes, cotton wands.
"Butterfly"
Unconventional technique: Monotypia.
Tasks: Continue to acquaint children with this technique. Introduce symmetry (based on butterfly). Develop spatial thinking.
Equipment: Sheets of paper, gouache, brushes.
"Children Protection Day" (poster)
Unconventional technique: Drawing with palms.
Tasks: Secure the drawing technique with palms. Learning to complement the composition with details using different fine means.
Equipment: Watman, gouache, brushes, napkins, wax crayons, pastel, pencils, markers.