Drawing winter window frosty patterns. How to draw frosty patterns on paper? Patterns for patterns
The magic of the beauty of winter with its snow-covered snowdrifts, "crystal" trees, horned snowflakes and merry holidays fascinates not only children, but also adults. Therefore, it is not surprising that children's creativity so often conveys the beauty of winter landscapes. There are many drawing techniques: "splashing", drawing with salt, semolina and even shaving foam. Let's decide what and how best to draw.
The work on the winter drawing is greatly simplified by the materials at hand: special stamps, cotton swabs, toothbrushes, wax crayons, salt and cling film. Let's consider the most accessible techniques.
Snow-covered tree using the stamping technique
Even a preschooler can draw such a drawing. The work uses special sticks made from a piece of cotton wool, bandage and scotch tape.
Sticks, dipping them in white gouache, make "pokes" around the trunk of the tree and at its base. Children can be given ready-made templates.

The basis of the picture is left white or painted over in a blue tint.
 Sorceress winter
With the help of paints and wax crayons, real masterpieces are obtained. On a white sheet, the child applies with chalk any drawing, for example, falling snowflakes or snowdrifts.

Then the paper is covered with paints and the drawing comes to life. For more magic, sprinkle salt on a still wet surface.
 Imitation of snow with semolina
The easiest way to depict a winter landscape is with glue and semolina. It is very easy to work with such material, and it costs much less than colored sand. For work, take colored cardboard, preferably blue or blue. The workplace is covered with oilcloth or newspaper. The drawing is applied to the surface with PVA glue. The theme can be any: a snow-covered forest, a house, falling snow or a spruce standing in a snowdrift. At this stage, small artists may need the help of adults.
 Semolina is poured into a saucer and generously sprinkled with cereals.
 The work is left on the table for a few minutes. Then the sheet is slightly turned over and the remnants of the semolina are shaken off. The pattern will appear only in those places where the glue was applied.

The best winter drawings, photo
Snowmen are essential heroes of winter landscapes. They can be located in the courtyard, in the schoolyard, or stand in pairs.
Cute snowmen

To begin with, two large circles are depicted on the sheet, standing side by side. On top of the balls, two smaller circles are drawn. Noses are applied to the upper balls in the form of the letter "v". A curved long line depicts a common scarf. In the fifth step, draw two lines for the hands and complement the scarf with another curved line.
 Next, on the head of each snowman add "birds" for the eyes and an additional line on the scarf. Then the hands are detailed in the form of sticks and more curved lines are drawn. In the ninth step, they begin to draw an oval for the general hat and the convex lines of the outer part of the scarf.
Step 10 involves drawing two smaller ovals for the top of the hat and more curved lines for the inner arm. The inner sticks of both snowmen are angled downward to form a "V" shape. Add two vertical lines to the hat.
 At the twelfth step, the upper left half of the "heart" -arms and three buttons on each snowman are depicted. Finish the "heart" and draw a circle over the hat for the bird. Ovals for the eyes are depicted inside the circle (step 14). In steps 15 and 16, the bird should have wings and a nose. At the end, the work is decorated.
Winter snowfall
The next work involves drawing a snowfall that suddenly hit the village. Many people are intimidated by drawing landscapes, but there is nothing difficult about it. The basis of the drawing is made up of snowy hills that covered the house and the visible forest, so they are outlined at the very beginning of the work.

A house is depicted on the right top, and three large spruces are in the foreground. In the distance you can see smaller trees (they are applied in triangles), a snowman and a path leading to the house.
 Then they draw the contours and detail the objects: a cylinder and hands are added to the snowman, windows, doors and smoke are drawn on the house, going into the sky. To add dynamism, the space is filled with falling snowflakes.
 The work is decorated. To more accurately convey the beauty of the night landscape, the drawing is performed in dark and gray colors, and a full moon is added to the sky.

Winter forest in gouache
An example of a drawing, when seasonal changes in nature are shown in one work. The paint is applied on a white background.
Painting with gouache involves the application of several layers: background, forest and only when dry - white snow.

Winter landscape in pencil
With the help of a simple pencil, only a true master can convey the beauty of a winter forest.

Winter morning in the village
The work is done with paints. The pink shade of the trees conveys the magic of the rising frosty rays of the sun.

Winter cat drawing in stages
The cat sits against the background of the lunar window, so only its main outline is visible. To work, you need gouache in dark shades (blue, green, red and black). A cat figure is placed in the center of the sheet. Her head is slightly turned to the left. The animal is located on the windowsill, so the shape of a frame with a handle is applied to the right.

The sky is set off by mixing blue with black or blue with green gouache. You can add a little red. The clouds are made lighter at the top and slightly darker at the bottom. A yellow circle of a lantern is being drawn near the house.
 The house is covered with a blue-gray color, giving yellow highlights from the lanterns on the facade.

Shown in yellow are windows and lampposts.

A hard brush is dipped in thick white paint and the trees and ground are “covered” with snow.

Then white is mixed with blue and applied to tree trunks.

Using a toothbrush, spray white paint over the window. A transparent curtain is drawn on the left. For this, white paint is diluted with water to a watercolor state.

The cat is painted over in black and blue tones, placing glare from the light of lanterns along its contour.

Winter patterns drawing step by step
It seems that intricate frosty patterns are difficult to transfer to paper, but they are not. There are many drawing techniques, but let's focus on the simplest ones.
Pattern application with a brush
The surface of the sheet is coated with blue paint. The brush is dipped in a white shade and paint is sprayed over the blue surface. The edges of the pattern are decorated with a brush.

Foam pattern
A three-dimensional frosty pattern is obtained using shaving foam. A small amount of the product is squeezed onto the sheet, the edges are leveled with a ruler over the surface.

In several places, dots are made with blue paint, and then curls are drawn with a brush.

Cover the work with a clean sheet and press lightly. The winter pattern should be imprinted on the second surface. The impression is removed and dried.

Unusual pattern
The work is performed on a white surface. Curls are applied to the paper with a pencil, and then pass over them with the tip of a candle.
 The surface is moistened with a damp brush and covered with blue paint.
 The places where the candle passed will remain white.

Winter drawings about sports, step by step
It is not so easy to transfer an image of a person to paper, especially when he is in motion. In the work, you should adhere to certain proportions and initially make a sketch with a pencil, and only then work with watercolors.
Figure skater
First you need to study a photo of a real skater, which will serve as a hint. Below are the steps for drawing a girl. The work begins with the bending of the body, then they complement it with a head and a dress.

Skier
The figure of a skier descending a mountain is drawn from a sketch. One of the athlete's legs is slightly raised, while the other is on the track.

Hockey player
Below is a simple diagram for drawing a hockey player. The work begins by drawing the bend of the body and head, then drawing out the details of the costume and adding a club with a puck.

Winter window drawing, in stages
The beauty of the snow-covered streets can be admired from the window. The working background of the picture is usually painted over in a light blue color, you can attach pieces of plastic film on top. This will give the work a special magic.

The drawing is applied with whitewash in various techniques, for example, leaf imprinting, spraying or poking.
 And the subject matter of the work can be different, it all depends on the desire of the author.

When the view is completely ready, white stripes are glued to it, which serve as a window frame.
Examples of children's work done in different techniques.


Winter Palace drawing, in stages
Palaces are usually associated with magic and have many small details: turrets, small windows, roof tiles and high fences.
An example of a palace from a square

The drawing is painted in white, blue and gray tones, sparkles can be applied.

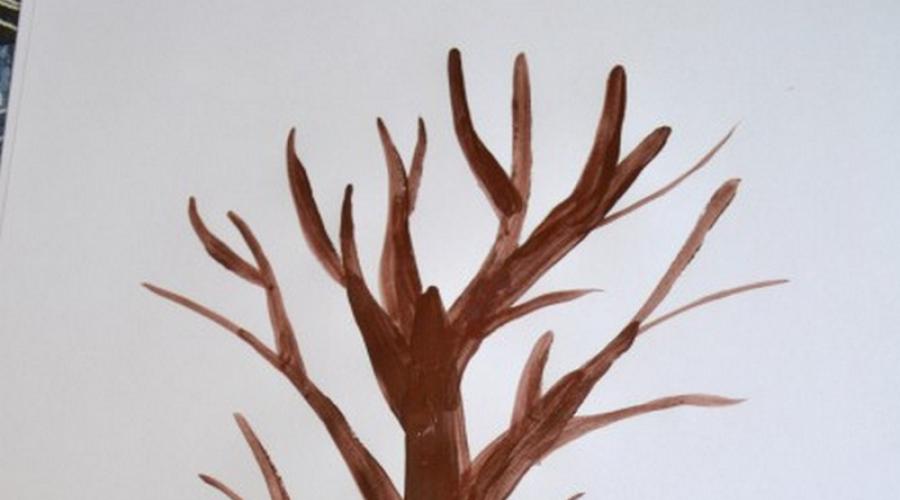
Winter oak drawing, in stages
Oak is a powerful tree with a spreading crown, so the drawing must necessarily convey its strength. The winter state of the tree is emphasized by cold tones. The background of the picture is made in one color with a gradual lightening with white paint.

It is better to blow out the trunk of a tree with a tube of brown blot. It will turn out to be slightly inclined from the wind.

The sponge is dipped in white paint and frost is applied around the tree.

You can add a snowdrift visible in the distance and another mighty tree.

Drawing winter forest, in stages
Before starting work, you need to remember what is the peculiarity of the winter forest? At this time, blue and purple shadows lie between the trees over the pristine sparkling snow. And the dark needles of spruce only emphasize the severity of the cold pore.
The paper should be slightly wet before applying blue and cyan ink. Then turn the sheet to one side to get streaks.
 On the left, in the foreground, the trunk of a mighty oak is depicted, surrounded by small bushes.

 With a dark green tint, two spruces are depicted aside.
Winter games drawing in stages
To convey the winter fun of children, you need to portray the guys on the street. A winter walk involves children's looks, dressed in overalls. We will draw them with the palm of our hand.
The left palm is applied to the surface, while the thumb is slightly pulled to the side.
 Then the ring and middle fingers are separated to form a "birdie" between them.
The work is turned over, a semicircle for the hood is drawn at the top. One more hand is added to the right. It can go up or to the side, it all depends on the author's idea.
On the edges of the jumpsuit, ovals for boots and mittens are drawn. The eyes, mouth and nose are applied to the face.
 The contour of the drawing is covered with wax crayons, which makes it easier to work with watercolors.
The jumpsuit is made bright with many small details.

Drawings for sketching winter views
For those who do not know how to draw at all, ready-made templates can be used in their work. They are kept in front of the eyes and gradually transferred to the surface. Any winter landscape will come to life with a little imagination and patience.


 It seems that winter landscapes are boring and monotonous, but each work has its own charm, conveying the personal view of the author. They are fabulous and non-agile, dazzling snow-white and somewhere a little sad.
If, on the eve of the New Year, the weather outside your window is not entirely frosty and snowy, and you really want to admire real winter landscapes, then there is a simple and original way to achieve this without any special costs. Frankly speaking, this method is quite relevant even when winter pleases with its beauty to the fullest. After all, frosty drawings on the windows for the New Year are always fun, beautiful and festive! In addition, it is a simple and affordable option to quickly and originally decorate glass in your home, kindergarten, school. As a rule, in order to draw New Year's drawings on the windows, paper templates and stencils are used. As for the materials used for this purpose, stained glass paints, gouache with a brush, artificial snow in a spray can are ideal for drawings on glass. By the way, the latter can be replaced without any problems with regular toothpaste / powder and an old brush. More ideas and examples in step-by-step master classes with photos of drawings on the windows for the New Year 2018 Dogs on.
What can be quickly and simply drawn on the windows for the New Year in kindergarten - a master class with a photo
There are a lot of options for what you can quickly and simply draw on the windows for the New Year in kindergarten. But we want to offer you a drawing that will not take much time to design and will be one of the most budgetary options. Learn more about what you can quickly and easily draw on the windows for the New Year using stencils in kindergarten from the lesson below.

The necessary materials to quickly and easily draw on the windows in kindergarten for the New Year
- Toothpaste
- kitchen sponge
- duct tape
- new year stencils
- skewer
Step-by-step instructions on what and how to draw simply on the windows for the New Year in kindergarten

How to draw frosty patterns on the window for the New Year with toothpaste - a lesson with a photo step by step
The next technique for drawing frosty patterns on the window for the New Year with toothpaste is even easier than the previous one. In addition, it is also a very fun way to usefully spend time with children, who will gladly take part in such decoration. Read about how to draw frosty patterns on the window for the New Year with toothpaste in the step-by-step lesson below.

Materials needed to paint frosty patterns on the window for the New Year with toothpaste
- Toothpaste
- old toothbrush
- paper snowflakes
Step-by-step instructions on how to draw frosty patterns on the windows for the New Year with toothpaste

Beautiful drawings on the windows for the New Year 2018 in gouache and a brush, a step-by-step lesson with a photo
With a brush and gouache, you can also draw very beautiful drawings on the windows, dedicated to the theme of the New Year 2018. Since the very technique of applying gouache on windows does not differ from the usual method of drawing, we will show it using an example with paper. And you, having mastered on paper a beautiful drawing with gouache and a brush for the New Year, will cope with the image on the window without much difficulty.

Necessary materials for a beautiful drawing on the window for the New Year 2018 in gouache and a brush
- gouache
- small flat synthetic brush
Step-by-step instructions for beautiful drawings for the New Year 2018 with gouache and a brush on the window with your own hands

Original drawings on the windows for the New Year with do-it-yourself glue paints - a step-by-step master class with a photo
Glue paints are ideal if you want to decorate windows for the New Year with your own hands with original volumetric drawings. In the absence of such paints in stores in your city, you can easily make them at home. To do this, mix gouache, PVA glue and starch in equal portions. The finished mass should be poured into a convenient tube with a spout and you can start applying the original drawing with your own hands on the windows with glue paints for the New Year.

Necessary materials for the original drawing on the window for the New Year with do-it-yourself glue paints
- new year stencils
- glue paints
- baking paper, clear file, or cling film
Step-by-step instructions for original drawings with glue paints for the New Year with your own hands on the windows

Thematic drawings on the windows for the New Year 2018 of the Dog, stencils and templates
Since the upcoming New Year 2018 will be held under the auspices of the Dog, it is logical that themed drawings on the windows, which can be applied using stencils and templates, will be especially relevant. It is believed that any image of an animal symbol in the house contributes in every way to well-being, prosperity and good luck throughout the year. In addition, themed drawings on the windows for the New Year 2018 Dogs (stencils and templates below), like real watchdogs, protect their owners from everything bad. Therefore, if you want to draw a New Year's dog on your window, then take a closer look at the options for the drawings that we have collected in the selection below.


What original can be drawn for the New Year 2018 at school on a window, glass (photo)
Decorating school windows with drawings on the eve of the New Year is a fairly common creative practice. Often there are even whole competitions between classes on the topic of whose office windows can be called the most festive and beautifully decorated. Therefore, the question of what original can be drawn for the New Year 2018 at school on windows and glass is relevant for many students. If we consider that children's imagination has no boundaries, then there can be a great variety of options for such New Year's drawings. And to inspire your creativity, we suggest taking a look at a selection of original pictures that you can draw on the glass / window at school for the New Year.


Frosty drawings on the windows for the New Year 2018 with toothpaste - templates and examples
Since toothpaste is very similar in appearance to frost in its external characteristics, it is quite actively used to apply frosty drawings on windows on New Year's Eve. The templates and examples that you will find below are a direct confirmation of this. Most often I use toothpaste to simulate frosty patterns, but it is also suitable for painting snowy landscapes and other New Year's pictures. By the way, for the manufacture of such drawings on the windows, you can use not only paste, but also tooth powder. It should also be diluted with water in a ratio of approximately 1: 1. The consistency of the paint should be fairly fluid, but with intense color. To apply frosty drawings on windows for the New Year 2018 with toothpaste according to a template, you can use a brush or foam sponge.


What to draw on glass with stained glass paints for the New Year at home, video in stages
Frosty drawings on the windows for the New Year 2018 Dogs at home, at school, kindergarten, you can also draw with stained glass paints, which are ideal for working on glass. Unlike the technique with toothpaste, brush and gouache, working with stained glass paints requires certain skills and strict adherence to instructions. In order to draw a thematic drawing on the glass with stained glass paints for the New Year at home, you can use ready-made templates and stencils with symbols. Also, these paints are suitable for drawing subtle frosty patterns and small details. You can see the step-by-step process of working with stained glass paints on glass using the example of the video tutorial below.
The snow outside the window is a great excuse to take a brush in hand and depict all the beauty of a winter-winter. Show the little ones a few ways to draw snowdrifts, crystal trees, horned snowflakes, fluffy animals, and let the winter drawers bring joy to creativity and decorate your home.
Music for which masterpieces are created
So, turn on pleasant background music and ... draw winter with the children!
We draw with "snow"

mtdata.ru
You can imitate snow in the picture in different ways.
Option number 1. We draw with PVA glue and semolina. Squeeze the required amount of glue straight from the tube, if necessary, you can smear it with a brush (if you plan to close large surfaces). Sprinkle the image with semolina. After drying, shake off excess cereals.

www.babyblog.ru
Option number 2. Draw with salt and flour. Mix 1/2 cup of water with 1/2 cup of salt and the same amount of flour. Stir the "snow" well and draw winter!

www.bebinka.ru
Option number 3. Draw with toothpaste. The toothpaste perfectly plays the role of "snow" in the drawings. It can be tinted with watercolors or gouache if you need to get a color image.

Drawings with white paste on dark paper look beautiful. And they Smell delicious!

The most popular toothpaste has won, perhaps, because it is easily washed off, so you can draw with the paste on glass. Feel free to take the tubes in your hands and let's decorate mirrors, windows and other glass surfaces in the house!
 polonsil.ru
Option number 4. Draw with shaving foam. If you mix PVA glue with shaving foam (in equal proportions), you get an excellent "snow" paint.

www.kokokokids.ru
Option number 5. We paint with salt. If you sprinkle salt on a drawing circled with PVA glue, you get a sparkling snowball.
Drawing on crumpled paper
An unusual effect will be obtained if you draw on pre-crumpled paper. The paint will remain in the creases and form something like a crackle.
We draw with stencils

img4.searchmasterclass.net
Stencils make drawing easier for those who “don't know how” (as it seems to them). If you use several stencils at the same time, you can get an unexpected effect.

mtdata.ru
Leaving the part of the image covered with a stencil unpainted, you can pay more attention to the background: sprinkle salt on the still wet surface, apply strokes in different directions with a hard brush, etc. Experiment!
 www.pics.ru
Several sequentially superimposed stencils and splashes. It is convenient to use an old toothbrush or a stiff bristled brush for this purpose.

www.liveinternet.ru
A knitted snowflake will help you create real lace on paper. Any thick paint will do: gouache, acrylic. You can use a spray can (spray from a short distance strictly vertically).
We paint with wax

Wax drawings look unusual. Using a regular (not colored) candle, paint a winter landscape, and then cover the leaf with dark paint. The image "appears" right before your eyes!
Who are you? Seal?

masterpodelok.com
The effect of fluffy wool will help to create a simple technique: dip a flat brush in thick paint (gouache) and apply strokes with a “poke”. Drawings with white paint always look better on a dark contrasting background. All shades of blue are great for winter motifs.
How to draw winter trees

www.o-detstve.ru
The crowns of these trees are made using a plastic bag. Dip in paint and blot in the right places - that's the whole secret of "snow caps" for trees.

cs311120.vk.me
Finger drawing is suitable for kids. Dip your index finger in thick gouache and generously pour snow on the branches!
 masterpodelok.com
Extraordinarily beautiful snow-covered trees are obtained using the cabbage leaf. Cover the Chinese cabbage leaf with white gouache - and voila! Such painting looks especially impressive on a colored background.
 www.mtdesign.ru
No cabbage - it doesn't matter. Any leaves with pronounced veins will do. You can even donate your favorite ficus. The only BUT, remember that the juice of many plants is poisonous! Make sure your child does not taste his new brush.

ua.teddyclub.org
The trunk is a handprint. And everything else is a matter of minutes.

www.maam.ru

orangefrog.ru
A favorite technique of many is blowing paint through a straw. We create "Snowy" using fingerprints of a little artist.
 www.blogimam.com
Not everyone will guess how this charming birch grove is drawn. The resourceful artist used masking tape! Cut the strips of the required width and glue them onto a white sheet. Paint over the background and remove the paint brushes. Draw on the characteristic "lines" so that the birch trees become recognizable. The moon is made in the same way. Thick paper is suitable for these purposes, the tape should not be too sticky, so as not to damage the top layer of the picture.
Draw with some bubble wrap
 mtdata.ru
Apply white paint to the bubble wrap and apply it to the finished drawing. So it started snowing!
 mtdata.ru
The same technique can be used in applications.
The snowman has melted. It's a pity…

mtdata.ru
This idea is suitable both for the youngest artists and for those who want to make a present "with humor". Cut out “spare parts” for the snowman from colored paper in advance: nose, eyes, hat, hands-twigs, etc. Draw a melted puddle, wait for the paint to dry and glue what is left of the poor snowman. Such a drawing can be an excellent gift for loved ones on behalf of the baby. More ideas in our article.
We draw with palms

www.kokokokids.ru
An easy way to create an amazingly touching New Year card is to tell a story about funny snowmen. A whole family will turn out if, on the basis of a palm print, you draw carrot noses, eyes-coals, bright scarves, buttons, twig hands, hats on your fingers.
What's outside the window?

ic.pics.livejournal.com
What does the window look like from the street side? Unusual! Invite your child to look at the window through the eyes of Santa Claus or another character who may be on the street in the fiercest cold.
Dear Readers! Surely you have your own "winter" drawing techniques. Let us know in the comments.
The festive atmosphere and solemn mood largely depend on the furnishings and interior. That is why decorating a home before certain holidays has long become a tradition.
This is not only a way to make the interior special, but also to bring the whole family together for a common occupation.
Creating a New Year's Mood
One of the most anticipated holidays is the New Year. Every house is changing. A traditional Christmas tree, garlands, figures of Santa Claus and Snow Maiden appear.
One way to create a festive and dreamlike atmosphere is to apply frosty patterns to the windows.
This is not at all difficult to do, there are many ways to create such a decor. In addition, all family members can take part in the process.
Preparation for decorating windows with patterns
Before getting down to business, you need to prepare. Depending on how you create and apply frosty patterns on windows, you may need:
- Paper.
- Scissors.
- Stationery knife.
- PVA glue.
- Paint brush.
- Small sponge.
- Toothbrush.
- Toothpaste.
- Soap.
- A little glitter optional.
It is not at all necessary to arm yourself with all of this, without exception. In some cases, 2 - 3 elements from this list are sufficient.
Ways to apply a picture to windows
In this case, several options are possible.

It is not necessary to make a choice in favor of one of the methods. They can be very well combined.
The process of creating a frosty pattern on the window with your own hands
The technique of drawing a picture on glass directly depends on the skills and wishes of the creator:

This method is perfect for those who have the necessary drawing skills.
- If you are using frosty patterns on the window, you can also use a brush. She can sketch the cuts completely, with a dense layer. Then the drawing will turn out to be clear and traced.
- If you want to get a more delicate image as a result, then you can dilute white toothpaste with a little water. You need to dip a toothbrush into the resulting mixture. And then run your finger along the bristles, creating splashes and directing them onto the glass.
It is necessary to continue until the drawing is completely formed. You can apply the mixture in several layers until the color becomes more saturated.
- The same toothpaste mixture can be applied with a sponge. It needs to be dipped in toothpaste diluted with water. It is advisable to remove excess mixture so that there are no smudges.
Then apply a sponge to the glass, as if blotting. Translucent ornate traces are obtained, which will become frosty patterns on the window.

By the same principle, you can use a solution of water with gelatin, and ordinary salt instead of "snow".
As you can see from the description, the process is not complicated. If there is absolutely no experience in drawing and home art, then there is nothing wrong with using drawings and images from the Internet.
Patterns for patterns
Templates are most often used to decorate window panes. With their help, you can create almost any drawing that will look beautiful and neat.
Many ready-made templates can be found on the internet. It is enough to print them, cut them out and use them as intended.

But you can do it all yourself. To do this, it is necessary to think over the entire composition completely: what size the pattern will be, in which part of the window it will be located, etc.
This will help determine what size the paper sheet should be. Now you can apply the drawing. It is advisable to do this with a simple pencil so that you can correct it.
When the drawing is ready, you can start cutting. The finished template can be reattached to the desired location to make sure it matches the idea.

A stencil (or template) is easier to use when it doesn't move. To do this, you can moisten the paper in soapy water and attach it to the window.
Now draw frosty patterns on the window, filling all the cutouts in the template with white flowers. When the paper is dry, it should be easy to remove it from the glass. The template lends itself easily and does not spoil the drawing in any way.
The advantage of a template is that it can be reused. At the same time, the frosty pattern is repeated in exactly the same way as many times as necessary.
It is very convenient. For example, if you need to decorate several windows of the same room. Or the composition is repeated as planned on all windows of the house.
Vytynanka on the windows
This is one of the very interesting ways to decorate glass. The frosty patterns on the windows are a separate drawing or composition cut out of white paper.
This decoration method requires thorough preparation. It will take more time to draw and cut. Then all that remains is to fix it all on the glass.
As with templates, you can find ready-made drawings. Or show your imagination and apply the pattern on the paper yourself.

This type of creativity has its own characteristics. Therefore, it is recommended that novice craftsmen first make a small drawing in order to understand the principle of work. Especially if a ready-made solution is not used.
Vytynanki on the windows usually look brighter, as they are clearly delineated.
Ideas for drawings on windows
A wide variety of images can be applied to glass. For example, large and ornate patterns that completely fill the space of a window glass. Or small neat drawings that are located only in the corners of the windows.
Also, the picture can be with clear boundaries and completely painted over. Or it will be a light translucent pattern.

Often, a white splash background is applied to the glass. And on top they are already painting with white paint or paste with a brush. The process is more time consuming, but everything looks very beautiful.
Or, on the same white background, you can paint with the back of the brush. In this case, part of the applied composition is erased from the glass and a pattern remains in the form of transparent lines on a white background.
You can use your own ideas or take inspiration from photos of frosty patterns on the windows.
Drawing patterns on windows with children
Children are happy to take part in the process of decorating the house. Drawing frosty patterns on the window is no exception. At the same time, the process perfectly develops the imagination and fine motor skills of the hands.
If the child is old enough and can use the scissors on his own, then it is worth letting him show his imagination and independently create a template (or apply a drawing).

If very young children are involved in the process, then they cannot do without the help of their elders. It should be borne in mind that out of curiosity, kids often try to taste the "frosty pattern".
In this case, it is advisable to use sweet edible syrups (for example, sugar dissolved in water) instead of a soap solution. And powdered sugar instead of "snow".
To make the drawings of frosty patterns on the windows beautiful, and the application process does not cause trouble, it is advisable to adhere to some recommendations:
- Clean the glass surface well beforehand. This will help the drawing lie flat and hold for a long time.
- Smudges or image errors are easily erased from the glass. So the drawing can be corrected at any stage of creation.
- It is better to fix frosty paper patterns on the window with soapy water. PVA glue will take longer and more difficult to wash off.
- Small and complex design details are easier to cut with a utility knife.
- When using a utility knife for cutting, it is recommended that you place a piece of wood underneath to avoid damaging the table surface.
- The entire process from start to finish can take a long time. It is recommended to think over and prepare in advance templates, protrusions and everything you need. And then devote a separate time to drawing on the windows. Thus, this activity will not get bored and will only bring pleasure from joint creativity.
- If a composition of a very large size is conceived, then you can compose it from fragments. Especially if it is a template or vytynanka. It is difficult to cut and mount very large images.
Master class in drawing "Winter patterns".
Anastasia Sergeevna Kovtonyuk, second year student of the Kostanay Pedagogical College of the Education Department of the Akimat of Kostanay region, Republic of Kazakhstan.Supervisor: Syzdykova Bakyt Saparbekovna, teacher of physics and mathematics, Kostanay Pedagogical College, Education Department, Akimat of Kostanay region, Republic of Kazakhstan.
Work description: This work examines the attentive attitude of people to the world around them, describes the beauty of nature, the ability to depict the beauty of nature on paper with a simple pencil and gouache on tinted paper. This work is intended for teachers, club leaders, students of grades 1-6 of schools in the preparation and conduct of extracurricular activities dedicated to the world around them, the season is winter.
Target: develop in children a sense of beauty, the ability to comprehend the life around them, to depict the beauty of winter nature on paper.
Tasks: to cultivate a respectful attitude towards the surrounding world.
develop the ability to build a composition and sketch a drawing on a sheet of paper (A3);
develop the ability to create new colors by mixing paints.
Tools and materials: A3 sheet of drawing paper.
Simple pencil, eraser.
Gouache paints.
Paint brushes.
Glass for water.
Epigraph:
And the window glass seems to be kissing
From Winter maiden, every day a gift,
The silver of the picture is bright like a ray of the sun.
O. Esin
The world around us is full of amazing wonders, but we often do not pay attention to them. Admiring the clear blue of the spring sky or the bright colors of the sunset, we don't even think about why the sky changes color with the time of day.
Outside the window - blue sky, white clouds ...
Clouds are accumulations of tiny water droplets and ice crystals.
Light, meeting with a micro-droplet of water, is reflected from its surface.
This allows the sunbeam to remain in its original color palette, that is, white, while coloring the cloud molecules white.
The microscopic size of cloud elements - drops or pieces of ice - allows them to stay in the air for a long time.
For sunlight to reach the earth, it needs to break through a huge layer of air. During the passage of light through the air, the rays begin to scatter, and this process occurs more intensively with the blue color, since the wavelength of blue light is the shortest.

In order to paint a picture, we must first place the image correctly in the center. Draw a sketch of the future image with a simple pencil.
Who applied the complex ornament
At the window of any apartment?
It's all one artist.
These are all his paintings.

Next, we start working in color. For this image, I used paints such as gouache and dark tinted paper, which can still be replaced with cardboard. On such darker paper, the image appears more contrasting, brighter. Colors: brown, green, white, blue. We usually start with darker tones and gradually introduce lighter ones. For window frames and the landscape in the background, medium-sized brushes are suitable, but for patterns we need a thin brush.
Winter draws patterns for me,
And the window glass seems to kiss,
From Winter maiden, every day a gift,
The silver of the picture is bright like a ray of the sun.

We begin to paint the landscape outside the window. In order to achieve a heavenly color, by mixing colors of blue + white in an unequal amount, there should be a little more white than blue. After drying, we introduce white color in order to depict clouds, snowdrifts, snow on Christmas trees, as well as glare on window frames.
All drawings are different, the skill of creation,
And with a strong frost, more inspiration,
The girl will not get tired of creating pictures,
Till Spring will cover with a snowy feather bed!
Now winter has come
silvery,
Covered with white snow
the field is clean.
Happy ice skating with children
everything rolls around,
At night in the snowy lights
crumbles ...
Writes a pattern in the windows
ice needle
And knocks on our yard
with a fresh herringbone.

After we have generalized our drawing, we can proceed to detailing. We start by drawing more clearly the patterns on the window. Using a thin brush and white gouache, we try to convey whimsical patterns with smooth lines.
Whirling around easily and clumsily
The snowflake sat on the glass.
The snow was thick and white at night -
The room is bright with snow.
Slightly powdered volatile fluff,
And the winter sun rises.
Like every day, fuller and better,
A fuller and better new year ...
Winter pictures
The aunt is walking the puppy.
The puppy parted with the leash.
And now on a low level flight
The crows are flying after the puppy.
The snow is sparkling ...
What a little!
Sadness, where have you gone?
The frost is bursting. The rivers froze.
Birches tremble by the river.
It's warm here. In a hot oven
Lights crackle.
They will burn, and soon, soon
In a cozy room warmth
Fine patterns will melt
On painted glass.
Who draws so skillfully
What a miracle dreamer
Ice drawing is sad:
Rivers, groves and lakes?
Who applied the complex ornament
At the window of any apartment?
It's all one artist.
These are all his paintings.
Gambling in a wide field
And tired of wandering in the forest,
Santa Claus out of boredom, or something,
I decided to climb into a warm house.
But scared people
The door was locked
And Morozko - come what may -
He climbed through the window to them soon.
But there was a barrier too -
Glass was everywhere in the windows
And Morozko with annoyance
I decided to harm people.
He estimated with a sly eye,
I took brushes, whitewash, enamels -
And by morning all the glass of the windows
The light was not allowed into the house.
It is twofold more interesting to observe natural phenomena, knowing the reason for the appearance and development of certain phenomena. Thanks to such a wonderful science as physics. It is very informative to find answers to the mysteries of nature.
Winter. A magical time of the year. When to observe changes in the environment
One of the beautiful things: the patterns on the windows. How fabulous these patterns look, like an artist, frost paints these wonderful pictures.
Since childhood, I liked to admire frosty patterns. I tried to portray this phenomenon of winter on paper. But like any child, it did not quite work out. Looking at the window today inspired me to try to portray it on paper. In addition to the patterns, I depicted a landscape that can be seen from the window. But I focused on the frosty patterns, which I was able to repeat, remembering my children's drawings.
Frosty patterns on the windows ...
As the air cools, its moisture content decreases. Frosty patterns on glass form when humid air is cooled to the freezing point of water, that is, to 0 ° C. At this temperature, excess moisture contained in humid air condenses on cold surfaces. In this case, the water crystallizes, that is, it turns into the smallest ice crystals. Water contained in humid air, at 0 ° C, passes from a gaseous state to a crystalline one.
Why do ice crystals form bizarre patterns?
There are irregularities and scratches on the glass surface that are invisible to us. Ice crystals are formed on them. Crystals are deposited one after another, on top of each other, and amazing unique patterns are obtained.
In addition to the irregularities of the glass, dust particles on the glass surface and air currents are involved in drawing patterns.
Patterns are formed if the humidity of the air is increased, and the cooling of the glass began even at a positive temperature and continued with a further decrease in temperature. In this case, a water film forms on the glass, which crystallizes upon freezing. Most often, this process begins at the bottom of the glass, because more water accumulates there under the influence of gravity. That is why the patterns in the lower part of the window are larger, and the higher, the thinner and smaller the ice twigs.
If the glass is evenly moistened during cooling, that is, it is covered with an even film of water, then the patterns are approximately the same in size over the entire surface of the glass.

Now apply the colors with a thick, slightly damp brush, as if we were spraying color. To achieve this result, we can replace the brush with a sponge.
Snow and snow patterns
In the field - blizzards of talk,
Cold, semi-darkness.
Day - skates, mountain, sleigh,
Evening - grandmother's tales.
Here it is - winter!
Winter is decorated:
Fringe on the headdress
From transparent pieces of ice
Snowflake stars.
All in diamonds, pearls,
In multi-colored lights
Pours around the radiance
Whispers a spell:
-Lie down, soft snow,
To forests and meadows
Cover the paths,
Fluff the branches!
On the windows, Santa Claus,
Scatter crystal roses
Light visions
Tricky plexus.
You blizzard, chudi,
Round dances of the backwater
Soar like a whirlwind white
The field is gray!
Sleep, my land, sleep
Keep your dreams magic:
Wait, dressed in brocade,
New dawn!