I would never have guessed to use colored crayons in this way! It turns out a fascinating decoration .... Such ordinary and unusual wax chalks that can be made of wax chalk
Encausky is drawing with wax crayons, melted on the surface of a hot iron. Such a simple device will help create amazing paintings, master an interesting needlework.
What is Enkauska?
This art implies the creation of paintings with the molten wax of various colors. Such work is still found on excavations of ancient Greece. Early Christian paintings and now retain their bright colors.
To work it will be needed:
- paper;
- iron;
- wax pencil.
Drawing wax: Necessary equipment and materials for Enkautics
You can depict anything. If you are a novice artist, then you will be abstract pictures. If you have experience in creating crafts, then you can depict clear landscapes.

The main material that is required in the work is art wax with colored pigments. It is sold in specialized art stores. If it is not possible to purchase such a wax, then use crayons for drawing and wax pencils. They can be purchased at the Stationery Store.
You will also need:
- glossy dense cardboard;
- soft cloth for polishing;
- lining on the desktop so that it remains clean in the process of work.

If there is no such possibility, then use the usual household iron, but it must be a small size, have a sole without holes and a temperature controller.
You will need toilet paper and napkins or a cloth, these materials need to clean the sole of the iron to change the wax color to the new one.
If you have a hairdryer, in which you can adjust the temperature, then you can apply it. Then use wax pencils as materials.
If the Enkauska becomes your constant hobby or even a source of income, then you will need to buy a special heating rod that has the name of the causary. It will help to portray small details and suitable patterns.

Encaustics for beginners
For those who only decided to master this interesting technique, it will be useful to find out which techniques can be used when working, this is:
- smoothing;
- the work of the edge;
- print;
- work nose.
When the material acquires such a consistency, it will be necessary to carry out the iron on the surface of the paper, but without pulling it into it, so as not to burn. A trace of the desired form should remain on the sheet.

Working an edge allows you to create various strips. This technique is used to draw grass, flowers. First you need to act in the same way as in the case when you put an impression in the technique of smoothing. Now put iron iron on this drawing to get a strip of the desired length. Surplus wax remove with a soft cloth.

In order to use Enkauska technique, to do in the drawing of the residence, you need to apply paint on the paper basis, and then put the iron sole on it for a few seconds. At the same time, it should lie like a blade, they can not be shred.

To create small pattern details, you need to dip the tip of the iron in the molten wax, and then attach it to the canvas in the right place.

Enkaausky - Master Class with photo
Now that you have learned the basics of this art, it's time to move to a practical lesson. It will be slightly, under the power of beginners.

Take:
- wax pencils;
- white tight cardboard sheet;
- glue;
- hair dryer in which the temperature can be adjusted.
Pencils should be the same size, if any of them are longer, cut them back from the side rod to compare with others.
Fold up the top of the sheet with glue, attach here the wax blanks tightly to each other with the edge down. When the glue dries, bring the hairdryer to the tips of wax pencils, turning it on the strongest power. At the same time, the blanks will have to start melting, and the wax will gradually drain down.

If you need strict vertical lines, then keep the cardboard sheet in the usual position. If you want to achieve interesting special effects, then turn it out of side.

If you are satisfied with the resulting result, then put work on the horizontal surface and wait for your masterpiece.

Such an art object will decorate the dwelling or will be an unusual gift for the new year or another holiday.
The next master class will create a beautiful abstract picture.
For the implementation of the conceived will be required:
- dense paper;
- a small iron without holes on the sole;
- wax pencils;
- paper that can be displayed working surface.

Now bring the iron to the paper sheet and begin to promote it horizontally into one and the other way. Try so that while the color stripes as little as possible crossed each other and mixed with each other.

As you understood, the principle of smoothing was applied. Now you need to use the ottis method. To do this, press the iron to the surface to leave uneven prints on it. You can make some more posts on each to achieve an interesting effect.

Wait for the picture in the technique of ENKAUSTIC slightly cool and tell the surface with a soft cloth in about a minute.

The inexperienced spectators are unlikely to understand what you have made this job, beautiful and very spectacular. After you work out on simple samples, you can move to more complex.
Enkauski - master class for experienced
If you have all the necessary tools, then the work should not seem too difficult to even crafts with small experience. That's what you need:
- cooking surface;
- iron;
- paper;
- foam;
- the cloth.

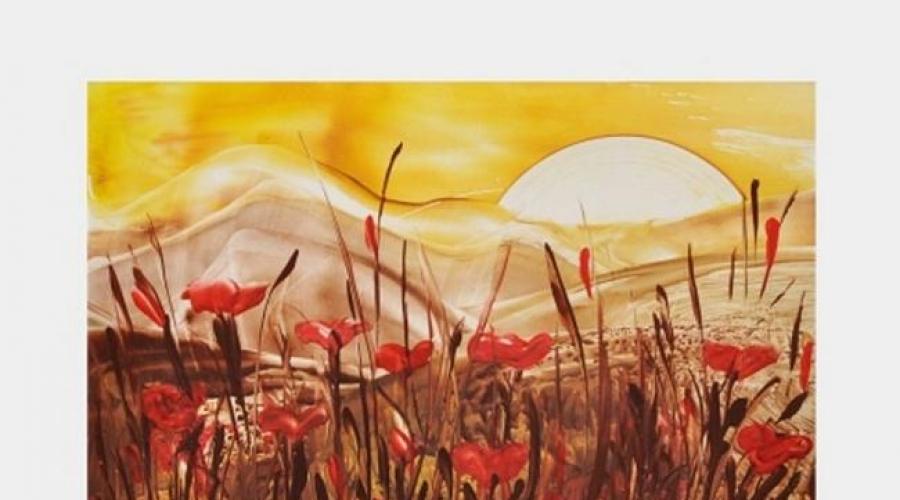
To draw a landscape, take the wax chalk or pencil of blue and begin to rub it in the top of the sheet. Since the cardboard base will be heated, it will be easy to do it.

Then the mountains are drawn. To do this, put the brown chalk on the okay sole, turn the tool, heat it.

Then attach the iron to the surface of the sheet, depict the pointed peaks and the system of the mountains using some techniques of enkautics.

If you need to grow paint, apply a piece of fabric or sponge for this. In order for the mountains to surround the greens, depicting it with the help of a shape of this color. Draw other elements of the picture, after which you can edit it into the frame.
Wax drawing technique on paper
Encaustics technique allows you to get very beautiful landscapes. In this you now make sure. See what miraculous paintings create craftsmen.

To work, you will need:
- iron for Encoustics or ordinary road small size without holes;
- glossy cardboard, the thick photo paper is suitable for printers, on which photos are printed;
- colored shallow;
- napkins;
- soft rag.

When they become soft, you can use them, but without waiting until the wax starts to drain from the surface of the iron down.
Attach melted wax to glossy cardboard, move the move from left to right. At the same time, make a small semicircle.

Carefully, not to burn, erase from the surface of the iron wax with napkins and put a small color here. When they are missing, put the iron on the right side of the sheet and spend left, then in the opposite direction and left again.

Now you need to remove this wax with a napkin and melt brown on it. Prepared solution make so-called lowlights. At the same time you need to apply iron to paper and quickly raise it. So do several times.

It remains to designate small details. For this, the receivers listed earlier are used. Spend a rib, and then the tip of the iron in the drawing to portray the bush.

Look, what beauty turned out. Since the picture is made with wax paints, it will charmively glitter.

Encausky technique is good yet in that you can invent the plot for the picture right on the go. Making several movements with an iron, placing wax in an arbitrary order, you can detect that they drew uneasured earlier.
Master from the next master class exactly so depicted a bird on his masterpiece. But first things first.
At first she took:
- heat-resistant glossy cardboard;
- german and Russian wax crayons;
- iron;
- towel;
- napkin.
Now we need to put the white and blue chalk on a warm iron, start drawing them.

Turn the cardboard sheet and cover it with wax with an iron on the other side. Now you need to draw a cloud iron iron ribs.

If required, sometimes wipe the sole of your tool with a napkin. But if you use the same colors, then you can not do that.
Looking around, the craftswoman saw that a bird appeared on the canvas, though, a little strange. It was decided to try her feathers with the tip of the iron.

You can make an adjustment using a toothpick or a sharp wooden spare. With her, you will remove too much, try something, clean something.

Now you need to make prints to portray grass, bushes. To do this, put green and brown chalk on the iron, apply them to the desired part of the pattern.

Crowns of trees are depicting so. Apply a little brown or green wax on the weeds of the iron and draw this part of the picture to this part of the tool.

Applying the technique of print, draw on the trunk and branches of the leaves, and apply adjustment with a spacing.

The first bird did not like the heroine, so she painted the crown of the tree on this place. But then decided to draw a seagull white. To do this, you need to suck the contour of the bird with the edge of a wooden stick. Pulle it in molten wax and draw the items.

It remains to polish the masterpiece with a soft napkin and you can hang a picture or give it to any holiday.

How to draw an iron - technique for beginners
The next master class will create a picture in red-yellow tones with dark splashes.

It can be portrayed even those who believe that they do not know how to draw. To do this, they will need only:
- glossy cardboard format A5;
- wax children's crayons;
- iron without holes on the sole with a thermostat that is designed for a dry ironing.

The iron temperature must be minimal, so put the thermostat to the smoothing position of wool or silk. Position the shames on the sole of this tool so that the yellow is at the bottom, orange under it, red is even lower, then it goes dark pink and burgundy.

Draw this color rainbow a bright sky, applying a reception of smoothing. To do this, simply take the iron on the surface of the paper as if you see the right left and vice versa.

Watch the napkin of the excess wax on the warm surface of the iron and put the chalk of another color. What, visible in the next photo.

It is also necessary to try the leaf horizontally movements there and here. So you make the main background.

To draw an iron further, you need to dissolve black chalk at its tip. Use this part of the working surface of the iron, making it a tip of writing on paper.

Further, with the help of this technique, make an outturope at the bottom of the sheet and create fabulous vegetation.

To draw wax further, use the side sides of the iron. Put it on the edge on the applied background, to get vertical lines, for example, grass.

After you have made a black wax, on the tip of the iron you will have a certain drawing. Do not wipe this coating, make prints further, it turns out a spectacular result.

Such an enecausky is suitable for beginners, since it does not require special skills.
Now paint the tip of the iron, for this, the spacing of the iron you need to pick up a little wax and drive it in the picture, creating black flowers and leaflets here.

Look, how to draw bird wax. To do this, put on the desired part of the picture by the end of the iron point. Then draw the ribs for two wings for each bird.

Final Accord - polishing the image with a soft cloth. It will turn out to be radiant and brilliant.

When you parse on such work, you can create masterpieces in this technique with smaller features.

To reproduce such a blooming apricot or Sakura branch, take:
- black cardboard;
- white marker;
- wax crayons;
- iron;
- soft rag.

Keep iron in your right hand, and take green chalk into the left. Leave his tip to the iron so that the wax slightly melted.

If you better own your left hand, then keep the tool and chalk as it is convenient for you.
Start filling first one half of the sheet, moving the iron up and down. Do not break it away from cardboard to get a solid layer. Now, just fill out the second half of the sheet.

Take the pink chalk, melt it on the tip of the iron and begin to recreate the pink petal.

In the same way, perform all the flower elements. Those petals that are closer to the viewer should be filled with the latest to create volume.
Apply a brown paint on the tip and make a twig. From yellow and brown form the stamens.

To the flower look more realistic, you need to slightly scratch a special tool from the core to the beginning of the petals. To do this, you can use a pointed wooden wand.

With the help of the same device, you can scratch the wax where it is not needed to make the contours of petals and flowers more smoother.
If the elements of the picture are already frozen, you can put the web on the heating surface, so that the wax can be softered slightly and remove unnecessary or draw residence per sheets. After the final grinding, the painting with a soft cloth can be proud to admire the result of the work.

Yes, if you try, then the iron will become a tool of a talented artist.
Presented works more forces adults, and young children can not be given to work even warm irons. Therefore, familiarize yourself with the type of this technique, which kids are happy with pleasure.
Encausky technique for children
Inconsider the guys to engage in pointelism style. The next master class will help you master this needlework yourself and teach him children.
On a sheet of paper, you need to draw a simple pencil outlines of the future masterpiece. For example, it is a rooster.

So that you can portray it, we offer to attach a sheet of paper to the presented template and simply redraw.

Since ENKAUSTIC still implies the heating of wax, so you are with the child during the classes. Place the candle in a comfortable container, burn it. Let the child holds the wax chalk over the candle flame until a drop is formed. After that, it needs to be quickly transferred to a certain section of the picture.

Work requires patience, accuracy, but the result will be amazing. Such a bulk picture will be the subject of the pride of the parents for his child.

If children are very small, then you do not need to show them the method of creating a picture of a burning candle, but it is better to teach them how you can create masterpieces in the technique of pointelism, using the cool cold method for them.
Winter drawings will now come to the way. To make them, give children:
- sheets of black cardboard;
- cotton swabs;
- paints.

Adults or older guys can use white wax pencils, heating that will create work, thereby having mastered the art of Enkautics.
To secure the material studied, look a video, which will help beginners and older children even better master the drawing with hot wax.
If you have already been strained enough, then try to create a picturesque landscape with the author of the next video.
Share your experience, if there is such: how long they could do without a face cream, and how many years decided to apply it. At the same time, what do you think the skin is worse / better or on a par with those who use the creams for a long time and constantly?
Why ask? Yes, here I have this cream. For hand only. Yes, and the face is just washed with water. Without soap. And we do not use tonics.
So I want to know the opinion and experience of the same as me. Happy New Year everyone!
Anonymous
Hello everyone. I have always been amazed by spoiled teenagers who scandalite with parents because of an iPhone on color, but such a story happened to me: this year we had a lot of spending: buying a house, furniture, kitchen repair, child birth ... In general, I did not clear on the New Year's gift, although I stutter several times that I want a new iphone 11 Pro. Well, yesterday, I found the same phone under the Christmas tree, but ... in gold, and I wanted a fashionable Midnight Green that was fashionable this season. In theory, it can be changed to the green, but I'm afraid to offend your husband and seem ingrateful. What should I do?
110Anonymous
I decided to write here, because it is very annoying, and what to do and how to react - I do not know. Thank you very much for the advice.
I have a daughter for 11 years, and my colleague daughter is 13 years old. She could not get pregnant from her husband for a very long time, divorced and gave birth to a casual man who sometimes helps them. I gave birth in marriage, then my husband went to the other.
Collaborative all the time about his daughter tells in an excellent degree. What English she knows perfectly and speaks with a British accent, even the English teacher is amazed by her innate abilities. She dances from five years old and her in a dance mug always put the first parties or solo. She floats like a little mermaid, she delays her breathing for six minutes. Horse riding like a real rider. All boys in the class run behind her herds, girls are built up to sit down with her for one desk. A, well, the fact that beautiful is by itself. The photo does not show that we, envious aunts, do not smooth it.
And now my sister transferred his son to class where this girl learns. After some time, we accidentally talk about her, and it turned out that this girl is very timid, stuttering from excitement when teachers or classmates speak with her. She is high and complete, she has very thick legs and a long a little horse face with a heavy lower jaw, she is scary awkward, walks by a rotational. It does not go to the pool at all with the class, she is allergic to chlorine. He learns so-so, because of the timidity does not answer, even if he knows the topic, and those teachers who do not regret it, often put the top three. Generally learns between 3 and 4. No one runs behind it from the boys, but on the contrary, tease and laugh at it. And the girls do not want her to take it into their company, snort. She sits alone, in any class events never participate, the most latter is always resorted to physical education.
And now when at work, my colleague begins to tell the unprecedented about his daughter, I always want to somehow respond, and how I do not know. If she just told, otherwise it always speaks as it were to the rest of the rest. Someone says "My completely fell away from the hands, the lessons do not, walks, not to drag home," she's immediately: "And my clever immediately, how comes from school makes all the lessons, then English is engaged in Skype for two hours, then boils to mine. The arrival of the soup, vacuuming, embroiders, then at leisure sew aprons, tacks and laughs the curtains. " Six her diary put from delight. And so always. I want to somehow give her to understand that I know how in fact things are with her daughter, but I don't want it to look like I'm from envy I do it.
What would you do?
104tatyana Konyukhova
Congratulations to the forumchanok with the coming new year! Interested in the opinion of those who gave birth to Lyubertsy Koress. What are the pros and cons. Are the pros (or cons) of paid genera in this RD are obvious. I understand that the reviews can be very subjective. Therefore, if not difficult, what exactly liked, but what is not. All health, good and love!
82Actually what is the problem. As far as I know in such cases there is some payment. Insurance or something like that. How to get it? What is required for this? It is clear that the management can resist, it is to blame, they say, and all that. Is there any chance to achieve anything?
81Modern artists for writing paintings use the most unusual techniques and strange items. Today, no one will surprise the pictures of, and even. Instead of paints, artists apply.
Not exceptions and wax pencils. It turns out that it can be done not only, but also to create masterpieces. The article will consider several techniques for creating paintings from ordinary drawing items.

Method No. 1 "Chips". To create a picture, prepare wax pencils of different colors.
.jpg)
Remove the paper wrapper from them.

You can make chips from pencils with two options. Using sharpeners. She removes a thin layer of colored waxed with pencils.

Or you can grate pencils on the grater. You will have a smaller crumb. Both shallow wax size is necessary to create a picture. So patterns will turn out more diverse.

Prepare a canvas for the painting. In order for the drawing to have saturated paint, it is better to use the fabric. On paper, the color will look like fad. Put the cloth crumb from pencils. It can be stripes or other figures.

Cover from top of the parchment that hostesses are used to baking.

Well warp the iron and swing the paper. At high temperatures, the wax will start melting.

When you handle the entire surface, slowly remove the paper. You should not do sharp movements, otherwise the drawing is lubricated.

Leave the wax to frozen. Optionally, you can decorate the sides of the canvas.


Method No. 2 "Pictures using a hair dryer". Melt wax with pencils will help the hairdryer. At the same time, the option of creating paintings does not need to be removed wrapped with pencils and grind. Stick them on canvas.

Lift it so that the pencils are located on the top of the base.

Turn on the hair dryer and direct hot air to wax. Gradually, it will melt, and flock down.

When using such equipment, the original paintings are obtained.

Figures from wax pencils can be anyhow. If you arrange a color wax in the shape of a heart, then the inner part on the canvas will be clean.

.jpg)
Or glue a paper stencil on the material before we melt wax.
.jpg)
Then remove it after working with the hairdryer. Additionally, you draw an empty place or decorate sparkles.

With this option, the creation of paintings is the drawing in the form of strips. Make bright spots on canvas can be different. Cut the pencils in small pieces. Attach them on canvas.
.jpg)
Warf wax hairdryer. If you slowly rotate the hair dryer around the pencil, then the drawing of a round form.
.jpg)
.jpg)
Colors and place them choose depending on the desired composition.
.jpg)
Method 2 "Adhesive Pistol". Often in needlework use a glue gun to connect parts of the decor. It can be applied to write paint wax. This device has a heating instrument in its design. It is he who can melt wax pencils.
Instead of glue rods prepare pencils. If necessary, then cut the extra wax. Insert the pencils into the adhesive gun, and turn on the device into the outlet.

When the wax starts to melt, bring the device to the canvas and click on the lever. The wax will drip on paper, creating bizarre patterns.
.jpg)
Color wax remnants collect together and make colored crayons for children's creativity.

Create paintings from wax pencils is easy. Make such an original masterpiece you can do it yourself, if you use these technicians.
Babies love to draw wax pencils who often break. You can save these short pencils in the hope that the child will draw them. But usually children draw new ones, and these pieces can be copied, because throwing them out every time too wasteful.
These colored wax pencils have a wonderful application. They can be melt and draw with liquid bright wax, and you can overpay into new ones.
You will need: Broken wax crayons, silicone molds for ice or baking, the cheapest or old brushes for drawing, paper or canvas, pipette, oven or microwave, clothing with long sleeves (ideally protective clothing for drawing).
INSTRUCTIONS
1. Turn the oven for 200 degrees and go to the next step. Or skip it if you chose a microwave.
2. Clean the shallow from the wrapping paper and sort the colors. You can perform together with the child.
Cut the shallow on a piece of about 1.5 cm so that they melt faster. Spread each color in a separate shape.

3. Mount wax chalk in a preheated oven. An approximate time is 5 minutes. Depends on the initial hardness and size of fragments.
You can also melt the shallow in the microwave oven at the middle power (450) in 2-2.5 minutes.
4. Gently take the mold with molten shallow. After a couple of minutes you can draw when the silicone form will cool a little! Warn the child in advance so as not to touch the hot molds.
5. Now we use liquid shallow as paints. You can use for this brush or pipette. The drawing will be 10-15 minutes, then the wax will start to harden.

6. Dry paintings. It may take up to 30 minutes. If you painted on paper, then over time the wax will have a wax, and under it the lighter drawing will remain. To save the drawing for a long time, choose a canvas or any suitable tissue.
Tip:when the wax will cool and starts to fit, place the molds in the freezer 10 minutes to full frost. As a result, you will have new chalks for drawing! How your baby will be delighted with new wax pencils, and even unusual forms. After all, it can be hearts, fish, and leaves, and cars, etc.

IMPORTANT! Do not use these silicone making for cooking.
We wish you a pleasant joint creativity!
BabbleDabbledo.com.
Paints, markers, pencils, pastel, wax crayons are such a variety of materials that our children use for creativity. Each of them has its own properties and features inherent in this material.
Today I would like to tell about how to use wax crayons and that you can do unusual with them.
Surely, each mother faced the fact that the remains of greedy crayons are lying around the house. It is already uncomfortable to use them, but also throw out a pity. How to give this chalk new life?
Take a silicone shape, crumble the remains of chalk into it. You can scatter on shades, but you can make a mix from different colors.

Put the shape in the oven by 180 degrees.

Smalls are missing for 10 minutes, then get them. If you notice that the melted chalk was divided into two layers (a transparent layer was formed at the top), or air bubbles were formed in it, simply preserve the contents, for example, toothpick and leave cool.

When chalk froze, remove them from the form and you can draw!
Such crayons can even be done specifically for small children, it will be more convenient to keep the small details of such a form, rather than long thin, and even constant from drops.

While we melted the crayons, I had the idea that melted crayons could also be drawn! If you do not wait for their frost. Since my small details were in the form with a lot of cells, we turned out this mixture, but if we take, say, molds for cupcakes and melt the shallow there, then when the contents are pouring, it will not be mixed and real drawings can be drawn, and not abstraction. For example, flowers, where the petals are made of drops, and the skeleton will certainly take a bizarre form. In addition, the process itself is interesting, the result will also be unusual, because the drawing will be volumetric.

And it is also interesting to make such pictures, melting chalk with a hair dryer.

On the sheet of paper, glue crayons, give adhesion to dry.

Then take a hairdryer and, turning it on the hottest mode, blow on the chalk, the sheet with the shallow hold almost vertically. My advice is to blow to the middle, or even on the upper part of the shallow, and not on the most of his tip. Clear will begin to fit and flock with smooth lines. If you blow on the tip of the shallow, then the melted wax will fly away in different directions due to a strong air flow. Actually, we did it that way.

After the lodges were dried, we drank chalks and began to fantasize. We have a holiday with gifts and multi-colored balloons!

Then I accidentally damaged not to the end of a dried blossom of melted chalk and a notch was formed in it, then I had the idea that wax crayons were easy to use as a background on which you can scatter something interesting.

And a little later I remembered that my girlfriend told how in childhood they made engravings with his brother. They took a candle, rubbed her sheet of paper, poured on top of a car, gave to dry and the needle scratched the drawing.
Instead of a candle, I took wax chalk, and on top covered them with black gouache. When the gouache dried, we enjoyed this technique, using ordinary toothpick for drawing. A little later, it turned out that I did not invent a bike and such a technique is called a handicraft.

Small-shakes are soft material, so they are perfectly chosen. Cut different shapes from paper and spread them on a clean sheet of paper.

Holding a finger shape imposed on top, so that it does not move, circle the contour of shameles.

Then we grow your finger in the direction from the center.

Here is such a cheerful result.

Well, finally, how to decorate the house with the help of wax chalk. Do you plan a children's holiday and you invent, how to decorate the room? Offer your child to decorate the most direct participation.

To do this, you will need a wax paper, sharpener and wax chalk. Cut from paper flags of any shape, cut out so that they folded in half, as a postcard.

Understate the shakes, pour into the chips one half of the flag, cover the second half and through the usual paper to join the iron flag. Then fasten the flags on the thick thread or braid, and you will get a wonderful homemade garland!

Merry holidays!