Learn to draw with oil paints. Basics of drawing with oil paints
The greatest masterpieces were written by oil paints, they were given away, and they still give their preference to the masters of painting and famous artists. But work with such colors has its own unique features and peculiar differences in technicians. Therefore, many beginner artists have some difficulties in writing paintings. In this article, we will try to figure out how to draw with oil paints, which they happen, and consider several techniques in painting with butter.
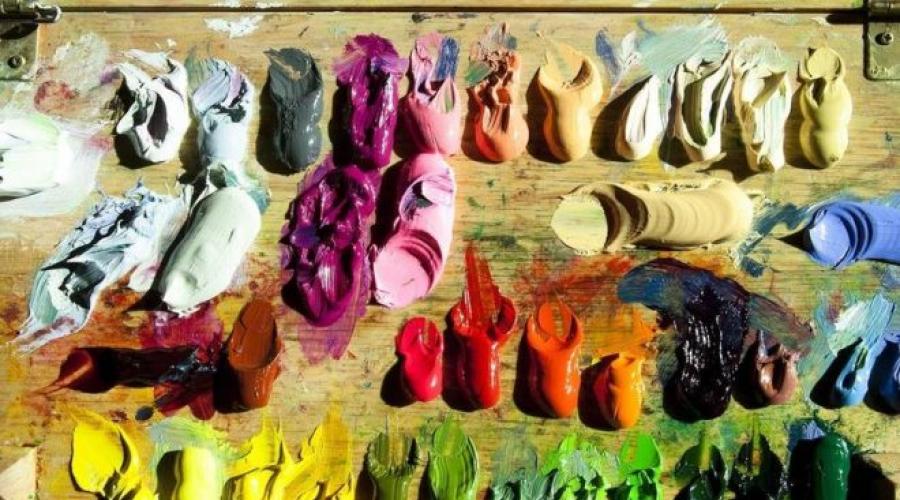
In specialized stores, oil paints are presented in a large assortment, there are many brands under which such art goods are available on sale. What is the feature of oil paints?
The composition includes various pigments: mineral, organic, synthetic and earthen. The same components are present in other types of paints, whether it is acrylic or watercolor.
Oil paints differ from the other binding component - this oil of flaxseed. It is it that gives brightness and saturation of the color, and it is because of it such paints will dry for a long time. But but the fresh layer of oil, applied to the canvas, can be changed, that is, you can repeatedly adjust the drawing and apply new layers on top of the old.

Another feature of oil paints is that they are diluted not with water, but a special solvent, which also uses vegetable oil. Such a diluent is sold in art stores as the paints themselves.

What kinds are there?
In each specialized store you can find paint three types:
- Highly artistic. These are paints that are purchased by professional professionals. Consist only from high-quality components, so they have a high cost. But for a good picture, good paints are needed, which over time do not lose their shine and do not change color.
Article on the topic: Features of the choice and application of paints on glass and ceramics

- Studio. Use no less demand than the first option, behave well on canvas. Suitable for both professional and beginner artists.

- Sketch. More suitable for beginners in artistic business, as it is possible to purchase enough paints for the low cost and choose your application technique.

Oil colors are located in many countries of the world. Artists with experience have already selected for themselves the options that are suitable for work. Many combine their sets from different firms, which is also permissible.
Olter paints are divided into transparent and opaque. The latter is more dense in their structure and therefore do not miss light. Each pack must be present special designations. For example, the designation "*" speaks about the resistance and durability of paint on canvas. The more such characters on the paint, the longer the finished canvases will serve. The best paints have a period of more than 100 years.
The symbol in the form of a painted black square indicates that the paint is not transparent, if half is then translucent.

Pigments that give paint one or another can be divided into organic and inorganic. The first species gives brighter shades, and the second natural colors. With a good pigment ratio, manufacturers achieve beautiful and high-quality shades.
For the production of oil paints, linseed oil of imported production is usually used, as Flax, growing in the territory of the Russian Federation, has unique properties, due to which artistic paints have their own unique qualitative characteristics.

On video: how to choose paints for painting with oil.
About drawing techniques
Preparation for creativity does not take much time, especially since modern art stores can be purchased all the most necessary for work. Already stretched and primed canvases can be found any size - from the smallest to the huge.
Picture written by oil paints looks very impressive. The smears imposed by the artist look like separately from each other. Many people think that oil painting is a fairly simple occupation, but it is completely wrong. Let's try to figure out how to learn to draw with oil paints.
Article on the topic: What kinds and forms are tassels for drawing and how to choose them?

Each wizard has its own drawing technique, which is characterized by its features. Standard can be allocated:
- multi-layer imposition;
- alla-Prima is one layer.
The execution of multilayer overlay is a very complex technique at which you need to be as cautious as possible, knowing all the properties and characteristics of oil paints. It is necessary to work in one style and not dilute the paint to finish work faster. Diluted composition may look on the canvas more matte and dimly than the other details. With this technique, not one and not two paint tubes will take all the work.

When applying one layer, it is necessary to remember that the paint can be gripped, and cracks will appear in the picture. Artists in this case give the first layer to dry completely and write the second. Many masters more often use this technique, since the consumption of the material is below.

Fundamental rules
So, learn to draw oil. What rules need to be observed:
- Mandatory condition for writing any picture is light. Only correctly displayed lighting allows you to achieve the desired effect.
- Artists begin their work from the outline of the future picture. For this, coal will fit well. It can be easily erased with a cloth and draw a newly uninstalled element. Lines that are drawn by coal must be fixed on the canvas.
- In the picture, all tones and shadows are obtained by constant mixing of colors. It is necessary to clearly understand which colors need to be mixed to achieve one or another shade.
- The masters begin to write their picture from the brightest elements of the composition. That is, you first need to highlight the darkest element and the brightest. Next, you can start and all other details.
- As soon as the main sketch is made, you can move to the drawing. But you should not sharpen your attention on one element. It is necessary to gradually use the entire canvas.
- Artists recommend taking Belil much in large volumes than paints of other colors, as they are used more often.
- The finished picture will dry for three days, so you can make an amendments on canvas the day after the completion of work. Not the resulting place can be removed by the spatula. This will not harm or the canvas, nor the whole picture as a whole. Work will remain as strong.
- For beginners and lovers, use professional paints is unprofitable, since the beginners will mostly draw sketches.
- For oil paints, it is necessary to prepare a special storage space. What you need for drawing (paint, brushes, canvas, palette) must be in one place, and at the first need they can be taken and used.
- After complete drying, the web can not be surface with a dirty cloth and touch her hands. This can harm the appearance of the general drawing.
The phased drawing with oil paints looks like this.

How to draw their first paintings to prompt artists who can boast a lot of cloths. For drawing oil on canvas there are certain drawing techniques. The novice artist needs to start working under the supervision of an experienced teacher. As soon as the written drawings become obtained, and their techniques will be revealed, you can paint with oil yourself.
Article on the topic: Tech painting acrylic fabric paints
What to write with oil paints and how to start drawing can prompt both sellers of art supplies stores. There are many schools where people of any age learn to write painting. Learn to draw only good painting masters!
Master classes for painting by oil (2 video)
Pictures stages (23 photos)


How to learn to draw with oil paints? Many novice artists seek to find an answer to this question. It is believed that the canvases created in this technique are easy to perform, and the way of work itself is suitable for those who have just started familiarizing with painting. However, such attitude to the pictures and the process itself is distinguished by amateurs. Professionals know how difficult it is to create a picture of oil.
Experienced masters learn from the art of drawing with oil paints not one year. Difficulties lie beginners at each step: the process may seem too difficult to them, and numerous corrections will make it take to attend those who are accustomed to the rapid and easy achievement. But the opportunities that this wonderful technique opens up long-term training. You can create beautiful and tender sketches, outline in pastel colors or an expressive and picturesque cloth. Overflows of color and game Glavov will make your work with a real masterpiece.
Many fans of fine art are trying to write with oil, but not everyone is given to master the method requiring painstaking work and takes a lot of time at a young artist. But if you still decided to start the classes, be patient and be prepared for annoying mistakes. Remember: all the great masters passed through the path of corrections and improvements, but none of them left their craft because of the difficulties arising.
What should be done first? Buy paint. Their choice is a difficult task for a beginner.
- It is believed that it is best to acquire a set of tubes;
- Do not be afraid that you do not have enough colors: take only those shades that you will need to work on the picture;
- White and yellow paint ends very quickly: buy them in large tubes;
- Take 2-3 samples: so you will provide yourself with the need for drawing material.
What kind of products to choose
Many artists believe that it is best to linger to canvas for professionals - premium class. They are significantly more expensive than other samples presented in specialized stores, and are distinguished by bright colors and good consistency.
Getting Started: What colors must be purchased:
- belil;
- yellow;
- blue;
- natural umbra;
- golden ocher;
- red Dark or light cadmium;
- green;
- ultramarine;
- neapolitan or Indian Yellow
The necessary painting tool is brushes. How not to be confused in the existing variety of materials?
- many choose artificial samples: such products are durable and well copes with the effects of solvents for washing and paint texture;
- a natural hair brushes are not suitable for painting with oil paints and should be used for other techniques.
It is also necessary to buy varnishes and special oil, which makes paint more liquid, and applying it to canvas comfortable and easy. The basis for the work should not strongly absorb moisture. Most often for such painting techniques choose products from the following materials:
- cotton;
- burlap (perfectly suitable for drawing etudes);
- polyester.
Carefully inspect the canvas before buying it. Do not take a relief pattern, if the thread sticks out of it, and nodes and bugs appeared on the surface.
Materials purchased and can safely begin to work. How to start correctly draw oil paints on paper and canvas? Should I mix different tones and use non-standard foundations? Recommendations of professionals will help you believe in yourself and approach the skill of famous artists. Do not forget about daily workouts, and your paintings will become a unique work of art.
The first stage in the work of any painter: installing the composition and drawing the contours of the items of the items. To apply the first tones to the canvas, the coal is best. The lines spent by them are easy to erase with a cloth. However, the outline must be consolidated: to cover with a pencil or graphite, to cover the paint mixed with turbidar.
Write, not painting. Do not choose the simple path of the coating of the canvas in one tone. Learn to mix paint and create light glare. Remember the paired shades, the union of which gives a new color.
- red + yellow \u003d orange;
- red + blue \u003d purple;
- blue + yellow \u003d green;
- fuxine + blue \u003d dark and rich shade.
Do not be afraid to mix all the paints to find out what the result will be. Hurry up the earthy and muted tones: such colors will need to create landscapes. Make shades lighter with Belil.
Draw with color spots on canvas and working out them, comparing colors. Start with bright places. Install the ratios between muted and bright shades. Learn the shift of the paints in nature. Without constant observation of the outside world, you will not notice subtle transitions and constant changes of the gamma that will need to be transferred to the picture.
Work "for raw". Fixing the mistakes made, cover the canvas portion with a new paint layer. If cracks occur on the canvas, and the color fades and fade, cover the damaged places with oil, not forgetting to remove the flowing paper.
How to draw on organic colors
Many artists choose non-standard bases for painting. One of the original materials is organitis. This is a mixture of fibers of wood and glue. The canvas made of such a solid board is obtained particularly heavy and durable.
Oil paints are ideal for drawing on a similar basis. Before starting work, prepare organitis
- treat it with sandpaper to achieve smoothness;
- cover the surface with oil varnish;
- on the corrugated side, put a few layers of water-emulsion paint;
- clean the canvas and brally by her whites.
How to draw at the same time acrylic and oil paints
One of the common writing techniques is the use of acrylic and oil paints that are applied to the canvas in a specific sequence.
Oil applied over acrylic. Such a base with ease replaces the primer and protects the drawing well from damage. To create an expressive relief, you can add sand or small wood sawdust into the paint.
Oil painting. Basics. Lessons Bill Martin for beginners.
There are things you need to know before starting to write with oil.
All paints are a mixture of dry pigment and liquid. In oil paints, coloring pigment is mixed with linseed oil. Linseed oil is an oil drying during air oxidation. It absorbs oxygen from the air and crystallizes the pigment of paint on an ongoing basis. When oil dries out, it is impossible to remove it.
Oil paints dense. They are produced in tubes. Paints are squeezed out on the palette, and mixed with the help of a mastichene to obtain new shades. Then they are applied to the vertically located canvas with rigid elastic tassels.
Oil paints dry very slowly. Usually you need to wait three days before putting the next layer. Such a long drying time is both the advantage and disadvantage. The big advantage is that you will have time to understand what you drew. It is very useful when you make gradient transitions from one color to another. Or, if you are dissatisfied with what it turns out, while the paint is still wet, it can be scrasing with a rag, a masticine or rubber scraper, and redraw.
The disadvantage is that if you put a number of wet paints of two different colors, they can mix with each other inactively. With a palette, brushes and wet cloths need to be treated very carefully, that you do not smear yourself, clothes, food and furniture.
You can work with paint until 12 hours in a row, then you must leave work on drying for three days, after which you can continue. When the paint dried, you can apply new colors over. There may be many layers in the work. Each subsequent layer should be the same in thickness or thicker than the previous one, otherwise there are cracks.
After the work is completely dry (from three to six months), you need to apply a protective layer of damary varnish.
PICTURE.
A complex pattern is rapidly lost when applying oil paints, so the drawing is better to designate simple figures and contour lines. The drawing can be done right on canvas, or it can be prepared in advance and translate to canvas.
When the drawing is applied immediately to the canvas, it is better to use dilute paint. Since it is also paint, you do not have to isolate it from the subsequent layers.
You can also use coal. Coal sketch will need to be isolated from the following layers of fixing. Soft coal is easier to fix fixation than extruded coal.
The drawing can be applied with a canvas pencil. Then also fix fixation. The sharp tip of the pencil can make cracks in the soil layer, so you can additionally apply another transparent layer of primer. If you have applied another layer of primer, the fixing is not required.
In the photo: Caller with fixation, in the box - copy paper.
The drawing to translate through the copying is better to prepare on fine tracing, then it will be easier to translate it. Attach the drawing to the canvas. Translate it with copy paper. Circuit your drawing with a football. Use with the ballpoint pen of contrasting color to see which areas you have already translated and control the thickness of the lines. The drawing applied should also be fixed with a fixed or subtle lining layer of transparent primer.
Transition of one color to another
Consider a graduated transition of one color to another. Oil paints, as they require a time to dry, allow you to move them to the canvas while they are still wet. That is why oil is much easier to make smooth gradations of color than with other paints. This can be done by any brushes. But the best brushes are best suitable, and the worse is round. For small and large stretch marks, the same principles work. 
Paints are mixed on the palette and applied to their estimated places on canvas. Then brush is driven there and here in the cross-manner between two gradations of color until the result satisfies you. Then conduct parallel strokes for the final processing of the site. Work with a clean brush from a dark color to the middle, and then, again, a clean brush from light color to the middle. 
(A) In this example, brush strokes are always perpendicular to the flare. Moving the brush in a circle, we try to make the smears perpendicular to the glare, respectively, we get the shape of the twisted brushes.
(B) Depending on the location of the main stretching colors, an idea of \u200b\u200bthe plane is created in which the surface is located. Notice how shades are located to portray the flat surface (left) and the curved surface (right).
Create forms
All forms are created from five major forms. These forms: ball, cone, cylinder, cube and torus (bagel, ram). Parts of these forms form any items that we see. Imagine the cylinder half the cylinder - and you get the form of an American mailbox. Half of the ball and the cone will give you the shape of tears, the tree is a cone, oak is a semisfer (half a ball), and a cylindrical mug usually has a handle in the form of halves of the torus (bagel). 
Light creates a form. Each of these forms has clearly defined Locations of Light and Shadows. The sphere characterizes the sickle and ovals. The cones have a triangular lighted part and everything else in the shade. Cubes and flat surfaces contain stretch marks (gradient transition of light into the shadow).
Cylinders consist of stripes. Thor - from crescents and stripes.
Bent variants of these forms have the same light, but without reflexes.
If you learn to draw these five forms, you can draw everything.
The ball (sphere) is determined by crescents and ovals. Balls are painted with sickle and twisted brush strokes. 
Cones consist of triangles of light and shadow. Cones write triangular brush strokes. 
Cylinders consist of light and shadow strips. Cylinders are written with parallel brush strokes.
Cubes and any flat surfaces obey one rules. Graduated transition from light to the shade. If the surface is parallel to the canvas, then it is depicted with one smooth tone. Cube is a combination of intersecting planes. Each side of the cube contains a stretching of lighting. The cube is drawn by parallel brush strokes.
The torus contains aspects of two other figures. He has a strip of light and shadow, like a cylinder, in the center, and crescents, like the sphere, at the edges. The torus is written with twisted smears and sickle smears. 
Here you see that to transmit the form of the object you need to use light and shadow, and not loop lines. The light can confuse you, so first try to see the form of the object, and only later - how exactly the light falls on this form.
Comparison of flowers
The rainbow gives us examples of clean colors that surround us in the world. Rainbow colors in order: red-purple, red, red-orange, orange, yellow-orange, yellow, yellow green, green, blue-green, blue-purple, purple. When these colors are decorated in a circle, we get a "color circle". The color circle is the necessary thing when comparing colors. 
The circle is located so that yellow, the brightest light color, turned out to be at the top, and purple, the darker - down. From top to bottom, right, go yellow-orange, orange, red-orange, red and red-purple. These colors are called warm.
From top to bottom, on the left, are yellow-green, green, blue-green, blue and blue-violet. These colors are called cold.
Additional colors. 
Any two colors, located opposite each other in the color circle are called additional colors. Red and green are additional colors in relation to each other, as they are located opposite each other in a color circle. Yellow and purple are also extra relative to each other. Yellow-green and red-purple - extra colors. Additional colors laid on canvas are reinforced each other. Additional colors when mixing on the palette neutralize each other. On this tablet, additional colors are at opposite ends of the scale opposite each other. If we move on this scale to the middle, we will come to a neutral gray color, the least saturated from all. 
All colors have shades. Clean spectral colors in this picture are marked with letters.
So, how do we pick up the colors, remember all the foregoing?
We only need to answer these three questions.
1. What color will be the color you need, where is this color located in the color circle? (Meaning spectral color).
2. How is it intense? (The more add an additional color to the color, the less saturated color you need).
3. Tint (as dark or light it will).
That's how it all works. 
Paints are decomposed in colors on the palette. 
We select a color, like a brown leaflet.
The spectral color will be red-purple. White is added to coincide with the shade. Yellow-green, optional to red-purple, added to reduce its saturation. 
We select the color of the green leaflet.
Spectral green. Cadmium green - our base color. It contains a little yellowness, so we reduce its saturation of red-purple (chinacridone pink). Yellow-green and red-purple are additional colors in relation to each other.
White add to clarify the shade. 
We select the color of the silver tape.
Spectral color blue. White add to clarify tonal saturation. Orange, optional to blue, add and get gray. 
We select the color of the three-dimensional object. A piece of soap. 
First select the middle. Spectral color - yellow-orange. A very small amount of additional blue-purple add to reduce color intensity. And a little white. 
To get bright sections of our soap, add the sequence of another white to the resulting color. To get the color of the shadows, add the middle-violet in the color of the middle. 
So, the colors of the soap are chosen. Usually, to get the shadow color on the subject, you need to add an additional object in the main color of the subject. For darker shadows, use the basic color of the subject, but with a smaller amount of white. In some cases, adding additional color does not dimly darken the color, then we add some black.
Shadow
Shadows create light. Shadows are divided into three categories. The first is a shaded part of the subject, known simply as a shadow. The second is a falling shadow from the subject that the subject is observing the light from the light source. The third category is a shadow of neighboring items. 
The shadow part of the object is a darker, less saturated version of its primary color.
The straight light gives dark shadows. The scattered light gives less intense blurry shadows.
Reflected light in the shade (reflex). 
The light falling on the object from its environment is called reflected light or reflex. The color of the objects that surround our object significantly affects the reflected light. See Green reflected light in the left ball? Pay attention to the reflected red on the middle ball. The color of the environment is an integral part of all shadows. 
Black and white saturation of the surrounding objects also affect the reflected light. The first ball is simply hanging in the air. The second ball reflects the white surface. The third ball reflects the black surface. The black and white saturation of the surrounding objects is also an integral part of the shadows.
Falling shadows.
The falling shadow is always characterized by the fact that it is the darkest and most focused at the source of the shadow (from the subject). Falling shadows are written with darker, less intense color than the surface color to which they fall. 
The color of the falling shadow always contains an additional color to the color of lighting and an additional color to the surface of the surface on which the shadow lies.
See the blue shade in the shade of the object, which is lit by orange light? And the orange shade in the shade of the object illuminated in a blue. In the shade of the object illuminated by the red light, there is a shade of green. And pay attention to the red-purple shade of the shade, discarded by the object illuminated by yellow-green light.
Falling shadows are associated with form and texture. 
Falling shadows describe the environment of the object. Left wall is determined due to the falling shadow of the glass. Right shadow displays the presence of a hill. 
The edges of the shade are determined by the texture of the surface on which the shadow falls.
The grass on the left and dirt with stones on the right.
Falling shadows in straight and scattered light. 

The straight light (left) is usually formed from one source of light - for example, the sun or a point lamp. It gives high contrast and saturated dark falling shadows.
The scattered light is usually obtained from several light sources. It gives low contrast and fuzzy falling shadows. 
Objects are always in almost no falling shadows in the scattered light, where they seem flatter and less textured.
Shadows from neighboring objects. 
These are dark shadows that we see in places where objects concern each other. Dark line around a closed door, a dark line under a mug with coffee, a dark line between tightly compressed fingers is a shadow from neighboring objects.
It does not relatively depend on the direction of lighting. These shadows in the shadows are usually the darkest places of the drawing. 
A narrow dark strip under the cylinder on the left tells us that objects are separated. The cylinder on the right is connected to its base.
CONTRAST
We use light and shadows together.
The contrast is the ratio of the brightest and the darkest part of the object or its environment.
Tone scale.

Left - high contrast, right - low contrast.

When objects have a high contrast, they seem closer to us. When the contrast is less, objects seem to us further from us. Those rocks in the distance seem to us located on from us, their contrast is lower than the contrast of the closest cliffs to us. 
The gradual saturation of objects with contrast makes them visually closer to us. 
In contamination of the falling shadow and its environment, you can determine the distance.
Low contrast 
Objects in the scattered light have the lowest contrast. 
Objects without falling shadows are always in the scattered light. If the object has a tone gradation from the average to the dark, it must have a falling shadow. 
If the object has a tone moving from the average to light, it will turn out to be in a haze or fog.
Contrast creates a type of light. High contrast matches bright lighting. Low contrast corresponds to multiple lighting, distant distance and criminalization.
TEXTURE
The texture helps determine what exactly you see.

The best texture is visible when moving light into the shadow. On smooth objects, the glare is a distorted display of the very source of light. The sharper focus of this reflection, the smoie the surface of the object. A glass bottle has a smoother surface than an aluminum, which, in turn, is ironing than wax candles. We know how these objects focus on themselves.

On objects without bright glare, the texture is visible well and is determined by the transition from light to the shade.

These ten objects are arranged in order of their texturability.
Notice where your eye looks immediately to evaluate the object texture.

We look at the transition of light into the shadow to determine how much the object is.
Texture in scattered light.

Left - straight light, right - scattered.
The objects in the literal light seem more textured than objects in the scattered light.
The log and towel seem softer and smoothed with multiple lighting. Objects seem less textured during the scattered light, because the transition from light to the shadow is longer.
Glazing / Lesseing Layers
Glazing layers are superimposed on top of dried paint.
Transparent oil paint layers are called glazing. Translucent - these are layers of lesing. To obtain lescing, the paint is bred in the ratio of 1/3 of damary varnish, 1/3 of the turpentar and 1/3 of linseed oil. The glaze is a thin transparent layer of paint, which is put on another dried layer to get the shade of the third color: //www.kamforum.ru/style_images/1/folder_rte_images/image.gift. For example, if you put a diluted chinacridone pink (transparent color) on the blue, you will get violet. If you are aligning exactly the same color, then you will strengthen it. Falling shadows on complex textures are very often covered with glazing. Glazing slightly darkens color. (See the "Paints" lesson about transparency and mattness).
This is glazing.

For example, the beetle is checked.

Liquid for glazing is mixed on the palette with cyan green (transparent color) until the required degree of transparency is achieved.

Then the mixture is applied with a column tassel to the drawing in a horizontal position. Leave to dry overnight. When using glazing, you can change the color of the pattern without changing the direction of the paint strokes on the main layer.
The lesing is obtained by using diluted matte color on top of the dried color of another paint. The lesing layer does not change the color and is a translucent layer.

The paint is also mixed on the palette with a mixture for glazing and applied to a horizontal surface with a column brush.

White (matte color) with glazing give us rays of light. Leave to dry work at night.
http://demiart.ru/
The artist always tries to show his connoisseur what his soul feels, seeks to convey how he sees the world around him. This feature is not only that the artist depicts, but also in what technique it works. It is also important and the material that is used by the master. Oil paints in contrast to acrylic, gouache and watercolor, have a long drying property, since the layer of oil paints can remain wet for a long time. When dried, if any part in the future picture did not suit the artist and there was a need to fix something, the thick oil layer can be removed using a special knife - Mastichene.
Next, the new layer of paint can be easily applied to the canvas! In addition, the oil has another specific feature: due to its slow drying, the artist can mix colors, turning them into an incredible color diversity palette and smooth color transitions.
How to draw first of all, you need to choose the paint itself. In this issue, the main criterion in the selection of the material is its quality. Oil paints having a "aa" class are quite persistent compared to the colors of the class "C", since the latter quickly fade and lose their saturation. Drawing butter for beginners should take the beginning with a study theory, because first of all you need to know the material with which you work and be able to choose it to choose and apply it. Such a situation occurs when when applying a repeated layer of oil on canvas (without pre-drying the first layer), the color of the image changes. In this regard, it is necessary to familiarize themselves in detail with the peculiarities of the composition of the paints and the nuances of their application.

How to draw with oil paints and what to mix them? Representing the image of the artist, on the subconscious level a picture of a man with a scarf in the "French" take, who holds a large palette in his hands with brushes. It is the palette that is the main element of the image of the artist. Mostly, the palettes are made of wood and have a form, convenient to keep them in the left hand along with tassels. Such have a thumb hole. It should be noted that a good wooden palette is processed and impregnated with oil, after which it is dried. This procedure is necessary in order for the oil to be available in the palette absorb, since otherwise the paints are subject to rapid drying.
How to draw with oil paints and what brushes it is better to use? Oil painting requires a separate approach to the selection of materials. Oil should choose flat bristles. An important point is that it is impossible to write in one brush. In the process of creativity, the brush does not wash (only when the work is completed), so the use of one brush for light and dark colors can lead to incorrect mixing and "contamination" of the primary color.

How to draw oil paints on canvas? Canvas is the basis for the future picture. In order for the picture to be realistic and saturated, it is necessary to properly choose the material from which canvas is manufactured. For oil painting fits hemp or linen. Your canvas fabric should be without knots, smooth and dense. Important moment: Be sure to progress the canvas! In specialized art stores, you can purchase both the ready-made intricate canvas and produce this procedure yourself.
He who does not know how to do this? Draw a man with oil - a complex multi-step process that requires certain knowledge and skills. In addition, you need to perfectly know the proportions of the human body and be able to competently and correctly compare them, the writing of such a portrait of the oil involves additional awareness of the preparatory stages of work with materials, stages of application and mixing paints. Therefore, a young, novice artist initially should teach himself to a thoughtful, systematic, serious work and proper attitude to the material with which he works.
Oil painting - This is the most popular and favorite technique of many world-famous artists, both past centuries and our time. Due to its plastic structure, oil paints will dry for a long time, which makes it possible to correct the drawing for a long time. Oil painting always looks elegant and refined. Learning to draw oil - the task is though difficult, but brings the sea of \u200b\u200bpleasure by the artist. If you have not yet mastered this technique - start right now: who knows, maybe you are hidden the future Aivazovsky or Vasnetsov? What do you need to have a novice artist for drawing butter?
List of necessary oil drawing items
- Oil paints.
- Brushes: You can use the brushes from natural bristles and from synthetics (the choice of brush depends on how much you have and what result you want to achieve).
- Wooden palette.
- Oil for diluent.
- Diluent (used so that the paint is not too thick).
- Canvas (equally good and canvas on the subframe, and canvas on cardboard, and sad cardboard).
- Special brushes washing fluid.
- Victims.
Oil paints - Paints created from oil, pigment and turbidar. For oil paints, linen, hemp, poppy, walnut or saffelor oil is used. Pigments affect paint color and can be synthetic and natural. Pictures, written by oil, long century remain in a wonderful condition: the striking, oil paints retain their color, they are not afraid of light and frost. Due to the pasty structure, oil paints have remarkable crumbling abilities.
Pussy: Oil colors are best to apply natural bristles or synthetic brushes. Each artist should have brushes of different rigidity and different shapes - this will help display the desired structure of the picture and make even small details.
Wooden palette - This is an indispensable thing in the artist's arsenal, loving to draw with oil paints. For convenience, you must have two palettes: one big - for drawing in the studio, the second is a small exit. Please note that the plastic palette for drawing with oil paints is not suitable.
Maslenka - Special dishes for a diluent, which, with the help of a special clip, is attached to the palette.
Diluent Used so that the paints be less dense. For oil paints as a diluent, petroleum, tee or linseed oil are most often used. By the way, people who negatively react to odors and allergies, it is better to use petroleum because it has no smell.
Canvas - This is the material on which the paintings are written. A variety of canvas in our time can embarrass the artist-novice. In any art equipment store, you can familiarize yourself with a large selection of canvases on the subframe or on cardboard and canvas familiar to the roll. Canvas are made of flax or cotton, which makes a variety of their structure - from fine-grained to coarse-grained. Most often artists use medium-trim canvases.
Brushing liquid - This is a special means for cleaning the brushes from paint residues. Such a liquid washed with a brush is much easier than other diluents, and with proper care, the brush will serve much longer.
Victims - A small peer, often having a shape of a small bucket, with a spiral mounted on top, for fixing the brush. With the help of a vibrant, in liquid for washing there is only the desired part of the bone, which allows you to keep the handle of the brush from damage.
Buy, quality oil paints, as well as all the necessary accessories for oil painting, you can in our store. We will be happy to help you!