Drawn cute greeting card with their own hands. Making beautiful postcards for any holiday with your own hand drawings with a pencil on the topic happy birthday
The best gift is the one that is made with his own hands. And what can you pretend to my friend for your birthday? A gift can be anyone, and supplement it is worth a postcard. What to draw for a birthday? We have collected the best ideas of postcards, inspire.
Funny owl
What to draw for your friend's birthday or girlfriend? Try to portray the funny owl. This bird is a symbol of wisdom, and such an allegory will definitely deter to your close person. How to portray it? Everything is very simple. First you need to draw a big circle. It will be the sun. Now I depict oval is the body of the owl. Immediately reinstate the falling shadow from the bird. Accent will do eye. They are depicting in the form of two huge circles. Duplicate these geometric shapes twice two times, gradually reducing them. Dorify the beak, it will look like a rhombus. Schematically depicting paws. They will be like a flower with three leaves. On the stomach, the wavy line is depicting feathers. And the image of the owls of the ears and a festive cap will be completed. All this is drawn by triangles. Two ovals depict wings. One of them needs to be bent so that it seems that Owl holds the thread wing from the balls. Now go to the image of the festive attribute. Draw balloons and plate. All this needs to be depicted by ovals. And it remains to draw a festive cupcake. Optionally, it can be changed on the cake. Do not forget about the candle. It is possible to schematically draw one, and you can also depict them as much as the birthday is fulfilled. It remains to paint the drawing. You can use our sample or use any other color gamut.
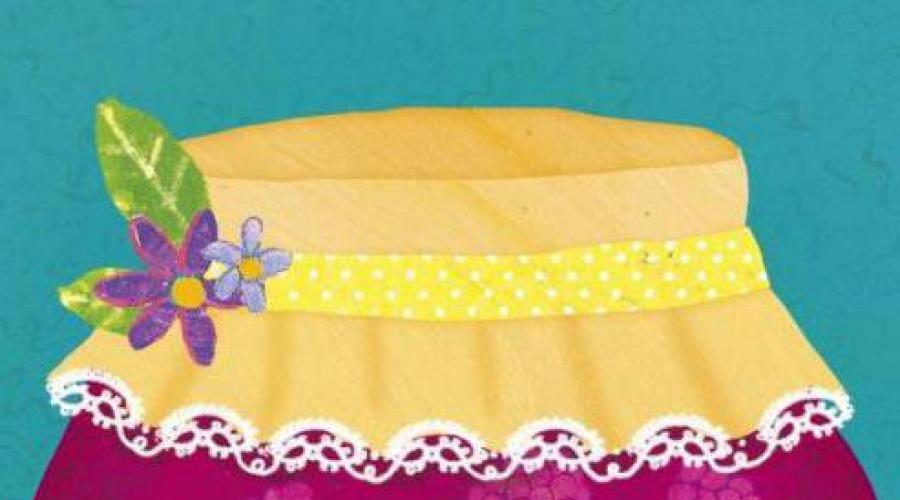
Bank jam

When you break your head over to draw mom's birthday or sister, you can depict something unusual. For example, jam can. How to draw it? We depict a big circle. Now reincut the exaggeration and erase the lines that turned out at the intersection. Slightly above the circle draw another oval. Pull down two rectangles down, from the last down the skirt in the form of a trapezoid should be dug. The edge of our lid is wavy. We decorate it with lace. The basis is ready. Now you need to decorate it. On the bank we draw raspberries or other berries for your taste. On a tape that adorns the jar, draw flowers, they decorate the space from below. You should not portray only one inflorescence. Draw several colors with leaves at once. Well, it remains the main thing - to portray the label on the bank. We write a beautiful handwriting "Happy Jam Day" and draw a berry. The label circuit can be "set" strokes. It remains to give our color image, and the greeting card will be ready.
Cake

If a child thinks to draw grandmother's birthday, then you can file an idea. For example, draw a cake, decorated with candles. On top of a sheet with multicolored pencils congratulatory words. This may be the phrase "Happy Birthday" or its English variation of Happy Birthday. We proceed to the image of the cake. We draw the semicircle and the lower part of it depict the wavy line. It should be something similar to the leaks of glaze. The cake itself is not necessary to draw, but if desired, it can be outlined by two straight lines leaving to the edge of the sheet. We put on the glazes of the candle. There may be an arbitrary quantity, but you can draw as much as the birthday age. We light on the candles of lights and add a decor in the form of wave-like lines that will symbolize the exploding flap. You can add a postcard with colored dots or asterisks.
Air balloons

How to draw a birthday card to look original? Everything is very simple, you need to combine the drawing and glue the application on it. Here with its manufacture and start. We take a sheet of paper, watercolor paints and toothbrush. Wash the brush in the water, dip in any bright paint and splash onto a sheet. We produce this operation several times with different colors. We are waiting for the paint to dry, and cut out the contours of the balloons from the sheet. In our case, they are 4, but you can do more or less. Now we need two sheets of paper: one color, another white. White sheet should be slightly smaller. We glue two blanks so that the color edge looks like a passe. We stick our balls from above, and we spend the wavy lines from them with a black handle. From the bottom of the postcard we write a greeting phrase.
Laconic pattern

What can be drawn on a birthday? Today in fashion minimalism, therefore, we will depict a postcard in this vein. Draw a festive cake. But the image will be very schematic. With such a task, even a person who does not know how to draw. Visually divide the sheet into three parts. The first of them will occupy an image of a culinary masterpiece. Draw a thin rectangle with rounded edges. Top with the same geometric shape, only wider. In its center we depict a strip. Cake ready. Candle draw schematically. It will look like a rectangle with a thin rod from above. We supplement the candle of the lights. It will be a droplet with rays diverging in different directions. Now go to a congratulatory inscription. In English, she will look more stylish. Therefore, we write happy print letters on the second third of the sheet. From the word to the left and right we depict two fat stripes. On the last third part of the sheet we draw the word Birthday.
No longer worth thinking for a long time to draw dad for a birthday. Just give him such a postcard.
Congratulatory bear
How to draw a birthday pattern? There is nothing complicated here. I will depict a cute bear who holds a gift in her hands.

We will do it in the form of appliqués. To begin with, choose paper with a tree texture. Let it be inhomogeneous, somewhere with a turn, somewhere darker. Draw a rectangle on a sheet, a slightly expanding book. At the upper corners, you will depict two circles. This is a bear hull. On dark brown paper draw okal. It will be nose. Cut out our billets and glue them to a blank sheet of paper. Two points draw eyes and a big drop depict the nose. Optionally, you can draw a little bit a smile. Recovering 2-3 cm from the application, we write a greeting inscription. On the bear we glue the square, carved from any wrapping paper. From it, we cut the flags that "spend" at the top of the postcard.
Postcard with flowers

What to draw mom for a birthday? Well, of course, flowers. They can be depicted realistic, and it is possible, as in our case, decorative. At the bottom of the sheet, we carry out a line that will combine direct and zigzag segments. This is grass. Top writing congratulatory words. And in the middle draw sticks, on which we depict various flowers in the form. It can be bells, roses, chamomile. To look more gentle, it is necessary to paint everything in one color range. And in order to fill the space between the colors, you need to draw bizarre curls with a black handle.
Sometimes in the needleworking impulse, I want to do something beautiful with your own hands, but as I called it nothing climbs into my head, and so as not to suffer once again I decided to collect a selection of examples how to make a postcard with my own hands. Here are different examples of postcards and small descriptions, how to make one or another postcard.
He tried to pick up the most different images of both style and on topics, so that it was from what to choose from. Of course, every postcard is just an example of how you can make postcards with your own hands.
Mom.
How to make a card card? It is clear that it should be the most beautiful and touching, but I want some kind of specifics, right? First of all, you need to focus on reason, it can be:- unplanned card without any reason;
- mother's Day or March 8;
- new Year's and Christmas;
- birthday or birthday;
- professional holidays.
Butterfly postcard option:
But the option of cute postcard by slippers:


Of course, no one will be able to prevent you from doing and give mom card dedicated to the first snow or even to the elimination of your favorite TV series, but in general, the main reasons are rather relocated.


Mom's postcard for the new year can be ordinary (from the point of view of New Year's congratulations, of course), it is not necessary to somehow emphasize the special relationship. But the birthday or day of the mother is special holidays in which you should present a personal postcard with the signature of "Favorite Mom".
How to make a postcard for my mother's birthday? Sketch a simple pencil, add some color to navigate with the color range and understand what you need shades in the process of work. So, you need to buy or find in the covers:
- the workpiece for your needlework (a dense and thin cardboard is suitable);
- the background image - it can be paper for scrap, colored paper, any sheet that you liked the ornament, and you can simply spray paint on a sheet of white tight paper or even use the technique of monotype and marbeling;
- chipboard for the inscription - it is better to purchase ready-made or use a special stapler for edge design;
- a pair of decorative elements - flower, butterflies, beads and leaves;
- one or two large decorative elements - flowers or bows;
- decorative scotch;
- good glue;
- fastonic tape or lace.
First you need to glue the background image to the workpiece, then place large flowers, and only then supplement the resulting composition with small décor and lace. Seeing the finished job well, decorate with small decor and sparkles, and then sign - my mother will be glad to such a sign.
Now you know how to make a postcard for a mother's day, and you can easily come up with what a postcard for an anniversary or an angel day should be.
Another original option: The essence is that it is necessary to cut the circle from colored paper, and then cut each circle on the spiral and twist it into the bud, it turns out cute flowers that can be decorated with a card.


Dad
Postcard Pope for your own hands - it is always very touching and cute. Choose some special "papal" theme is not too simple, but there is a wonderful straw, for which it is worth sticking - style. If you make a stylish postcard, then the father will be undoubtedly glad to get it, even if it does not have the usual characters of "masculinity", to which we often include cars, weapons and fishing.
Naturally, if the father celebrates the anniversary of the driver's experience, then the car on the postcard is quite appropriate, but on the birthday of Pope it is better to present a neutral and beautiful greeting card.

What postcards like men:
- not too motley;
- in a calm, slightly muted range;
- with clean lines;
- in which visually invested a lot of effort.
Men admire the process, so before making a glorious postcard in the scrapbooking technique, think about what you can invest your work in the postcard? It can be working with threads or embroidery, spirography and cutting out of paper, pyrography and much more.
Make a few elements with difficulty and love of elements in your work, and the postcard for the birthday of the dad will be great.

So, make cards from paper with your own hands for your favorite daddy. Start by selecting the plot - it can be some kind of element of a male portrait - a stylish beard and glasses in the spirit of hipsters, or a silhouette of your favorite dad tube, you can also make some kind of heraldic flag or symbol.
Pick up the colors - they must be calm and beautiful, and also look good in harmony among themselves.
Make the pattern of the future greeting card and proceed to work - if it is an ordinary application, then cut all the items and gently lay out the future composition. And in the case of art cutting, it is better to pay the time and drawing time. By the way, for such work you will need a good dump knife.
After all the basic elements are cut, assemble a postcard - if you planned it in scrapbooking technique, you can simply glue the song, and if you are trying to create a thin openwork from cardboard and paper, then select the colors for each layer - to work It looked really openwork, you will need to choose such shades that emphasize all the slits.
Make a central element on your postcard, and then put it under the press - it will help to avoid strain paper from the moisture that is contained in the glue.
In honor of the wedding
Make a beautiful postcard with your own hands on a wedding - a difficult task, and here it is better to see the master classes.

The wedding is one of the most important events in the life of a young family, and therefore just just draw a postcard, it is necessary to carefully arrange and pack it, and it is also possible to add some other elements.


How to make a beautiful postcard for congratulations on the wedding day:
- come up with an idea;
- learn from the bride and the bride the main color of the wedding, or the main theme of the celebration;
- view various options for postcards - in the technique of scrapbooking, with embroidery, ribbons, and so on;
- select some interesting lessons;
- make a draft card from paper and cardboard (and if not sure as a result, it is better to do this step several times);
- make original postcards with your own hands;
- pick up the packaging and make it somewhat unique;
- take the envelope and postcard.
Other reasons and recipients
Be sure the postcards made by your own hands on your birthday or please recipients - after all, it is not just a postcard with your own hands on the master class, this is the most real manual miracle that keeps the soul particle.


You can make cards for mom and dad with your own hands, and you can delight friends before every holiday by author's congratulations - for it only free time, good master classes and some patience.
3D cards are especially spectacular. How to make a bulk card? Come up with (or see the experienced authors) the idea how you can give the form so that you have volumetric postcards. You may want to use more decorative elements, or you decide to make a simple card for greetings happy birthday with your own hands, in which there will be 3D elements.

By the way, if you figure out how to make a postcard for mom or girlfriend with bulk elements from paper, look at children's books. Surely you have preserved several copies, with the disclosure of which you have boiled and castles, trees and horses between the pages.
Carefully consider how these elements are made and glued - you may have to reproduce it on your sketch.

Or try to do something in the style of Shabby chic and scrapbooking with your own hands - it is not so difficult, as it seems, the entire basic effect of volume is created by laying elements. By the way, flat cards are also good. :)
I think now you have enough ideas for creating congratulatory cards, postcard and tags - needle for your pleasure and delight your loved ones!

A few more ideas for inspiration:


Liked? Tell your friends:
You may also like ...
Give a beautiful drawing on Mother's Day with your mother every child and teenager wishes. Exhibitions are often held from such pictures, competitions in school and kindergarten are being created. Try your hand and learn how to draw original paintings with your own hands novice artists are now easier than simple. From the proposed master classes with photos, video prompts you can create a real work of art. Draw images can be paints or pencils. About how to draw a picture to mom on the Mother's Day statenly told in the proposed master classes for kids, students of 3-5 class and older school.
Beautiful drawing of the mother's day with a pencil - Phased with photos and video for beginners
Make the original drawing of the mother's day with a pencil for beginners is usually difficult. Therefore, the simplest solution will be redrawing photos. It is necessary to prepare a beautiful image of a bouquet, including diverse elements. They are easier to depict without prior applying "frame" by a simple pencil, work is carried out using only color pencils.
Materials for master class "Beautiful bouquet": drawing on mother's day for beginners
- sheet of paper A4;
- set of color pencils on 18 colors;
- photo of bouquet.
Step-by-step drawing with a pencil "Beautiful Bouquet" for Mother's Day for beginners

On how to draw a rose with a simple pencil and how to add the shadows in stages and such a master class will also tell.
Step-by-step drawing on Mother's Day - Phaoodly draw a postcard with flowers (for high school)

The original drawing of the mother's day with paints can be turned into an unusual postcard. For example, on the inner reversal draw flowers, and on the outside to put a beautiful signature. Such a craft can be placed on the Mother's Day's drawings contest: an unusual work will help get a victory.
Materials for master class in drawing on the postcard "Maks and Chamomile"
- dense paper or double-sided white cardboard;
- acrylic white, ivory;
- brush blade, thin brush;
- ordinary pencil;
- watercolor paints;
- thin marker.
Bright postcard "Maks and Chamomile" for the day of the mother to school stages

A simple drawing on the mother's day with your own hands with the photo - for students of 3-5 class

Standard Picture of Mother's Day - Floral Arrangements. But for students of 3-5 classes, creating a large image is a problem. Therefore, a small flower branch will become an excellent alternative to a lush bouquet. Such work can be used for the drawings of the mother's day or to give your favorite mom to her holiday.
Materials for work with your own hands on the master class "Red Flowers"
- dense paper A4;
- pearl acrylic paints: green and red;
- thin brush.
Unusual drawing "Red Flowers" for Mother's Day with your own hands - Phased with a photo

Beautiful paint flowers can be drawn and through another master class. The attached video will allow you to portray bright maki in just 10 minutes:
Step-by-step children's drawing on mother's day with detailed photos - draw bells

Select a master class for drawing on the mother's day to kindergarten, according to the following criteria: simplicity, brightness, unusual. Small flowers bells will become an excellent basis for the image. They can be decorated with postcards or become a pleasant gift picture. You can even portray small flowers with your own hands even kids from the initial or middle group of kindergarten.
Materials on the master class "Bells" - Children's drawing of the mother's day do it yourself
- dense sheet of paper A4 (preferably with a textured surface);
- pastel pencils;
- ordinary pencil;
- eraser;
- hair spray.
Original picture "Bells" on Mother's Day with their own hands - Phased for kindergarten

A bright and colorful drawing on a mother's day with a photo and video will be able to create even a novice artist. Master classes for creating images with flowers are optimal for school, and for kindergarten. They describe how to properly work with pencils and paints, as stages to do blanks and paint images. With you create your own hands, every child and teenager will be able to create a drawing of the mother's day. Such works can be submitted to children's contests and exhibitions: the original work will certainly deserve praise and, perhaps, will lead the author to the prize place.
Creating a postcard for loved ones for different holidays.
For any person, regardless of age, the birthday means the beginning of something new, where cherished desires are carried out and, of course, the most hidden dreams come true. On this beautiful day, the birthday girl expects gifts and congratulations from his loved ones. After all, they are forcing the recipient to smile and rejoice.
Each of us without exception adores surprises. Consequently, if you are going for a birthday, you need to prepare in advance for this celebration. Let's look at a few options for postcards that you can do yourself and give your favorite person.
How to draw a congratulatory card for my mother's birthday?
Of course, the postcard should look beautiful and touching. Perhaps you want to do something concrete? Then we advise you to write an ordinary one on the product very much, but a very pleasant inscription: "Favorite Mommy". For the manufacture, take the scissors and glue, and also go to such objects:
- Billet for needlework (you can take a dense cardboard).
- The background image (you can take conventional colored paper, a piece of paper for scrap and so on).
- Chipboard for inscriptions (buy ready-made in advance or use the stapler, which draws up the edges).
- Decorative elements (flowers, butterflies, beads, leaves) - 2 pcs.
- Large decorative elements (bow, flower) - 2 pcs.
- Decorative tape.
- Lace or Fester Ribbon.
Manufacturing process:
- To begin with, make a sketch with an ordinary pencil. Add colors that will give you the opportunity to understand which shades you will apply during work.
- Stick the background to the blank postcard. Place large flowers. Complete the overall composition with decorative elements.
- Thoroughly dry work.
- When it dies, decorate it with sparkles.
- After that, write on the postcard of the wishes of an expensive mom.
- Inside the postcard can draw beautiful flowers or bows, and write a wish to a native person.
How to draw a greeting card for the birthday of dad?
Greeting card your favorite daddy for the birthday is at least touching. Pick up the topic for such a postcard is difficult, however there is one detail that you simply must apply - this is a style. If you have a stylish greeting card, believe me, your dad will definitely get to such a gift. Let even on the postcard itself there will be no symbols of "masculinity", for example, an image of cars, weapons or fishing.
You can make a postcard with embroidery, threads and so on. Try all patience and love to your own creativity. To begin with, pick up the postcard plot, for example, any element of a man's portrait, for example, beard, smoking tube, Hipster-style glasses. Select the desired shades. Ideal are calm and beautiful, which will harmonize each other.


Manufacturing process:
- Take the basis of the postcard. Cut for her shirt.
- In the center "Shirts" cut the triangle.
- Stick under the "shirt" rectangle.
- Take a satin ribbon. Tie a tie in the form of a note from it and get to the base.
- Top tie stick to the "shirt".
- Using a special circuit, make stitches.
- Stick to the button of buttons.
- Write congratulatory wishes inside the postcard, add more small pictures, for example, balls.
How to draw a greeting card for the birthday of the grandfather?
You can give your grandfather to give a beautiful postcard that you make your own hands. To create this craft, you will need to spend a minimum of free time, plus the sea of \u200b\u200bfantasy, as well as take scissors with glue, and stock as follows:
- Color cardboard
- Colored paper
- Paper strips for queening
- Buttons
- Double-sided scotch


Manufacturing process:
- To create a blank for a postcard, take the cardboard. You can apply two-way or one-sided cardboard. Fold it into two equal parts.
- Gently sell the line where the postcard will bend.
- Then at the top of the postcards make a small stubborn approximately equal to 2 centimeters.
- Fold the edges of the postcard so that you have a collar.
- Make a "vest" from color strips. Strips neatly glue to the outside of the product, while alternating the colors to their own discretion. You can draw strips instead of paper strips with pencils or paints.
- Take a brown strip. Stick in the central part of the postcard.
- Also such a strip will cross the edges of the vest
- Make a bow. Attach it to the collar with a tape or glue.
- On the right and left side are small pockets. And in the center, take a button (you can somewhat or immediately).
- Next, place the postcard inside for your own.
How to draw a greeting card for grandmother's birthday?
Grandma is exactly the person who is always ready to feed delicious pie and pies, listen and give a useful advice. If you want to surprise your grandmother's birthday with a unique gift, give her a beautiful postcard. But not the one you can buy in the store, but made with your own hands.
For the manufacture of the postcard, take the following materials and tools:
- Cardboard colored and white with black
- Lace - Approximately 12 cm, but not less
- White ribbon - 30 cm
- Artificial Flowers - 3 pcs
- Buttons matching paper - 3 pcs
- Scissors
- Line of glue
- The pencils
Manufacturing process:
- From the white cardboard, cut a 16 cm rectangle * 20 cm. Bend this rectangle into two equal parts. So you will have the basis of the postcard.
- Take a black cardboard. Cut 2 rectangles from it (15.6 cm * 9.6 cm and 8 cm * 3.2 cm).
- Take the color cardboard. Cut rectangles from it (15.2 cm * 9.2 cm and 7.7 cm * 2.9 cm).
- Stick color cardboard over black to get a black frame.

- Collect the substrate.
- Stick a smaller rectangle and the inscription "Happy Birthday" on a smaller rectangle.
- Then glue the lace. From the white ribbon, cut off the strip 12 cm. Stick it from above the lace.

- Make a bow from the ribbon, stick it to the substrate. Also glue flowers and buttons on a small rectangle.
- Enclose the substrate to the basis of the product.
- Next, decorate the postcard as you wish with colored pencils. Do not forget to write a congratulation.


How to draw a greeting card for a friend's birthday?
What can you give to your favorite girlfriend? The usual gifts, sometimes, are no longer able to please the birthday girl. But the postcard made by the personally can really surprise any person. Moreover, for the manufacture you will spend only 30 minutes, maybe a little more. So, you should have such materials in stock:
- A piece of bilateral cardboard
- A piece of snow-white cardboard
- Scissing
- Blade or knife
- Double-sided adhesive
- Measuring supplies (pencil line)
- Ribbon
- Decorating elements
- Hole puncher

Manufacturing process:
- Take the color cardboard. Cut a rectangle and bend it to 3 equal parts. On the cardboard, designate the circuit of the handbag.
- Cut the postcard form.
- Take the blade or knife. Cut the handle handle. Get it inside the product.
- In the inner part of the handbag with the help of a tape, cover a rectangle carved from snow-white cardboard. You can cut a rectangle edges using a hole.
- Decorate the product - tie a bow, stick it for a fastener seat. Stick decorating elements.
Please this postcard your favorite girlfriend!
How to draw a birthday greeting card to a friend?
If you have a very close friend you know almost from birth, you can draw an unusual and bright postcard for him. Try to imagine what your friend loves and depict it on your postcard. We suggest you make the next postcard. Take:
- Snow-white paper (landscape sheet)
- Ordinary pencil
- Multicolored pencils
- Scissors with ruler

Manufacturing process:
- Take paper. Bend it in the center.
- On the inside of the paper, with the help of a simple pencil, draw what you want, for example, balloons.
- Then write with multi-colored letters wishes a birthday room. Position the inscription on balloons or email pleasant words at the bottom of the postcards.
- After you accurately decide with the postcard, draw it.
- You can use multicolored pencils, and can water paints. It all depends on what's better you can work.
- If you want to draw a beautiful nature on the postcard, then for this you advisively apply paints. With them you can more naturally convey the shades of nature and its riotiness.
How to draw a greeting card for the sister's birthday?
Do you have a younger sister? Does she have a birthday very soon? Then you should bother in advance about the gift. To the end result turned out very colorful and beautiful, then take the following items:
- Colored High Density Paper - 1 Set
- Markers or markers
- Multicolored pencils
- Colored handles
- Simple pencil well-fulfilled
- Scissing with glue
Manufacturing process:
- Take paper. Bend it in half.
- On the outside, draw an image on the inside write the wish of the birthday man on the inside.
- Now proceed to drawing. Take a simple pencil. Draw an oval on the postcard. In the center of oval, draw the strip curve (it will be a center of a bear face). Then draw the muzzle and nose itself.
- Draw a spout, leave a small glare.
- Next, draw your eyes, mouth, eyebrows and ears of a teddy bear. Draw them with colored pencils.
- Draw a torso. Spend 2 parallel rounded strips from your head (so you get the body of the Mishutka).

- Draw a teddy bear 2 lower legs.
- Then depicting a cake in the figure and show off it. Add one upper paw.
- Then dorisite another upper paw.

- Place the background card. You can draw balloons, and on every ball write letters that make up the phrase "happy birthday".
- Finish the postcard - just paint it with multicolored pencils.
![]()
As a result, you will get a beautiful postcard, which your sister will definitely be delighted.
How to draw a birthday greeting card brother?
If you want to give younger brother an unusual gift, then make him a postcard yourself. You can draw an elephant on the postcard. How to do this below.
- On a clean sheet, draw a pair of circles that must be appointed to each other. Just keep in mind, these details must be different in size.
- In the center of the circumference of a smaller size, draw a trunk of an elephant. Above the trunk draw eyes and eyebrows.
- Cears are elephant with big. Apply smooth strips at the top and wavy below.
- At the bottom of the circumference of the larger size, draw the legs.
- Make folds (knees and claws).
- Draw an elephant tail, and on his tip a brush.
- Remove the extra lines using the eraser, and the main thing is thoroughly circled.
- Coloring the elephant at your request. Write wishes.

How to draw a birthday greeting card to the teacher and teacher?
Greeting card, which is done with your own hands is the best gift for the teacher from the student. There are a large number of options, but we offer you to use our. In order to create a postcard, stock materials:
- Cardboard (from it you will make the basis)
- Gouashe paints or watercolor
- Napkin

Manufacturing process:
- Make the basis for your postcard. Take a snow-white cardboard.
- Then take the prepared paints. Pulk your fingertips in the paint.
- In the central part of the postcard, you will show the flower using this method.
- Wait for the postcard completely dry.
- Inside the postcard write a beautiful poem. You can even come up with himself.
How to draw a birthday greeting card Tete, godfather, woman?
Flowers must be depicted on the card for aunt and the godfather. After all, all women without exception adore them. We suggest you make the next option of the postcard, which you can give not only a close person, but also a neighbor, my mom's mom and so on.

Manufacturing process:
- To begin with, draw a vase on the postcard. Mark the places that flowers will occupy.
- Then drew the flowers themselves, for example, roses. The amount is not so important. The most important thing is to be odd.
- Finish draw rose petals. Then draw a beautiful bow on the vase.
- Picture pink leaves.
- At the very end, add all the elements. Color the drawing with red or bardery paints. Vase can paint blue.
How to draw a greeting card for a man's birthday?
For a man, for example, for the Chef, you can make an interesting postcard in the style of antiquity. You can view drawings in advance that are very suitable for that time. After you select Figure, print it on the printer or snatch. Especially if you love to draw.
For the manufacture, take:
- Paper for the base (cardboard paper, color or white).
- Scissors.
- Knife.
- Elements for fastening.
- Decorating elements.
- Pencils or paints.

Manufacturing process:
- To begin with, decide on the color range and the main drawing.
- Make the basis for the postcard of any form. If you want the postcard to be opened, then bend it in the pressure.
- On the postcard, get a picture, pieces of material and other decorating elements. Make sure they are suitable for general topics.
- Start these elements in turn on the basis.
- On the inner and outer side of the product, draw in bright pencils of congratulatory words.
- If you want the postcard to be more interesting, tie it around a thin ribbon, and then tie a bow.
How to draw a greeting card for a birthday boy?
Any child dreams of having all the cherished desires. And who can execute them? Of course, the goldfish. You can make a greeting card, decorating her goldfish. The kid will definitely believe that she will fulfill his dreams. To execute, take:
- Blue cardboard (size as landscape sheet).
- Golden nail polish or gold jewelry is also golden.
- Glue.
- Gel pen (better than several different colors).
- Ordinary pencil.
- Eye (beads).
- Scissors with a ruler, plus double-sided tape.

Manufacturing process:
- Bend the cardboard input. The blue side should look out. Draw the outline of the fish in the center. Circle it with a handle. Draw the crown and fins.
- Picture a glazing with a simple pencil or get a prepared eyebreaker (bead).
- Lubricate fish glue. Sprinkle gold jewelry in the form of small balls.
- Then draw bubbles from the air.
- At the bottom of the postcard write "Happy Birthday".
How to draw a greeting card for the birthday girl?
Girls, as a rule, unlike the boys, when they give unusual and bright gifts. If you give a postcard that you make your own hands, you will definitely deliver the girl a lot of positive emotions. For your own creativity, take:
- Colored paper.
- Snow white paper.
- Glue with scissors.
- Cardboard.
- Paints or color pencils.

Manufacturing process:
- On snow-white paper with pencils or paints, you will depict the hedgehogs. Stick to a card with a circle of various sizes.
- If you want some balls to get volumetric, get into the picture similar to the size of the balls, but fold them in advance in the form of a book. Write a beautiful wish in the inside of each ball.
Is the wonderful postcard? You can also make it for a nephew or niece, for a gummy or a kid and so on.
How to draw a birthday greeting card to kindergarten?
Now let's try to make a postcard for the smallest kids who are still in kindergarten. Position the cute cat with a cake in the paws on it.
- Make to start a blank for a postcard.
- On the outside, draw the ball, fruit, eyes, spout and nurse of the cat. If you wish, you can draw a mustache cat.
- Dorisite the cat festive cap, ears and tail.
- Before the cat, depict a cake with candles.
- Add the animal strip on the body and on the tail.
- Behind the cat Picture Packed Gifts.
- Inside the postcard write "Congratulations".

Beautiful mother's portrait is usually difficult to draw even to schoolchildren. But if you choose simple lessons for children, in which all the stages of its creation are shown in detail, then there will be no problems in the work. For example, the following workshops will help to learn how to children 8-9 years old to draw mom beautifully and easily with pencil or paints.
Step-by-step master classes for creating a beautiful mother's portrait easy and easy for children
Using the proposed video, you can easily draw Mine Porter with paints or pencils. Such master classes are suitable for children of 8-9 years and older children.
How to draw mom and dad, and daughter, and son - master class with photos

One of the most beautiful and cute gifts for each mother can be a portrait of the whole family. And for the child to simply draw each of her member, it is recommended to make special templates for individuals in advance. They will help to statenly draw adults and the children of the face, step by step to arrange figures of people in the picture. To learn more about how to draw mom and dad with my daughter and son, will help children next master class. It is suitable for all elementary school students.
Materials for creating a simple family drawing
- color and white paper;
- ordinary pencil;
- color pencils or paints;
- eraser.
Step-by-step master class on drawing a family portrait with mom, dad and children

How beautiful to draw mom with a child - master class with video

With the help of a simple master class, you can learn to paint portraits, both adults and children. For example, the following instruction will help learn how to draw mom with a child easily and beautifully, without using special tools. These drawings, children can be portrayed with a pencil, and paints.
Master class with video creation Mom drawing with baby
The next video on the master class is great for children who learn to draw paints. Step-by-step instructions will help them create original pictures without special difficulties.
What to draw mom's birthday from my daughter - a step-by-step lesson for children

Having to make mom a cool drawing on his birthday, every child. And if the boys will easier to draw a mother's portrait, then daughters can pick up other drawings. For example, a girl can give the mom's original pattern of cake or cake. Therefore, choosing that to draw mom for a birthday from a daughter, baby should pay attention to simple and funny pictures. These include the next master class, which is excellent for children of school and preschool age.
Materials for creating a cool drawing for a birthday mother
- simple pencil;
- color pencils or markers;
- eraser;
- paper;
- line.
Step-by-step lesson drawing a cool picture for mom from his daughter

What you can draw mom just like this - a step-by-step master class with a photo

Make a mummy a nice gift and just please her, will help the creation of an unusual and cute drawing. For example, a child can draw a funny little animal for this, a beautiful house or a bright bouquet. Therefore, choosing that you just like to draw mom, you can not limit your fantasy and create any original pictures. For example, using the next master class you can learn easily and just draw a cute cartoon cat.
List of materials for drawing pictures Mom as a gift just like that
- simple and color pencils;
- eraser.
Step-by-step lesson with photo creation of simple drawing for handing mom

How to draw a card mom for mother's day with your own hands - a lesson with a photo

To make your mother, an interesting and beautiful postcard does not necessarily make applications or complex crafts. For example, it can be created using only pencil and eraser. The child will only stay beautiful to paint the picture and enter congratulations. The next lesson tells in detail how to draw your own postcard mom on the mother's day, easy and simple.
List of materials for drawing cards for mother's day
- white sheet of paper A3 (can and A4);
- simple and color pencils;
- eraser.
Photo classroom lesson for mother postcard in honor of the Mother's Day

The proposed master classes with photos and video will help every child to find out what to draw mom to the day of the mother, the day of birth or just like that. For example, they will be able to depict a mother's portrait or draw mom with dad, daughter or son. No less beautiful and easy with simple instructions, you can create cool greeting cards, mother's drawings with a child. The kids and schoolchildren will only have to choose how to draw mom, and what materials they want to use. Original drawings can be gradually draw, both simple pencils and wovers or paints.
In the fall in all corners of our planet, Mother's Day is celebrated. Large and small children express love and gratitude to their parents. A gift for the mother's day with his own hands will be a good addition to gentle words. Fiction, frame from Watman for a joint photo ... Even if you buy a ready-made gift, you can not do without a postcard for the mother's day - this product will warm your mom's soul.
How to make a postcard
Postcards with your own hands will be able to make the son and daughter of all age. Do not choose complex techniques - Mom will delight the fact that the child tried, trying to make her a gift. However, if you have your own work experience - take registration of postcards in 3D or scrapbooking technique - very interesting directions for creativity.
From paper
The scary and incomprehensible word "scrapbooking" is called the manufacture of postcards with the help of different little things - drawings, buttons, "different" threads, elegant lace, clothespins. Often, when creating crafts, some memorable elements are used: newspaper clippings on a specific topic, tickets, labels, notes, tag from maternity hospital, hair curl, wedding invitation.
Find out what other scrapbooking ideas can be applied to design a postcard.

From colored paper
Cardmayking is another "terrible" word from the world of Handmade. Although in fact, this firm term is just going to the process of creating postcards with their own hands. Appangers Handmade Art do not cease to argue about whether the cardmaking of the selection of scrapbooking or this is a separate type of creativity. Let them argue, and while you look at what postcards on the mother's day do it yourself.

Volume
If you want to make a postcard, using one of these directions, the question "What to give mom for the mother's day with your own hands" will disappear:
- Origami is a popular type of art that denotes the product of folded paper. Crafts for the mother's day, created in this technique, can be in the form of a dress, flower, heart or even God's cows.
- Kirigami - Even if you did not hear this word, the craft in this technique did for sure! The simplest representative of Kirigami is a snowflake, which preschoolers and adults on the eve of the New Year are cut out with diligence. Differences of the technique of Kirigami from their "fellow", origami technology, is allowed to use undergraduate means, such as scissors or glue.
- Quilling is the manufacture of different crafts using paper strips twisted into the spiral. An interesting occupation.
- Pop Ap - creating crafts with bulk elements that "fall out" when the product is disclosed (whether it is a card or book). Combines the techniques in Kirigami and artistic cutting.

Crafts for mother's day in kindergarten
Children's postcards are mastered all the kids visiting the pre-school institution. So the child will cope with the applique of any age. If there are problems, a caring teacher will direct it in the right direction, saying about the technique of performing a souvenir. Mama's postcard will also be an excellent developing occupation for the kid himself.
Flowers
Master class on how to make crafts from paper for children, for any age boys and girls. Teach them to "grow" flowers from paper, which will come in handy for a postcard created on the Mother's Day with your own hands. To create a postcard "Chamomile field":
- Prepare one sheet of yellow cardboard, tight paper of white and green, glue, a piece of wallpapers with summer motifs, a simple pencil, a stationery knife.
- Draw a template pattern of complex color and, moved it on white paper, cut 45 identical leaves.
- Tighten the edges of petals outwards using a pencil.
- Prepare the cores of flowers. They may become monophonic butchers or small paper circles.
- Divide the petals of 15 pieces. Sew them with a thread and needles, make a button on top. The second option is to glue the petals in a circle to the core. It turned out three flower.
- Bend in half a cardboard sheet. In the center of the front side, cut the flower, similar to the chamomile contours.
- From the wallpaper cut the rectangle, stick inside the postcard page.
- Cut 12 thin strips from green paper, tighten them with scissors. Get the "curls" in the lower corner of the postcard on the right, in three places, on which the finished chamomiles are already covered on top.
- It turned out a beautiful greeting card with her hands.

Sun
The original "Sunny" postcard will be a good gift of small "sunshine" to her moms:
- It will be useful: a dense white sheet A4, color-colored paper A4, yellow paper sheet, glue.
- Prepare a template for a "Sun" postcard from a white sheet A4. On a solid strip, cut out, on dotted - bend.
- Prepare the rays for the sun - glider stripes with tips to get a lot of color loop.
- Cut the circle from yellow paper (on the layout), draw a pencil line separating it in half. Get on top of the loops, draw eyes and smiling mouth.
- Cut the sun in half, get on a postcard.
- Draw a congratulation inside the postcard.

Heart
Help the children to explain to mothers in love, make this cute and easy to do with them.
- To create Valentine's postcard on the mother's day, you will need it: white cardboard, colored red, pink and purple paper for hearts, pencil, markers, scissors are simple and curly, glue.
- Fold white paper in half, cut the edges around the perimeter of curious scissors.
- Cut small hearts from colored paper, better than one size.
- Inside the postcard, draw two lines to which glue the cooked hearts.
- Ask kids sign your postcards. If they do not know the letters, let your congratulations draw: "Favorite Mom!"
Video master classes cards do it yourself
For those who cannot boast of figurative thinking, master classes laid out on YouTube are suitable. You do not need to reborn the worldwide web in search of the original idea of \u200b\u200bcrafts for mom. Easy and accessible video blocks will also tell and, most importantly, will show how to make a craft for mom. Information is useful as inexperienced needlewomen and scrapbooking sharks.
Simple postcard
Green or yellow cardboard card, folded in half, is a flower field. On the title side - your paper palm that holds a beautiful bouquet. For a gift? Your mother will accurately appreciate such a touching explanation for love, if you even at least 10, at least 40 years old. So, circle your palm on a piece of paper, cut it out ... although - all the details here.
Gift for mom do it yourself
The author will tell and show how to make an interesting notebook card. To create this heart congratulations, quite a few "ingredients" need: paper white and color, glue, scissors and various decorations such as sequins.
3D postcard
3D films will not surprise anyone. Three-dimensional graphic, which allows you to view pictures in the volume image, has long been working for the benefit of the cinema. That progress moved beyond the movie - 3D technology appeared in the world of needlework! On how to make an amazing postcard for a loved one, see here. Prepare scissors, glue, pencil, markers, multicolored cardboard and colored sheets of paper block for office notes.
Birthday is one of the most anticipated holidays, getting ready to congratulate someone, we view the incredible number of sites, search all stores in the district in search of the perfect gift. It should be original, unusual, atypical, memorable. Why not draw a birthday present? What about replacing a simple postcard for a gift for a congratulatory poster or poster?
Let's think together how to draw a poster for a birthday, how beautiful to arrange it and which birthday congratulations to place it, especially since the birthday posters are becoming increasingly popular.
Cool posters, cheerful cartoon, wall newspaper, poster made with your own hands - a nice birthday gift, the original congratulation is the key to the wonderful mood of the birthday man. A birthday poster can accommodate funny congratulations, poems, drawings, photos.
What will take for a congratulatory poster
To make a poster for a birthday, we will need quite a bit, first of all it:
- Whatman.
- Pencils, paints, markers, handles.
- Scissors.
- Glue.
It is possible that there are also photos of the future birthday party, old magazines, printouts, depending on the idea of \u200b\u200bthe future wall newspaper with wishes for a birthday.
By the way about the idea, before drawing a birthday present in the form of such a big, a kind of postcard, take a small draft, where you can make an outline of the future congratulations. Thus, we simplify the design of the poster, having thought of it in advance by the idea.
Constituting such a gift
- The inscription and its design.
The most important phrase, undoubtedly, should rush into the eyes, to be bright, emitting a good mood. How to arrange them? These letters can be diversified by Dudling, drawing big letters, add them colors or other small details, draw a similarity of graffiti or to make an applique. Letters can be printed, cut out of colored paper or from logs. Unusually interesting! - Background.
The background should be no less bright, but do not merge with the main letters, wishes and images. Watercolor will come to the rescue. A lightweight watercolor layer will dilute White Watman, and already on it you can place a wide variety of ideas. - Congratulations.
On a draft with a sketch, sketch and a few words for a celebrating birthday cool, in poetic form, short phrases or long prose. If you doubt your skill to write good greetings, look for them in advance on the Internet, print it or rewrite yourself.

First of all, the congratulatory poster for the birthday is simply obliged to be bright, and therefore it is necessary to minimize the use of dull, dark, cold colors.
A poster will not require a lot of effort, artistic skills, and interesting congratulations can be found on sites, there you will find not one good idea that for my birthday to draw.
The first thing that comes to mind when creating a poster is a huge birthday inscription, placed on top or centered, large beautiful letters, volumetric bright. So, first of all, place the phrase in a convenient place, to start, do it with a simple pencil. Armed with eraser and pencil, we will be able to fix random blots and shortcomings.
Ideas for drawing to the birthday
If you do not have ideas or lack inspiration, then here are some tips of what can be drawn for a birthday. Here you will find help, how to make a poster for a birthday, but do not forget to add your unusual raisin as a gift.


For artists
The first and simplest thing that can serve as a poster - drawings, simple thematic drawings, it can be balloons, boxes with gifts, a birthday image or simple drawings, such as flowers, among which congratulations will be posted.

Congratulations can be printed and glued to a poster, or write from hand. If balls are depicted on your posters, why not put congratulations on the balls. And if the flowers, petals are an excellent idea to arrange any wishes.
You can diversify such a poster volume, for example, glue from above another drawn ball, raising which you can detect a couple of warm words from you. You can also do with flower petals, and with gifts. If you have several small envelopes, or you can fold them out of paper yourself, then stick the finished envelopes, putting in them a pair of pleasant lines - a great idea.
Collage
Doubt your artistic skills? No problem. Having a color printer, find beautiful images on the Internet! Print, cut, and glue to the future poster. Between them you can place the same printed congratulations.

Photos for collage will be no less by the way. Take your shared photos made in the happiest moments or past holidays. Or photos from children's years, they can be placed on the poster in the order of the birthday of the birthday. Funny and random photos can also be used, of course, if the birthday girl is not offended, and you want to get cool posters.
Among congratulations with such photos, you can put a pair of phrases that are celebrating a birthday celebrating in your family / company.
Work on such a poster does not take much time, but it will be bright, attractive and original.
A sweet poster has now become very popular. Supermarkets die with a variety of sweets, and those are the most unusual and original names that can be used with congratulations on the poster. It will be fun to sound such phrases as "we are inseparable as twix" or "Communication with you - a paradise enjoyment" with a banty chocolate bant chocolate bant. Purchasing a pair of snacks, making an approximate plan for congratulations. Give, enter, attach small sweets to Watman, bright markers adding missing words to chocolate, candies and lollipops.

For congratulations on your birthday, you do not need to possess the poet's talent, and the drawing does not have to be your skate. Happy Birthday posters - a current way to express their congratulations.
A poster with birthday wishes is an interesting, unusual and original gift that is done not long, does not require a lot of effort. However, it is very nice to get such a congratulation, because he is made with his own hands, which speaks of attention to the birthday man and his gift.
For any person, regardless of age, the birthday means the beginning of something new, where cherished desires are carried out and, of course, the most hidden dreams come true. On this beautiful day, the birthday girl expects gifts and congratulations from his loved ones. After all, they are forcing the recipient to smile and rejoice.
Each of us without exception adores surprises. Consequently, if you are going for a birthday, you need to prepare in advance for this celebration. Let's look at a few options for postcards that you can do yourself and give your favorite person.

How to draw a congratulatory card for my mother's birthday?
Of course, the postcard should look beautiful and touching. Perhaps you want to do something concrete? Then we advise you to write an ordinary one on the product very much, but a very pleasant inscription: "Favorite Mommy". For the manufacture, take the scissors and glue, and also go to such objects:
- Billet for needlework (you can take a dense cardboard).
- The background image (you can take conventional colored paper, a piece of paper for scrap and so on).
- Chipboard for inscriptions (buy ready-made in advance or use the stapler, which draws up the edges).
- Decorative elements (flowers, butterflies, beads, leaves) - 2 pcs.
- Large decorative elements (bow, flower) - 2 pcs.
- Decorative tape.
- Lace or Fester Ribbon.

Manufacturing process:
- To begin with, make a sketch with an ordinary pencil. Add colors that will give you the opportunity to understand which shades you will apply during work.
- Stick the background to the blank postcard. Place large flowers. Complete the overall composition with decorative elements.
- Thoroughly dry work.
- When it dies, decorate it with sparkles.
- After that, write on the postcard of the wishes of an expensive mom.
- Inside the postcard can draw beautiful flowers or bows, and write a wish to a native person.
How to draw a greeting card for the birthday of dad?
Greeting card your favorite daddy for the birthday is at least touching. Pick up the topic for such a postcard is difficult, however there is one detail that you simply must apply - this is a style. If you have a stylish greeting card, believe me, your dad will definitely get to such a gift. Let even on the postcard itself there will be no symbols of "masculinity", for example, an image of cars, weapons or fishing.
You can make a postcard with embroidery, threads and so on. Try all patience and love to your own creativity. To begin with, pick up the postcard plot, for example, any element of a man's portrait, for example, beard, smoking tube, Hipster-style glasses. Select the desired shades. Ideal are calm and beautiful, which will harmonize each other.


Manufacturing process:
- Take the basis of the postcard. Cut for her shirt.
- In the center "Shirts" cut the triangle.
- Stick under the "shirt" rectangle.
- Take a satin ribbon. Tie a tie in the form of a note from it and get to the base.
- Top tie stick to the "shirt".
- Using a special circuit, make stitches.
- Stick to the button of buttons.
- Write congratulatory wishes inside the postcard, add more small pictures, for example, balls.
How to draw a greeting card for the birthday of the grandfather?
You can give your grandfather to give a beautiful postcard that you make your own hands. To create this craft, you will need to spend a minimum of free time, plus the sea of \u200b\u200bfantasy, as well as take scissors with glue, and stock as follows:
- Color cardboard
- Colored paper
- Paper strips for queening
- Buttons
- Double-sided scotch


Manufacturing process:
- To create a blank for a postcard, take the cardboard. You can apply two-way or one-sided cardboard. Fold it into two equal parts.
- Gently sell the line where the postcard will bend.
- Then at the top of the postcards make a small stubborn approximately equal to 2 centimeters.
- Fold the edges of the postcard so that you have a collar.
- Make a "vest" from color strips. Strips neatly glue to the outside of the product, while alternating the colors to their own discretion. You can draw strips instead of paper strips with pencils or paints.
- Take a brown strip. Stick in the central part of the postcard.
- Also such a strip will cross the edges of the vest
- Make a bow. Attach it to the collar with a tape or glue.
- On the right and left side are small pockets. And in the center, take a button (you can somewhat or immediately).
- Next, place the postcard inside for your own.
How to draw a greeting card for grandmother's birthday?
Grandma is exactly the person who is always ready to feed delicious pie and pies, listen and give a useful advice. If you want to surprise your grandmother's birthday with a unique gift, give her a beautiful postcard. But not the one you can buy in the store, but made with your own hands.
For the manufacture of the postcard, take the following materials and tools:
- Cardboard colored and white with black
- Lace - Approximately 12 cm, but not less
- White ribbon - 30 cm
- Artificial Flowers - 3 pcs
- Buttons matching paper - 3 pcs
- Scissors
- Line of glue
- The pencils
Manufacturing process:
- From the white cardboard, cut a 16 cm rectangle * 20 cm. Bend this rectangle into two equal parts. So you will have the basis of the postcard.
- Take a black cardboard. Cut 2 rectangles from it (15.6 cm * 9.6 cm and 8 cm * 3.2 cm).
- Take the color cardboard. Cut rectangles from it (15.2 cm * 9.2 cm and 7.7 cm * 2.9 cm).
- Stick color cardboard over black to get a black frame.

- Collect the substrate.
- Stick a smaller rectangle and the inscription "Happy Birthday" on a smaller rectangle.
- Then glue the lace. From the white ribbon, cut off the strip 12 cm. Stick it from above the lace.

- Make a bow from the ribbon, stick it to the substrate. Also glue flowers and buttons on a small rectangle.
- Enclose the substrate to the basis of the product.
- Next, decorate the postcard as you wish with colored pencils. Do not forget to write a congratulation.


How to draw a greeting card for a friend's birthday?
What can you give to your favorite girlfriend? The usual gifts, sometimes, are no longer able to please the birthday girl. But the postcard made by the personally can really surprise any person. Moreover, for the manufacture you will spend only 30 minutes, maybe a little more. So, you should have such materials in stock:
- A piece of bilateral cardboard
- A piece of snow-white cardboard
- Scissing
- Blade or knife
- Double-sided adhesive
- Measuring supplies (pencil line)
- Ribbon
- Decorating elements
- Hole puncher

Manufacturing process:
- Take the color cardboard. Cut a rectangle and bend it to 3 equal parts. On the cardboard, designate the circuit of the handbag.
- Cut the postcard form.
- Take the blade or knife. Cut the handle handle. Get it inside the product.
- In the inner part of the handbag with the help of a tape, cover a rectangle carved from snow-white cardboard. You can cut a rectangle edges using a hole.
- Decorate the product - tie a bow, stick it for a fastener seat. Stick decorating elements.
Please this postcard your favorite girlfriend!
How to draw a birthday greeting card to a friend?
If you have a very close friend you know almost from birth, you can draw an unusual and bright postcard for him. Try to imagine what your friend loves and depict it on your postcard. We suggest you make the next postcard. Take:
- Snow-white paper (landscape sheet)
- Ordinary pencil
- Multicolored pencils
- Scissors with ruler

Manufacturing process:
- Take paper. Bend it in the center.
- On the inside of the paper, with the help of a simple pencil, draw what you want, for example, balloons.
- Then write with multi-colored letters wishes a birthday room. Position the inscription on balloons or email pleasant words at the bottom of the postcards.
- After you accurately decide with the postcard, draw it.
- You can use multicolored pencils, and can water paints. It all depends on what's better you can work.
- If you want to draw a beautiful nature on the postcard, then for this you advisively apply paints. With them you can more naturally convey the shades of nature and its riotiness.
How to draw a greeting card for the sister's birthday?
Do you have a younger sister? Does she have a birthday very soon? Then you should bother in advance about the gift. To the end result turned out very colorful and beautiful, then take the following items:
- Colored High Density Paper - 1 Set
- Markers or markers
- Multicolored pencils
- Colored handles
- Simple pencil well-fulfilled
- Scissing with glue
Manufacturing process:
- Take paper. Bend it in half.
- On the outside, draw an image on the inside write the wish of the birthday man on the inside.
- Now proceed to drawing. Take a simple pencil. Draw an oval on the postcard. In the center of oval, draw the strip curve (it will be a center of a bear face). Then draw the muzzle and nose itself.
- Draw a spout, leave a small glare.
- Next, draw your eyes, mouth, eyebrows and ears of a teddy bear. Draw them with colored pencils.
- Draw a torso. Spend 2 parallel rounded strips from your head (so you get the body of the Mishutka).

- Draw a teddy bear 2 lower legs.
- Then depicting a cake in the figure and show off it. Add one upper paw.
- Then dorisite another upper paw.

- Place the background card. You can draw balloons, and on every ball write letters that make up the phrase "happy birthday".
- Finish the postcard - just paint it with multicolored pencils.

As a result, you will get a beautiful postcard, which your sister will definitely be delighted.
How to draw a birthday greeting card brother?
If you want to give younger brother an unusual gift, then make him a postcard yourself. You can draw an elephant on the postcard. How to do this below.
- On a clean sheet, draw a pair of circles that must be appointed to each other. Just keep in mind, these details must be different in size.
- In the center of the circumference of a smaller size, draw a trunk of an elephant. Above the trunk draw eyes and eyebrows.
- Cears are elephant with big. Apply smooth strips at the top and wavy below.
- At the bottom of the circumference of the larger size, draw the legs.
- Make folds (knees and claws).
- Draw an elephant tail, and on his tip a brush.
- Remove the extra lines using the eraser, and the main thing is thoroughly circled.
- Coloring the elephant at your request. Write wishes.

How to draw a birthday greeting card to the teacher and teacher?
Greeting card, which is done with your own hands is the best gift for the teacher from the student. There are a large number of options, but we offer you to use our. In order to create a postcard, stock materials:
- Cardboard (from it you will make the basis)
- Gouashe paints or watercolor
- Napkin

Manufacturing process:
- Make the basis for your postcard. Take a snow-white cardboard.
- Then take the prepared paints. Pulk your fingertips in the paint.
- In the central part of the postcard, you will show the flower using this method.
- Wait for the postcard completely dry.
- Inside the postcard write a beautiful poem. You can even come up with himself.
How to draw a birthday greeting card Tete, godfather, woman?
Flowers must be depicted on the card for aunt and the godfather. After all, all women without exception adore them. We suggest you make the next option of the postcard, which you can give not only a close person, but also a neighbor, my mom's mom and so on.

Manufacturing process:
- To begin with, draw a vase on the postcard. Mark the places that flowers will occupy.
- Then drew the flowers themselves, for example, roses. The amount is not so important. The most important thing is to be odd.
- Finish draw rose petals. Then draw a beautiful bow on the vase.
- Picture pink leaves.
- At the very end, add all the elements. Color the drawing with red or bardery paints. Vase can paint blue.
How to draw a greeting card for a man's birthday?
For a man, for example, for the Chef, you can make an interesting postcard in the style of antiquity. You can view drawings in advance that are very suitable for that time. After you select Figure, print it on the printer or snatch. Especially if you love to draw.
For the manufacture, take:
- Paper for the base (cardboard paper, color or white).
- Scissors.
- Knife.
- Elements for fastening.
- Decorating elements.
- Pencils or paints.

Manufacturing process:
- To begin with, decide on the color range and the main drawing.
- Make the basis for the postcard of any form. If you want the postcard to be opened, then bend it in the pressure.
- On the postcard, get a picture, pieces of material and other decorating elements. Make sure they are suitable for general topics.
- Start these elements in turn on the basis.
- On the inner and outer side of the product, draw in bright pencils of congratulatory words.
- If you want the postcard to be more interesting, tie it around a thin ribbon, and then tie a bow.
How to draw a greeting card for a birthday boy?
Any child dreams of having all the cherished desires. And who can execute them? Of course, the goldfish. You can make a greeting card, decorating her goldfish. The kid will definitely believe that she will fulfill his dreams. To execute, take:
- Blue cardboard (size as landscape sheet).
- Golden nail polish or gold jewelry is also golden.
- Glue.
- Gel pen (better than several different colors).
- Ordinary pencil.
- Eye (beads).
- Scissors with a ruler, plus double-sided tape.

Manufacturing process:
- Bend the cardboard input. The blue side should look out. Draw the outline of the fish in the center. Circle it with a handle. Draw the crown and fins.
- Picture a glazing with a simple pencil or get a prepared eyebreaker (bead).
- Lubricate fish glue. Sprinkle gold jewelry in the form of small balls.
- Then draw bubbles from the air.
- At the bottom of the postcard write "Happy Birthday".
How to draw a greeting card for the birthday girl?
Girls, as a rule, unlike the boys, when they give unusual and bright gifts. If you give a postcard that you make your own hands, you will definitely deliver the girl a lot of positive emotions. For your own creativity, take:
- Colored paper.
- Snow white paper.
- Glue with scissors.
- Cardboard.
- Paints or color pencils.

Manufacturing process:
- On snow-white paper with pencils or paints, you will depict the hedgehogs. Stick to a card with a circle of various sizes.
- If you want some balls to get volumetric, get into the picture similar to the size of the balls, but fold them in advance in the form of a book. Write a beautiful wish in the inside of each ball.
Is the wonderful postcard? You can also make it for a nephew or niece, for a gummy or a kid and so on.
How to draw a birthday greeting card to kindergarten?
Now let's try to make a postcard for the smallest kids who are still in kindergarten. Position the cute cat with a cake in the paws on it.
- Make to start a blank for a postcard.
- On the outside, draw the ball, fruit, eyes, spout and nurse of the cat. If you wish, you can draw a mustache cat.
- Dorisite the cat festive cap, ears and tail.
- Before the cat, depict a cake with candles.
- Add the animal strip on the body and on the tail.
- Behind the cat Picture Packed Gifts.
- Inside the postcard write "Congratulations".

Video: Greeting card with your own hands
For each child, Mom is the closest and native person who knows how to support his family in any situations. That is why kids and schoolchildren quite often make mothers "unplanned" gifts that will help her feel pleasant positive emotions. Choosing that to draw mom, you can also consider both complex, and simple pictures. For example, it can be an image of a cake or cat. And also children 8-9 years old or older with the following master classes with photos and videos can learn how to draw mom with dad, daughter and son. Simple instructions will also help you make a cool postcard for Mother's Day or Mom's Day for preschoolers, primary school students.
How to draw mom beautiful and easily - a step-by-step lesson for children 8-9 years

Beautiful mother's portrait is usually difficult to draw even to schoolchildren. But if you choose simple lessons for children, in which all the stages of its creation are shown in detail, then there will be no problems in the work. For example, the following workshops will help to learn how to children 8-9 years old to draw mom beautifully and easily with pencil or paints.
Step-by-step master classes for creating a beautiful mother's portrait easy and easy for children
Using the proposed video, you can easily draw Mine Porter with paints or pencils. Such master classes are suitable for children of 8-9 years and older children.
How to draw mom and dad, and daughter, and son - master class with photos

One of the most beautiful and cute gifts for each mother can be a portrait of the whole family. And for the child to simply draw each of her member, it is recommended to make special templates for individuals in advance. They will help to statenly draw adults and the children of the face, step by step to arrange figures of people in the picture. To learn more about how to draw mom and dad with my daughter and son, will help children next master class. It is suitable for all elementary school students.
Materials for creating a simple family drawing
- color and white paper;
- ordinary pencil;
- color pencils or paints;
- eraser.
Step-by-step master class on drawing a family portrait with mom, dad and children

How beautiful to draw mom with a child - master class with video

With the help of a simple master class, you can learn to paint portraits, both adults and children. For example, the following instruction will help learn how to draw mom with a child easily and beautifully, without using special tools. These drawings, children can be portrayed with a pencil, and paints.
Master class with video creation Mom drawing with baby
The next video on the master class is great for children who learn to draw paints. Step-by-step instructions will help them create original pictures without special difficulties.
What to draw mom's birthday from my daughter - a step-by-step lesson for children

Having to make mom a cool drawing on his birthday, every child. And if the boys will easier to draw a mother's portrait, then daughters can pick up other drawings. For example, a girl can give the mom's original pattern of cake or cake. Therefore, choosing that to draw mom for a birthday from a daughter, baby should pay attention to simple and funny pictures. These include the next master class, which is excellent for children of school and preschool age.
Materials for creating a cool drawing for a birthday mother
- simple pencil;
- color pencils or markers;
- eraser;
- paper;
- line.
Step-by-step lesson drawing a cool picture for mom from his daughter

What you can draw mom just like this - a step-by-step master class with a photo

Make a mummy a nice gift and just please her, will help the creation of an unusual and cute drawing. For example, a child can draw a funny little animal for this, a beautiful house or a bright bouquet. Therefore, choosing that you just like to draw mom, you can not limit your fantasy and create any original pictures. For example, using the next master class you can learn easily and just draw a cute cartoon cat.
List of materials for drawing pictures Mom as a gift just like that
- simple and color pencils;
- eraser.
Step-by-step lesson with photo creation of simple drawing for handing mom

How to draw a card mom for mother's day with your own hands - a lesson with a photo

To make your mother, an interesting and beautiful postcard does not necessarily make applications or complex crafts. For example, it can be created using only pencil and eraser. The child will only stay beautiful to paint the picture and enter congratulations. The next lesson tells in detail how to draw your own postcard mom on the mother's day, easy and simple.
List of materials for drawing cards for mother's day
- white sheet of paper A3 (can and A4);
- simple and color pencils;
- eraser.
Photo classroom lesson for mother postcard in honor of the Mother's Day

The proposed master classes with photos and video will help every child to find out what to draw mom to the day of the mother, the day of birth or just like that. For example, they will be able to depict a mother's portrait or draw mom with dad, daughter or son. No less beautiful and easy with simple instructions, you can create cool greeting cards, mother's drawings with a child. The kids and schoolchildren will only have to choose how to draw mom, and what materials they want to use. Original drawings can be gradually draw, both simple pencils and wovers or paints.