Comic for children with your own hands. Rules for building comics
If you conceived to create your comic, you want to draw your own story - a fictional or happening actually - graphic illustrations for the book, we will help you in this.
With us you can embody your creative ideas at a good technical level, even if you have never painted before. To do this, you need to carefully read this review and familiarize yourself with others. drawing lessonswhere we disclose separate technical nuances and techniques that you will need to create a comics.
For greater clarity, we will analyze the technique of drawing comics and, of course, a unique technique developed for this purpose by Aaron by Schnorbitsa, on a specific example of online comic "Aaron Schnorbits: Beginning."
With the full Russian version of this autobiographical comic retrospective, you can find in our section "Comics.The original English version of the comic is.
To facilitate the assimilation of the material, we break the process of drawing comics into several stages and we will analyze them separately. However, we first want to remind you:
Despite the fact that we are considering the creation of comics in the graphic editor of Illustrator CS5, you can draw them by analogy in other versions of this editor, graphic programs, and even on paper, using our advice in the article "Drawing lessons from a to sh". We strongly recommend familiarizing yourself with this material that will allow you to better understand the very essence of our method.
So, if you viewed the articles to which the above links are leading, you already realized that for the graphic embodiment of our ideas, we use two main techniques - collage and tracing. We will use these same techniques in a similar sequence to create a comic and divide this process to the following steps:
For this we need:
a) graphic editor illustrator cs5, b) internet connection, c) brain, capable of thinking logically, d) patience and desire to create
If the first two conditions (A, B) are optional, since you can create a comic one by analogy with a pencil, paper and a printed press, the last two conditions (C, D) are mandatory.
Operation of the idea of \u200b\u200bthe future comic
The very first and important stage. You have to specify and clarify (both with a common authentic and technical point of view) The main points of your future comic book.
First of all, you should be pretty think over acting persons your comics, their features, habits, actions, scene. You must accurately imagine the character of your hero to build the right and natural line for him, his appearance, manners. You must also choose the right context and entourage (including other actors), where the action will unfold.
Then you follow think over the narration itself - From beginning to end and choose which events you want to highlight, that is, to display on the page in individual cells. At the end of this stage, you already have to clearly imagine what you want, and how about you want to display it on pages. If you are a beginner in this matter, you should be avoided technically difficult in implementing ideas, such as comics with a large number of actors, or, for example, with detailed and complex landscapes (background drawings) or plots, where photographic accuracy of characters and the display of complex Emotions and gestures.
To this stage, it is possible to approach the extremely carefully, as any errors here can turn into the future in the process of drawing (when you have done a rather laborious work) into real problems.
For example, thinking too intricate the plot and drawing several pages, you suddenly understand that to complete your story you need to draw another 100 pages. In addition, choosing a battle theme as a plot, you can very quickly get tired of the unbearable drawing thousands of small little men. Another fatal mistake may be the principal hero itself, which requires complex facial expressions.
Therefore, to start choose a short plot with a minimum of acting individuals and simple scenery (background drawings).
Now we will explain this stage in the implementation of the comic on a specific example of the first two pages online comic "Aaron Schnorbits: the beginning"

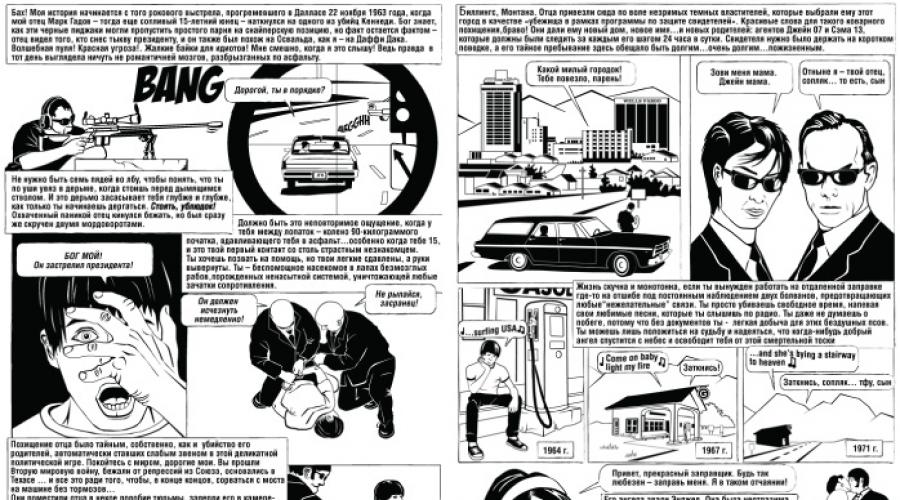
Our task was to be displayed on the first two pages of the comic event from the moment of the arrest of the fifteen-year-old Father Schnorbitsa Agents of the FBI during the murder of President D. F. Kennedy in Dallas to his (father, of course) marriage in the link in Billings!
At first glance, an unbearable task. Display 8 years of life of a person just on two pages! A person who is familiar to us only by apoloching descriptions of his forever sown.
However, in practice, with a common and consistent approach, everything turned out to be quite simple.
Characters: 15 year old guy. Since comic reflects real events, the behavior of our young hero, we also made extremely realistic. This is not a hero-mutant with superpowers like a person-spider, but a simple guy who fell under the millstone of a merciless system because of his curiosity. Faced with the FBI, he could only get frightened, conquer, torture and crushed. The line of behavior here is extremely predictable and natural for such a situation. The appearance of the hero is ordinary.
People surrounding it - FBI agents. We also decided to make them as much as possible on real - cold-blooded, worm, stupid, in classic black suits and glasses.
Scene: Dallas, where Kennedy's murder occurred, and Bill host. We immediately decided either to restrict ourselves to the image of a common panorama, individual places and attractions, or simply - a text description to make it easier for themselves.
Narration: We clearly imagined the sequence of events and clearly knew what of which the emphasis should be put on, and what should be mentioned in the text of the narration. We also understood well that covering such a long period of life of our hero The main part of the narrative should be set out with the help of the accompanying text.Development of a preliminary comic script, writing text
At this stage, you need to sketches sketches of pages, to roughly divide on their cells under the illustration, to think as deeply as possible, write text.
That is, you must already represent what specific episodes of the story (or actions) you will illustrate what plans will be used (large, common), how will you have these episodes and the corresponding text on the page.
you should clearly understandthat comic is the story outlined by a certain sequence of pictures with text (usually). The text can be divided into "voice-over" (narrative text), direct speech (statements and thoughts of characters, placed in classic "bubbles") and text illustrating various sounds.
When making a script, you need to take all this. You have to think through everything so that on the specified pages you fit all your illustrations so that they are located in a logical sequence and were not, for example, too small, as well as, importantly, leave a place for text. The text must be readable. (both by location, size and filling).
It should be noted here that the text in the comic should be read as in the book from left to right and top down. Any liberty with this Iron rule can lead to confusion. Always have "Text Bubbles", taking into account this rule.
Now consider our example:
In our narration, we immediately highlighted the key episodes that wanted to display. They should have looked spectacularly and excitation, that is, clearly and clearly illustrate the total line of the narration even without the accompanying text. By cells in the appropriate sequence, we decided to locate:
1st page: Sniper, president consignment in the sight, frightened face of a witness hero, arrest, conclusion, liberation.
2nd page: Arrival in Billings, FBI guardian agents, three static plans for a teenager bored on a gas station, a wonderful face of a future wife, newlyweds.
To better link all these illustrations in one storyline, we supplemented their volumetric text-narration, which should explain to the reader quickly replacing each other's pictures and reveal the plot's peripetics. It was for this reason that we immediately laid under it on the comic pages a lot of free space.
Then we wrote the text that according to the volume corresponded to the place allocated for it, approximately by placing it through cells. In order not to smack, on each page we decided to place no more than 6-7 cells with drawings. With this density of the drawings, the A4 comic comic page looks optimally saturated and detailed.
Search for necessary material
Now that we have a preliminary charged comic scenario, we should prepare the basis for drawing it.
As you already understood, if I went on the links at the beginning of this article, we use aaron Schnorbitsa methodwhich implies the presence of your minimum artistic skills. This means that we minimize the need to draw and, basically we will deal stroke (tracing) already ready images that we "reign" with Collage For our specific scenario. Well, for this, these images need to be found.
Essentially, this process is similar to the search and preparation of the material for drawing a print on a T-shirt. In the article "How to draw a cool print on a T-shirt. Part 1" We highlight this process in detail, so you it will be very useful to read it !!! Nevertheless, we briefly describe our task at this stage and its solution.
So, putting a sketch scenario of your comic, you must find with search engines on the Internet images that exactly as much as possible correspond to the one that you want to see in the cells of your comics, while immediately pretending how you can adjust them to your scenario upon subsequent stroke.
Now it seems difficult, but on our particular example you will be sure of the opposite.
Consider the first page of our comic. We decided to arrange the following images on it in the appropriate sequence: sniper, president's consignment in the sight, a frightened face of a witness hero, arrest, conclusion, liberation.
Let's start by searching for an illustration for the first comic-picture cell - sniper.
Open the browser and in the search engine in the search bar simply pick up the word "sniper", press the input and switched to the category "pictures". In order to do not experience difficulties with further drawing, choose the pictures of the middle and large size (in the yandex - the column on the left). They are clearly visible details that will not be superfluous for us when stroking. After that, we can only choose a suitable picture.
Selecting the sniper for our picture, we were primarily guided by the fact that it should be depicted in the profile (we initially wanted to send the barrel to the right cage with the picture of the cortem in the sight), its image should be wide and low so that it organically fit narrow In height cell. We also tried to find the Sniper of the 1960s so that he matches the time when the events unfold, however, as you noticed, they moved away a little from the rule and gave the will of fantasy, making it more modern.
When the first picture was found, we started similarly to the search for the second, and so on for all subsequent illustrations that we wanted to put on the comic pages. In the end, we have collected all the images you need for subsequent work. Below we give all the pictures collected by us for the first page of the comic:

Refinement of the script and comic composition (collage)
Thus, choosing all the necessary illustrations for comics on the Internet (or in the printed press) you can start refining the script and the final compilation of the compositions of pages and drawings in individual cells. If it is more easier - now you need from your photos and illustrations make a collage according to your idea - scriptwhich you have already developed at the preliminary stage.
If you approached the creation of a comic consistently and thoroughly, as we recommended you, you already have to present well how to arrange these drawings and "bubbles" with text. You can only fit them to each other, so that they look at the page as you have conceived. And for this you need to trim the extra edges of images, change the need for their scale, orientation (if it is, again, you need) and enter into the workspace, that is, the page.
Working in a graphic editor IllustratorYou can trim the extra edges of photos using the tool Clipping Mask (Object\u003e Clipping Mask\u003e Make)scaling with help Scale Tool (s), make a mirror reflection of the drawing using Reflect Tool (O).
With help Rectangle Tool (R) and Ellipse Tool (E)By making a white background, and the stroke is black, you can draw bubbles for text. As a result, if, for example, talking about the first page of our comic, from the collected patterns above, you need to get what you see below right - already ready for stroking collagewhich looks almost like a comic ready page (below the left).

Here we will not deepen in purely technical details of the sale of a collage for the comic book in a graphical editor, as they are practically similar to the fact that they are detailed in our article "How to make a cool drawing on a T-shirt. Part 2". You just do everything with analogy with the "Amendment to the Wind". We will only tell you what moments should pay attention to the example of our first comic book:
We all downloaded photos We put using the PLACE command (File\u003e Place) to the desktop - layer Layer 1 (default). In the parameters of the document, we chose the A4 format and, thus, immediately designated the boundaries of our page and got a clear picture of what photos should be trimmed, reduce or slightly increase relative to each other so that they fit into the workspace, taking into account the field and place Under the "bubbles" with the text.
Text we broke into parts (according to bubbles) and placed in the same layer. In this layer, we needed the text first of all in order to more accurately determine the size of the "bubbles". In particular, for the same, we immediately picked up the font and its size, as well as on the basis of the considerations listed in the past sections of the article.
After pre-setting photos in the A4 workspace, we started fitting them, starting from the first image - sniper. It was placed in the upper left corner under a large white square field of the "bubble", where the introductory and quite bulk part of the text was supposed. The bottom and unnecessary part of the photo we cut. Her place was taken by another "bubble" with the text. Thus, we consistently accounted for our page from the upper left to the right lower corner, actively using the scaling tool.
Honestly, the collage of the first page of our online comic was easy to implement, since successfully selected pictures did not require making more complex changes, except for scaling and mirroring. However, if it were required, such as, on the second comic book page (see Figure below - the upper two cells compiled from several images) the process itself would only be more difficult (we would have to first take the collage of individual comic cells), but in no way would not change.
Packing and adjustment of collage
Having created a comics page from the photos and illustrations, as well as "bubbles" with the text (see Figure above) you need to start drawing your comic book, or rather, the stroke of the received photo collage and enter the necessary changes to it (sequence of actions and equipment Fully similar to those described)
By and large, all that we did earlier - it was a painstaking preparation for this stroke process, which underlies our method of drawing and allows you to receive classic comic pages. The more responsible and thoroughly approached the previous steps, the easier it will be to draw in this stage, because the key to creating a beautiful drawing at this stage is the most accurately and reasonably selected photos of the stroke, which, with the right approach, require when drawing Making minimum changes.
And what changes will we contribute? Conditionally, they can be divided into important and cosmetic:
Important changes are those changes that define the plot, the appearance of the characters and, especially, the main character. In other words, these are changes that allow you to link all your pictures in a single story, and without which your comic will be incomprehensible.
For example, if you take a collage to our first comic book page (see Figure above), you will see that a person - a distinction of our main character in all cells is different, and we need to make it the same, because according to our scenario it is the same person - Teenager. Therefore, we need to make important changes when stroking. To simplify the task, we endowed our teen notable hairstyle, which, in principle, determines its appearance, especially when the overall drawing. In addition, we tried to slightly narrow his contours to give him a more subtitle and fragile appearance.
We can also attribute black suits of the fbers, which were not in the original photographs. In the figure below, it is perfectly visible, as well as the changes that we have contributed to turn the old man into a teenager.

Cosmetic changes include amendments that do not affect the plot and its perception, such as adding background parts, small elements of clothing, etc.
Tip:As a rule, in all comics there is a protagonist (or a few), which is depicted in a wide variety of plans and angles almost on every page of the comic, as around it, is essentially a story is built. The more recognizable it will be among all other characters, the more monolithic and convincing will look like your comic. To do this, you should make the appearance of the hero more noteworthy. Delighted it with special signs. It can be an unusual hairstyle, beard, glasses, characteristics, etc. Depending on your story. You can even simply highlight his clothes with a special color, which throughout the history will automatically associate with the reader with your character.
Important! Before making changes, count your strength. Do not try to draw something complicated, requiring artistic skills from you. The whole Dorivovka should be simple in performance and obvious.

Filling Comic Text Fields
The last stage remained: filling in text fields - the so-called "bubbles" of the comic. Recall that the text for your page had to be ready and edited at the second stage of creating your comic, and also divided into separate blocks, as based on their volume, we calculated the amount of bubbles, substituting them for "fitting", and, accordingly Corrected drawings in individual cells and the overall composition on the page. However, we did not put the text immediately in bubbles, and left them yet empty for a number of reasons:
First: usually, even after careful study, text is often edited Subsequently. No matter how you check it, but even obvious errors are sometimes told to the text. In addition, after reading it on a fresh head after some time, the author often makes stylistic changes to it so that it sound better, natural.
The second reason is: even if the text is not further edited, in the future it may occur need to translate it to another languageFor example, to participate in an international competition or exhibition.
The third possible reason: change the font, in particular when printing a comic on paper smaller format, or Size reduction Digital version Sometimes there is a need to choose less beautiful, but a readable printing font.
This factor should immediately take into account when the initial choice of font for the comic book (see at the beginning of the article) and avoid capital and also intricate fonts that, with a decrease, will turn into unreadable curls.
So, taking into account all the above requirements, we create in Illustrator new top layer specifically for text. This is done in order to closing the main layer with the drawings on the lock, you were more convenient to format separately and edit the text of the page, without fearing by chance to make unwanted changes in the drawings, or by chance something to erase.
In case you draw a comic on paper, you just need to leave bubbles of the original page empty, make several photocopy in high resolution, and already fill in them text bubbles. Thus, you will always have a clean template for working with text at hand.
And last: try to format text in this way so that there are always more free space in the bubblethan necessary. Thus, you are more likely to insure yourself from a lack of space with possible future editing or translations of text.
Good luck! If you have any questions - leave comments, we will definitely answer them. You can also join our groups VKontakte and Facebook by clicking on the corresponding icons on the page CONTACTS.
Popular contemporary art, allowing you to tell a fascinating story, providing it with bright and exciting graphics, has become famous and acquired many fans. Lovers of an unusual method want to learn how to learn to draw in the style of comics. The shielding of the most famous samples of the genre conquer the film screens, and the heroes of the novel become recognizable.
From this article, you will learn how to create a fascinating hand drawn story, depict key characters and master the technique in which specialists work from the Marvel Studio.
How to draw comics: preparation
Many people who wanted to master the difficult method scares its complexity and a long learning process. However, if you master the basic rules of work and realize the features that make this genre unique, you will be able to create any scene. Remember that the drawing of heroes, the creation of dialogs require painstaking work and talent. You must not only skillfully depict, but also masterfully create texts. There are many nuances affecting the final result. Get ready for long and stubborn training. Do not be discouraged if something falls in you worse: the desire to learn something new and interesting should only be fixed after failures and mistakes. Find in the work of the pros and cultivate every day. Do not forget to correct the shortcomings and look for your weaknesses.
Decide what exactly you are waiting for the upcoming work. Success can come to you much later. These comics are achieved by fame. If you want to get a place at the studio, give yourself aware that fully commercial activity leaves the right to change the existing idea. You will make the same type sketches, abandoning experiments with style. In order to create real works of art, you need to have recognizable technique and be creative personality. The artist who appreciates his work can abandon the clichés of mass culture.
Take care of the publication of your own work. So you will not depend on someone and gain popularity among comic lovers.
Remember that this art requires attention to detail and laconism. Character history you must tell on multiple pages. To do this, you need to constantly train: to achieve automatism, which will allow you to portray various objects at the same time.
Fast work is the key to a successful career. If you do not know how to make high-quality image in a short time, choose the option that will suit you: Draw and post your works on the Internet, transferring comics to the discharge of hobbies.
Inspire the works of professionals and do not be afraid to imitate them: This is one of the stages on the way to the acquisition of skill you have to pass.
Prepare all the necessary materials and tools. To create an exciting story in pictures, it is necessary:
- graphic editor (if you are going to work on the Internet);
- pencil and paper;
- mascara (in order to circle a drawing);
- thin feathers;
- pens and markers for drawing;
- belil or corrector;
- rulers and triangles to create borders.
Now you can proceed to work. How to learn to draw cool comics from scratch? Do not forget that the development of this technique will require impairment and attention from you, a long gradual activity, talent and inspiration. It is very important to adjust yourself to the creative process, find a place for drawing, ensuring comfortable conditions for creating a whole universe, inhabited by bright and interesting characters.
How to draw comics for beginners: work with a pencil
Start with exercises that will help you develop a brush and wrist. Draw straight or smooth, curved lines. Make sure that they are smooth and continuous;
In the process of learning, do not forget about observations. Watch out for people surrounding you, wildlife and objects. Try to reflect on paper all you see around. Strive for accurate and detailed drawing.
It is most important to learn to portray people, because they will become the heroes of your graphic novel. Nature the features of the physique of a person, the proportions of the shape. Do not forget about fabric textures: your character's clothes must be depicted as reliably as possible. Note folds and scuffs, with the help of hatching, create shadows and cutters.
Start work with drawing a naked body: so you will achieve an anatomically faithful image. This approach helps many novice artists. The foundations of the academic drawing will be useful to you in the complex business creation. Do not be lazy and find special books or thematic articles that will help you achieve goals.
Newbies are difficult to give an image of the face of the character. In order to create an accurate portrait, learn how to follow emotions, faithful. Watch your face, sketching seen. You can use frames from movies with expressive close-ups.
Get perfection in everything and try to beautifully and truthfully depict objects that will surround your heroes on the comic pages. Examine the prospects, draw buildings and landscapes, animals and birds, make etudes and quick sketches of items that see right in front of them. Such training will help you in a short time to overcome your own laziness and find your own style.
Do not forget to work out the background. This is an equally important part of the picture that requires special attention to small things and invoices.
If you do not know how to draw comics, make all the work in stages, remembering the sequence of actions and repeating them. Select a few hours a day to classes, I do not miss any workout.
In order to make the image distinct and emphasize the attention of viewers on important details, make the contour stroke using a marker, knobs or carcasses. Correct work and correct errors and minor shortcomings with white paint or special tool, which is sold at any shop with stationery.
Without contacting the works of professionals, it is impossible to know how to draw comics correctly. Learn graphic novels of the masters in order to come to an impeccable drawing.
Work carefully. Evenly apply the hatching, paint the shadows and carefully make the backdrop of the pattern. Learn to distinguish the shades of black and use them during contouring.
How to draw comics in marvel style
- Find the plot and create an approximate storyboard;
- Having made the main sketches, work each character;
- Do not forget to lay out the sheet and specify the borders, drawing the frame;
- First, think over and sketch the composition, and then proceed to the details;
- Transform a pencil image with paints and carcasses;
- After finishing the work, scan it and add dialogue in the editor.
Choose a drawing method: classic or on a computer. In the first case, you will need clean sheets of paper, pencils of different rigidity, ruler and good eraser. If you are going to seriously make comic creation, you can purchase a special inclined table. You also need a lamp and automatic sharpener.
If you want to draw comics on a computer, you will have to get out for a graphics tablet. This device allows you to create images directly in the graphics editor using a special pen. You can use both regular programs that allow simply draw (Photoshop, PaintToolsai) and specialized applications for comic authors (Mangastudio).
Characters
The basis of any comics - characters. You must not only in the smallest details of thinking the appearance of the hero, but also to create his character. What is his main motifs, as he looks at the world, what people and so on. It is best to make separate cards in which the history of the character will be indicated, his favorite and unloved things, as well as an approximate role in the plot.
It is recommended to create at least two main characters: protagonist and antagonist. This will add a plot of interest. Confrontation and complexity always attract more attention. Also do not make all the characters of the same sex. Miloid girls playing secondary roles often become much more popular than the main character.
Plot
It does not matter if you draw a funny or - never draw until you think about the plot. This will allow you to more correctly place the frames and accurately depict the feelings of the heroes.
Special attention should be paid to the surrounding. In the book, the author himself describes the location of heroes using metaphors. You will also have to portray the Dark Forest, and the interrogation room and much more. Therefore, it is better to first describe each scene in words (you can write or dictate to the voice recorder), and already start the image.
Remember about the component parts of the work: prologue, exposition, tie, development, culmination, junction and epiralogue. It is not necessary to include them all, but they will help correctly develop the plot.
Composition
Remember that comics can not be started and finished from turns, for these parts are isolated on a separate lane. The first frame should always contain a surroundings with the smallest details, it will allow the reader to immediately immerse yourself in the atmosphere. Each individual turn must contain a complete action as a paragraph in the text.
Main events and actions are better placed in the corners, and slightly give the middle of the page. It is best if there will be some phrase in the last frame of each turn, which will interest the reader and make it turn it over the page. Remember that wide horizontal frames slow down actions, and vertical, on the contrary, accelerate.
Paul Holden, an Irish artist, spoke about his drawing techniques and tricks, and also gave several tips to help you create your own comic in Manga Studio.
Drawing comics is a kind of skill that requires knowledge of anatomy, light and shadow, architecture and many other things, and they all work on one goal - to tell the story.
One of the dangers is the ability to get lost in trifles. You will very often detect that you fell in love with some element of the comic, but in the context of the story this element does not work.
1. Read the script!
Everything always begins with reading the script, because you need to understand the essence of the story. To familiarize yourself with it quite well and get used to it, it is worth reading the script several times until you feel that you are ready to draw miniatures. Since the comic should convey the script to the reader, you must thoroughly understand the history you draw.
2. Miniatures

Smash the scenario on thumbnails is necessary. At this stage, try to work with the arrangement of characters in the frame and the size of the comic.
Usually, the more dialogs in one window, the more it should be. Treat this stage with due responsibility, since you should not miss the items.
3. Planning

It is worth a little more work with miniatures. Planning is a bit boring, as well as the remaining initial stages of comic learning. But this is worth paying time.
It is necessary that the page looks like a full and independent story. To do this, you can make a long and large panel for one of the frames. Although, after reading this panel, it will quickly go out to the background and more role to play.
4. Character design

Usually the design of the characters is coming after reading the script. For those characters that appear once or two for the entire comic, you can not spend much time, since you will not need to think out their emotions and character. Well, the main characters, of course, will require much more effort.
5. Create a page

Never forget about page sizes. If they are specified in your task - make sure you put the right numbers. If you are not sure which the sizes should be comic, then it is better to ask the customer about it.
Resolution exhibit in 600dpi, it is higher than is usually required, but you never know whether your work will be published again. And technology move forward with a stunning speed, so it is better to be renewed.
Hotkeys: Move the page using SHIFT + SPACE (PC only). Hold these keys and use a mouse or a graphic tablet to move the page. Very convenient for drawing.
6. Rough markings

Sketch a pair of scenes. Roughly position everything you want to put on your page. Slide the page on the panel and, starting with the first, work the scene.
Still remember the scenario at this stage and that the scenes should have enough space on the page.
7. Cut page

Using your layout, as a guide, create a new "Frame Folder" in Manga Studio, and cut the page using the "Cut Frame" tool.
This will split the page on the comic book panel. Each panel will have its own folder capable of having several layers in yourself. You can configure the width of the border of the panel.
8. Install the frame

At this stage, you work on frame formulation. This is very important if you want to involve the reader in your world.
Since it was decided to make one panel to the page height, start with the construction of the city: to customize the list of perspective very simple and quickly if you use the Manga Studio line.
9. Old man and wood

Now it is necessary to focus on the expression of the face of the old man. The tree helps to form his face, while the head of a person and his shoulders allow you to turn the robots behind him.
10. Text

Dialogues in comics are located left to right, so you must make sure that the scenes and characters are arranged correctly, given this rule. Neglecting this, you risk staying as a result with crossed dialogues or, even worse, with an incorrect dialogue for this panel.
11. Panel panel
The four panel is a small copy of the two panel, while the panel five is a scene shift, a double-sided mirror that allows you to see the transition from one panel to another.
Remember that the background of each panel must match the scene and show that the scenes are associated between each other. In short, the background should follow a common story.
Hotkeys: You can switch the colors between the color of the foreground and the color of the rear plan using the keys and C (for PC only).
12. Turn off the light!

The robot enters the darker room. Leaving this panel in the shade and adding a silhouette, we can easily understand that the scene and the mood of the comic was changed. Assuming that the robot comes out of the door, and the old man is located in a large window, one can say that something like a test room is depicted.
13. Robot in the shade

The original idea was to show the face of the robot completely. But then it became clear that leaving some riddle, we will make a robot more powerful character. Therefore, it was decided to leave his face in the shadows, thus creating a sense of mystery.
14. Full stop

The last panel of the last page of the comic should resonate - this is a final punctuation mark in the entire history.
The plot and layouts told about the old man who cares about her tree, but at the last moment it was decided to use a stronger image that the tree itself was depicted. This is a strong image that assumes that the old man is no longer able to care for the tree.
15. Change

At this stage, you show your work to the customer and make changes to it. It may turn out to come up with a different development of the plot, perhaps a new idea will arise. It is also sometimes it turns out that you are completely in the other steppe, and your comic does not match the desired result. Then you have to remake everything.
16. Ink

We did everything in a pencil, and it's time for ink. We will work out the drawing using Turnip Pen.
Working on the tree is the most pleasant part. You can work out its trunk and watch the television show at the same time. Working on the tree, I decided to remove the borders of the panel, since without them the frame looked better.
17. And more ink

With the help of ink, you can work out light and shadow, add volume and texture your personnel and characters. You can add some effects using Splatter Pen, here you already have to fully rely on yourself, working as a picture so that it looks worthy.
18. Add strokes

One of the main features of the manga is toning with the help of elements such as circles, points, etc. In Manga Studio, you can add texture, simply pulling the desired tones from Materials Folder. This allows you to highlight the elements of the first plan, without pouring them in black, and simply giving them the texture.
19. Letters

No comic will do without text, therefore, from the panel panel you need to print dialogues and comments using trolation tools.
Make sure the text does not dominate the drawing. Lettering is a form of art that requires skill in itself. Adding text, you will finally be able to evaluate your comics and understand how good it turned out.
Special Brush: Pencil Side ON

This tool allows you to draw hard items and fill in black the necessary spaces.
Special Brush: Spray Pen

This brush uses scanned ink splashes, and attaches an interesting effect. This brush is very cool to draw stars or draw textures.
The true artist expresses what he thinks, not afraid to face century-old prejudices. Auguste Roden.
So friends, this lesson will be devoted to such an important topic as - rules for building comics. Maybe you have several characters you have free to draw. Perhaps you managed to come up with your own heroes. Now is the time to make them comic participants. Next, I will state the basic rules that will help create really good, interesting narratives in pictures. Inventive cartoonist artists at every step violate rules for building comics.But all the same, these rules need to know - at least in order to ignore them selectively.

Most comics are composed of three or four connected panels, but do not at all need to start with such a scheme. Collect the basics by working with one panel. When you find confidence, try to build one after another three panels, getting a connected story, and in place with him and a full comic!

Since this type is shifted too to the right. It turned out to be shedding panels. He literally nothing to breathe, and he feels not cozy.

Already better ... but boring. Everything is located in the center, it looks like a fresh and sluggish.

Eureka! Now there is enough space not only for the character, but also for the dialog box (or oval). As people read from left to right, the character placed on the left side of the panel will send them a look at the rest of the fragments.

Now see what we get, placing your character in Afas. In such a position, he will no longer guide the reader's view from left to right, therefore it may be in the left and on the right side of the panel - it no longer matter.

But he should not, after all, being in the middle: this placement does not leave the place for the dialogue.

Everything is fine, but remember that such a location is not suitable only for cases when the character turns strictly to the Face.

It's funny that one line can create a perspective of the entire scene, but this feature performs skyline - It is literally the border of the Earth. In fact, it determines the position and sky, because everything that is above the horizon line is perceived as the sky. Of course, if you add mountains and buildings, such a simple direct connection of the Earth and the sky will be broken.

The horizon is too low. The character is like a stretched rope.

The horizon is too high, such an overestimated horizon line creates an illusion that the background comes on us, and the drawing looks flat.

Here is the most acceptable formula: two thirds are given to the sky and one third.
Almost all of us are affected by film and television, and comic creators are no exception. Previously, in each panel, the character appeared completely - from the head to toe, but now everything has changed. If the character's expression of the character is very important in the plot, you may have a desire to show only his face. This is a closeup. On the other hand, if the key point for the panel is the movement of the character, you can show entirely its body - a common or distant plan. And if, for example, a character is interesting, not his legs, you can choose the average plan. The average plan is good for changing the tag of the story, and it often serves as a bridge between common and close-ups. A sharp transition from a common plan to a major can lead to visual dissonance.

Far (or shared) Plan: The whole body is shown.

 .
.
.
Special frames
Special frames serve, according to their name, to transfer special effects. They should not be abused, but they also do not need to be afraid - sometimes such frames are really funny.
 .
.
Such a frame is able to wake a carotid reader. Here you encounter your character's nose to the nose with the reader.

The close-up of what was discussed in the previous panel. If the object, in this case, the bone is important to perceive the joke, you can only show it, and the reader about it will not forget.

Another way to change the pace of narration. On such a frame, a highly located horizon line is appropriate.
Silhouettes are an excellent way to make changes to the visual series when a detailed image of the action is required at some stage. For silhouettes, medium panels are usually discharged: if you place the silhouettes on the first panel, the reader will not have the opportunity to see the faces of the heroes, and he can lose interest to them.
When using silhouettes in the final, the reader may not catch the climax of joke and the response to her other characters. The most effectively silhouettes in the frames of a very far plan.

The horizon lines can be used in the frames of the most different plan (except for very large, where the face takes up all the space). Please note how the horizon line gives the depth of this frame of a close-up with a character in a helmet.

When you enter the second character to the same panel, the result can be both positive and negative. Avoid chaos in the figure you will help one word - interaction. Plyow two characters on one panel, you need to show how they are physically interconnected. This does not mean that the characters must come into contact - they may well ignore each other, but no matter what happens in the figure, both subjects must be involved in a general action.


Since the effectiveness of the rear view is depends on the previously established relationships between the characters, it is used as a bridge between two other panels. Rear view allows you to focus on one character, leaving another in the shade. This reception is also used to create a frame depth effect.


Please note that the boundaries of the panels on this page are drawn by hand. Although most comic border are held for a ruler, you are entitled to experiment, choosing the most acceptable style for this situation.
Nothing so strongly highlights the comic on the newspaper page, like a brave combination of white and black. The more buried areas, the stronger the drawings are striking. But here it is important not to rearrange - a comic with an excess of black will be too dark and gloomy. The best way to achieve a balance is the principle of alternation of black and white, that is, the principle of "chessboard". The resulting effect can be observed on the figure below.

If there is nothing in the background of the drawing, which allows you to increase the visual contrast of the panel, try to improvise. Among the artists, the caricaturists are very popular with "Archny" Shading: Add a background with an arcuate border and stitch it. Your composition will immediately acquire greater tension.

Another way to enhance visual attractiveness is to add a shredded area right in the middle of the panel.
