Maple leaves drawing contour. How to draw a maple leaf with a pencil phased
About how to draw a maple leaf knows not every child, and not even every adult. The fact is that it is this sheet that is quite complicated for drawing, especially if we are talking about beginner artists. That is why before starting to study the question of how to draw the maple leaf, it is recommended to carefully consider it, learn how his structure is.
Before drawing a maple leaf in stages, be sure to prepare:
one). Paper leaf;
2). Pencils of a variety of shades;
3). Simple pencil;
four). A handle that has a black gel rod;
five). Erasing gum.
If everything is located near the above list, you can start learning how to draw a maple leaf in a phased pencil, and then paint it:
1. Put the "skeleton" of the leaf - that is, its stem and streaks;

2. Schematically, out shape maple leaves. The central part of its sheet must be the longest. The remaining parts are arranged symmetrically and have about the same dimensions. Of course, you should not draw a sheet on the line, because its edges are not perfectly smooth;

3. Start drawing the top of the sheet;

4. Gradually draw the entire sheet entirely;

5. Turn the stem. Note the location of three more leaves that are smaller in size than the first sheet;

6. Draw a streak and three small leaf stems;

7. Where the central little leaf is located, erase the image of a large leaf;

8. Draw the outline of the central sheet of maple;

9. Draw a second little leaf;

10. Draw the third small sheet of maple;

11. Carefully circle a bouquet of maple leaves with a handle;

12. Remove the sketch;

13. Now you know how to draw a maple leaf with a pencil and can start painting a bouquet. Light yellow pencil clinging the central leaf;

14. Red-brown pencils Slit stalk and bodies leaf;

15. Strike a burgundy pencil in places this leaf;

16. Light yellow pencil clotch a large sheet;

17. Dark yellow pencil coloring two other leafs;

18. Red-brown pencils crush the stems of leaves and accommodation on them;

19. Pencils of green and red-orange tones stitch maple leaves, creating a bright autumn composition.

Drawing ready! Now you know how to draw a maple leaf, or rather, a whole bouquet of these wonderful leaves!

Our first video tutorial! Enjoy your viewing to the meeting in the next drawing lesson!
Masks of autumn leaves
Parents raises the task to prepare maple leaves for the matinee.
One of the possible solutions may be making together with a child of the autumn maple leaf, followed by coloring this accessory to the children's costume matinee.
Making the autumn sheet of maple is better with the child from cardboard, or from paper.
The child will deliver a special pleasure, make a craft together with his parents, especially if at the end of his work it is waiting for a complete toy - the autumn leaf of the maple, which can be played long.
If the child can not do everything on his own - then the creativity, as a rule, are engaged in parents, and the child learns and carefully follows the magical action - as it would seem, of nothing there is a new toy - the autumn leaf of Maple (so that he quickly broke the maple The sheet to the children's costume matinee is recommended to be illuminated).
Below are pictures that allow you to make a maple leaf with your hands with your own hands to the children's costume matinee.
1. Maple leaf template to children's costumed matinee.
2. Maple leaf to a children's costume matinee.

3. Mask maple leaf to a children's costume matinee.

4. Color maple leaf to baby matinee. Party 1.

5. Color maple leaf to baby matinee. Party 2.

6. The chonded colored maple leaf to the Children's Matinee (two-sided-sides 1 and 2 are cut, glued and laminated).

7. Dried and cable maple leaves for children's costume matinee.

Below is the gallery of pictures that allow you to make a maple leaf with your hands with your own hands to the children's costume matinee.
In kindergartens are preparing another series of children's autumn matinees with masquerade costumes.
Parents raises the task to prepare the autumn mask to the matinee. One of the possible solutions can be the manufacture of a mask of the autumn leaf on the child's head. Making masks are better with a child from cardboard, or from paper.
The child will deliver a special pleasure, make a craft together with his parents, especially if at the end of his work it is waiting for a complete toy - a mask, which can be played long.
Naturally, in this creative process, each child requires the help of parents.
If the child is quite an adult, then from parents requires a general guide to the process.
If the child can not do everything independently - then their creativity, as a rule, are engaged in parents, and the child learns and carefully follows the magical action - as it would seem, a new toy appears - a carnival mask.
Below are pictures that allow together with the children with your own hands to make masks of autumn sheets: maple, rowan, oak, chestnut, willow, aspen, pita and larchs.


Pictures You need to save on a computer, insert into the editor (for example, MS Word), stretch to a sheet of A4 format sheet, print, along with children to color and if there is an opportunity - to illuminate (if not - stick to cardboard), cut down the contour and turn the rope or A rubber band in the size of the child's head.
If you have a color printer, you can paint the picture with the children and on the computer, and only then print.
To color the carnival mask on the computer you need:
1. Carnival mask in a graphic editor (Start - Programs - Standard - Paint)
3. Saved monochrome drawing of a carnival mask Save as a drawing with a large number of color (file - save the pattern as -16 colors (or 256 colors))
4. Choosing the color of the fill of the elements of the carnival mask, you need to elementally paint a carnival mask.
Below are the entire library of the pictures of autumn sheets: maple, rowan, oak, chestnut, willow, aspen, pita and larch.
Crafts. Autumn masks. Autumn crafts do it yourself from cardboard. Autumn leaf crafts. Autumn masks. Autumn crafts do it yourself from cardboard. Autumn leaf
Crafts. Autumn masks. Autumn crafts do it yourself from cardboard. Autumn aspen leaf. Osin sheet
Tree leaves are the easiest and most beautiful decoration of our planet. Only we pay attention to this only late in the fall, when the leaves change the usual green color on the golden, creating an extraordinary carnival of autumn paints and shades of nature. All leaves are unique and beautiful in its own way, but still, the maple leaf is distinguished among other leaves and size and shape. So let's try in this lesson draw leaves Maple, or rather one sheet. But it is enough to learn how to draw one sheet to draw a whole "bouquet" of leaves. By the way, multicolored maple leaves drawn on paper can become a stylish and bright decoration of your room. As always, the drawing will be performed in stages, first draw the contour of the sheet with a simple pencil, and after coloring paints or colored pencils.
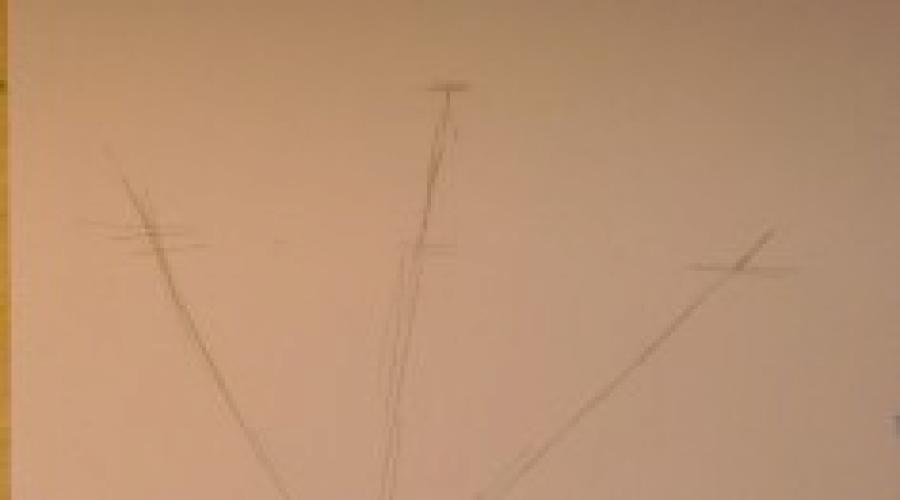
1. Make the initial markup of the residence

Spend a horizontal line and draw one vertical line in the center and one oblique line from it with a simple pencil on each side. Do not make lines using a ruler, in nature there are no leaves that have the right geometric forms.
2. To the main lodgings add minor

At this stage you need to arbitrarily, observing a certain symmetry, draw small streaks. Pay attention to the horizontal leaf streak, there are fewer branches on it. In general, if you draw leaves in summer or in the fall, then take a few maple leaves in the park and carefully read their structure. If you draw them "from nature", then figure leaves It turns out very realistic.
3. Maple leaves shape

It is completely easy to circle the drawn streaks with one solid line, not necessarily copying my drawing. The main thing is to draw sharp corners at the edges and make noticeable gaps between the parts of the sheet. Usually, the leaves have a solid shape, with barely noticeable breaks, and maple leaves consist of as it were from several segments. They differ from the leaves of other trees.
4. Drawing sheet of maple in details

Draw thickening for the main residence of the sheet. The leg for any leaf need to be done necessarily thicker than accommodation at the base. Finish draw the bottom circuit of the sheet form, and move on to the next step.
5. How to draw leaves. Final step.

You see that the leaves are not difficult to draw. It is important to correctly draw small details and accurately draw the form so that the sheet in the figure does not look like a slash or curve. Add as far as small strokes to the drawing and you can paint the resulting pattern of the maple leaf with paints or colored pencils.
6. Leaves are better painted with colored pencils.

I am always at the last step of the drawing make shadows with a simple pencil. You do not need to do this, especially since pictures of leaves Wonderful will look if you paint with colored pencils. You can of course paint and paints, only it is very difficult not having experience to keep small parts and not "paint" them. For the sheet to not look lonely, draw next to him a few more, slightly smaller, at the same time, give them any shade of autumn paints of falling leaves.
It is not necessary to observe the special "geometry" in the drawing of birch, it is not necessary to draw the leaves, it is not necessary to draw the leaves, it is only important to draw the barrel and branches correctly so that they do not get the same thickness and narrowed to the edge.
Trees branches should be evenly located along the trunk and stretch up to the sun, as well as having a variety of small twigs with leaves inside. Leaves on a tree to draw difficult. First, they must be a certain form and their main thing too much.
Drawn leaves will look much more "less", if you draw a cow creeping around List. Its size is small and will not divert attention, and bright coloring will give the drawing a new paint.
To begin with, we remember that the rose consists of petals adjacent to each other. This is the greatest complexity of the drawing. In order for the rose to look real, you need to accurately draw many details. Be sure to draw leaves having a juicy green color, stem and spikes.
Drawing chamomile, probably, will be able to draw each. Several petals, draw leaves, stem and daisy pictures. But for some reason, not always drawn daisies are obtained as real. The reason is that you start drawing chamomile from petals.
Draw an apple only at first glance seems simple matter. But this is not the case, because the picture of the apple has not been similar to the mug of the wrong shape with the tail, the shape of the apple should be volumetric. And so that the apple creates the effect of freshness, you need to draw leaves or at least one sheet and a few drops of water on them.
Much attention is attracted to themselves leaves adorning trees at any time of the year. In the spring, they begin to appear from, it would seem, dead trees, in the summer they please the eyes with green, and in the fall - turn into a charming gold carpet.
Many people consider leaves the most unique and beautiful decoration existing on our planet. Personally, the leaves are most likely to me in the fall. I love the period when the leaves begin to fall, and I can't fall in love with this unusual carnival of golden paints existing in nature.
Each leaf is beautiful in its own way and there is no difference in green he or already yellowed. Probably the most unusual and at the same time beautiful leaves from Maple. In my opinion, they stand out among all the others with their unusual shape, as well as the size. That is why this lesson wants to devote drawing a maple leaf.
To begin with, we will try to acquire the skills of drawing a single piece to create a huge bouquet of these leaves in the future. Such a bouquet of multicolored maple leaves I suggest you decorate your room. I think the room will become bright and beautiful.
As in previous lessons, we will draw in gradually. We carry out a pencil and depict the contour of our leaflet. When the drawing is ready, paint with paints.

We proceed to our task from drawing a horizontal line. We use a simple pencil for this and do not use a ruler. We depict a vertical line in the center of the leaf, then on each side there are several curves of lines from it.
I want to explain to you why I did not advise using the ruler. The fact is that the leaflets have an irregular geometric shape, it is simply not in nature in a different way.

I recommend you before drawing a leaflet first pretty studying its structure. Therefore, when you walk in the park, find several leaves and bring them home. Drawing leaves "from nature", you can convey their realism into the picture.
This stage requires compliance with symmetry, here is the main rule of the drawing of the residences. Little resilits draw arbitrarily, however, note that there should be no too many branches on our main horizontal branch.
 Probably, it's easier for this task that does not happen. You only need to circle all the drawn linas accommodation, making it solid. You can copy my drawing, but it is optional.
Do not forget to make edges with sharp. Between the particles, we make noticeable intervals. As we know, the leaves have a solid form on which there are slightly noticeable gaps, but the maple leaves are a bit different, as they have several segments. It is these maple leaves that differ from all other types of leaves.
 Now we need to work on the main streaks, namely, draw thickening for them. After that, we will depict the leg, we will make it thicker at the base. Thus, we worked on the lower outline of our leaflet, and then go to the next step.

I think you were convinced that draw maple leaves easily. Here the main thing is to correctly depict small details, as well as with accuracy to transfer the form of the leaflet. Next, we will add a small number of strokes to our masterpiece, remember, they must be small. Well, now you can begin for the painting of the leaflet. What you will be painted to choose you.
 It's time to take up the last stage of our lesson. Drawing your sheet, I sketched the shadow of a regular pencil, but you suggest making your picture multicolored. That is why we take for color pencils.
Maybe you wanted to use paint stage for this stage, but I want to warn you that you can spoil small details by typing them. This applies to smartly serious in this matter.
Perhaps your leafle looks lonely, then as next to do other maple leaves. Make them smaller and sketch in any shade, betraying the color of autumn falling leaves with its leaves.
And to look at the pictures of young professional artists you can on the site Art-Cherdak. Art-Cherdak is a site of three artists who represent their work.
Drawing with a pencil - a fascinating occupation. Following the tips of the masters, anyone, regardless of age and abilities, can learn how to create masterpieces.
What do you need to draw a pencil?
You can draw a pencil anything: animals and plants, people, buildings, animals, animal heroes. In general, everything that is enough fantasy. In this article, step by step is explained
For successful work at hand, the novice artist should be everything you need. Prepare good quality paper, sharply sharpened graphite pencil of medium hardness, soft eraser and memo "How to draw a maple leaf". In addition to the instructions, to have a good one and carefully consider several real maple leaves. At first glance it seems that they are very simple to draw them. However, in fact, everything will be a bit harder. It has a complex structure of several repeating elements. So you coped with the work, we will tell you how to draw in stages.
Step-by-step maple leaf drawing
Step 1. It is necessary to create the basis. To do this, it is necessary to draw a vertical and crossing its horizontal line. Then through the intersection point of these lines to spend another 2 inclined lines to the left and right. It turns out six intersecting lines, as shown in the figure.
Step 2. From large lines to carry out numerous small "twigs". They need to be located unevenly, which will make the finished work more natural.
In the first stages, the maple leaf of the pencil is drawn without pressure. The tool should be kept in hand gently, without tension. Lines should be easy and light.

Step 3. We have a pre-frame for the future drawing on paper. Now it is necessary to make the right outline. For this, scaffolding the grating from the twigs, as shown in the figure.

Step 4. With clear strokes, carefully draw the main skeleton and sheets of sheet. The figure shows that they should be slightly thickened compared to secondary branches. Their form resembles - narrowed from above and expanding books.

Step 5. Light small strokes add minor veins to secondary twigs. At this stage, we already have an idea of \u200b\u200bhow to draw a maple leaf. However, we are only a sketch. To obtain this picture, it is necessary to properly distribute the light and shadow on the sheet. Then it will not be just a picture, but the work of the artist.

Step 6. This is the last step. At this stage, you need to give a piece of realism. Make it necessary by catching sheets. Look at the "live" maple leaf through the eyes of the wizard. You should note which areas are more darkened, and what brighter. Such a game of light and shadow must be tried to pass on paper.

Now you know how to draw a maple leaf. To achieve the best result, we will give a few more general tips:
- at the beginning of work on the drawing, do not push the pencil strongly;
- contour Will, with a stronger pressure for receiving a clear line;
- sharch the drawing gradually, do not immediately make too sharp transitions from the light tone to the dark.