As stages to draw a balloon. How to draw balloons beautifully? How to draw a balloon step by step
Unfortunately, a person is deprived of the opportunity to fly. Therefore, he tries to rise in air with all available ways.
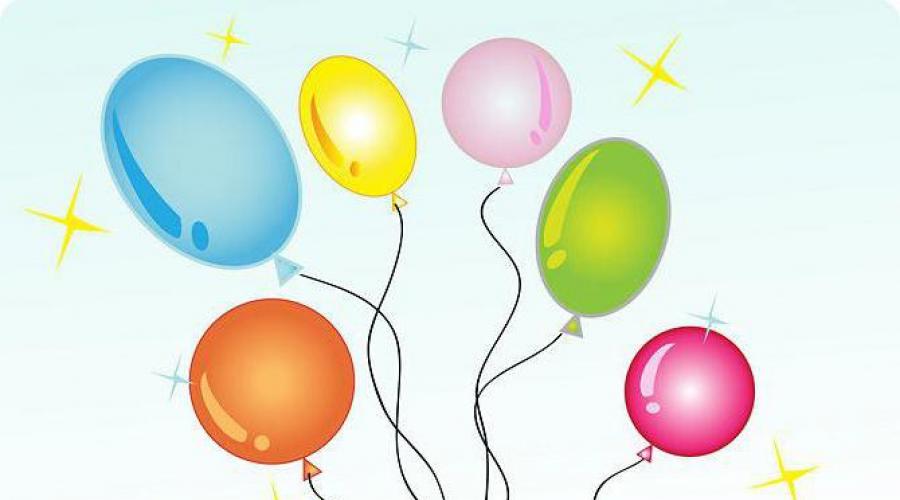
Description
Before moving to the solution of the question of how to draw a balloon with a basket, it should be understood that he is. The correct name of this design is a balloon. In fact, we are talking about a conventional spherical object that can climb to a huge height. This is due to the power of heated air. Currently, the described apparatus is extremely rarely used as a means of movement. Usually the attraction is made from it, similar to the ferris wheel. Rise to the height of a bird's eye on a similar miracle of technology dreaming millions of people, and draw it in all details - thousands of artists. Work on such a work of art can be very cheerful and even a little romantic.
Instruction
So, we turn to the phased solution to the question of how to draw in the first step they draw a figure, which in contours is similar to the silhouette of the object you need. Now make a more even sketch to get geometric shapes. Go to the next stage of solving the question of how to draw balloons, and remove the auxiliary lines. Next, we supply the contours.
Conclusion

At the next stage, we divide the object on the slices, like tangerine. Now we make a similar operation, but with horizontal lines. Finally draw a basket. Now you know how to draw balloons. It should be added that the main geometric figures that will be needed in this case are a rectangle and a circle. To work, you should stock paper, pencils, eraser. When creating a basket, it should be borne in mind that it represents a rectangle, the side of which is equal to the third part of the diameter of the ball.
What are working on today
Today we will create brushes with clouds, fog and special effects like an atmospheric perspective or depth of field.
1. Create a brush with clouds - Option 1
The clouds have many varieties, so let's try to create a universal brush that will allow you to draw all possible types of them at once.
Stage 1.
Choose a round rigid brush with an activated "Transmission" parameter ( Transfer.). To open the "Brush" panel, press F5:

Stage 2.
Also put the mark near the "Dispersion" parameter ( Scattering) And a little experiment with the settings. If required, go to the section " Cluster print form» ( Brush Tip Shape.) and change the value of the "Kehel" parameter ( Spacing):

Stage 3.
Activate the "Shape Dynamics" parameter ( Shape Dynamics.). This will get a random element size:

Stage 4.
Put the mark near the "Double Brush" parameter ( Dual Brush.), and select the type of brush " Chalk." Pick the desired values \u200b\u200bfor the tool settings to make the texture of the brush turned out more torn:

Then test the brush. If you are satisfied with the result, save it:

Stage 5.
Create a new document. Apply a gradient to it from dark blue to the blue to get the sky. Then create a new layer and draw the clouds using a muffled dark blue color (for example, # B5C6CC):

Stage 6.
Reduce the size of the brush and add additional parts to the clouds where brush rounders clearly appear:

Stage 7.
Make the color used is a bit lighter, and over the clouds already applied again, closer to their center:

Stage 8.
Even more illuminate the color to almost white. Reduce the size, and apply fragments over already existing clouds:

Stage 9.
To recreate the shadows, let's lower the saturation of the dark blue color, and draw distant fragments of clouds in the background:

Stage 10.
Depending on the style you need, you can slightly smear the clouds using the "Blur" tool ( Blur Tool). We took advantage of the "Mix Brush" tool ( Mixer Brush Tool.) with default settings:


To achieve a more air effect, you can work with a brush with soft edges inside the clouds.
Stage 11.
This brush can now be used for any clouds. Just do not forget to constantly change the size of the brush, making the clouds more chaotic and natural:

2. Create a brush with clouds - option 2
If you are important to do everything quickly, then we offer another brush option.
Stage 1.
Create a new file. Fill the background with black and on a new layer Draw a cloud figure using a brush " Chalk.»:

Stage 2.
Duplicate the figure ( Ctrl + J). Use the tool " Free transform» ( FREE TRANSFORM TOOL, CTRL + T) And change the size of the original figure. Hold SHIFT and ALT to keep the proportions in the scaling process. Then reduce the opacity level (OPACITY) of the source figure:

Stage 3.
Go to the menu Filter\u003e Blur\u003e Blur in motion (Filter\u003e Blur\u003e Motion Blur) So that the boundaries of the initial figure are barely distinguishable:

Stage 4.
Perform image mixing and invert colors ( Ctrl + I.). Then go to the menu Editing\u003e Determine Brush (Edit\u003e Define Brush Preset):

Stage 5.
Open the "Brush" panel ( F5) And try to achieve greater airiness. Do not forget to test the brush as settings change, and do not forget about the "Kehel" configuration ( Spacing):


This brush can be used to achieve the same effect as in the previous example. The only difference is that this brush can be created much faster, but it gives less controlled effect:

3. Create an atmospheric perspective effect
The atmospheric (or air) perspective is a great way to achieve depth. Despite the fact that the air is invisible, particles of water and dust can be considered. If the light falls on them, they look absolutely different. The more their content in the air, the more it becomes like a fog. It is usually thickened away, and slightly merges with the sky.
Let's try to recreate the corresponding effect in the next scene:

Stage 1.
Prepare a gradient with a transition from blue to white color. Then make a white area transparent:

Stage 2.
Spend the gradients created by the conditional land under the objects. Do not apply the effect to the entire scene. To apply the effect exclusively to the ground, you need to properly cut a layer with a gradient ( Ctrl + Alt + G):
Stage 3.
Switch overlay mode on "Screen" ( Screen.). We will make the Earth a little lighter and more blue than blue:

Stage 4.
Let's do the same with objects. Create a new layer over them, and create again " Outlifting mask» ( Clipping Mask.). Only now the gradient should not be horizontal, but to repeat the line of perspective:

Stage 5.
Change the overlay mode as well as we did on the previous time:

The effect will be noticeable regardless of how many objects are present in your scene. Thanks to the air perspective, you can easily convince the audience that it is not a smaller ball in size, and that it is located in the distance:
The more air will be saturated, the greater the feeling of fog. Therefore, cleaner air will create less effect. To achieve the desired result, we recommend that you not only reduce the level of opacity layer with a gradient, but also to "shorten" it:

4. Create a sharpness depth effect
The depth of field is another good trick to recreate the feeling of space. However, it should be noted that with incorrect implementation, it can spoil the entire image. Let's learn how to do everything right:

Stage 1.
First, we need to highlight the "levels" of our scene: earth, air and objects. Working with each object separately, we will be able to achieve a better effect of depth.
First we work with the earth. Highlight the desired layer, and go to the menu Filter\u003e Blur Gallery\u003e Tilt-Shift. Place the center where the viewer will allegedly be viewed, and this area is a little narrow:

These lines show us which objects must be blurred, and which will remain sharp:

Stage 2.
The sky can be easily blurred by blurring in Gauss. Filter\u003e Blur\u003e Blur in Gauss (Filter\u003e Blur\u003e Gaussian Blur):

Stage 3.
Apply the same blur filters to all objects that are located outside the field of field. If you have not previously divided them, you can experiment with Filter\u003e Blur\u003e Blur over the surface (Filter\u003e Blur\u003e Field Blur), But here you need to be neat so that the image does not become flat:

It is better to use this effect when it is assumed that the viewer will consider the image near.
Also, this effect is suitable when you need to show the viewer with his "imaginary" position on the stage. To do this, you need to place a big subject on the fore, and then blur it. In this example, the viewer seems to be behind the columns:

Or you can create an impression that the person came close to the fence:
And then looked at the rod. It all depends on what exactly you want to show:

We recommend using this effect when there is something big in the foreground of the image, but it does not hide the whole scene. This effect can be achieved if you bring the palm to the face and look at the screen.
5. Create a fog effect
Stage 1.
Fog is a dense concentration of moisture in the air. Let's try to create a similar effect on our scene:

Stage 2.
Create a new layer and pour it in black. Then go through B. Filter\u003e Rendering\u003e Clouds (Filter\u003e Render\u003e Clouds). Copy the image:

Stage 3.
Go to the window window\u003e Channels ( Window\u003e Channel.) And create a new channel.
In modern life, too much automated and mechanized. And the more valuable are man-made things and drawings created with the soul. Many like small children, adolescents, and adults. Sometimes I want to portray some interesting real object. For example, how to draw balloons with a basket, you can learn from this article.
Where are the balloons from
Long ago, people wanted to rise above the ground. The flight on the balloon allowed relatively safe to travel through the air. In fact, such an aircraft is a sphere connected by ropes with a passenger basket. This way of movement is used and now, but more like an entertainment attraction or as an option of a romantic date. Many artists depict it on love cards. How to draw balloons? Let's find out, this is worth learn at least in order to please your loved one.
Stages of creating a picture
Consider in more detail how to draw a balloon in stages. First of all, it is necessary to decide how many balls will be depicted, determine the proportions of objects. At the next stage, solving the issue of how to draw balloons, you need to schedule a large sphere and a small basket. Next, the sphere itself is divided into shares, like an orange - these are ropes that bind the ball and basket. You also need to detail the passenger basket, trace it to be connected to the ball itself. Completing the drawing, you need to wastely remove the construction lines gently. In order to add the work of dynamics and liveliness, you can outline clouds, tops of trees, birds flying nearby.
Creating a person in the image of his Most High forgot a few details. For example: Hands should grow from the right place, or the nose should not be unknowing. But all these are little things compared to what we still cannot fly. It is regrettable, and the person is trying to rose in every way in any available ways. About one of these ways now I will tell more. You will learn how to draw a ball with a pencil. Aerostate is the correct name of the balloon. But this does not care for us, for us it is an ordinary spherical object capable of climbing a bird's eye view due to heated air. As a means of movement is used extremely rare. This is usually an attraction type. Ride like a miracle dreams every girl. It is very romantic, scary and fun. Yes, it is in that order. I would also ride on this, be it in stock. But for the absence of it, I can simply draw it:
How to draw a poety air balloon
Step one. We draw such a form.  Step second. Now we will make more, you should get geometric shapes.
  Step Three. We remove the auxiliary lines, result in contours.
  Step fourth. We divide it as a mandaring on the slices.
  Pitch fifth. Now the same, only horizontal lines. And do not forget to draw a basket.
  We have drawing lessons for other aircraft and celestial bodies, here.
To teach a child to draw a balloon with a pencil, you will need only 10 minutes of free time, and another line with geometric shapes.
In balloons, not only brave airborne raids are rising, but also romantic princesses from maiden cartoons. It is so interesting to look at the planet with a big height! To teach a child to draw a balloon with a pencil, you will need only 10 minutes of free time, and another line with geometric shapes.
Basic design elements:
- actually a ball
- basket on ropes,
- ballast (sand bags).
On a vertical sheet of paper, black diameter circumference. In fact, the ball has a form, more similar to the incandescent lamp, but it is difficult for kids. While learn to make a schematic and quite recognizable image.

Bully below the ball will be a basket. It is chosen in accordance with the possibilities of the child. For the elders - a trapezium, for kids - a rectangle, even if on the line. The width of the basket is significantly less than a ball.

We connect two details of durable ropes.

Give the ball visual volume. In the upper part, we paint oval, we lower the line in the center, on the sides of it - arcs. Complete the design of wavy transverse lines.

"Test" outside a few sandbags are ballast.

Color the picture so that it becomes the same bright and joyful as a flight on a balloon.

Secure the resulting skill easily. Distribute several laps in the album at home from each other. Suggest the baby to draw balls with a pencil or felt-tip pen. The image is simple, and it can be reproduced in chalk on the asphalt, a stick on the sand, a finger on the place of the semolina. The main thing is to learn three basic elements. Well, in parallel, you can tell why the ball changes the height, as its flight depends on the wind.
Another version of the art master class - in a cartoon with a song "Draw a picture, theme!". This series for kids is laid out on the network in open access. Now that the reservoir can statenly draw a balloon, it's time to compose an adventure history and run into the sky of its first airons.
The balloons show is a very colorful event that always collects many viewers. On this topic, reoxooles together with parents can make an applique. Let the unique pattern appear on each ball, as if a mosaic, assembled from holographic colored paper or tracing pieces. Suitable for the decor and missing through the hole punch illustration from unnecessary magazines, advertising booklets. Crafts are very simple: a ball, a trapezoid basket, twisted thread for ropes.
