How to draw a very beautiful Christmas tree easily. How to draw a New Year's Christmas tree pencil phased
How to draw spruce stages.
In fact, we have - we, it seems like, it was already "passed." I will tell you this - today I draw a fir. What kind of type difference? Well, although these words denote the same tree, spruce is what grows, and the Christmas tree is more likely cut down and the new year is invited to join the fun.
Today we draw a whole, live spruce - it grows near our house and everything is good every year. Thank God, were those times when, under the New Year, the people rush all the trees and pines in the city right in the parks and on the streets. Well, now there is no such thing, my familiar tree of these times did not find it.
True, we will draw in the photo -Zimnaya Luddy Street - an unsuitable place for inspirational creativity and inventory sketches.
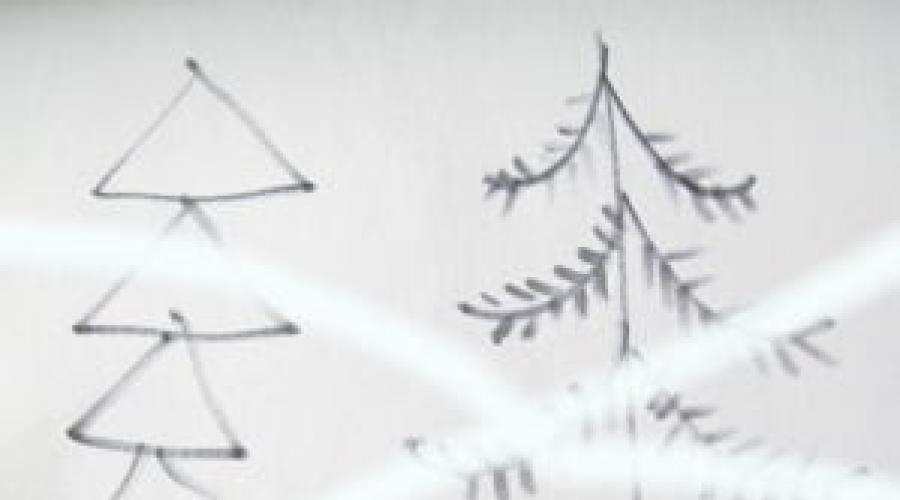
Here I note that there are no less myths about appearance than any variants of men. As a little man is drawn proceeding from oval, then from a rectangle, and fir, without looking rhymes, then on the arcs, then on triangles. And if you look, then branches like branches. The usual tree: trunk, on it branches, on them more branches. When I repeat it for the hundredth time, my students are smiling, but in their eyes they will glow familiar, challenged with pellery images:

"Classic" images
Well, do not give up.
Let's start with a pencil pattern. Note the general form of this specifically ate. We define the height of the trunk and the most common circuit looks like a pyramid because the lower branches are long, and the higher the above the trunk, the more shorter. We carry out the middle line (trunk) and border line branches:

Now they will make a branch - exactly where they grow, and observing the angles of their tilt. In general, as it has a selected ate.

Comrades, I ask you: do not grab about needles right away. Everything has its time. We first distribute the branches, and we'll start with the branches of the first order - that is, those that grow from the barrel.
I will depict a chevy felt-tip pen. I will start from the top of ate.

The branches are a bit, just draw. Below the branches are already merged into arrays. Here I use a thicker green marker.

The most difficult for children is to hold attention to nature. That is, draw a consistent branch behind the branch as they look on the tree. We are patient and proceed to drawing small twigs. Well, a drawing of a fir tree in winter - looks like her real prototype.

However, we will not be limited to one of this lesson - this is only a training. Soon summer - and all the surrounding ate will be happy to pose.
Soon the New Year, and before you dress at home the Christmas tree, learn how to draw it with a pencil and paints.
"A Christmas tree was born in the forest, she grew up in the forest ..." - who did not sang this wonderful New Year's song as a child? For the new year to all: both children and adults, you want a holiday and New Year's miracles.
One of these miracles can be a drawing of a New Year tree, although if you know how to draw, then cope and without tips. But if you are not ahti what artist, or want fun, New Year's time, spend time with your child, then such a drawing lesson, which is offered here, just for you. So, draw a New Year tree
How to draw a New Year tree in stages easily and beautifully a pencil for beginners and children?
Options to start a christmas tree pattern.
For example, the first option:
- A sketch is done - a big triangle and square below, where the stand under the Christmas tree will be.
- After the triangles of the trees are poured out of the triangle, because the New Year's beauty should be fluffy. You can make their three rows.
- Now you need to draw a few twigs in the foreground of the Christmas tree, so it will look at the bulk.
- Time came to draw toys, bumps, balls, candy and garlands on the Christmas tree, that is, decorate the New Year tree.
Another option:
- Begin from the sketch again. This time you will need only a vertical line that will mean the trunk of the Christmas tree, and again the base is square.
- At the top point line draw an asterisk, it is a star on the top of the Christmas tree.
- Further, relative to the vertical line draws several rows of triangles with cloths.
- The last stage - decorations on the Christmas tree - balls, stockings, garlands, lights.


The most simple version:
- Draw just a triangle on a small square at the base.
- With the help of teeth on the sides of the triangle and on its area, the visibility of the volume and magnificity of the Christmas tree is created.
- At the last stage, you can move to drawing decorations on the Christmas tree.
- If such a Christmas tree is painted, make a multi-colored toy and the visibility of radiating lanterns, then it will look very festive!
 Simple Christmas tree drawing: Step 1.
 Simple Christmas tree drawing: Stage 2.
 Simple drawing of the Christmas tree.
 VIDEO: How to simply draw a tree with a pencil?
How to draw a New Year tree in stages easily and beautiful paints?
In addition to pencil drawings, the Christmas tree can immediately draw paints.
But still starting such a drawing better from a pencil sketch of a triangle on a leg-stand.
After the fluffyness of the Christmas tree is painted with brushes and paints.
Important: Before switching to the next drawing stage, you need to make sure that the previous layer of paint is already drying.
At the last stage, new year decorations on the Christmas tree are drawn in different touch of the tassels, and under it a different size of the gift box.

 Drawing of a Christmas tree with paints: Stage 1.
 Figure Christmas tree with paints: Stage 2.
 Drawing of a Christmas tree with paints: Stage 3.
 Figure Christmas tree with paints: Stage 4.
 Figure Christmas tree with paints.
 You can also try to draw the christmas tree, conducting a silent circle around the symmetry line. It turns out the original tree, which is also decorated as far as fantasy.


IMPORTANT: New Year tree can be painted and leaving it in nature, as if she was decorated right in the forest or in the yard. For this, in addition to the Christmas tree itself, you need to draw a background for her. The background can be snow-covered drifts or light air paints. At different times, the air will have different shades - from the blue to pinkish-purple.
VIDEO: Draw a Christmas tree. How to draw a Christmas tree for children?
Pictures of the New Year tree with a pencil and paints for children to handle
Drawing a New Year tree in different ways, the child is shattered before dressing a real forest beauty. Options for festive decoration are endless!
Soon the new year 2018 will come, and therefore each of us will get alone, but made with love gifts. Of course, surprises from parents will be much more "weighty" in all senses than funny children's drawings, but the latter will be able to warm up the warmth of their sincerity and guys. Well, what boys and girls can be portrayed in winter? Of course, everything related to the New Year holidays is Santa Claus, ate, Snow Maiden, Snowman, a forest, covered with snow. If your children are still small and do not know how to draw a Christmas tree easily and beautiful, look along with them video and photos of master classes presented here. They are shown as even a beginner, using pencils and paints, will be able to phasepail a Christmas tree decorated with garlands and toys. Carefully made, neat, bright drawing will receive a prize in the creative contest of crafts in elementary school or kindergarten.
How to draw a Christmas tree with a pencil stepmate easily and beautiful - master class for beginners
If you want to learn more about how to draw a pencil Christmas tree in stages easily and beautifully, use the Tips of the master classes for beginners presented here. Similar work can be performed by markers, but it should always be used to create a drawing sketch.
Methods of drawing a Christmas tree with a pencil: examples in the photo

The Christmas tree is one of the most simple drawings, but you can create it in different ways. A selection of these photos will help you understand how to draw a Christmas tree with a pencil in stages easily and beautiful, and the master class for beginners can be found on the video.
First method - Christmas tree from cones
Carefully look at the scheme of phased drawing ate. Start depicting it, drawing a cone-skirt. At the end of the work, when all the auxiliary lines are erased, the Christmas tree can be decorated with garlands and toys.

Second way - Tree-stick
Here your artistic creativity needs to start with an image of a single vertical stick. Already to her "attach" the branches of the tree and its foliage - needles.

Method Third - Christmas Tree on Stand
In this case, the foundation is the triangle on the "stand" - a horizontally located rectangle. Little wavy triangles are attached to the large triangle on the sides - spruce paws.

How to statenly draw a Christmas tree with paints - photos and video master classes for beginners
The brightest, realistic looking Christmas trees are obtained by artists who use paint in their work. Undoubtedly, beginner creators first use a pencil - such sketches are easy to fix, erased by their eraser. And yet, the drawing, made by watercolor or gouache, always attracts more attention. About how to paint the Christmas tree in paints, tell these photos and video master classes for beginners.
Draw a Christmas tree with paints - photos with explanations

Even the most inexperienced artists can learn a new year Christmas tree without using pencils. Learn how to draw a Christmas tree in paints: photos and video master classes for beginners will tell you how to work with a brush.
Christmas tree-zigzag paint

Here the artist, using the brushes of different width, conducted a zigzag line, gradually expanding the book. After that, the paints of another color he "hung" on the Christmas tree balls.
Christmas tree paint

At first, the artist spent a straight line from top to bottom - so he portrayed a tree trunk. On the left and to the right of it, he struck the paint of different shades of green, yellow, and then, and white colors. The smears were applied with layers of different colors - from the bottom to the upper one in such a way that the Christmas tree was wide, and at the top - pointed.

After the master with white paints, it depicted snow on the Christmas tree.
How to draw a New Year tree with toys and garlands in primary school and kindergarten
Before the onset of 2018, many guys will want to learn how to draw a New Year tree with toys and garlands to school and kindergarten. Of course, most of them are already able to portray the Christmas tree in the form of a stick and springs, but this master class will teach them a slightly more complex drawing technique.
Draw the Christmas tree 2018 with decorations in stages

The pattern, located here, will help to figure out how to draw a New Year tree, decorating it with toys and garlands, and put the work on the drawings in elementary school and kindergarten.
- Start working from the image at the bottom of the sheet of a small square and a triangle, "planted" on its upper face.
- Add small zigzags on the sides of the large triangle on the sides of the large triangle and processing the "skirt" of the tree.
- Start decorating the Christmas tree, placing the garland diagonally, and waving balls according to the branches.
As a child, you can draw a Christmas tree in stages in watercolor or gouache
If you want to know how the child can draw a Christmas tree in stages in watercolor or gouache, read the master class presented on this page, look at the video tutorial, explaining the features of working with paints, in the end, offer your daughter or son to portray New Year's Eve together.
Draw a Christmas tree gouache or watercolor - master class with photos

After you read everything about how together with the child you can draw a Christmas tree in stages, using watercolor or gouache, proceed to work. Prepare everything you need for this:
- Paints;
- Whatman;
- Jar for water;
- Brushes of different sizes;
- Palette;
- Simple pencil;
- Eraser.
- Schematically depict the heart of the Christmas tree, a stick on which you will mount branches.

- Finish draw the "skeleton" of the Christmas tree.

- Mix on the palette blue, white and green paint. Start the strokes to "ride" needles on the Christmas tree.

- Draw spins carefully, not forgetting any one twig of our future Christmas tree.

- If you want to make a spruce more fluffy, add more branches, covering them with needles as it is described in the previous paragraph.

- A brown watercolor or gouache draw the trunk of a tree, Blue - fill in the entire space of a sheet not occupied by the pattern.

We hope that now, after you learned how to draw a Christmas tree with a pencil or paints in stages, you along with the child represent the New Year's Christmas tree 2018 with toys and garlands. Master classes with videos and photos, posted on this page, are also designed for beginners of all ages.
Take a sheet of paper or album, pencil and eraser. Ask a child than he will decoke on the hedgehog and make pencils, markers or paints with a tassel.
Tell the child the rules how to work with paints.
- Clean water prepare and moisten the paints;
- mixing paints to produce on a palette (white paper) without forgetting to flush brushes;
- smoothly close the surface of the background and characters in the composition;
- at the end of the work, wash the brush, do not leave in a jar with water, and wipe it with a cloth;
- at the end of the paint, the pencil is removed in the boxes or pencils.
How to draw a new year tree


Step-by-step instruction "Step by step" how to draw a New Year's Christmas tree.

1. Draw a triangle. Now draw a star on the top of the triangle. Leave enough space to add the rest of the tree.

2. Draw the top of the tree, which consists of three branches, as shown in the figure. Do not try to draw too precisely, not quite even lines will look better. The ends of the branches of the branches must join the star.

3. Now add two more row of fir branches. Moreover, in each subsequent row of branches, one more is becoming one more. Thus, 1 row are three branches, 2 row - four branches, 3 row - five branches.

4. Then, just under the tree, draw a bucket and attach to a tree with two lines that will be a spruce. Add two lines in the center of the bucket in the form of a tape, as shown in the figure. Erase all auxiliary lines.

5. Dorisite the bow on the ribbon and draw on the ball on each branch. Star on top of the tree give the effect of sparkling. Our New Year's Christmas tree is ready! You are great!

6. Now you can proceed to decorating.
To nor drew your child, be sure to praise it and hang the resulting masterpiece on the wall so that the baby felt like a real artist.
How to draw a tree
We offer a tree version that you can decorate as you wish.
Send us the resulting drawing on the e-mail. Specify I.F. child, age, city, country where you live and your baby will be a little famous! We wish you success!
Master - class for children 5-8 years old "Beauty Christmas tree"
Ostain Victoria Aleksandrovna, teacher MDOU DS KV "Raduga" JV "Silver Kopytz"
Purpose: Performing a New Year's craft.
Tasks: - learn to draw the Christmas tree;
- learn to use sweater materials in their work;
- develop the creative abilities of children;
- Learn to be neat when working with gouache and glue.
Purpose: Drawing-interesting process. This master class will allow creative people to easily draw winter beauty, and for educators and teachers who work with children of preschool and younger school age will serve as guidance to teaching their wards with a simple and understandable way to draw and design crafts for the new year.
Description: The master class will open all the simple eye drawing option with its subsequent decoration. In the work, we will use fir-handed materials, which will make our craft available for everyone: white napkins - for the manufacture of snow on the legs of the Christmas tree, and Mishur is bright ingriction for adding an image. The process of making a craft is accompanied by detailed photos.
Materials: White sheet of paper, color cardboard, gouache, brush number 5 and brush for glue, scissors, simple pencil, eraser, adhesive pencil, PVA glue, silver tinsel, white paper napkins.

Progress:
Soon, soon new year
A visit to the children will come.
Soon soon in every home
Slap lights Christmas tree!
Split lights
Just a miracle - see !!!

In anticipation of New Year's miracles, so I want to make an adhesion just brighter a little more interesting. Each adult recalls his childhood when it was possible to take paints and brushes and draw a wonderful eagle with toys and a bunch of gifts under her, hang on the wall and please all with their work. Becoming adults, we lose this opportunity due to the lack of free time or indecision, because we do not all know how to draw beautifully and be shericing sometimes. But we have a unique opportunity - to give us the opportunity to bring us the opportunity to believe in our strength and draw a wonderful Christmas tree and decorate it with girlfriend, and in the end it will turn out a wonderful Christmas dealing, able to decorate our home and give it an atmosphere of the holiday. Boldly take the gouache brush and start drawing !!!

And in part with us the wonderful poem of Tatiana Volgina, because it is just such a Christmas tree, we will now do now:
"Before the holiday of winter ...
Before the holiday of winter
For green trees
Dress white sama
She sewed without a needle.
Smoked white snow
Christmas tree with a bow
And worth most beautiful
In a green dress.
Her green color to face
Christmas tree knows it.
How is she under the New Year
Good dressed! "
1. Let's start working from the manufacture of the background. To do this, we need a white sheet of paper and a bright background, for example red. We need a white sheet to be less than a red cardboard sheet. To do this, we cut with the help of scissors 2 centimeters from two sides of the white sheet.

2. Now apply it to a red cardboard sheet.

We will not glue until, we simply checked, as it looks.
3. Now proceed to drawing. We need to draw the basis. To do this, with the help of a pencil and ruler, draw a large triangle, with a convex basis, retreating about 2 centimeters from the top of the sheet and from the lower corners. It is only important not to draw the lines clearly, try to choose a soft pencil and do not press it - the lines should be slightly noticeable, later we will move them.

4. Now we divide the triangle by transverse lines into 4 equal parts in height.

5. Now draw arc instead of straight lines, our Christmas tree should turn out to be beautiful! On the outer sides of the Christmas tree, the lines are concave, and on the transverse lines of the arc - are deposited down.

6. Now we erase the extra lines.

7. For drawing, we need a gouache of green color, a glass with water and a brush.

8. We type gouache on the brush and apply long strokes, as shown in the photo.

9. We try to apply strokes evenly, imposing them at the beginning of a bit on each other, and to the bottom of the Christmas tree, smoothly next to each other, trying not to leave gaps so that the Christmas tree turned out fluffy.

10. Now we draw the second tier of the twigs in the same way.

11. Now the third tier. Make sure that the smears overlap the transverse arcs withstand the same length of the smears.

12. Now we draw the painshore. Mails starting from one point trying to make the top of the sharp. Christmas tree is ready.

13. Now the tip of the brush will make a Christmas tree fluffy. Small smears are applied short needles on the top of the Christmas tree.

14. We continue to draw the needles in the Christmas tree. You can take a gouache more dark shade. Short vertical smears applied needles on the bottom of each tier.

15. Yelochka is ready.

16. With a pencil glue, we glue our drawing to the base of color cardboard.

"Here it is, our Christmas tree,
In the brilliance of radiant lights!
It seems to be beautiful
All green and lush.
In the greenery hide a fairy tale:
White swan floats,
Bunny slides on sleds,
Squirrel nuts nibble.
Here it is, our Christmas tree,
In the brilliance of radiant lights!
All of us from joy dance
On the day of New Year under her! "
Such wonderful words wrote Valentina Donnikov and they just perfectly describe our beauty.
But to complete the image, we make some sparkles and white fluffs!
17. For the manufacture of snow, we will need white paper napkins. Rive them on small pieces.

18. Roll into small lumps.

19. Now with the help of a brush we applied PVA glue in the form of droplets on the Christmas tree.

20. Now we apply the resulting lumps on the leak droplets and slightly press. Let's dry and snowball sank to our Christmas tree.

21. Now a little magic and in our Christmas tree, Irryovka will appear!
Take silver tinsel and scissors. Carefully cut the tips of tinsel.

We try not to scatter them, but we put in one pile.

22. Now with the help of a tassel we will apply glue PVA, but not droplets point, as the previous time, small horizontal smears.

23. Now we smell silver winting on glue. After I ran around Irry, you can turn the sheet with the Christmas tree and shook extra winting, and then sprinkle them again on the peeling glue.

Christmas tree ready!


Such a wonderful Christmas tree will become a worthy exhibit at the exhibition of children's creativity.